Purpose
The purpose of this Business Process Procedure is to explain how to process a Separation Action in the Integrated HR-Payroll System.
Trigger
There is a need to process a Separation for one of the reasons listed in the Business Process Procedure Overview section.
Business Process Procedure Overview
Separation - from State service occurs when an employee leaves for the following reasons: resignation, voluntary resignation w/o notice, separation due to unavailability, retirement, reduction-in-force, dismissal, appointment ended, and death.
- An employee provides notice that they will be leaving the State of North Carolina employment or an appointing department issues a letter to an employee telling them they will no longer be employed and the reason why.
- HR receives employee data and gathers additional information if needed.
- HR initiates PCR for approval via Workflow.
- HR receives approval via Inbox.
- HR executes Separation Action.
Note: If the individual is retiring, and has requested a one-time deferral, the deferral MUST be processed after the separation action has been completely processed in the system, including all payouts. If it is processed prior to the separation process being active in the system, the deferral will be taken from their last check, and potentially the entire check will be sent to their retirement system.
This action automatically converts the direct deposit to a check in 90 days from the Separation Action effective date. It is important to verify that the address is correct.
The following reasons are available for Separation:
- 01 - Better Employment – accepted employment from private company.
- 02 -Personal Reasons – leaving for personal reasons.
- 03 - Involuntary Separation - (1) the employee’s inability to return to all of his/her work schedule due to a medical condition or the vagueness of a medical prognosis; or (2) the employee and the agency cannot reach agreement on a return to work arrangement that meets both the operating needs of the agency and the employee’s medical/health needs.
- 04 - Did not Report – no show
- 05 - Voluntary resigned without Notice - employee who is absent from work and does not contact the employer for three consecutive scheduled workdays can be separated from employment as a voluntary resignation.
- 06 - Reduction in Force (RIF) - employee reduced in force for reasons of shortage of funds or work, abolishment of a position, or other material changes in duties or organization (Requires OSHR approval).
- 07 -No Reason Given – employee didn't give a reason.
- 08 - Long-Term Disability – employee has exhausted short-term disability and has been approved by the Retirement System to be separated to Long-Term Disability.
- 09 - Retirement - The last day of work shall be the date separated, except in cases where an employee is exhausting leave prior to retirement. If the last day of work is the last workday in the month, the employee shall be paid for the full month. SEE NOTE ABOVE ABOUT DEFERRALS.
- 10 - Retirement Disability – employee receives disability until they meet retirement eligibility.
- 11 - Contract Ended – end of contract.
- 12 - Time Limited Appt. Term – end of time-limited appointment.
- 13 - Supplemental Appt. Term – end of temporary appointment. \
- 14 - Appointment Ended - separation occurs when an employee is terminated for reasons other than just cause from one of the following positions:
- Exempt positions appointed by the Governor,
- Policy-making positions,
- Confidential assistants and secretaries, or
- Chief deputy or chief administrative assistant.
- Certain Judicial Branch positions.
- 15 - Not Re-Elected – employee wasn't re-elected.
- 16 - Dismissed – Gross Inefficiency – separated for gross-inefficiency.
- 17 - Dismissed – Conduct – separated for conduct.
- 18 - Dismissed – Unsatisfactory Performance – separated for unsatisfactory performance.
- 20 - Prior to achieving perm status – employee involuntarily separated during probation at the initiation of management.
- 21 - Pay in lieu of notice – employee is paid for notice instead of working the notice (Requires OSHR approval).
- 22 - Death - The last day of work or the day of death shall be the date separated. If the last day of work is the last workday in the month, the employee shall be paid for the full month.
- 23 - Other – no other reason is applicable.
- 24 - Terminate while on FMLA – employee did not return from FMLA.
- 25 - Beacon to Non-Beacon Agency – employee transfers to a Non-Beacon Agency. Note-- IT2012 (Time Transfer Specifications) has been added so pro-rated longevity will not be paid.
- 26 - Cancel Separation Pay Continuation – moves separated employee from inactive to withdrawn status and will no longer receive pay from the Integrated HR-Payroll System.
- 27 – Removal from Office – AOC Only - This reason should be used only by the Judicial Branch for elected/appointed officials removed from office.
- 28 – RIF – Discontinued Service Retirement – employee is reduced in force and has been approved by the Office of State Budget and Management to receive discontinued service retirement. (Requires OSHR Approval).
- 29 – Unavailable to Work – Employee becomes or remains unavailable for work after all applicable leave credits have been exhausted and agency management does not grant a leave without pay, or does not extend a leave without pay period, for reasons deemed sufficient by the agency.
- 40 – 115C Dismissal – Dismissal of a teacher or school administrator who was hired in a position subject to the G.S. 115C public education human resources system. Note—Specific reason for the dismissal as outline in G.S. 115C-325© (1) must be placed in the comments section.
Tips and Tricks
- Prior to initiating any workflow, ensure the data being used is valid and appropriate. For example, if working with a Separation action, ensure the individual is currently listed as a valid employee (and not already separated).
- Ensure the following have been completed:
- all timesheets have been entered, released and approved
Important: Please review the employee’s action history prior to creating the Separation PCR to ensure that the Action/Reasons below have been canceled.
- ZC – Salary Adjustment/07 – Acting Pay
- ZC – Salary Adjustment/04 – Temp In-Range for Job Change
- Z1 – Promotion/03 – Acting Promotion
Procedure
There are 16 steps to complete this process.
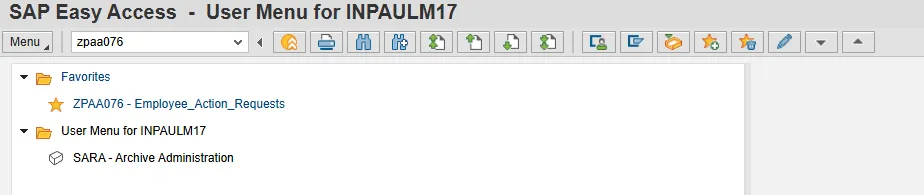
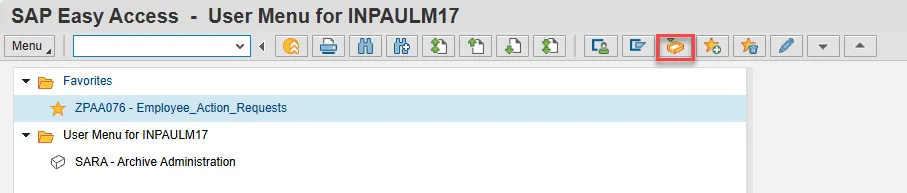
Step 1. From the SAP Easy Access page, select transaction code ZPAA076.
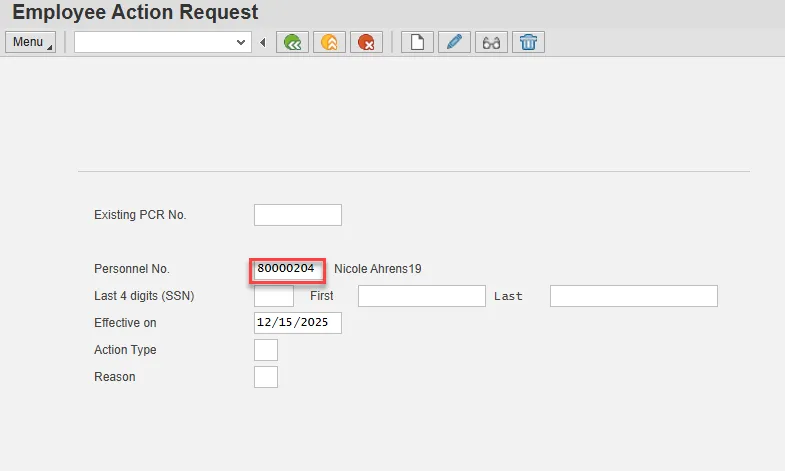
Step 2. On the Employee Action Request screen, complete the Personnel No. field and select Enter on the keyboard.
Step 3. In the Effective on field, input the correct effective date.
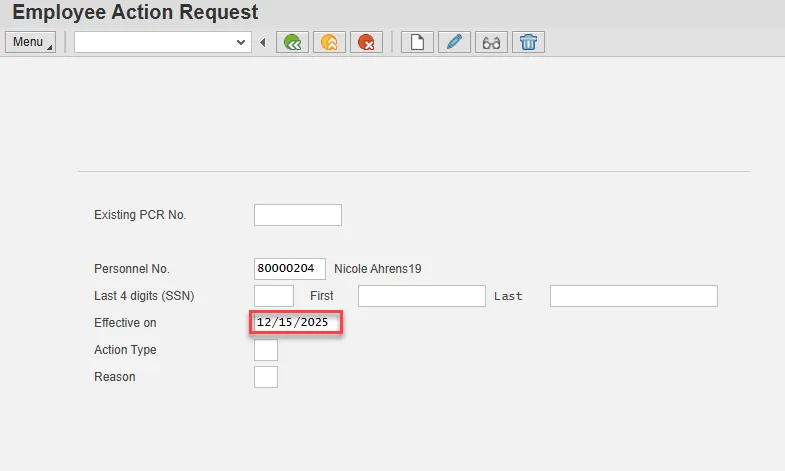
Although the Effective Date (according to the system) is the next day after the last working day, the system will take this into account automatically, so you must enter the last day worked. For example, if my last day worked was 6/30/11, then the date entered would be 6/30/11, and the system will change the date to 7/01/11 when processing the action.
The system defaults the current date, but you can change the date to a day in the past or in the future.
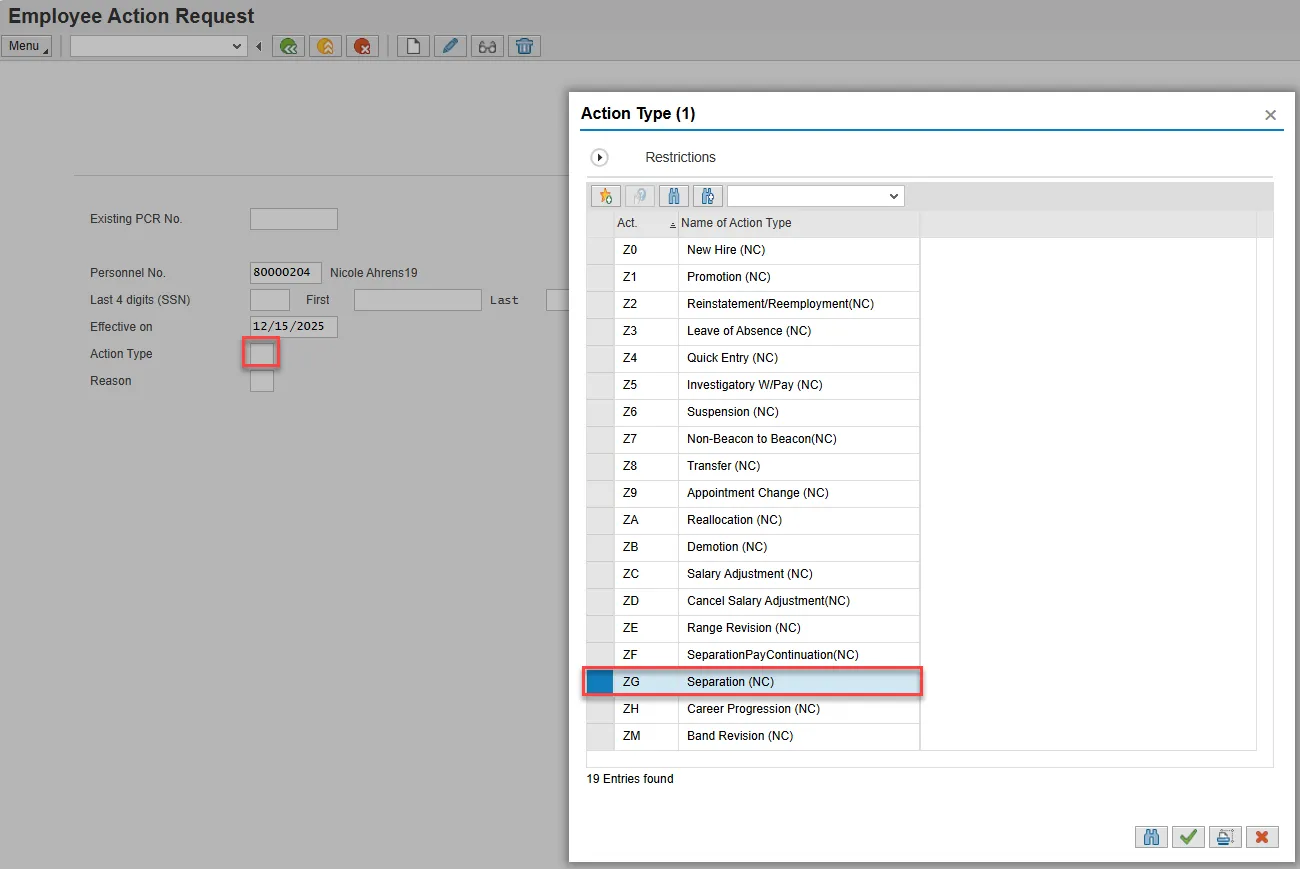
Step 4. Select the Action Type field and access the matchcode. Double click Separation (NC) from the list.
Step 5. Select the Reason field and access the matchcode. Double click the appropriate reason from the list.
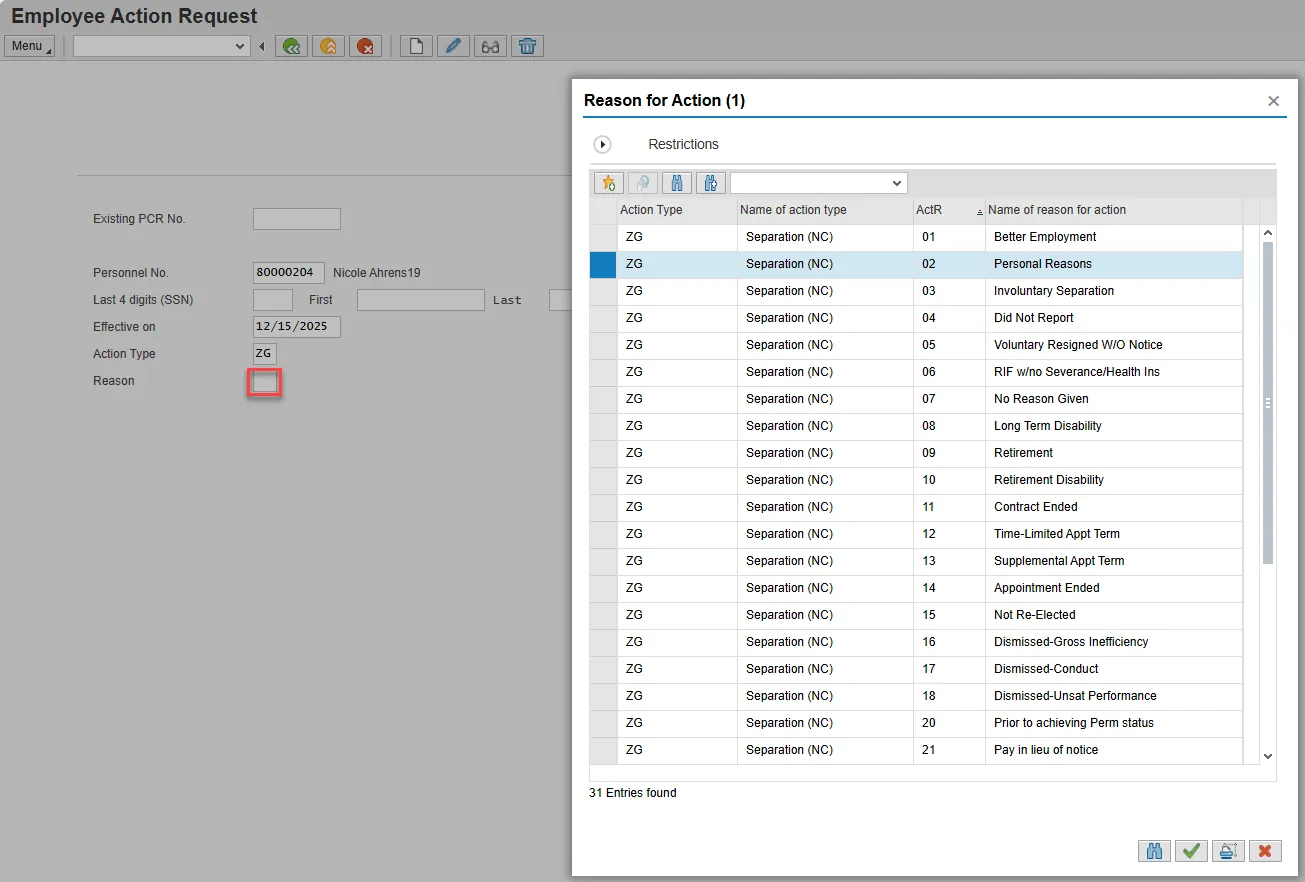
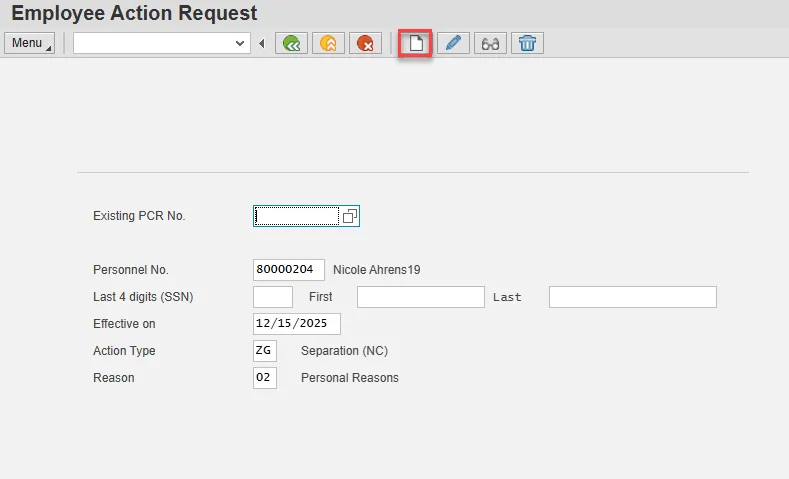
Step 6. Choose Enter on the keyboard and select the Create button.
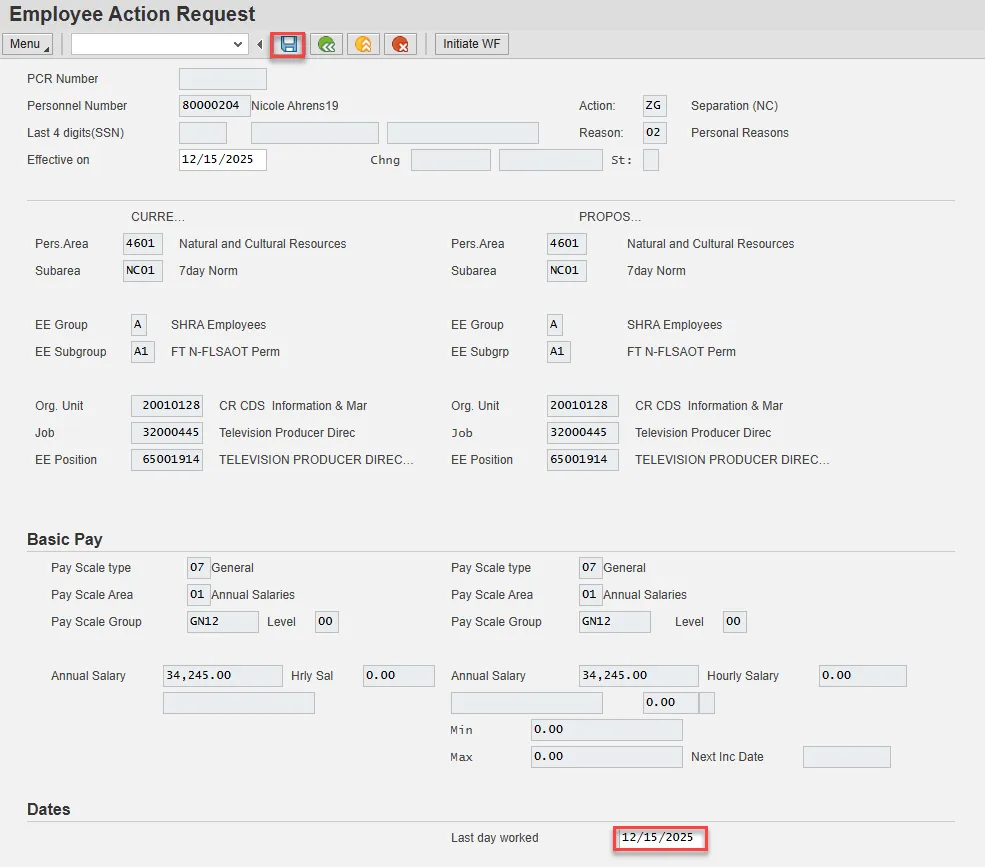
Step 7. Update the Last day worked field and select Enter on the keyboard and Save.
The only field which requires entry on this Employee Action Request screen is the Last day worked field. Enter the date of the last day the individual was physically at work.
You may need to scroll down the screen to view this field.
Note: Do not change the EE Position field to 99999999. The system will change it within the processing of the action after it has been approved.
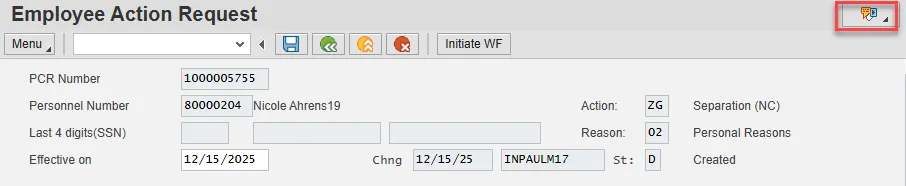
Step 8. The action request will be assigned a PCR number. Choose the green check button from the pop-up.

Note: You can save this information as much as you like. Each time you will receive confirmation of the save. You will not be able to create a note attachment until you have saved it at least once. If you have submitted the PCR to workflow already, you will not be able to change the details, nor save any new information, only display the existing details.
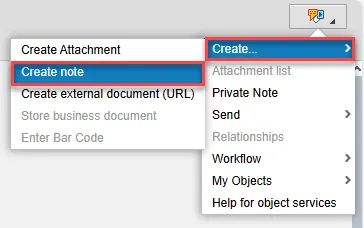
Step 9. Select the Services for Object button in the upper right corner.
Step 10. Hover over Create and choose Create note from the drop-down menu.
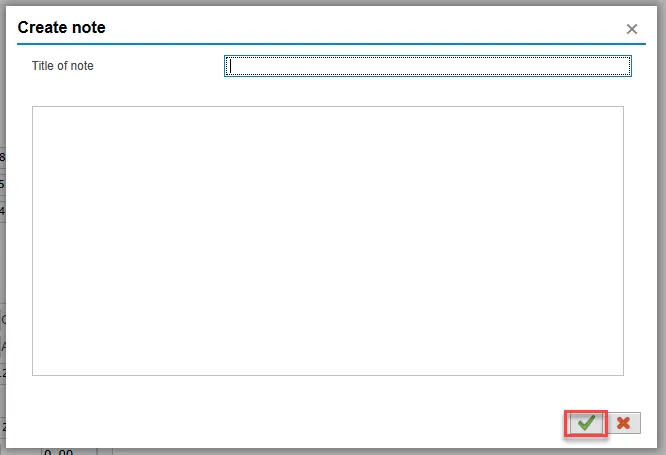
Step 11. Update the Title of note field and the body of the note.
The note is a required part of the request creation process. Notes entered during PA workflow must follow OSHR’s action notes template: PA Action Notes Template.
Choose the green check button in bottom right of note pop-up.
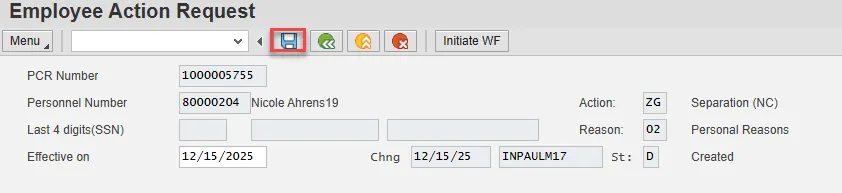
Step 12. Choose Save.
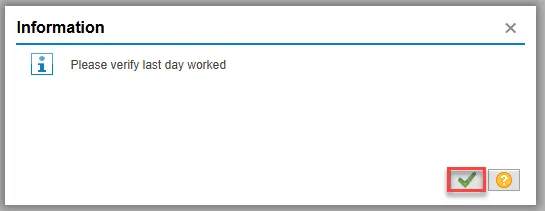
Step 13. Select the green check button in bottom right of Information pop-up.

Step 14. Choose the Initiate WF button.
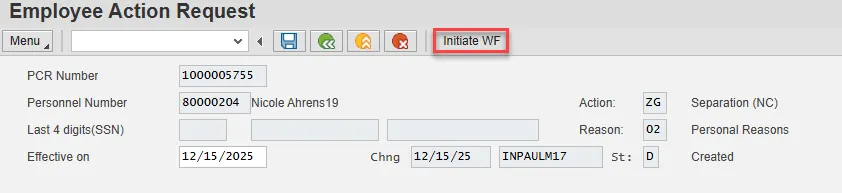
Select the Initiate Workflow button to send the Reinstatement Action through the approval process. No changes can be made after the PCR has been submitted for approval, unless the PCR is rejected at any stage and sent back to you (the initiator/requestor).
Step 15. Select the green check button in bottom right of the Information pop-up.

Step 16. Choose the green Back button.

After Workflow Approvals have been received, proceed with the complete Separation action process.
Instructions for Completing the Action
There are 25 steps to complete this process.
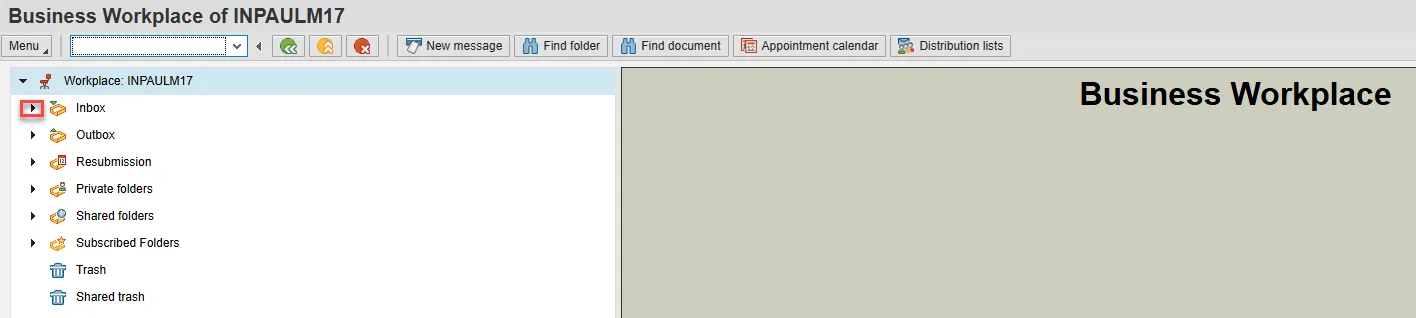
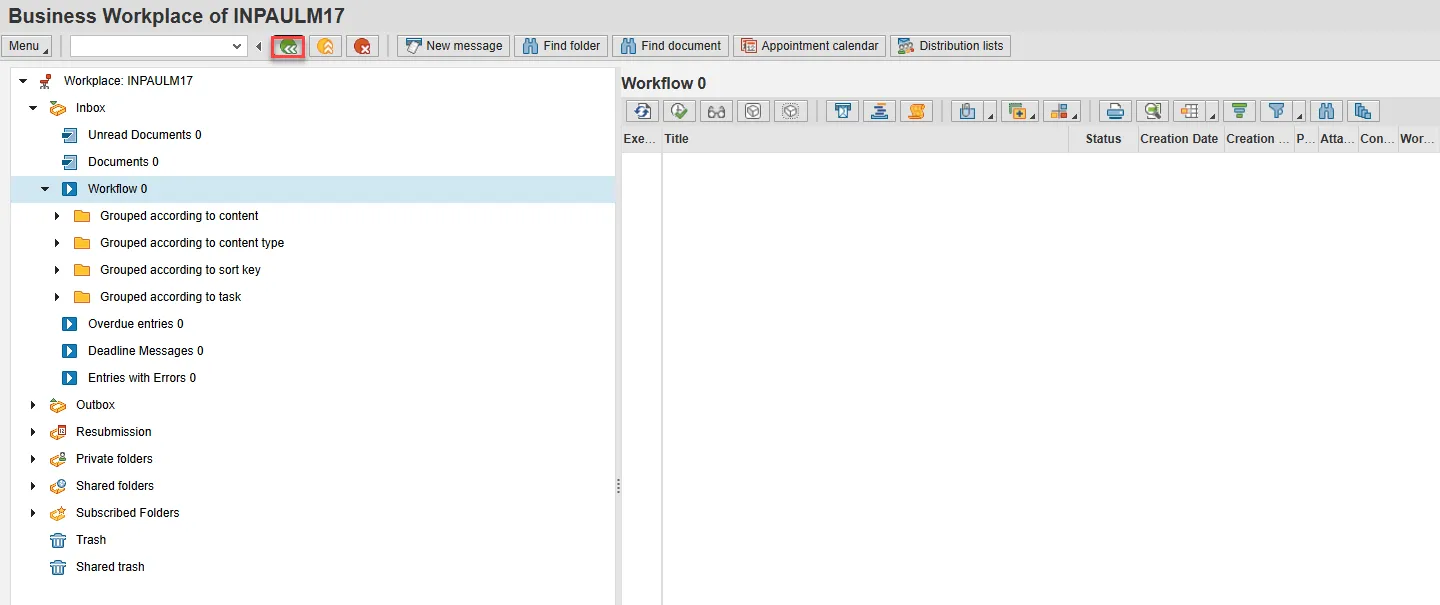
Step 1. Choose the SAP Business Workplace button from the SAP Easy Access page.
Step 2. Expand the Inbox using the expand node.
Note: Failure to complete this step could cause some functions to be unavailable on the secondary button ribbon in the subfolders.
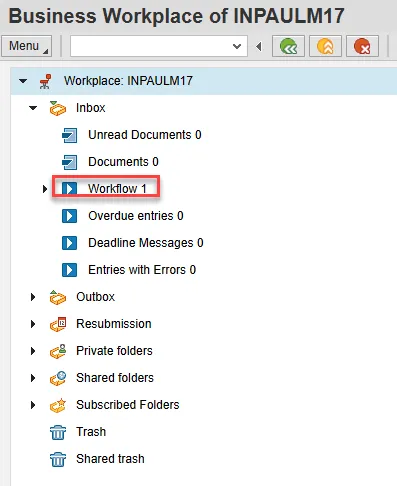
Step 3. Select the Workflow subfolder.
Step 4. Access the Environment button on the secondary button ribbon to retrieve a copy of the note. Access PER-57 Copying Notes from the PCR to Infotypes for steps on retrieving the note.

Step 5. Double click the PCR to begin the action.

Step 6. On the Personnel Actions screen, enter the effective date in the From field.
Note: The effective date must match the date used to create the request.
The effective date is the last day worked. The SAP system will automatically add a day to your date.
When you have received approval to process the action, you will enter the effective date on the first Personnel Actions screen. The next screen, IT0000 defaults one day after. This date should not be changed except for IT0416 (Time Quota Compensation), which should be changed to effective date of the action. If the date is changed for any other infotype, the employee will not receive the last day of pay.

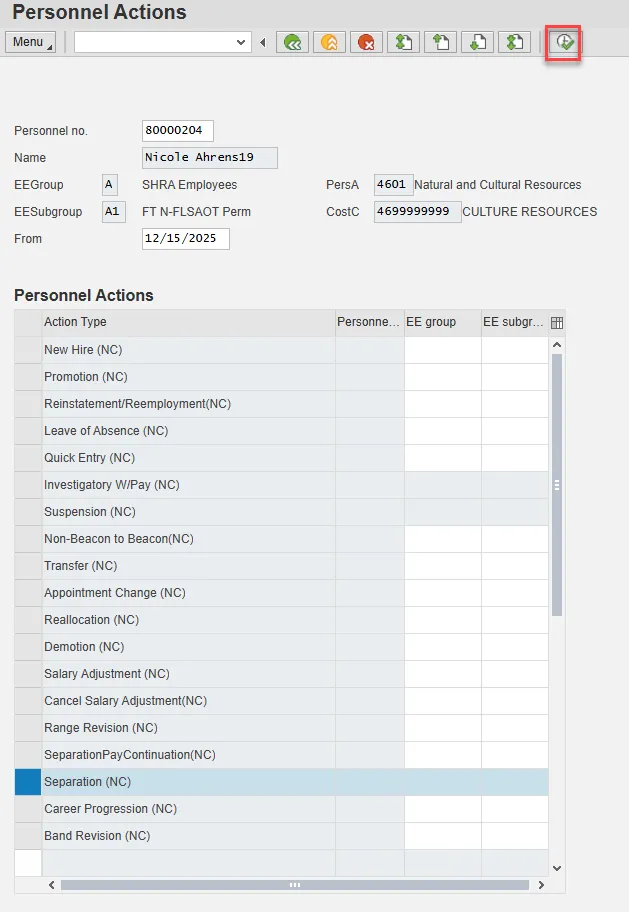
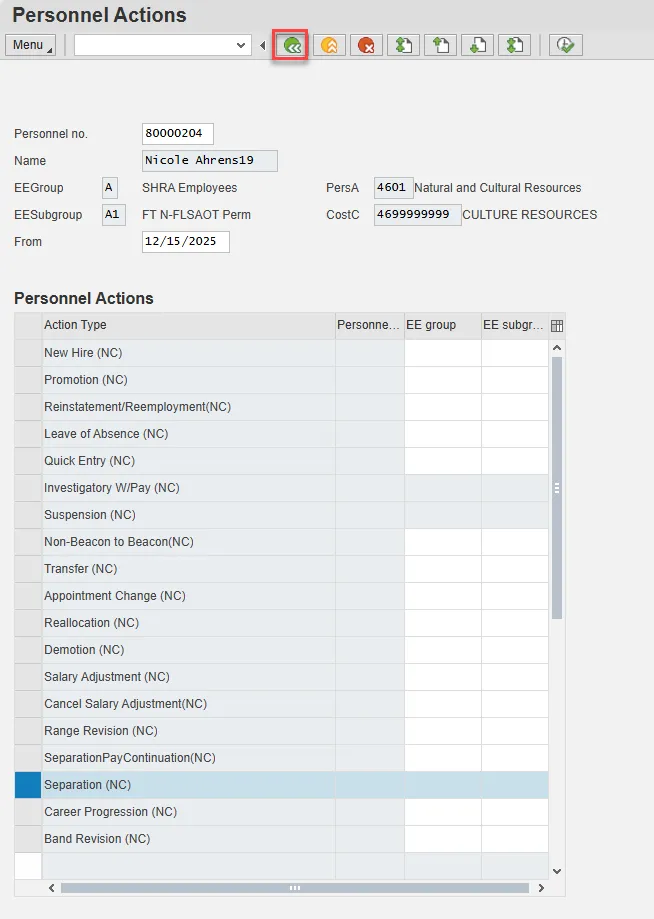
Step 7. Select the gray box to the left of Separation (NC) to highlight that action.
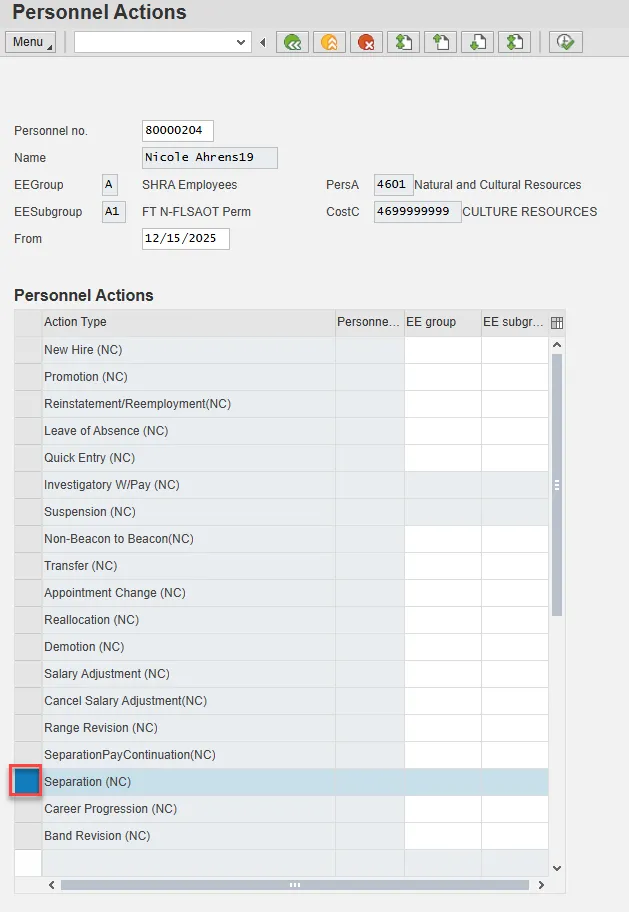
Step 8. Select Execute.
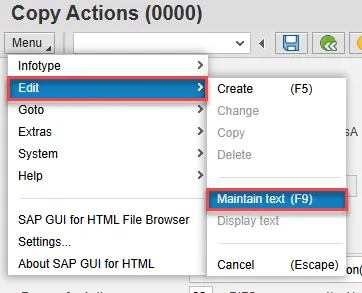
Step 9. On the Copy Actions (0000) screen, select the Menu button.

Step 10. Hover over Edit and choose Maintain text (F9) from the pop-out menu.
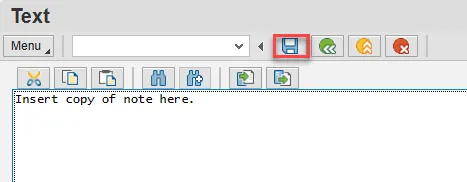
Step 11. On the Text screen, insert your note and choose Save.
Step 12. Back on the Copy Actions (0000) screen, choose Enter on the keyboard.
Some items may turn red and there may be a yellow warning message in the bottom left stating that a record will be delimited. This is expected behavior. Choose Save.

Step 13. Choose Yes on the Create Vacancy pop-up.

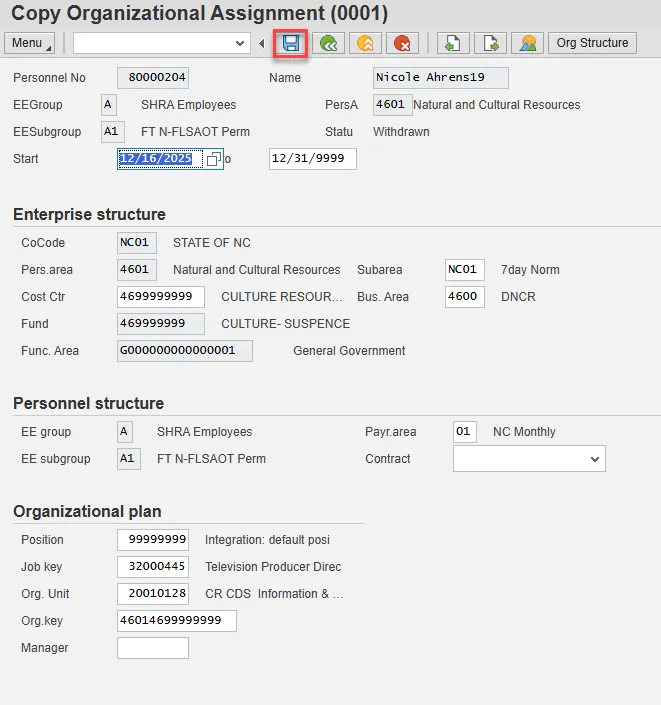
Step 14. On Copy Organizational Assignment (0001), choose Enter and Save.
Step 15. On Copy Date Specifications (0041), choose Enter.
A yellow warning message will appear in lower left indicating a record will be delimited.
Choose Save.

Step 16. Choose the green check button on the Information pop-up.
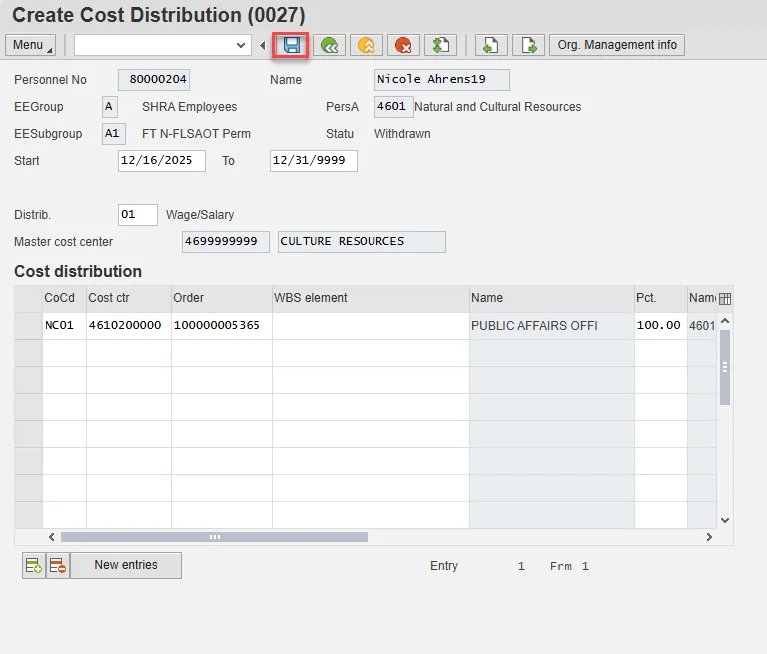
Step 17. The information on Create Cost Distribution (0027) is copied from IT1018 automatically. No entry is required here. This information is required for Payroll to have the necessary information if they need to generate a check after the employee has separated. Even though the system defaults the entry from IT1018, it is critical that you save the infotype again.
Choose Enter on the keyboard and Save.
If the balances are not ready to payout, skip and create by using transaction code PA30.
Notes:
You will need to change the date to the effective date of separation, otherwise the system will not pay out the vacation since the person is no longer active.
Time evaluation is run nightly, so the balances should be current each day.
The balances are current based on the time the Time Administrator or Supervisor has approved.
If employee has vacation, bonus or eligible for overtime payout you will prepare one payout here and when action is completed you will need to prepare the others using transaction code PA30, infotype 0416.
Longevity is calculated by a rule in Time in the background and submitted to Payroll for payout.
Notify your Agency Leave Administrator of the Separation to create any needed IT2013s with the appropriate time types.
When you use the separation reason Beacon to Non-Beacon, the Integrated HR-Payroll System automatically stops pro-rated longevity by running the Time Transfer Specifications (IT 2012) in the background. After you separate an employee using this reason, use PA20 to view the IT 2012.
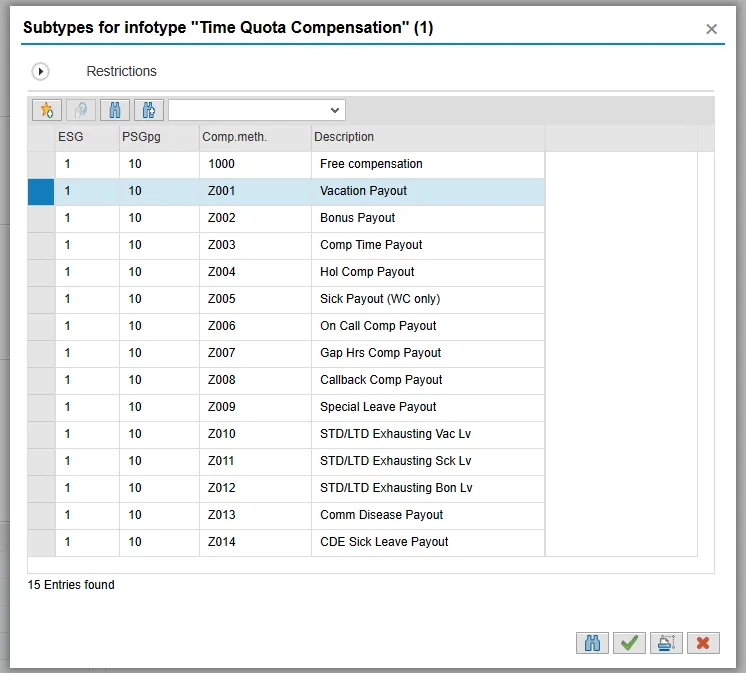
Step 18. Double-click the type of leave to compensate from the Time Quota Compensation pop-up.
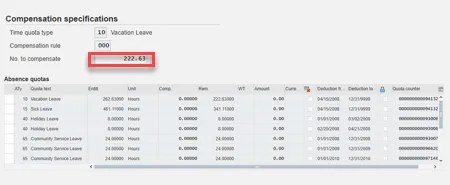
On the Create Time Quota Compensation (0416) screen, the system will show you the number of hours per quota type available for compensation. Enter the total number of hours to be paid out for the quota type chosen. Time evaluation is run nightly, so the balances should be current each day.
The balances are current based on the time the Time Supervisor has approved.
Step 19. On Create Time Quota Compensation (0416), update the No. to compensate field.
Step 20. You will need to change the date to the effective date of separation, otherwise the system will not pay-out the vacation since the person is no longer active.
Change the effective date to the original date used to create the request.
Choose Enter on the keyboard and Save.

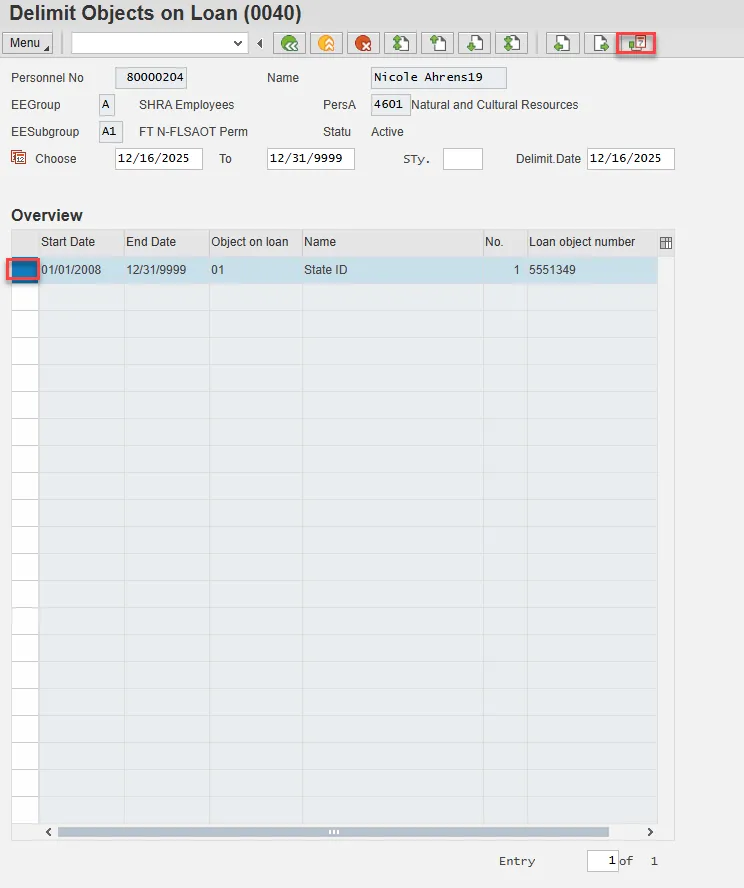
Step 21. On the Delimit Objects on Loan (0040) screen, choose the gray box next to the item you wish to delimit. Select the Delimit button.
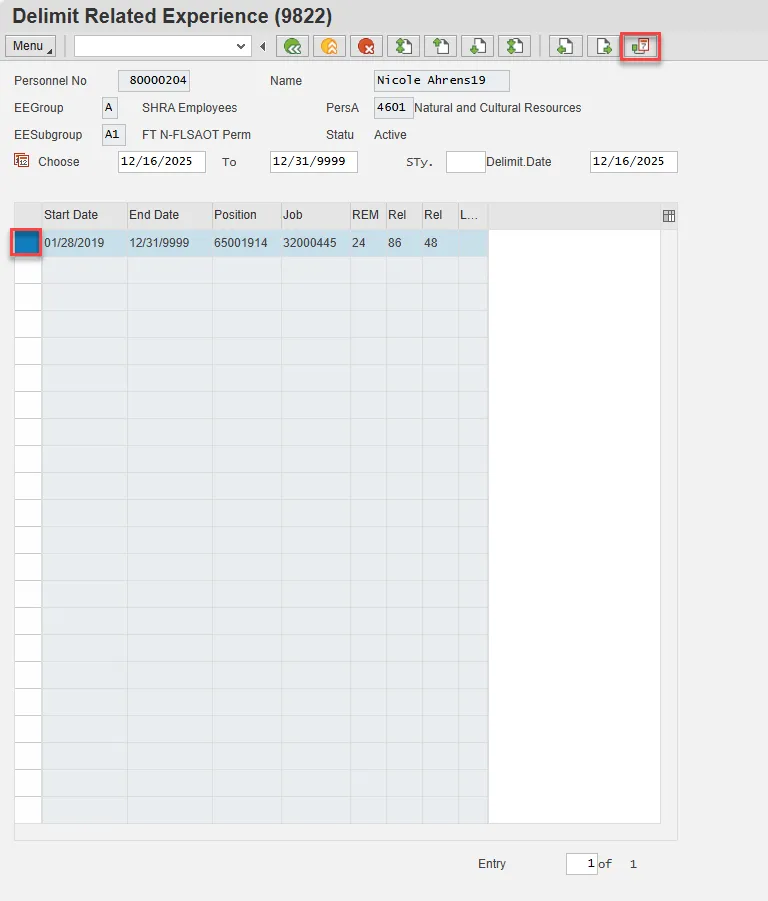
Step 22. On the Delimit Related Experience (9822) screen, choose the gray box next to the current (12/31/99) line item. Select the Delimit button.
Step 23. Back at the Personnel Actions screen, select the Green Arrow Back button.
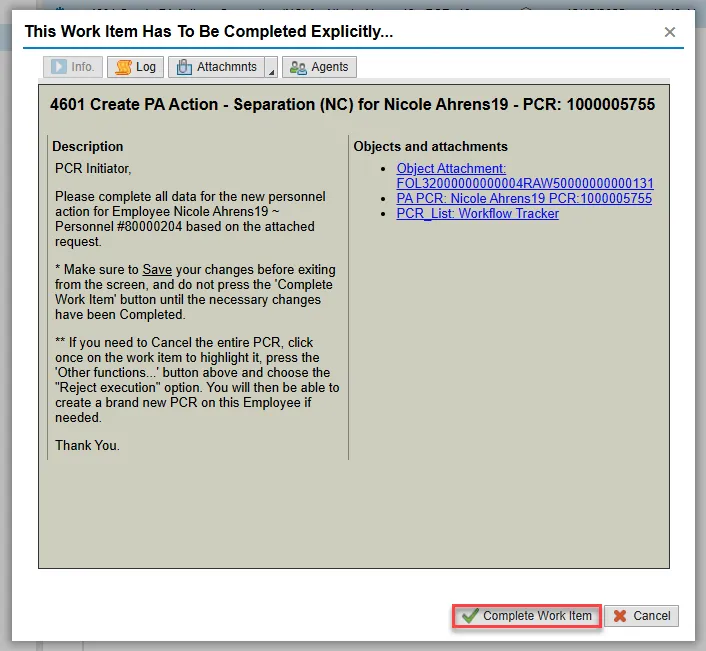
Step 24. On the pop-up, select Complete Work Item. (It has a green check beside it.)
Only choose Complete Work Item if you have completed all steps of the Separation process, including additional payout types if appropriate. This will mark the Separation PCR as complete.
Step 25. From the Business Workplace screen, select the Green Arrow Back button to return to the SAP Easy Access screen.
Note: The Separation Action is complete, but we recommend reviewing via PA20 all infotypes that have been processed. Check the Leave balances to ensure that they are correct.