Purpose
The purpose of this Business Process Procedure is to explain how to copy notes from the PCR to Infotypes.
Trigger
The PCR is ready to be executed. The notes/comments on the PCR need to be copied to the applicable Infotypes.
Business Process Procedure Overview
PA Actions need approval before the Action can be executed. The Integrated HR-Payroll System Workflow enables approvals (or rejections) to be obtained electronically. Documentation must be provided to the Approver. In the Integrated HR-Payroll System, you can attach documents to the Workflow as well as write notes.
Note: Keep in mind that the notes and documents associated with Workflow do not move forward automatically when processing the infotypes of the approved workflow document.
When a PCR is created, notes are created utilizing the Services for Objects button. The Services for Objects option allows notes and attachments (Word, Excel, Notepad) to be included with the Workflow PCR. All Approvers at the next levels (unless marked private) can view the notes or attachments. Only the creator of the private note can view it.
When the Initiator receives an approved PCR in his/her Inbox, it is ready for processing.
By using the Header, you can access the Services for Object button to see any notes or attachments that were created with the PCR.
The Initiator can access the comments from the Services for Object and copy them to the clipboard which services as a holding area for the copied notes/comments. Once the PCR is executed from the Initiator’s Inbox, the notes/comments can then be pasted to the appropriate infotypes.
Access Transaction
Via Menu Path: SAP Menu > Office > SBWP – Workplace > Inbox > Workflow
Via Transaction Code: N/A
Procedure
Begin the copy process on the Business Workplace of the Workflow Initiator. There are 17 steps to complete this process.
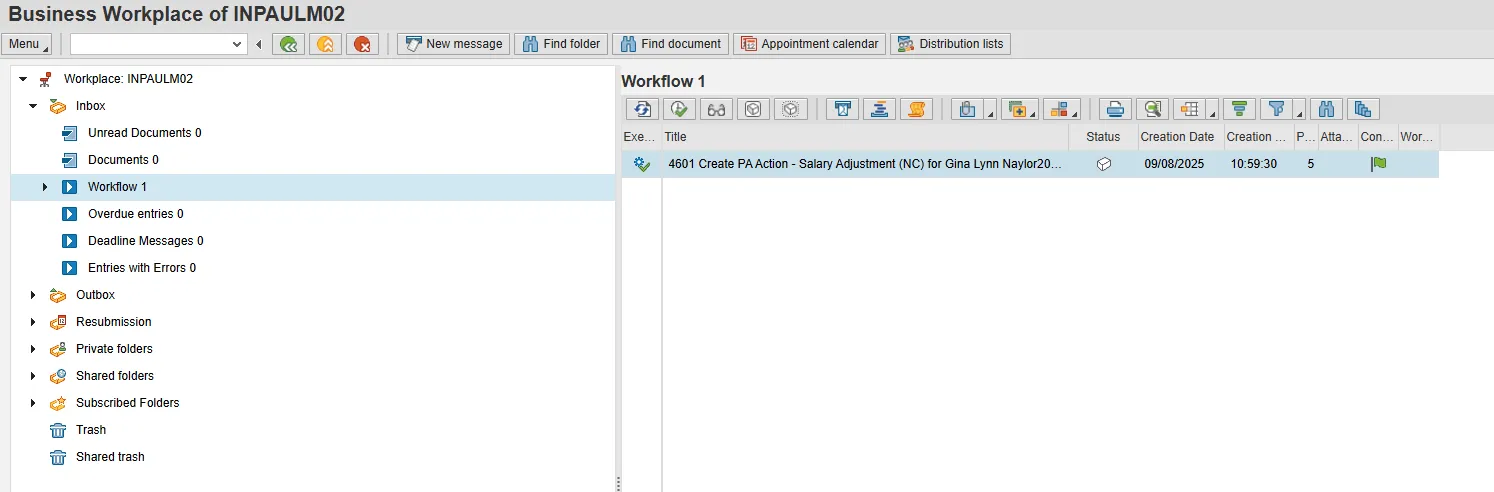
Step 1: Single-click the PCR to select it.
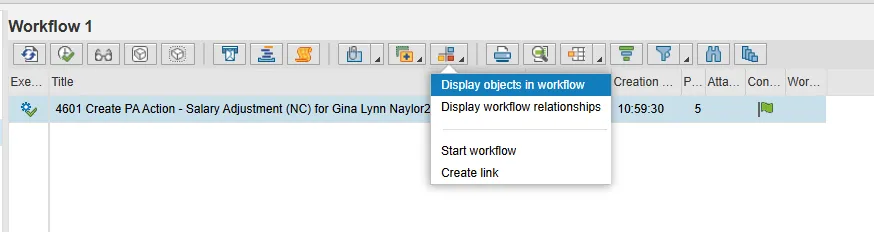
Step 2: Click the Environment button and choose Display objects in workflow from the drop-down menu.

Step 3: Double-click the Workflow Header. It contains the PCR number.

Step 4: Click Services for Object and choose Attachment list from the drop-down menu.
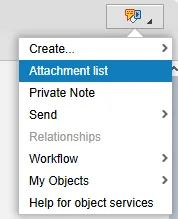
Step 5: Click Attachment list.

Step 6: Double-click on the desired attachment. The attachment is displayed.
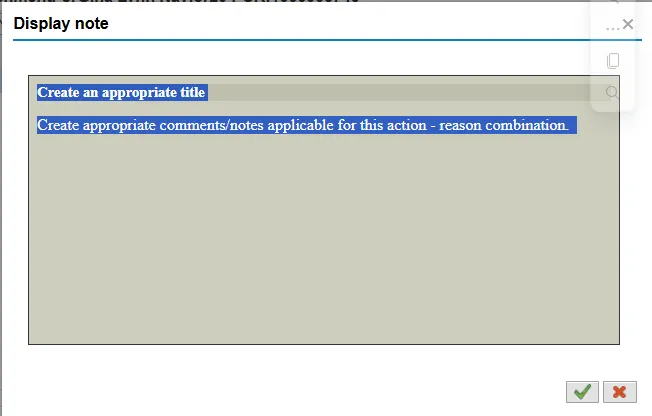
Step 7: Highlight the contents of the note and copy the information to your computer’s clipboard. You can use control + c or right-click copy.

Step 8: Click the Red X to close the attachment window.

Step 9: Click the Red X again to close the Services for Objects attachment window.

Step 10: Click Green back arrow to return to the PCR.

Step 11: Double-click the selected PCR or click on the Execute button.
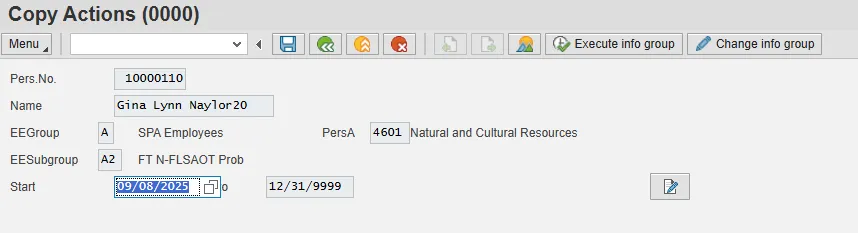
Step 12: Enter the effective date of the action in the From field (should be same as PCR).
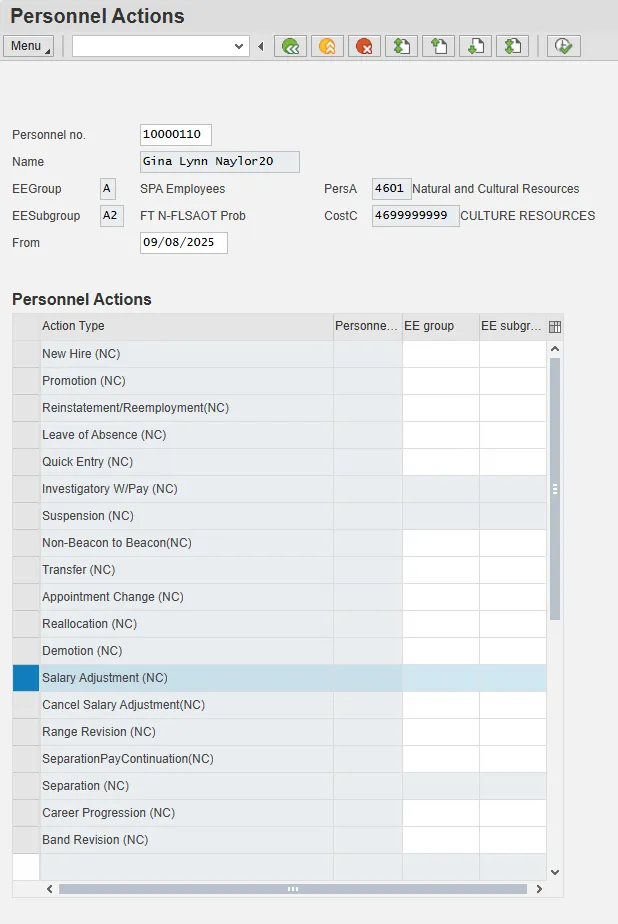
Step 13: Click on the gray box to the left of the action you wish to process. (This example uses the Salary Adjustment action.)
Step 14: Click the Execute button. The Actions infotype is displayed.
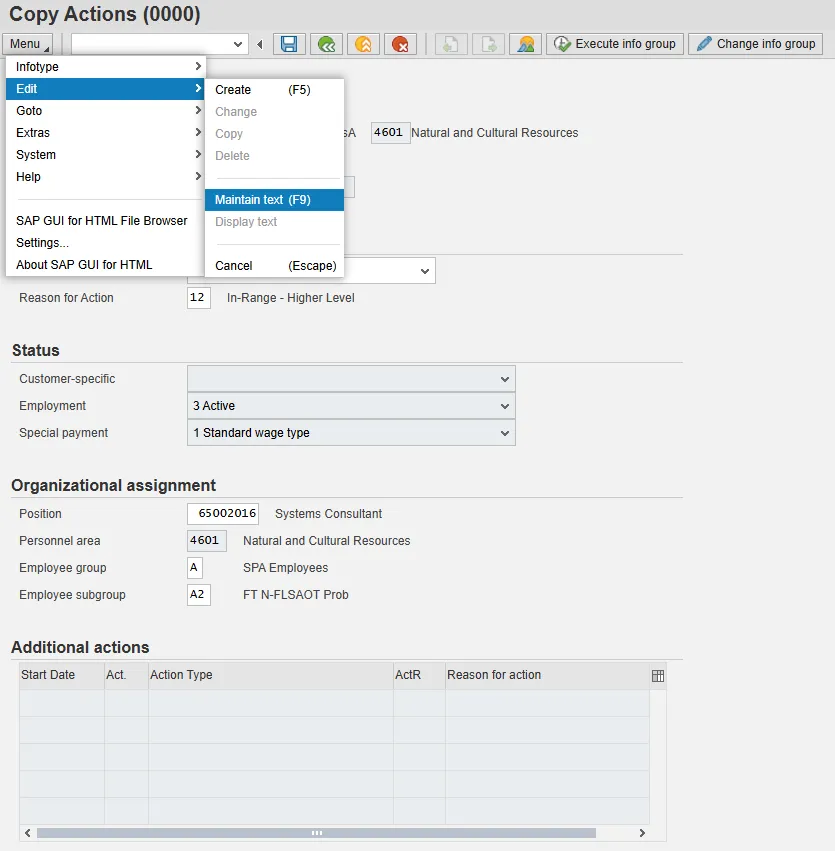
Step 15: Click Menu > Edit > Maintain text. A dialog box is displayed.
Note: If the dialog box screen does not display, try clicking Enter until it displays.

Step 16: In the text box area, right-click and select Insert Text. Text is pasted into the text box.

Step 17: Click the Save button. The Actions infotype screen displays again, now with an icon indicating that there are comments attached to this infotype.
Continue processing the Action. Add notes to other infotypes as appropriate.