Purpose
The purpose of this Business Process Procedure is to explain how to process a new hire action – National Guard in the Integrated HR-Payroll System.
Trigger
There is a need to process a New Hire action for National Guard when notified of a new National Guardsman.
This action is used by the Department of Public Safety only.
Business Process Procedure Overview
A New Hire action needs to be initiated when a Supervisor/Manager notifies HR of the initial employment of an individual to a position. This New Hire action form will be completed and submitted via workflow and will be assigned a PCR number (personnel change request number). This PCR will proceed through the workflow approval levels as defined by the business process, and when complete, will come back to the Initiator's inbox for processing. The Initiator will open the approved New Hire PCR request, process the New Hire action, and when completed with all infotypes, click Complete on the PCR request.
As the initiator, you will use the Employee Request Form to create a New Hire Action workflow request for an employee. You will review the workflow item and use the standard workflow functions as appropriate to:
- View the workflow log
- View the workflow tracker
- View the workflow header
- View the priority classification
Once the PCR request has been approved, the initiator/requestor will process the New Hire action, which begins from the approved PCR item in the SAP inbox.
The New Hire action is used to generate a Personnel No and HR Master Data for:
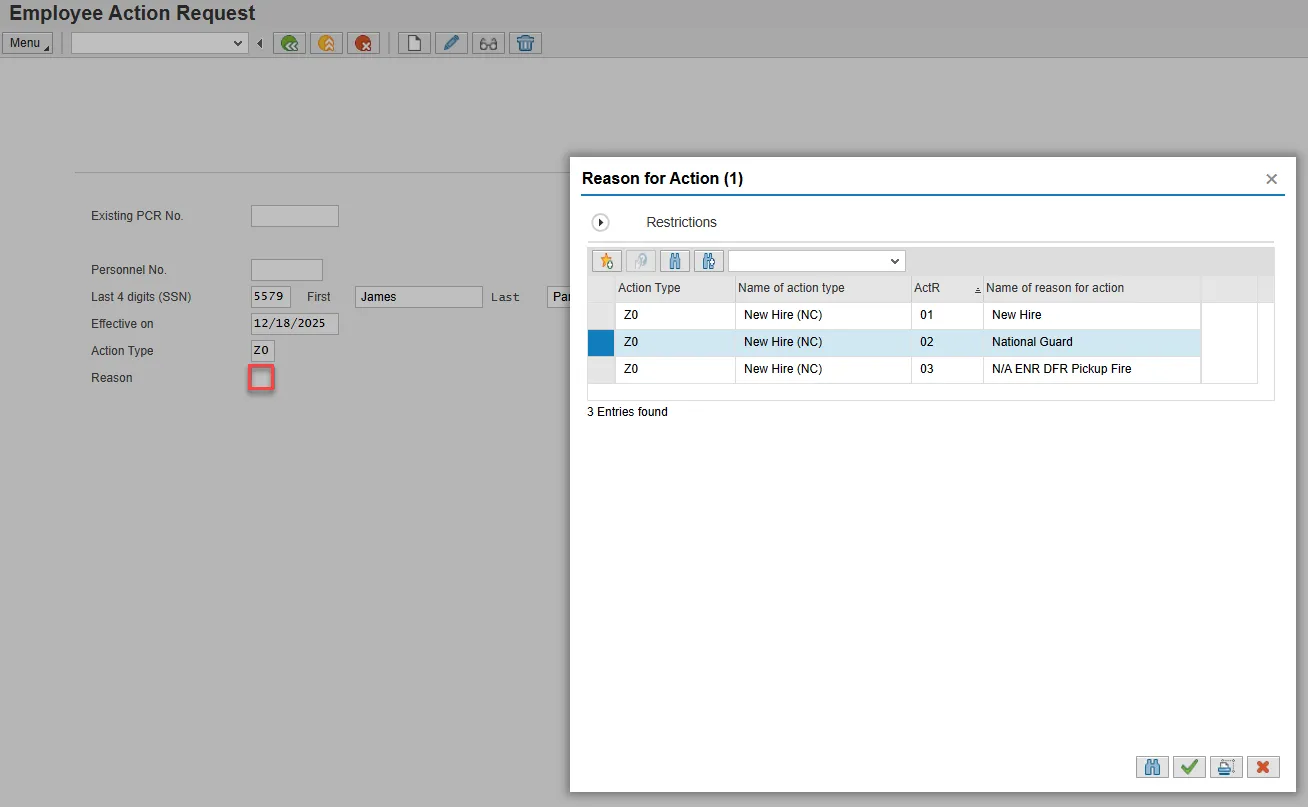
- A new employee who has not worked for the State of North Carolina. In this situation the Reason for Action is 02 – National Guard
Note: Verify using B0157 Cross Agency Verification report to ensure the employee is not already in the system prior to starting the PCR action.
Tips and Tricks
INITIATE
- Notes must be attached to the PCR to aid in the approval decisions by those in the approval workflow chain. These notes will not transfer to the Action but may be copied and pasted into new notes within the Action.
- We recommend, on the Employee Action Request, entering the EE Position number first, and then clicking Enter to request validation by SAP and the pre-population of many of the fields. If other fields are entered prior to the position number, when SAP validates the position number, the fields may not populate properly.
COMPLETE
- We recommend processing the employee on the first day of employment.
- Prior to starting the New Hire process, review the position to ensure there is no holder relationship.
- Personnel actions are date sensitive. Dates can be entered for an event in the future and will not take effect until that date, but will show in the system as soon as they are entered (for future-dated actions you will not be able to see the action unless you search within that date range – the default date range for searches is the current date).
Procedure
There are 19 steps to complete this process.
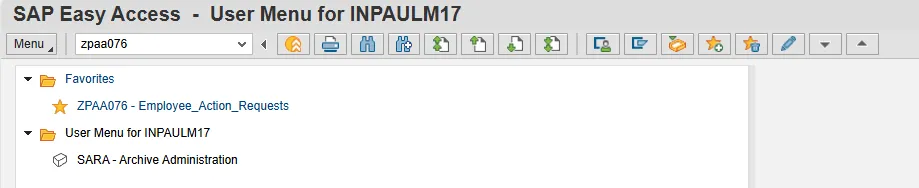
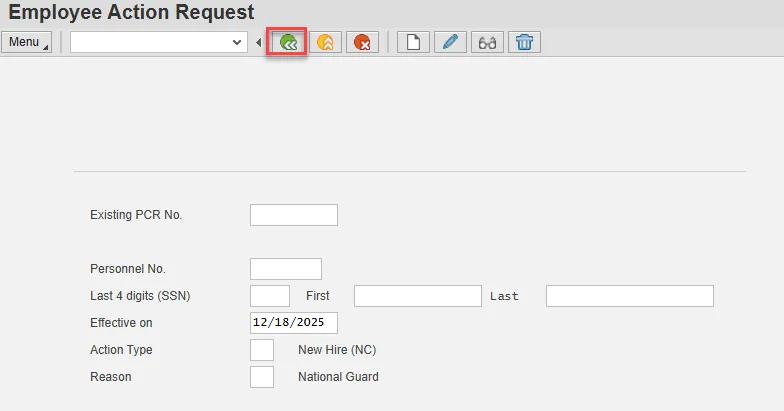
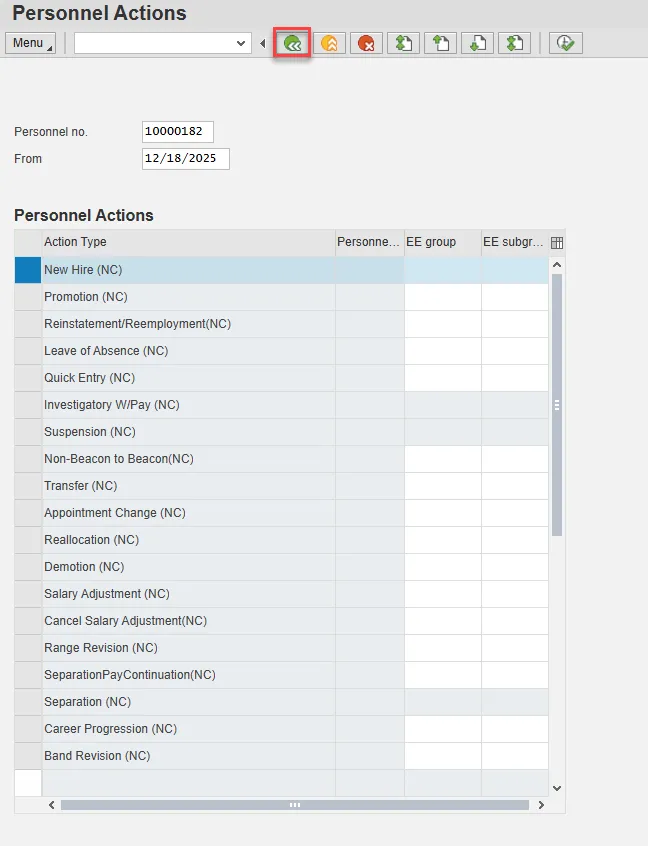
Step 1. From the SAP Easy Access page, select transaction code ZPAA076.
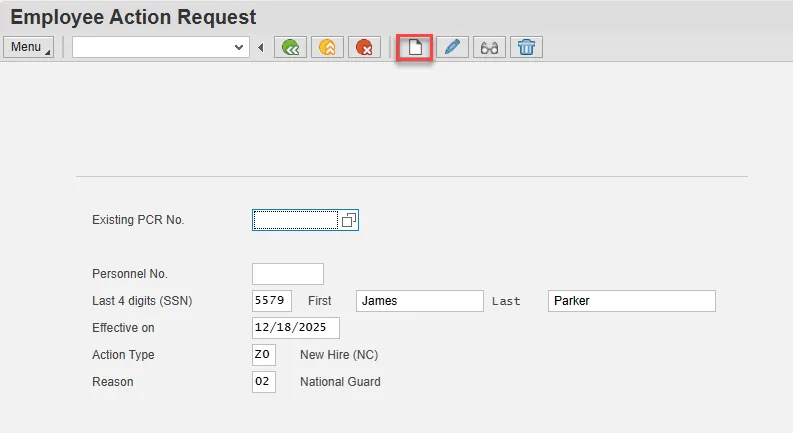
Step 2. On the Employee Action Request screen, complete the Last 4 digits (SSN) field. This is the last four digits of the new hire’s social security number.
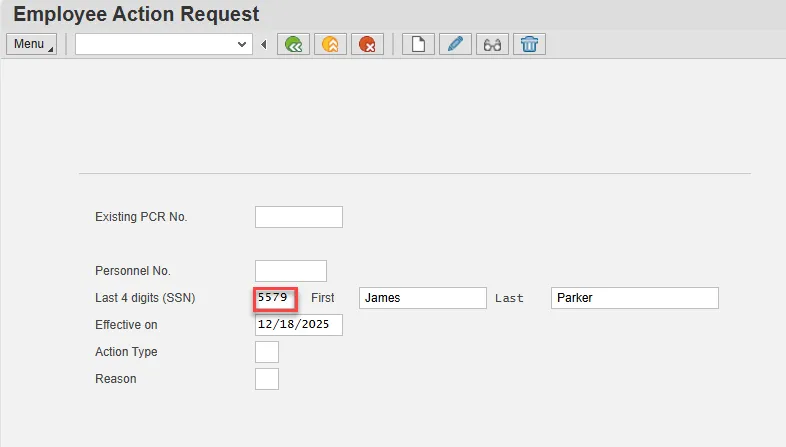
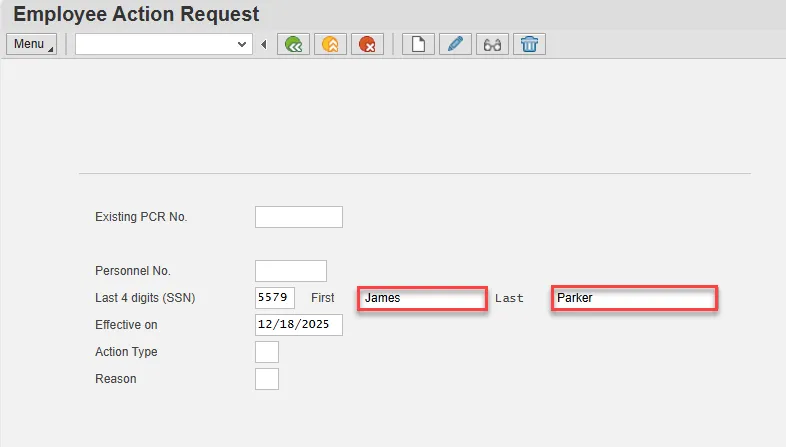
Step 3. Complete the First and Last fields with the new hire’s first and last name.
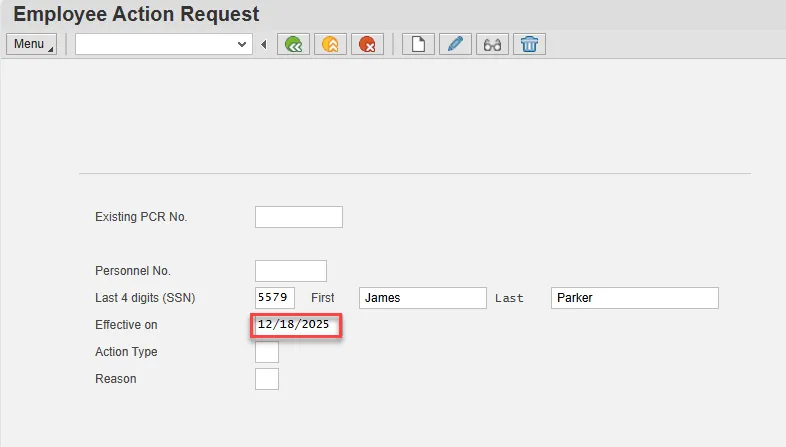
Step 4. Update the Effective on field with the effective date of the action.
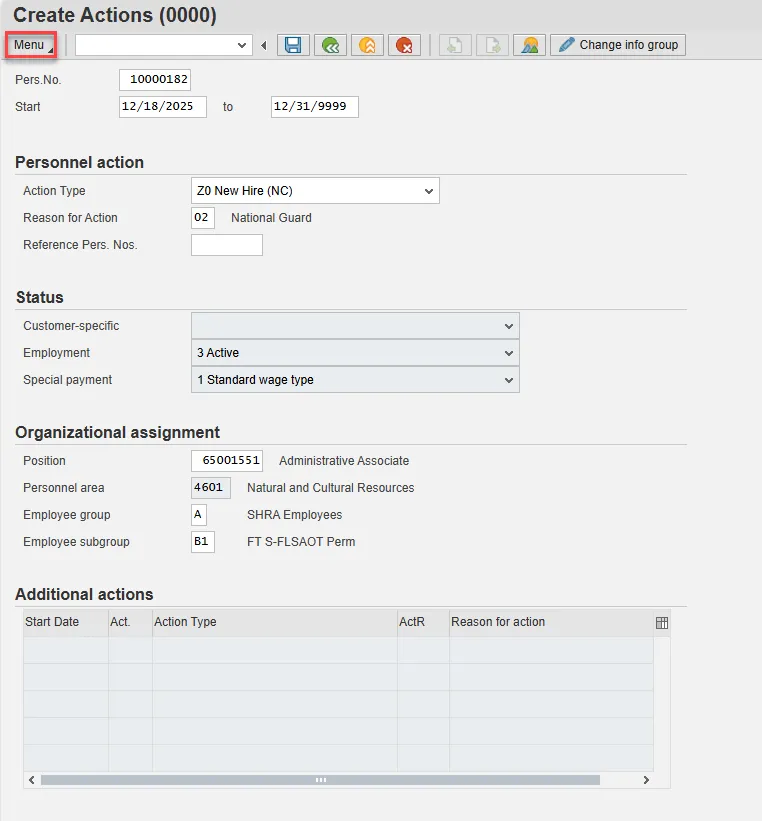
Step 5. Select the matchcode in the Action Type field and double click New Hire from the list.
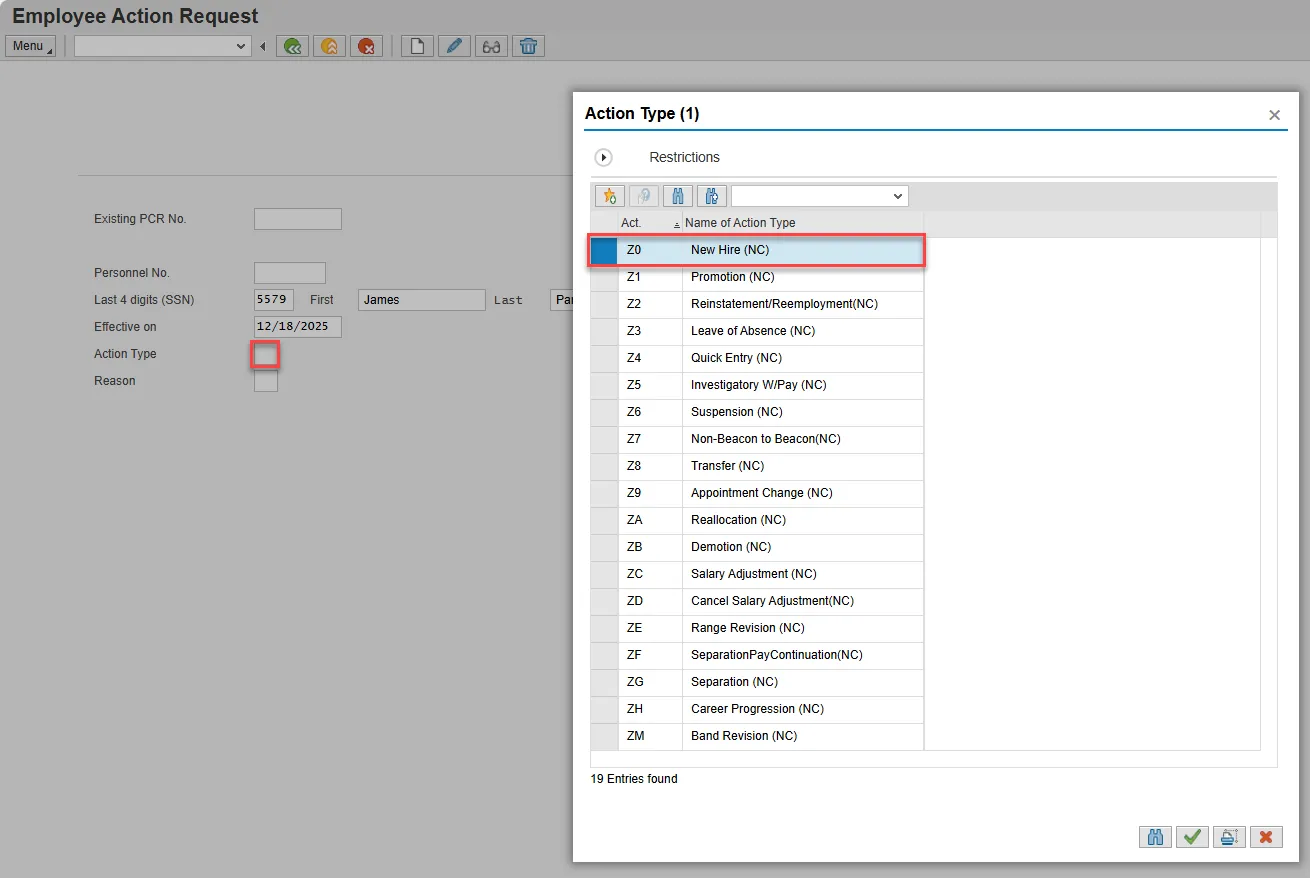
Step 6. Select the matchcode in the Reason field and double click the appropriate reason for the New Hire action.
Note: Leave the Existing PCR No. field blank if you are creating a new PCR.
Step 7. Select Enter on the keyboard and choose the Create button.
Step 8. OSC recommends entering the EE Position number in first, so the Personnel Area, Personnel Subarea, Employee Group, Employee Subgroup and Pay information pre-populate based on the position number entered. If you do not enter the position number first, the pre-population of data based on the position number may not work properly.
Complete the EE Position field and choose Enter on the keyboard.
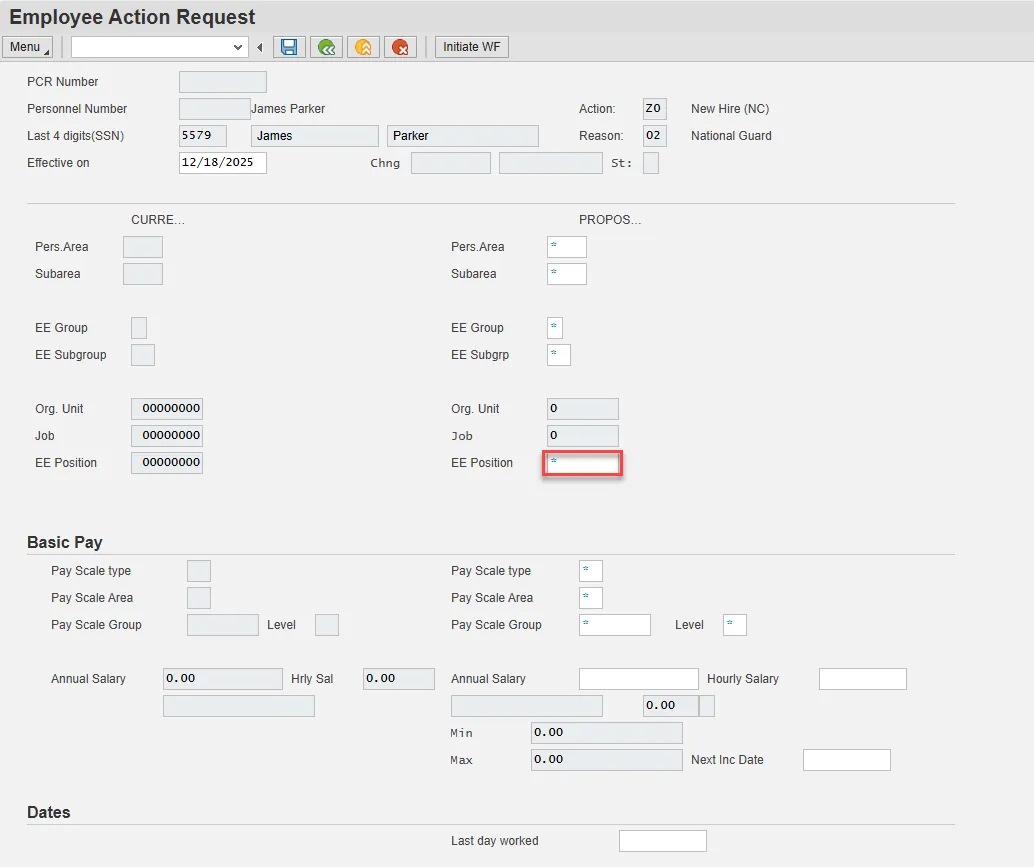
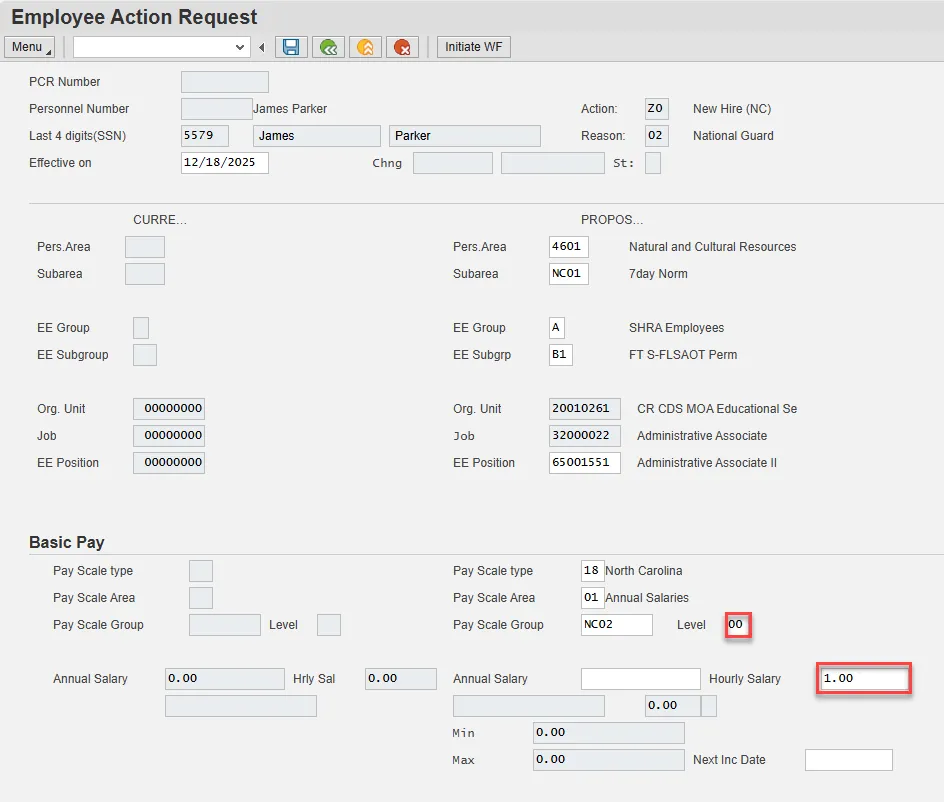
Step 9. Enter 1.00 in the Hourly Salary field.
Note: The Hourly Salary is not used to calculate pay. Agency Payroll enters the amount to be paid on IT0015, subtype 1630 as required.
The National Guard will always be $1.00.
Choose the matchcode in the Level field to find 00 that matches the Hourly Salary rate.
Select Enter on the keyboard.
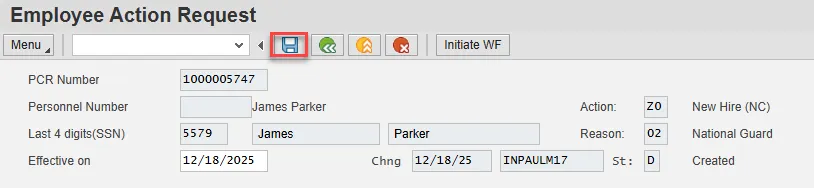
Step 10. Choose Save.
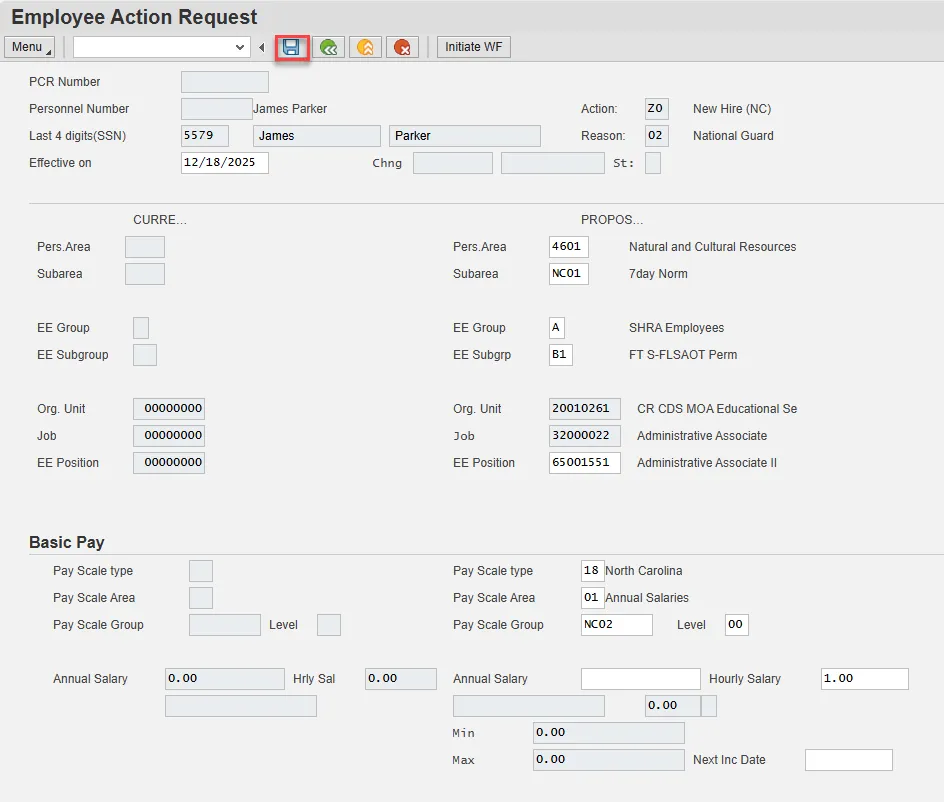
Step 11. You can save this information as many times as you like. Each time you will receive a confirmation of the save. Choose the green check in the bottom right of the pop-up.
Note: You will not be able to create a note attachment until you have saved it at least once. If you have submitted the PCR to workflow already, you will not be able to change the details, nor save any new information, only display the existing details.
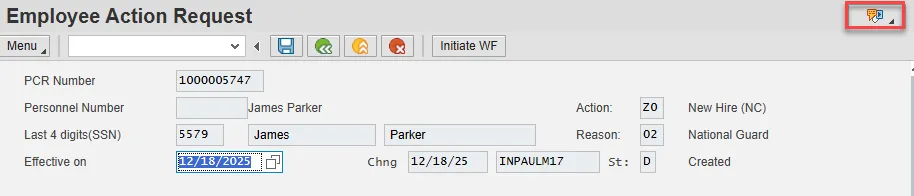
Step 12. Select the Services for Object button in the upper right corner.
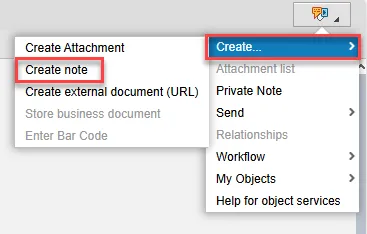
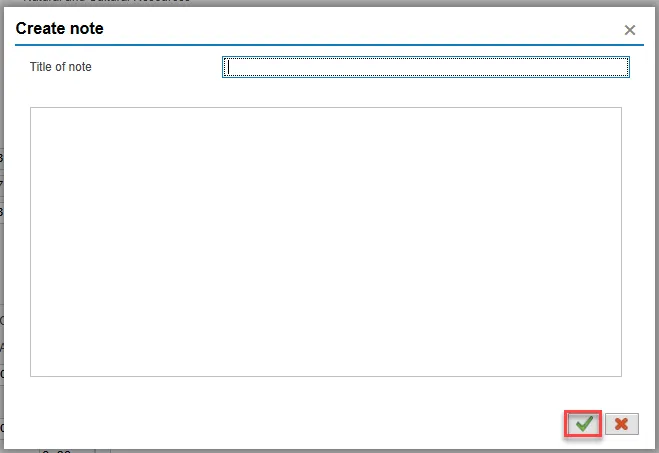
Step 13. Hover over Create and choose Create note from the drop-down menu.
Step 14. Update the Title of note field and the body of the note.
The note is a required part of the request creation process. Notes entered during PA workflow must follow OSHR’s action notes template: PA Action Notes Template
Choose the green check button in bottom right of note pop-up.
Step 15. Choose Save.
Step 16. Select the green check button in bottom right of Information pop-up.
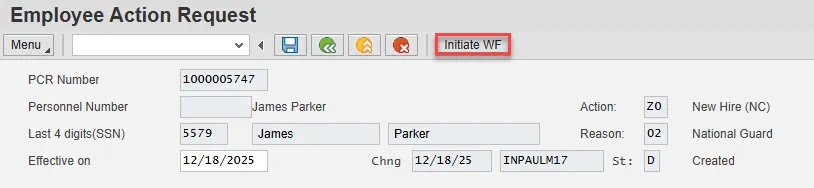
Step 17. Choose the Initiate WF button.
Select the Initiate Workflow button to send the Reinstatement Action through the approval process. No changes can be made after the PCR has been submitted for approval, unless the PCR is rejected at any stage and sent back to you (the initiator/requestor).
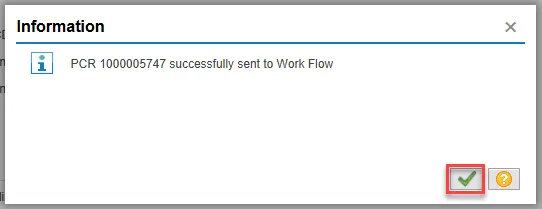
Step 18. Select the green check button in bottom right of the Information pop-up.
Step 19. Choose the green Back button.
The Initiate New Hire Action is complete.
After Workflow Approvals have been received, proceed with the Complete New Hire Action process.
Instructions for Completing this Action
There are 32 steps to complete this process.
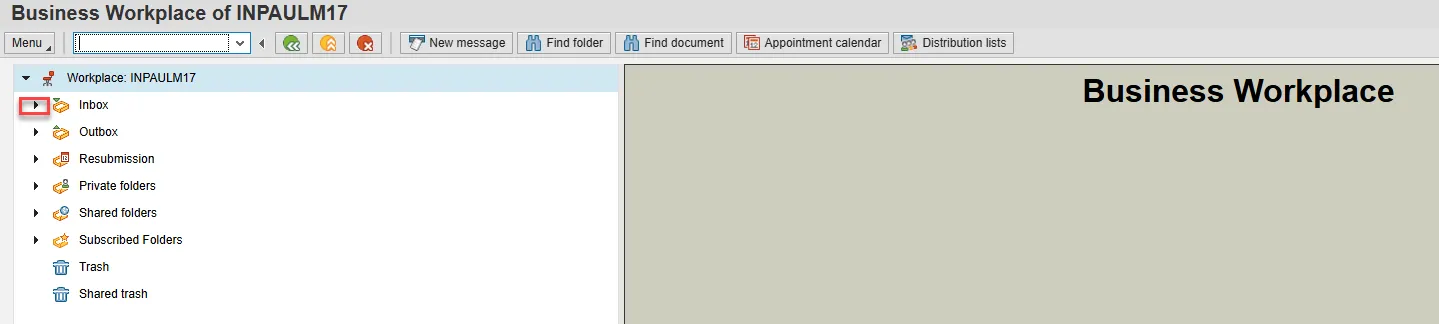
Step 1. Choose the SAP Business Workplace button from the SAP Easy Access page.

Step 2. Expand the Inbox using the expand node.
Note: Failure to complete this step could cause some functions to be unavailable on the secondary button ribbon in the subfolders.
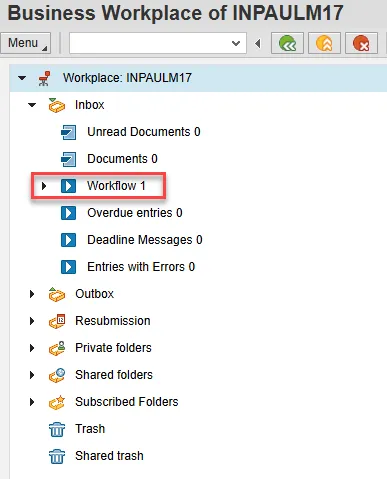
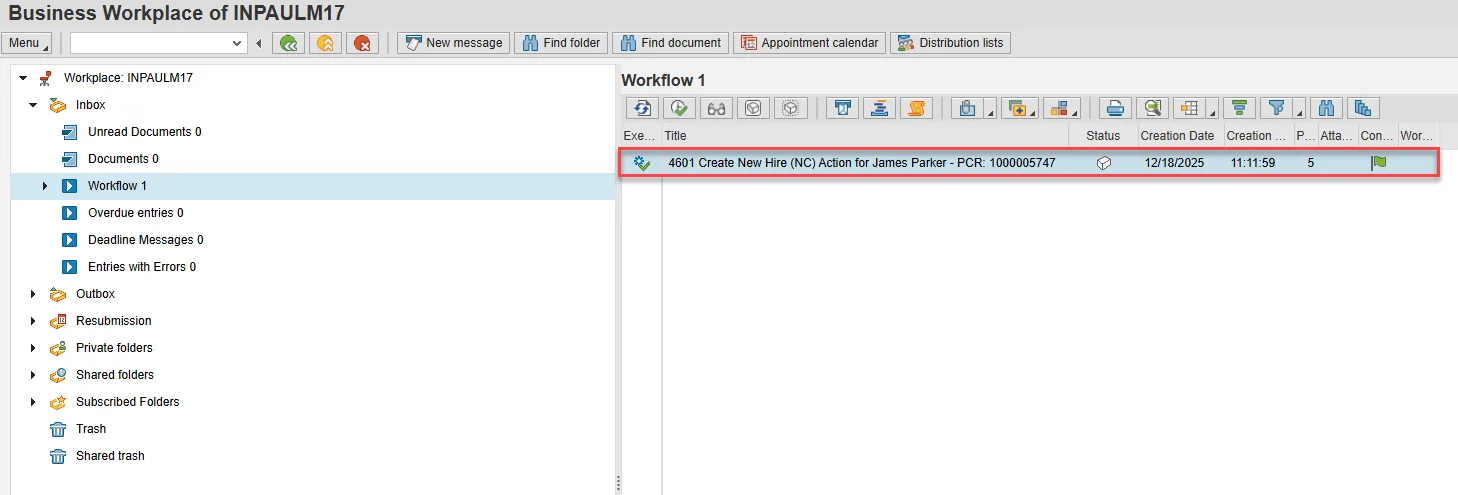
Step 3. Select the Workflow subfolder.
Step 4. Access the Environment button on the secondary button ribbon to retrieve a copy of the note. Access PER-57 Copying Notes from the PCR to Infotypes for steps on retrieving the note.
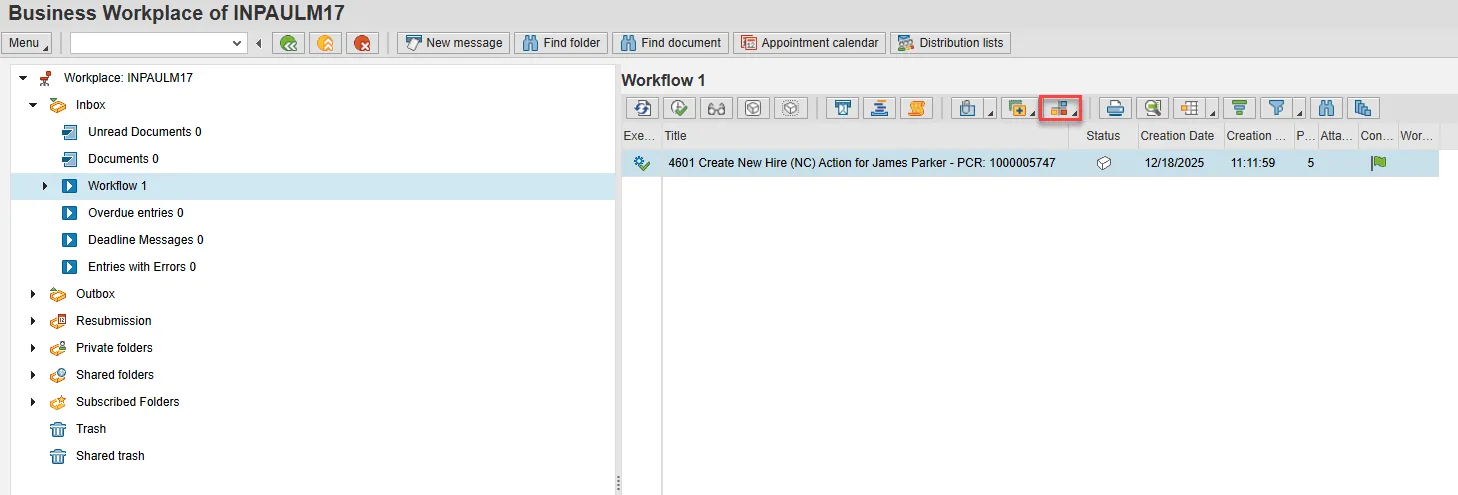
Step 5. Double click the PCR to begin the action.
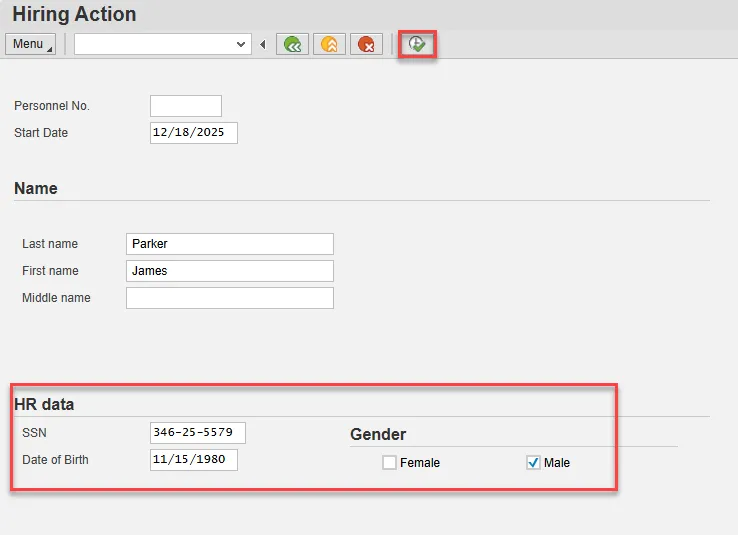
Step 6. On the Hiring Action screen, complete the SSN field (full social security number with dashes), Date of Birth, and Gender fields.
Note: The last 4 digits of the Social Security number must match the numbers entered when initiating the PCR. If they do not match, the system will notify you that you do not have a valid, approved PCR and will not let you process the New Hire action.
Note: You CANNOT enter a dummy/temporary social security number. Once infotype 0002 is saved you must contact BEST HR to be maintained.
Choose Execute.
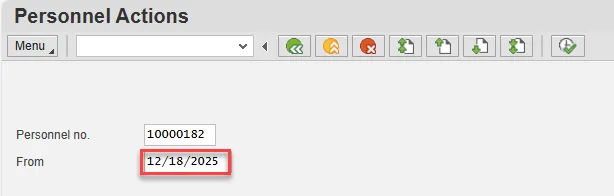
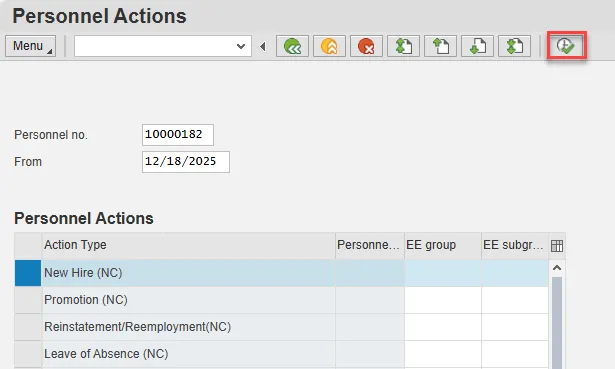
Step 7. On the Personnel Actions screen, enter the effective date in the From field. This must match the effective date used to create the request.
Note: Notice that the Personnel Number has pre-populated here. This is the employee's Personnel Number, generated as a unique number from the Orbit retirement system.
Step 8. Highlight New Hire by selecting the gray box at the beginning of the New Hire row.
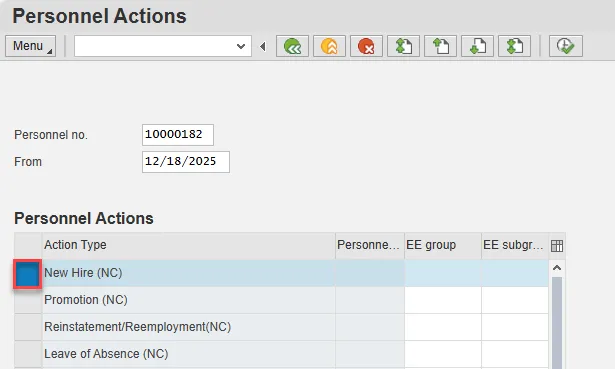
Step 9. Choose the Execute button.
Step 10. On Create Actions (0000), choose the Menu button.
Step 11. Hover over Edit and choose Maintain text (F9) from the pop-out menu.

Step 12. On the Text screen, insert your note and choose Save.
Note: If the text screen does not display, try carefully selecting Enter on the keyboard to display the screen.

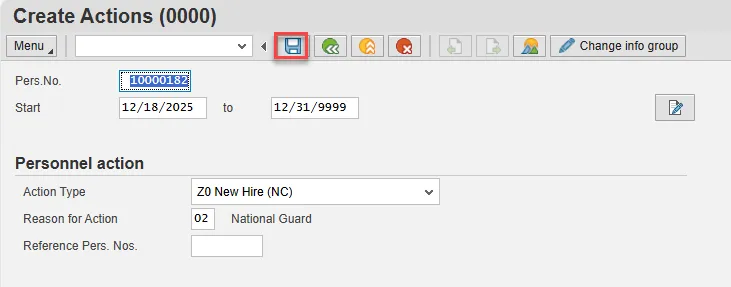
Step 13. Back on the Create Actions (0000) screen, choose Enter on the keyboard and Save.
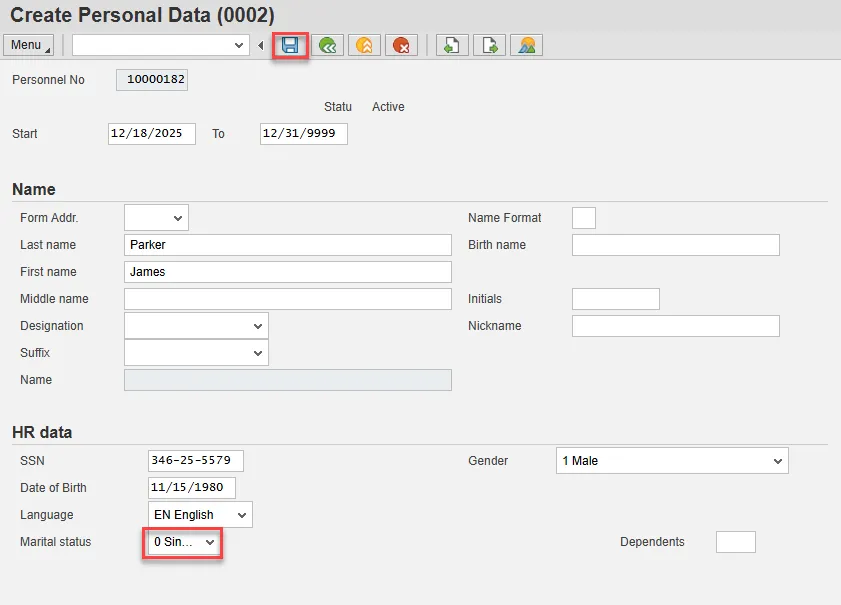
Step 14. On the Create Personal Data screen, use the drop-down to update the Marital status field.
Enter and Save.
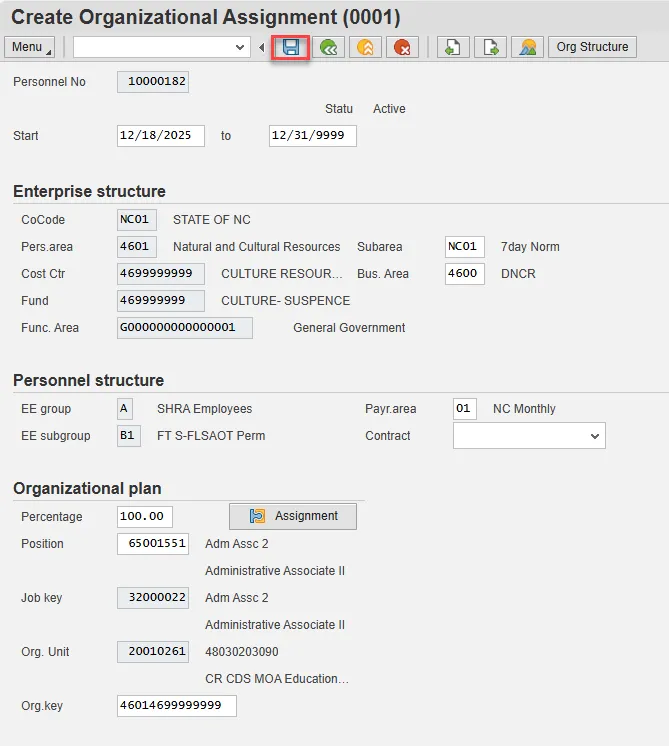
Step 15. On Create Organizational Assignment (0001), select Enter on the keyboard and Save.
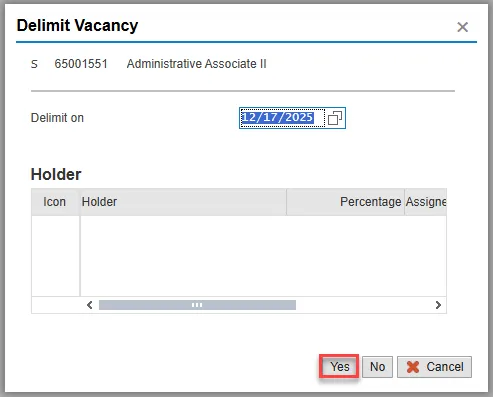
Step 16. On the Delimit Vacancy pop-up, select Yes in the bottom right.
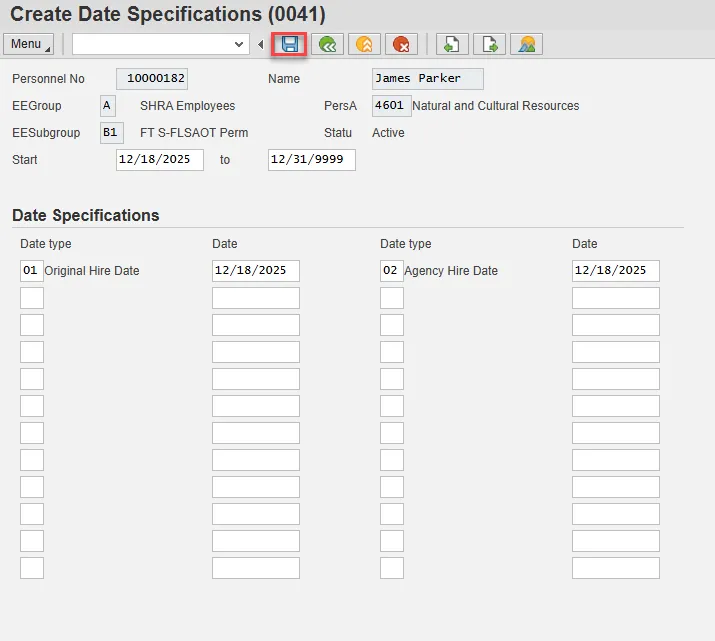
Step 17. On Create Date Specifications (0041), choose Enter on the keyboard and Save.
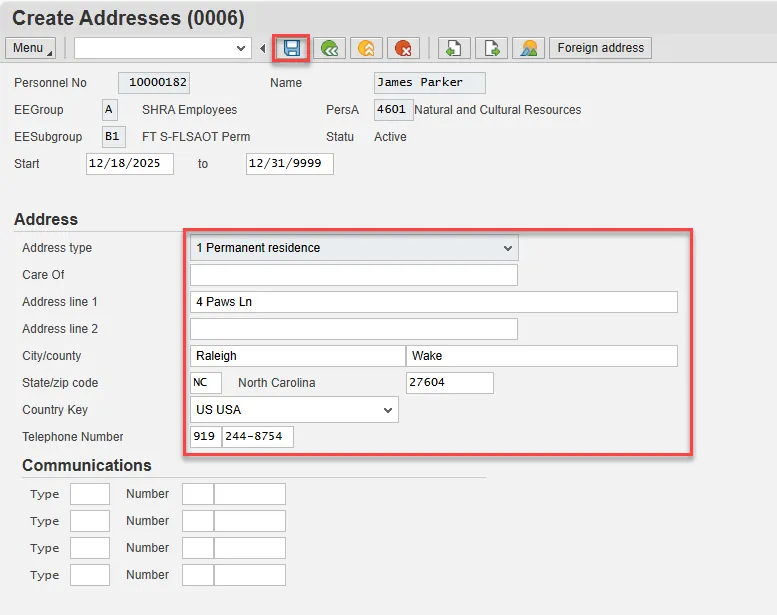
Step 18. On Create Addresses (0006), update the Permanent residence information including the Telephone Number field.
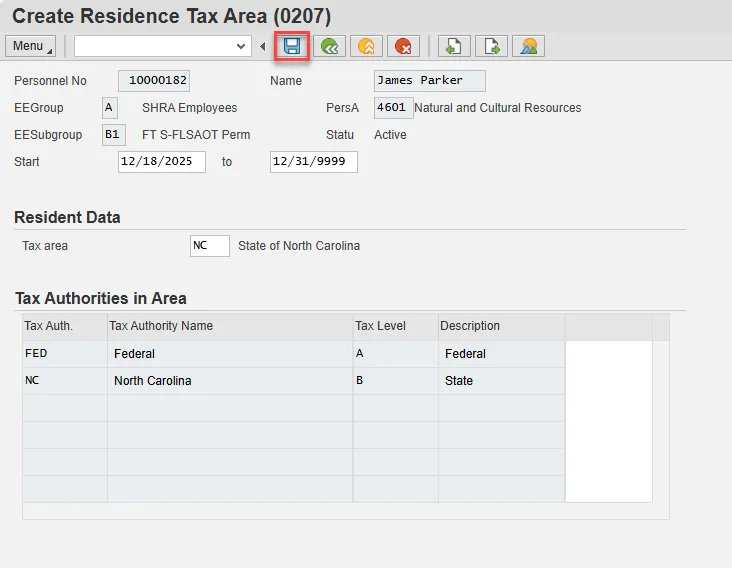
Step 19. Accept the defaulted information on Create Residence Tax Area (0207). Enter and Save.
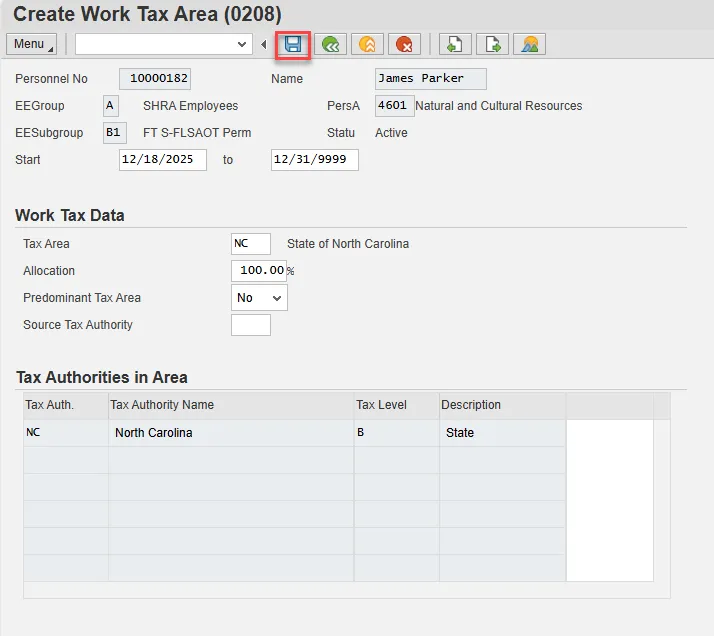
Step 20. Accept the defaulted information on Create Work Tax Area (0208).
The Predominant Tax Area field is used only for employees who work in and are taxed by multiple locations within Pennsylvania. This field will default to No and should not be altered.
Enter and Save.
Step 21. Accept the defaulted information on Create Unemployment State (0209). Enter and Save.

Step 22. On Create Withholding Info W4/W5 US (210), it is best practice is to enter any data as appropriate from the withholding form, review all data, and click Enter to allow the system to validate the data.
The default will be 03/Single or Married Filing Separately for the Filing Status field.
Employees with ESS (Employee Self-Service) access will be able to update their Withholding Information W4 via ESS.
Once updated, Enter and Save.
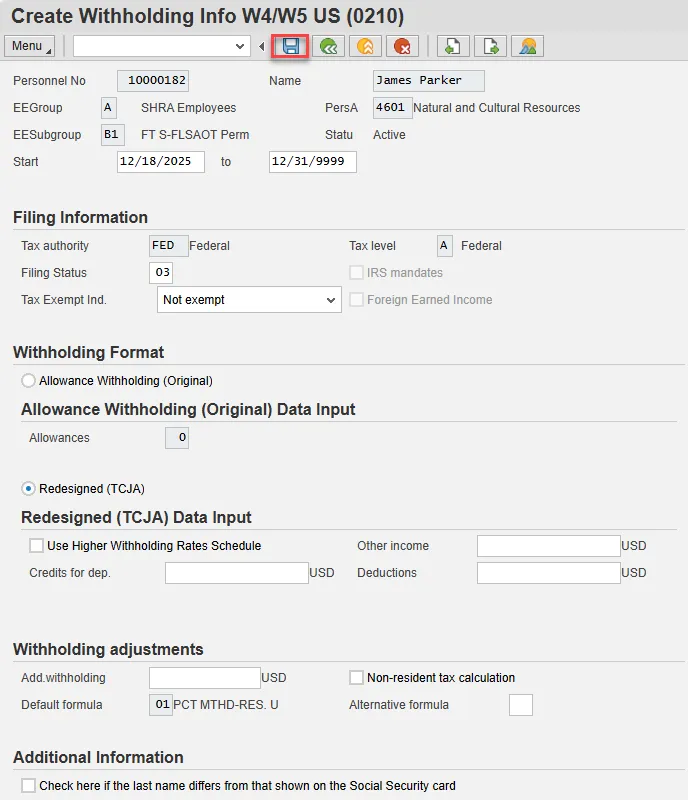
Step 23. On the next Create Withholding Info W4/W5 US (0210) screen, it is best practice is to enter any data as appropriate from the withholding form, review all data, and click Enter to allow the system to validate the data.
The default will be 01/Single or Married Filing Separately for the Filing Status field.
Once updated, Enter and Save.

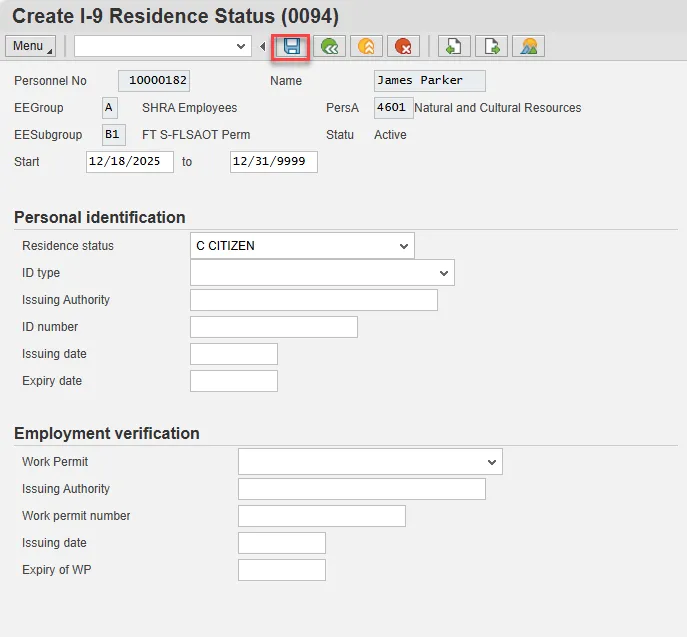
Step 24. Select the appropriate Residence status from the drop-down menu. The only required field is Residence status. The remaining fields are optional.
If a residence type other than Citizen is chosen, an additional screen will display containing infotype 0048 information to enter Residence Status details (such as permission number, expiration date, date of issue, etc.). In this example we have chosen Citizen.
When hiring someone who is a Non-Resident Alien, you will choose non-resident alien on IT0094. IT0048 will come up with US01 or US02 as the choices. When you save IT0094 with the non-resident alien choice, then IT0048 with Subtype US01 will come up. The dynamic action brings up IT0048 subtype US01 first, so if you don't want that one, click the YELLOW arrow past that infotype and IT0048 subtype US02 will come up.
Enter and Save.
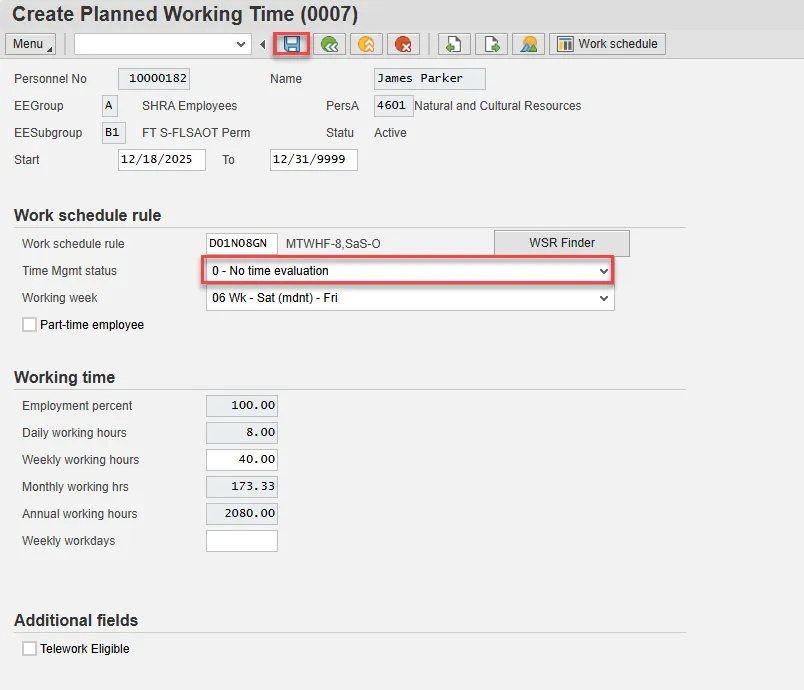
Step 25. The Time Management Status always will be “No time evaluation” on Planned Working Time (0007).
Enter and Save.
Step 26. On Basic Pay (0008), the pay scale values (pay scale type, pay scale area, pay scale group and level) have been designed to default based on the rules assigned to the employee's position. If the pay scale values do not default, please contact BEST Shared Services or your BEST HR Specialist.
Enter the Reason for the action (in the case of a New Hire there is only 1 reason), and the person's Amount if hourly. Click Enter and the system will validate the salary and provide the hourly rate.
Note: If the person is on an hourly position, enter their HOURLY rate, and the system will calculate their salary.
- Reason - enter or select from the drop-down menu
- Next increase - this field is blank except for the Judicial Branch, which uses it to track the next increase
- Annual Salary - populates from the workflow, verify this field for accuracy
- Amount - will be blank; if the employee is paid hourly instead of annually, enter the hourly amount in the Amount field
- Number/Unit - will be blank
- Unit - will be blank
Note: Employees can be different from the position. For example, the position may be annual salary and the employee may be hourly.
Once updated, Enter and Save.
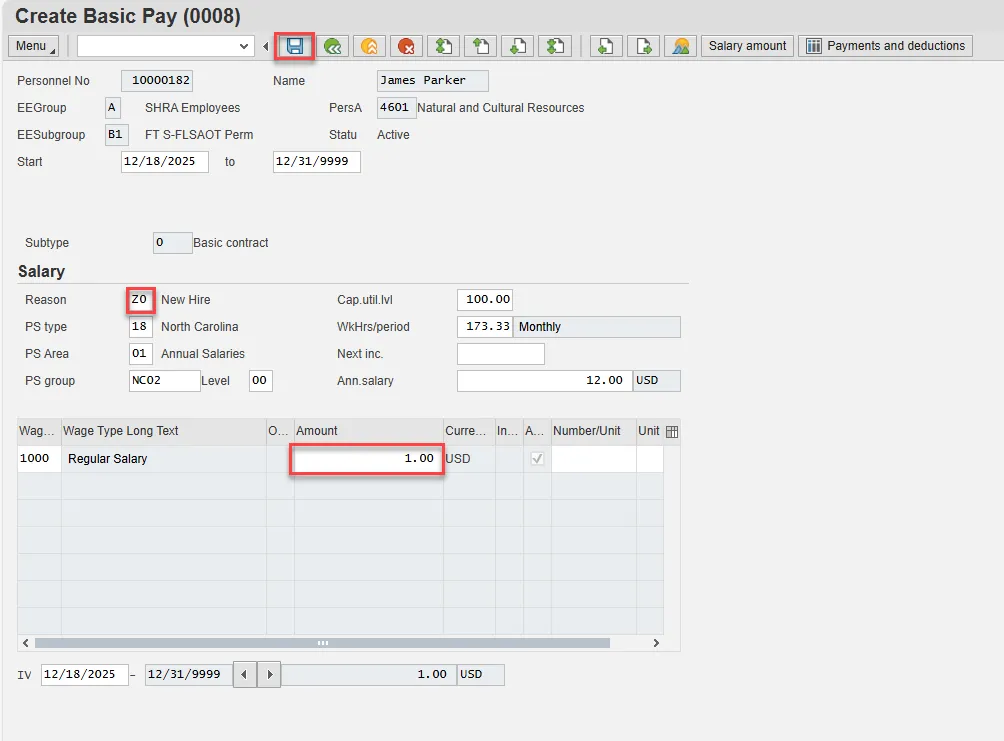
Note: When you enter the HOURLY rate, the system will calculate their salary. The National Guard will always be $1.00.
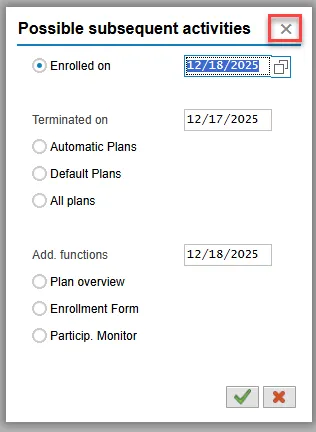
Step 27. On the Possible subsequent activities pop-up, choose the X in the upper right.
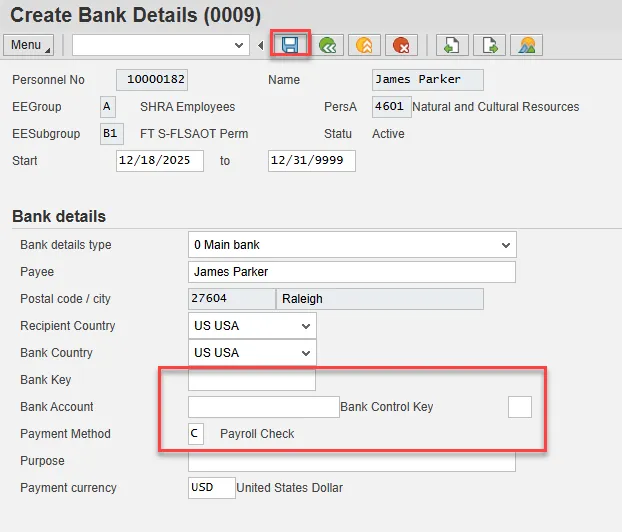
Step 28. The completion of the Bank Details infotype (IT0009) must be entered for payroll to run on the new employee. If the bank details are not available at the time of the data entry, set up a paper check. It is your responsibility to obtain that information and enter the infotype before the system is closed for payroll processing. Even if you have instructed the employee to enter the data in ESS, you still must follow up with the employee to ensure he or she makes the entry prior to payroll closing. You must obtain high level approval before you can change the field from “direct deposit” to “check.”
National Guard employees are approved to be set to Check.
Enter and Save.
Step 29. Back at the Personnel Actions screen, select the Green Arrow Back button.
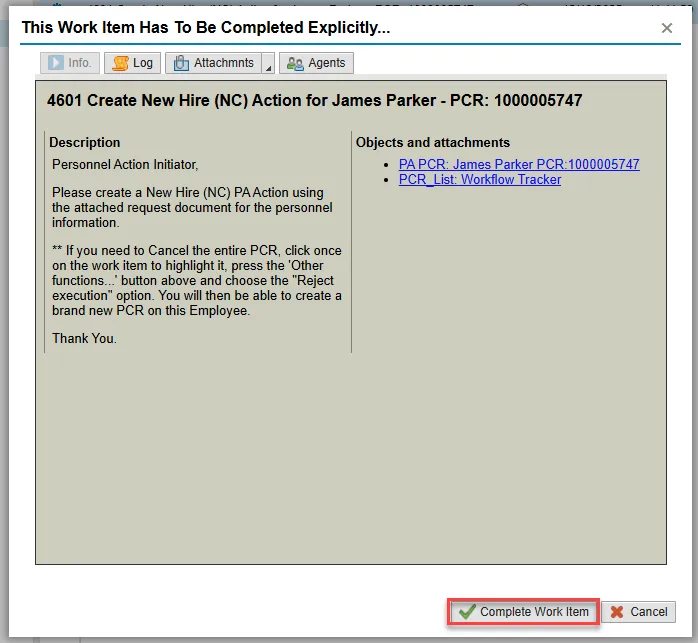
Step 30. On the pop-up, select Complete Work Item. (It has a green check beside it.)
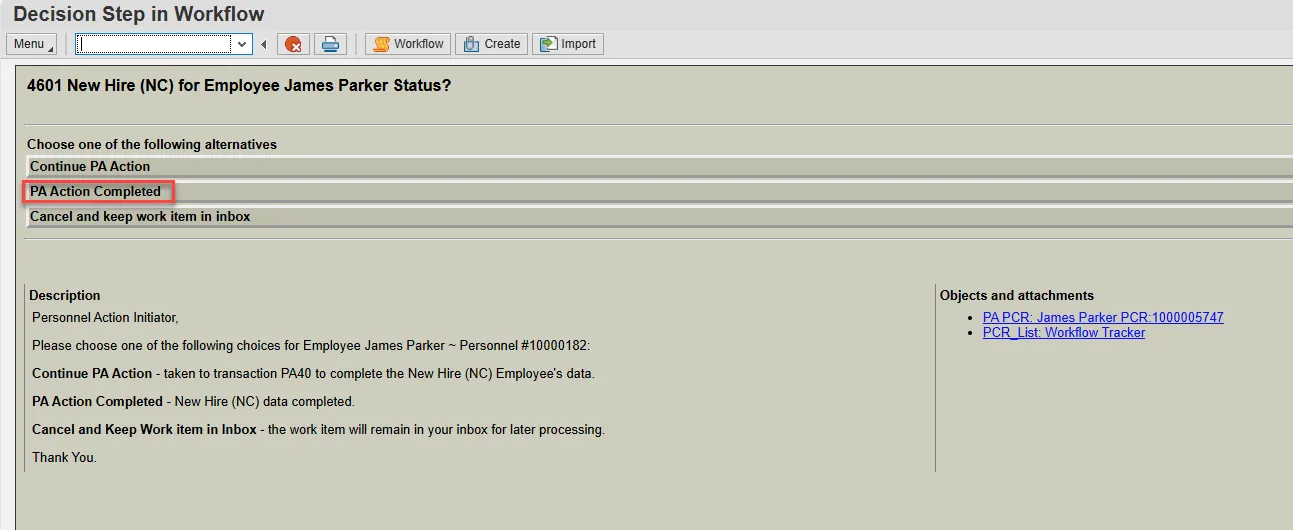
Step 31. At the Decision Step in Workflow pop-up, choose PA Action Completed.
Step 32. From the Business Workplace screen, select the Green Arrow Back button to return to the SAP Easy Access screen.
The New Hire Action is complete, but we recommend reviewing via PA20 all infotypes that have been processed.