Purpose
The purpose of this Business Process Procedure is to explain how to process Reinstatement/Reemployment Action from LOA in the Integrated HR-Payroll System.
Trigger
There is a need to process a Reinstatement/Reemployment for one of the reasons listed in the Business Process Procedure Overview section.
Business Process Procedure Overview
For Reinstatement/Reemployment from LOA only.
Reinstatement/Reemployment - the reinstatement of an employee from leave of absence with or without pay.
- 06 - Return from Short-Term Disability Trial Rehab – return to service in the same capacity that existed prior to the disability. Based on doctor’s note.
- 20 – Rtn from STD with Restrictions – return to service with restrictions such as physical restrictions (lifting, standing, driving, etc.) or time limit restrictions limiting the number of hours the employee can work.
- 07 - Return from Short-Term Disability Complete – returning to work per doctor’s note.
- 08 - Return from Long-Term Disability – returning to work per doctor’s note.
- 09 - Return from Disciplinary Suspension – returning to work.
- 10 - Return from investigatory Placement Leave – returning to work.
- 11 - Return from Military Leave – returning to work.
- 12 - Return from Worker’s Comp Trial Rehab - return to service in the same capacity that existed prior to the WC Leave. Based on doctor’s note.
- 13 - Return from Worker’s Comp Complete – return to work.
- 14 - Return from Educational Leave – return to work.
- 15 - Return from FMLA – return to work.
- 16 - Return from Family Illness - return to work.
- 17 - Return from Parental – return to work.
- 18 - Return from Other Leave - return to work.
Tips and Tricks
Prior to initiating any workflow, ensure the data being used is valid and appropriate. For example, if working with a Reinstatement/Reemployment action, ensure the individual is currently listed as out on LOA.
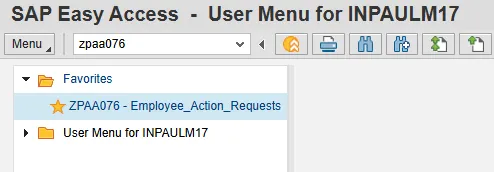
Access Transaction
Via Transaction Code: ZPAA076
Procedure
There are 18 steps to complete this process.
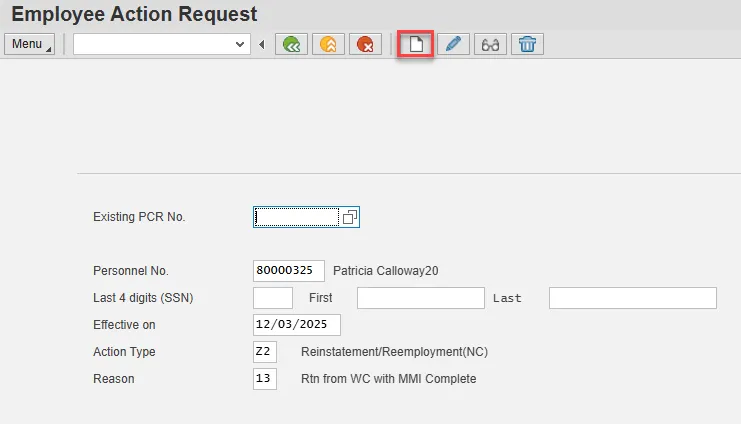
Step 1. From the SAP Easy Access page, select transaction code ZPAA076.
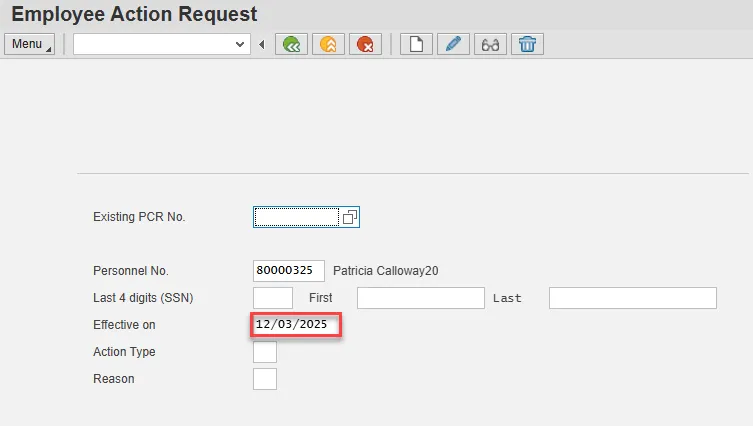
Step 2. On the Employee Action Request screen, complete the Personnel No. field and select Enter on the keyboard.
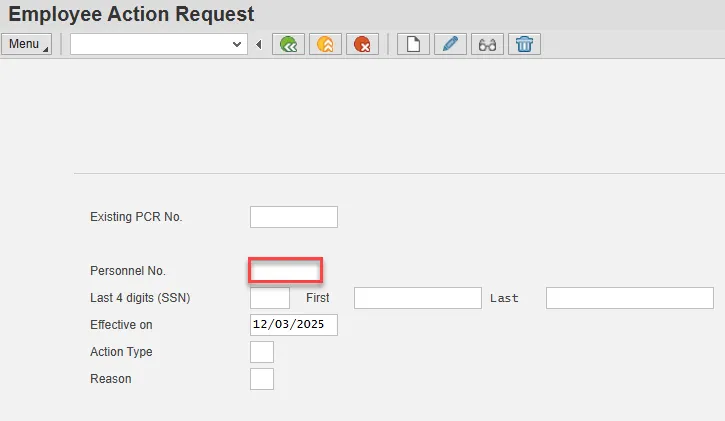
Step 3. In the Effective on field, input the correct effective date.
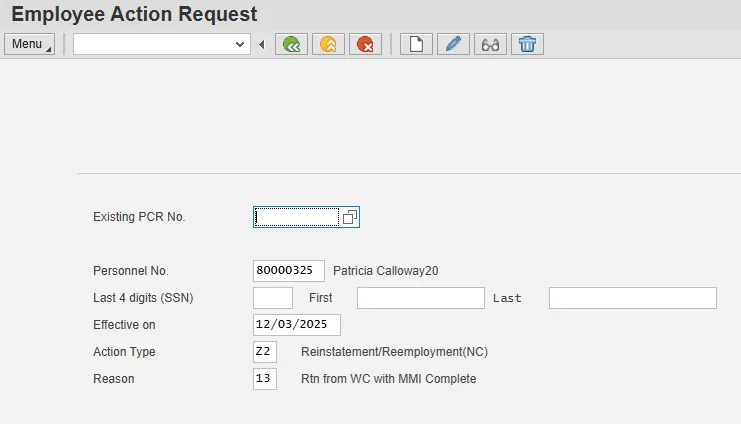
Step 4. Select the Action Type field and access the matchcode. Double click Z2 Reinstatement/Reemployment(NC) from the list.

Step 5. Select the Reason field and access the matchcode. Double click the appropriate reason from the list.

Step 6. Choose Enter on the keyboard.
Step 7. Choose the Create button.
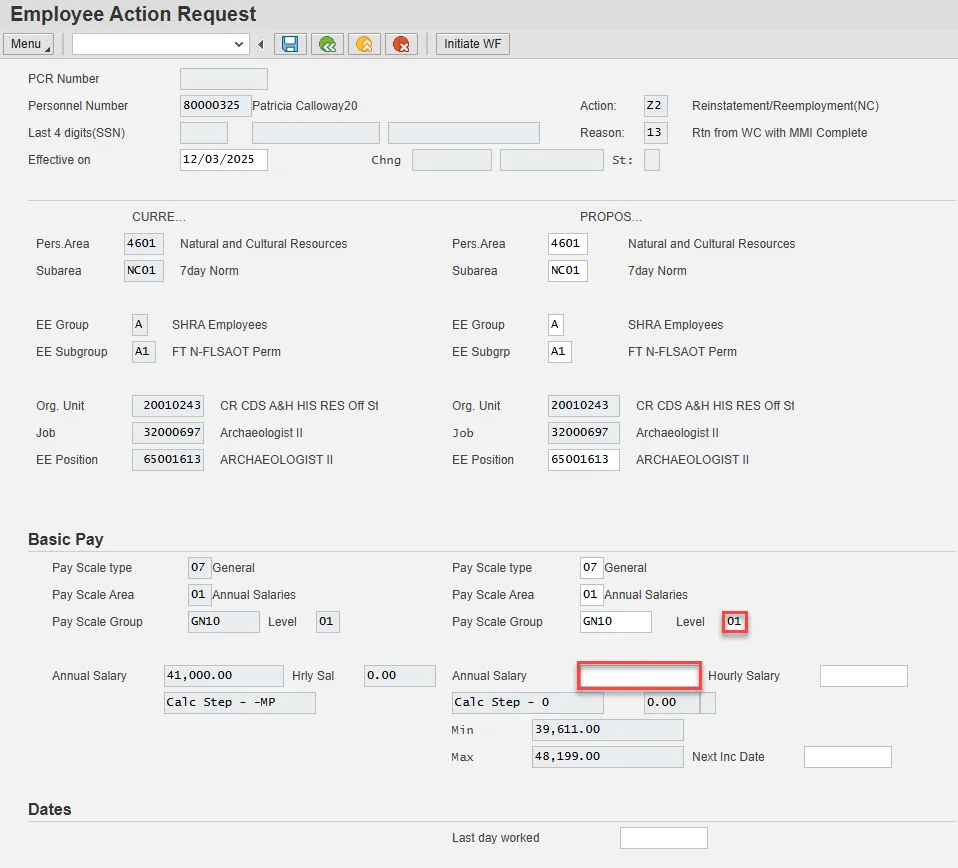
Step 8. Enter the salary/hourly information in the Annual Salary or Hourly Salary field.
Make sure the Level field represents the level associated with the range of the salary. Choose the matchcode to find the correct level.
If the employee is an hourly employee, you will have to enter the hourly amount. The annual amount doesn’t populate for hourly/salary employees. The system will calculate on IT0008 Basis Pay when created. No Basic Pay (0008) will be created for this action, but you must enter the salary amount here as part of the request.
Note: Enter the position number (only if employee is returning to a different position number).
Choose Enter on the keyboard to validate the data.
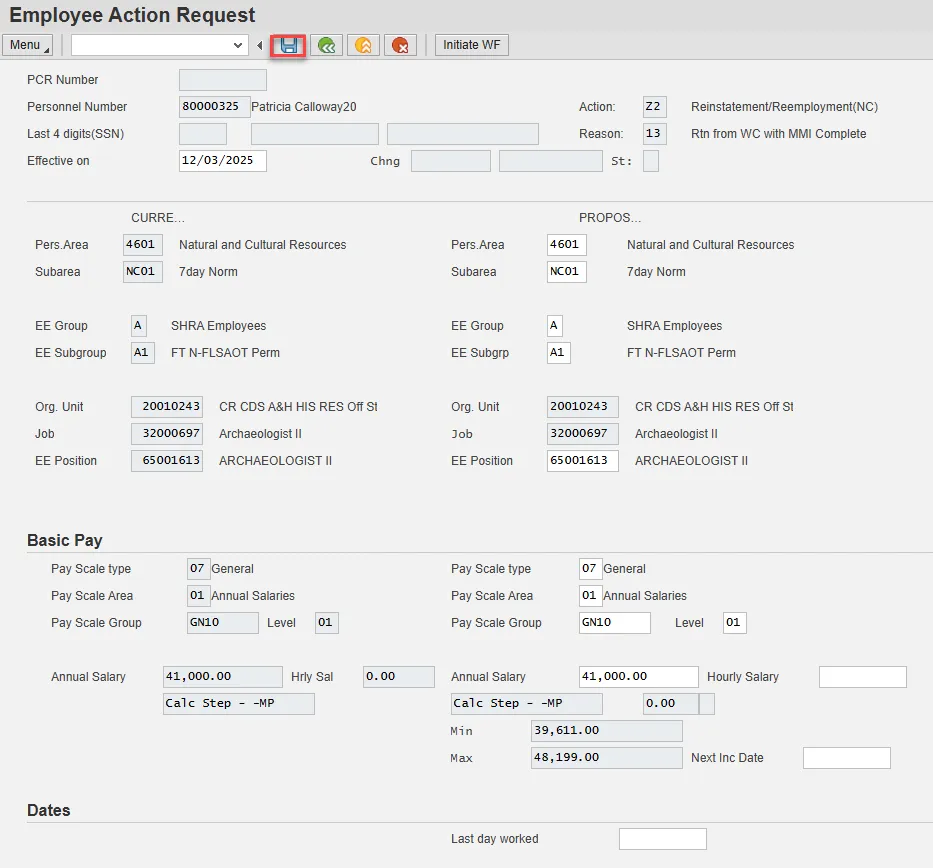
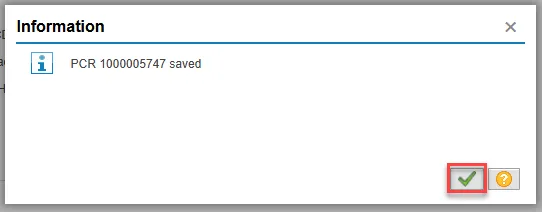
Step 9. Select Save to save the data.
Step 10. The action request will be assigned a PCR number. Choose the green check button from the pop-up.
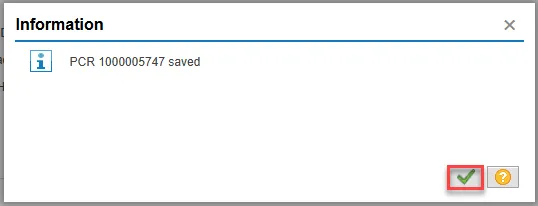
Note: You can save this information as much as you like. Each time you will receive confirmation of the save. You will not be able to create a note attachment until you have saved it at least once. If you have submitted the PCR to workflow already, you will not be able to change the details, nor save any new information, only display the existing details.
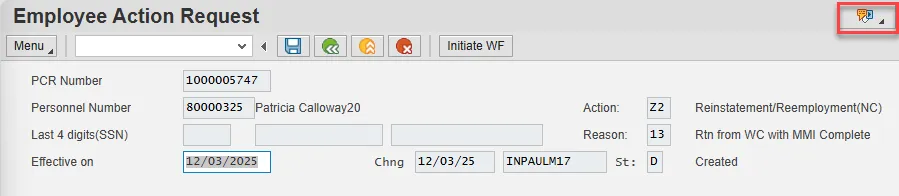
Step 11. Select the Services for Object button in the upper right corner.
Step 12. Hover over Create and choose Create note from the drop-down menu.
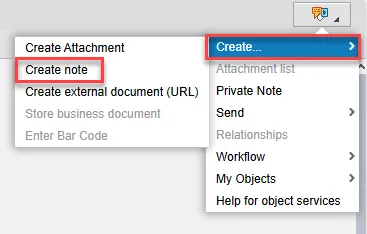
The note is a required part of the request creation process. Notes entered during PA workflow must follow OSHR’s action notes template: PA Action Notes Template.
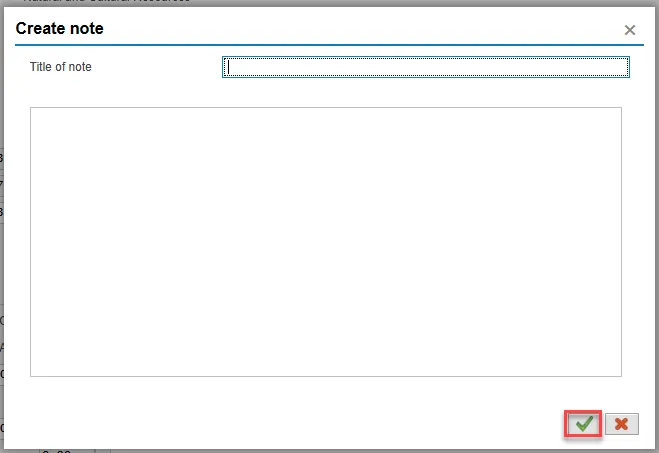
Step 13. Update the Title of note field and the body of the note.
The note is a required part of the request creation process. Notes entered during PA workflow must follow OSHR’s action notes template: PA Action Notes Template.
Choose the green check button in bottom right of note pop-up.
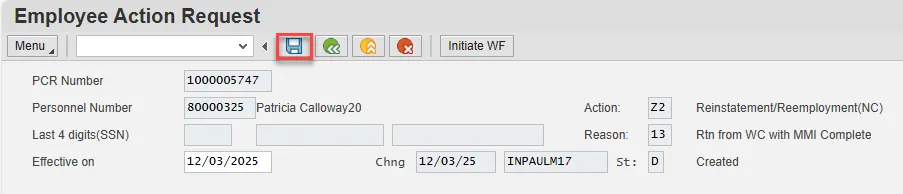
Step 14. Choose Save.
Step 15. Select the green check button in bottom right of Information pop-up.
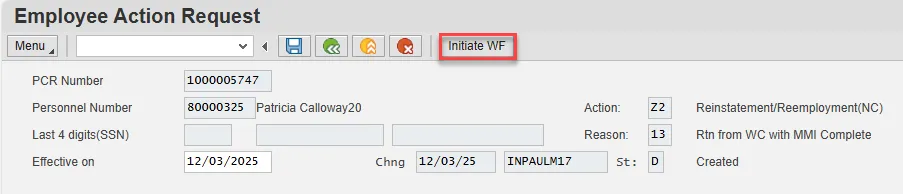
Step 16. Choose the Initiate WF button.
Select the Initiate Workflow button to send the Reinstatement Action through the approval process. No changes can be made after the PCR has been submitted for approval, unless the PCR is rejected at any stage and sent back to you (the initiator/requestor).
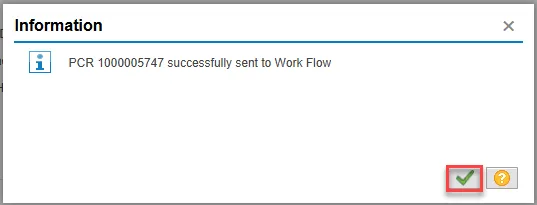
Step 17. Select the green check button in bottom right of the Information pop-up.
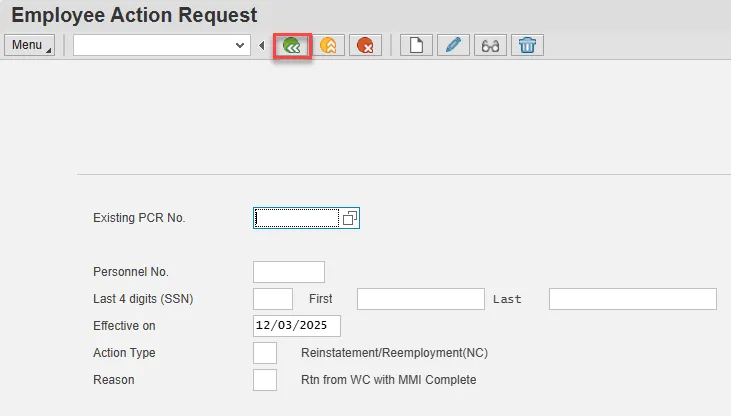
Step 18. Choose the green Back button.
The Initiate Reinstatement/Reemployment Action is complete.
After Workflow Approvals have been received, proceed with the Complete Reinstatement/Reemployment Action process.
Instructions for Completing the Action
Note: These instructions assume you have initiated the Reinstatement/Reemployment Personnel Change Request (PCR) in workflow, and you have an approved PCR ready to be processed in the system.
There are 24 steps to complete this process.
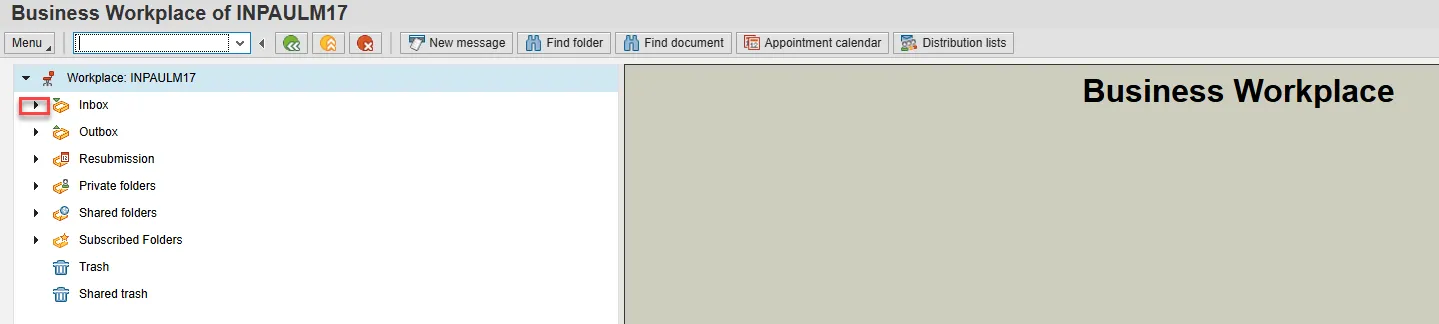
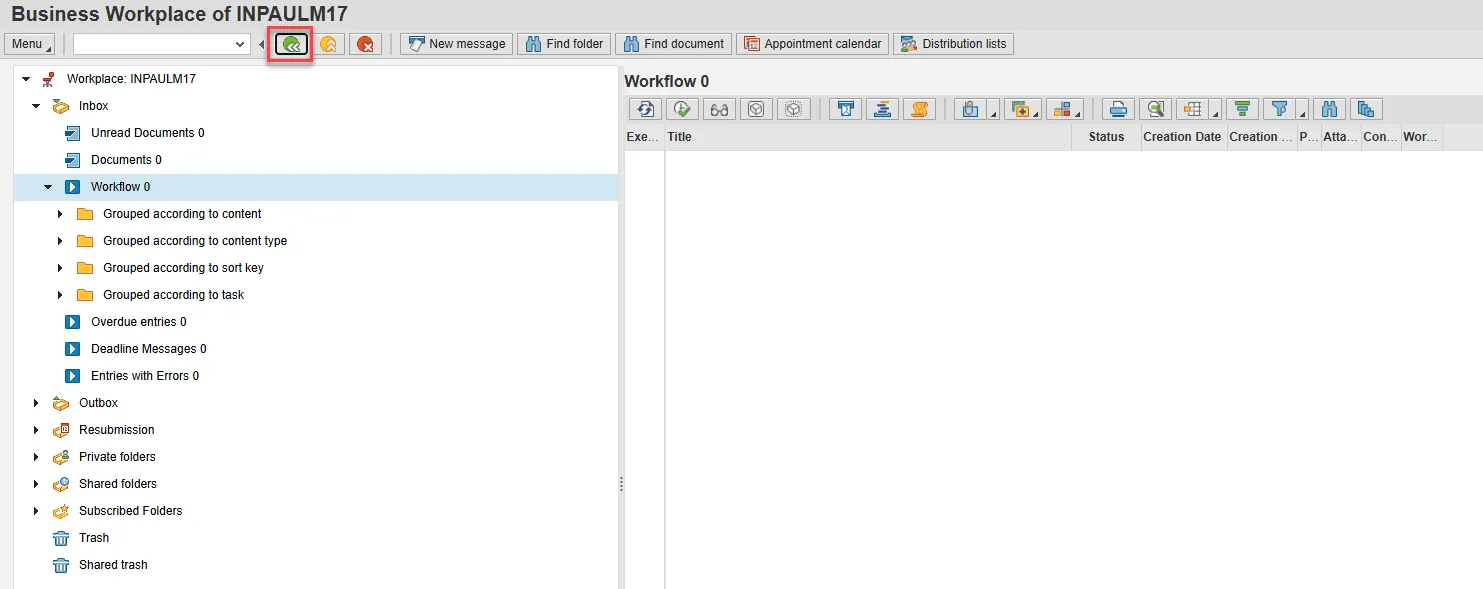
Step 1. Choose the SAP Business Workplace button from the SAP Easy Access page.

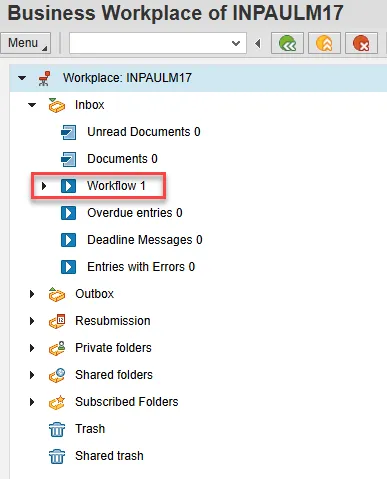
Step 2. Expand the Inbox using the expand node.
Note: Failure to complete this step could cause some functions to be unavailable on the secondary button ribbon in the subfolders
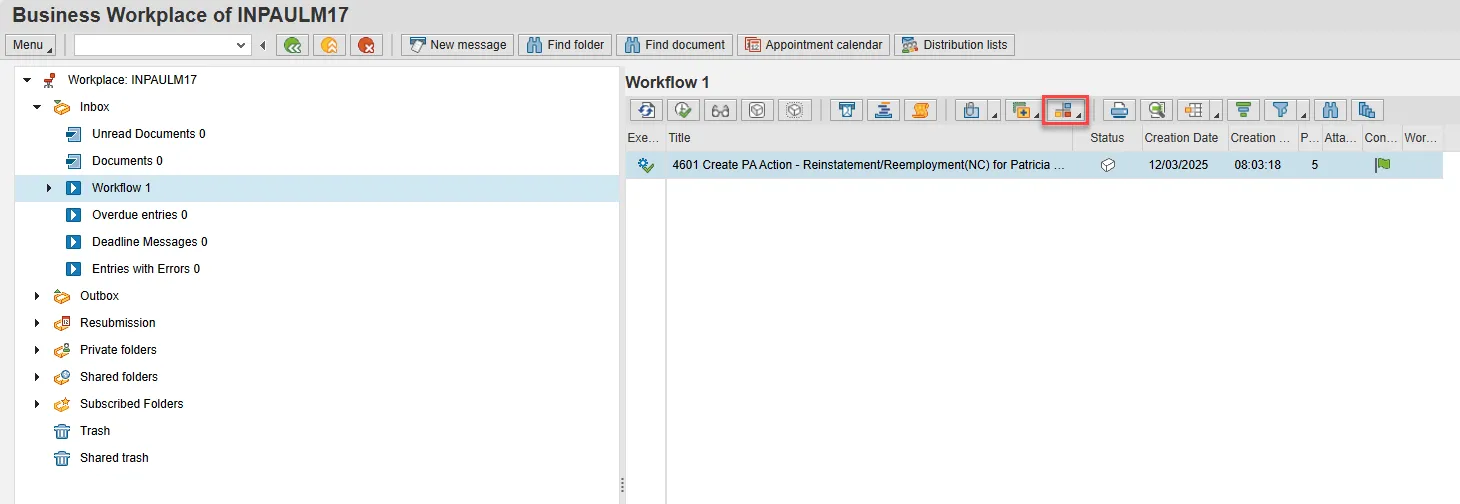
Step 3. Select the Workflow subfolder.
Step 4. Access the Environment button on the secondary button ribbon to retrieve a copy of the note. Access PER-57 Copying Notes from the PCR to Infotypes. for steps on retrieving the note.
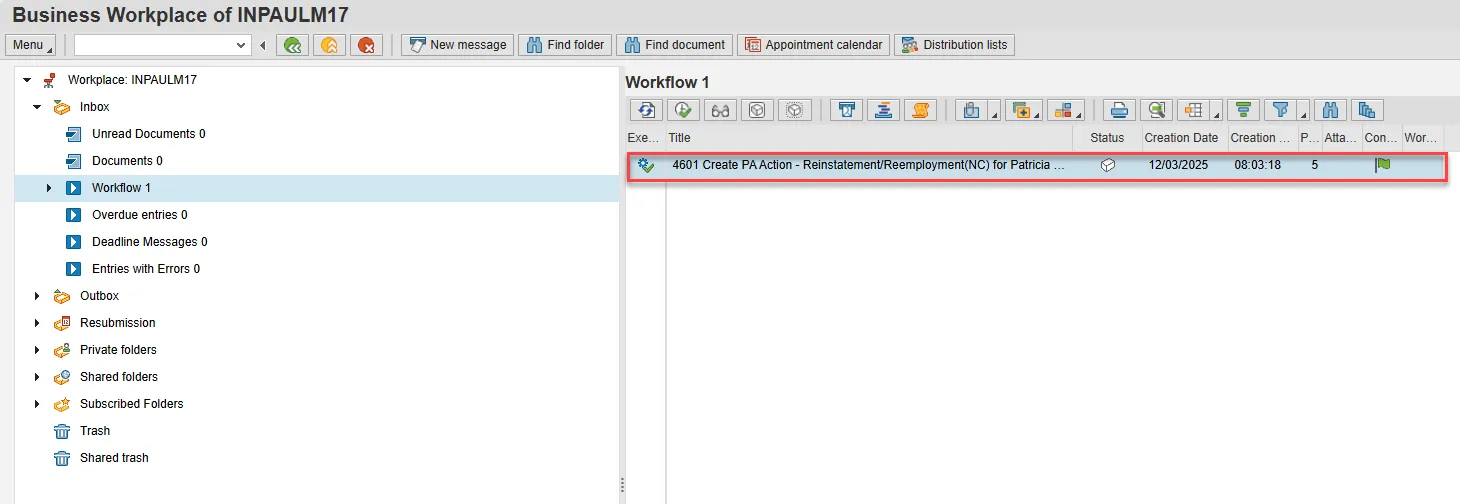
Step 5. Double click the PCR to begin the action.
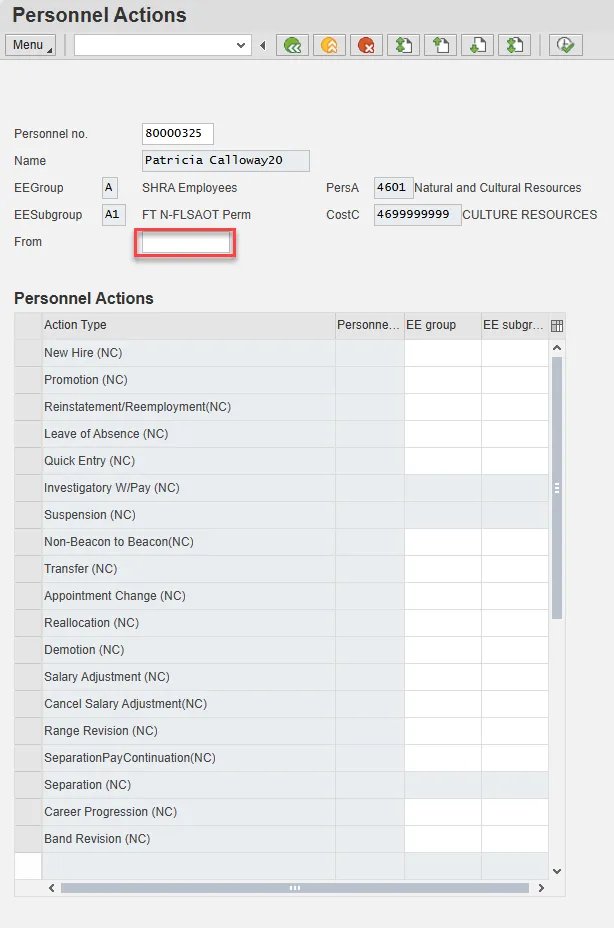
Step 6. On the Personnel Actions screen, enter the effective date in the From field.
Note: The effective date must match the date used to create the request.
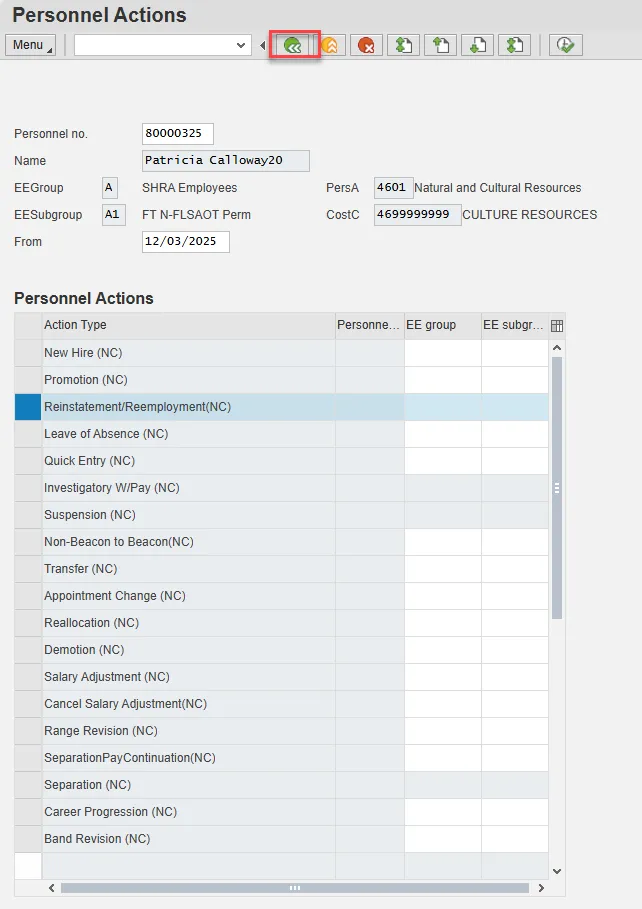
Step 7. Select the gray box to the left of Reinstatement/Reemployment(NC) to highlight that action.
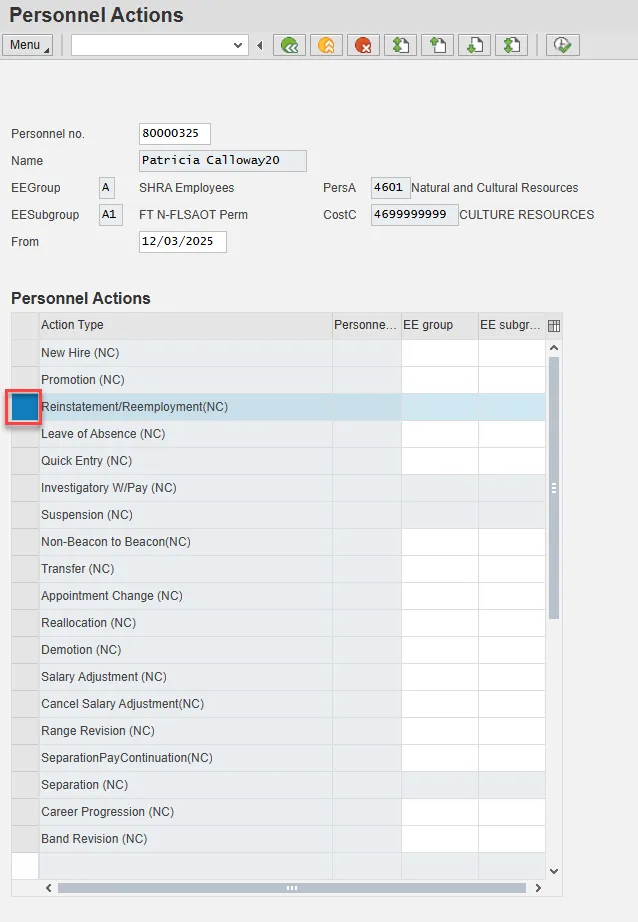
Step 8. Select Execute.
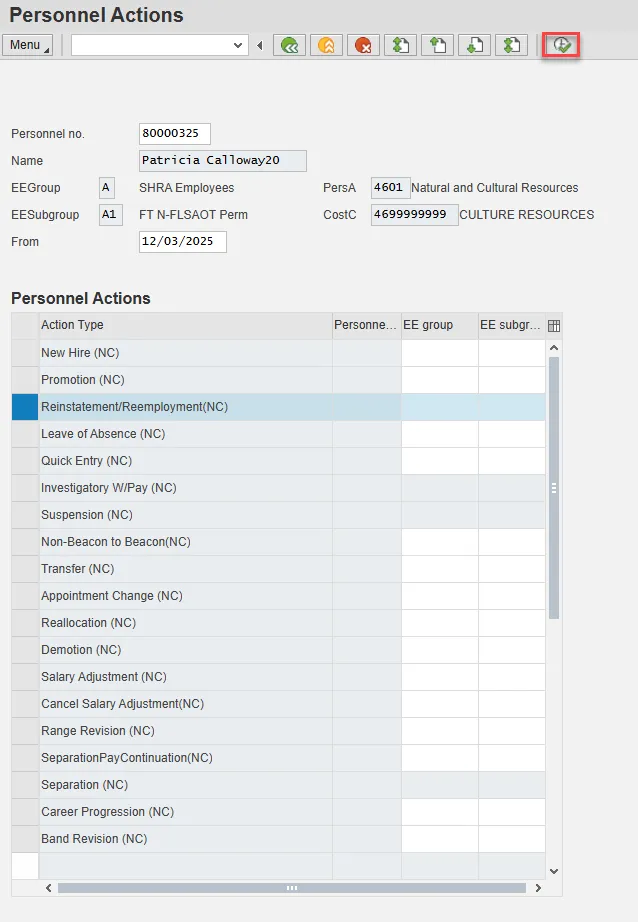
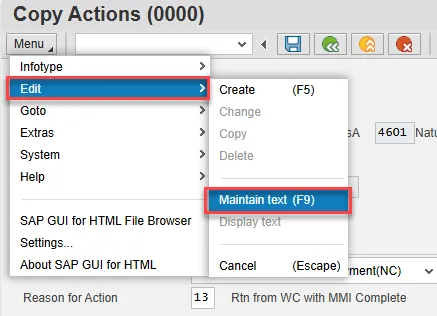
Step 9. On the Copy Actions (0000) screen, select the Menu button.
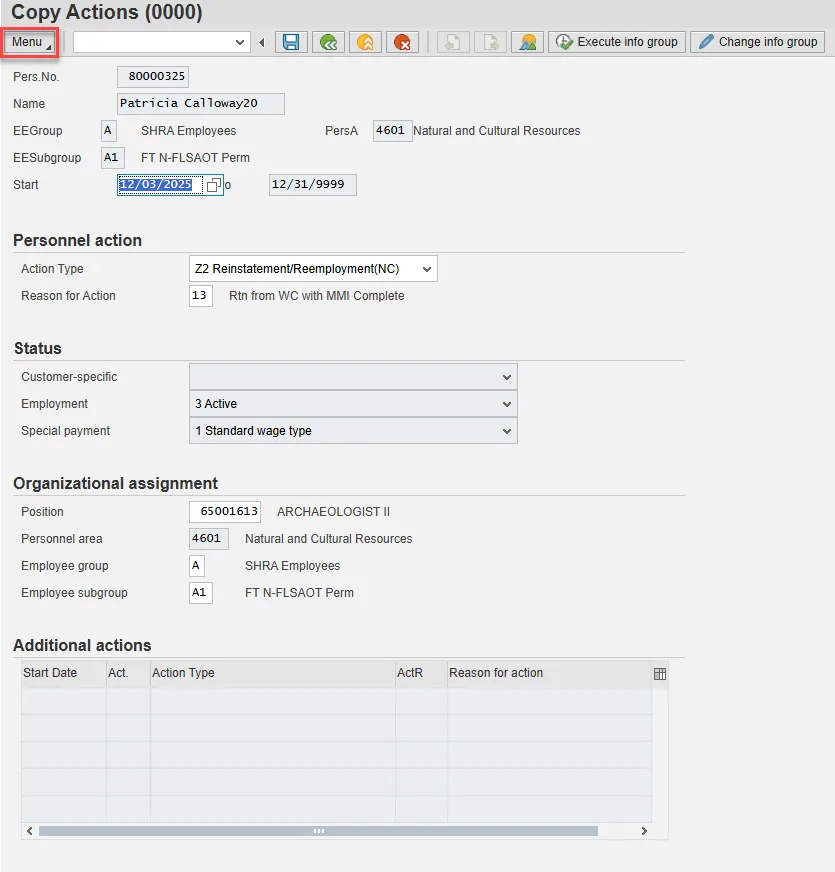
Step 10. Hover over Edit and choose Maintain text (F9) from the pop-out menu.
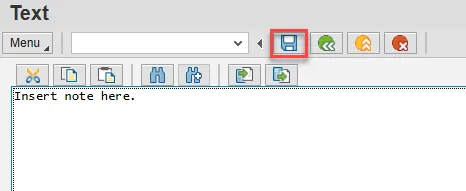
Step 11. On the Text screen, insert your note and choose Save.
Step 12. Back on the Copy Actions (0000) screen, choose Enter on the keyboard.
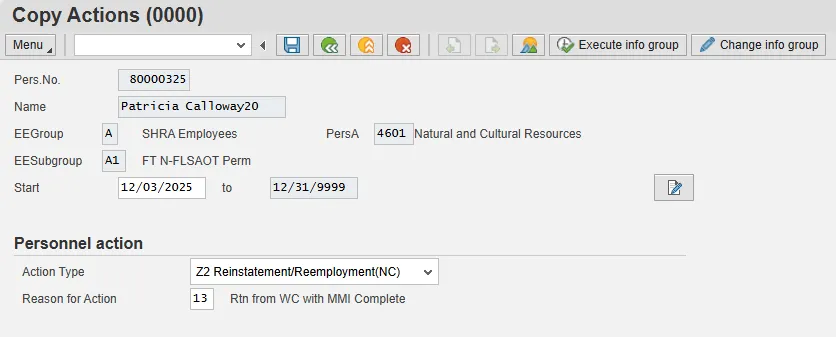
Step 13. Some items may turn red and there may be a yellow warning message in the bottom left stating that a record will be delimited. This is expected behavior. Choose Save.

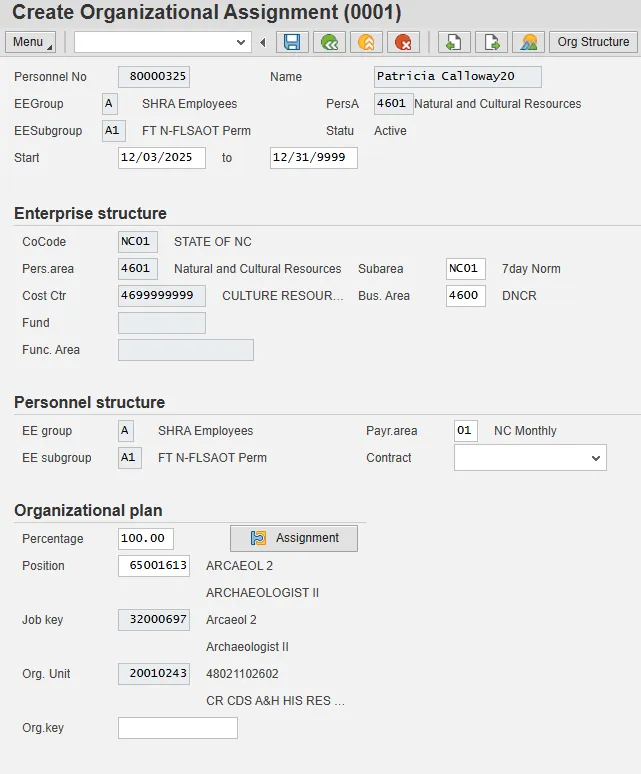
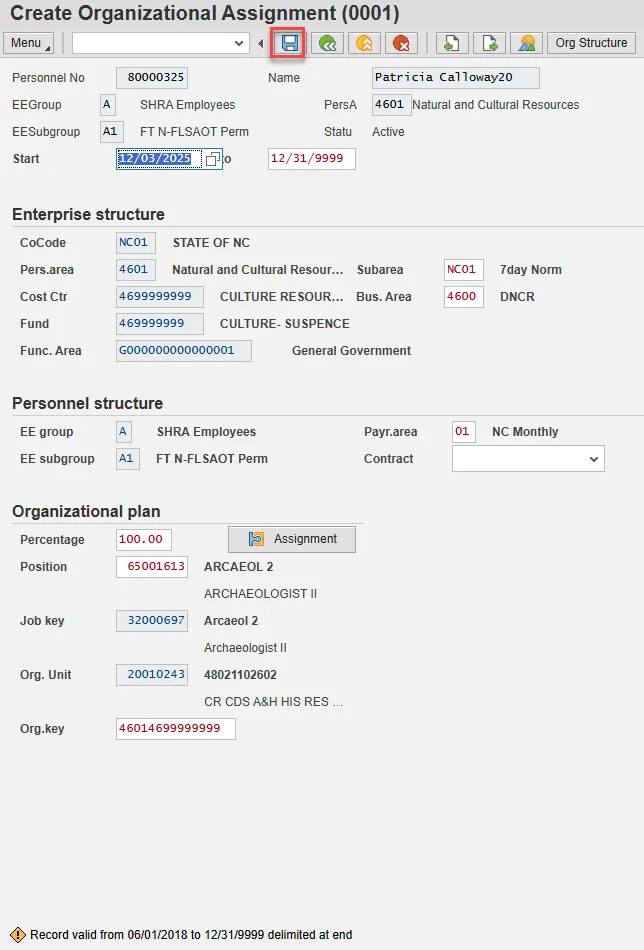
Step 14. Create Organizational Assignment (0001) will populate. There are no changes needed to this infotype. Select Enter on the keyboard.
Step 15. Some items may turn red and there may be a yellow warning message in the bottom left stating that a record will be delimited. This is expected behavior. Choose Save.
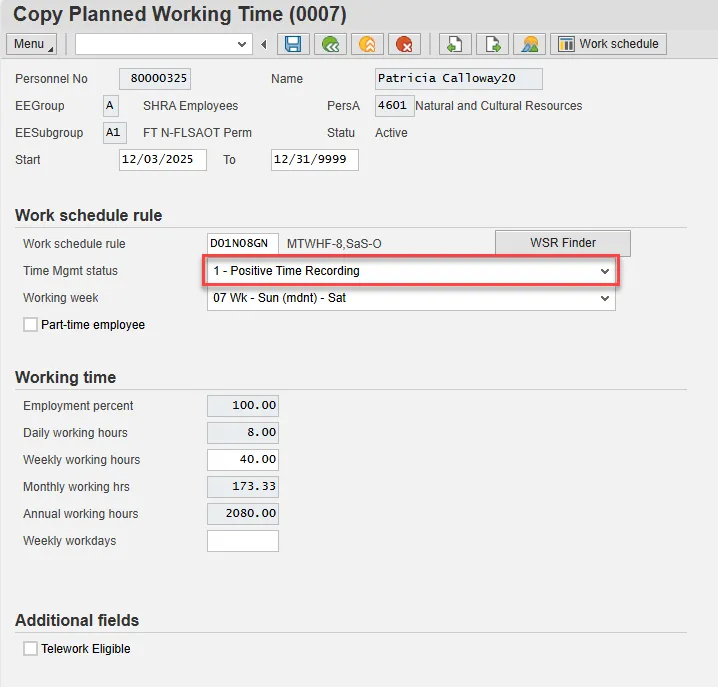
Step 16. When an employee is returning from a WC LOA, they should be reinstated in the same capacity as they left (same work schedule rule). If their working hours need to be changed (FT to PT), an Appointment change action will need to be entered with the same effective date. Subject employees must be positive time. Employment percent should always be 100.
Best Business Practice: Change the work schedule rule back to what it was before the employee went on LOA.
In this example, the employee’s Time Mgmt status is changed from Positive Time Recording to Negative Time Recording.
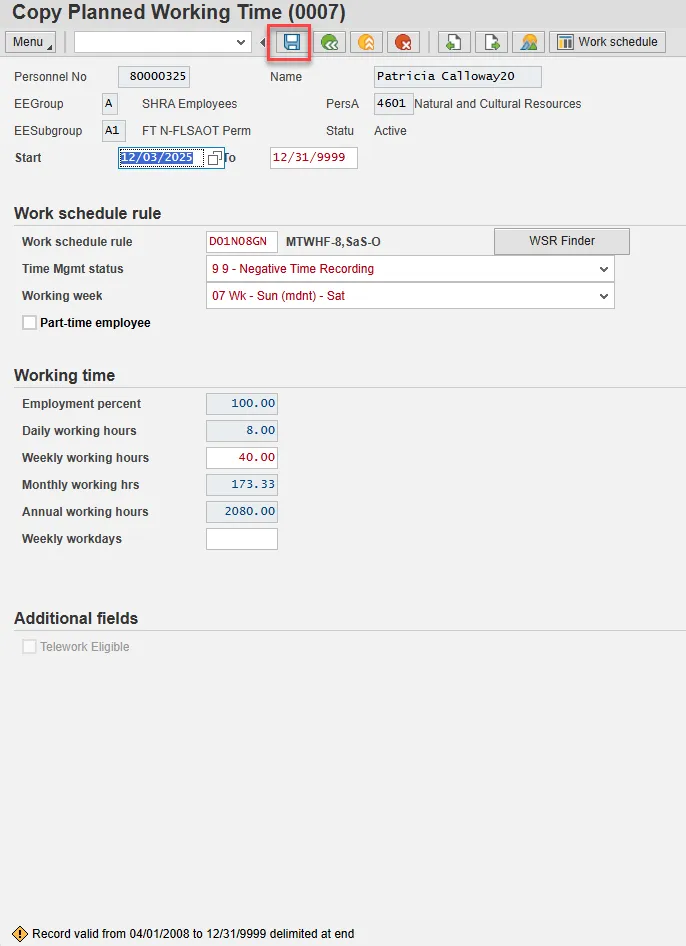
Step 17. Select Enter on the keyboard. Some items may turn red and there may be a yellow warning message in the bottom left stating that a record will be delimited. This is expected behavior. Choose Save.
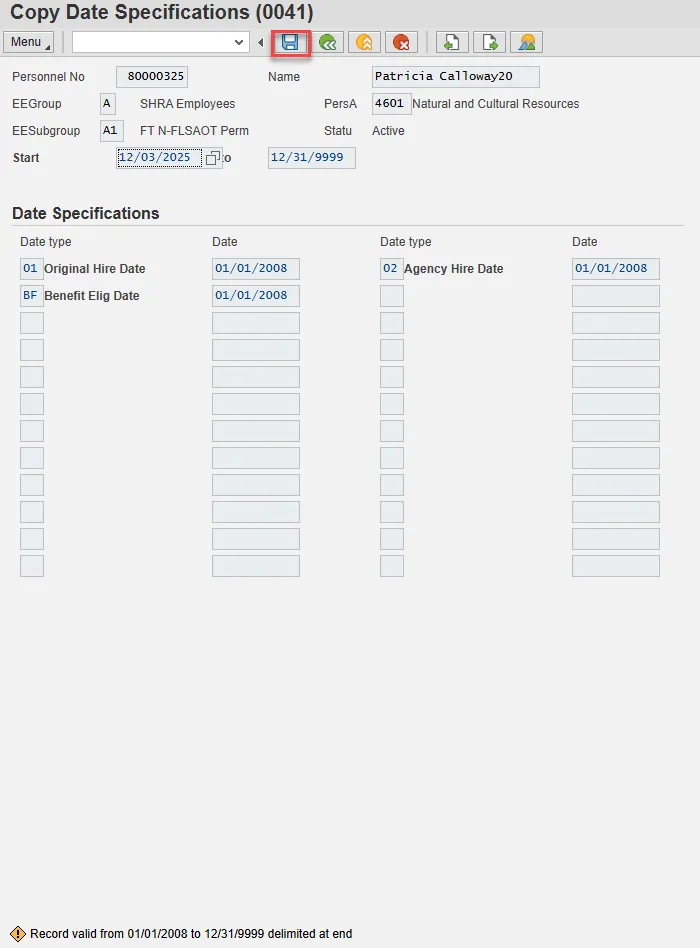
Step 18. There are no changes needed on Copy Date Specifications (0041). Choose Enter on the keyboard.
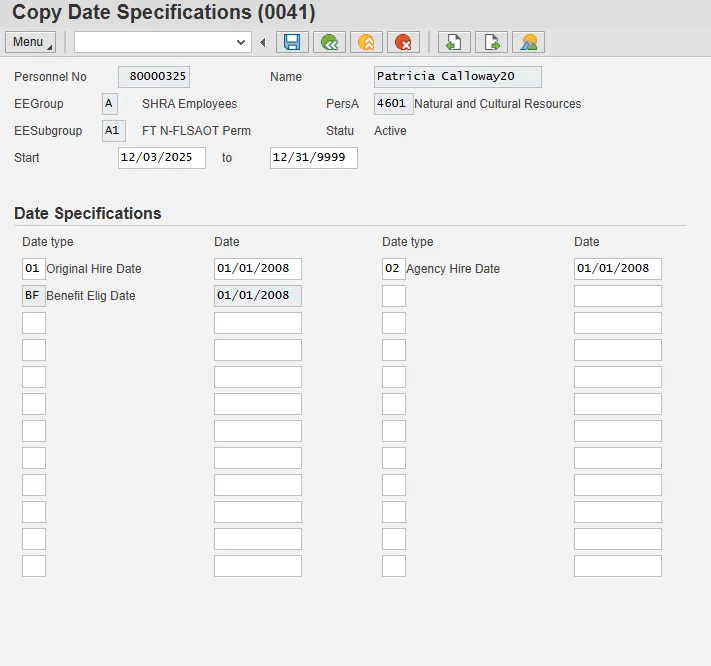
Step 19. The fields will be grayed out and there will be a yellow warning message in the lower left. This is expected behavior. Select Save.
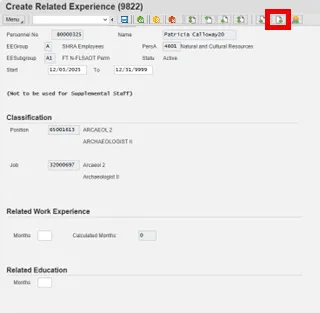
Step 20. Critical Step: The IT9822 record should not be saved when reinstating an employee from a leave of absence, especially with the starting related work experience field showing 0. Select Next Record.
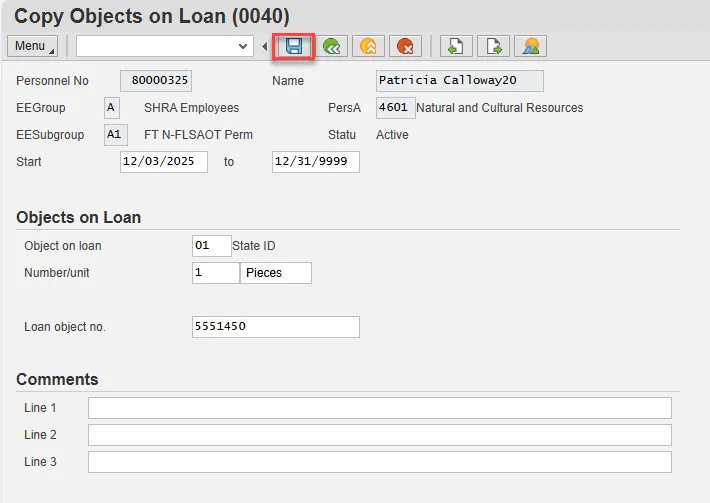
Step 21. Verify the objects on loan that have been issued to the individual. When the individual went on leave, the various objects on loan may or may not have been delimited. Reassign or add new ones. Comments can be entered on lines 1, 2, and 3 if appropriate for your business policy.
Note: If the employee receives more than one item on loan, process a PA30 transaction in order to add the additional items to infotype 0040.
Choose Enter and Save. (Or choose Next Record if your agency does not use this infotype.)
Step 22. Back at the Personnel Actions screen, select the Green Arrow Back button.
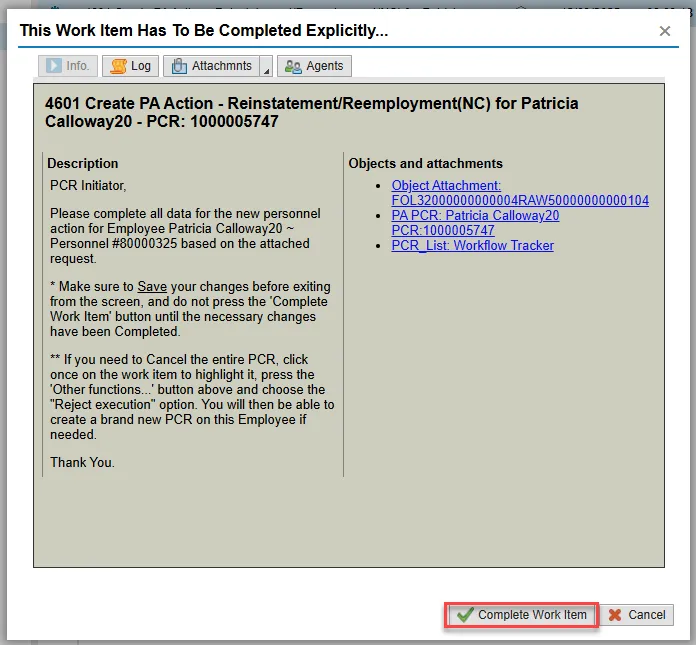
Step 23. On the pop-up, select Complete Work Item. (It has a green check beside it.)
Step 24. From the Business Workplace screen, select the Green Arrow Back button to return to the SAP Easy Access screen.
Note: The Reinstatement/Reemployment Action is complete, but we recommend reviewing via PA20 all infotypes that have been processed. Check the Leave balances to ensure that they are correct upon the Reinstatement/Reemployment Action.