Purpose
The purpose of this Quick Reference Guide (QRG) is to provide step-by-step guidance of how to Create a Manual Pick Wave, Schedule a Pick Wave, Print a Pick Slip Report, Confirm Picking, and Confirm Shipping in the North Carolina Financial System (NCFS).
This QRG is to be used in conjunction with Web-Based Training INV103-Warehouse Staff and Instructor Led Trainings INV105-Inventory Management and INV106-Warehouse Transactions. As well as INV-14 QRG, INV-18 QRG, INV-34 QRG, and INV-35 QRG.
Introduction and Overview
This QRG covers the pick wave process for inventory agencies using NCFS. The pick wave process is used for Self-Service Procurement (SSP) orders for consumption or Transfer Orders for replenishment and warehouse movement. Not all transactions use the pick wave process, such as the NC Direct Issue miscellaneous transaction; see INV-16 QRG for more information.
Create a Manual Pick Wave
To schedule a pick wave in NCFS, please follow the steps below. There are 9 steps to complete this process.
Step 1. Log in to the NCFS portal with your credentials to access the system.
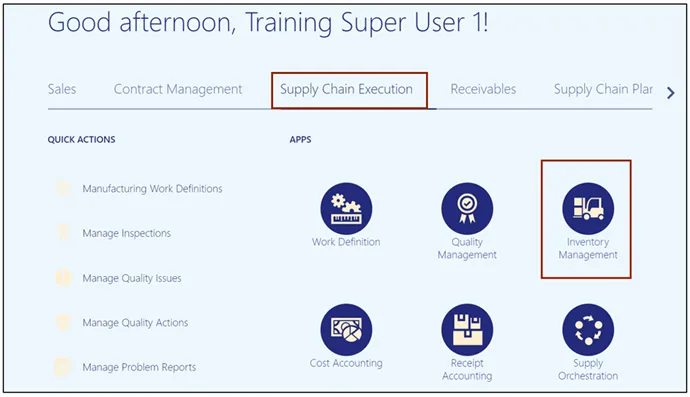
Step 2. On the Home page, under the Supply Chain Execution tab, click the Inventory Management app.

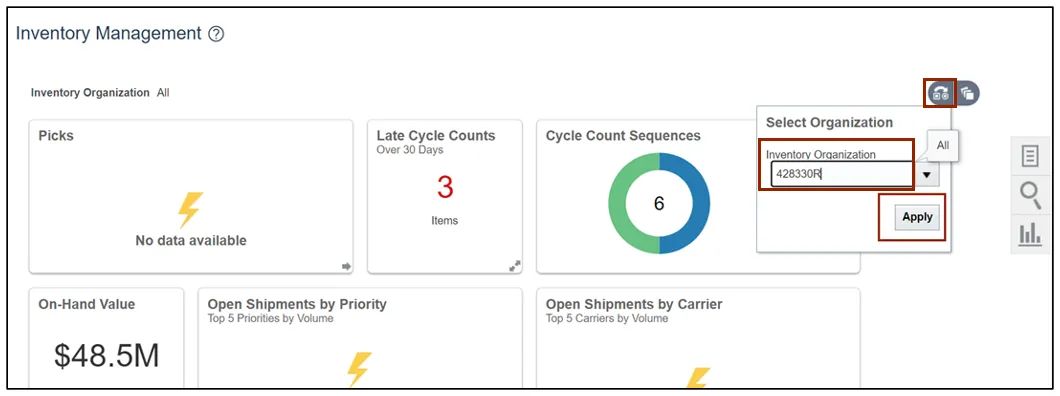
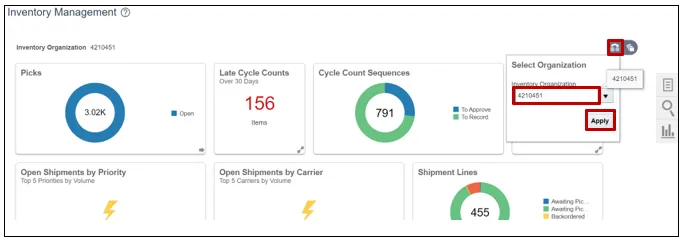
Step 3. On the Inventory Management page, click the View by icon and enter the Organization ID. Click the Apply button.

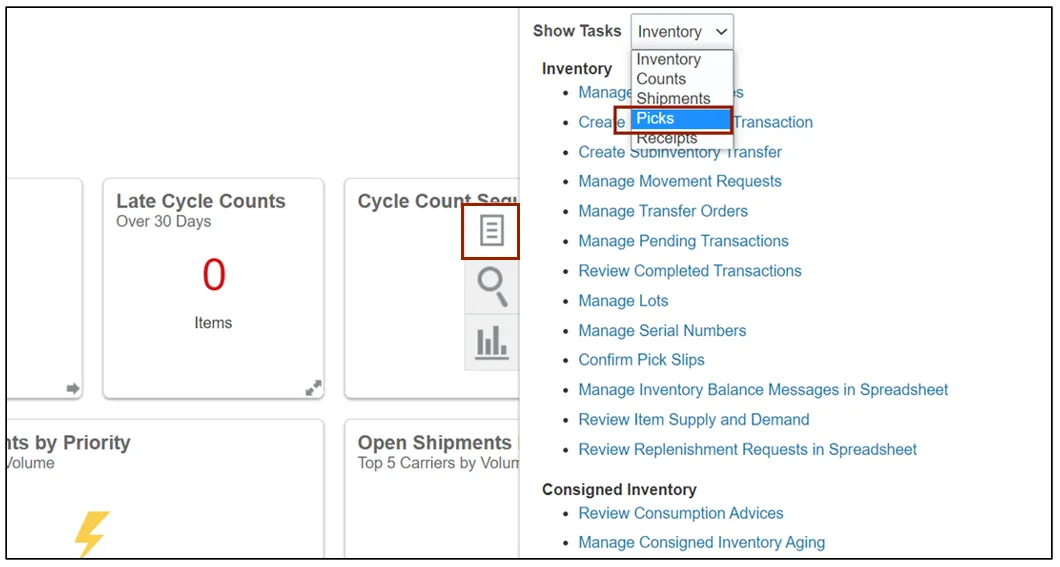
Step 4. Click the Tasks icon and select Picks from the Show Tasks drop-down choice list.
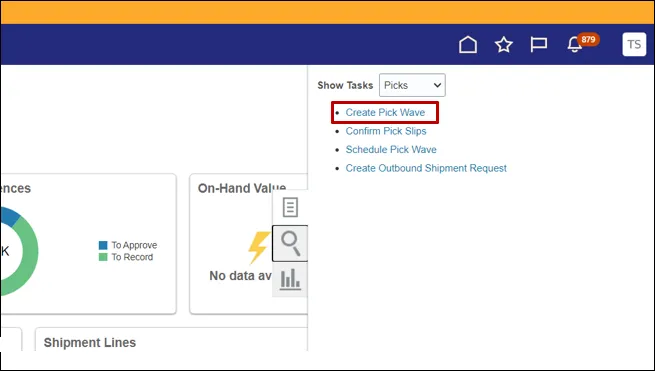
Step 5. Click Create Pick Wave.
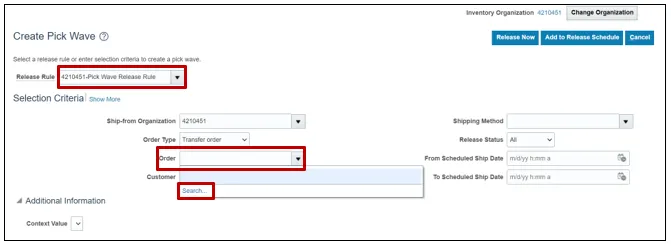
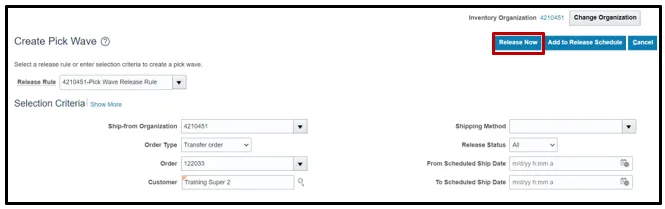
Step 6. Choose the Release Rule for your Inventory Organization from the Drop-Down List.
Step 7. Open the Order Drop-Down List and click Search....
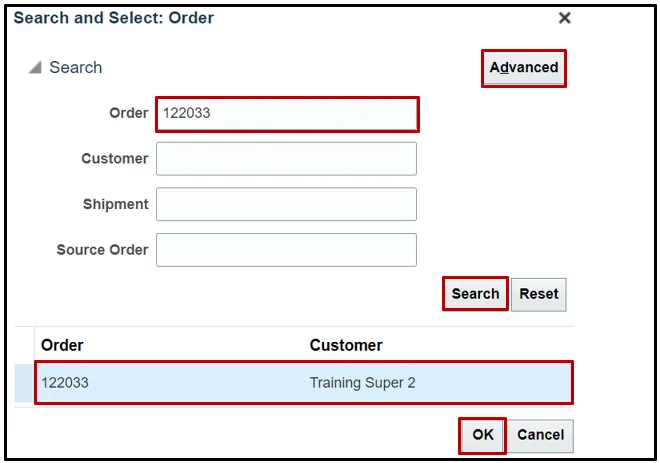
Step 8. Search for the order to be picked. The Advanced button will assist with searching partial information.
In this example, order 122033 was used. Click Search. In the search results section, click the order to select it then click OK.
Step 9. Click Release Now. The Pick Wave has been released for picking.
Schedule a Pick Wave
To schedule a pick wave in NCFS, please follow the steps below. There are 10 steps to complete this process.
Step 1. On the Home page, under the Supply Chain Execution tab, click the Inventory Management app.
Step 2. On the Inventory Management page, click the View by icon and enter the Organization ID. Click the Apply button.
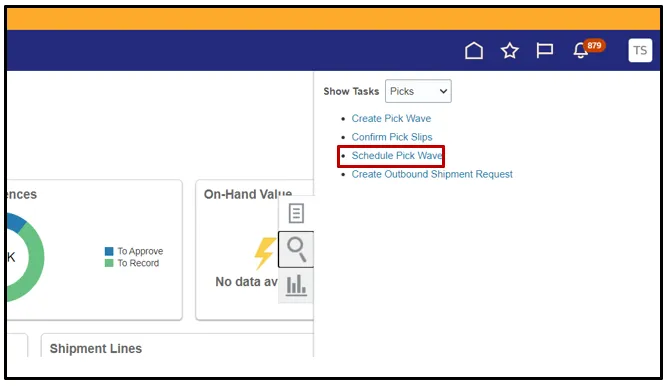
Step 3. Click the Tasks icon and select Picks from the Show Tasks drop-down choice list.

Step 4. Click Schedule Pick Wave.
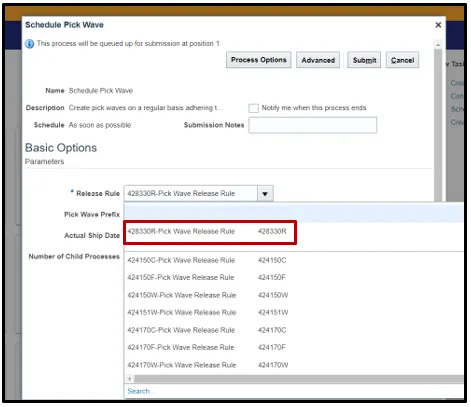
Step 5. Choose the Release Rule for your Inventory Organization from the Drop-Down List.
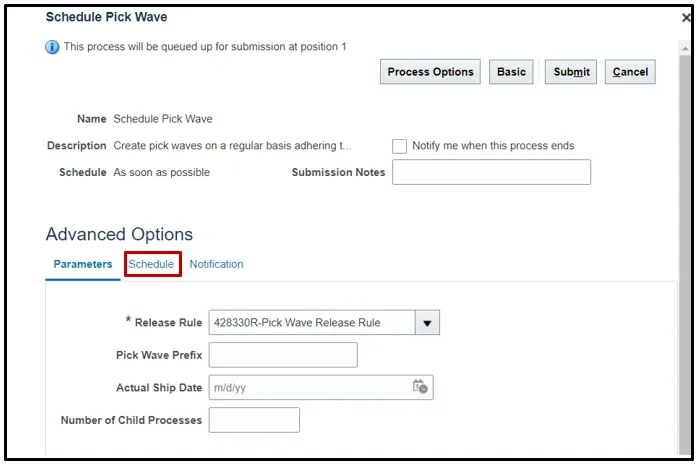
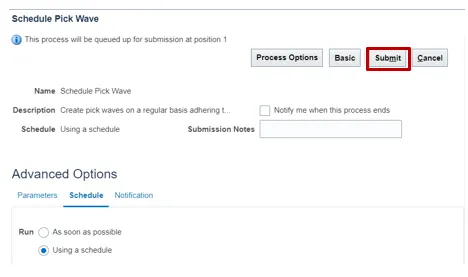
Step 6. Switch to the Advanced view by clicking Advanced.

Step 7. Click the Schedule tab.
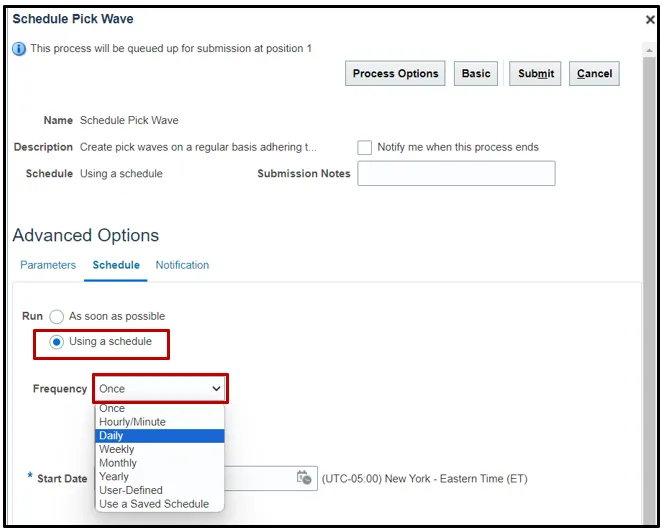
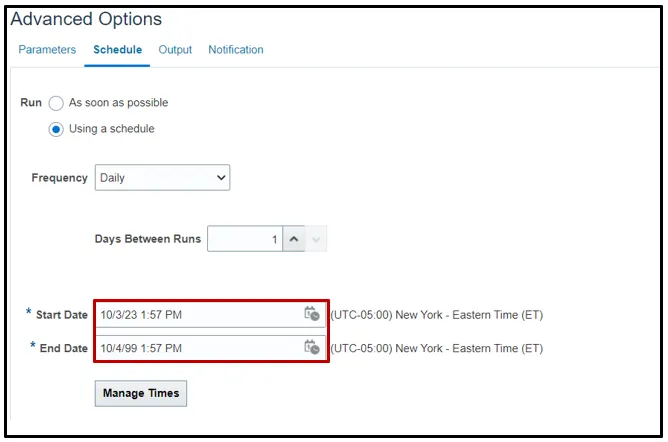
Step 8. Click the Using a schedule radio button and choose the frequency from the Frequency drop-down list.
In this example, Daily was chosen.
Step 9. Enter your Start and End Dates.
In this example, an end date of 2099 was chosen.
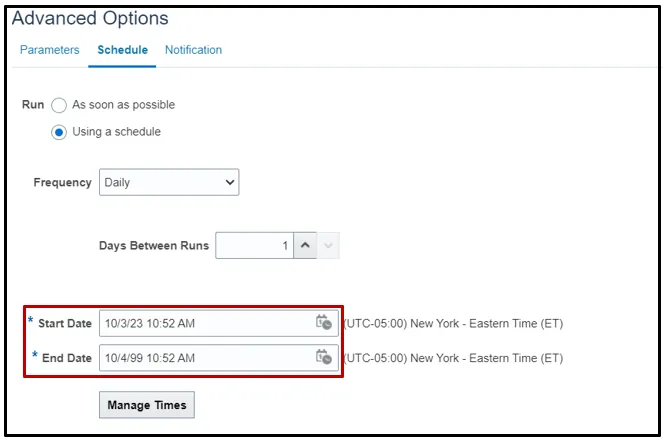
Note: Change other options as necessary before moving onto the next step.
Step 10. Click Submit to schedule your Pick Wave.
Generate Pick Slip Report
To generate a pick slip report in NCFS, please follow the steps below. There are 11 steps to complete this process.
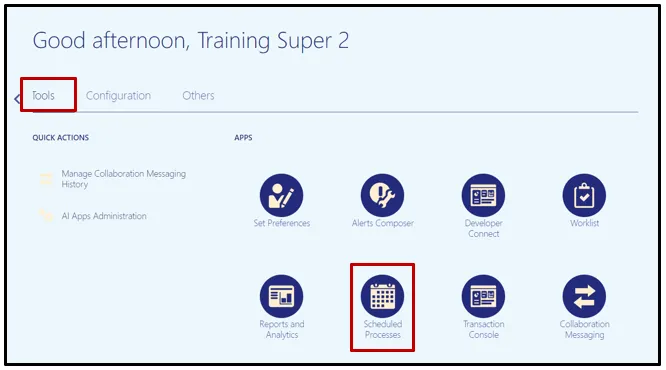
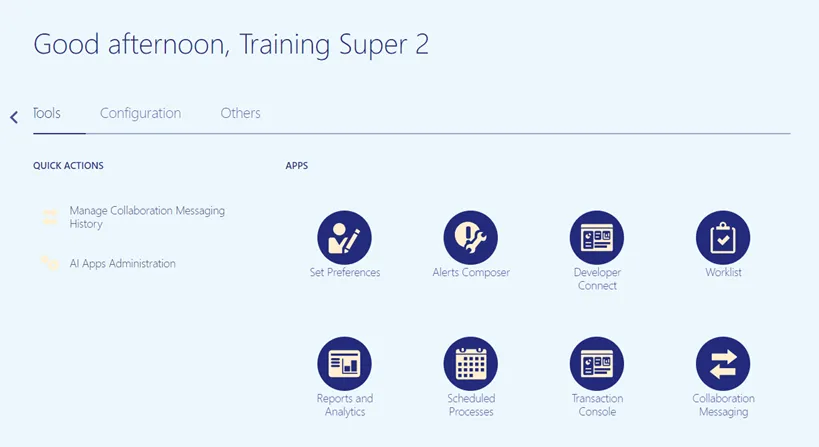
Step 1. On the Home page, under the Tools tab, click the Scheduled Processes app.
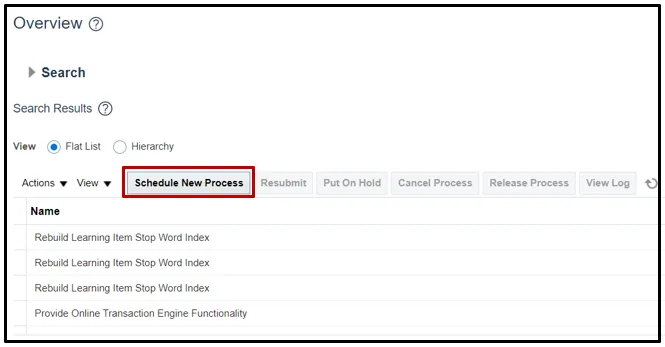
Step 2. On the Scheduled Processes page, click Scheduled New Process.

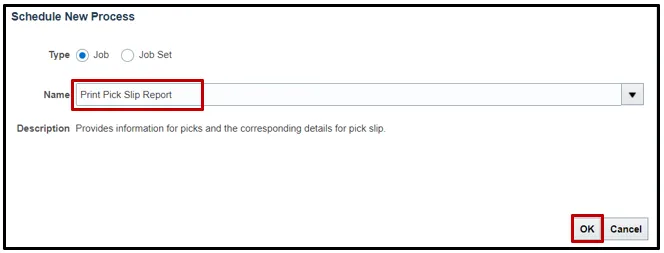
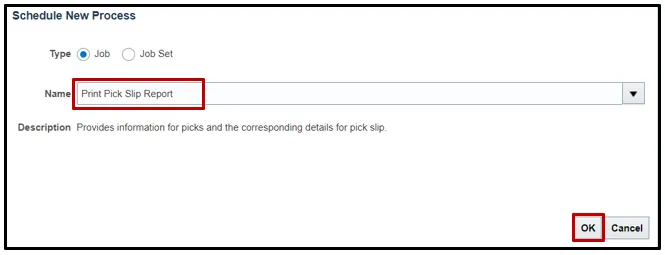
Step 3. Type “Print Pick Slip Report” in the Name field. Click OK.
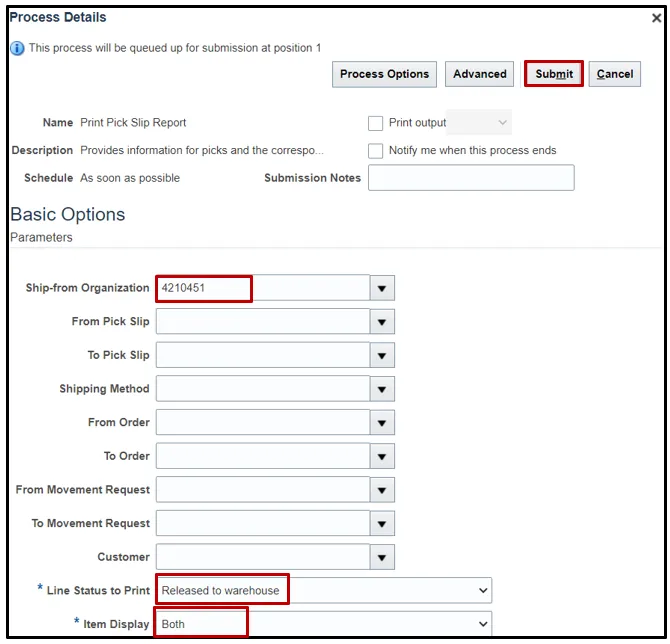
Step 4. Choose Released to warehouse from the Line Status to Print drop-down list. Choose Both from the Item Display drop-down list. Choose the Inventory Organization from the Ship-from Organization drop-down list.
Step 5. Click Submit.
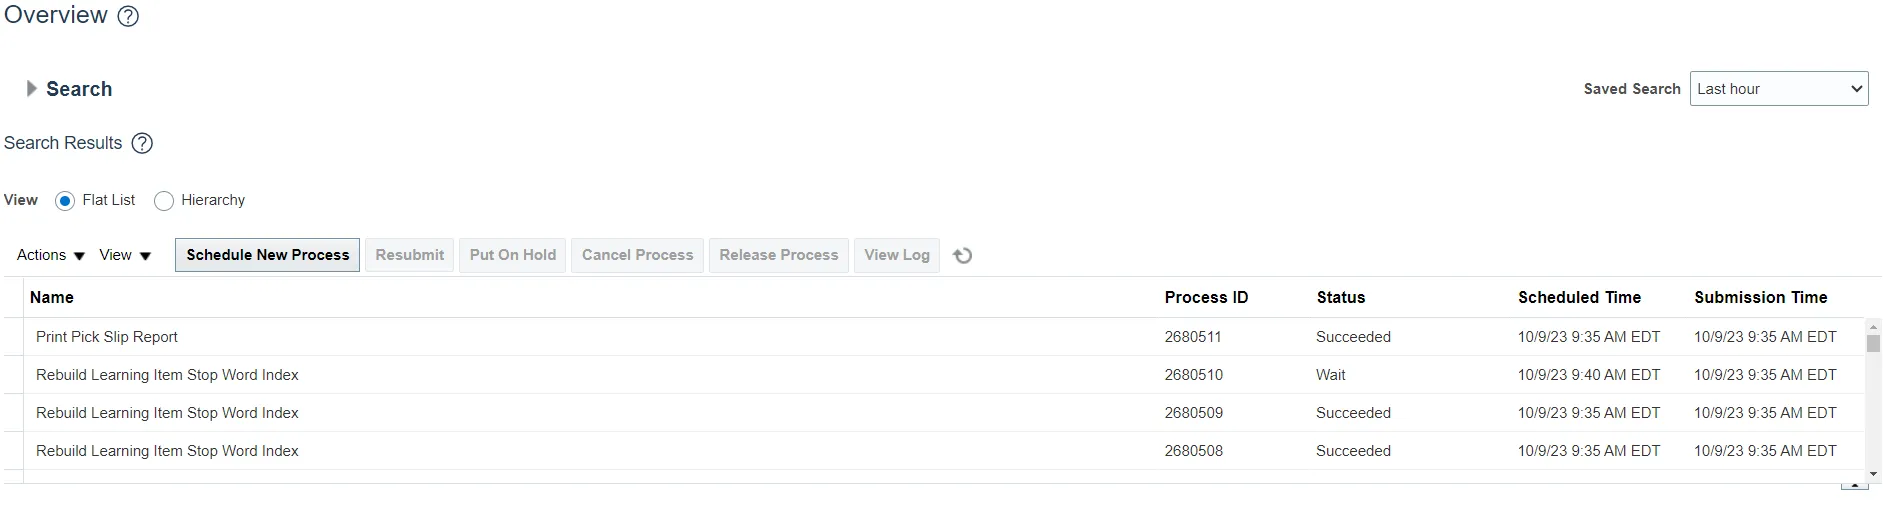
Step 6. Click the Refresh button until the Print Pick Slip Report status shows as Succeeded.
Step 7. Click the Print Pick Slip Report line under the Process Details tab, click the Republish icon.
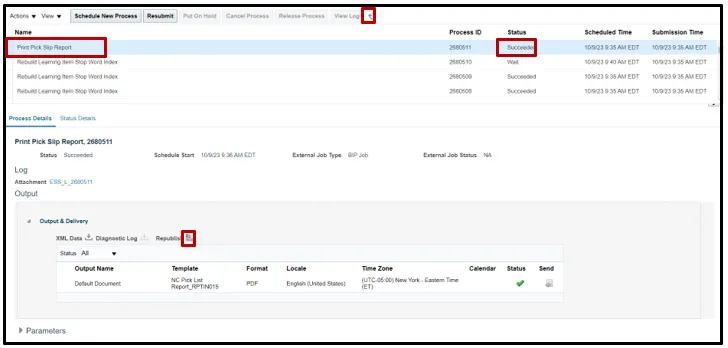
Step 8. The Print Slip Report pop-up will appear. Click the Actions button. Mouse over the Export list and click PDF.
Step 9. Open and view the output.

Step 10. Click the Actions icon and select Export. Select the format (PDF) to get the report output.
Step 11. Open and view the Output.

Schedule Pick Slip Report
To schedule a pick slip report in NCFS, please follow the steps below. There are 11 steps to complete this process.
Step 1. On the Home page, under the Tools tab, click the Scheduled Processes app.
Step 2. On the Scheduled Processes page, click Scheduled New Process.
Step 3. Type “Print Pick Slip Report” in the Name field. Click OK.
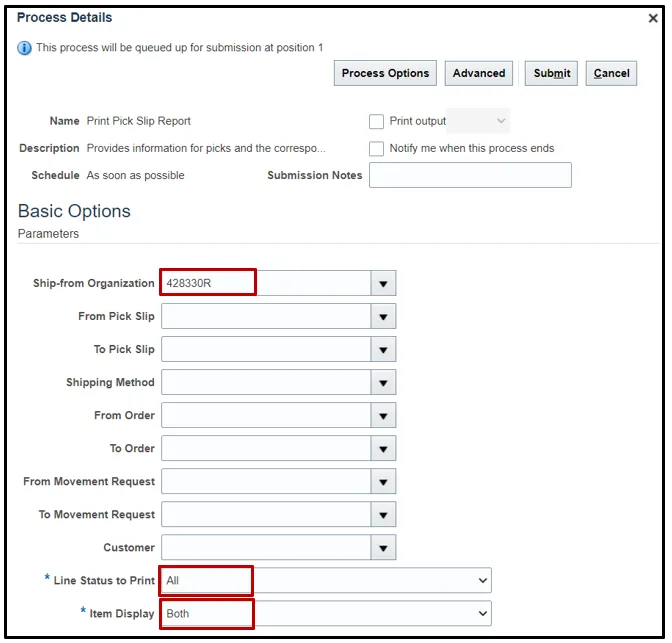
Step 4. Choose All from the Line Status to Print drop-down list. Choose Both from the Item Display drop-down list. Choose the Inventory Organization from the Ship-from Organization drop-down list.
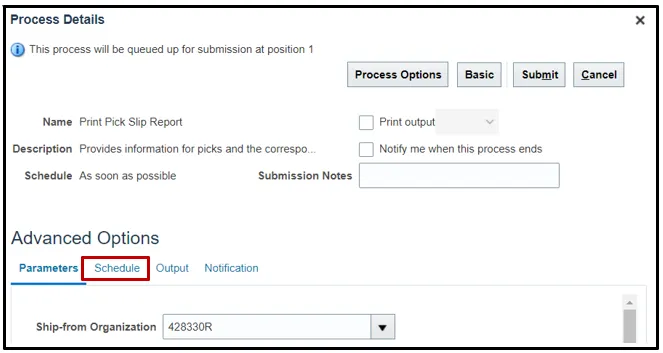
Step 5. Switch to the Advanced view by clicking Advanced.

Step 6. Click the Schedule tab.
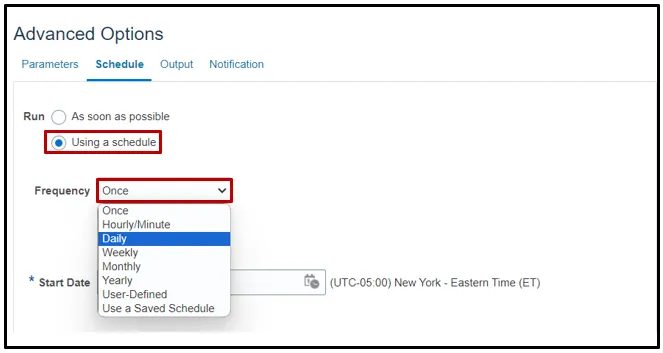
Step 7. Click the Using a schedule radio button. Choose the frequency from the Frequency drop-down list.
In this example, Daily was chosen.
Step 8. Enter your Start and End Dates.
In this example, an end date of 2099 was chosen.
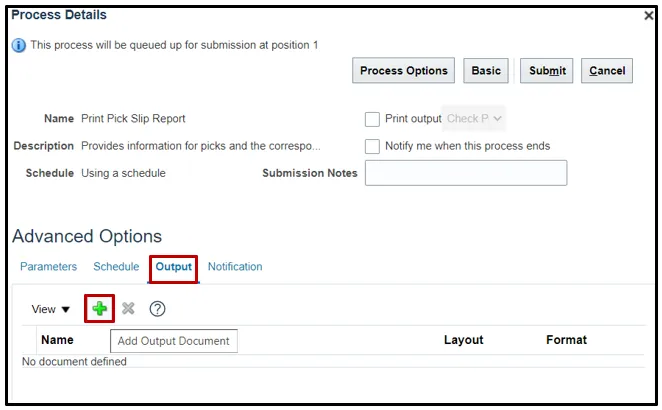
Step 9. Click the Output tab to determine output location. Click Add Output Document.
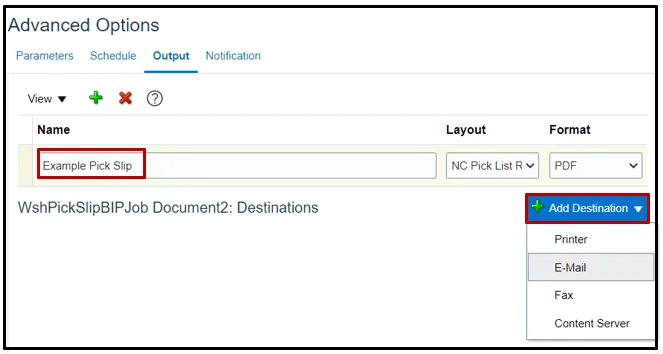
Step 10. Use Name field to name your output. Click Add Destination to choose a destination and complete relevant fields.
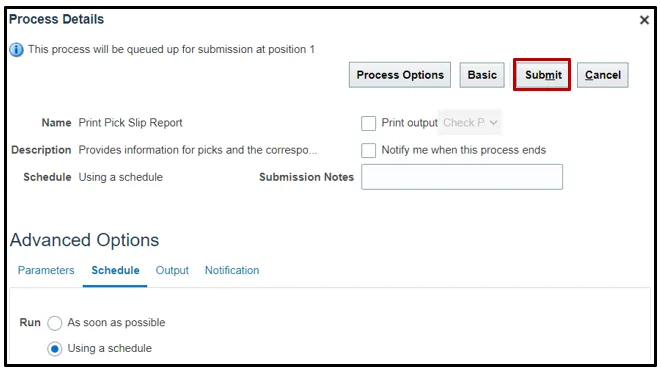
Step 11. Click Submit to schedule your pick slip report.
Confirm Pick Slips
To Approve Customer Orders in NCFS, please follow the steps below. There are 7 steps to complete this process.
Step 1. On the Home page, under the Supply Chain Execution tab, click the Inventory Management app.

Step 2. On the Inventory Management page, click the View by icon and enter the Organization ID. Click the Apply button.
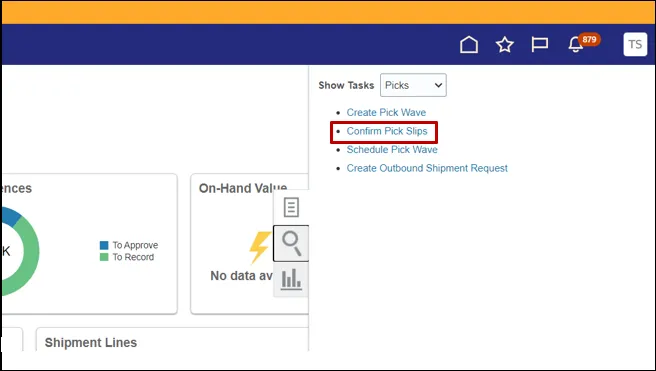
Step 3. Click the Tasks icon and select Picks from the Show Tasks drop-down choice list.

Step 4. Click Confirm Pick Slip.
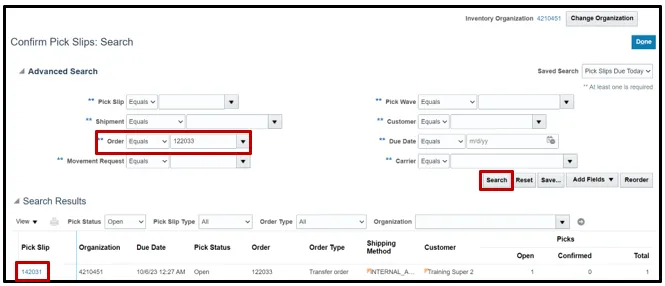
Step 5. Use the search fields to find the pick wave.
In this example, the Order number 122033 was searched by using the Order field. Click Search to view the results.
Step 6. Click the Pick Slip Number link to go to the Confirm Pick Slip page.
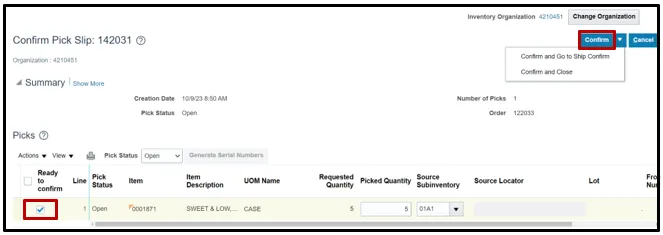
Step 7. Make any changes to the pick lines. Click the Ready to Confirm check box. Click Confirm. You can click Confirm and Go to Ship Confirm by using the drop-down list to go directly to Ship Confirm.
Ship Confirm a Pick
To Ship Confirm a Pick in NCFS, please follow the steps below. There are 7 steps to complete this process.
Step 1. On the Home page, under the Supply Chain Execution tab, click the Inventory Management app.

Step 2. On the Inventory Management page, click the View by icon and enter the Organization ID. Click the Apply button.

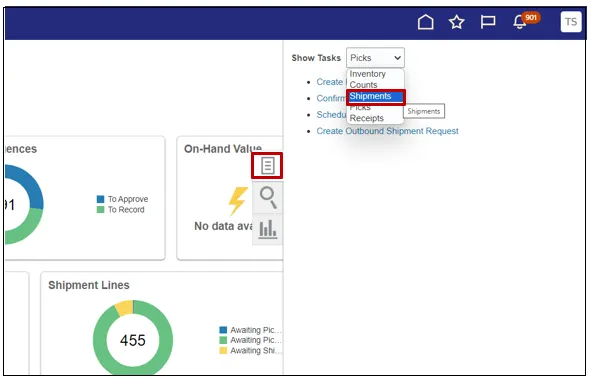
Step 3. Click the Tasks icon and select Shipments from the Show Tasks drop-down choice list.
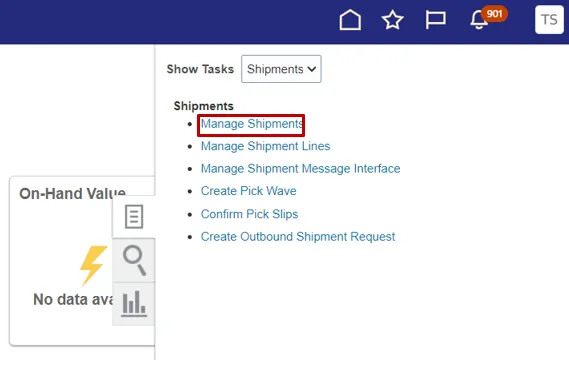
Step 4. Click Manage Shipments.
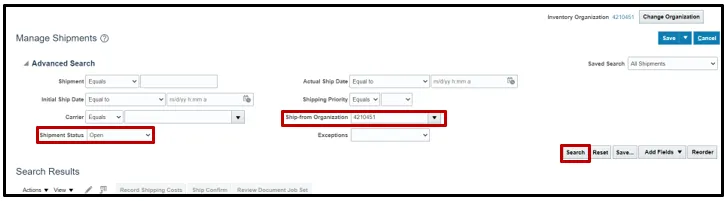
Step 5. Use the search fields to search for the order to be Ship Confirmed. Click Search.
In this example, open orders for Inventory Organization 4210451 were searched.
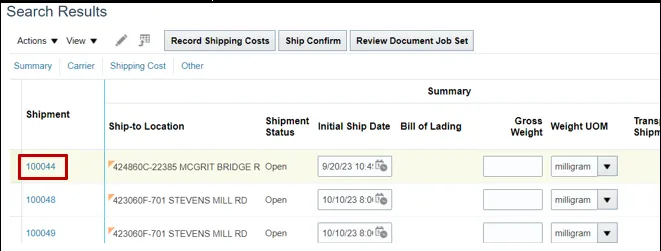
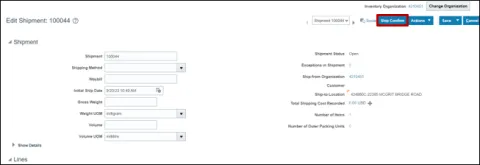
Step 6. Click the Shipment number.
Step 7. On the Edit Shipment page, make any necessary changes then click Ship Confirm.
Wrap-Up
This QRG covers the pick wave process for inventory agencies using NCFS. The pick wave process is used for Self-Service Procurement (SSP) orders for consumption or Transfer Orders for replenishment and warehouse movement. Not all transactions use the pick wave process, such as the NC Direct Issue miscellaneous transaction; see INV-16 QRG for more information.
Additional Resources
- Virtual Instructor-Led Training (vILT)
- Web based Trainings (WBT)
- Quick Reference Guides (QRG)