Purpose
The purpose of this Business Process Procedure is to explain how to change an individual’s work schedule in the Integrated HR-Payroll System.
Trigger
You need to change the work schedule for an individual. The work schedule is changed on a person's record and can be processed via transaction code [PA61] (these instructions) or via transaction code [PA30].
These instructions do not walk you through entering a substitute work schedule for an individual, only changing the work schedule permanently.
Business Process Procedure Overview
Work Schedules
The work schedule is required for all employee records and
- Defines the expected daily work hours,
- Defines the number of expected workdays used to determine when an employee will accrue leave in that month,
- Is used to constrain leave usage,
- Does not limit work hours,
- Will drive Shift Premiums for eligible employees, and
- Is tied to a Holiday Calendar.
An employee can see their work schedule assignment on the upper right-hand corner of the Time Statement.
If at all possible, change work schedules on the first day of an overtime period (7 days, 28 days, etc. - this is not necessarily the payroll period), so the entire overtime period contains the same work schedule. This will prevent the payroll process from changing calculation rules within an overtime period. If it is not possible to wait until the next overtime period to change the work schedule rule (such as with promotions, LOA w/pay, etc.) it is ok to change the work schedule within an overtime period, but payroll will no longer be calculated on a period-basis. It will be calculated on a daily basis, prorated based on the date of the work schedule change. The calculation in the system will be correct but may be slightly different than if the work schedule was not changed within the period, due to the calculations being daily instead of for a period.
A work schedule has been made to fit various schedules: Days, Evenings, Nights, Rotating Flex Schedules
- D = Days
- 01 = Schedule number
- N = No weekends
- 08 = Hours per day
- GN = General Schedule (common schedule)
Evening Schedule: E01N08GN
Night Schedule: N01N08GN
- The first character in the work schedule defines the premium eligibility. Agencies have decided which shifts are Day, Evening, and Night.
- The last 2 characters may also represent
- FX = Flex where the hours are set but the days are flexible
- M, T, W, H, F = to show which day is the scheduled off day
- 01-99 = used to represent versions of a work schedule
This is meant to make some sense of the hundreds of work schedules in Integrated HR-Payroll System. The syntax may be imperfect at times as work schedules are very complex.
Employees assigned to a night shift will earn night premium for hours recorded on their SCHEDULED workdays. NOTE: Time worked on NON-SCHEDULED workdays require a substitution or a push code.
Rotating Schedules - Common in 24x7 operations
Flex Schedules
- Allow employees to record any number of work hours or leave hours on any day of the week
- May be a 4, 8, 9, 10, or 24-hour flex schedule
- Should be used with caution
Employees on Rotating schedules must be assigned with care. In addition to identifying the rotation schedule to which they belong, it must also be determined where they are within that rotation to match up work days/off days.
Anyone with a regular recurring work pattern should be assigned to a specific work schedule that reflects the normal expected work hours per day per OSHR. Flex schedules may invite some work hour flexibility that may benefit the employee but impede business operations.
Not all schedules are permitted by all agencies.
Tips and Tricks
- You can access infotype 0007 Planned Working Time via transaction code [PA30] or transaction code [PA61]; both update the records on an individual.
- This process should not be used to create a work schedule substitution, only a change of work schedule permanently.
Access Transaction Via Transaction Code: PA61
Procedure
There are 19 steps to complete this process.
Step 1. Update the following required and optional fields:
| Field Name | Description | Values |
|---|---|---|
| Command | White alphanumeric box in upper left corner used to input transaction codes |
Enter value in Command. Example: PA61 |
Step 2. Click Enter.
Step 3. Update the following required and optional fields:
| Field Name | Description | Values |
|---|---|---|
| Personnel no. | Unique employee identifier |
Enter value in Personnel no. Example: 80000532 |
Step 4. Click Enter.
Information: Best practice is to enter any data as appropriate, review all data, and click Enter to allow the system to validate the data. Verify you are working with the correct personnel number before proceeding.
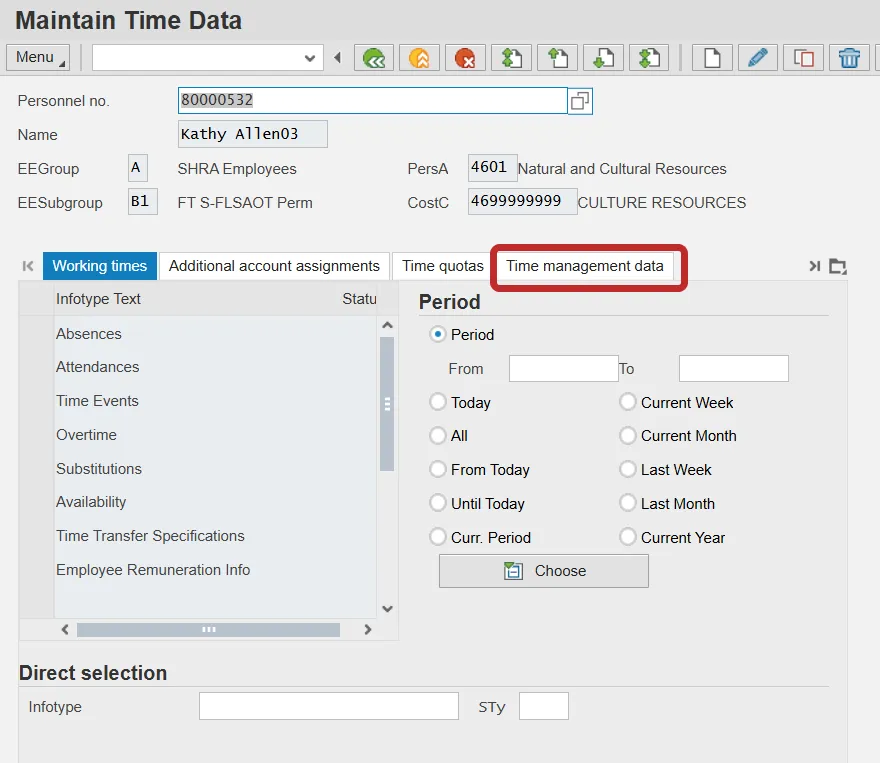
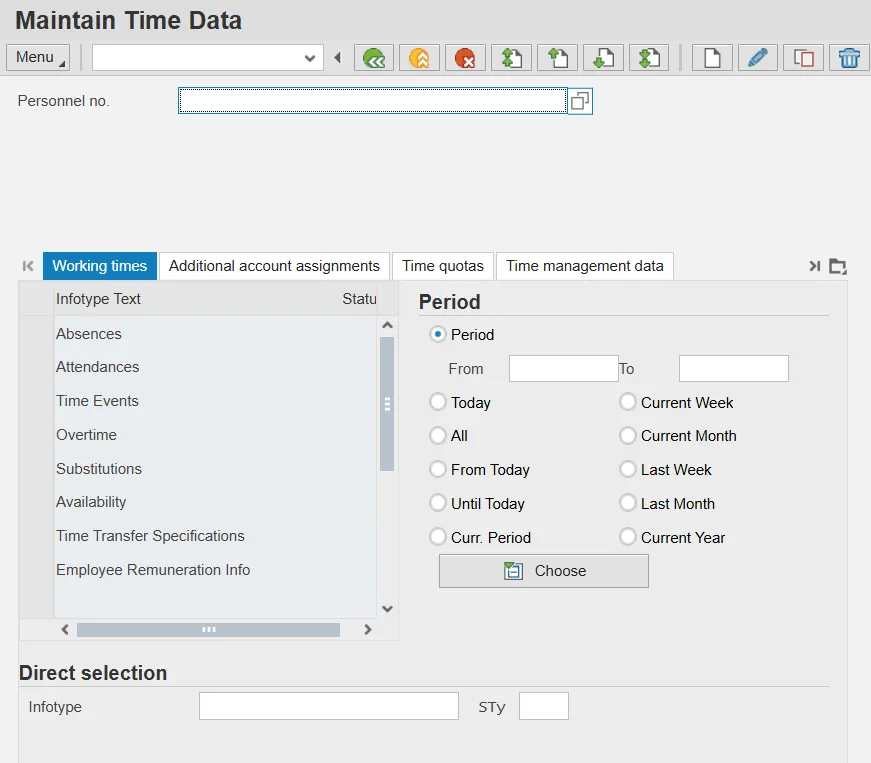
Step 5. Click on the Time management data tab.

Step 6. Select the Planned Working Time row.
Information: You can find the Planned Working Time infotype on the Time Management Data tab, or you may enter [0007] in the Infotype field at the bottom of the screen and click Enter.
Step 7. Click Copy (Shift+F9) button.
Information: Always use Copy to keep a record of the historical work schedules. If you use the Change function, the record of what the work schedule used to be is not saved.
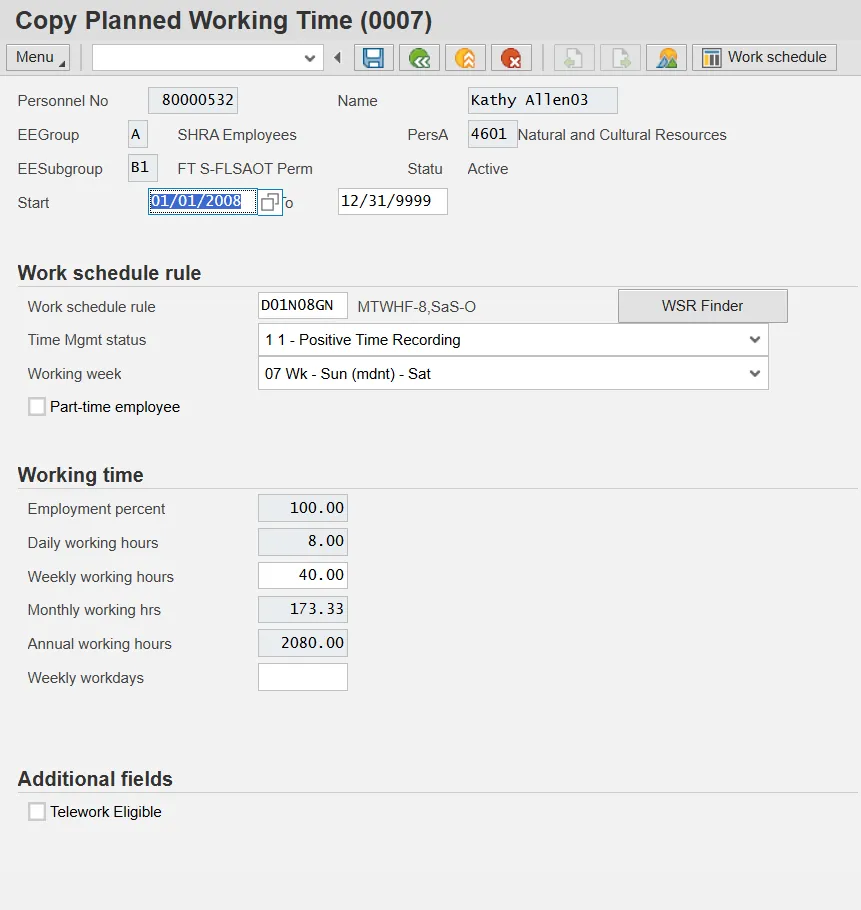
Step 9. Update the following required and optional fields:
| Field Name | Description | Values |
|---|---|---|
| Start | Beginning date of the specified date range |
Enter value in Start. Example: 10/22/2025 |
Step 10. Identify the work schedule rule to be implemented.
Information: The match code will present a long list of available work schedules. OSC recommends using the Work Schedules Job Aid to find the appropriate schedule key. Once identified, copy into your clipboard and paste directly into the Work Schedule Rule field.
Information: You should change the work schedule at the beginning of an overtime period (7-day, 28 day, etc.) if at all possible.
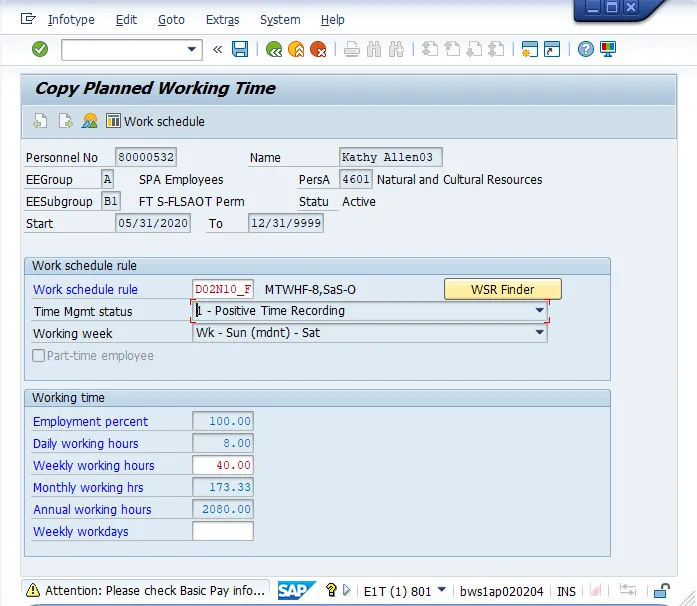
Step 11. Click Enter.
Information: You can ignore the yellow caution message about the Basic Pay record when you make this change.

Step 12. Click Enter.
Information: Notice the yellow confirmation message at the bottom of the screen noting the previous work schedule record will be delimited or have an end date put on the record.
Step 13. Click Save (Ctrl+S).
Possible subsequent activities
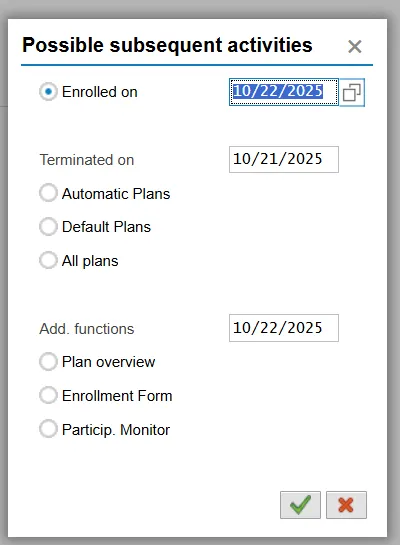
Step 14. Click the Cancel (F12) button.
Information: Since a change in work schedule has the potential to affect the benefits of the individual, the system prompts you with a benefits change option. If you need to change benefits, click Continue. If you need to change benefits with the change in a work schedule, those instructions are not handled in this BPP. Several Benefits specific Job Aids and BPPs can be found here.
Step 15. Click All radio button.
Step 16. Click Overview (Shift+F8) button.
Information: To review the changes you have made now or in the future, choose All for the date range (the default is today's date, which may not show you records in the past), and click Overview to see the history of all work schedules on this individual's record.

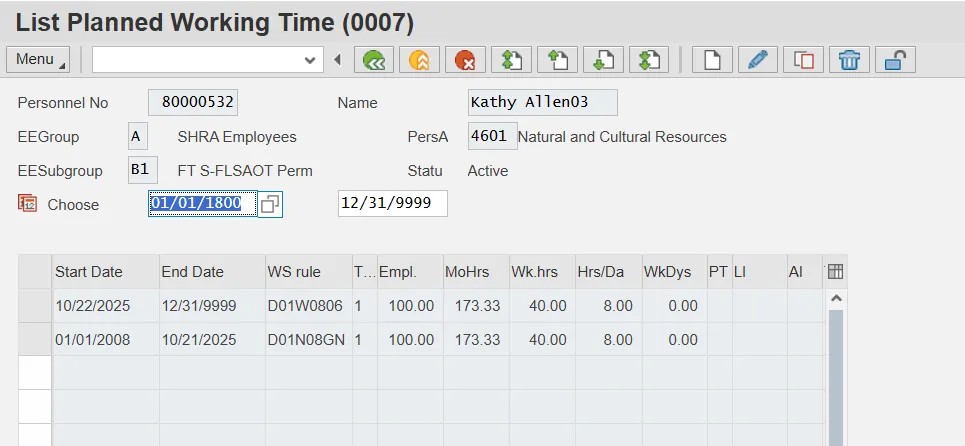
Step 17. Click the Back (F3) button.
Information: Notice the history of all work schedules and the valid dates are displayed. To return to the main screen, click Back.
Step 18. Click the Back (F3) button.
Step 19. The system task is complete.