Trigger
Agency has a requirement to print check stub information (remuneration statement).
Business Process Procedure Overview
The preferred method for printing check stubs is through Employee Self Service (ESS.) This transaction allows for central printing of the remuneration statement for users that are not able to print and for agencies that will initially print this statement. A designated agency user will be able to print the check stubs for a group of employees.
Tips and Tricks
- Pre definition of a group of people for whom the pay stub is to be printed is very important. This pre definition can be in the form of an Organizational Unit or Personnel Number.
- Every pay period you must receive a new Identification Number and Run ID for pay stubs printing from your HR contact in order to print the pay stubs. Ensure that you get this information every pay period. Also refer to page no. 3 in this BPP document which explains what the Run ID and date mean. Currently Beacon is in the process of finalizing the details regarding distribution of the Run Id.
- In order to print pay stubs for your Organizational Unit, or for your group of employees, you must have the required authorization.
- Additional knowledge of the Agency’s Organizational structure/units and its relationship with individual personnel will be very useful.
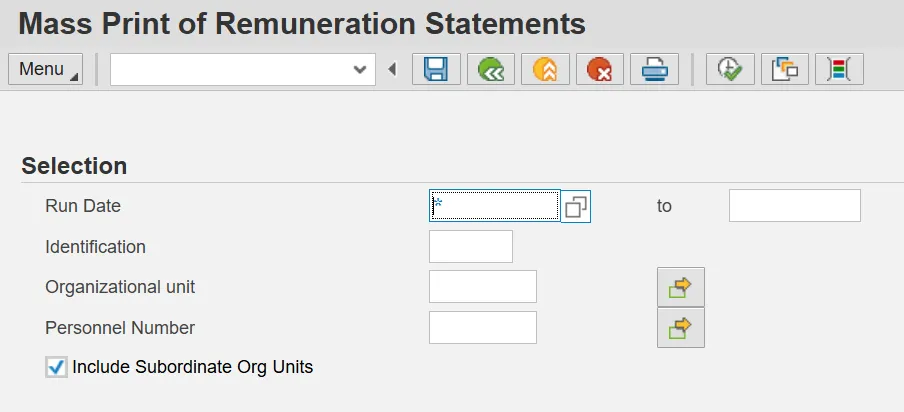
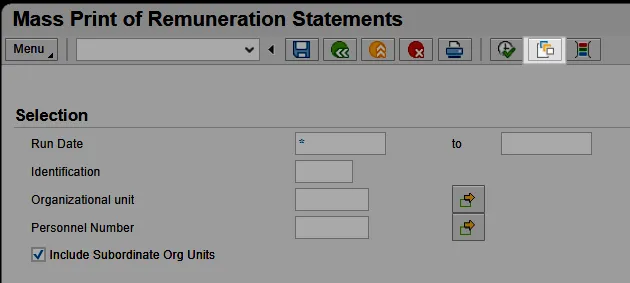
To print pay stubs, it is important to understand the definitions of the above selection field/parameters.
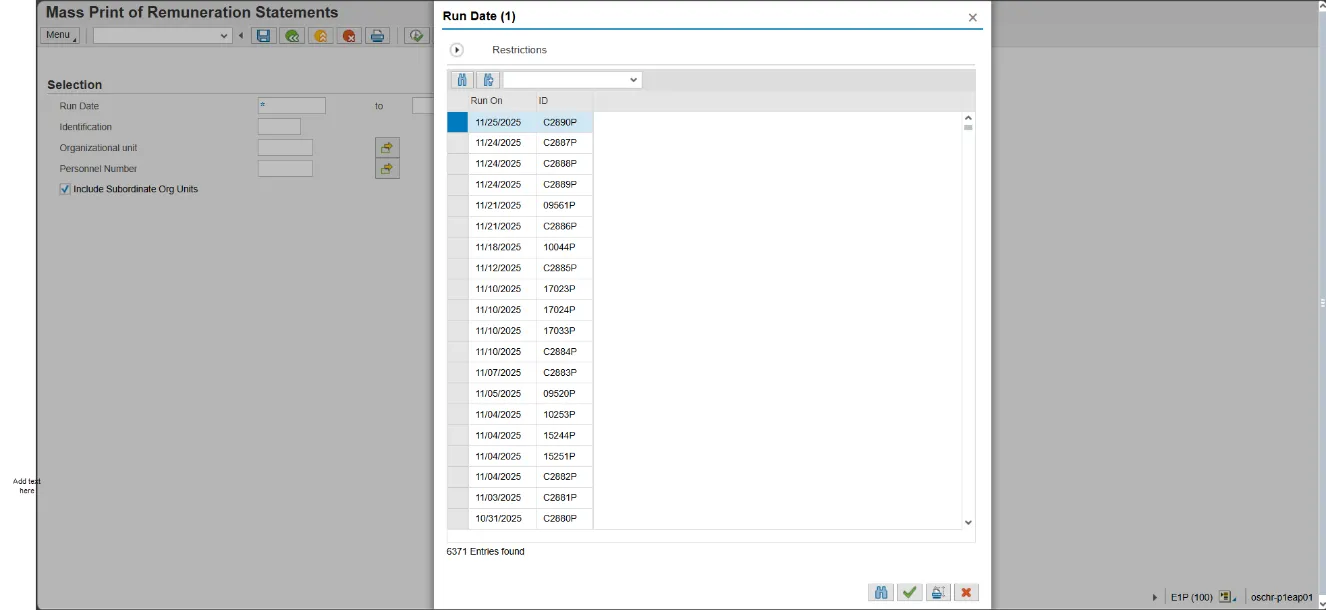
- Run Date - Run date is the date on which the payroll team (Shared Services) has processed the payment run which either transfers money to bank (direct deposits) or prints a check based on the employee master data setting. Before a check stub can be printed, it is important that Shared Services must first run a payment run for that period and communicate the information to each Agency HR contact person. In turn, each Agency will have to provide the run date to all persons responsible for printing the check stubs for their group of employees.
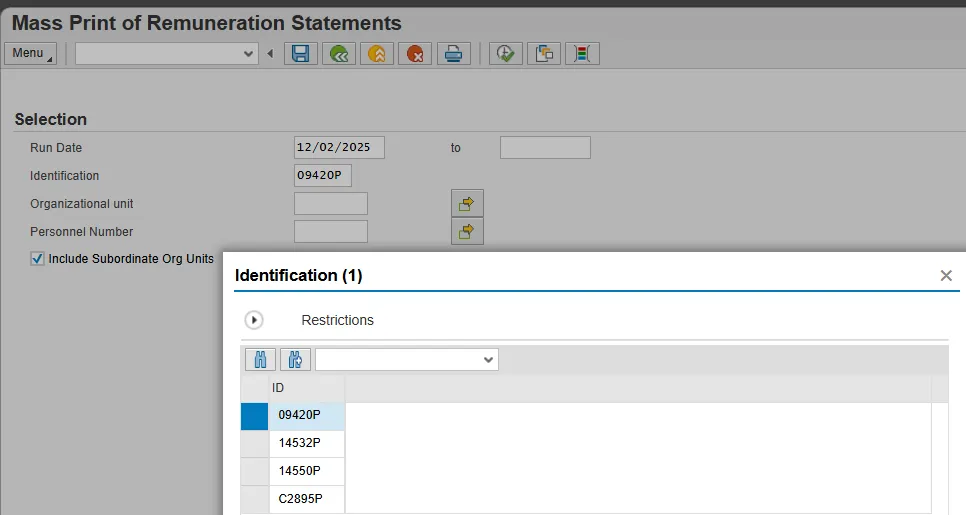
- Identification – The identification number is used to distinguish between several payment runs with the same reconciliation key date. There will be at least two different identification numbers per pay period as there are two payment methods, direct deposits and checks. The person responsible will be required to process at least two print runs every pay period, one for direct deposits and one for checks. If there are additional payment runs for off cycle payroll then more identification numbers will be created.
- Important: Shared services will inform the Agencies Payroll Administration folks of all the run dates and identification numbers for that pay period.
- Organizational Unit – Using Organizational Unit the local HR representative will be able to print the check stubs for all employees under their Organizational Unit (that are in positions that belong to that particular Org Unit). The Agency HR should communicate to each of their HR representatives the Organizational Unit(s) for which they will be responsible for printing check stubs.
Note: Organizational Unit is a master data field and each employee is assigned to a specific Organizational Unit. Each local HR representative will be able to maintain documentation for their assigned organizational units.
Please note the following:
- There is a checkbox underneath ‘Personnel Number’ that allows you to include subordinate Organizational Units (checkbox selected) or to exclude subordinate Organizational Units (checkbox deselected) when you print the remuneration statement. By default this checkbox is selected so that if you enter a value in the Organizational Unit field it will include all the subordinate Organizational Units.
- This allows flexibility when selecting the group of employees for which you want to print remuneration statements.
- Examples of how the selection options can be used.
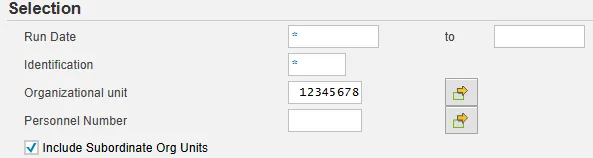
- Print remuneration statements for employees in a single Org Unit A (the 8 digit number for this Org Unit is 12345678). If you have 10 employees that belong to Org. Unit A and you want to print their statements you will enter the number of this one Org Unit, deselect the checkbox so that no subordinate Org Units are included and print the statements. See screen print below.
If you do not know what the 8 digit number for the Org Unit is you can use the Search button next to the Organizational Unit field to look this number up. Click on the Search button, drill down in the structure until you find the Org Unit you are looking for, select and double click and the number will be pulled into the field.
- Print remuneration statements for employees in a number of Org Units where there is a hierarchical relationship with subordinate units. In this example Org Unit A is the highest Org Unit in the hierarchy (10 employees) and Org Unit B (6 employees) and C (5 employees) both report to Org Unit A. To print remuneration statements for all 21 employees you will enter the number for Org Unit A in the Organizational unit field, select the checkbox to include subordinate Org Units and print the statements. See screen print below.
Note: This is the way DOT has been printing their remunerations statements so nothing is changing for them. They should leave the default selection of the checkbox and enter the values as they have been doing since go-live on SAP.
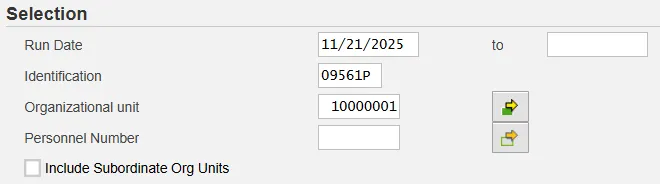
- Print remuneration statement in a number of Org Units that are not related via a hierarchy. You may have a situation that you want to print statements for employees that belong to Org Units in separate areas of your organization. If you have this requirement you can select individual Org Units and print statements for the employees that belong to these Org Units. Say you have Org Unit Z (10000001), Org Unit Y (10000002) and Org Unit X (10000003) but they do not report to each other. You can still print statements for the employees that belong to these org units by entering the org units separately in the selection screen as follow.
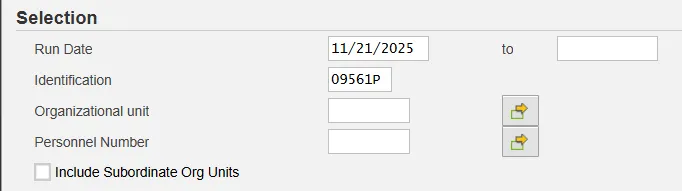
Complete the Run Date and Identification fields and deselect the checkbox to include subordinate Org Units. See screen print below.
Click on the Arrow button next to the Organization unit field and enter the Org Unit numbers in the screen that appears as shown below. This screen should contain all the Org Units numbers you want to select.
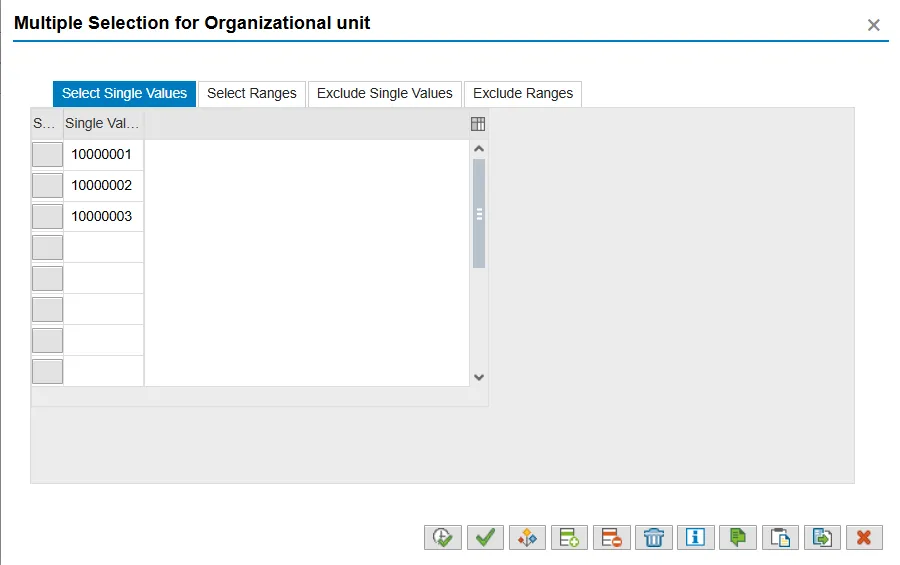
Note: You may also search for Org Units by clicking on the Search button and then drill down in the Org Structure until you find the Org Unit(s) you are looking for. Simply select such an Org Unit by double-clicking on it.
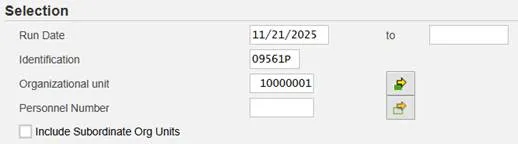
Step 3: Click on the copy green check button to return to the previous screen. You will notice that the ‘multiple selection’ button now looks as a yellow back arrow - which shows you that you have selected more than one Org Unit.
- If you are a group 2 agency that wants to print remuneration statements for a group of temporary employees you can also use the Organizational Unit field. Since all temporary employees are paid bi-weekly there will be a separate Run Date and Identification value for this group of employees each pay period. To print the statements for these employees simply enter the applicable Run Date and Identification fields, select the Organizational Unit or Units to which these employees belong and print the statements.
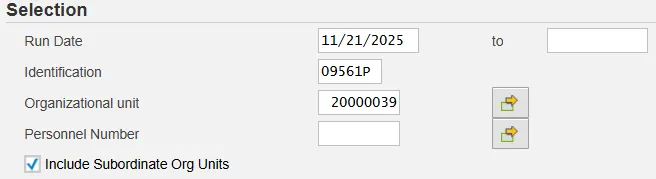
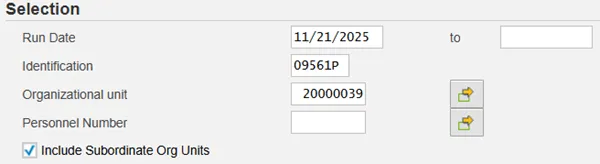
For example, if the Department of Environment & Natural Resources wants to print the remuneration statements for all their temporary employees. They will simply select the correct Run date and Identification (received from Shared Services), enter the highest Organizational Unit (20000039 – Environment Natural Resources) and ensure that the checkbox to include subordinate org units is selected. See screen shot below.
- Personnel Number - This is the lowest level of selection parameter for check stubs. Check stubs can be printed for an individual employee or for a group of employees as shown below.
Examples of how the Personnel Number field can be used to print remuneration statements.
- Print a remuneration statement for a single employee. After you have entered the Run Date and Identification fields you can just enter the personnel number for the particular employee directly into the field and then proceed to print the Pay Statement. If you need to search for the Personnel Number there is a search help feature you can use, following the steps described below.
Click on the button next to the Personnel Number field (if you do not see this button just click in the Personnel Number field and it will appear). You will see the next search help screen.
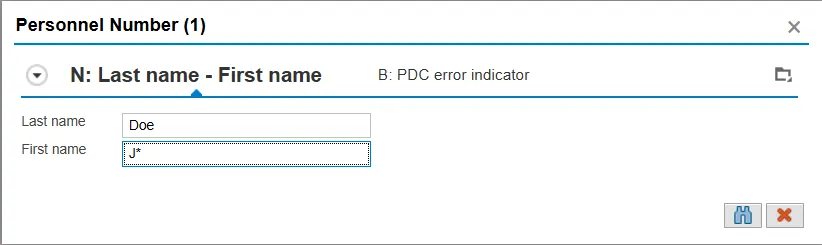
This screen offers several options to search for an employee, represented by several different tabs (Last name - First name) at the top of the screen. The most frequently used options are the one shown here (using the Last name and First name fields) and the other option is to search by - Organizational assignment - (organizational assignment) - shown later.
Enter the Last name / First name and click on the button. You will get a list of all the employees with the last name ‘Doe’ and the first name starting with a ‘J’ (in this example there was only one hit).

Select the appropriate employee by double clicking on the name in the list (You can also select the employee with a single click and then click on the. In the example below.
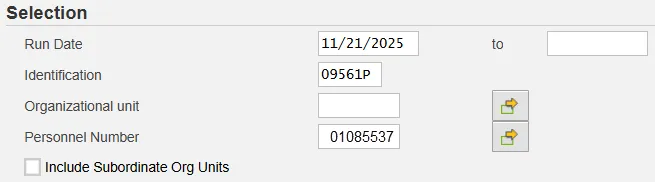
The system will enter the selected Personnel Number in the field and you are now ready to print this individual’s pay statement.
- Print a remunerations statement for a group of employees using the Personnel Number field and a series of selection options. If you want to select a very specific group of employees in your organization (other than in a particular Org Unit or Units) you can use other selection options that are to be found in the Search option next to the Personnel Number field. To do this follow the following steps.
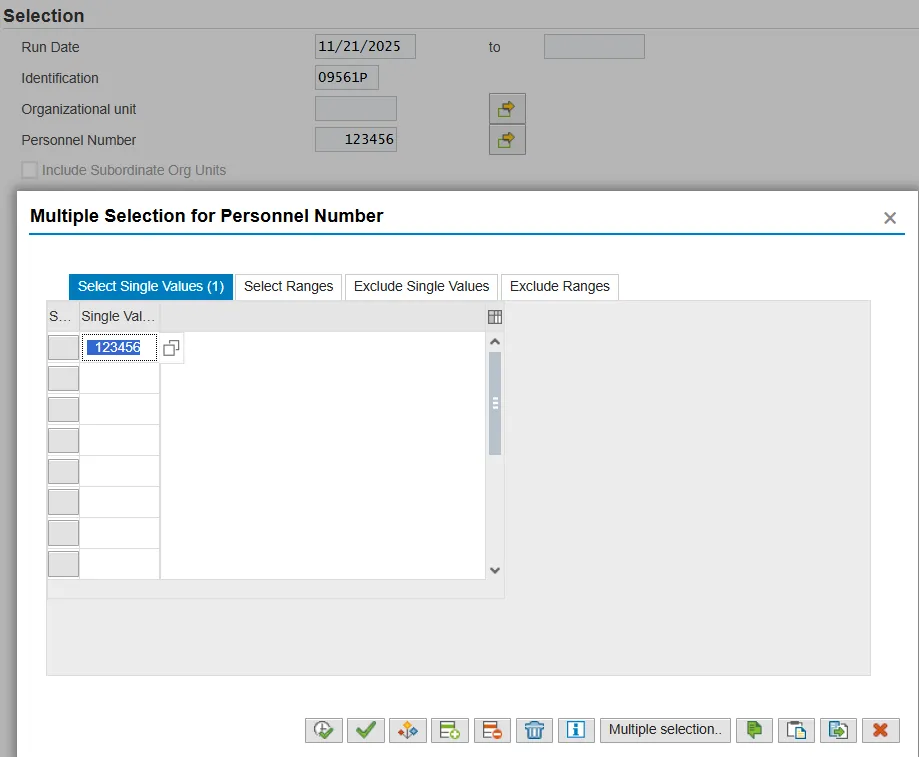
Complete the Run Date, Identification and Org Unit or Personnel Number fields and deselect the checkbox to include subordinate Org Units. See screen print below.

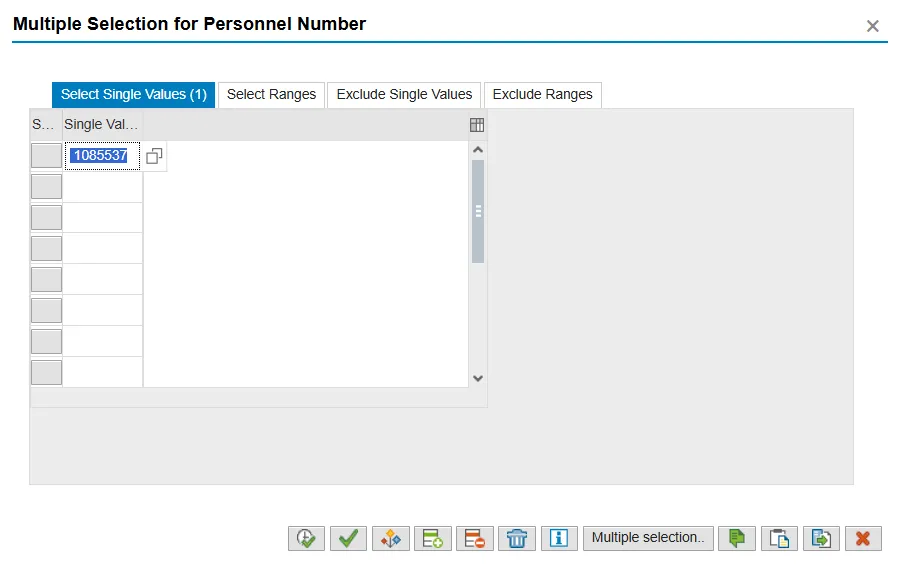
Click on the multiple selection button next to the Personnel Number field and then on the multiple selection button at the bottom of the pop-up screen that appears (see below).
In the following screen click on the ‘Organizational assignment’ tab and use the fields (selection options) on this screen to narrow down / select the group of employees you want to print statements for, e.g. employees in a certain employee group or employees in a certain Payroll Area or a combination. In this example I have selected all the employees in Personnel Area 1401 (OSC), in Payroll Area 01 (Monthly) whose Last Name begins with a ‘W’.
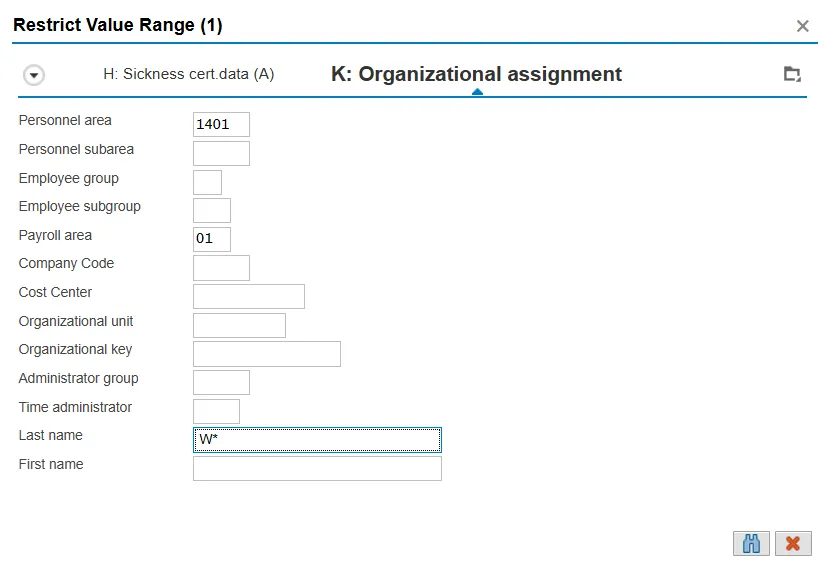
Click on the Search button (binoculars) and you will get a list of these employees upon which you can select some or all of them.
Notes:
- Only use this option when there is a need to print check stubs for a limited number of individual employees. The Personnel number will be required in order to print a check stub for that individual.
- Use only one value for either Organizational Unit or Personnel number (do NOT enter values in both fields). If you enter both, the system will provide an error message.
Required and optional fields:
| Field Name | Description | R/O/C | Values |
|---|---|---|---|
| Run Date | Run date is the date on which the payroll team (Shared Services) has processed the payment run which either transfers money to bank (direct deposits) or prints a check based on the employee master data setting. Before a check stub can be printed, it is important that Shared Services must first run a payment run for that period and communicate the information to each Agency HR contact person. In turn each Agency will have to provide the run date to all persons responsible for printing the check stubs for their group of employees. | R |
Enter value in Run Date. Example: 10/09/2007 |
| Identification no. | The identification number is used to distinguish between several payments runs with the same reconciliation key date. There will be at least two different identification numbers per pay period as there are two payment methods, direct deposits and checks. The responsible person will be required to process at least two print runs every pay period, one for direct deposits and one for checks. If there are additional payment runs for off cycle payroll then more identification numbers will be created. Again Shared services will inform Agencies HR contact personnel of all the identification numbers for that pay period along with the run date associated with same. | R |
Enter value in Run Date. Example: 10255P |
| Organizational Unit | Organizational unit is master data field and each employee is assigned to a specific organizational unit. Each local HR representative will be able to maintain documentation for their assigned organizational units. | R |
Enter value in Organizational Unit Example - 70227938 |
| Personnel no. | This is the lowest level of selection parameter for check stubs. Check stubs can be printed for an individual employee or for a group of employees as below. | R |
Enter Value in Personnel No. (Orbit no.) Example - 1501777 |
Note- You can not enter values in both the Organizational unit and personnel number fields. The system will give an error message if both values are entered. Only use Organizational unit as provided by your HR office.
Press ENTER or Click Enter button.
The system validates the values you have entered. If there are any errors in your selections, review the selected values for each field and if values are correct, contact your Agency HR technician.
Click Execute (F8) button and wait until printer selection screen is displayed as shown below.
Information:
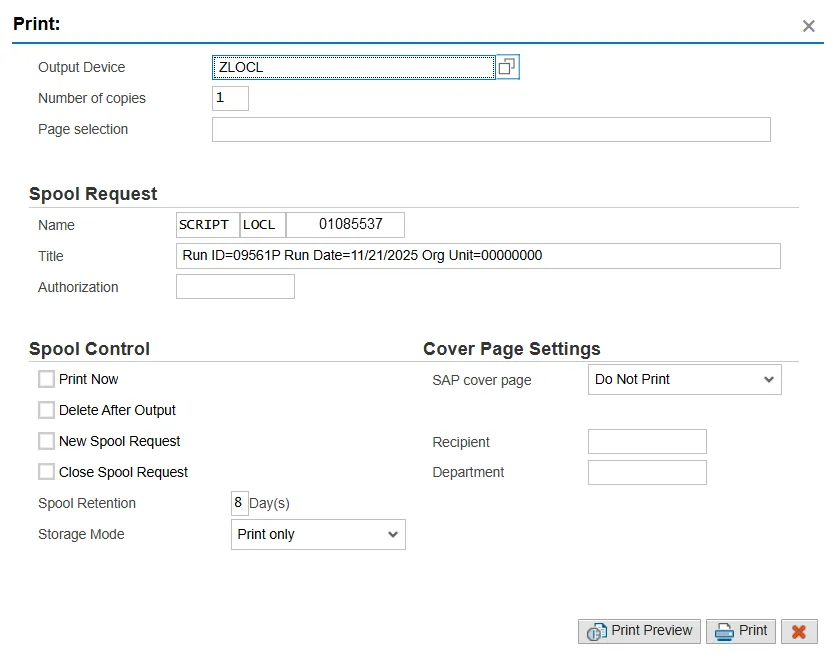
- Most of the values for the above selection are populated automatically based on the settings prepared for you by selecting the printer (e.g. ZLOCL = local printer set for you in Beacon). NB – Must be ZLOCL (LOCL does not print correctly).
Note to DOC and DHHS (for printing of large quantities of remuneration statements to Mainframe Printers).
Please follow the following steps to select the correct printers for mainframe printing (do not use ZLOCL).
Click on the drop down next to the ‘Output Device’ field.
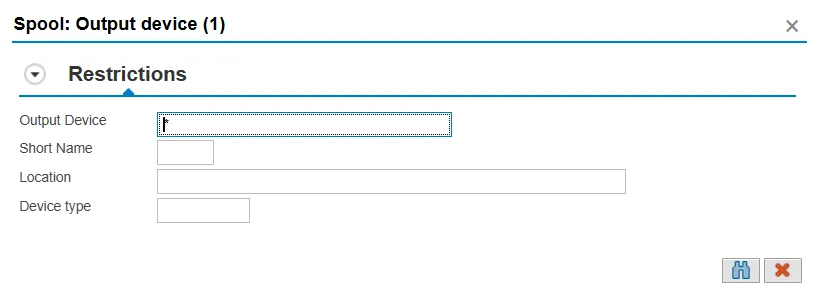
Put a * in the Output Device field and click on Search.
You will see a list of available printers.
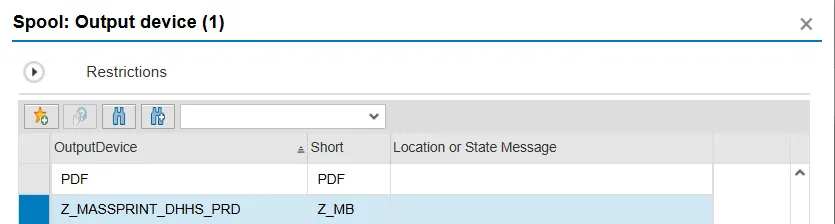
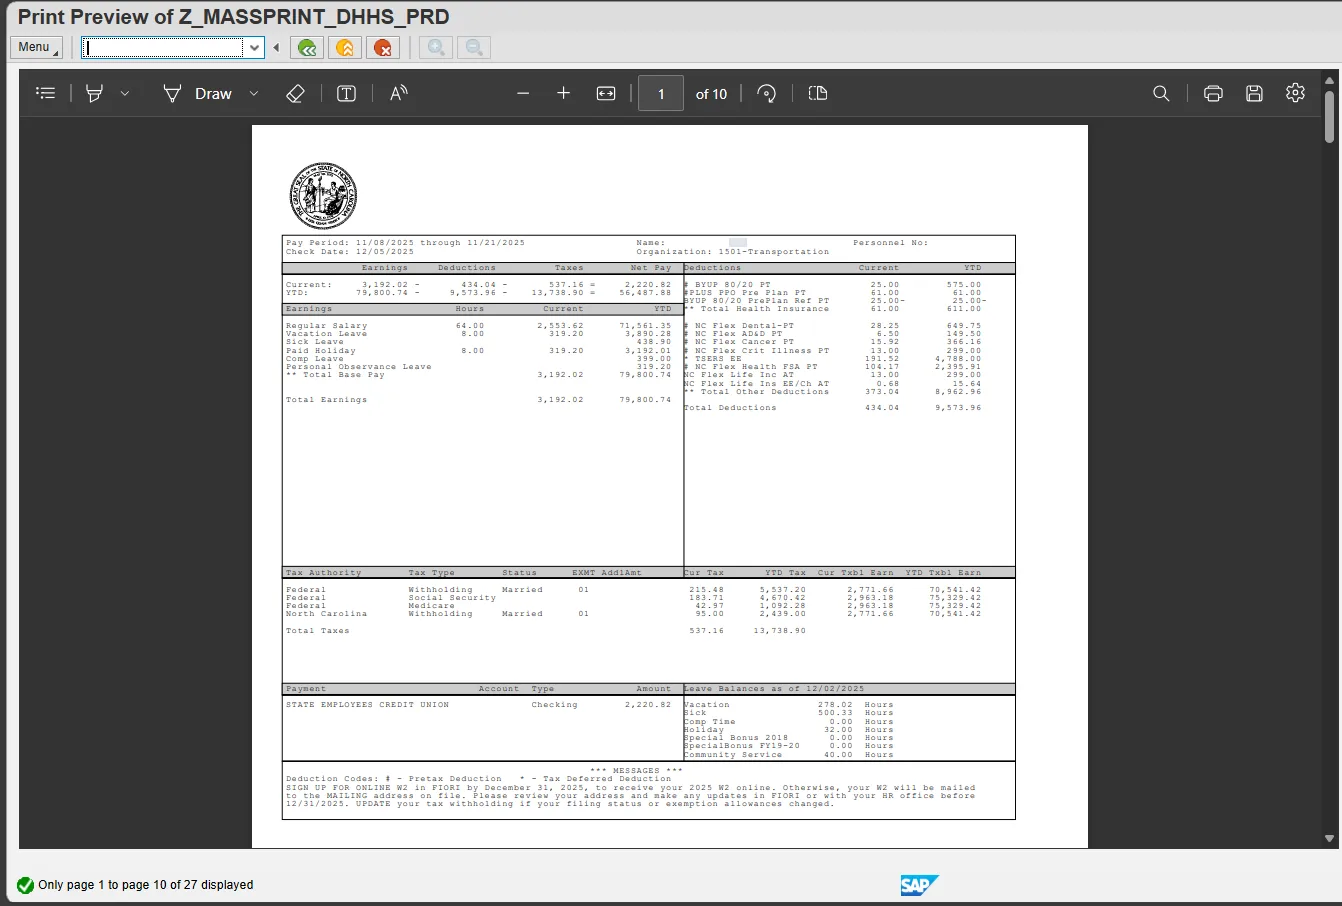
Select the appropriate printer from the list: (for DHHS = Z_MASSPRINT_DHHS_PRD and for DOC = Z_MASSPRINT_ITS_PRD).
Step 1. Click on the ‘copy’ button.
Step 2. You have selected the correct printer for Mass Printing to the Main Frame.
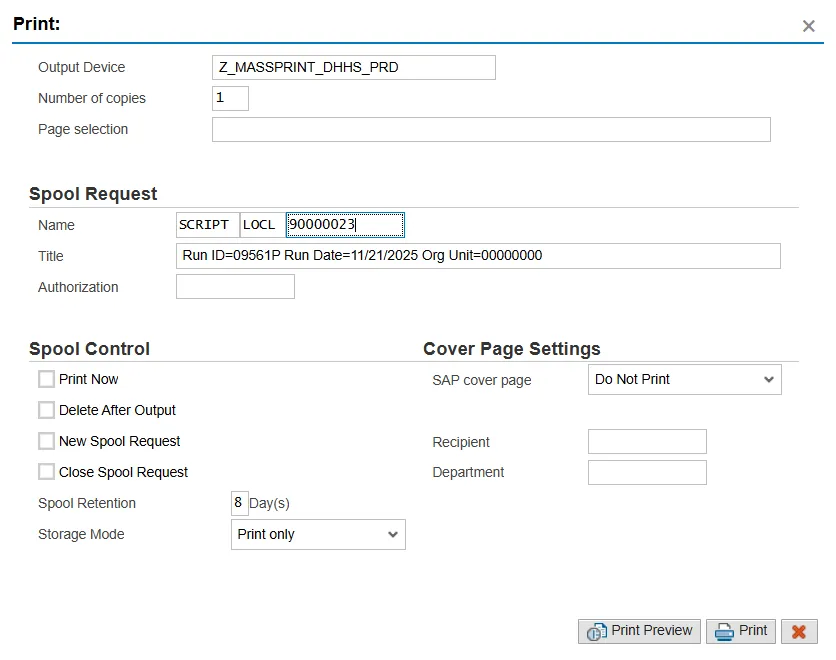
- The above example shows the process to use for large quantity print (over a hundred check stubs). You will select print and then release it from the print spool which will be shown on the following pages. However, if you only have a few statements to print, check the Print immediately box under Spool Control in this pop up spool window. The statements will go directly to the printer and you are finished.
Copy the Entire Title under Spool Request
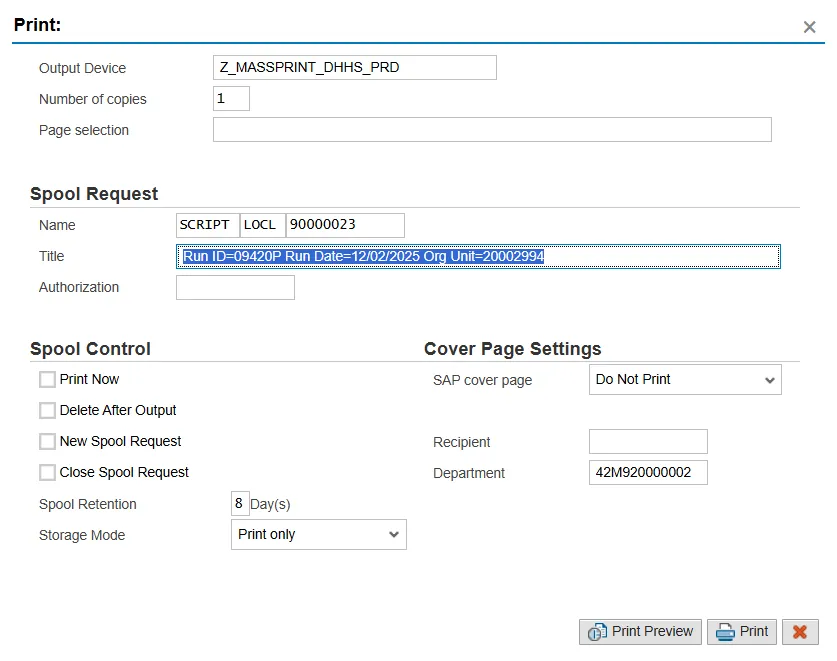
Click Print button.
Once you click print button, you will get the following screen.
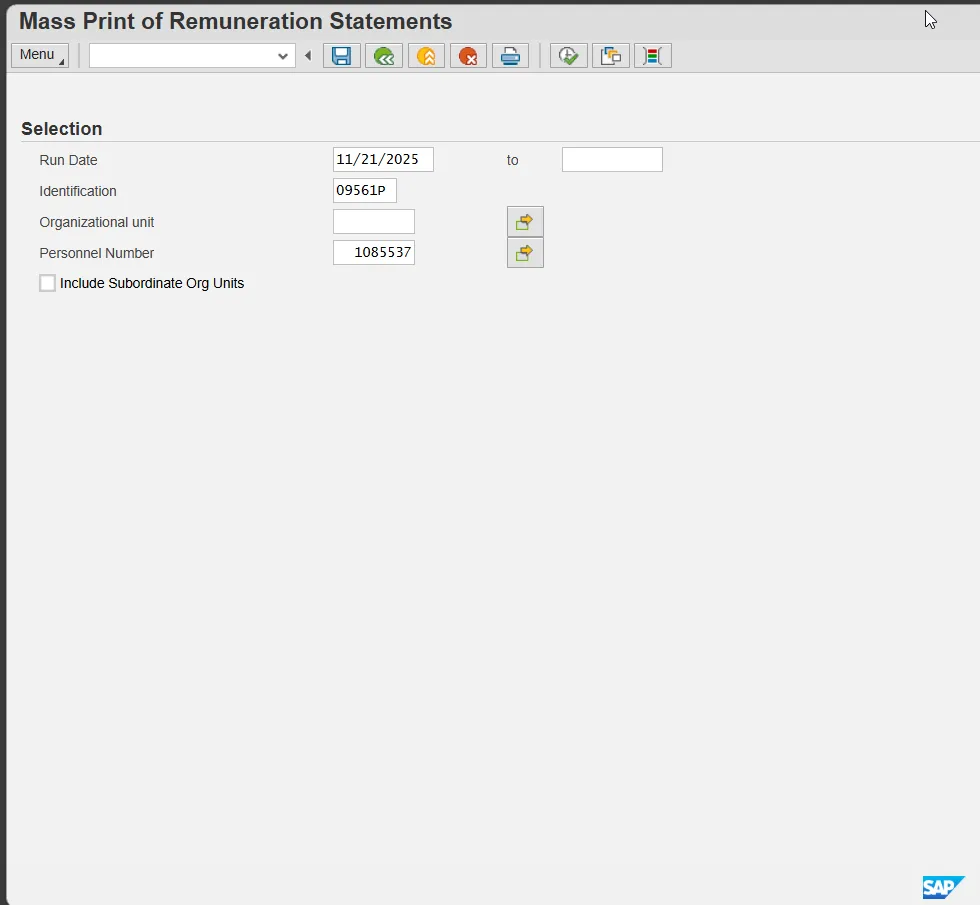
Mass Print of Remuneration Statements
Exit Transaction by clicking the Back (F3) to return to SAP Easy Access Menu.
Open Transaction SP01.
Mass Print of Remuneration Statements
Paste the Title in the “Title” section of SP01.

Information: Check the date and time for the appropriate print file. Select the item that looks like a document icon under TYPE. This will allow you to review the documents in the print spool as shown on the next few pages. Select the box next to the spool request and select the print icon to print the documents.
Click Execute (F8).
Click Spool no. checkbox.
Click the eyeglasses to Print Preview.
Print Preview of LOCL Page 00001 of 00027.
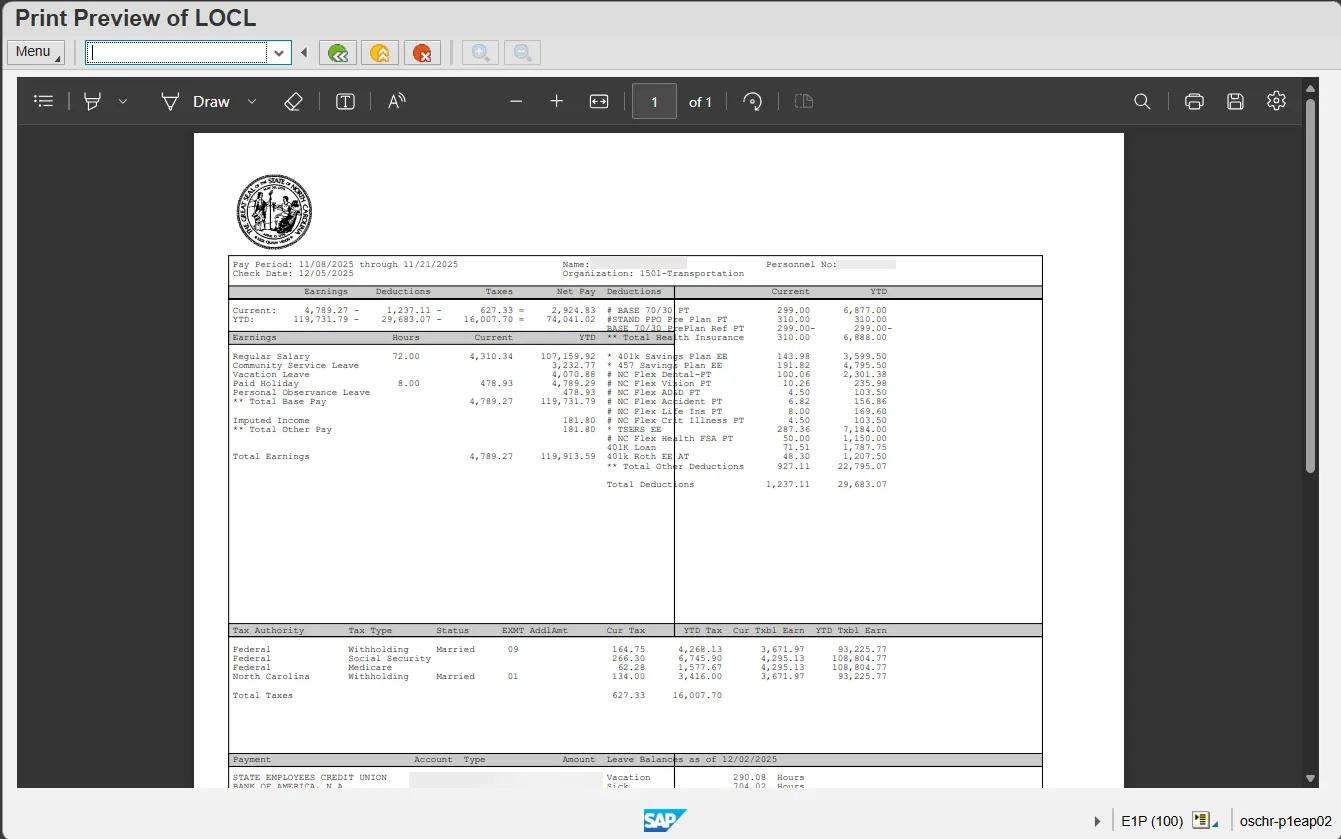
Print Preview of LOCL Page 00002 of 00027.
Click Back (F3) button to go back to spool list as below.
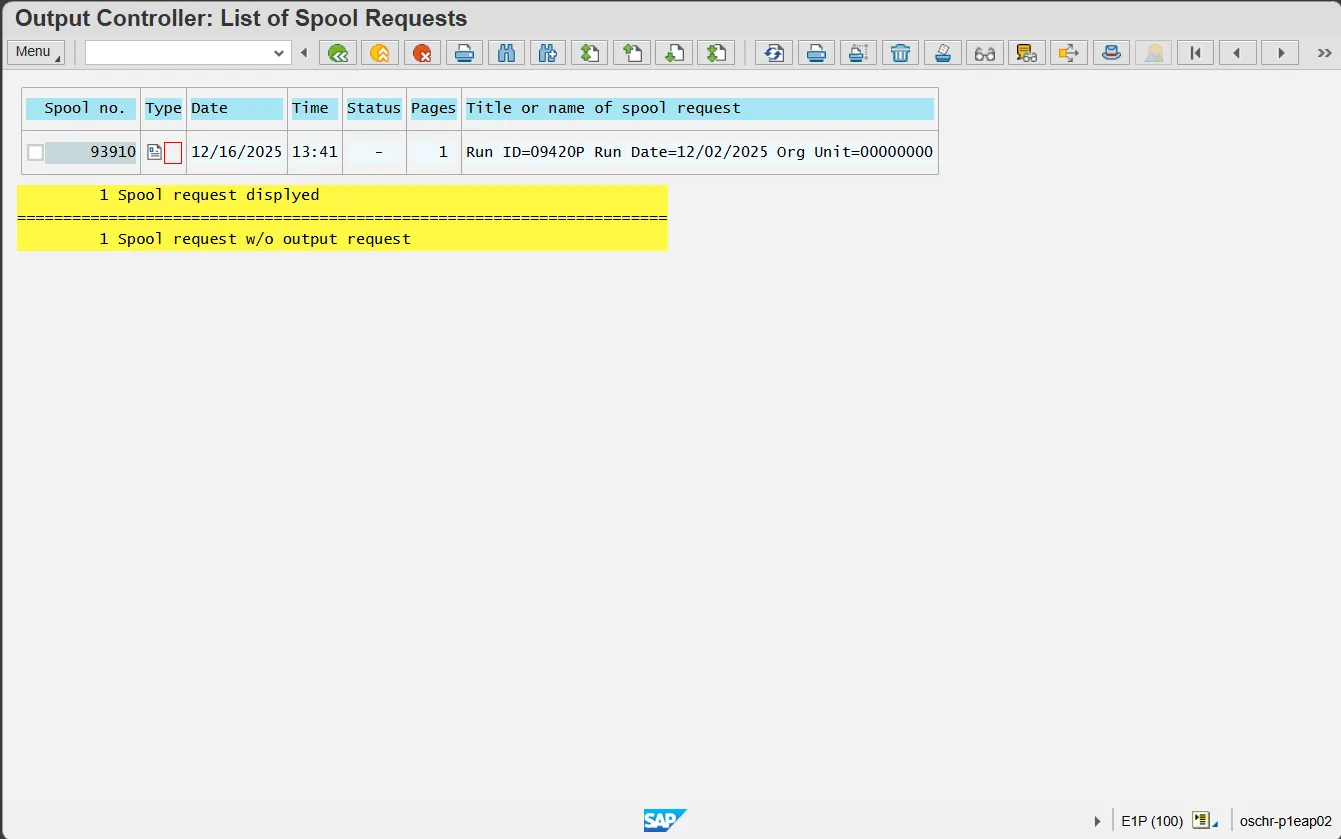
Output Controller: List of Spool Requests
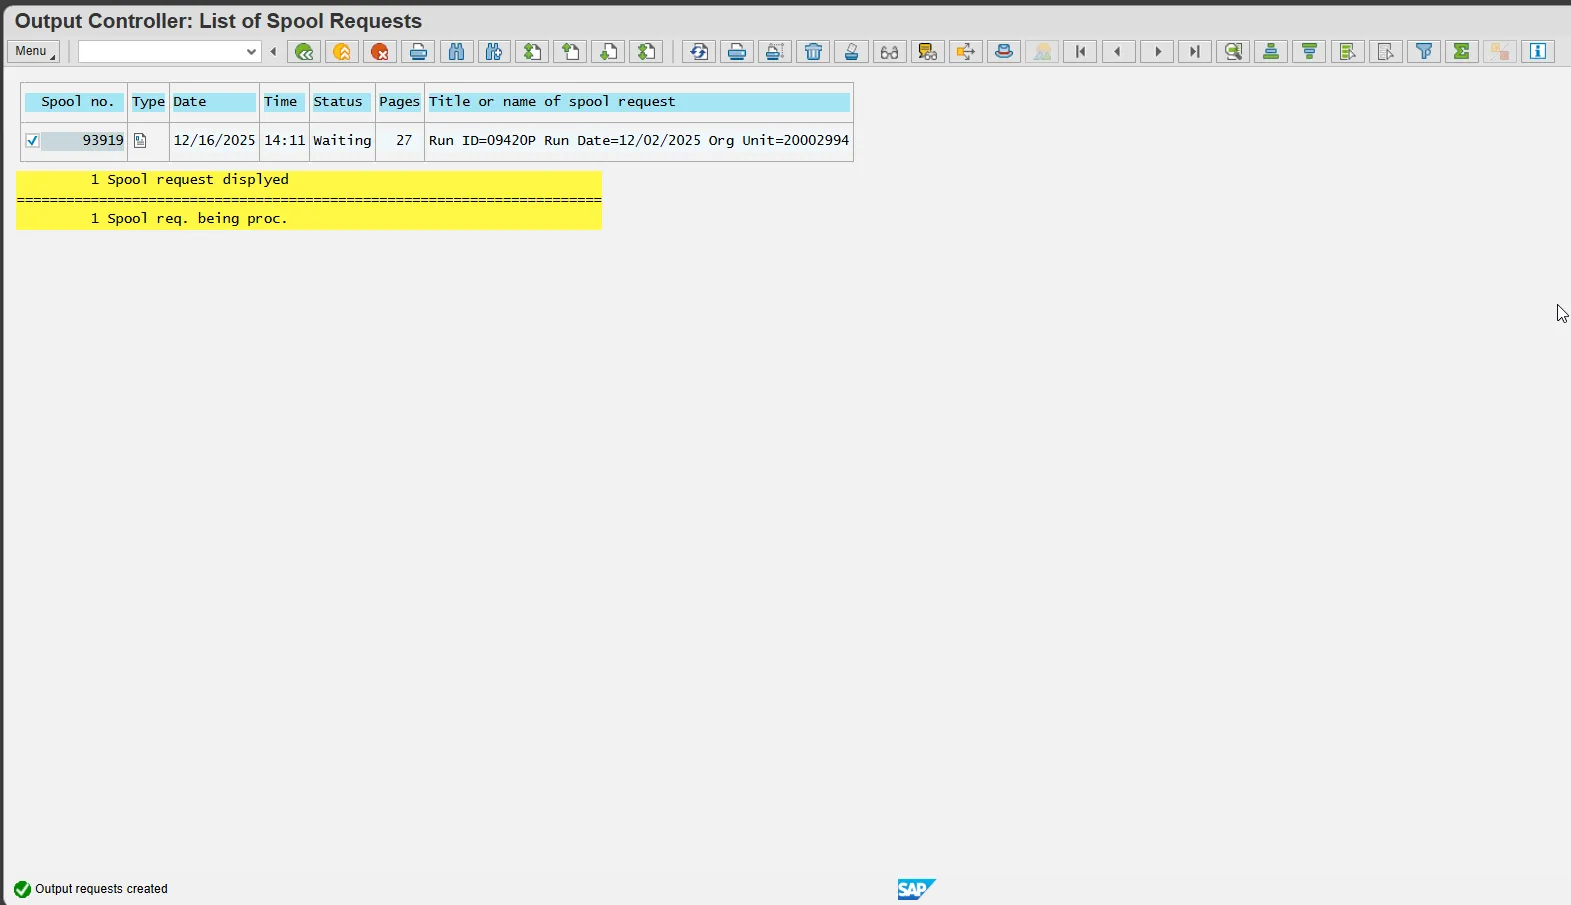
Click Spool no. checkbox.
Click print icon (or Ctrl+Shift+F8).
Output Controller: List of Spool Requests

Click Back (or F3) button.
The system task is complete.
Sorting
The program will sort the remuneration statements using the following fields in order.
- First using the short description field of the Organizational Unit (12 characters). Each agency determined the values they wanted to capture in this field. Usually the first two digits indicate the agency. For example: If one looks at the Best Shared Services organization in OSC it looks as follow.
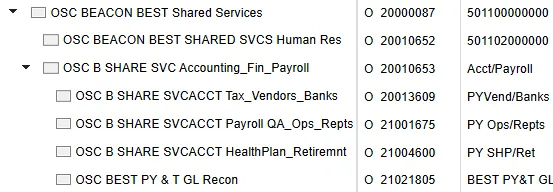
In the example above the short description for OSC BEST Shared Services is 501100000000.
- Secondly the statements will be sorted by the Last Name of the employees in each Org Unit in alphabetical order.
Setting up and using variants for Mass printing purposes:
A. Setting up the variant.
Step 1: Once you have gathered the data you want to use for printing the Remuneration statements in your Agency you enter it into the selection screen (after you have entered T-Code ZPYR001).
In the example below you have decided you want to print the Remuneration statements for all employees in Org Unit (# 12345678 and all the subordinate Org Units). You have also received the Run Date and Identification detail from BEST Shared Services, namely 03/12/2008 and 07525P.

Step 2: Since you will always be printing the Remuneration statements for all the employees in this Org Unit (# 12345678 and all its subordinate Org Units) you want to save these values as a variant so that you do not have select these values every time you run the report. To do this hit the Save button at the top of the screen. The following screen will appear.
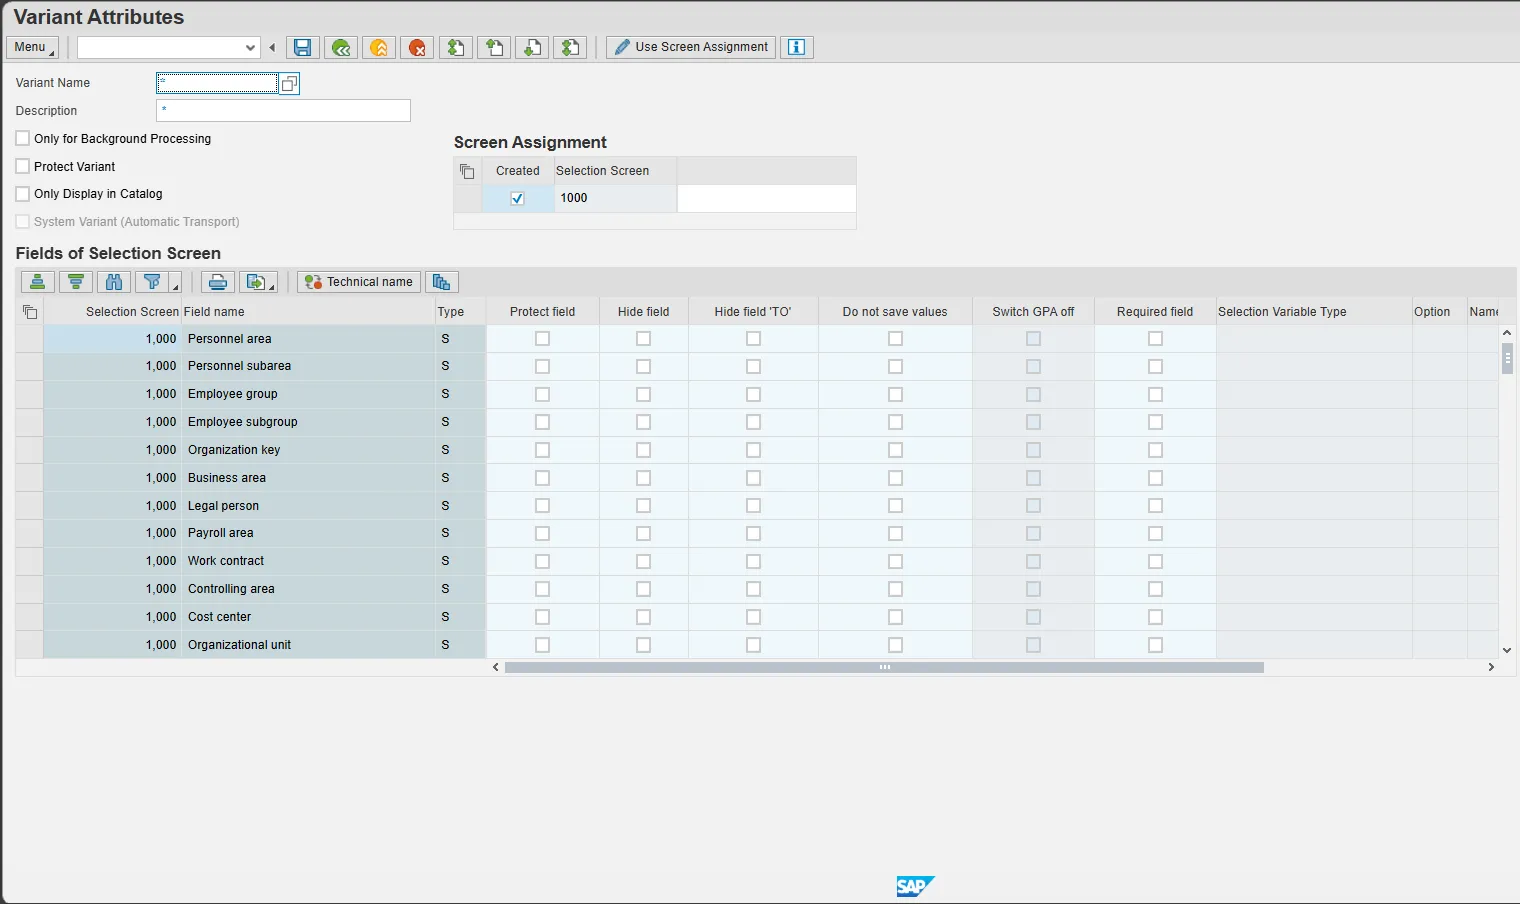
Now you have to enter the Variant attributes so that you (or other co-workers) will recognize this variant in future when they want to use it. You have to complete the following fields:
- Variant Name (Use a naming convention for your agency / group)
- Meaning (Give a description of the content of the variant)
Note: Since the first two fields in the report are required you have to complete them to save the variant. But since these two fields will change every pay period (you will get new values to enter) you may not want to save them permanently in your variant. SAP has a way of saving a field without values (at the bottom of the Variant Attributes screen).
Step 3: Complete the Variant Name and Meaning fields, mark the checkboxes for ‘Do not save values’ next to the ‘Run Date’ and ‘Identification’ fields and hit the Save button again.

Note: You have to scroll down to find the 2 applicable fields (Run Date and Identification) in the list of fields.
Step 4: You will get a message at the bottom of the screen that the variant (Name) has been saved.
B. Using the variant.
Next time you want to use this variant to print remuneration Statements you can access it as follow.
Step 1: Enter T-Code ZPYR001 to a start the program.
Step 2: Click on the ‘Get variant’ icon. The next screen will appear.
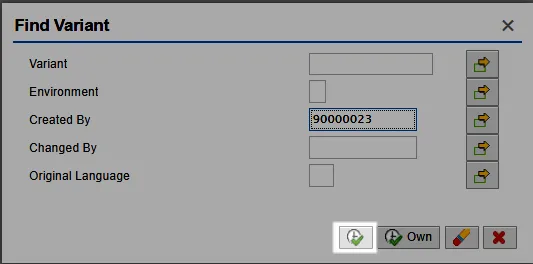
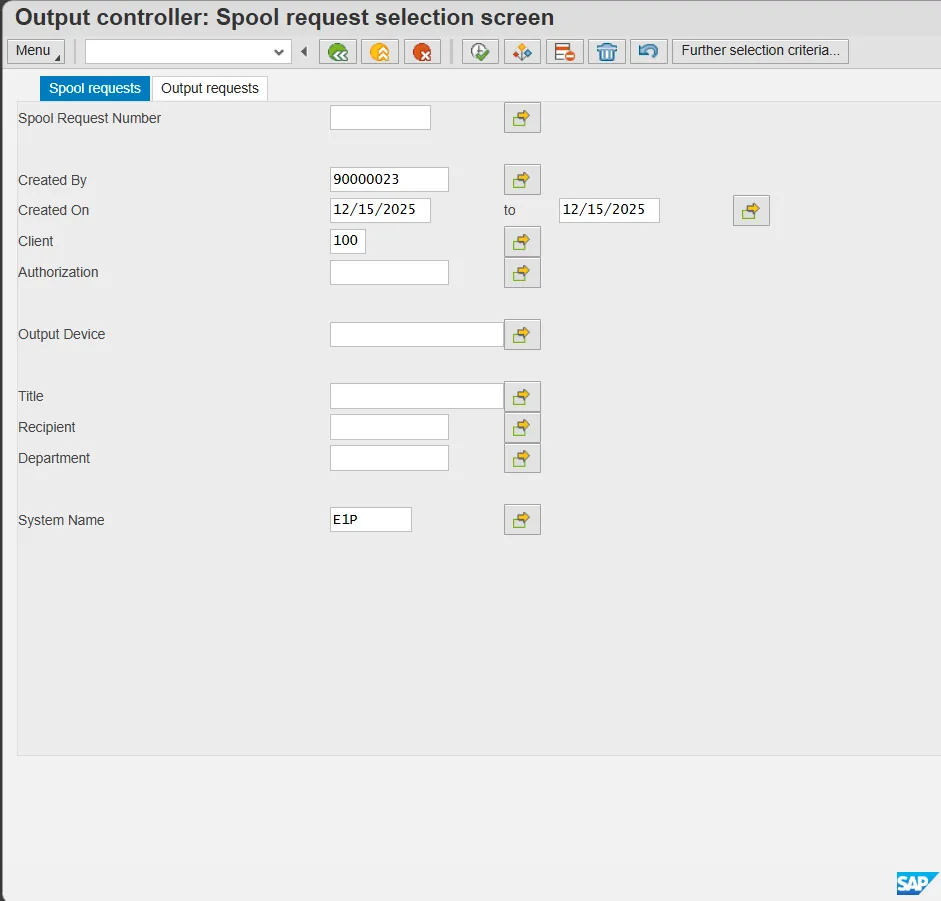
The field ‘Created by’ will contain the User Name of the person who logged in to SAP to execute the program (in this example it is 90000023). If you want to see the variants that this person has created you will simply hit the Execute button. However, if you want to see ALL the variants you have to remove the User Name as it acts as a filter. That way you will see variants created by other users as well.
Step 3: Hit the Execute button and you will see a list of all existing variants.
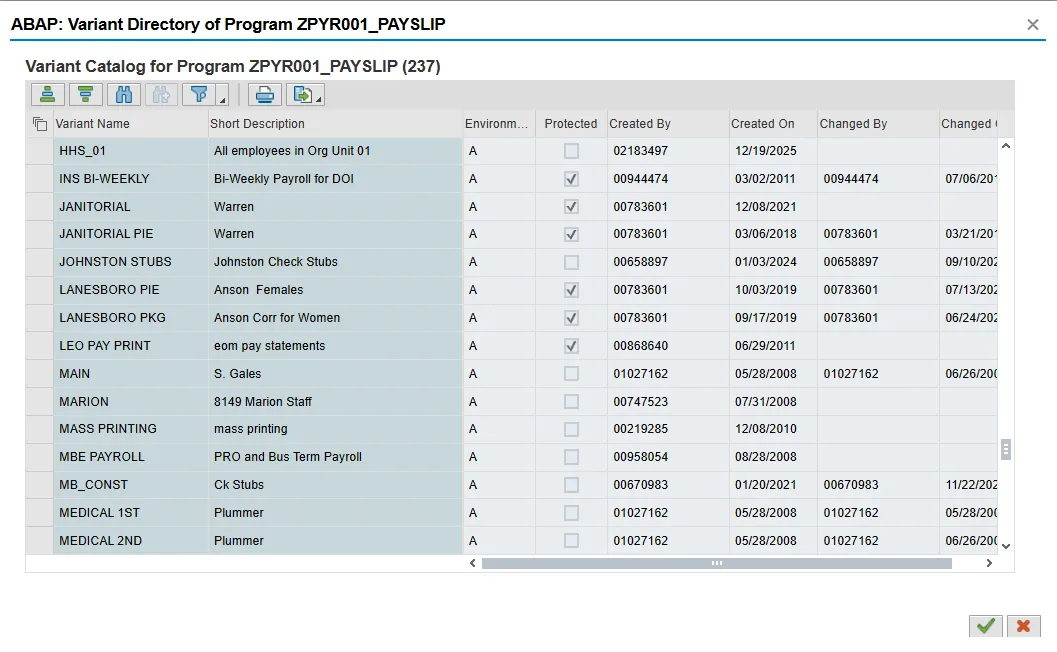
You can see the variant that we saved at the top of this list (you may have to scroll down to find your variant if there is a long list).
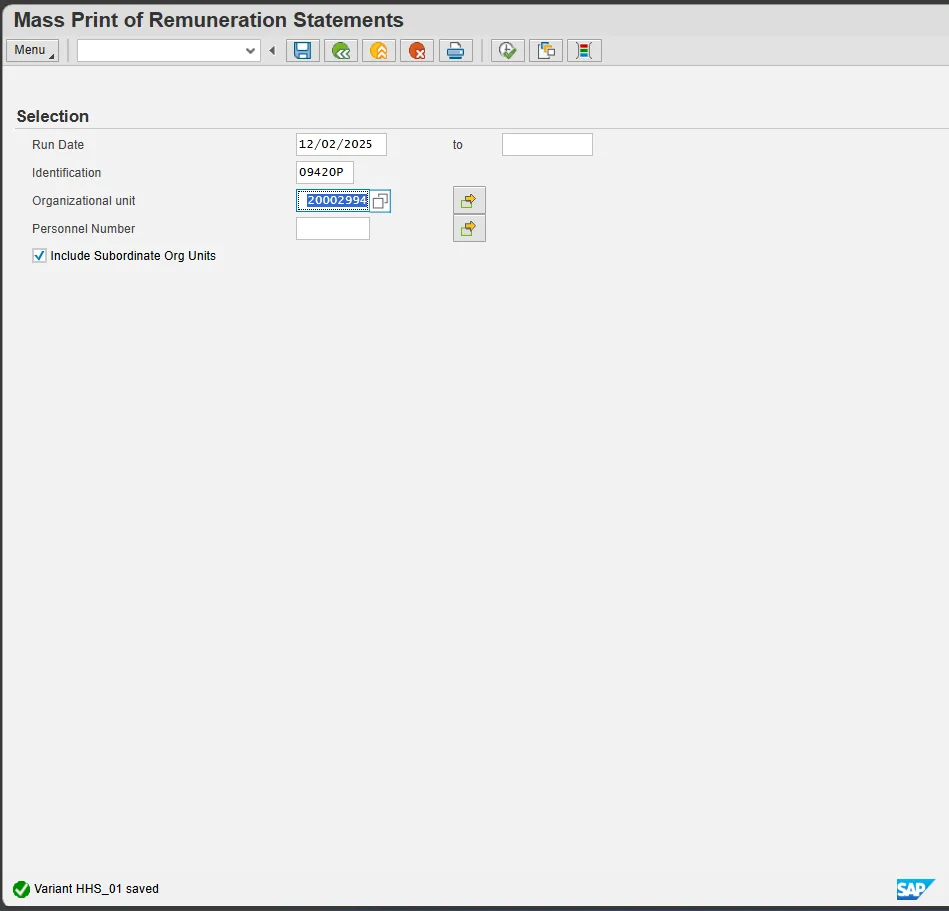
Step 4: Select the variant by clicking on it (will highlight in yellow), and then hit Enter. The values you have saved will default into the selection screen – see below.
Note how the first two fields are empty (since we saved the variant without values) but that the Org Unit field contains the value we selected and the checkbox to include subordinate Org Units is also selected.
All you have to do is to enter the Run Date and Identification and you are then ready to print the Remuneration Statements.