Purpose
The purpose of this Business Process Procedure is to explain how to create time specification/employ periods in the Integrated HR-Payroll System.
Trigger
Agencies should create only for employees who are New Hire or Non-Beacon to Beacon Actions with prior state service. For corrections, submit a ticket to BEST.
Business Process Procedure Overview
A new employee is hired with prior creditable state service.
- Agency HR verifies prior state service.
- Agency HR creates IT0552 Time Specification/Employ Period
- Create a separate IT0552 for each service record.
For corrections, contact BEST.
Tips and Tricks
If you do not know if a previous employer is a State government agency or university, you can check the List of Credible Service Employers for Longevity State Service which can be viewed using the following link: List of Creditable State Service Employers
This document is located on the OSHR website in the State Personnel Manual-Salary Administration Section on the Longevity Policy Resources page. The Longevity State Service list includes a column that identifies the category of each employer.
- Employers with categories of State Agency or State University System would not be treated as new hires.
- Employers with categories of Local SPA, Community College, or Public School System would be treated as new hires.
If the specific employer in question is not listed on the creditable service list but you think it is a State agency or University, you should contact your assigned OSHR HR Consultant with the Recruitment, Selection and Salary Administration Division to confirm the State government employer status.
Access Transaction
Via Menu Path: Your menu path may contain this custom transaction code depending on your security roles.
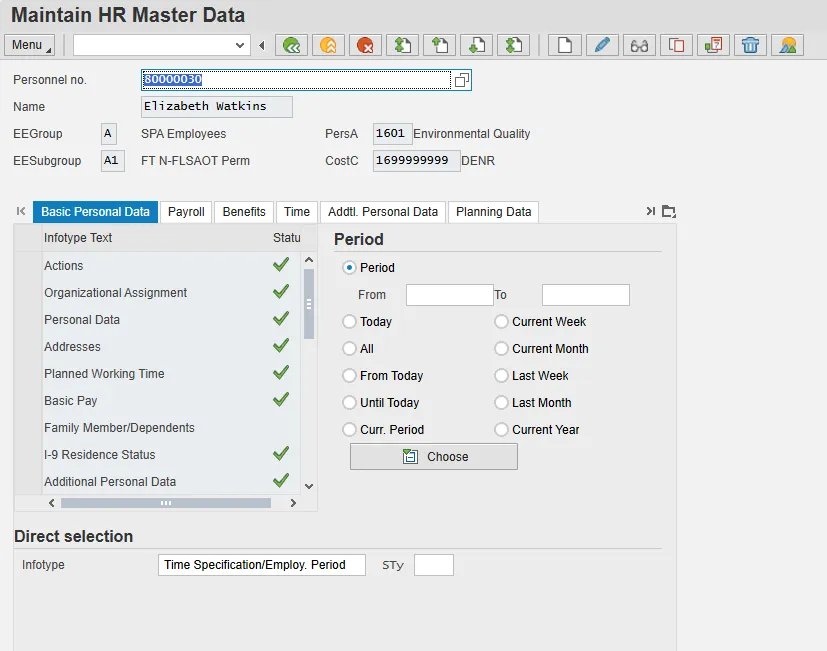
Via Transaction Code: PA30
Procedure
There are 8 steps to complete this process.
Step 1: Update the following field:
| Field Name | Description | Values |
|---|---|---|
| Command | White alphanumeric box in upper left corner used to input transaction codes |
Enter value in Command. Example: PA30 |
Step 2: Click the Enter button.
Information: You may want to enter this transaction code in your Favorites folder.
- From the menu button at the top of the screen, choose Favorites > Insert Transaction.
- Type in PA30.
- Click Enter.
To see the transaction code displayed in front of the link in your favorites, from the menu at the top of the screen:
- Choose Menu > Extras > Settings.
- Place a check next to Display Technical Names.
- Click Enter.
Critical! Agencies should create only for employees who are New Hire or Non-Beacon to Beacon Actions with prior state service.
Step 3: Update the following fields:
| Field Name | Description | Values |
|---|---|---|
| Personnel No. | Unique employee identifier |
Enter value in Personnel No. Example: 80000030 |
| Period | The start and end dates respectively of the person and data selection period. | Click All. |
Step 4: Update the following fields:
| Field Name | Description | Values |
|---|---|---|
| Infotype | Unique number identifying the type of data to be displayed |
Enter value in Infotype Example: 552 |
Step 5: Click the Create button.
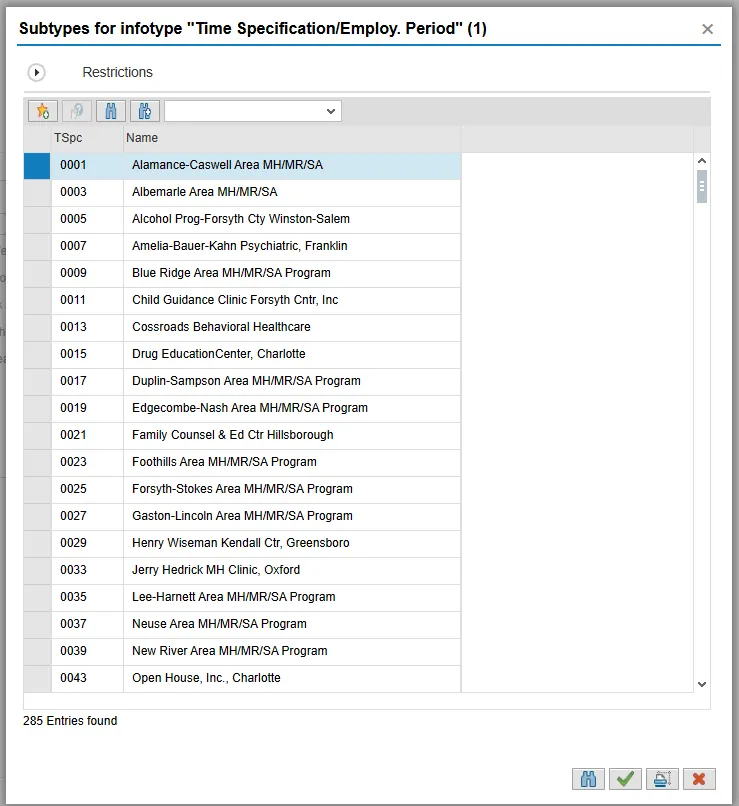
Step 6: Select the appropriate subtype.
Step 7: Click the Enter button.
Step 8: Update the following fields:
| Field Name | Description | Values |
|---|---|---|
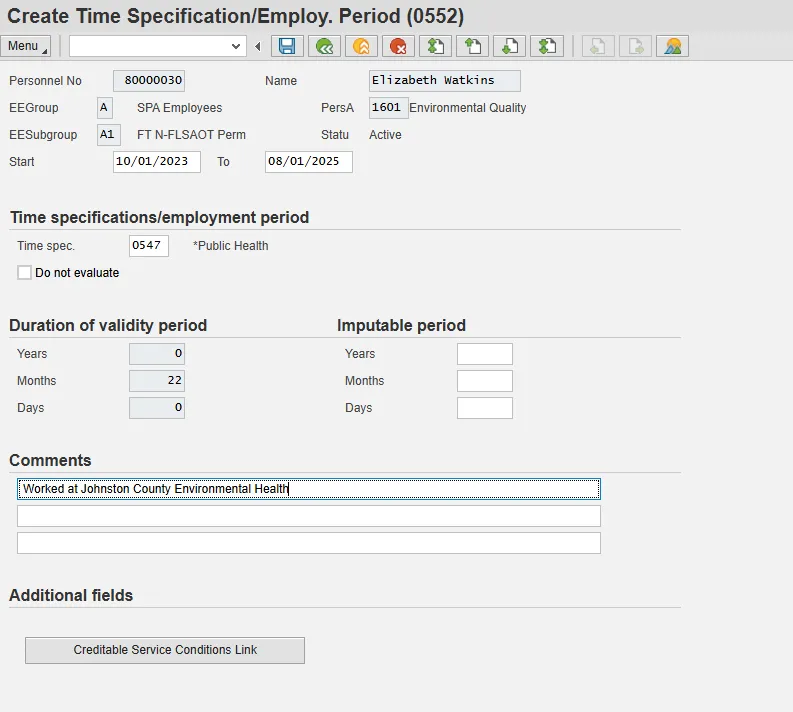
| Start | Begin date of employment |
Enter the value in the Start field. Example: 10/01/2023 |
| To | End date of employment |
Enter the value in the To field. Example: 08/01/2025 |
| Comments | Place of Employment |
Comments Place of Employment Enter the appropriate comments in the Comments field. Example: Worked at Johnston County Environmental Health |
| Additional fields | Creditable Service Conditions Link | View OSHR List of Creditable Service Conditions List with additional information. |