Purpose
The purpose of this Business Process Procedure is to explain how to change position extended duty rate in the Integrated HR-Payroll System.
Trigger
There is a need to change the extended duty rate for a position.
Business Process Procedure Overview
Extended Duty (IT9016) - Positions that are eligible for extended duty compensation should have this Infotype created to indicate that eligibility. OSHR policy provides for special compensation under "extended duty" situations for certain medical classes.
- Attendance Type 9510 (Additional Hours) - Should be used on the time sheet to indicate applicable hours.
Tips and Tricks
See the OM Tips and Tricks Job Aid for a full listing of Best Practices and Tips & Tricks. The job aid is located on the Training HELP website.
- Copy is to be used most of the time. This will delimit the existing record and create a new record with the start date given. Copying keeps a history of the old record.
- Change is to be used only if you make a spelling or other simple error and want to change the record. There is no history tracked on what the record used to be if you use the change functionality.
OSHR Policy
Procedure
There are 13 steps to complete this process.
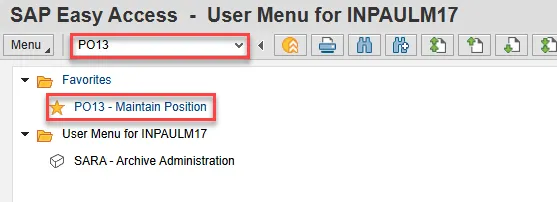
Step 1. Type PO13 in the command field (1). Hit enter on your keyboard (2). Also, you can double click it from your favorites folder if you’ve previously saved it there (3).
Step 2. Input the position number that needs updating. This document will use 60087078 from the OSC training environment.
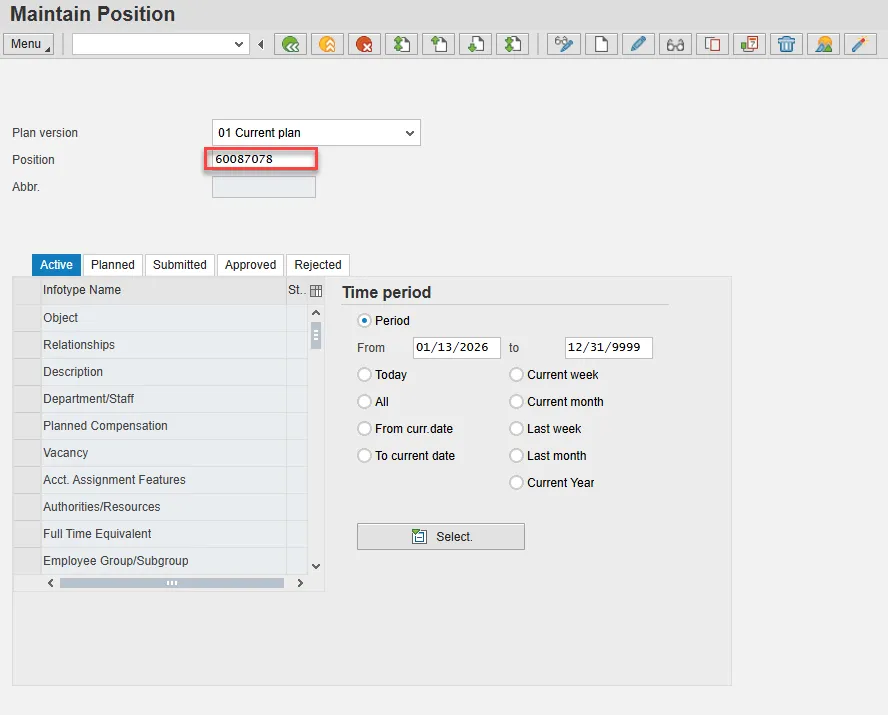
Step 3. Click the Enter button and verify the position displayed is the one you need to change.
Alert! Be vigilant on this step. A position number may already be present when you access the transaction, so be sure to review the position number and name to ensure they are correct.
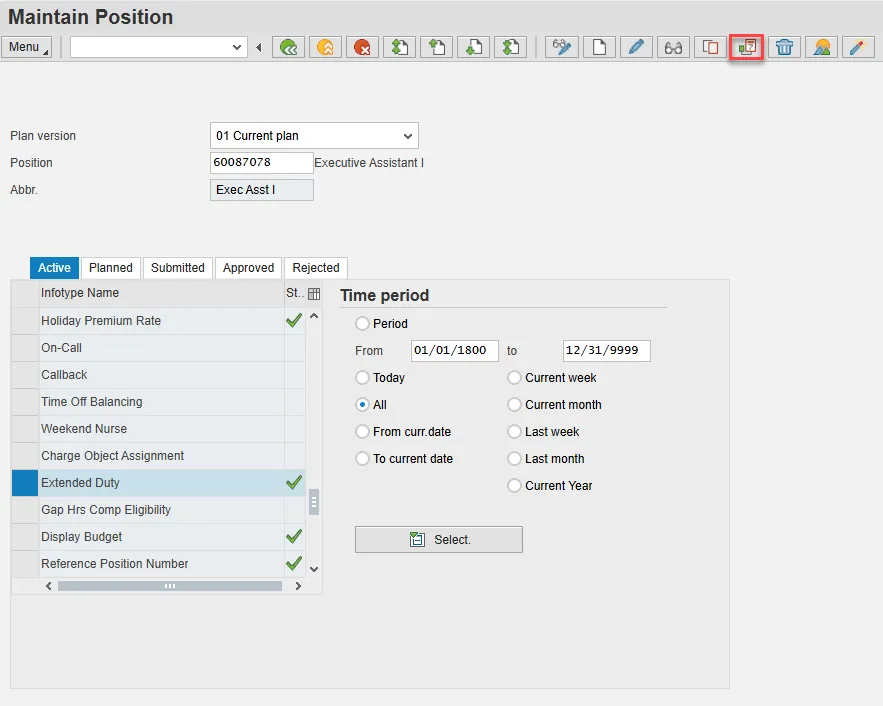
Step 4. Within the Active tab:
- Scroll down the list of position infotypes and click the square in front of the Extended Duty row. There may or may not be a green check already present.
- In the Time Period area click into the All radio button and then click Select.
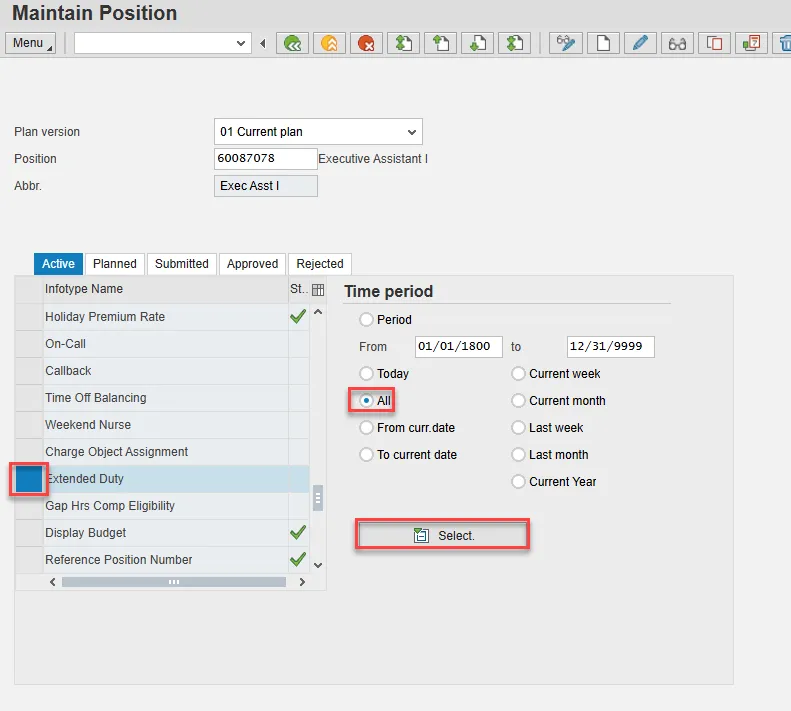
ATTENTION! If a new eligibility needs to be created or a rate adjusted, continue to step 5. If a current eligibility needs to be ended, skip to step 8.
Step 5. Click the Create button.
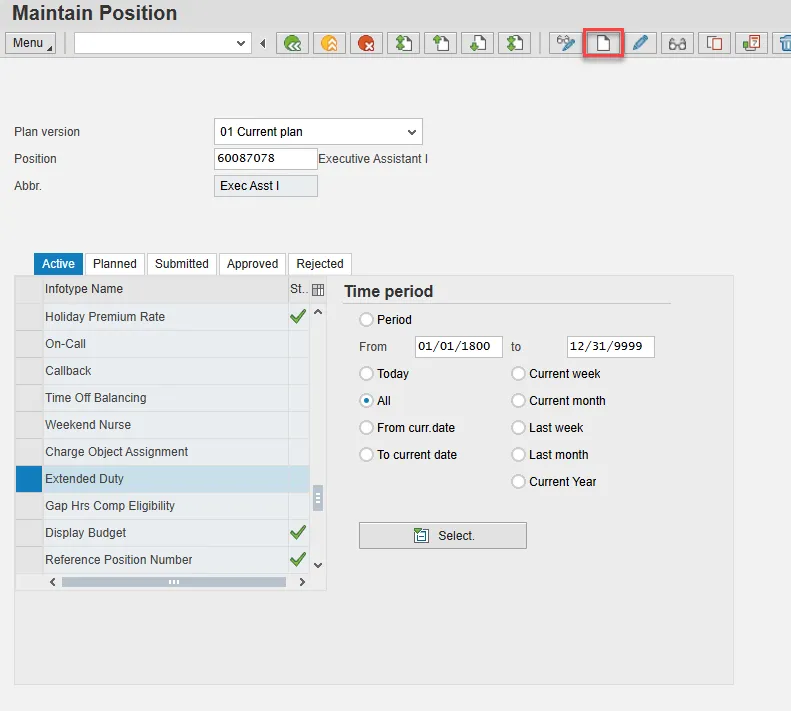
Note: Using the create button will work even if a record already exists.
Step 6. Enter the start date of the new record and update the Extended Duty Rate field with the appropriate salary.
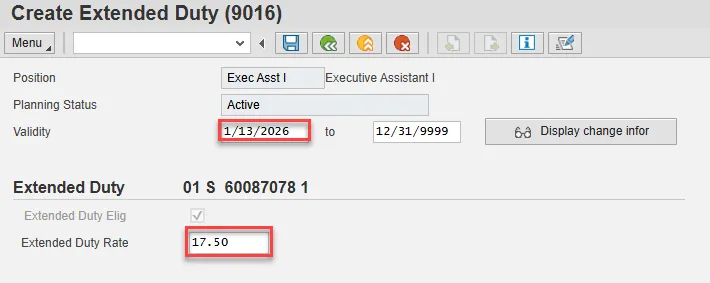
Step 7. Click the Save button. If updating a record, click Yes to delimit the previous record. No pop-up will appear if there was no previous record.
Proceed to step 11.
Step 8. (Begin at this step to end the Extended Duty for a position.)
Click the Delimit button.
Step 9. In the To field, enter the last day in which the position was eligible for the Extended Duty Rate.
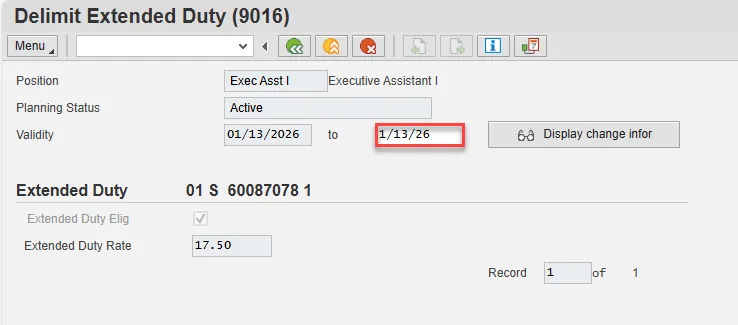
Step 10. Click the Delimit button.
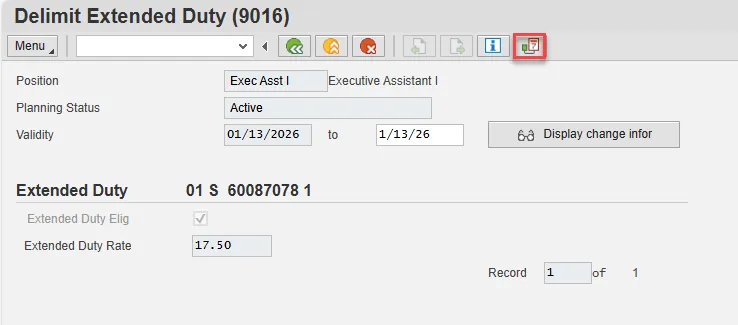
Step 11. Review your work by ensuring that the Callback infotype is selected and click the Overview button.
A list of all Extended Duty Infotypes for the Position will be displayed, including the Validity Dates, eligibility, and the extended duty rate.
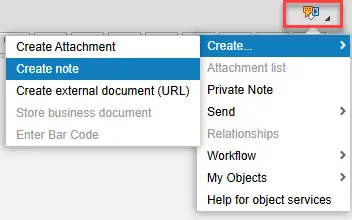
Step 12. Optional step: Include a note. Click on the right side of the Services for Object button. In the resulting drop-down menu, hover over the Create option and then choose Create Note.
Note: Although a note is not required when updating a position’s Overtime Compensation settings, OSC staff recommends that one be created, nonetheless.
Enter in today’s date and your name (or initials) and a brief note with information used to justify the change.
Click the Green check to save your note.
Step 13. Click the Back button.
The system task is complete