Purpose
The purpose of this Quick Reference Guide (QRG) is to provide a step-by-step explanation of how to View Purchase Orders in the North Carolina Financial System (NCFS).
Introduction and Overview
This QRG covers how to view purchase orders in NCFS which will enable you to view the purchase order.
View Receipts
To view purchase order in NCFS, please follow the steps below. There are 16 steps to complete this process.
Step 1. Log in to the NCFS portal with your credentials to access the system.
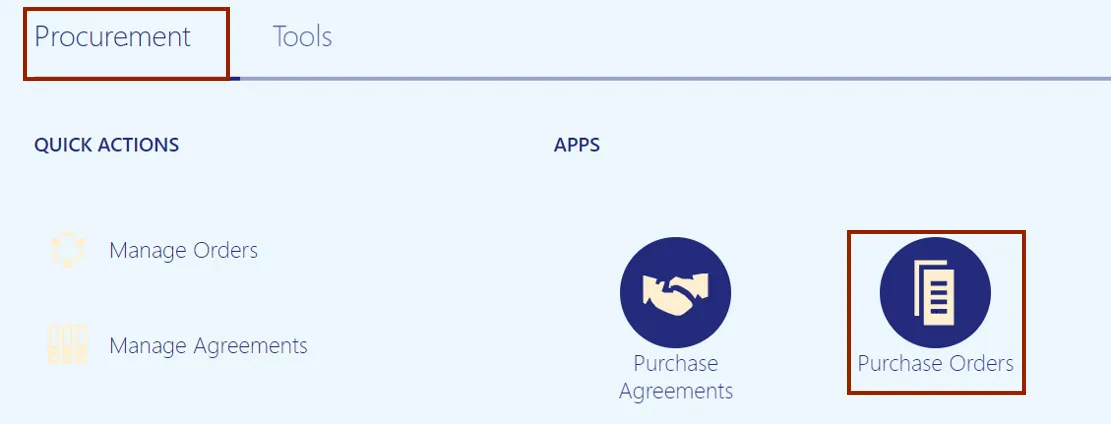
Step 2. On the Home page, click the Procurement tab, and then click Purchase Orders app.
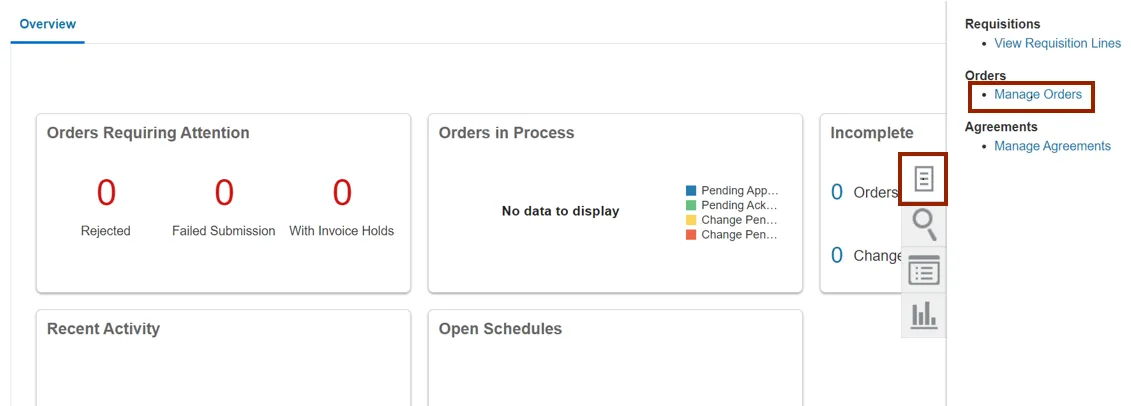
Step 3. The Overview dashboard displays, click the Tasks icon, and then click Manage Orders.
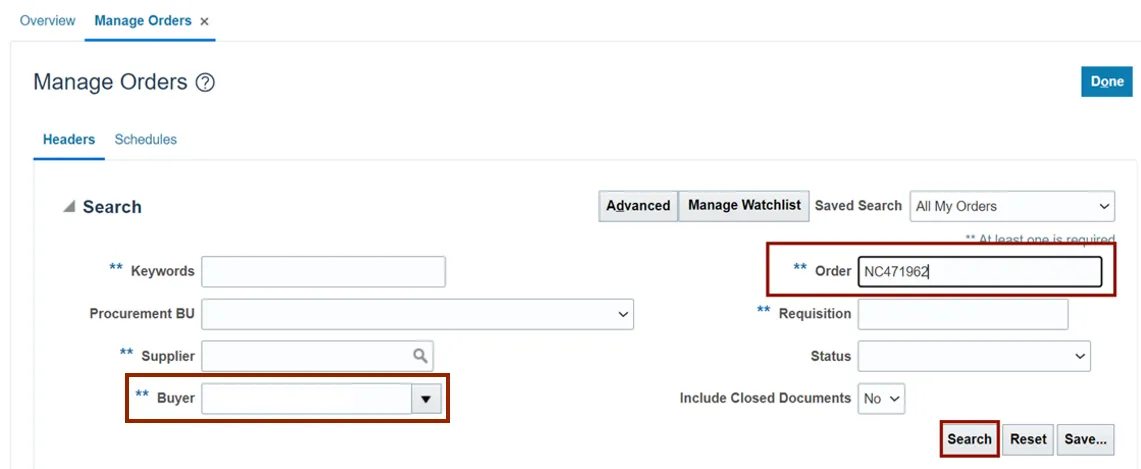
Step 4. The Manage Orders page displays. On the Headers tab, enter the Purchase Order number in the *Order field.
In this example, we choose NC471962 and click the Search button.
Note: Remove the Buyer field before searching as it defaults to the login username.
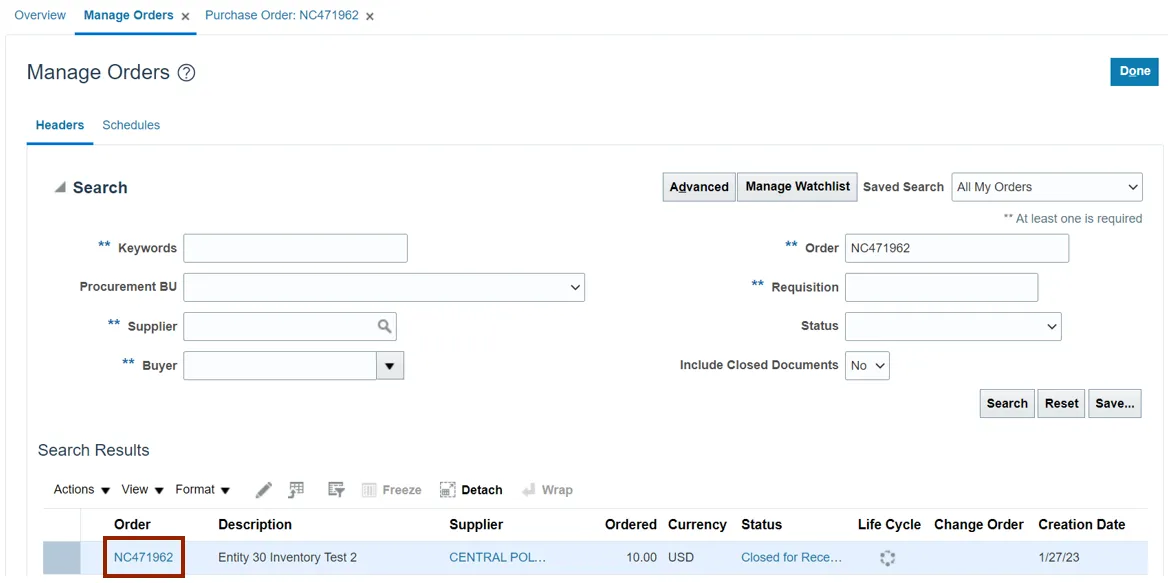
Step 5. The Order is displayed in the Search Results section. Click the Order link to view details.
- Click the small arrow button beside “View” and then choose “Columns > Show all” to view all PO data.
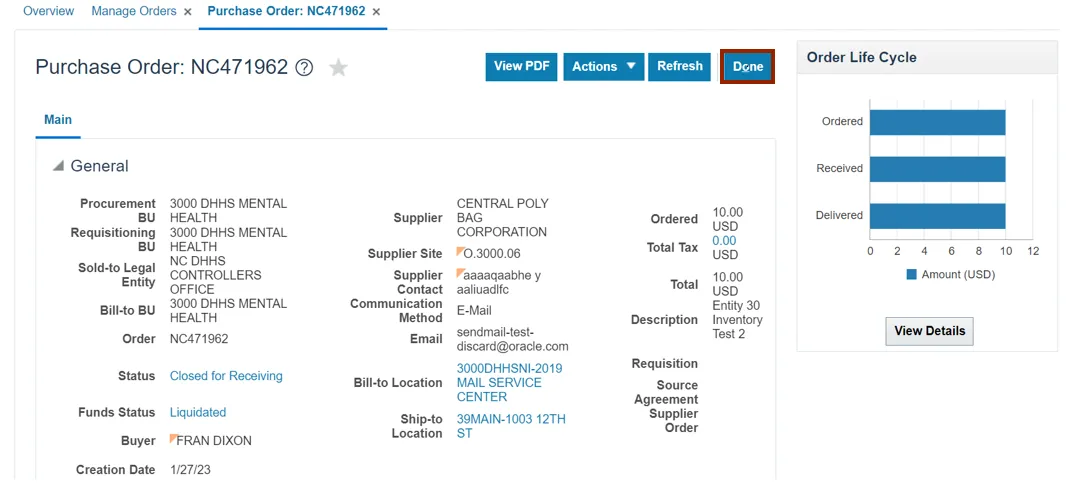
Step 6. The Purchase Order: NC471962 page is displayed. Validate the Purchase Order details and click the View Details button.
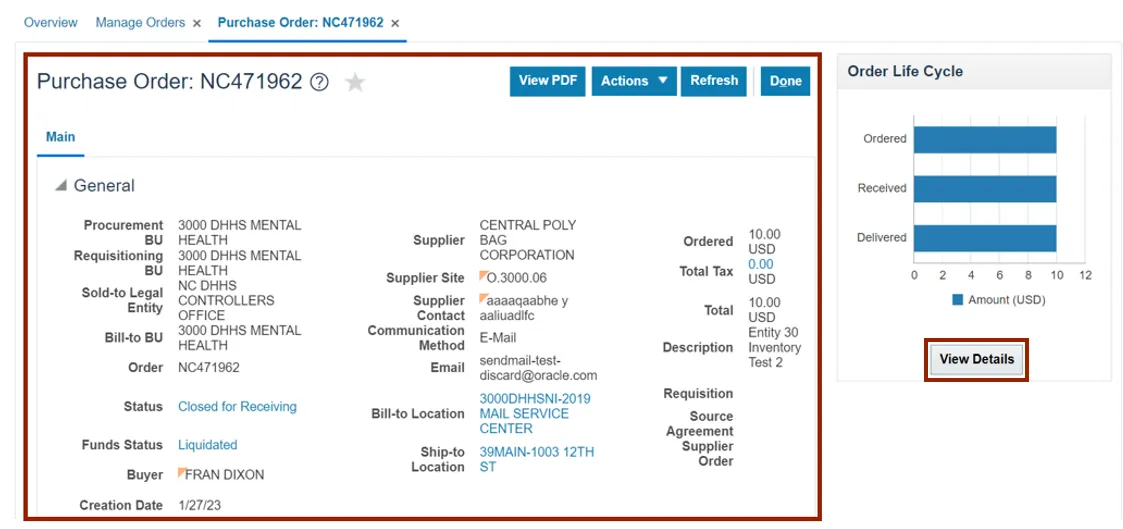
Step 7. View the Order Life Cycle details.
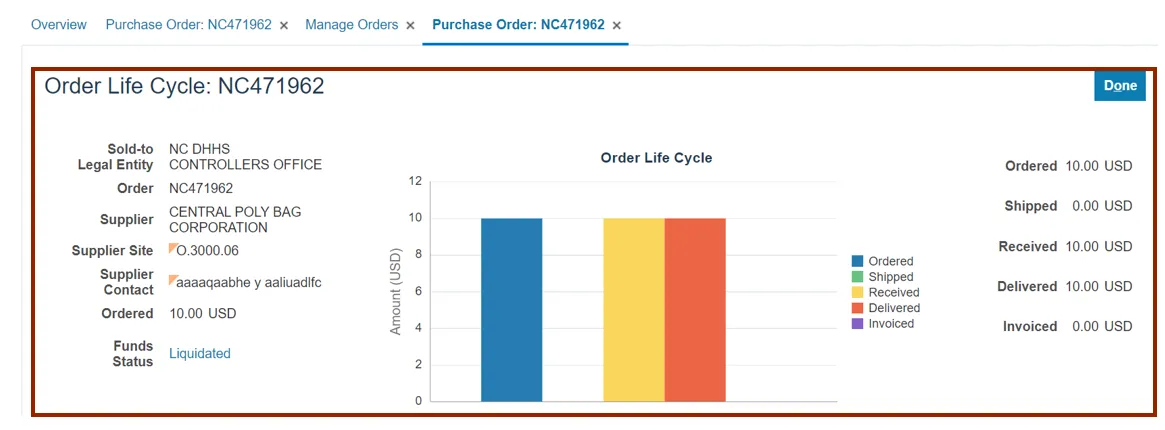
- Step 7a. The invoiced amount shown here is the total amount of the PO that has been invoiced.
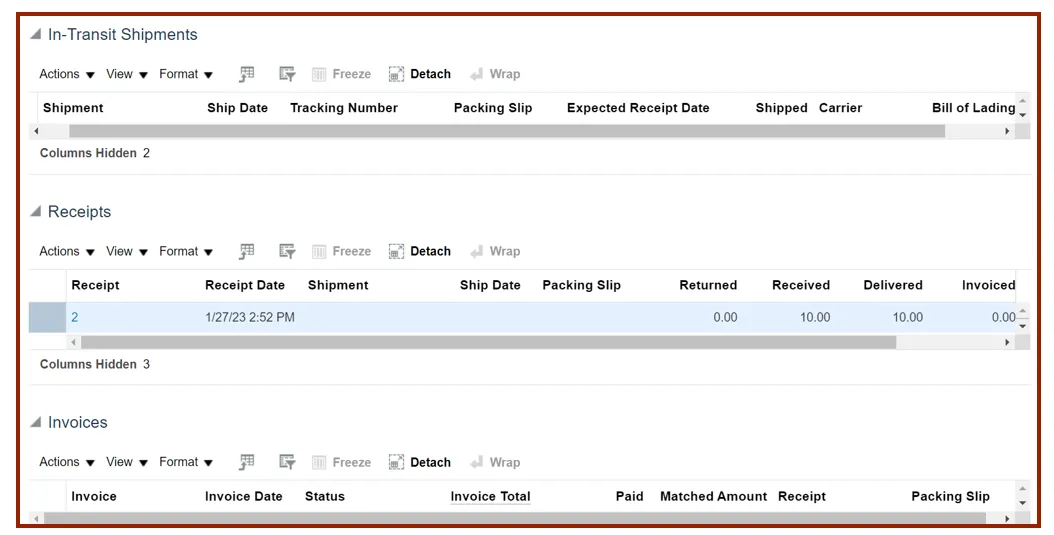
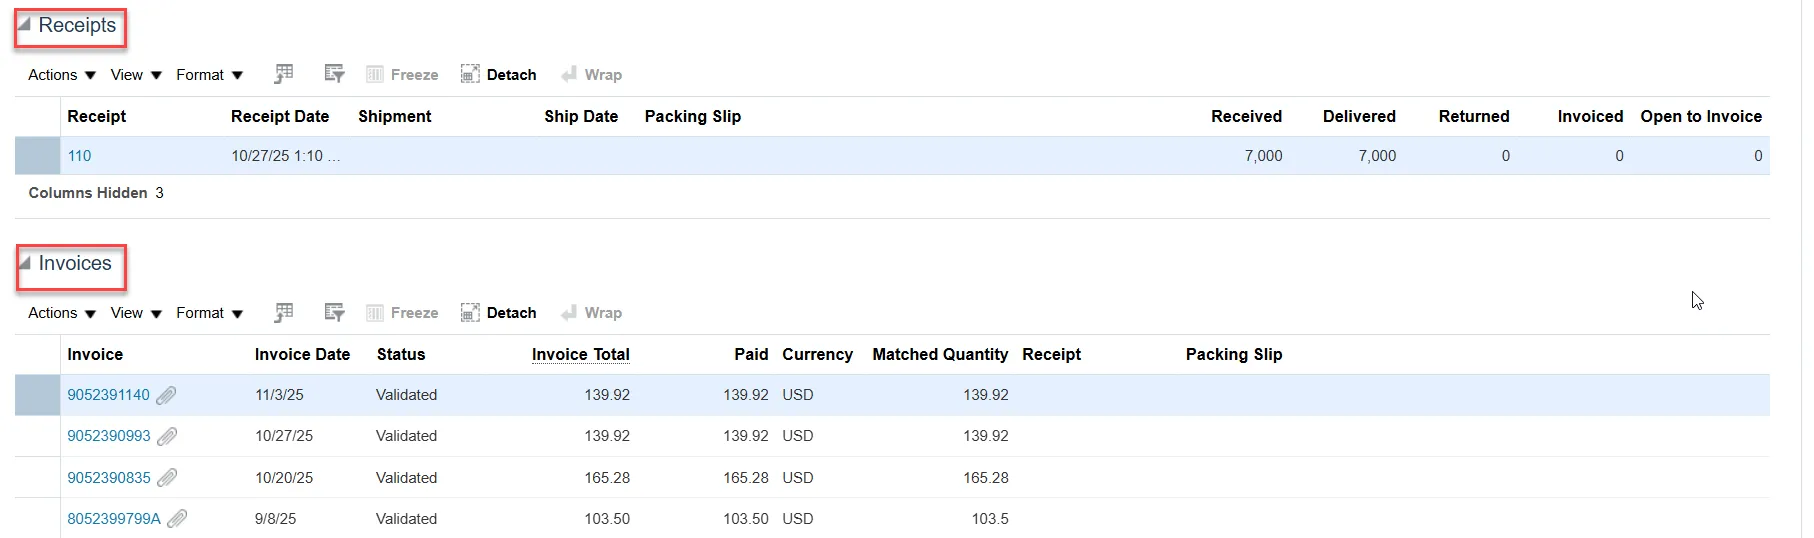
Step 8. Scroll down to view In-Transit Shipments, Receipts, and Invoices section.
- Click the small arrow button beside View and then choose Columns > Show all to view all shipment, receipt and invoice data.
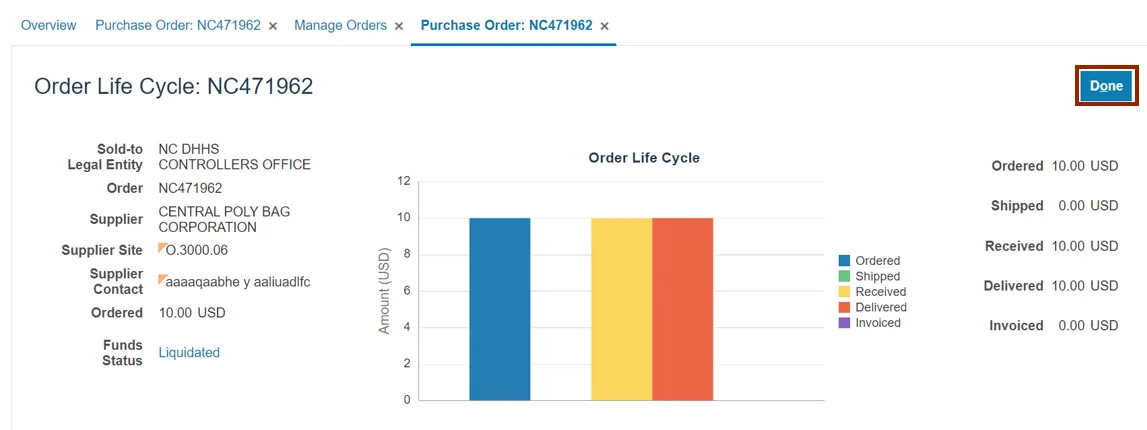
Step 9. Scroll up and click the Done button which will redirect you to the Purchase Order page.
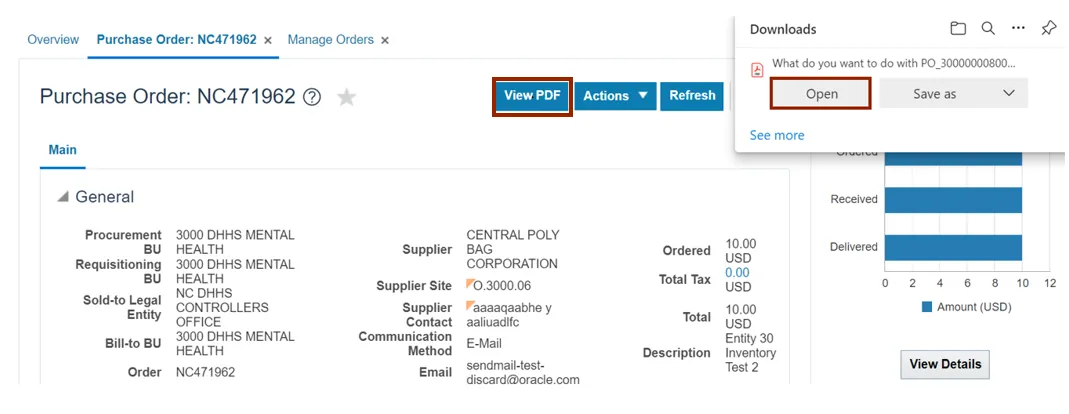
Step 10. Optionally, you can click the View PDF button to export and view the Purchase Order details in a PDF format. The Downloads pop-up appears, click the Open button.
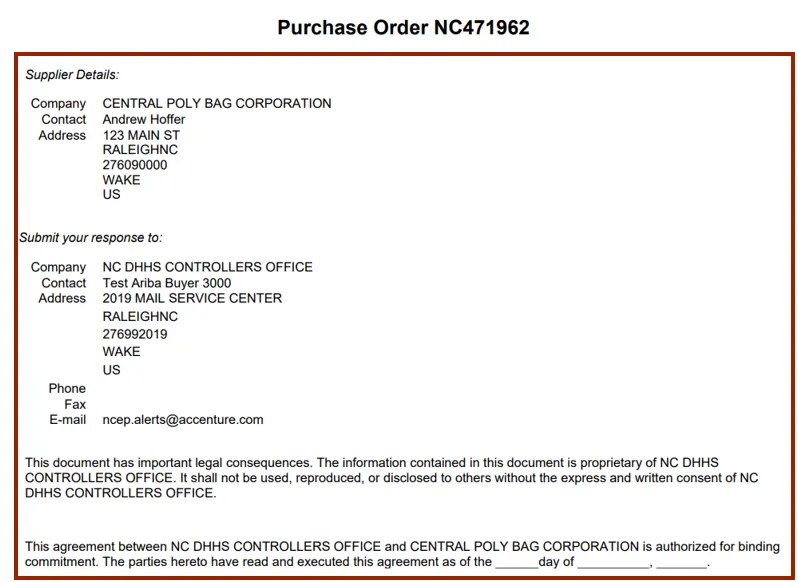
Step 11. The Purchase Order NC471962 details are displayed in the PDF format.
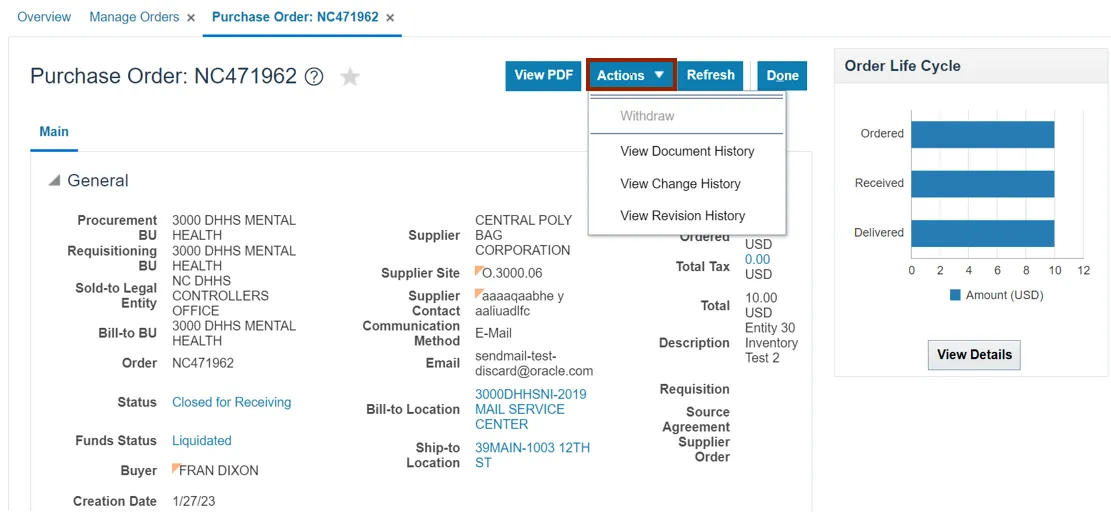
Step 12. Back on the Purchase Order: NC471962 page, click the Actions drop-drown choice list to view the actions that can be performed on the Purchase Order.
Step 13. Scroll down and validate the information in the Lines section.
- Click the small arrow button beside View and then choose Columns > Show all to view all line data.

Step 14. Validate the information in the Schedules section.
- Click the small arrow button beside View and then choose Columns > Show all to view all line data in the following steps.
- Step 14a. Click on the Life Cycle circle to view detailed information about a specific PO line.

- Step 14b. The invoiced amount shown here is the quantity that has been invoiced for the PO line.
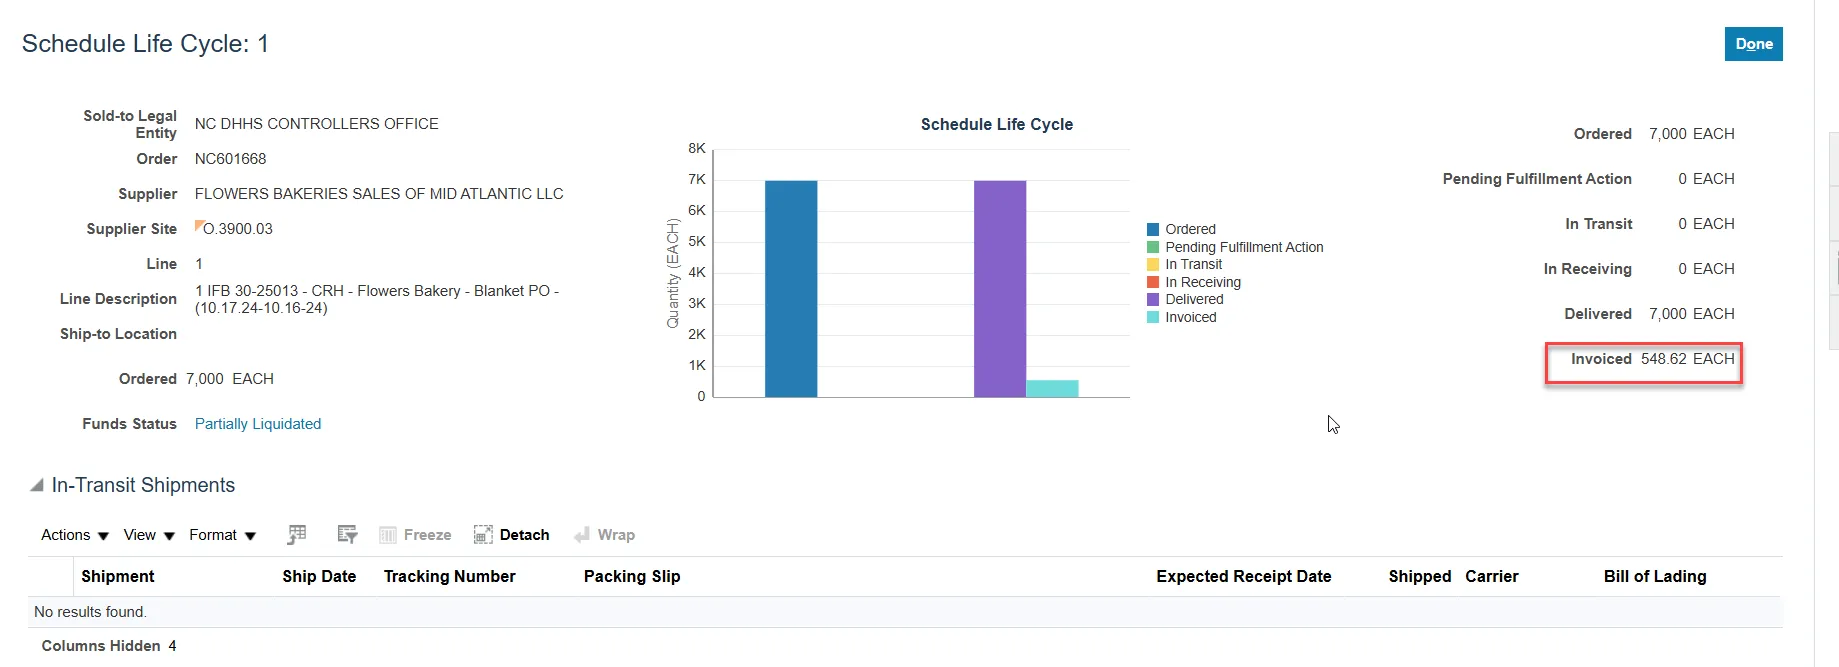
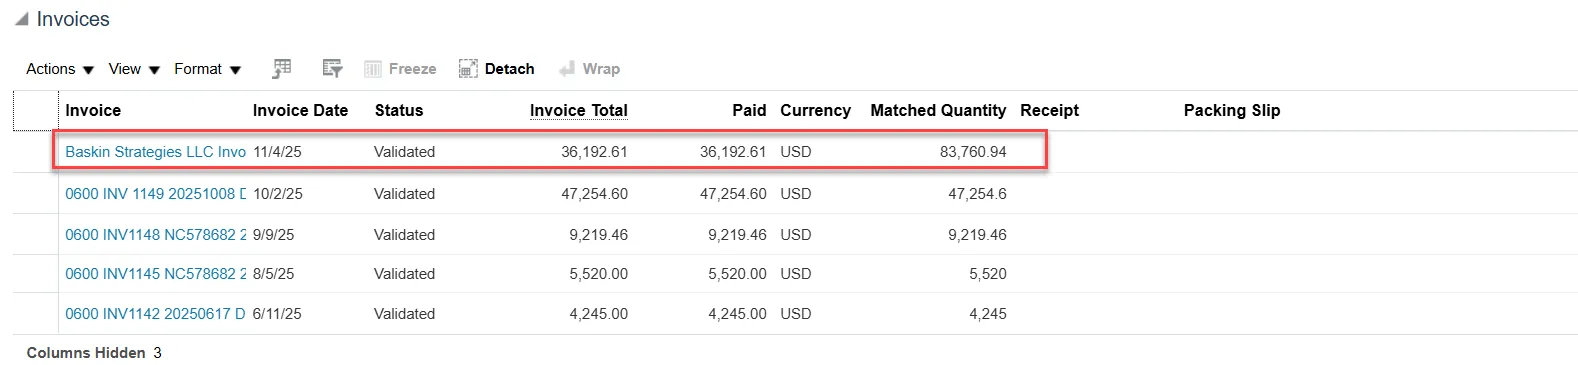
- Step 14c. Scroll down to see receipts and invoices that have been paid to the PO line.
Note: If you see the Invoice Total, Paid, and Matched Quantity are NOT the same amount, you will have a price/quantity exception that will need to be corrected. See QRG AP-34 Correct PO Matched Paid Invoices.
Step 15. Validate the information in the Distributions section.

Step 16. Scroll up and click the Done button once the PO is reviewed. This will redirect you to the Manage Orders page.
Wrap-Up
View purchase orders using the steps above for any purchase order that needs to be viewed and validated.
Additional Resources
- Web-Based Training (WBT)