Purpose
The purpose of this Business Process Procedure is to explain how to navigate the Pay Statement within the Fiori My Paystubs application.
Steps for Accessing My Paystubs
There are 19 steps to complete this process.
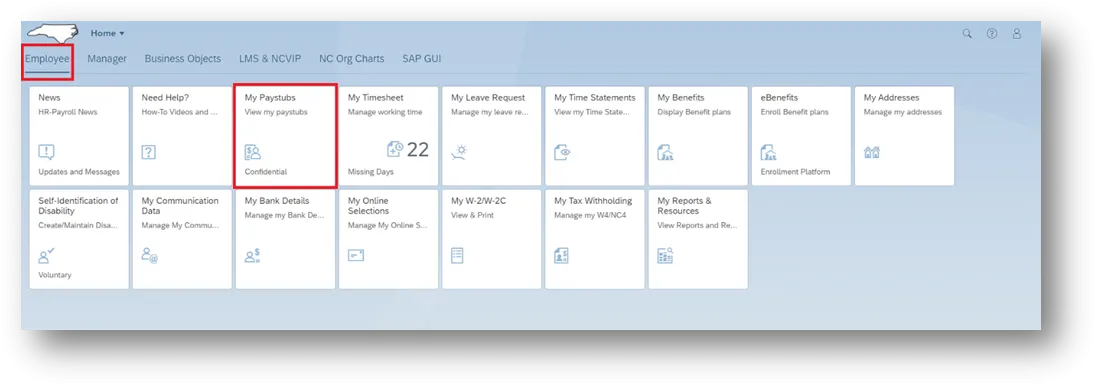
Step 1. Log into Fiori and select the My Paystubs application tile located on the dashboard under the Employee tab.
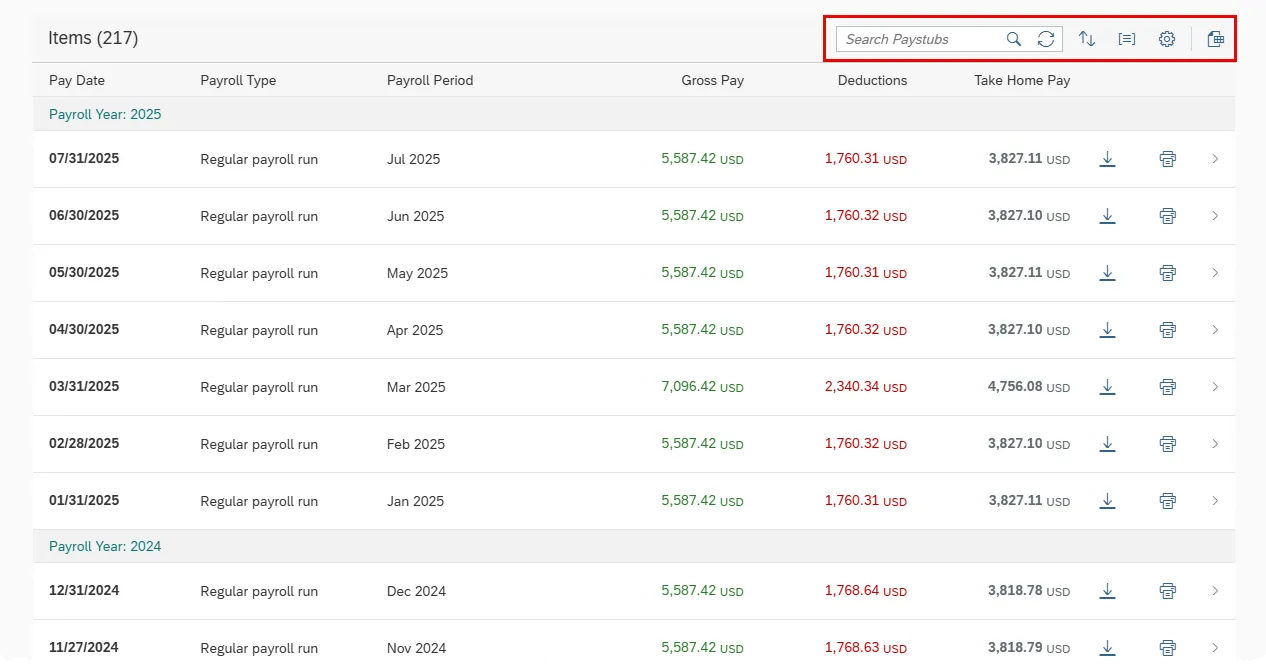
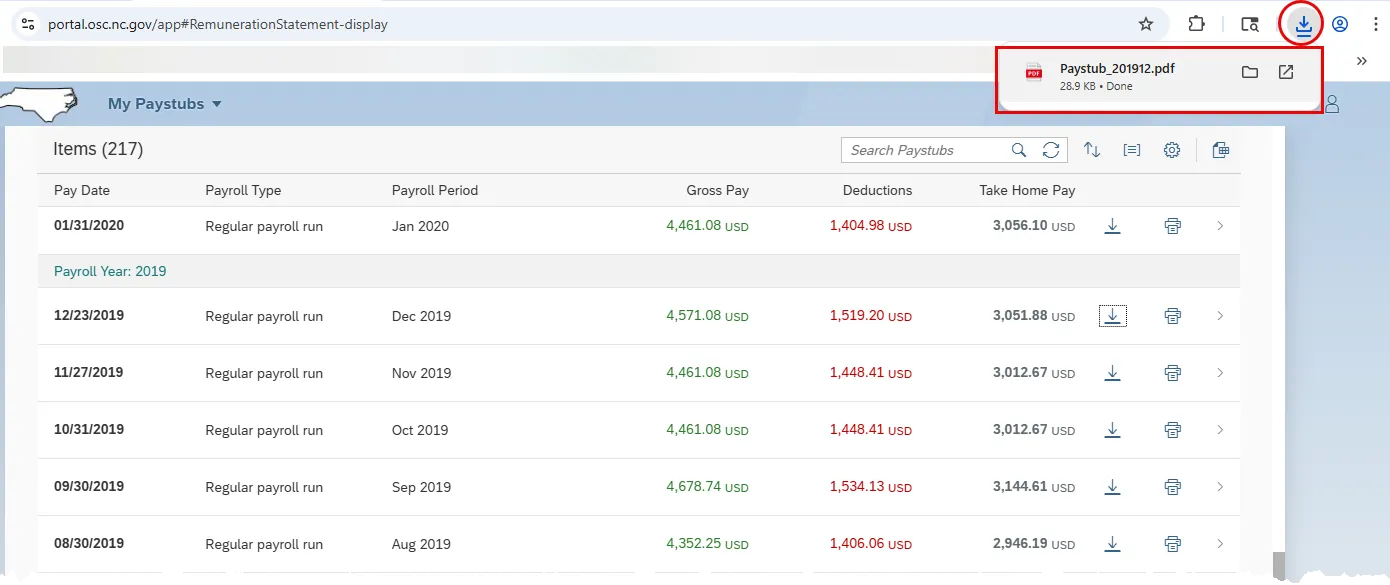
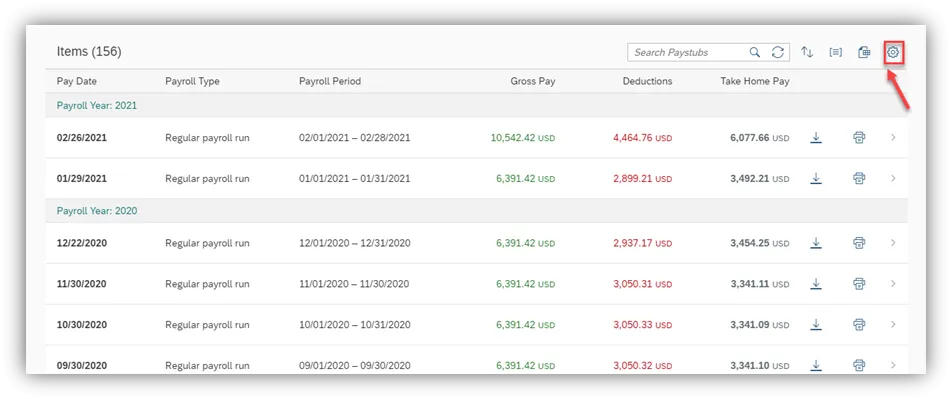
Step 2. A collection of all paystubs is displayed and can be viewed in detail using the navigation features on the upper right of the screen.
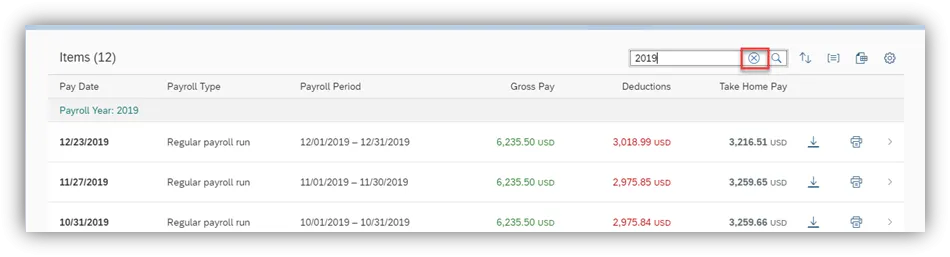
Step 3. To filter on a specific year of pay statements, go to the Search Paystubs field and type in a year. For example, type in “2019” and click Enter on your keyboard or click the Search magnifying glass icon.

Step 4. To delete the search criteria and go back to the full list, click the X in the Search field.
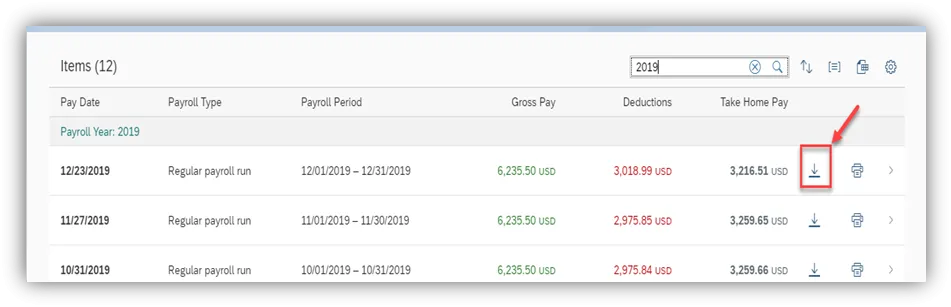
Step 5. To download a specific pay statement, click the Download PDF arrow in a column on the right side of the screen.
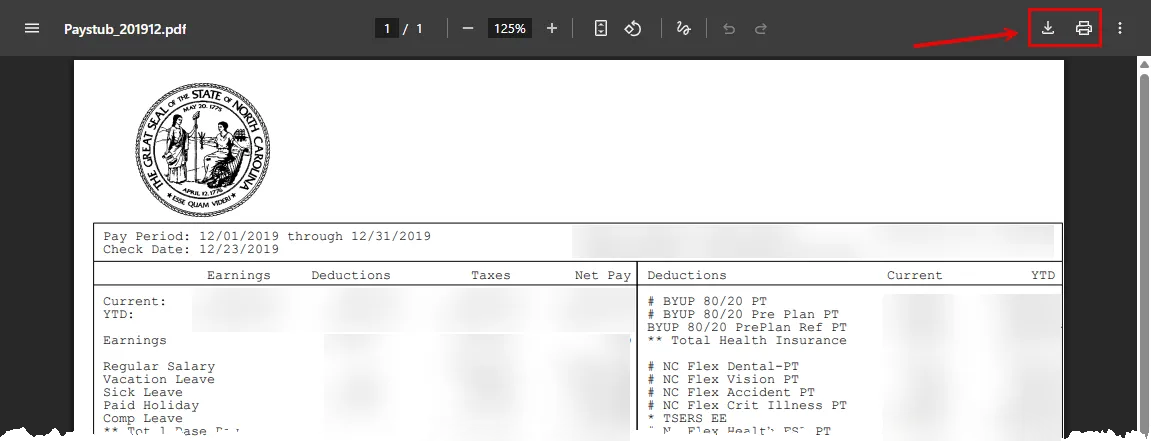
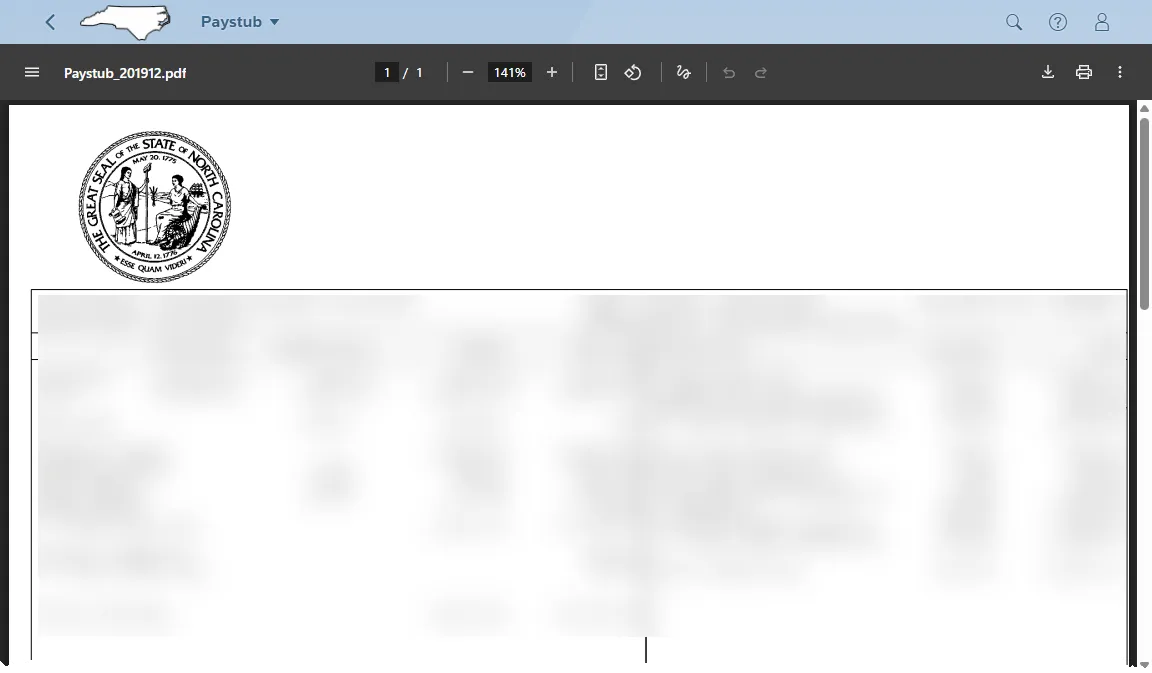
Step 6. Click on the downloaded file to open the PDF. It will be behind the downloads button on the top right of your screen.
Step 7. Click on Download or Print icon to save or print the pay statement.
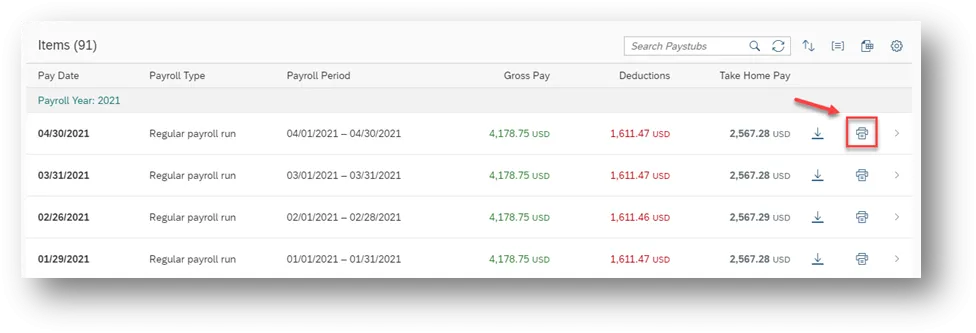
Step 8. Another way to print a pay statement is to click on the Print PDF icon in the column on the right side of the screen.
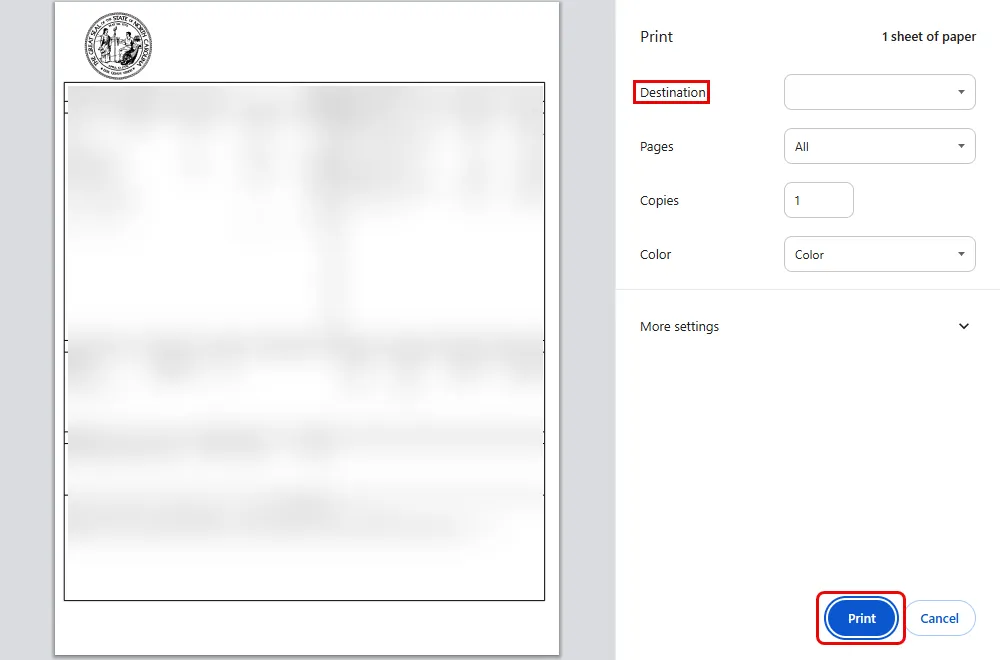
Step 9. A popup window will appear. Choose your printer in the destination field, then click the Print button to print the pay statement PDF.
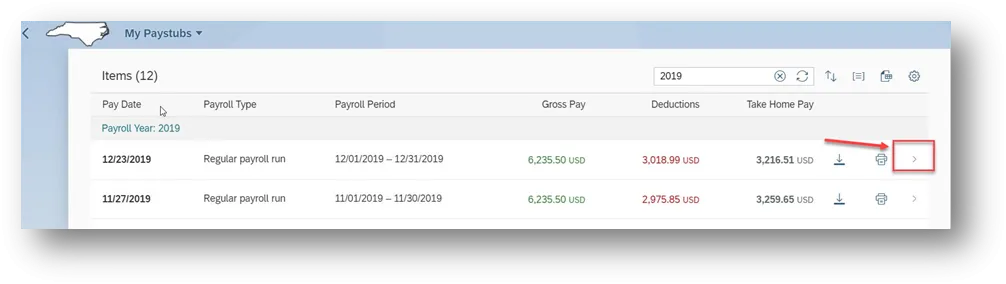
Step 10. Click an arrow in the last column on the right side of the screen to open a pay statement. Click the back arrow to go back.
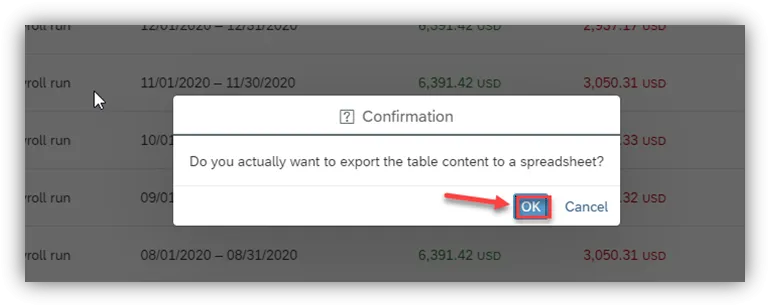
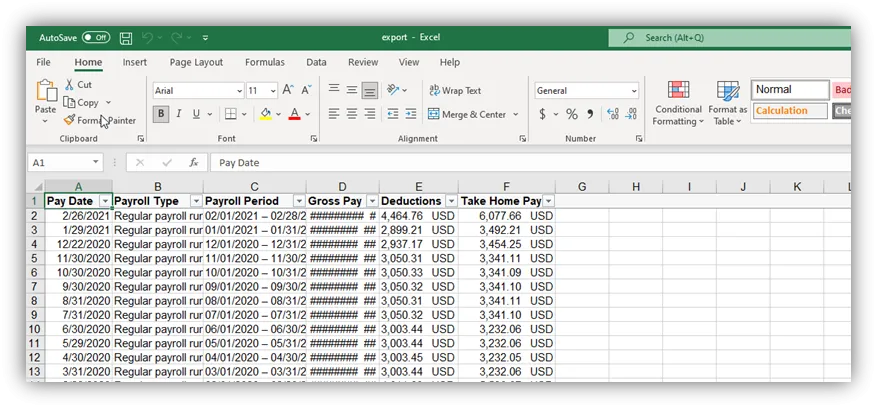
Step 11. Click the Export to Spreadsheet icon in the navigation features to export a .xlsx file. Click the OK button on the confirmation popup window.

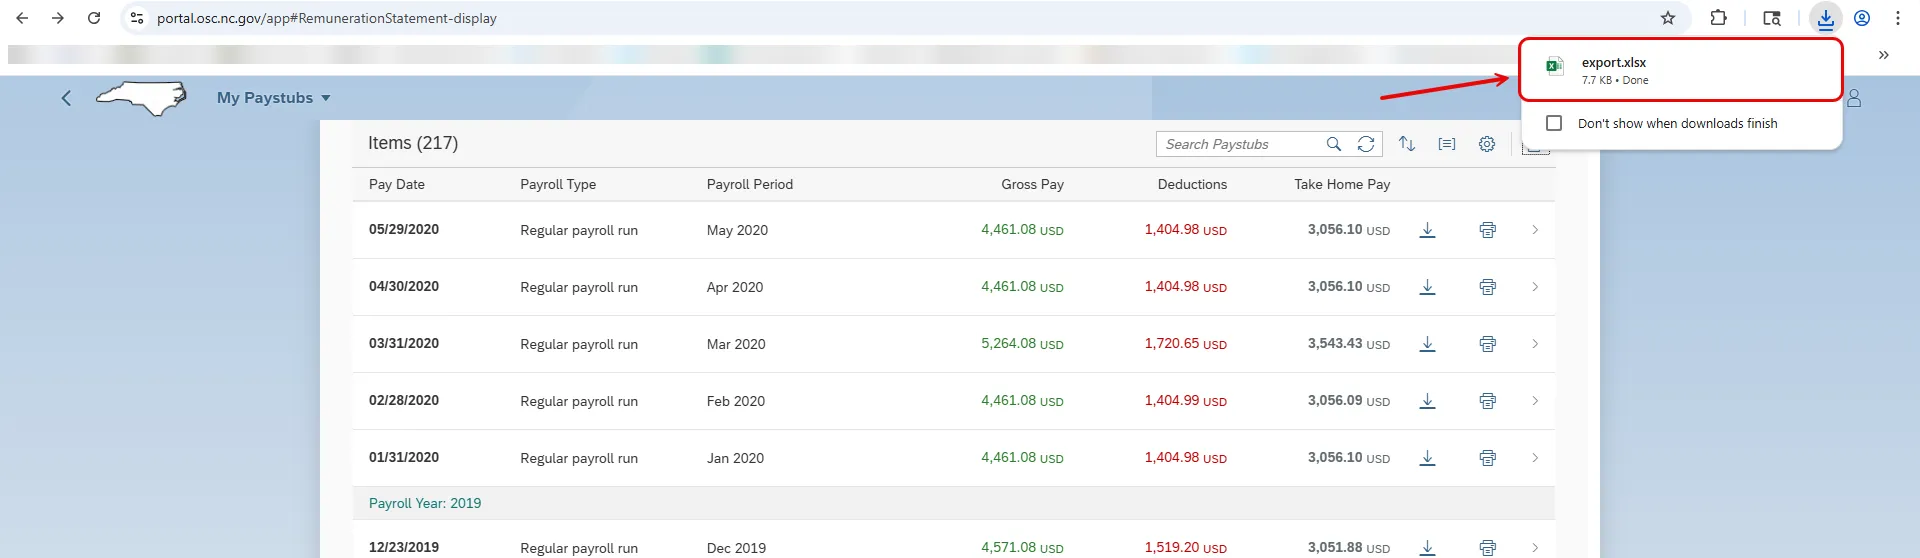
Step 12. Click the .xlsx file in the download area of your browser window to open, and the Excel file is displayed.
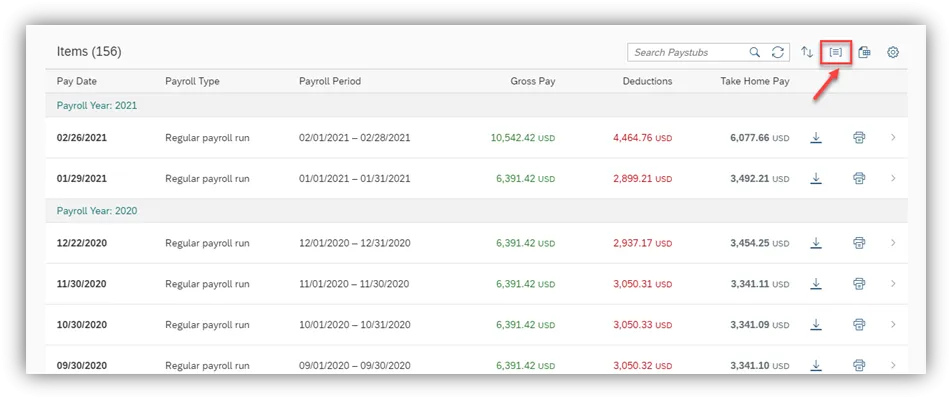
Step 13. Click the Group your paystubs icon in the navigation features to change the Group order.
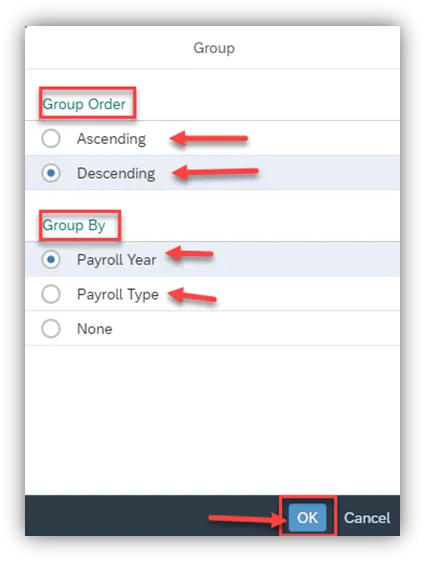
Step 14. Adjust the Group Order to Ascending or Descending or the Group By to Payroll Year, Payroll Type, or None and click OK.
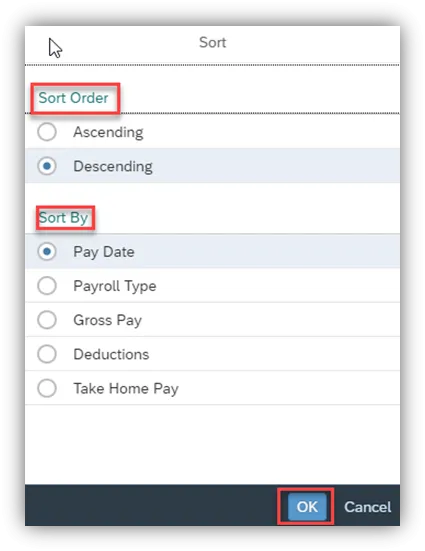
Step 15. Click the Sort your paystubs icon to sort pay statements within the timeframe.
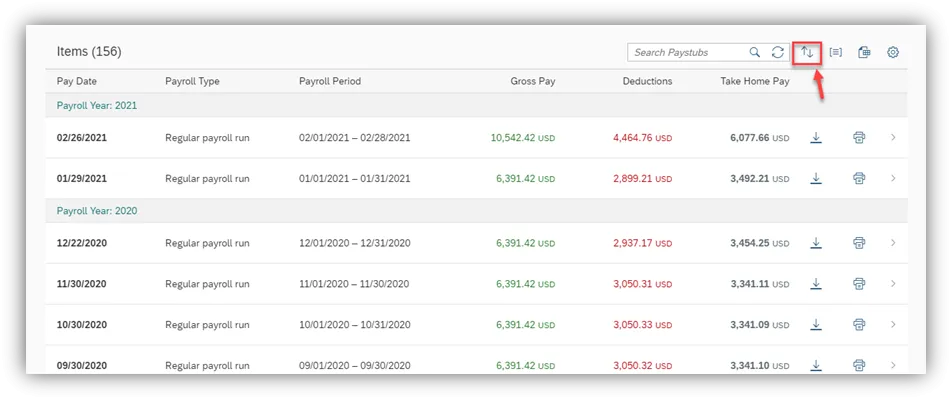
Step 16. You can Sort by Pay Date, Payroll Type, and several other options as well as Ascending or Descending.
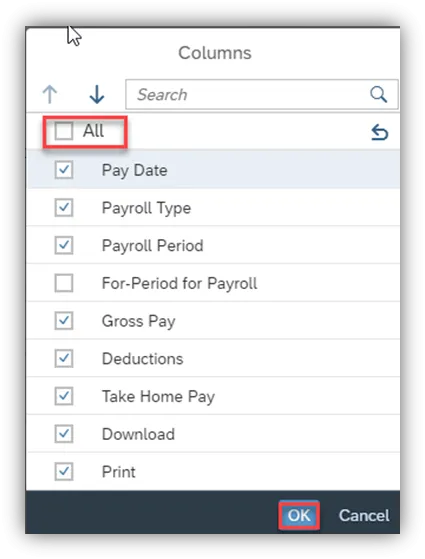
Step 17. Click the Personalize the table appearance icon to customize the data that is displayed.
Step 18. Click the various fields to select or de-select columns to display and click OK.
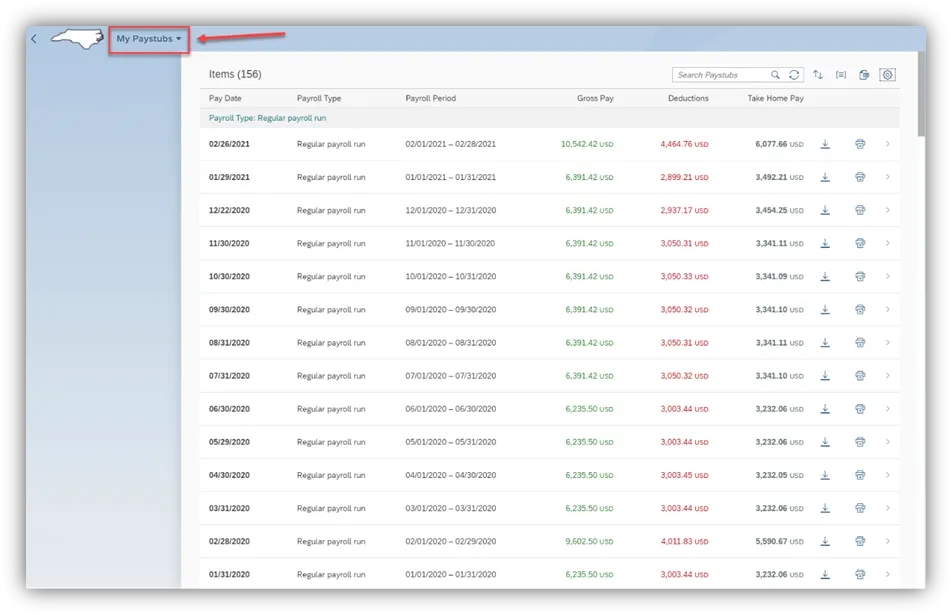
Step 19. Click My Paystubs to return to the previous screen.
Note: The pay statement will not be available to view until payday.