Purpose
The purpose of this Quick Reference Guide (QRG) is to provide a step-by-step guide of how to create freight items in the North Carolina Financial System (NCFS).
Introduction and Overview
This QRG covers the process for creating a freight item in NCFS.
Create Freight Items
Once logged in to NCFS, follow these steps. There are 36 steps to complete this process.
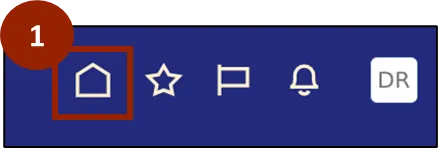
Step 1. Begin from the Home page, or click the Home icon.
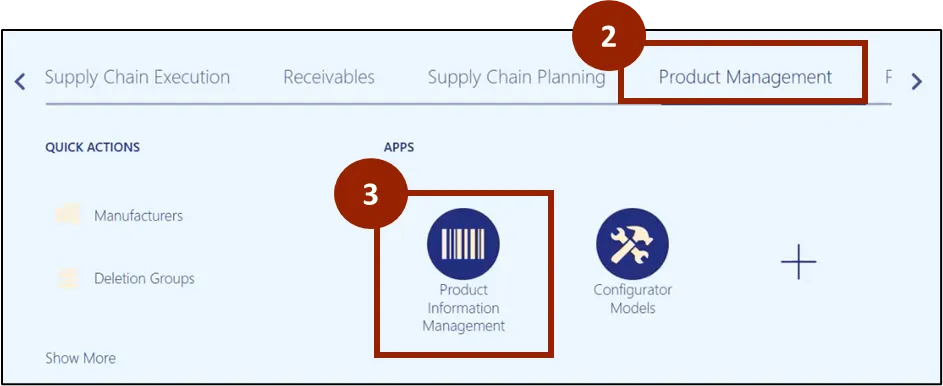
Step 2. On the Home page, select Product Management.
Step 3. Within the Product Management tab, select Product Information Management.
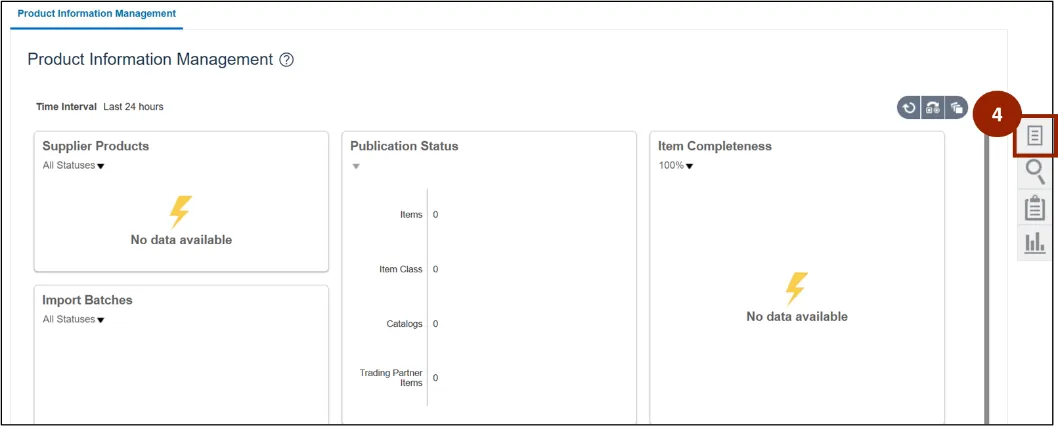
Step 4. Click on the Task icon.
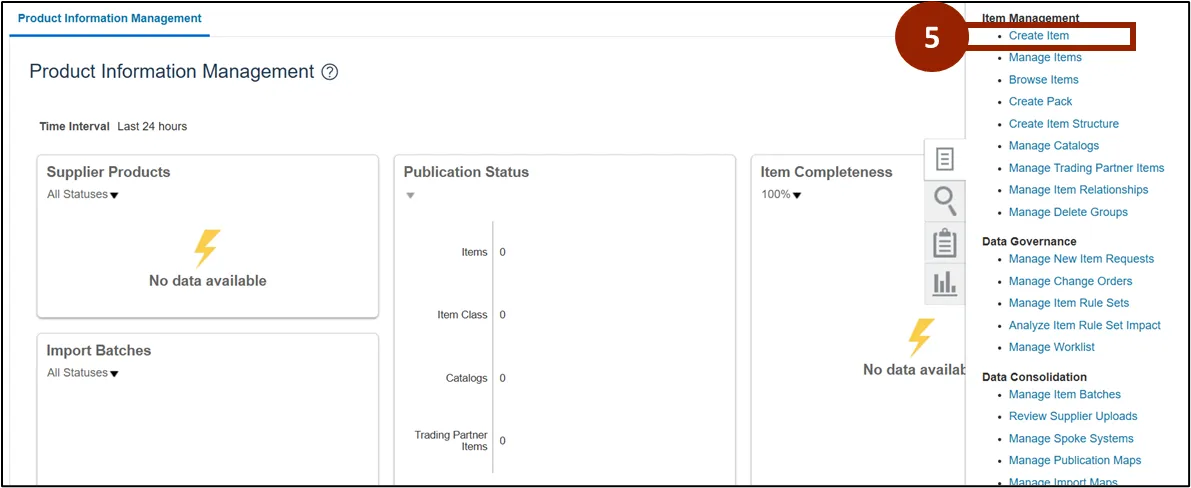
Step 5. Under the Item Management heading, click Create Item.
Note: The item is created at the Master Organization (ITEMMASTERORG) level, establishing its primary definition. This ensures all child (inventory) organizations inherit consistent fundamental information.
Step 6. In the Organization field, enter ITEMMASTERORG.
Step 7. In the Number of Items field, enter the Quantity required.
Step 8. In the Item Class field, enter DAC Item Class.
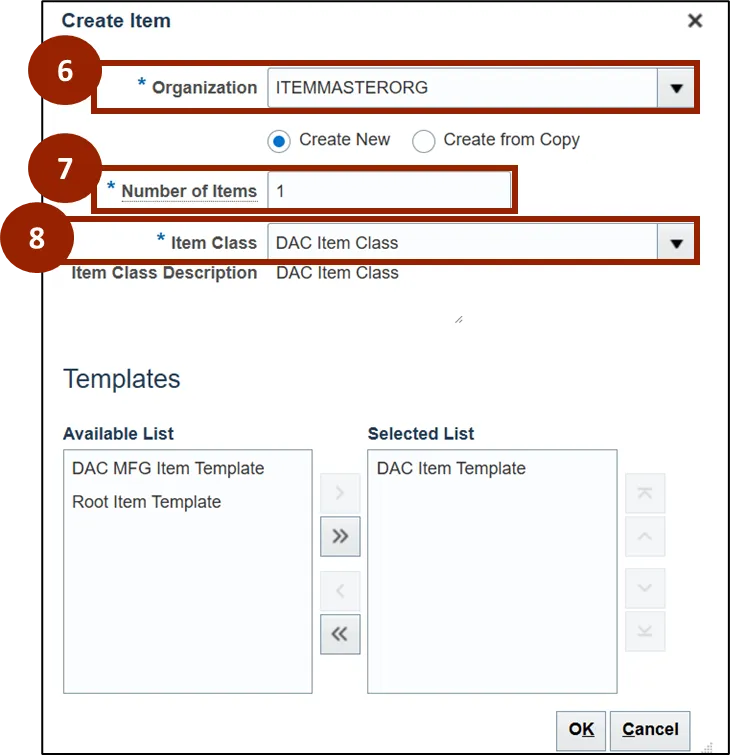
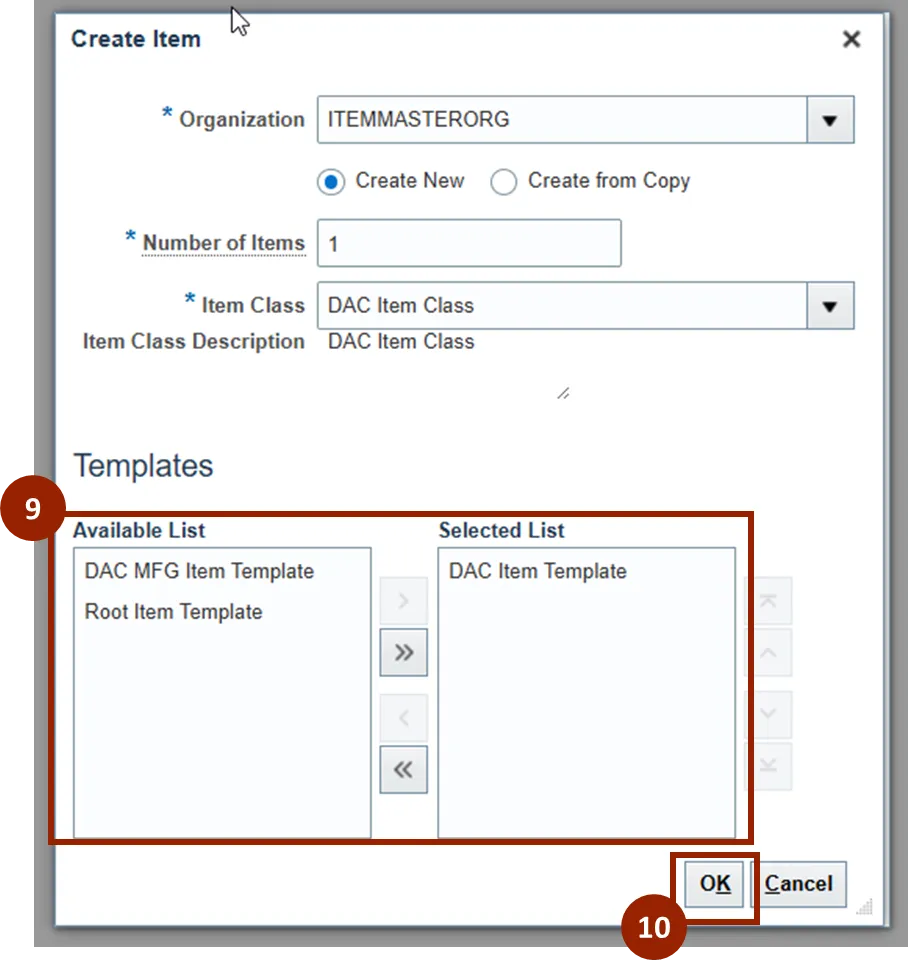
Step 9. Within the Templates section, the Available List displays a list of templates available to apply. The Selected List displays the template selected for this item, defaulted to display DAC Item Template.
Step 10. Click the OK button.
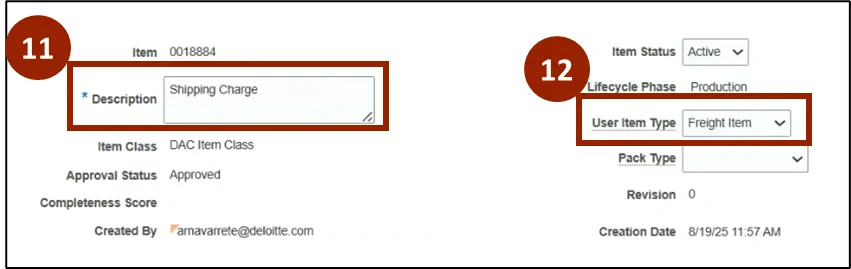
Step 11. On the Create Item screen, enter the item description within the Description field (e.g., Shipping Charge).
Step 12. From the User Item Type drop-down, select Freight Item.
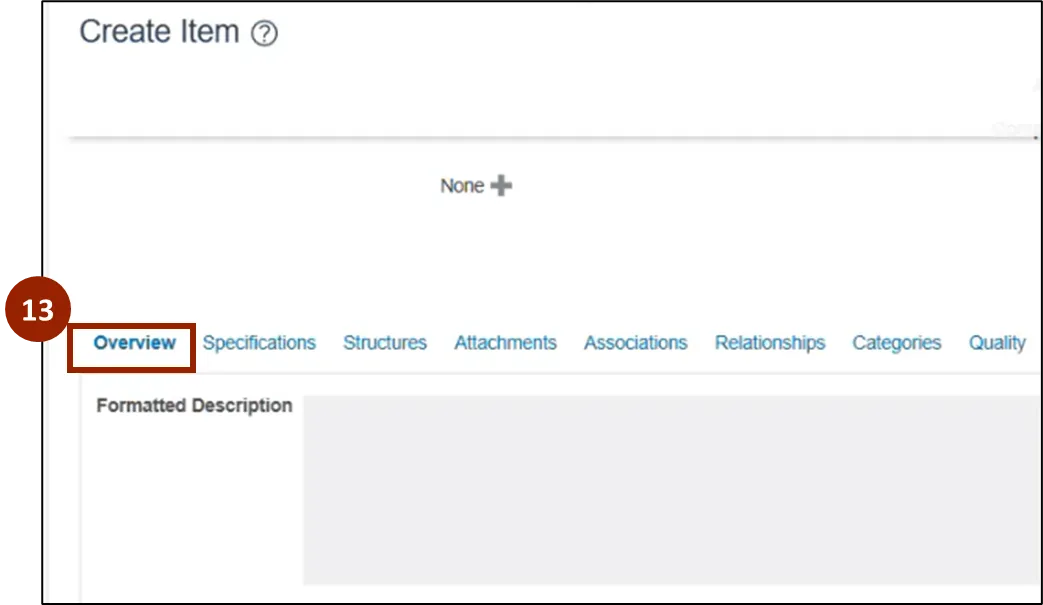
Step 13. On the Create Item page, navigate to the Overview tab.
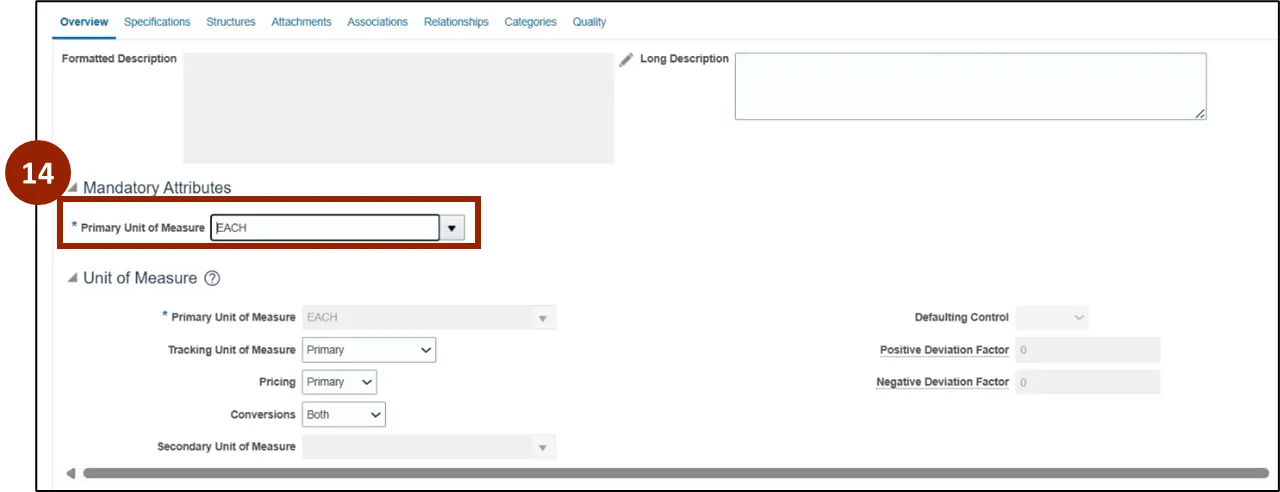
Step 14. On the Create Item page, in the Primary Unit of Measure field within the Mandatory Attributes section, type EACH.
Note: You can also search for the desired Unit of Measure by selecting the drop-down button and performing a search.
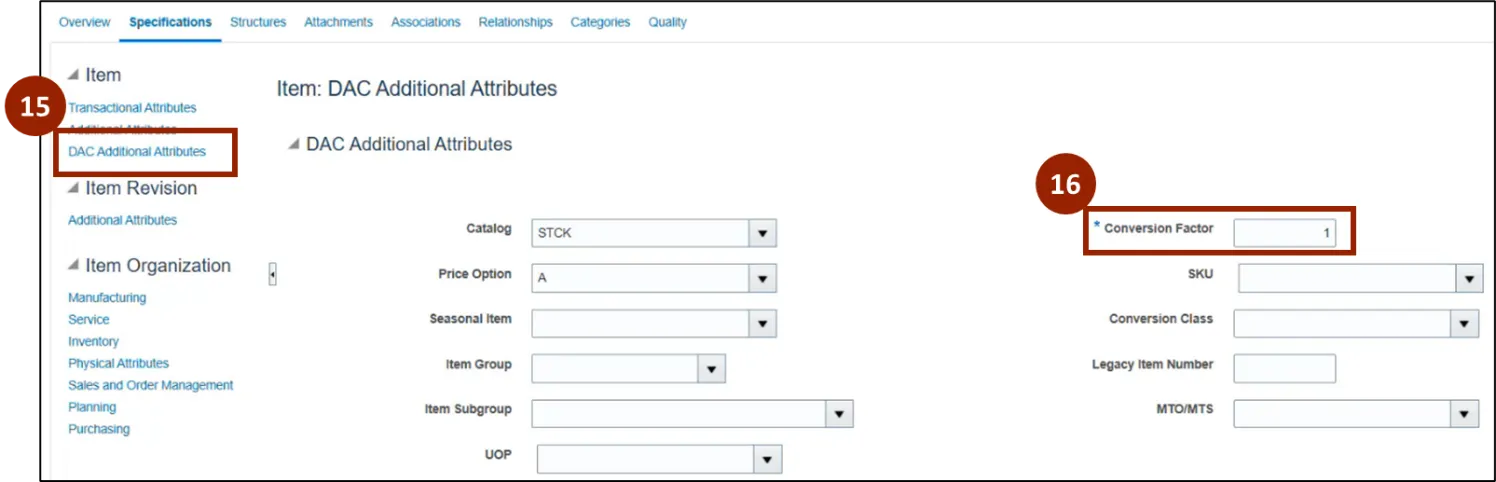
Step 15. Navigate to the Specifications tab and select the DAC Additional Attributes link.
Step 16. In the Conversion Factor field, type 1.
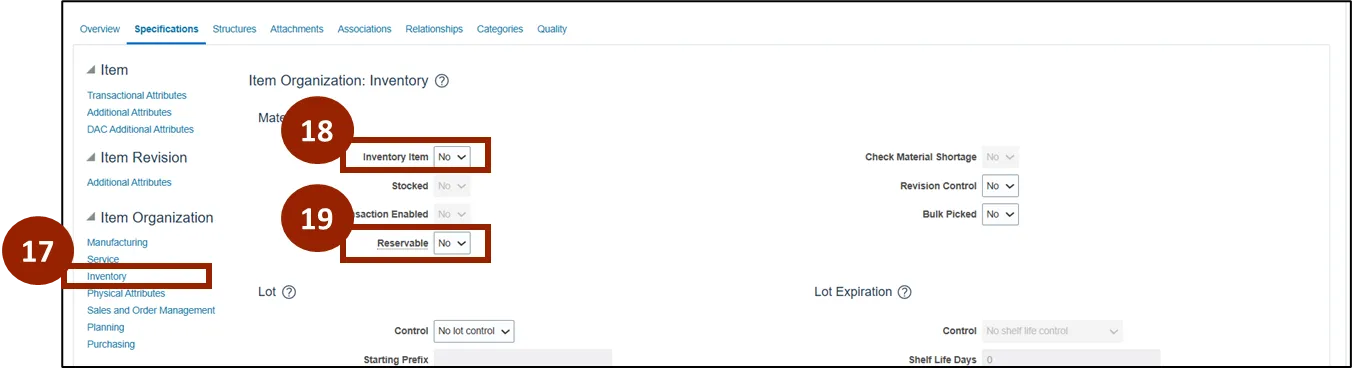
Step 17. Under the Item Organization section within the Specifications tab, select Inventory.
Step 18. From the Inventory Item drop-down, select No.
Step 19. From the Reservable drop-down, select No.
Step 20. Scroll down to the Cycle Count section. From the Cycle Count Enabled drop-down, select No.

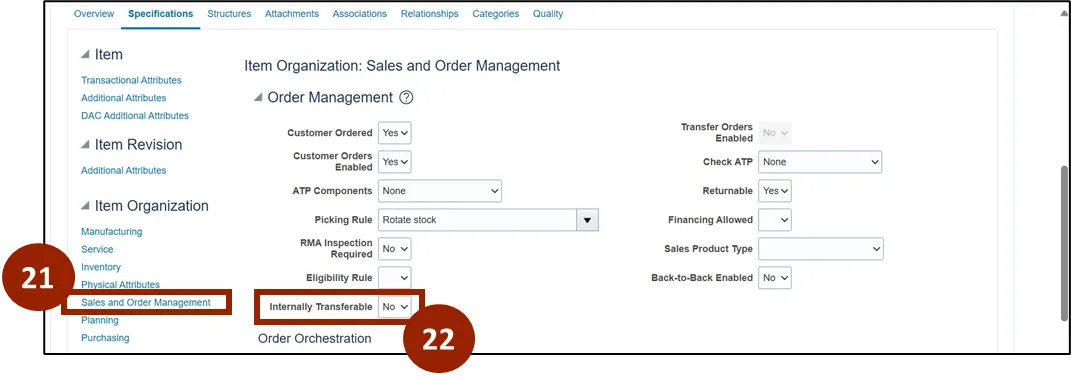
Step 21. Within the Item Organization section, select the Sales and Order Management link.
Step 22. From the Internally Transferable drop-down, select No.
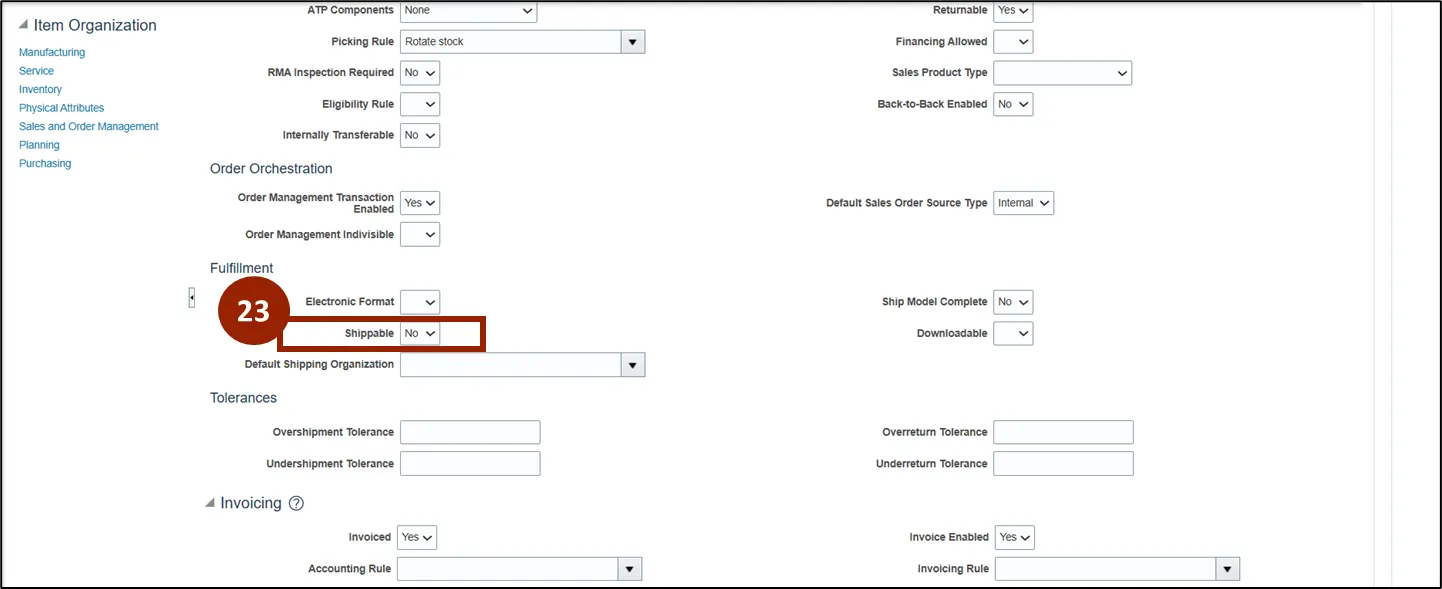
Step 23. From the Shippable drop-down within the Fulfillment section, select No.
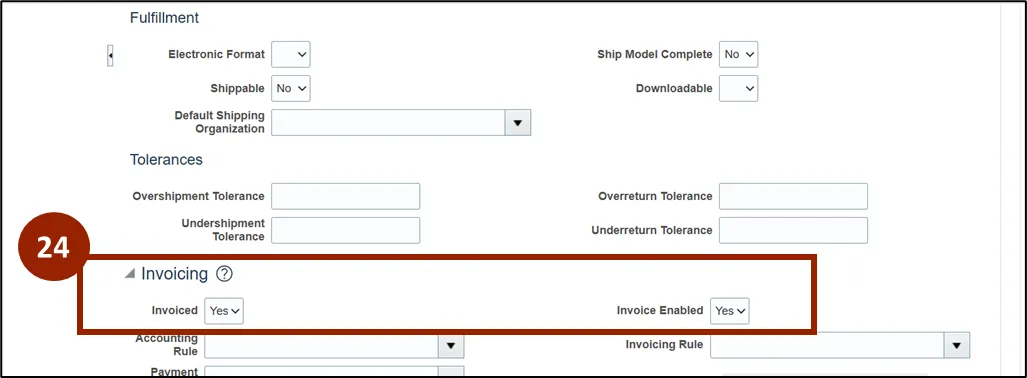
Step 24. Scroll down to the Invoicing section. Confirm that both the Invoiced and Invoice Enabled drop-down values are set to Yes.
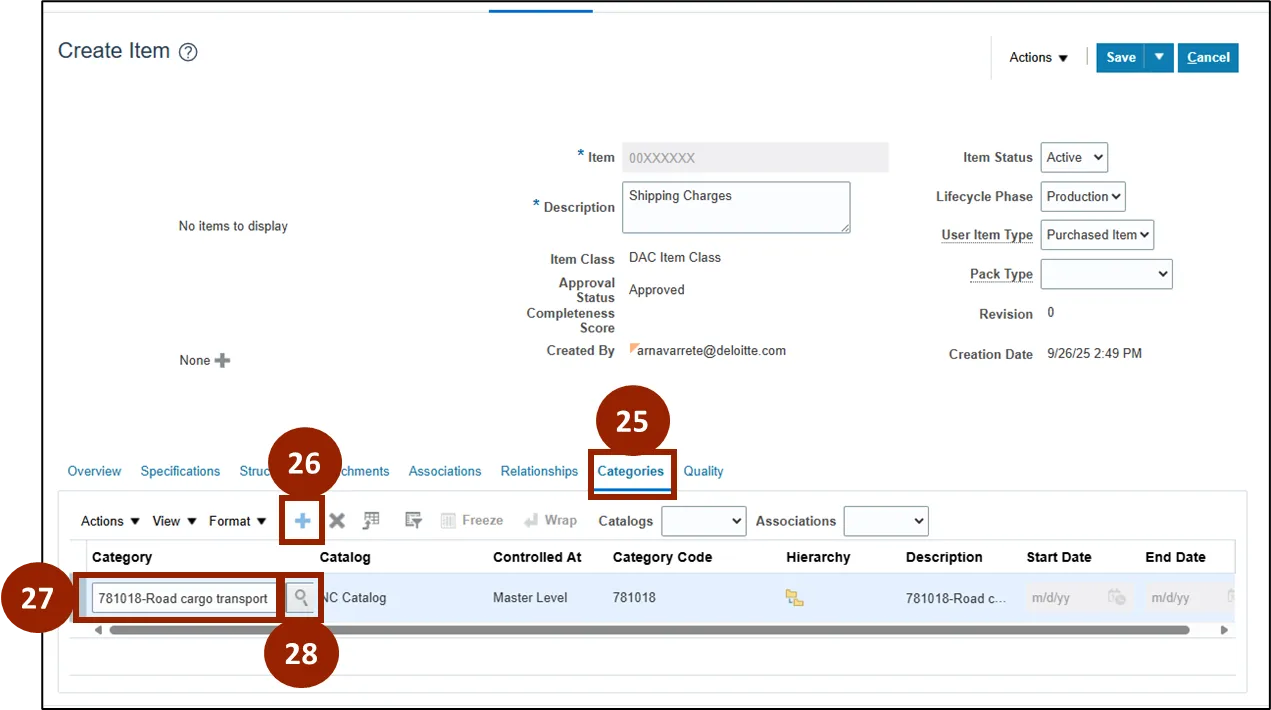
Step 25. Navigate to the Categories tab.
Step 26. Select the Add Row icon.
Step 27. In the Category field, enter 781018-Road cargo transport.
Step 28. Click the Search icon.
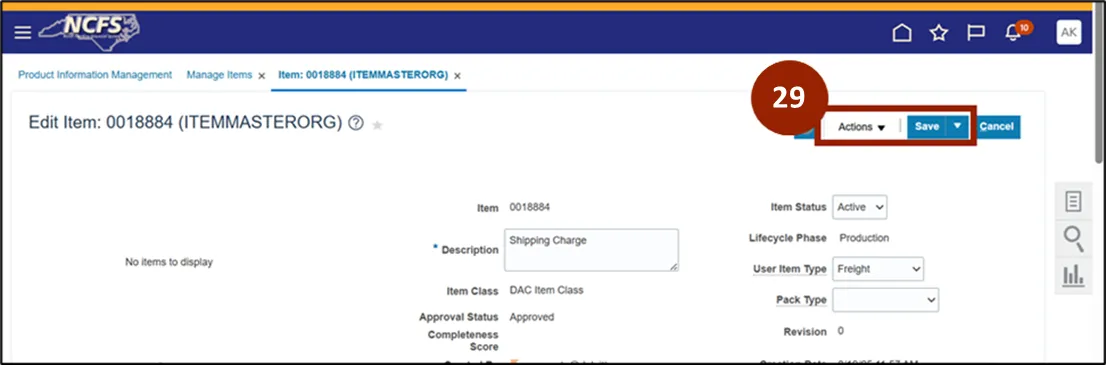
Step 29. Scroll to the top of the Create Item page and select Save.
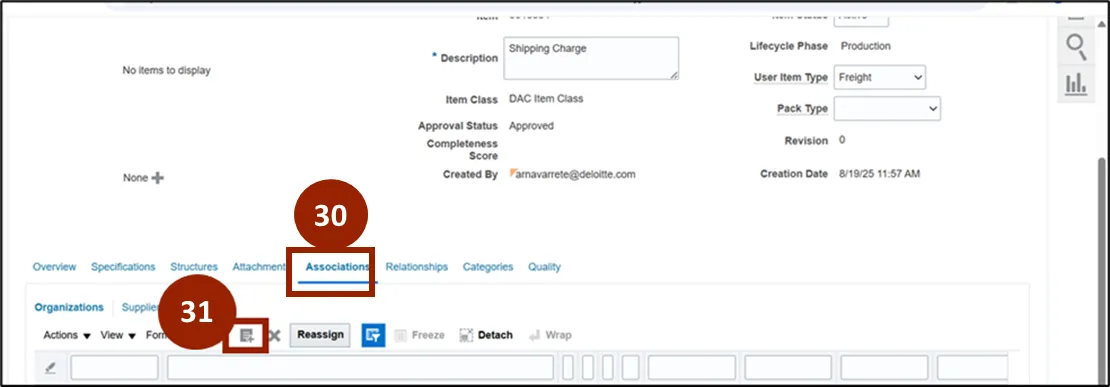
Step 30. Navigate to the Associations tab.
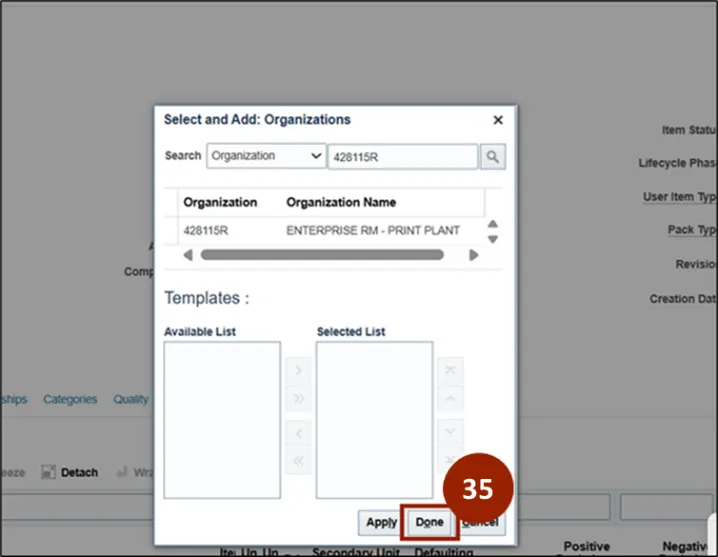
Step 31. Select the Add icon to open the Select and Add: Organizations pop-up.
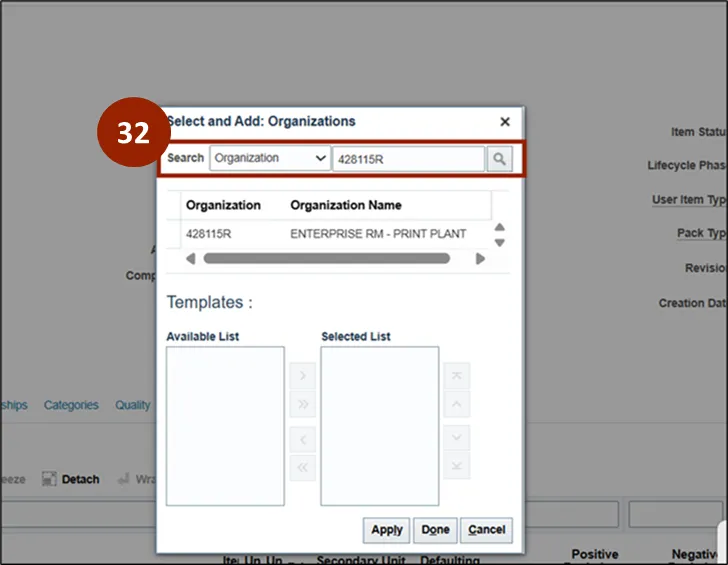
Step 32. In the Search field, search the organization to associate the item where it will be utilized, then click the Search icon.
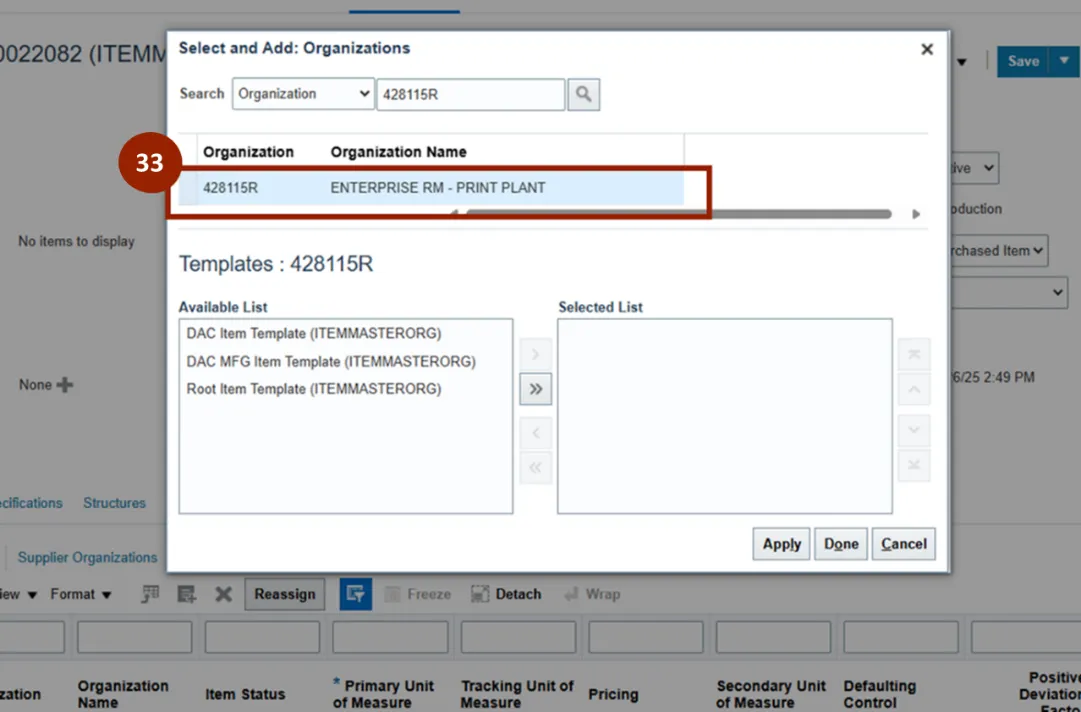
Step 33. Select the Organization under the Organization column header to apply the related organizations.
Note: If multiple organizations populate, select the white box next to the Organization column header to apply the full list of related organizations.
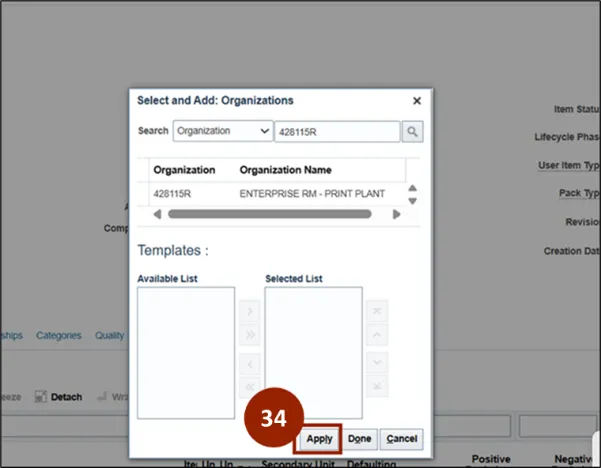
Step 34. Select the Apply button.
Step 35. Select the Done button.
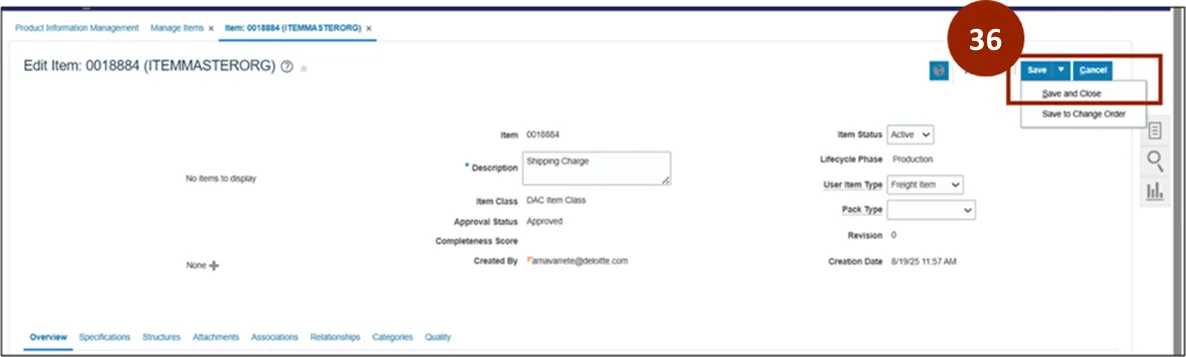
Step 36. Navigate back to the top of the Create Item page. From the Save drop-down, select Save and Close.
Wrap-Up
NCFS users can create freight items by following the steps outlined above.
Additional Resources
- Instructor Led Training (ILT)