Purpose
The purpose of this Quick Reference Guide (QRG) is to provide a step-by-step guide for entering manual orders in the North Carolina Financial System (NCFS).
Introduction and Overview
This QRG covers the process for creating and managing manual sales orders in NCFS, including entering order details, adding attachments, and saving draft orders for processing.
Create Order Screen: Headers Information
There are 13 steps to complete this process.
Step 1. Click the Company Single Sign-On (SSO) button.
Step 2. Enter your @dac.nc.gov email address.
Step 3. Click Next, then enter password.
Step 4. On the Home page, select the Order Management tab.
Step 5. Click Order Management App.
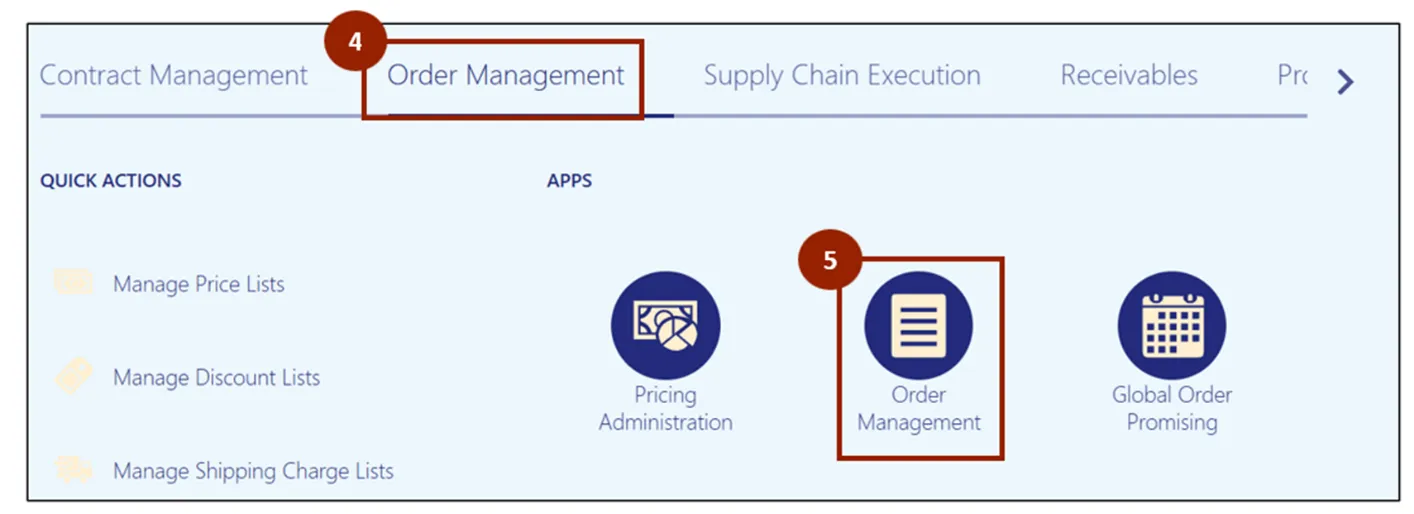
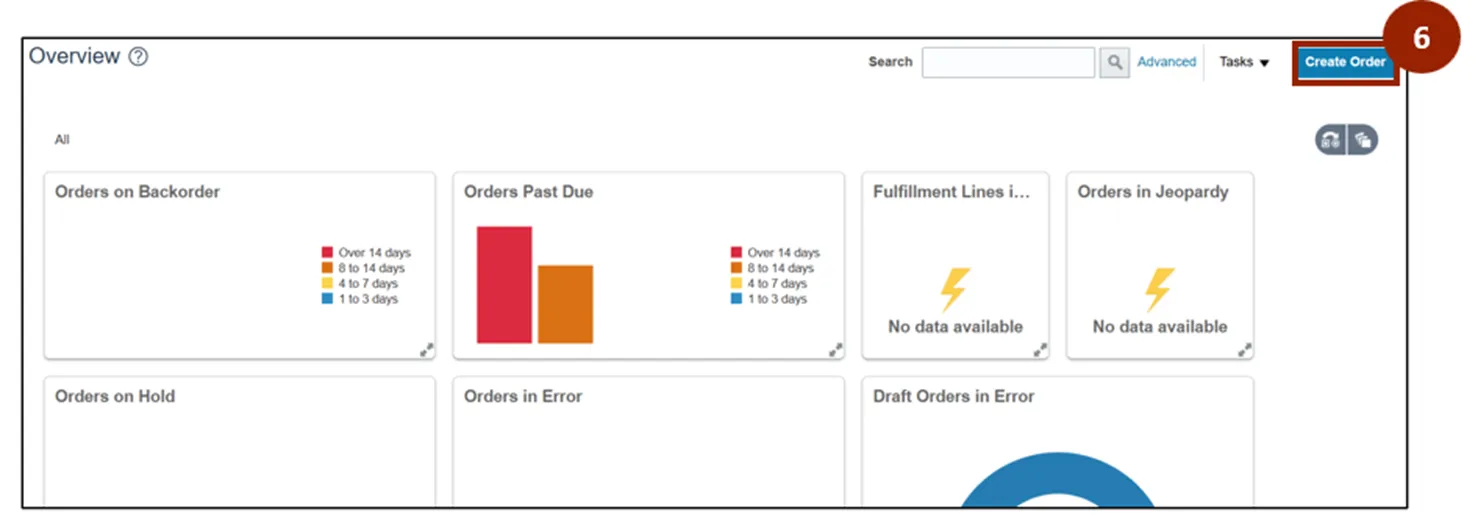
Note: The Order Management Overview screen displays information visually, providing data for DAC. As orders are created and progress, the diagrams and values will populate on this screen. If it is a new instance, this screen displays with minimal information.
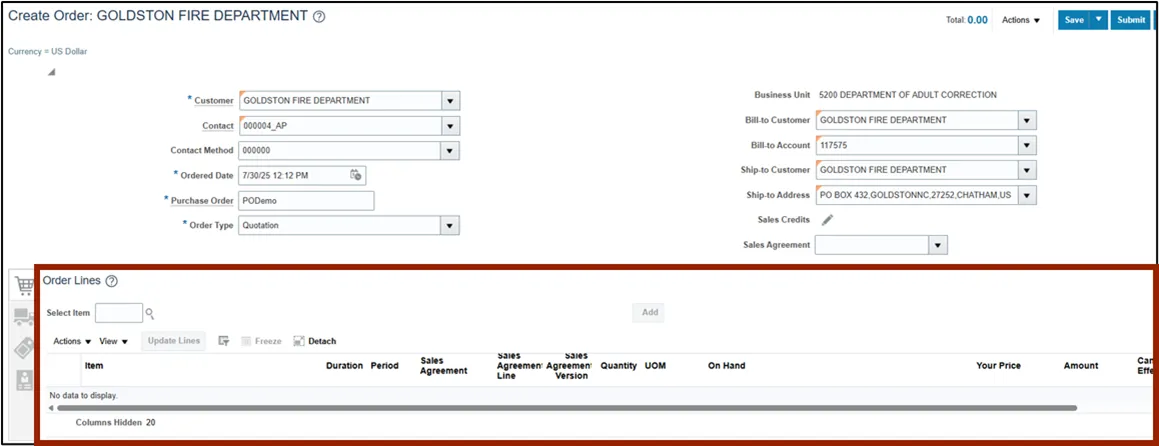
Step 6. Click the Create Order button.
Note: The Create Order screen displays, allowing DAC to create an order by manually completing the NCFS Header fields at the top of the screen.
Note: Some screens within NCFS may have a single asterisk (*); any fields marked with a single asterisk must be completed before proceeding. Additionally, the Business Unit field automatically defaults to 5200 DEPARTMENT OF ADULT CORRECTION.
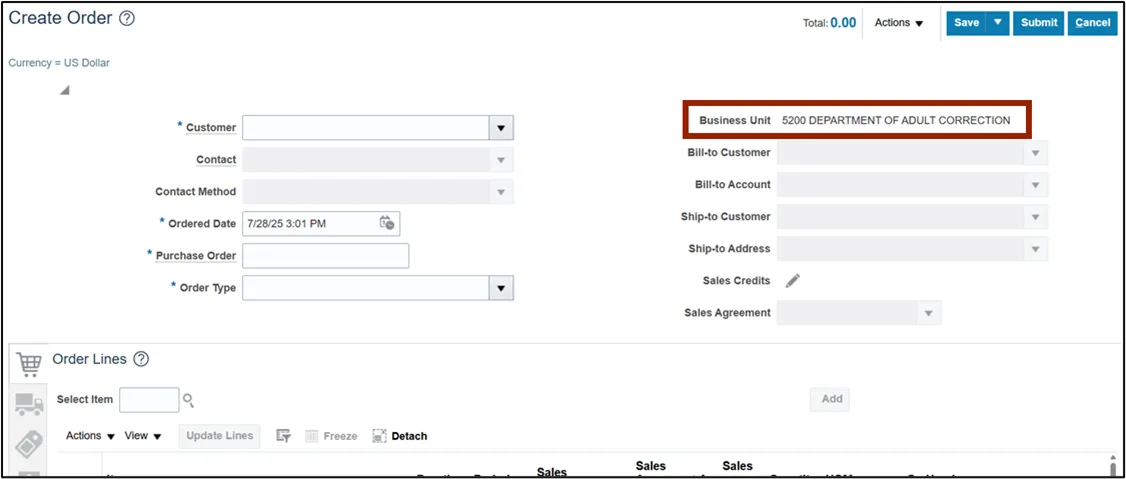
Note: As a best practice, all required fields in the Header section should be completed before proceeding to the tabs and tables below.
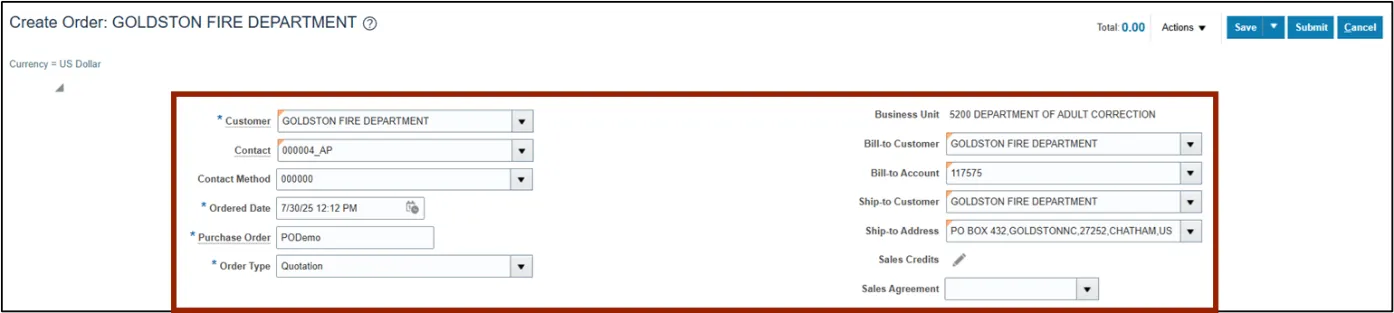
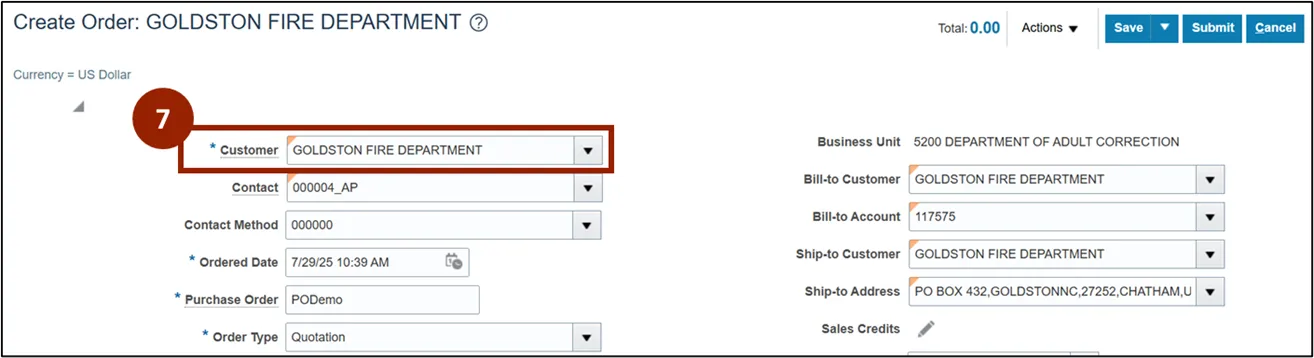
Step 7. In the Customer field, enter or search for the customer’s name (e.g., GOLDSTON FIRE DEPARTMENT).
Note: A customer must be selected from the list by either typing the name and choosing from the Customer field’s drop-down menu, or by clicking the Search… link. Once a customer is selected, the other fields on this screen will automatically populate with the corresponding information for that customer. If you are unable to find the desired customer, the customer must be added to NCFS. To add a customer, contact NCCE Customer Service.
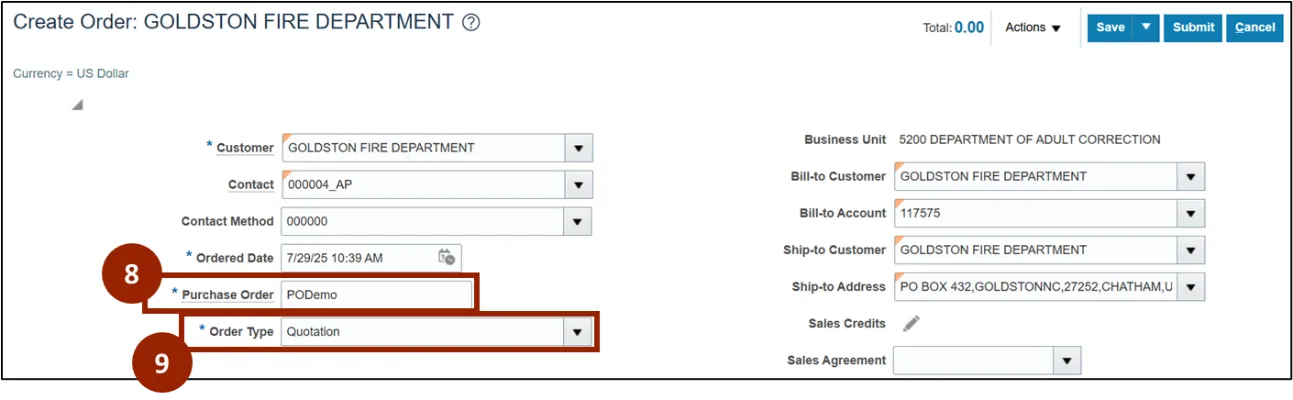
Step 8. In the Purchase Order field, enter the purchase order identifier (e.g., “PODemo” is used in this demonstration).
Step 9. In the Order Type drop-down field, select the desired order type from the drop-down list (e.g., Quotation).
Note: NCFS includes Actions that allow for optional Edit Additional Information fields, which have been configured for DAC upon request.
To complete these additional fields, follow these steps.
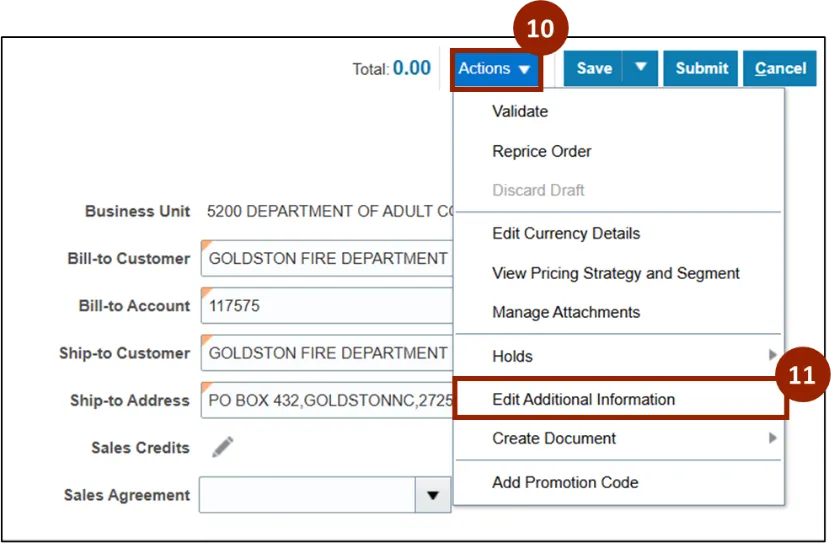
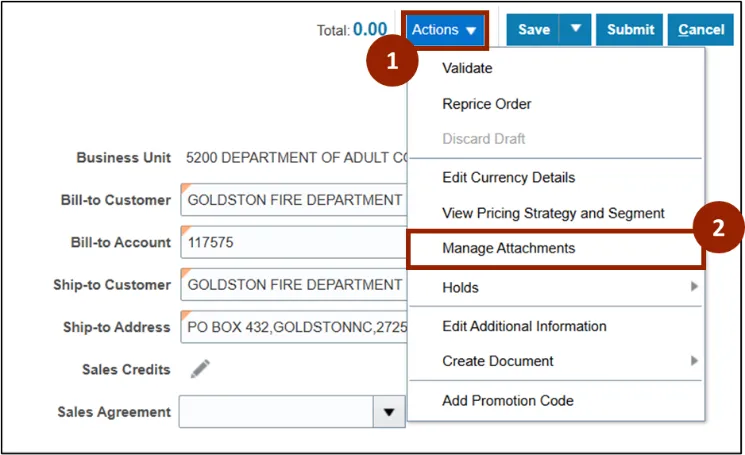
Step 10. Click the Actions drop-down.
Step 11. Select Edit Additional Information.
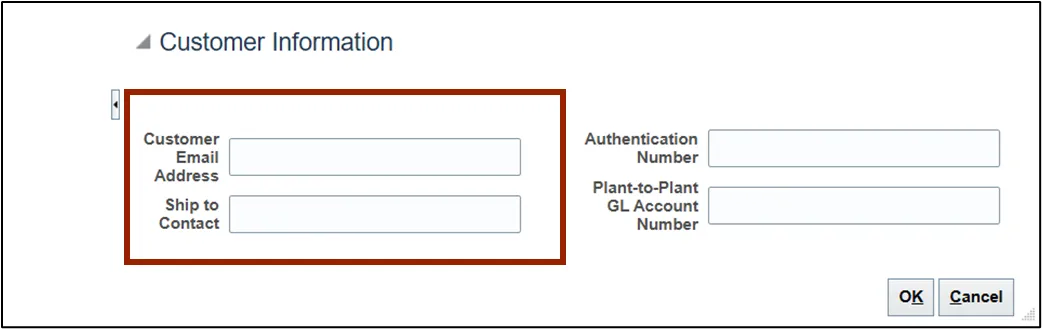
Step 12. (Optional) Complete any of the fields displayed.
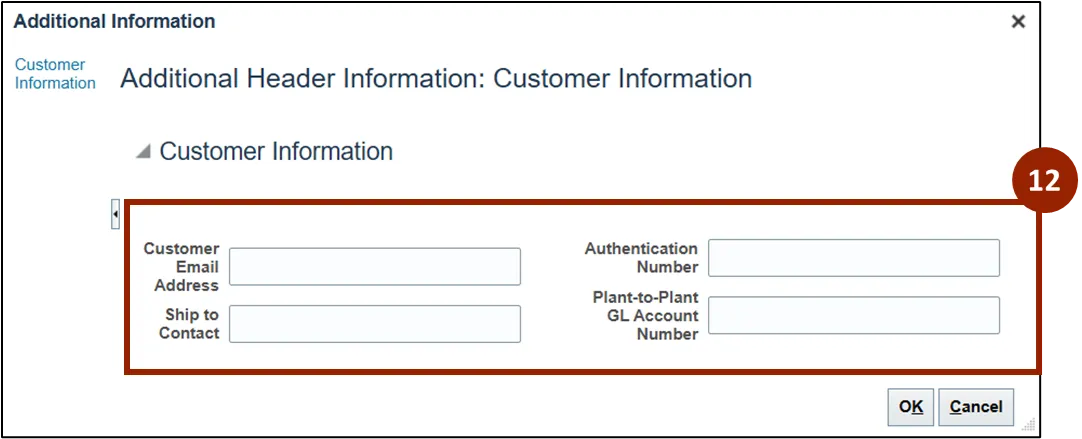
Note: The Customer Email Address field is provided for reference only, NCFS does not send information to the email address through the system. The email address is included in certain NCFS reports. The Ship to Contact field represents backup contacts designated by the customer, this field can include both the name and phone number. This information is also included in certain NCFS reports.
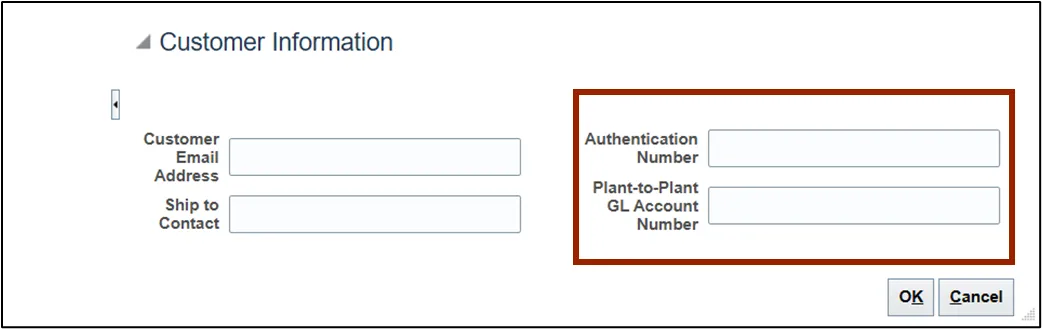
Note: The Authentication Number field is used only when an employee places an order. In such cases, payment must be made upfront using a credit card. Once the transaction is completed, an authentication number is generated by the payment system. This number should be entered here for employee-placed orders only. The Plant-to-Plant GL Account Number field is used for sales occurring within or between plants. The appropriate account number should be provided to facilitate financial transactions and reporting related to these internal sales.
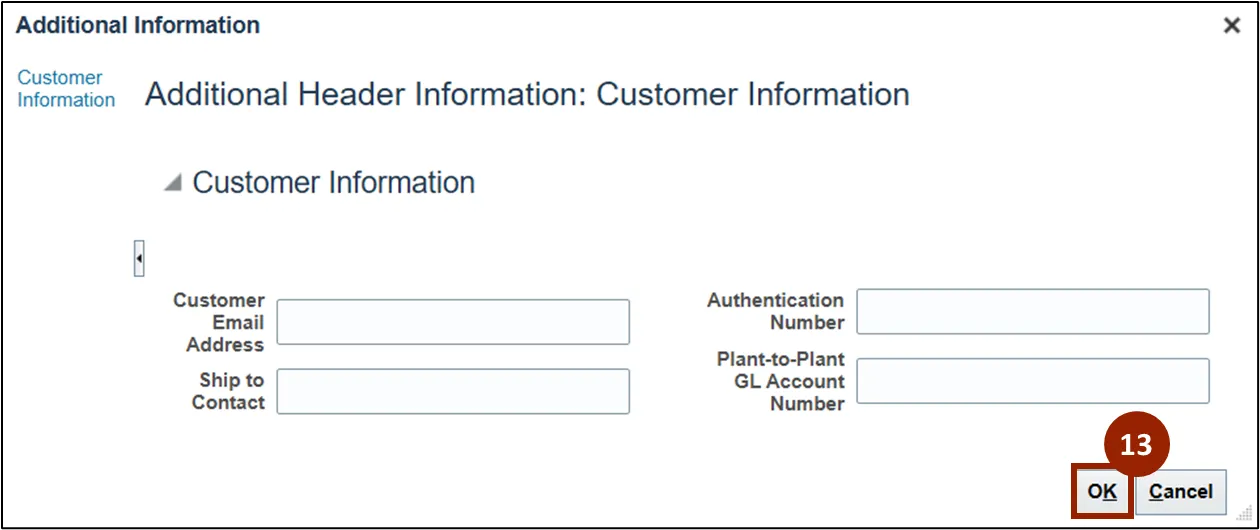
Step 13. Once complete, click OK to return to the Create Order screen.
Manage Attachments: Header Level
Within the Create Order screen, if DAC needs to attach any documents at the Header level—such as reference materials or supporting files—NCFS provides an option within the Actions menu to manage attachments.
To add or manage attachments, follow these steps. There are 8 steps to complete this process.
Step 1. Click the Actions drop-down.
Step 2. Select Manage Attachments.
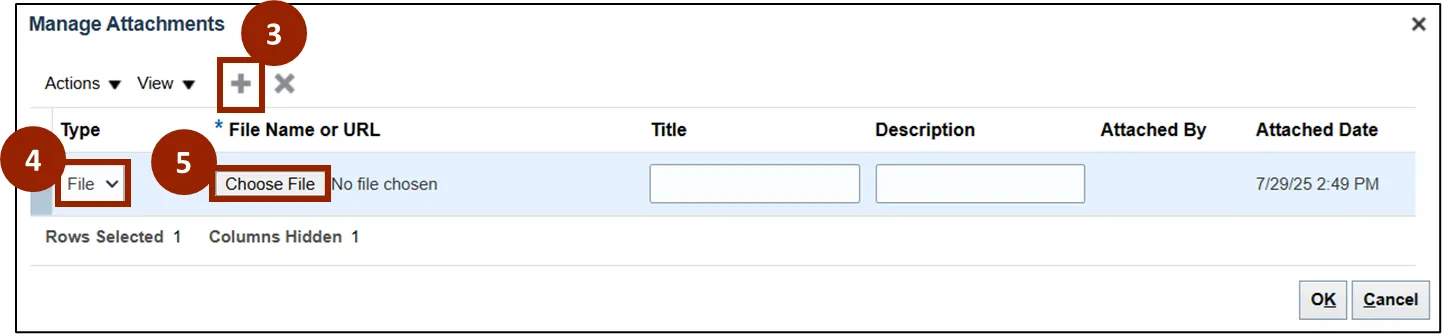
Step 3. Within the Manage Attachment pop-up window, click the Add (+) icon to insert a new row.
Step 4. In the Type drop-down field, select the appropriate attachment type (e.g., File).
Note: Attachment options include File, Text, or URL. The required fields will vary depending on the selected type. For this demonstration, the File option is used.
Step 5. In the File Name or URL field, click the Choose File button to open your computer’s File Explorer and select a file to attach.
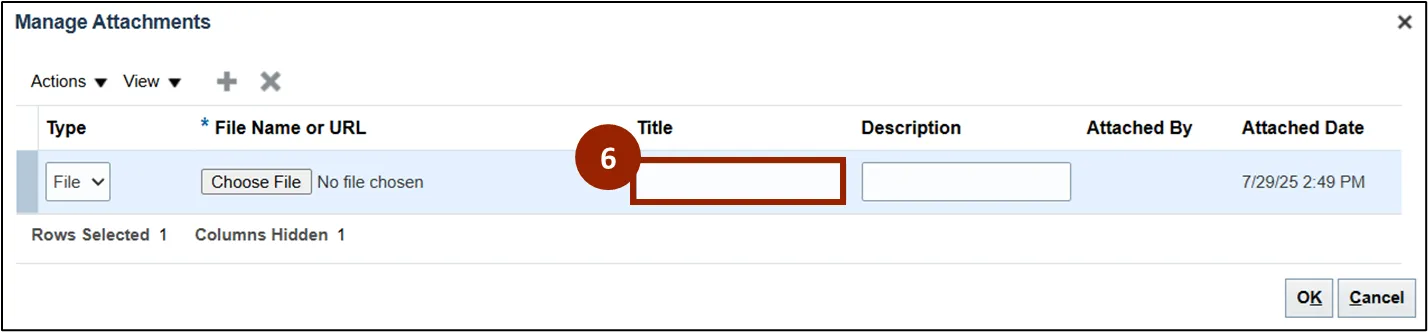
Step 6. In the Title field, enter an appropriate title.
Note: If a title is not entered, the system will automatically use the first few words from the File, Text, or URL field as the default title. As a best practice, always enter a specific and descriptive title for each attachment.
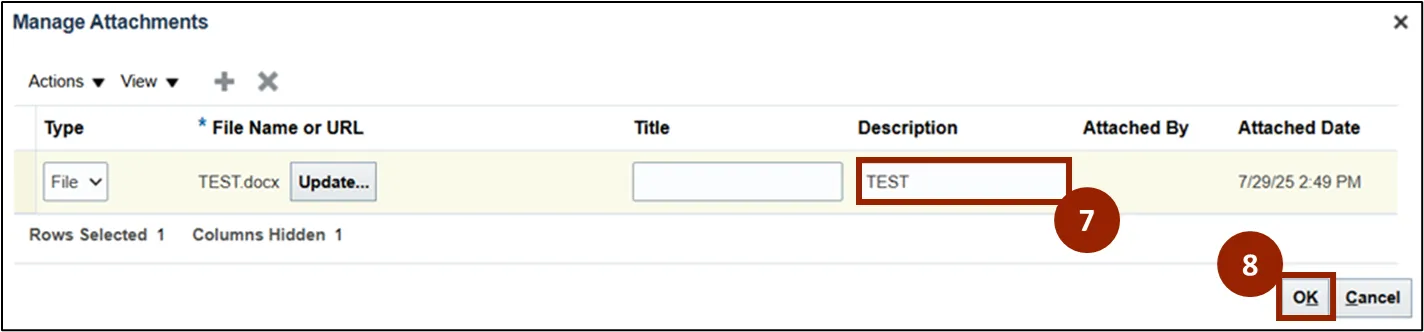
Step 7. (Optional) In the Description field, enter a description.
Note: To add additional attachments, repeat the steps above. Attachments can be removed by selecting the corresponding row and clicking the Delete (X) icon. To update an existing attachment, click the Update… button within the File Name or URL field after an attachment has been added.
Step 8. Once all Attachments have been added, click OK to save them to the Header Level.
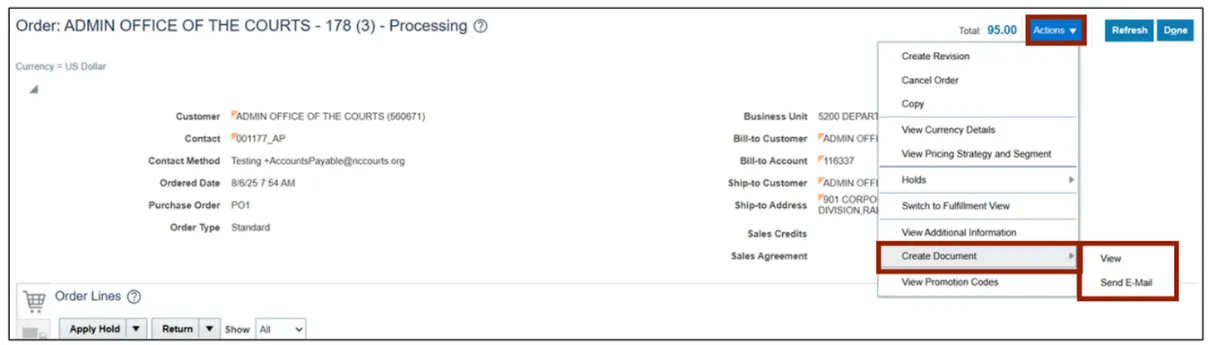
Note: The "Create Document" option is accessible from the Actions button drop-down list while entering a sales order. Selecting this option generates an NCFS-standard order document in a predefined format and provides the ability to email the generated document. For DAC, a customized BI Publisher report has been developed and is available in the Reports and Analytics folder. DAC users should utilize the customized report instead of the “Create Document” option from the Header Level Actions drop-down list.
Create Order Screen: Navigating the Header Section
Within the Create Order screen, the Header section provides multiple tabs for navigating and managing key order information. All data entered in the Header fields is synchronized with the details displayed in the tabs and tables in the lower portion of the screen, confirming consistency throughout the order. Once a customer is selected, fields across the Header, tabs, and tables automatically populate with information specific to that customer, such as contact methods, shipment details, and billing and payment information.
Note: Certain Order Header attributes become available only after a customer is entered. If you are unable to find the desired customer, the customer must be added to NCFS. To add a customer, contact the NCCE Customer Service.

Create Order Tabs Overview
Note: There are three main tabs used in DAC to manage sales orders:
Order Lines Tab (Shopping Cart Icon)
- Contains the Order Lines tab, which lists the products requested by the customer.
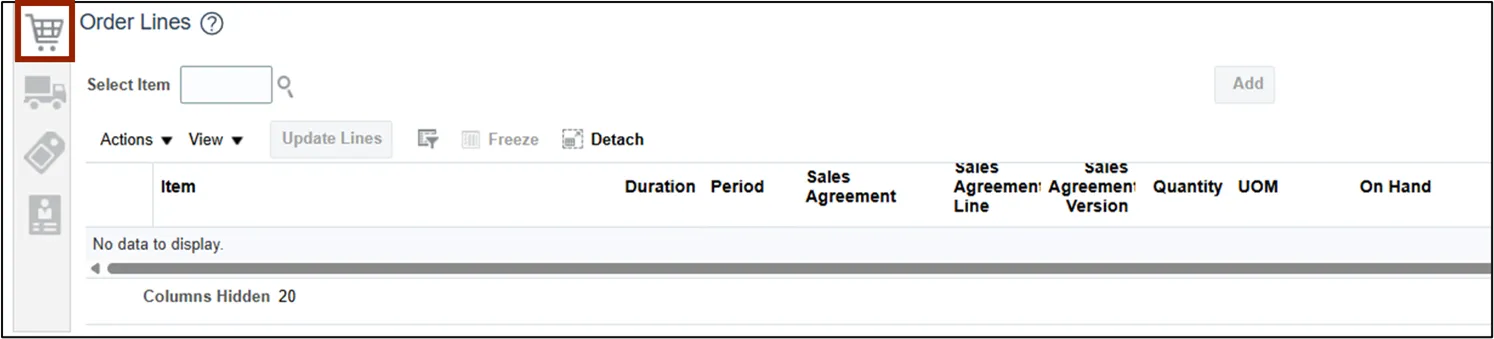
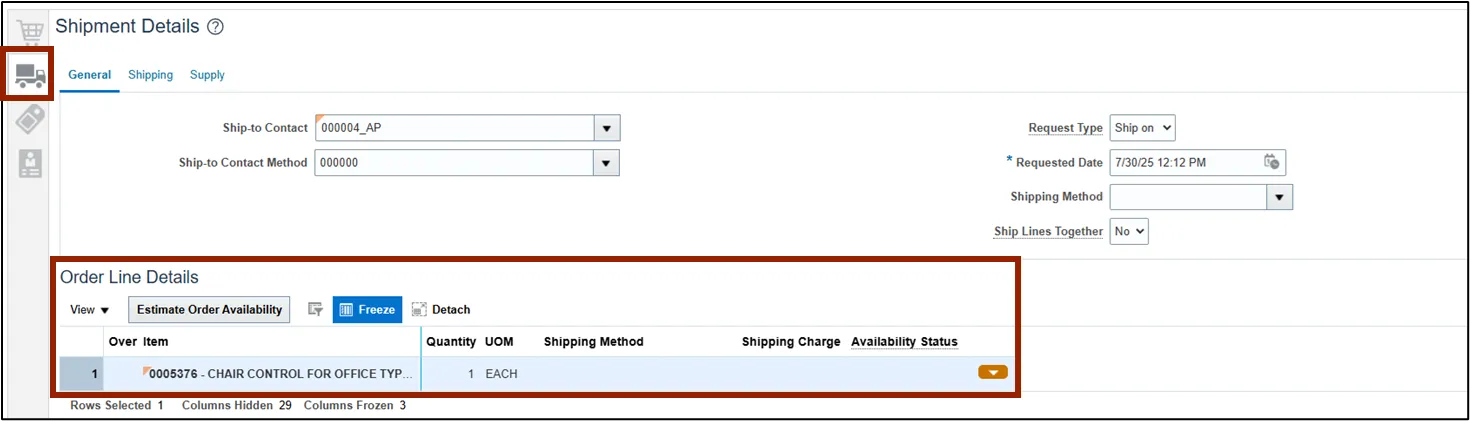
Shipment Details Tab (Delivery Truck Icon)
- Used to set ship-to details (such as the ship-to contact person) and select the shipping method (e.g., United States Postal Service).
- Allows you to add packing and shipping instructions, estimate availability, and determine whether order lines are shipped together in a shipment set or individually.
Note: The Shipment Details tab contains three additional sub-tabs: General, Shipping, and Supply. Detailed instructions for completing these will be provided in a subsequent course.

Billing and Payment Details Tab (Price Tag Icon)
- Used to set billing details (such as the bill-to contact person), and define the payment term.
Note: The Payment Terms field defaults to Net 30 for all customers’, meaning payment is due within 30 days.

Additional Notes: Some customers may have different Ship-to and Bill-to Addresses in their master customer record.
Note: Although the Manage Sales Credits tab appears in NCFS, DAC does not use it to manage sales orders.

Order Lines: Search and Add an Item
In the Create Order screen example, the Order Type has been set to Quotation in the Header. As a result, the system will recognize this as a quoted order, not one that should be fulfilled immediately.
Note: Once all Header information has been entered move on to the Order Lines section, which is the default display within the Create Order screen.
There are 11 steps to complete this process.
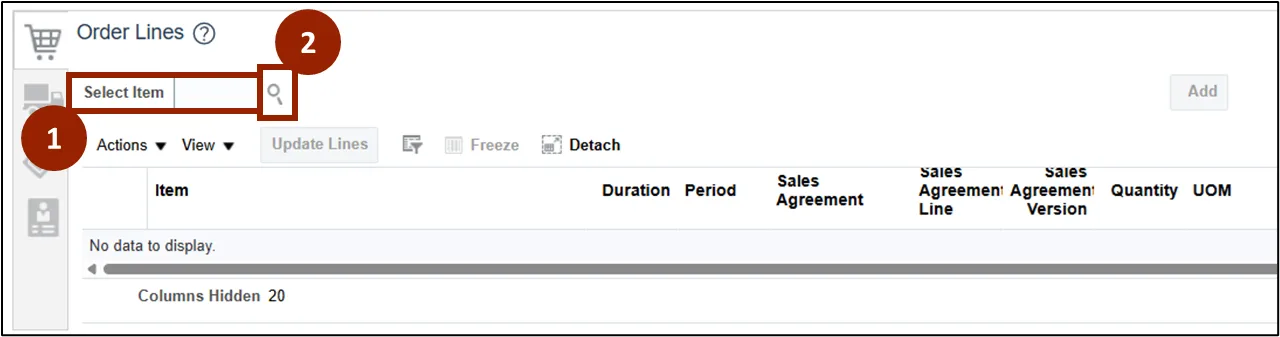
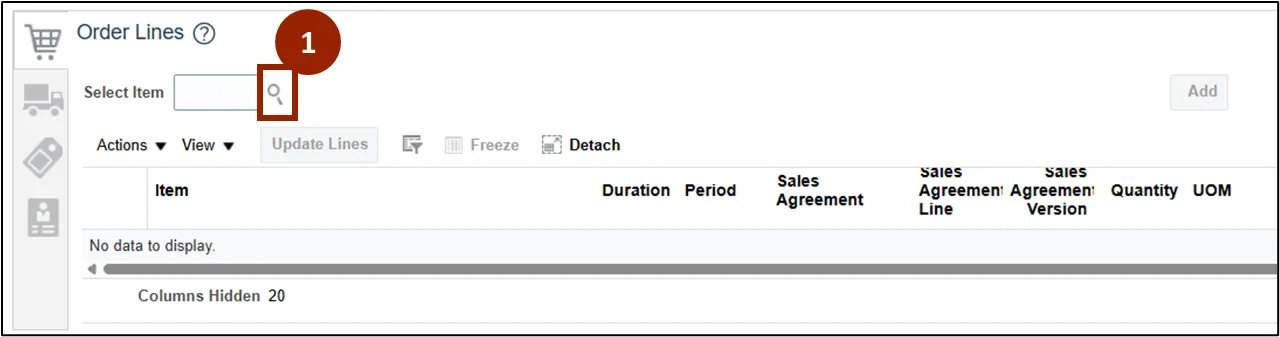
Step 1. In the Select Item field of the Order Lines table, enter the item number.
Note: If the item number is not known use the search feature outlined on the next set of steps.
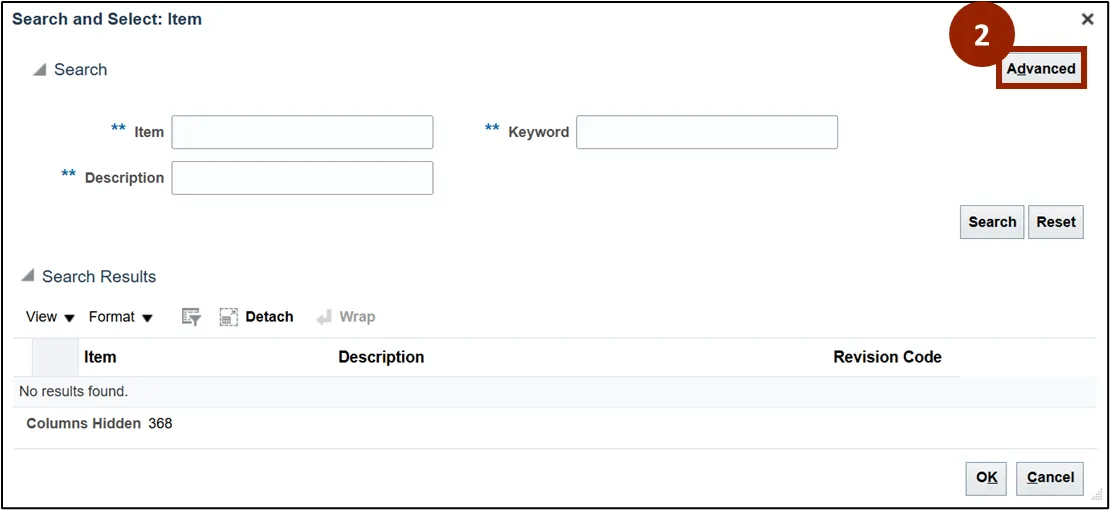
Step 2. Click the Select Item field’s Search icon to open the Search and Select pop-up window.
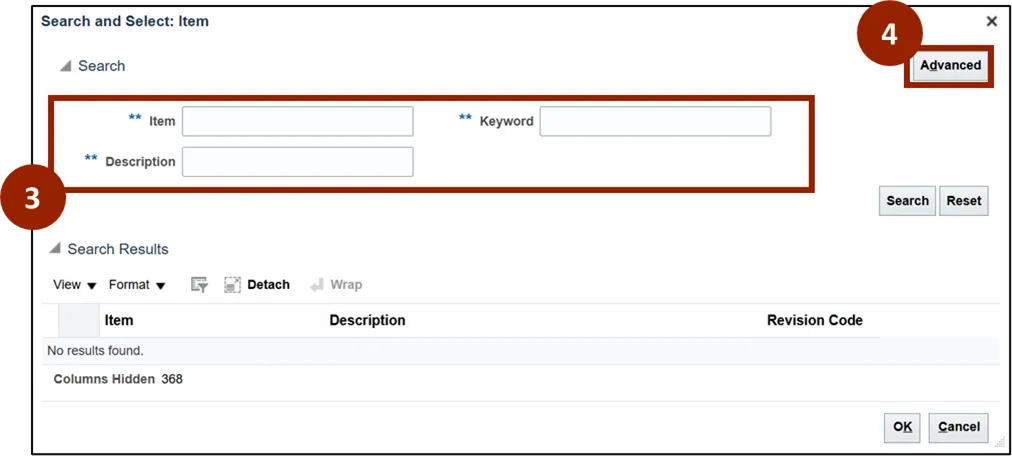
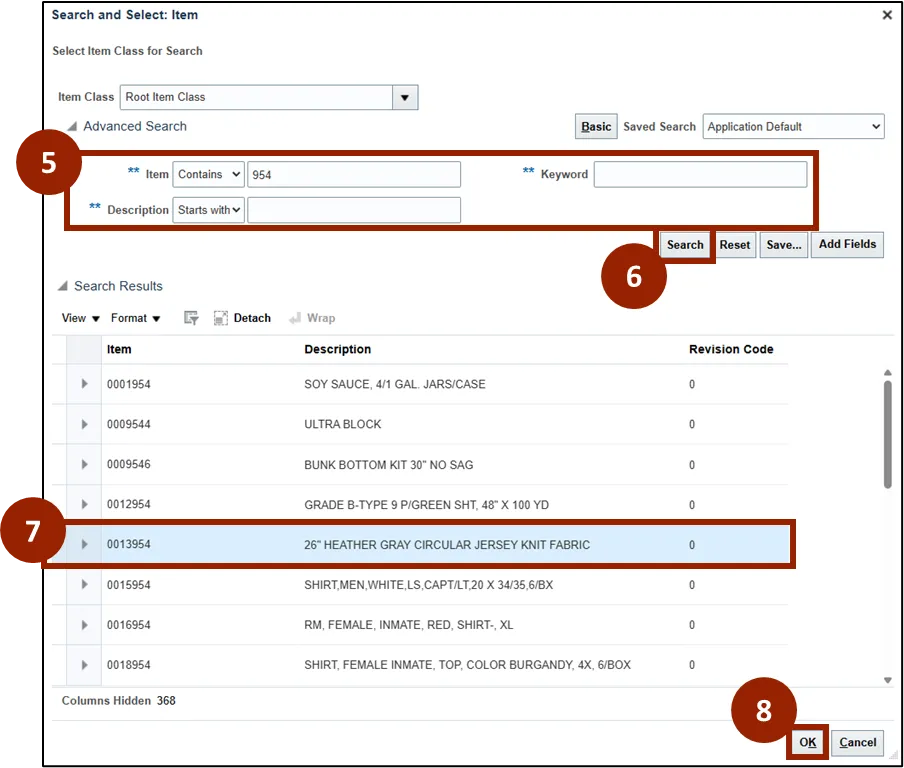
Step 3. Complete at least one of the fields marked with a double asterisk (**) to perform a basic search.
Note: To move forward with a basic search, click the Search button. To add advanced search parameters, follow the subsequent steps.
Step 4. Click the Advanced button.
Step 5. Complete at least one of the fields marked with a double asterisk (**) to perform an advanced search.
Step 6. Click the Search button.
Step 7. From the Search Results, Select an item row (e.g., 0013954).
Step 8. Click OK to return to the Create Order screen.
Note: The selected item populates within the Select Item field.
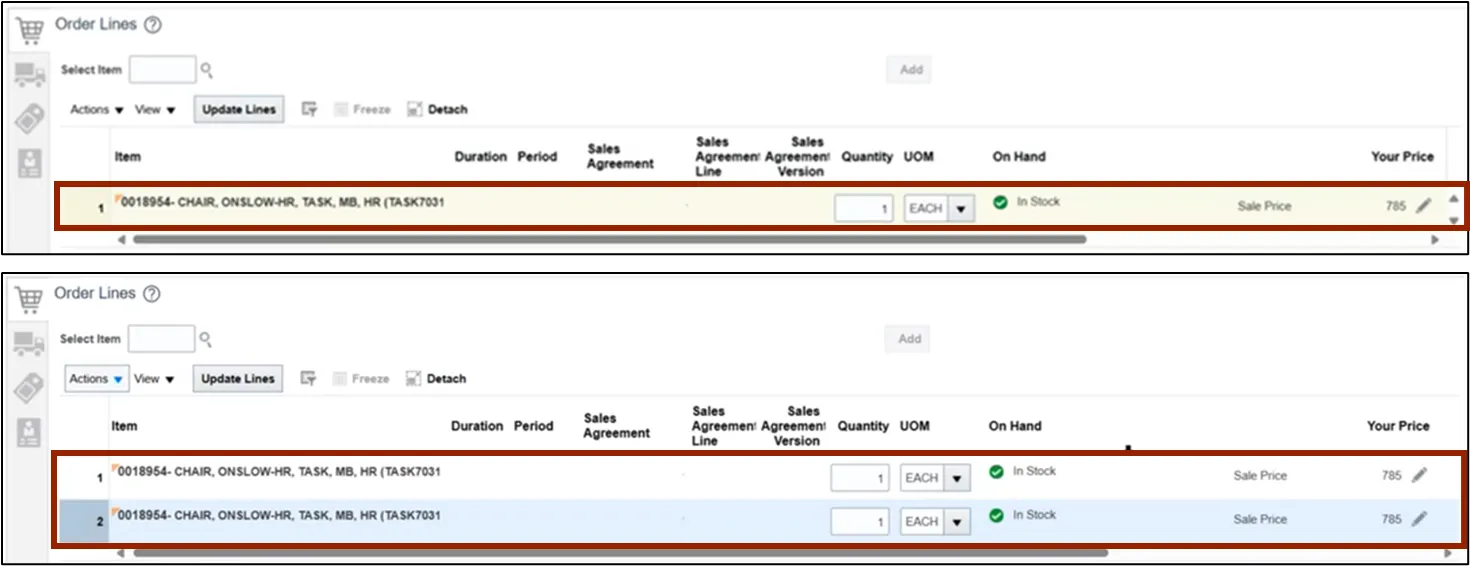
Step 9. The Quantity field is pre-filled based on the selected item (e.g., “1”) and can be manually updated if a different amount is required.
Step 10. The Unit of Measurement (UOM) defaults to the appropriate value for the selected item (e.g., “EACH”).
Step 11. Click the Add button.

Note: Once an item has been added as a row within the Order Lines table, additional items may be added to the Order Lines list. Unlocked fields can also be adjusted as needed. For this demonstration we will display multiple rows within the Order Lines list with additional columns displayed when scrolling to the right. To add multiple Order Lines, repeat the previous steps.
Note: As items are added to the Order Lines table, the related tabs—accessible via the icons on the left side of the Create Order screen—automatically update to display information relevant to the selected order lines.
Search and Add a Legacy Item Number
There are 16 steps to complete this process.
Step 1. Click the Select Item field’s Search icon to open the Search and Select pop-up window.
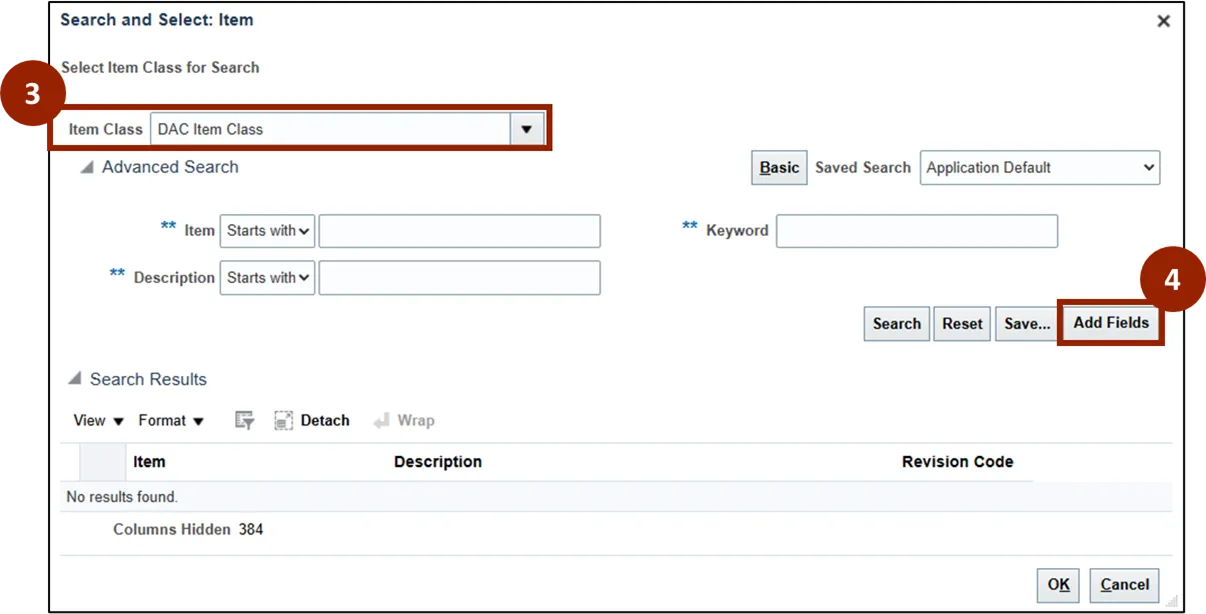
Step 2. Click the Advanced button.
Step 3. In the Item Class field, select DAC Item Class.
Step 4. Click the Add Fields button.
Step 5. In the Find field, enter Legacy.
Step 6. Click the Legacy Item Number attribute.
Step 7. Click the single arrow (>) icon to add the attribute to the Selected Attributes list.
Step 8. Click OK.

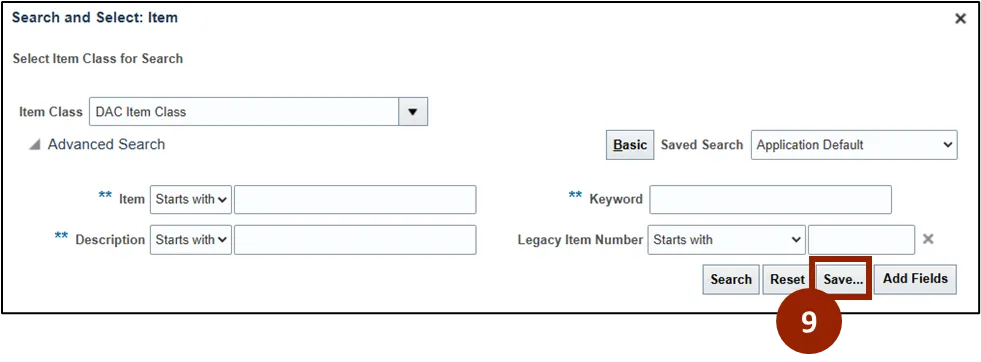
Note: The Legacy Item Number field now appears within the Search and Select: Item pop-up window.
Step 9. Click the Save… button to save the search for easy access.
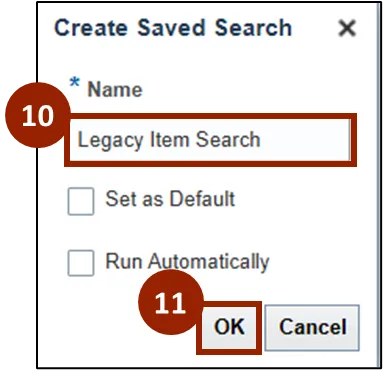
Step 10. In the Name field, enter Legacy Item Search.
Step 11. Click OK.
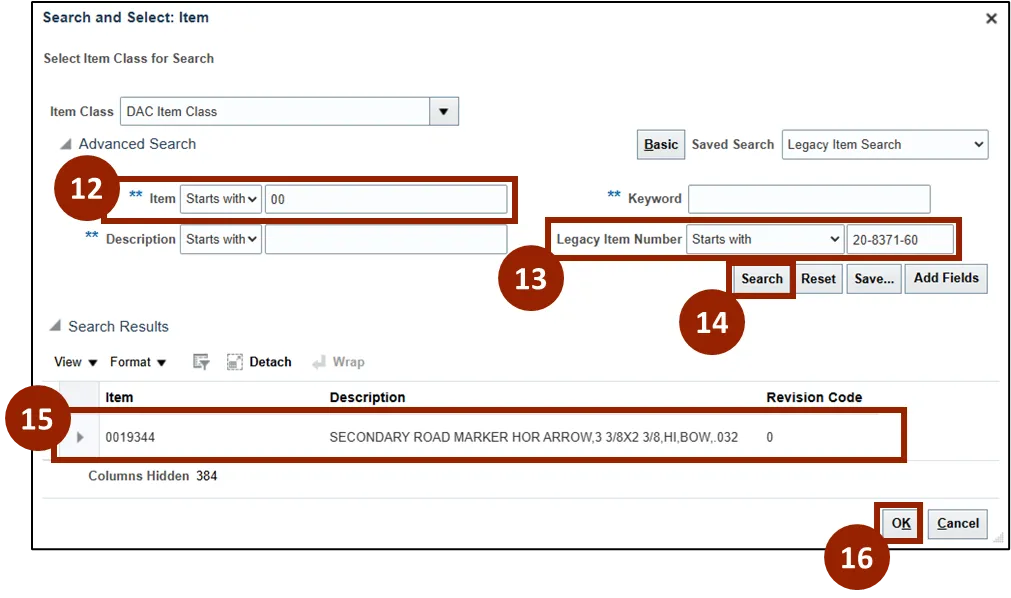
Step 12. In the Item field, enter 00.
Note: At least one of the fields marked with a double asterisk (**) needs to be filled before conducting the search.
Step 13. In the Legacy Item Number field, enter the Legacy Item Number.
Step 14. Click the Search button.
Step 15. From the Search Results field, select the desired item.
Step 16. Click OK.
Note: If you cannot find the legacy item number, double-check the number for accuracy or try searching by Description.
Manage Attachments: Line Item
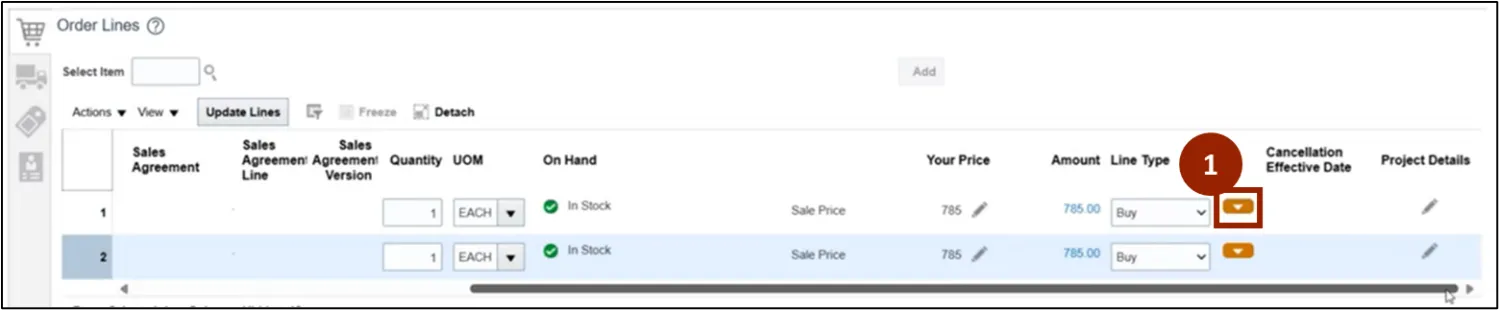
To add custom information or attachments to an item from the Order Lines table in the Create Order screen, follow these steps. There are 8 steps to complete this process.
Step 1. Click the Orange Actions icon to display actions for the record.
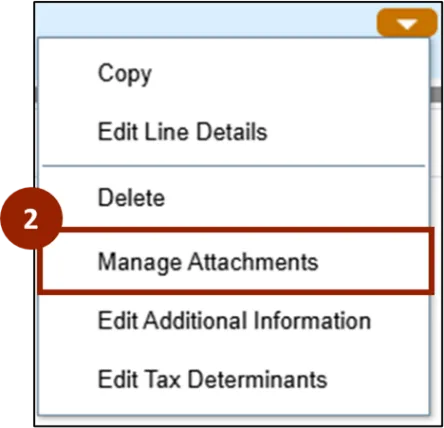
Step 2. Select Manage Attachments.
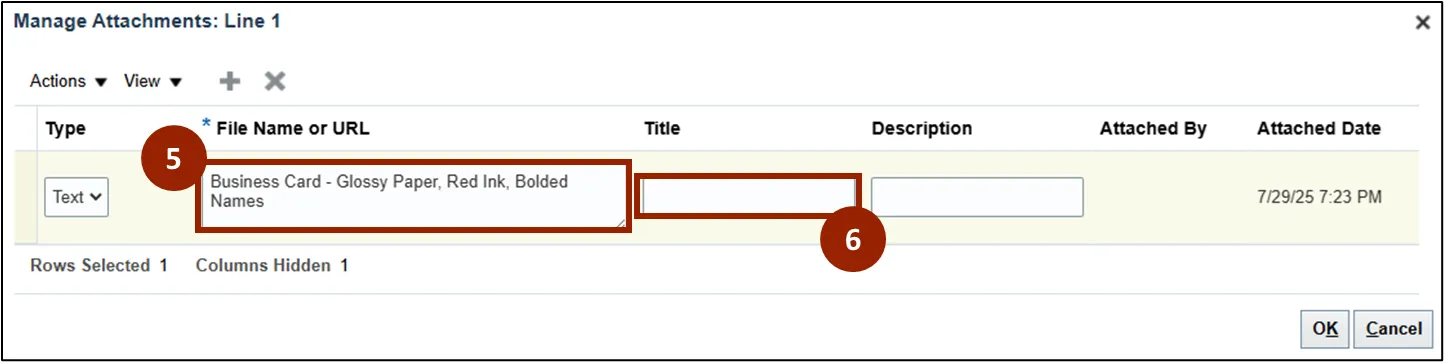
Step 3. Within the Manage Attachments: Line 1 pop-up window, click the Add (+) icon to insert a new row.
Step 4. In the Type drop-down field, select the Text attachment type.
Note: Attachment Type options include File, Text, or URL. The required fields will vary depending on the selected type. For this custom item demonstration, the Text option is used.
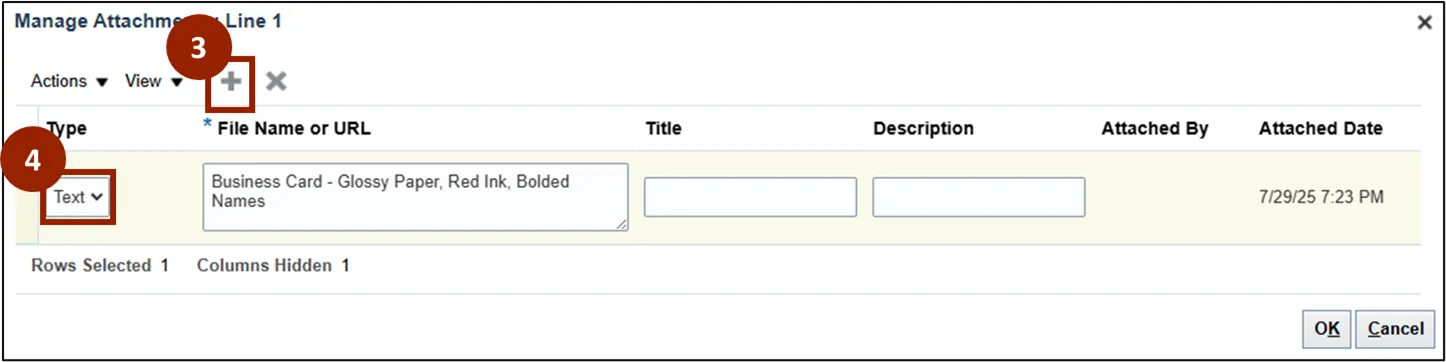
Step 5. In the File Name or URL field, enter the custom details regarding the custom information (e.g., Business Card - Glossy Paper, Red Ink, Bolded Names).
Step 6. In the Title field, enter an appropriate title.
Note: If a title is not provided, the system will default to using the first few words from the File, Text, or URL field. As a best practice, enter a specific and descriptive title for each item.
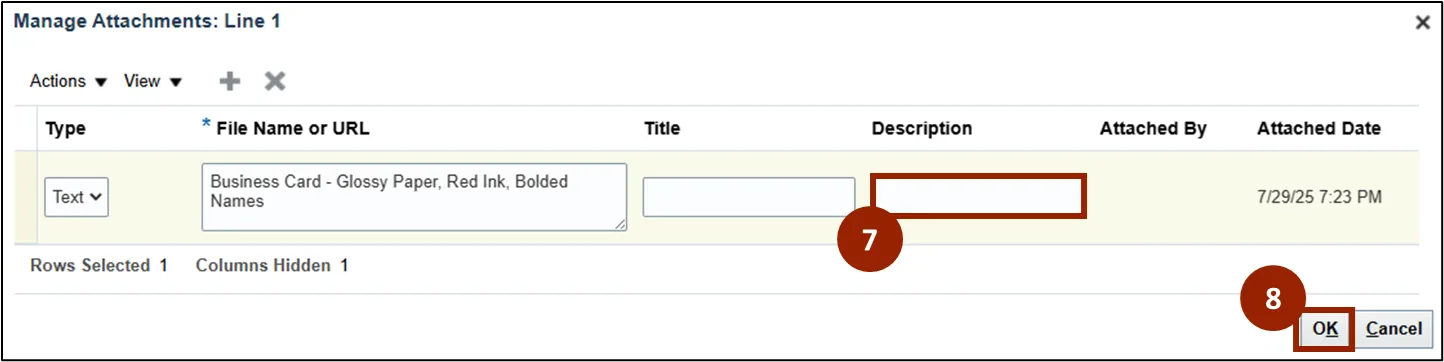
Step 7. (Optional) In the Description field, enter a description.
Step 8. Click OK.
Save Sales Order Progress
Note: To confirm that your progress is not lost, click the Save button located at the top right corner of the Create Order screen.
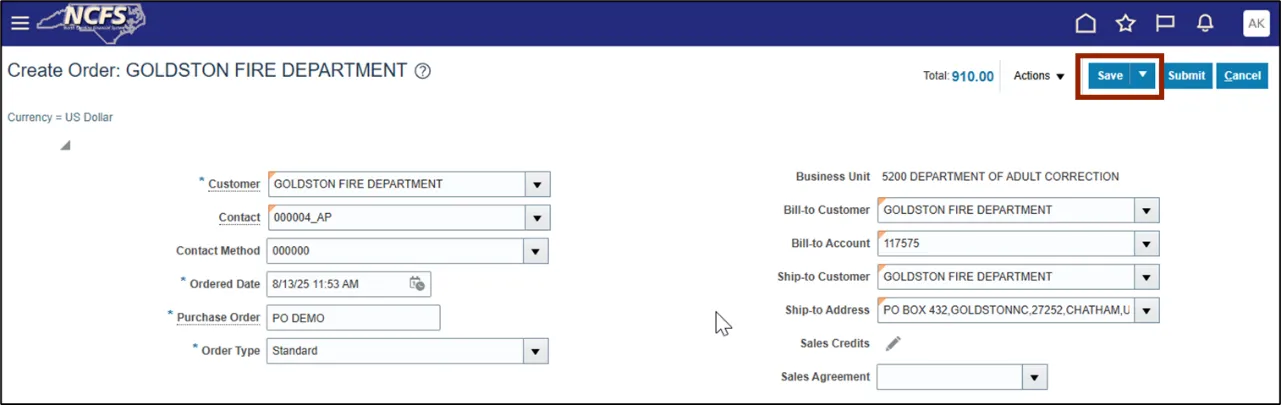
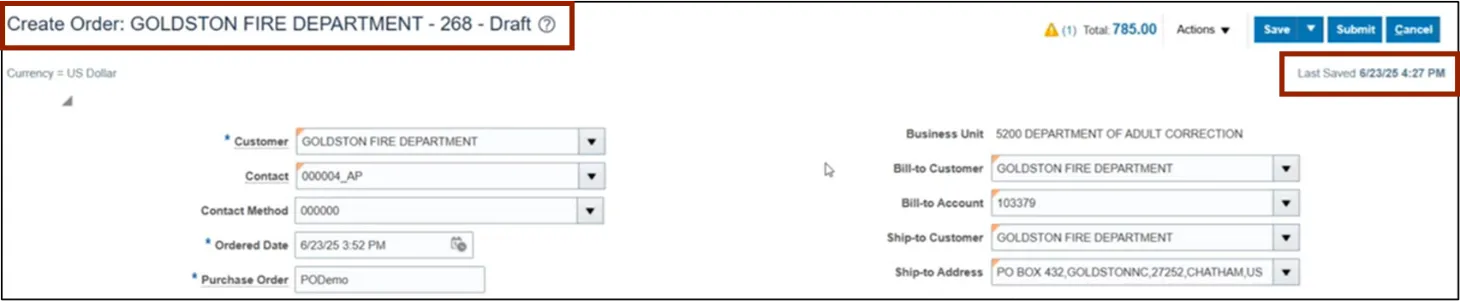
Note: If at least one Order Line has been added, clicking Save will store the current sales order as a draft, a Confirmation pop-up window indicating that the sales order has been saved in draft format successfully, and the Create Order screen will display a Last Saved date.
Note: Saving your progress at this stage allows you to return and complete the sales order process later. Managing a Sales Order Draft will be covered in the subsequent course.
Wrap-Up
NCFS users can enter manual orders using the steps above.
Additional Resources
- Instructor Led Training (ILT)