Purpose
The purpose of this Quick Reference Guide (QRG) is to provide a step-by-step guide of how to execute the Pick Release Process in the North Carolina Financial System (NCFS).
Introduction and Overview
This QRG covers the process of Pick Release on how to confirm picked inventory and update quantities as needed before shipment.
Pick Release: Schedule a Pick Wave
There are 15 steps to complete this process.
Step 1. Click the Company Single Sign-On (SSO) button.
Step 2. Enter your @dac.nc.gov email address.
Step 3. Click Next then enter your password.
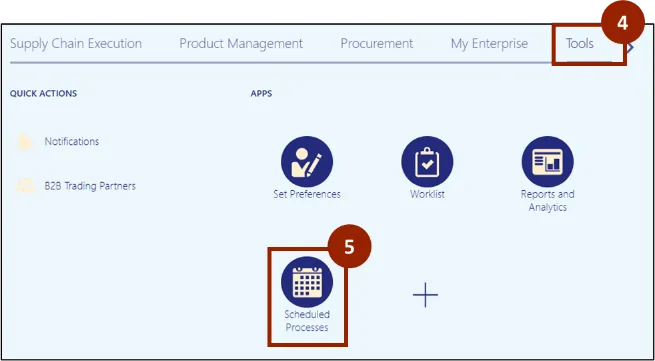
Step 4. From the Home screen, select the Tools tab.
Step 5. Click Scheduled Processes.
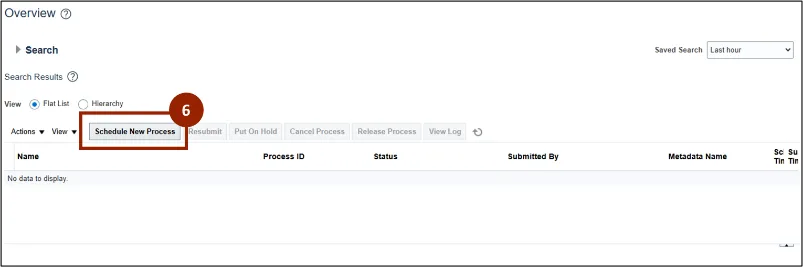
Step 6. The Scheduled Process page appears, click Schedule New Process.
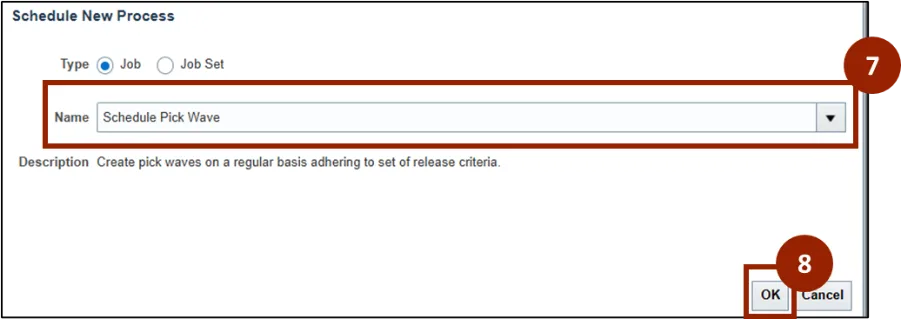
Step 7. From the Name drop-down, select Schedule Pick Wave.
Step 8. Click OK.
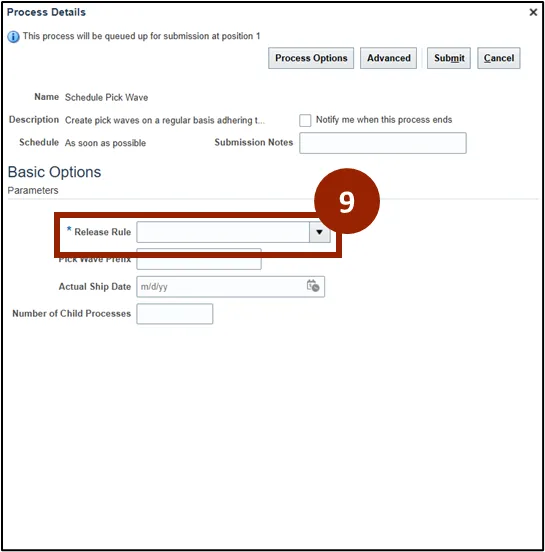
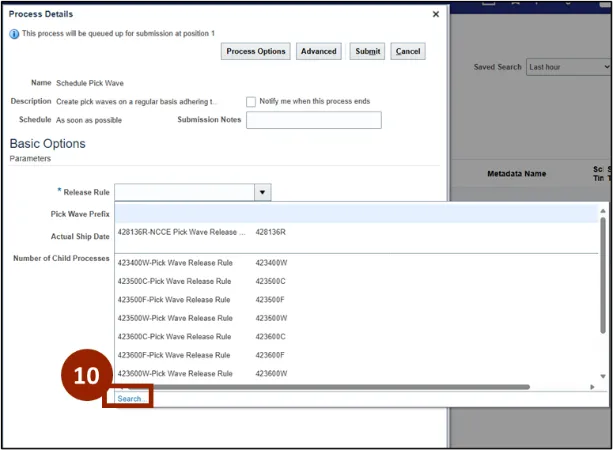
Step 9. Select the Release Rule drop-down.
Step 10. Select Search to select the appropriate rule.
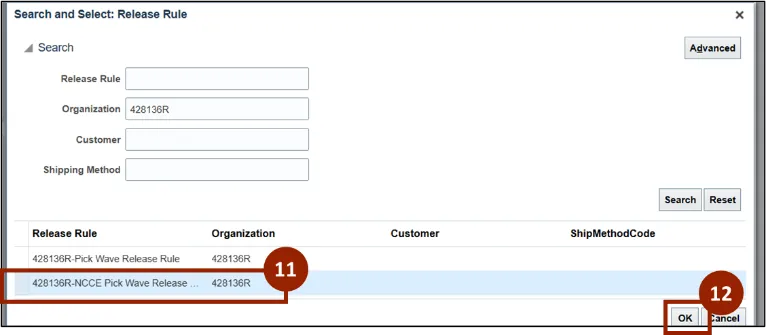
Step 11. The Search and Select: Release Rule notification appears, select (Organization Number)-NCCE Pick Wave Release.
Step 12. Click OK.
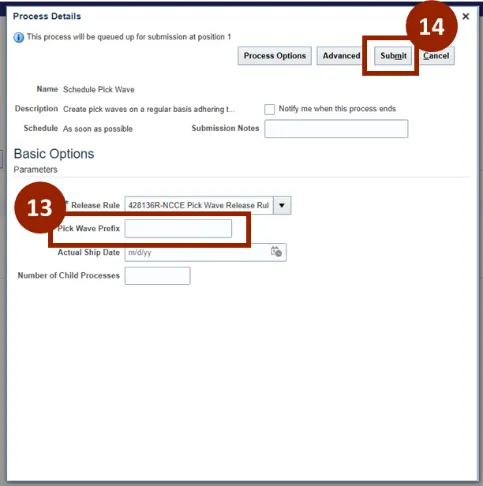
Step 13. In the Pick Wave Prefix field, enter a Pick Wave Prefix name.
Step 14. Select Submit.
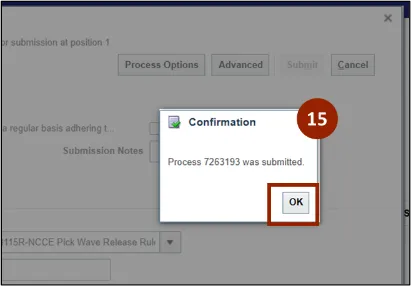
Step 15. The Confirmation notification appears, select OK.
Pick Release: Assign a Shipping Method
There are 12 steps to complete this process.
Step 1. Begin from the Home page, or click the Home icon.
Step 2. On the Home page, select Supply Chain Execution.
Step 3. Within the Supply Chain Execution tab, select Inventory Management.

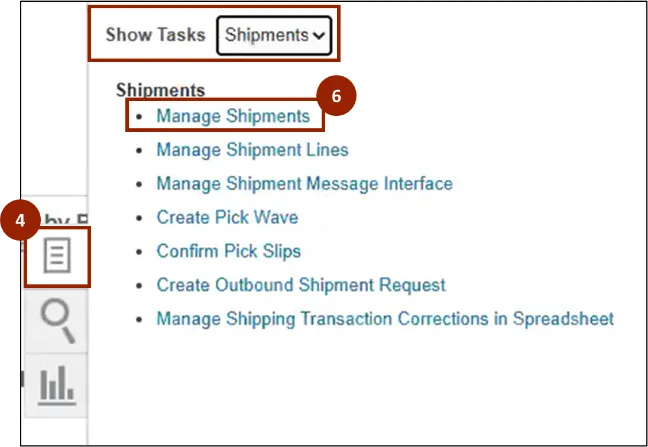
Step 4. Click the Tasks icon.
Step 5. In the Show Tasks field, select Shipments from the drop-down.
Step 6. Select Manage Shipments.
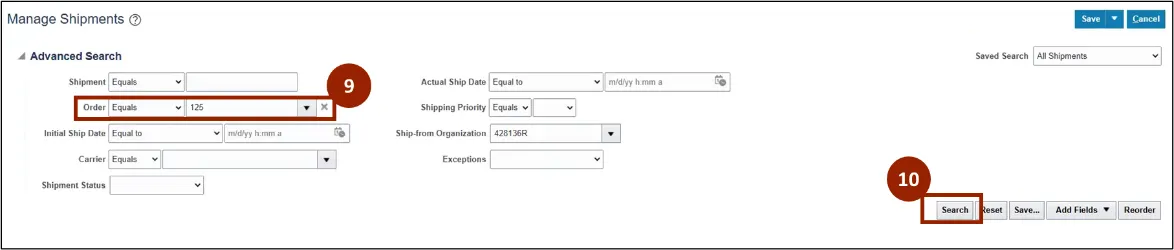
Step 7. Click the Add Fields drop-down.
Step 8. Select Order.
Note: These steps are used to search for an order number. Have the necessary order information available before beginning.

Step 9. Enter the Order Number into the Order drop-down.
Step 10. Click Search.
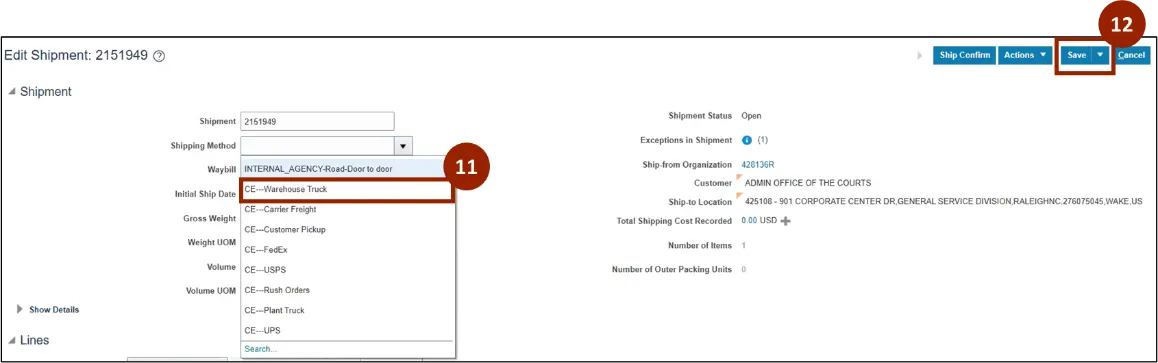
Step 11. If the shipment is for an APEX shipment, select Warehouse Truck from the Shipping Method field drop-down.
Step 12. Click Save.
Pick Release: Print a Pick Slip Report
There are 16 steps to complete this process.
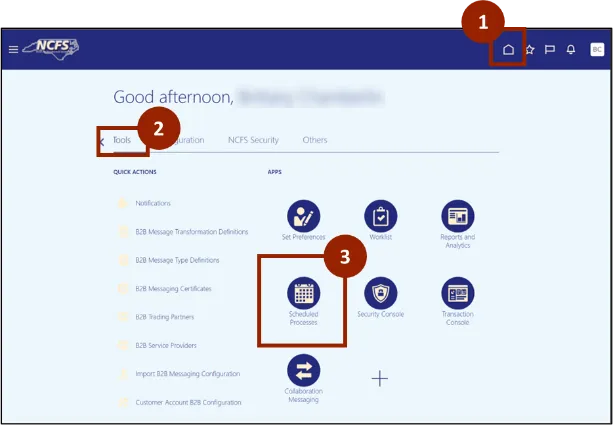
Step 1. Begin from the Home page, or click the Home icon.
Step 2. On the Home page, select Tools.
Step 3. Within the Tools tab, select Scheduled Processes.
Step 4. Select Schedule New Process.
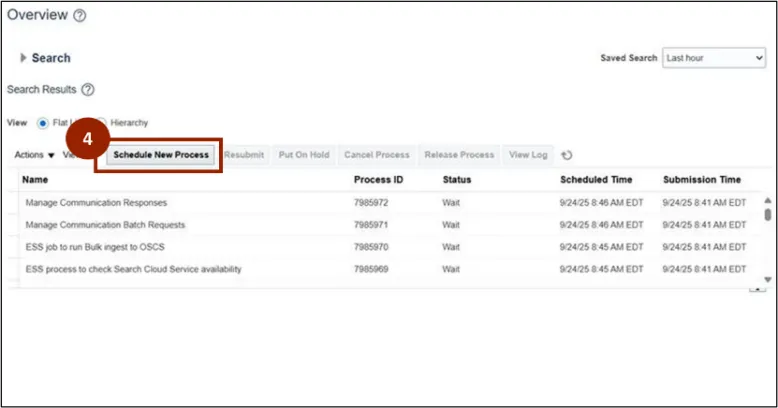
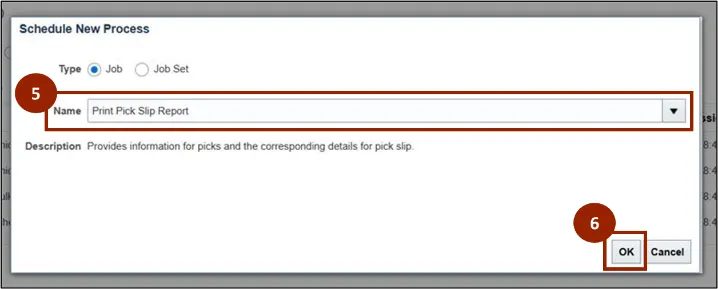
Step 5. In the Name field, enter Print Pick Slip Report.
Step 6. Click OK.
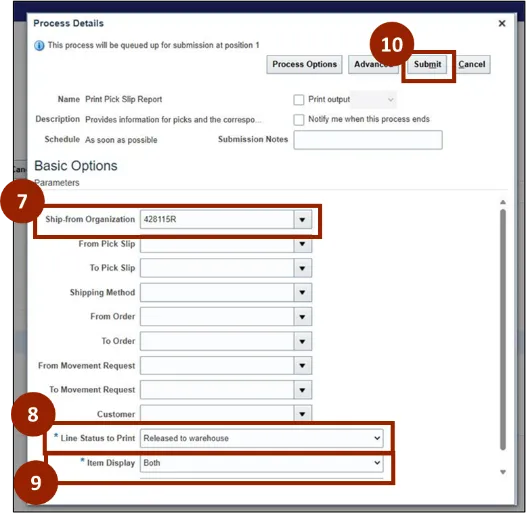
Enter the following parameters.
Step 7. In the Organization field, input the appropriate Organization Code from the drop-down.
Step 8. In the Line Status to Print field, select Released to warehouse from the drop-down.
Step 9. In the Item Display field, select Both from the drop-down.
Step 10. Click Submit.
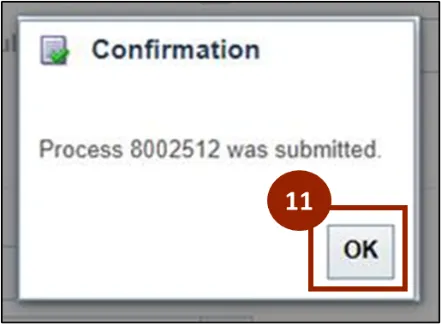
Step 11. A Confirmation notification will appear, click OK.
Step 12. Select Print Pick Slip Report.
Note: This report tells warehouse staff where to find the item in the warehouse. Staff will collect the items and move them to the staging area (the final location before shipping).
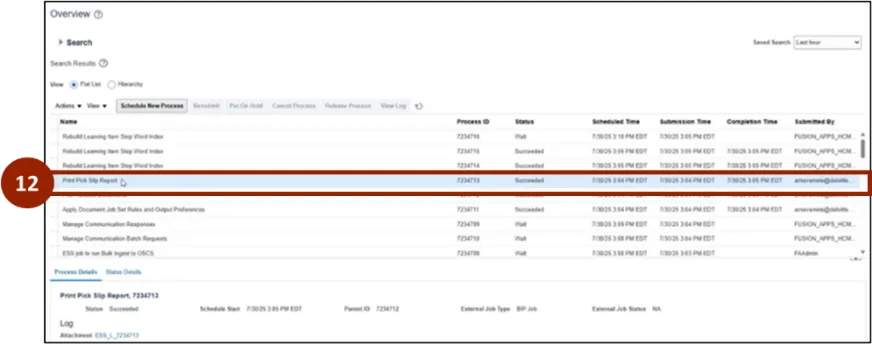
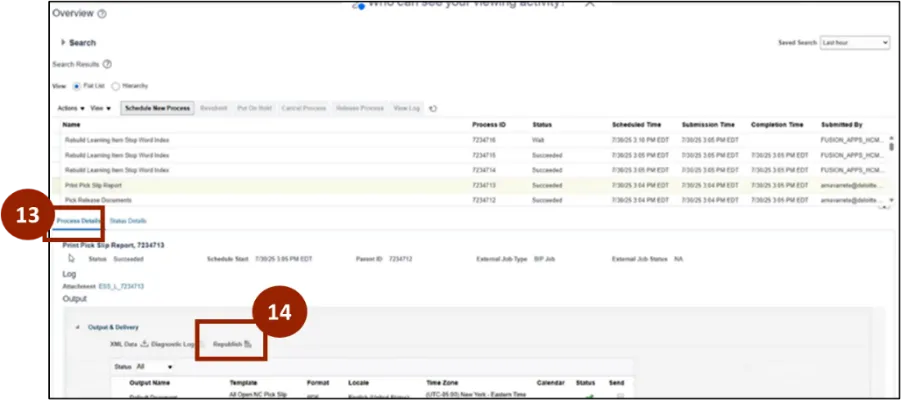
Step 13. On the Overview page scroll down to the details area, select the Process Details tab.
Step 14. Select Republish.
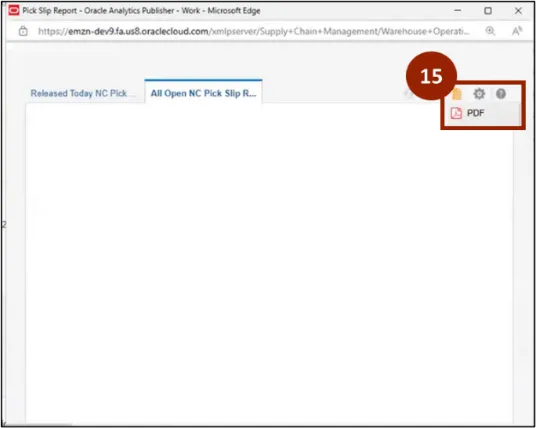
Step 15. Select the notepad icon and select PDF.
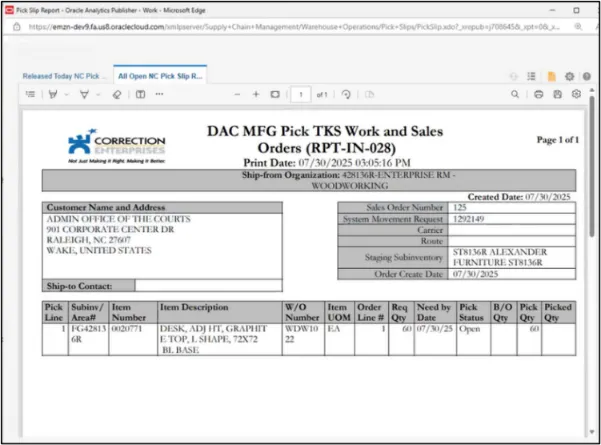
Step 16. The DAC MFG Pick TKS Work and Sales Orders (RPT-IN-028) will display details of the sales order.
Note: In the Work Order Number Column there may be multiple Work Order Numbers in a single line.
Wrap-Up
NCFS users can reference the Pick Release Process using the steps above.
Additional Resources
- Virtual Instructor Led Training (vILT)