Purpose
The purpose of this Quick Reference Guide (QRG) is to provide a step-by-step guide of how to Plan Inventory Replenishment in the North Carolina Financial System (NCFS).
Introduction and Overview
This QRG covers the process of Plan Inventory Replenishment. This process provides information on identifying the required fields and parameters for setting up items for Min-Max Planning and how to execute the process for running the Print Min-Max Planning Report in NCFS.
Plan Inventory Replenishment
Setting Items for the Min-Max Planning Report
There are 17 steps to complete this process.
Step 1. Log in to the NCFS portal using the Company Single Sign-On (SSO) button.
Step 2. Enter your @dac.nc.gov email address.
Step 3. Click Next, then enter your password.
Note: The system will automatically sign on using SSO and log in to NCFS. After the first login using SSO, future access may not require credentials. If SSO is not available, enter credentials manually within the Username and Password fields, then click Sign-In.
Step 4. Navigate to the Home page.
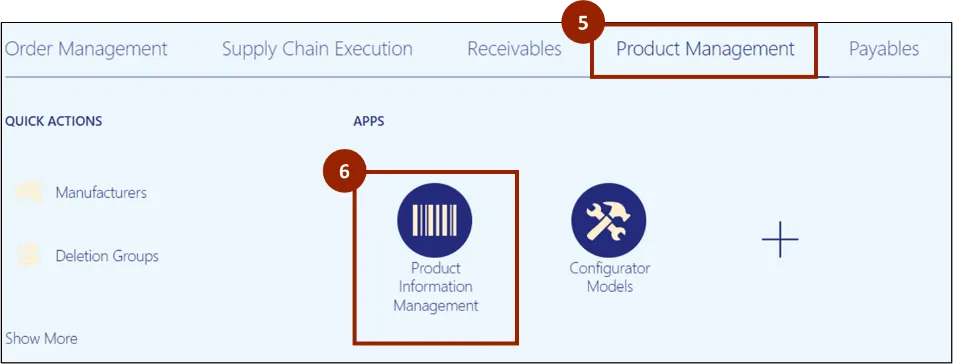
Step 5. Click on the Product Management tab.
Step 6. Click on Product Information Management.
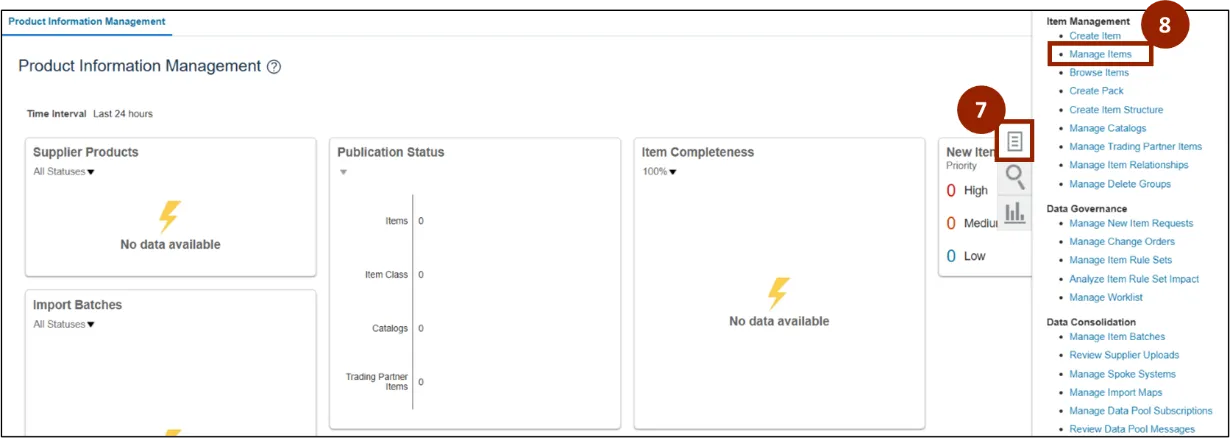
Step 7. On the Product Information Management page, click the Task icon.
Step 8. Select the Manage Items option.
Step 9. In the Item field, enter or select the desired item (i.e., 0015062) and click Search to find the selected item.
Note: At least one of the fields marked with a double asterisk (**) must be completed before clicking the Search button.

Step 10. The Search Results table displays, click the desired Item Number link to open the Edit Item screen for that item.
Note: Select the item for the desired Organization. In this example we are selecting the item for Organization 428262R.

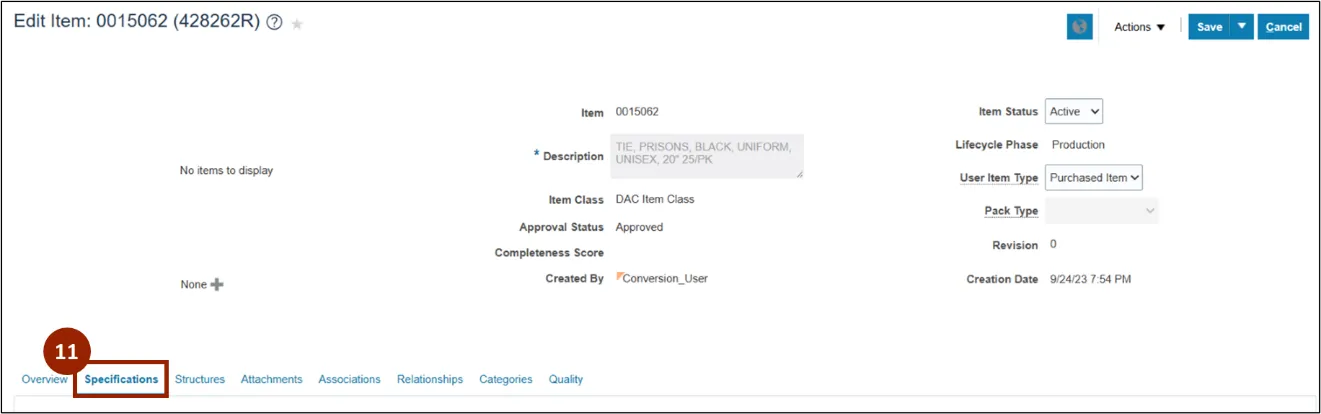
Step 11. Within the Edit Item screen, click the Specifications tab.
Step 12. Under the Item Organization header, click Planning.

Note: For an item to be included within the Min-Max replenishment process, the item needs to be set with the following parameters.
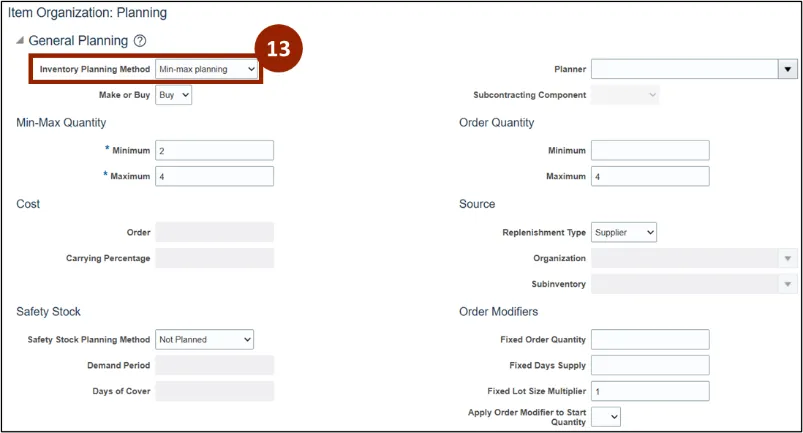
Step 13. In the Inventory Planning Method field, select Min-max planning.
Note: If fields do not display on the Planning page, select the refresh button.
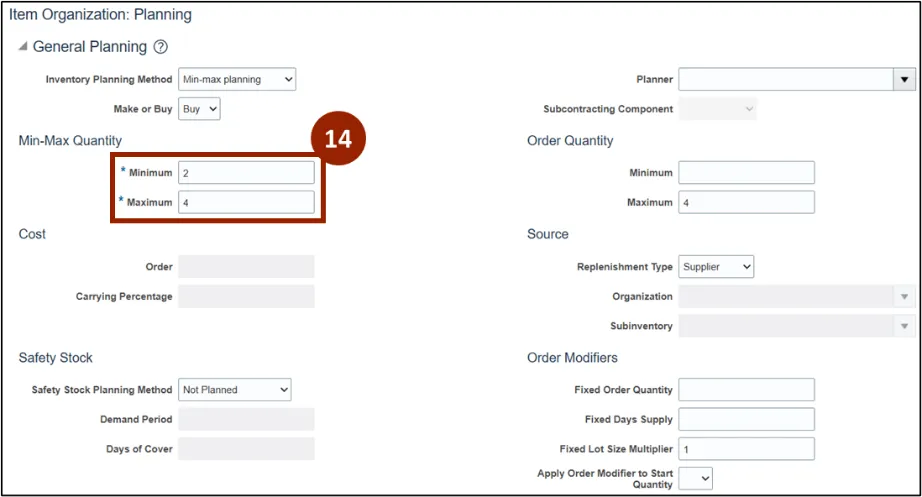
Step 14. Enter the Min and Max quantities in the following fields: Minimum and Maximum. The quantities entered should be based on the Primary UOM.
Step Note: Any of the unlocked fields can be configured and adjusted, as needed. The Min-Max report will display based on selections made to fields on this screen.
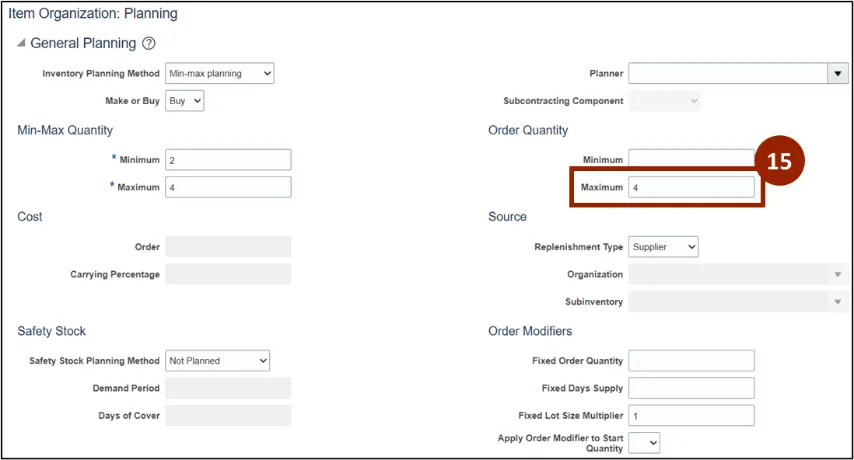
Step 15. In the Order Quantity section, enter the Maximum.
Note: The Min-Max planning uses this field as follows: If the order quantity is greater than the maximum order quantity, the order quantity is revised down to the maximum.
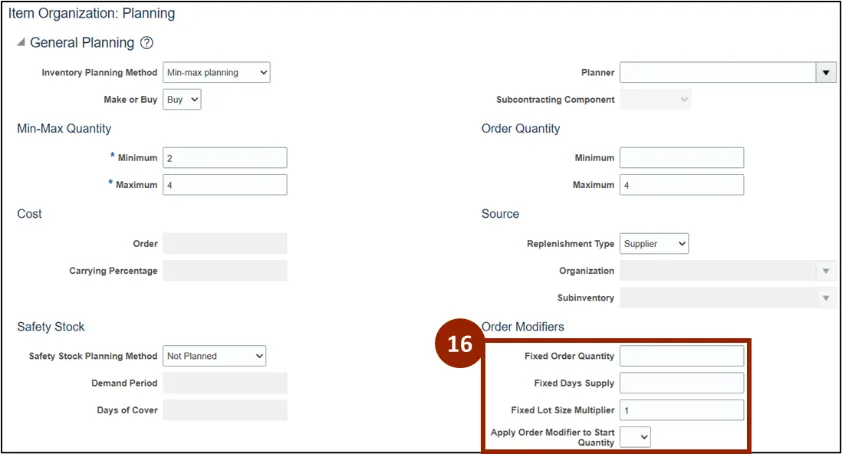
Step 16. In the Order Modifiers section, enter the Fixed Lot Size Multiplier.
Note: The Min-Max Planning uses the Fixed Lot Size Multiplier setting to round reorder quantities.
Step 17. Once all changes have been made, click Save.

Printing the Min-Max Planning Report
Once logged in to NCFS, follow these steps. There are 17 steps to complete this process.
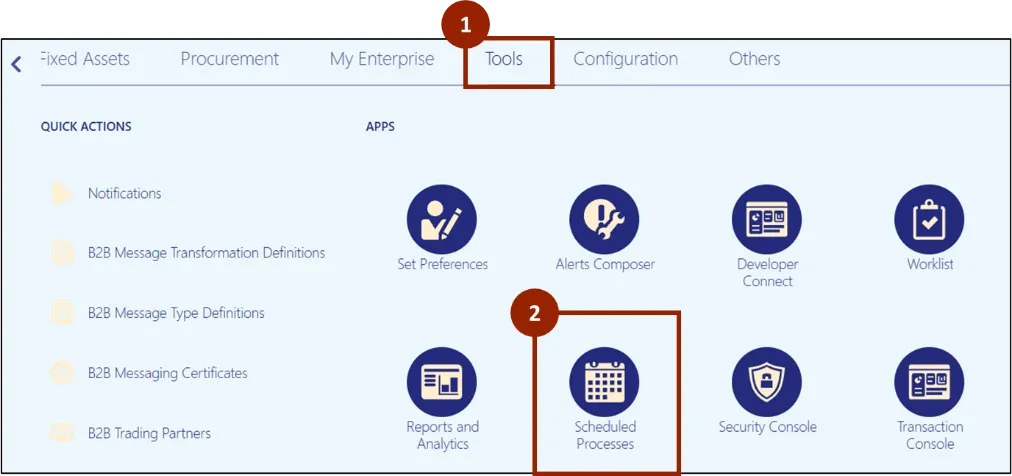
Step 1. From the Home screen, select the Tools tab.
Step 2. Click Schedule Processes.
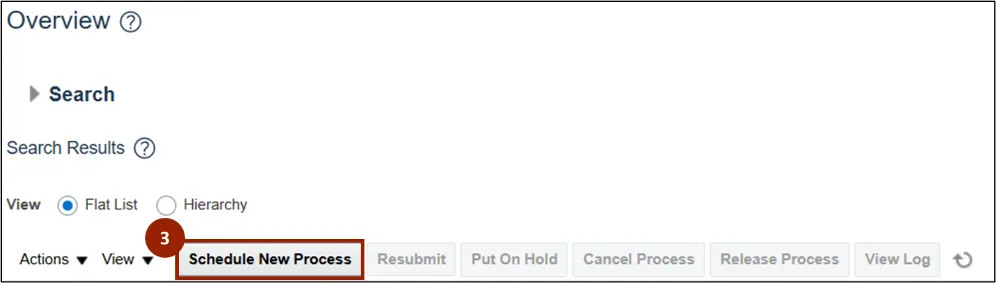
Step 3. The Scheduled Processes Overview screen displays, click the Schedule New Process button.
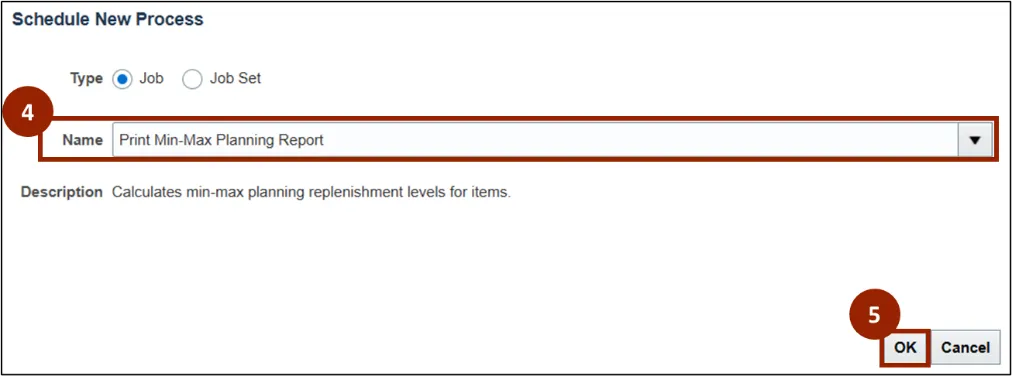
Step 4. In the Name field of the Schedule New Processes pop-up window, enter or search Print Min-Max Planning Report.
Step 5. Click OK.
Note: Once the appropriate Job Name is selected, the Description field automatically populates.
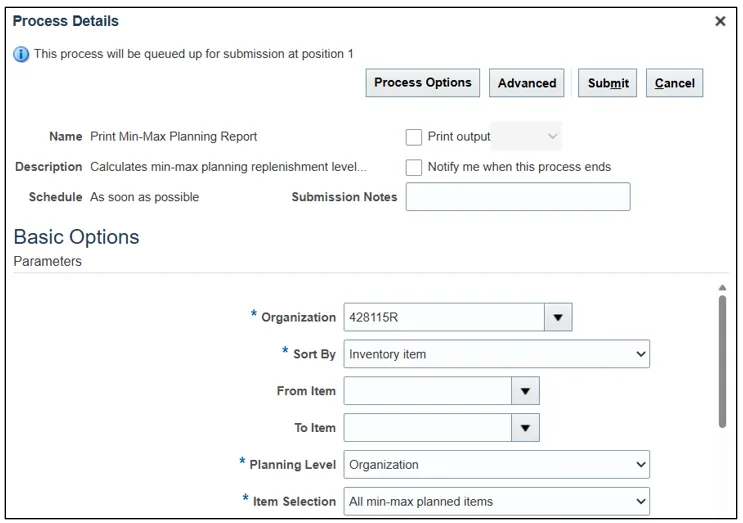
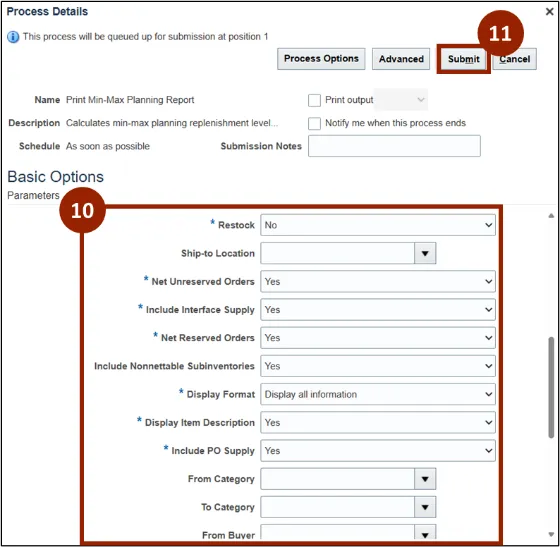
The Process Details screen displays basic options for the Min-Max report parameters, the Parameters section determines what specific areas are included within the report.
Note: To generate the report, all fields marked with a single asterisk (*) are required and must be completed. The fields outlined are recommended to complete as a best practice.
Step 6. In the Organization field, enter or search for the appropriate organization option (i.e., 428262R).
Step 7. In the Sort By field, select Inventory Item.
Step 8. In the Planning Level field, select Organization.
Step 9. In the Item Selection field, select All min-max planned items.
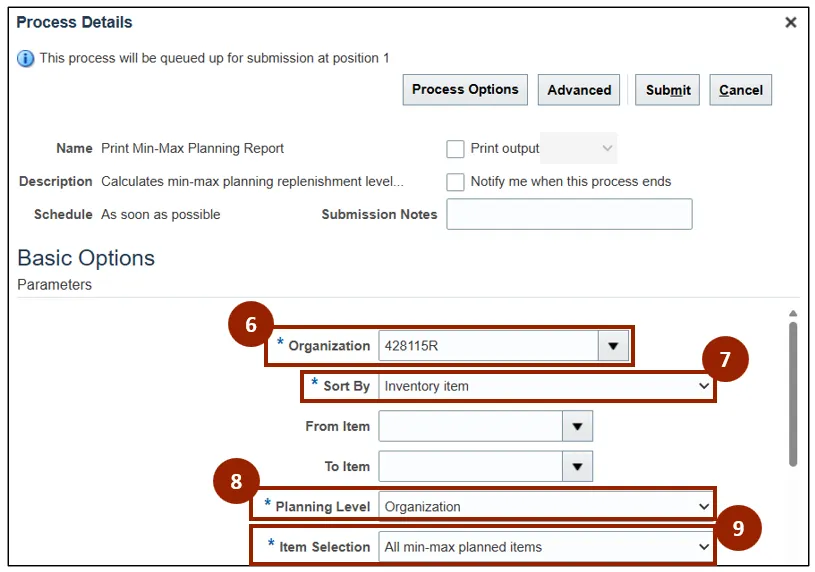
Step 10. All other fields displayed can be left as their defaulted selections.
Note: The restock should be set to No and all other Parameters can be adjusted to fit the desired report output.
Step 11. Once all Parameters have been selected, click the Submit button.
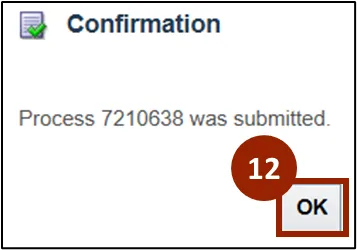
Step 12. A Confirmation pop-up window displays, click OK to close the window.
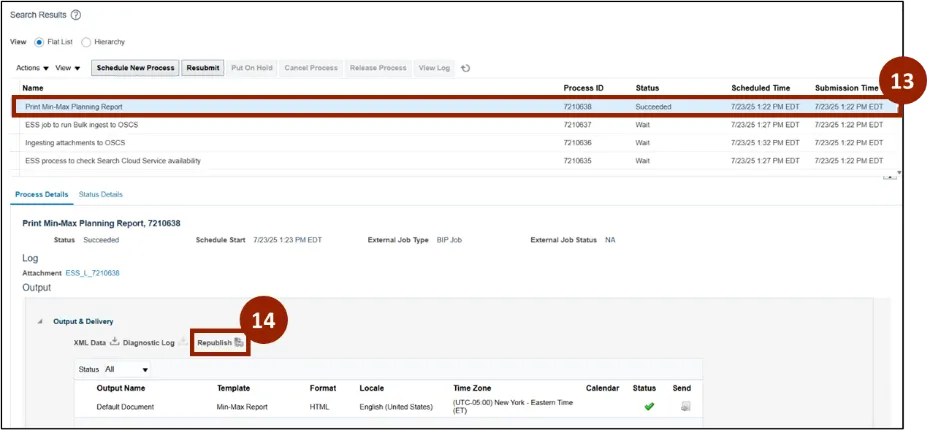
The Scheduled Processes overview screen now displays the Print Min-Max Planning Report information within the table.
Step 13. Once the scheduled report’s Status displays as Succeeded, click the Report to open details below.
Step 14. Click the Republish icon.
Step 15. Within the Min-Max Planning Report window, Click the View Report icon.
Step 16. Click the PDF option from the list.
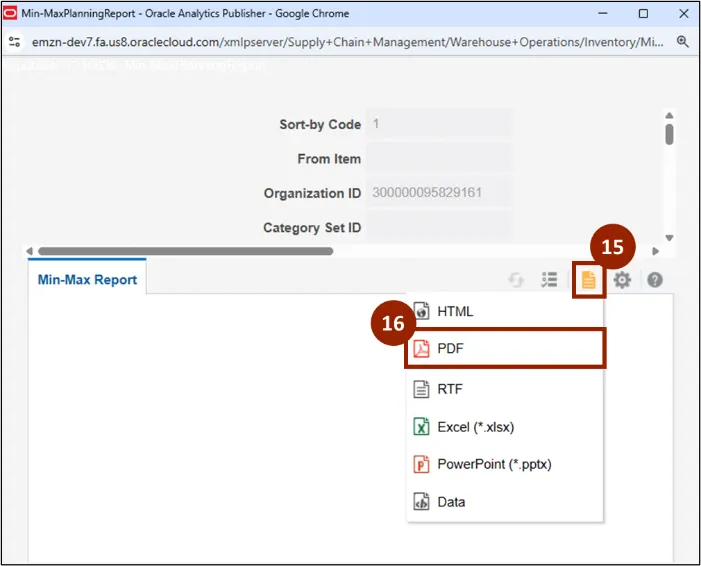
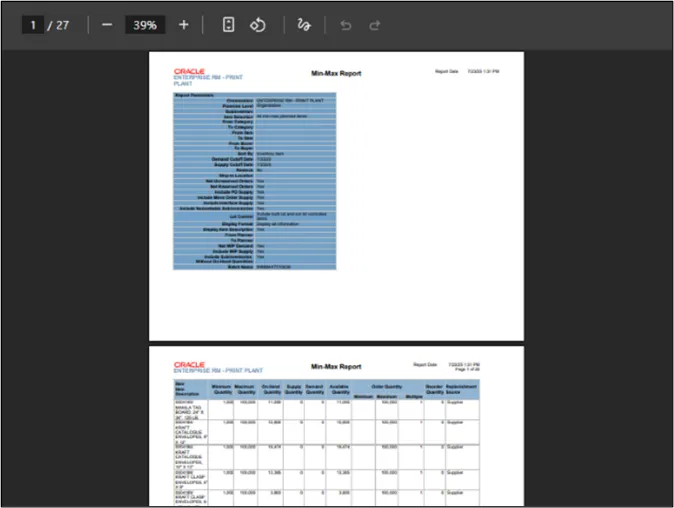
Step 17. The Min-Max Planning Report generates in PDF format, displaying all relevant information according to the parameters selected. Review all information within the report before moving forward with a new process.
Note: You can download or print the report directly from your browser window.
Wrap-Up
NCFS users can reference the Plan Inventory Replenishment using the steps above.
Additional Resources
- Virtual Instructor Led Training (vILT)