Purpose
The purpose of this Quick Reference Guide (QRG) is to provide a step-by-step explanation on how to Create, Manage, and Associate Inventory Items to Subinventories in the North Carolina Financial System (NCFS).
Introduction and Overview
This QRG covers how to create, manage, and associate inventory items to subinventories to store and transfer materials in and out of the Inventory Organization in NCFS.
Quick Links
- Create and Manage Subinventories
- Creating a New Subinventory from an Existing Subinventory
- Creating Multiple Subinventories for an Inventory Organization
- Editing a Single Subinventory for an Inventory Organization
- Editing Multiple Subinventories for the Same Inventory Organization
- End Dating/Inactivating Subinventory(s)
- Single Inventory Item Associating to Subinventory
- Multiple Items Associating with a Subinventory (Upload)
- Multiple Items Associating with Multiple Subinventories at the same Inventory Organization (Upload)
- Single Inventory Item Association to Subinventories for Multiple Inventory Organizations (Import via Action button from Setup and Maintenance screen)
- Disassociate an Inventory Item from a Subinventory
- Subinventory Reporting
- Additional Resources
Create and Manage Subinventories
Follow the steps to create subinventory in NCFS. There are 20 steps to complete this process.
Step 1. Log in to the NCFS portal with your credentials.
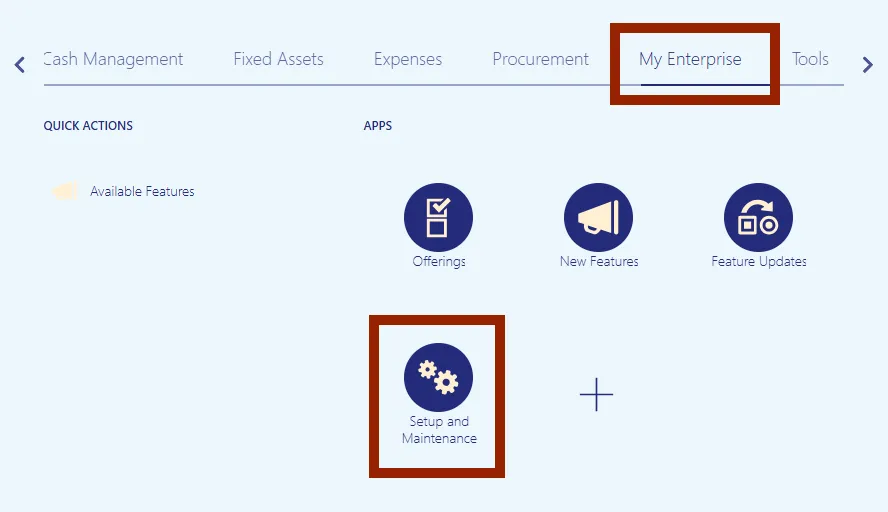
Step 2. On the Home page, click the My Enterprise tab, and then click the Setup and Maintenance app.
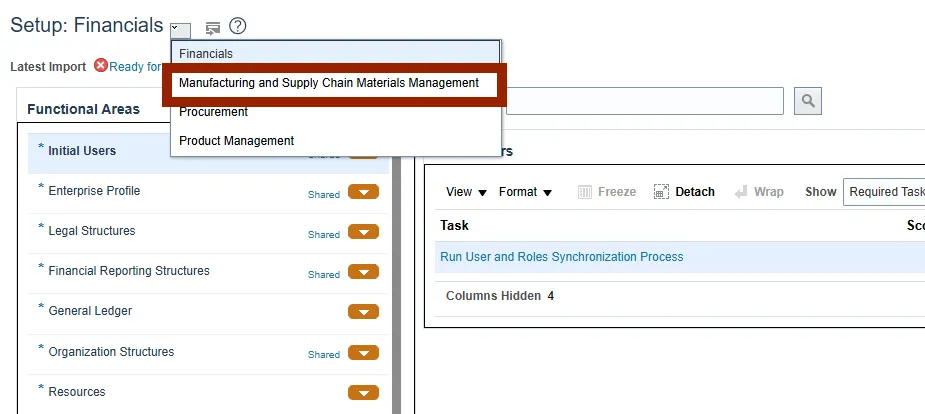
Step 3. On the Setup page, navigate to the Setup: Financials dropdown menu, and select Manufacturing and Supply Chain Materials Management.
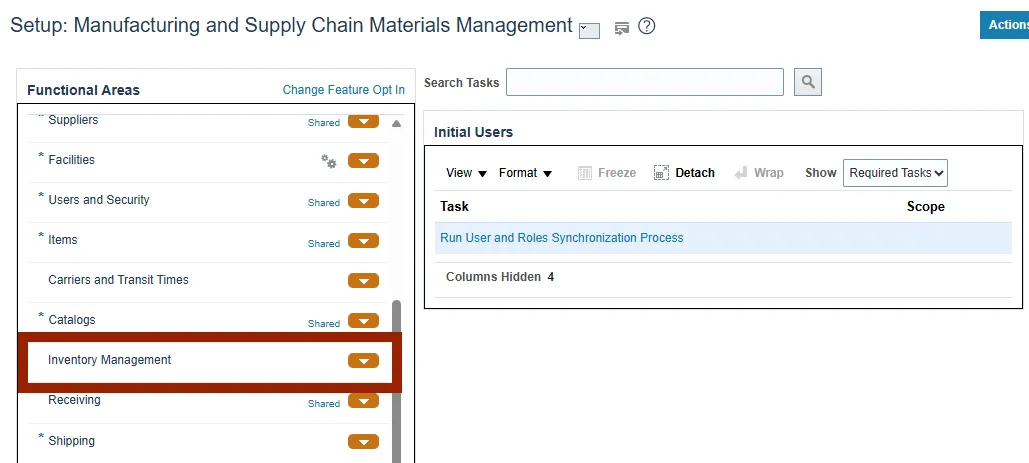
Step 4. Select Inventory Management, within the Functional Areas the left side panel in the Manufacturing and Supply Chain Materials Management section.
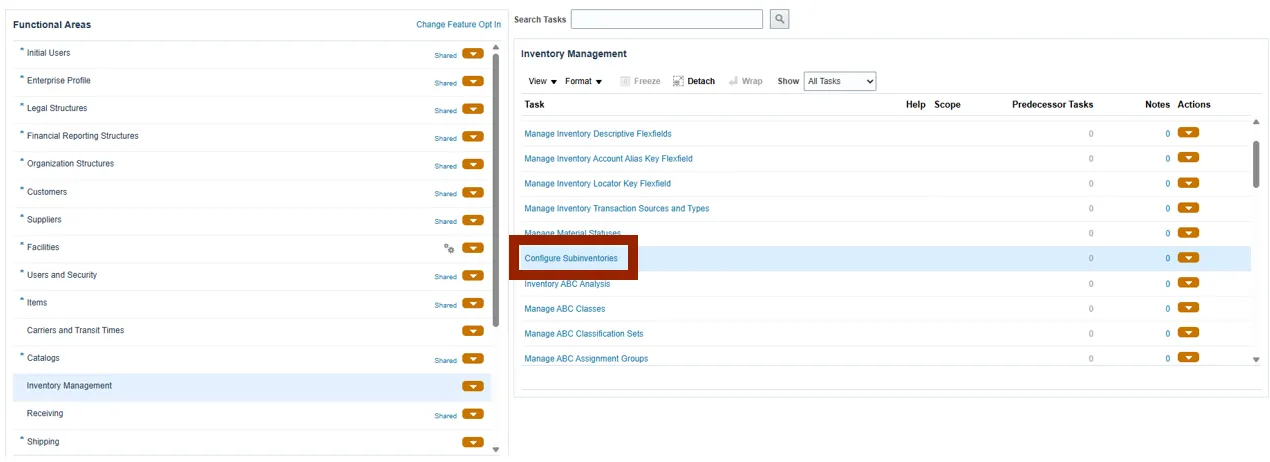
Step 5. Select Configure Subinventories, from the Inventory Management Tasks.
Step 6. Select the drop-down menu and search the required Organization by name or number.
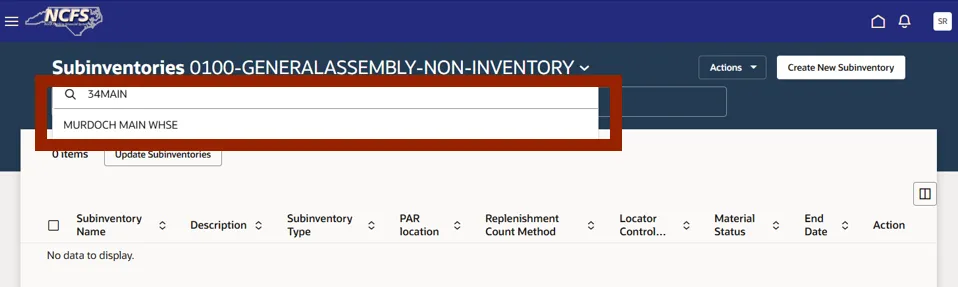
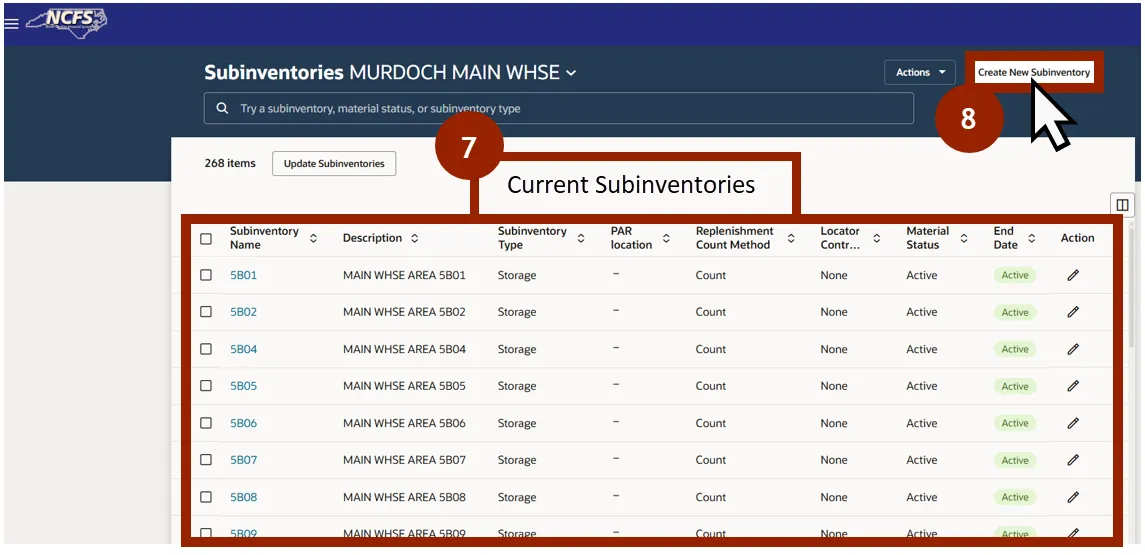
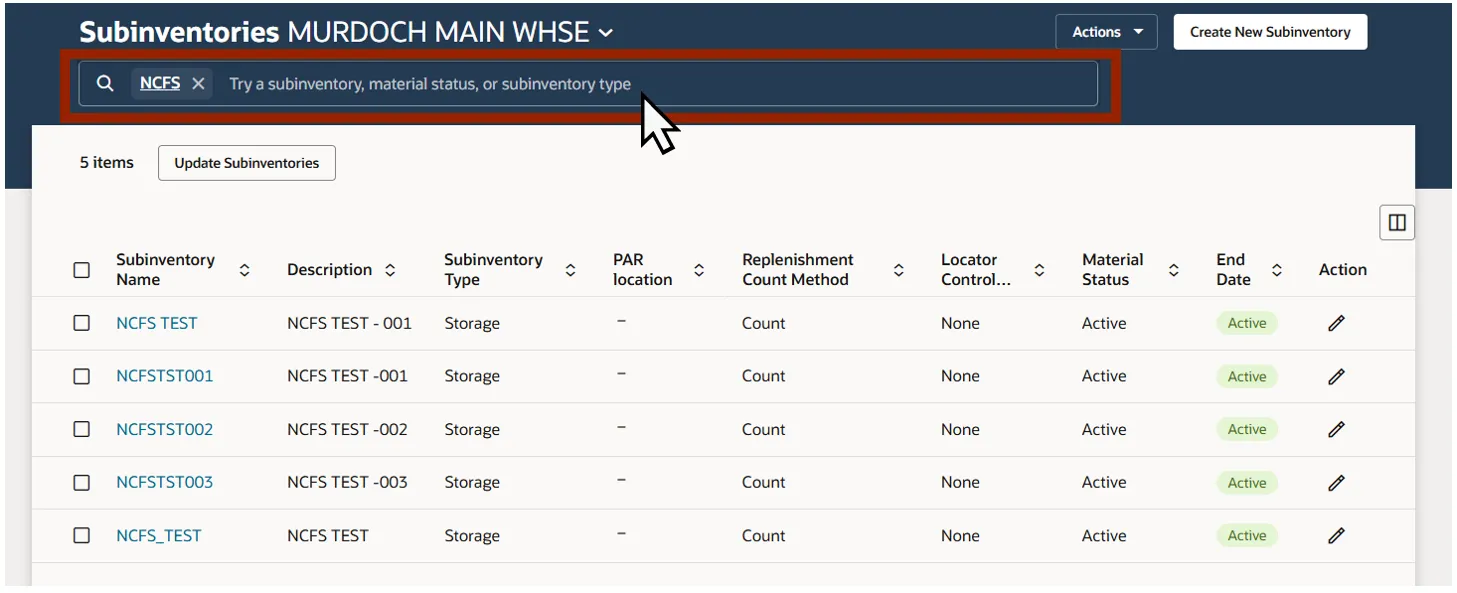
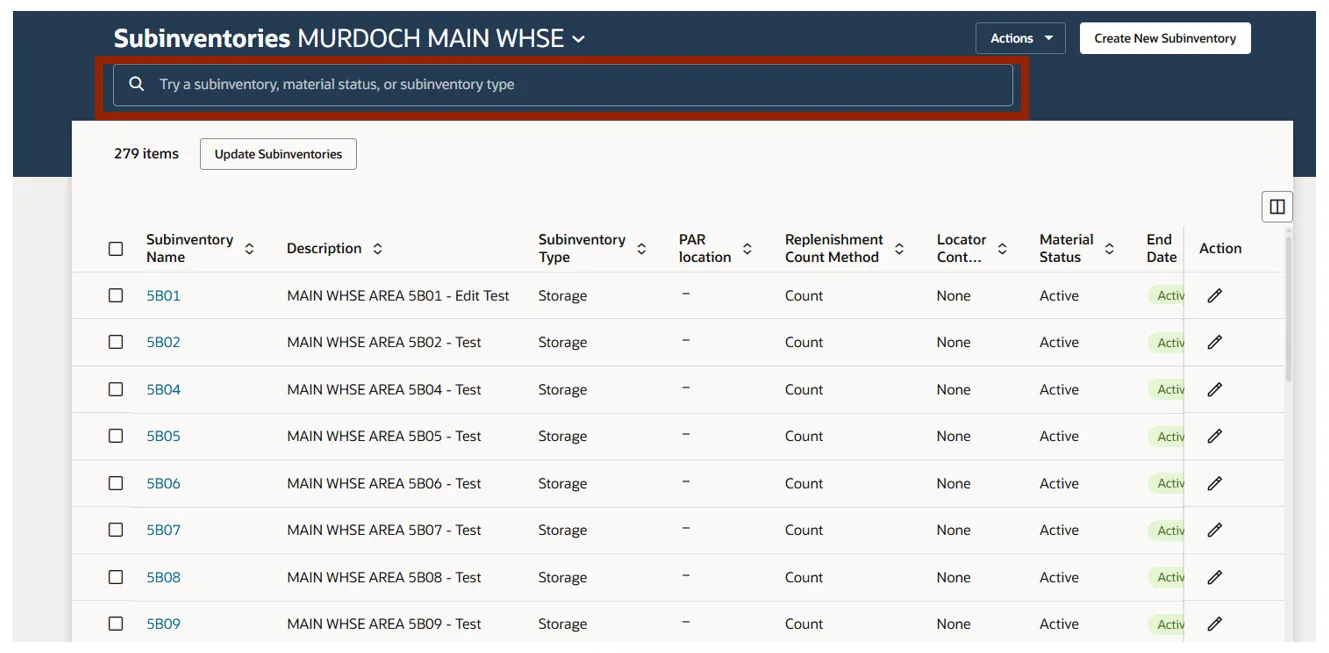
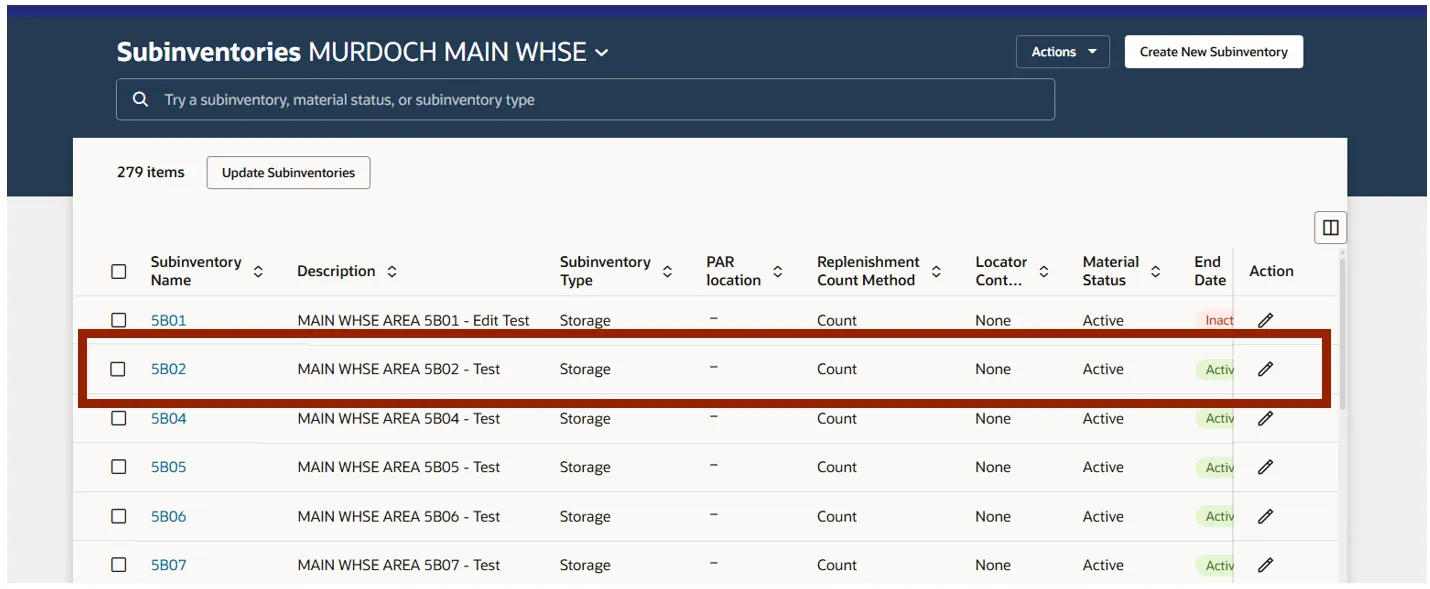
Step 7. The SUBINVENTORIES page displays all the current subinventories for the organization.
Step 8. Click the Create New Subinventory button to create a new subinventory.
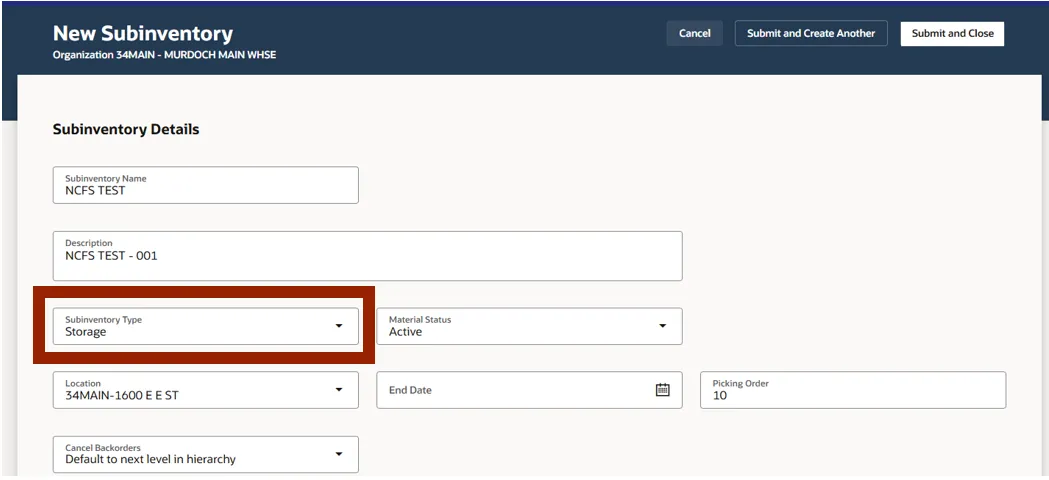
Step 9. On the Subinventory Details screen, complete all mandatory fields.
Step 10. Enter the subinventory name into the Subinventory Name field.
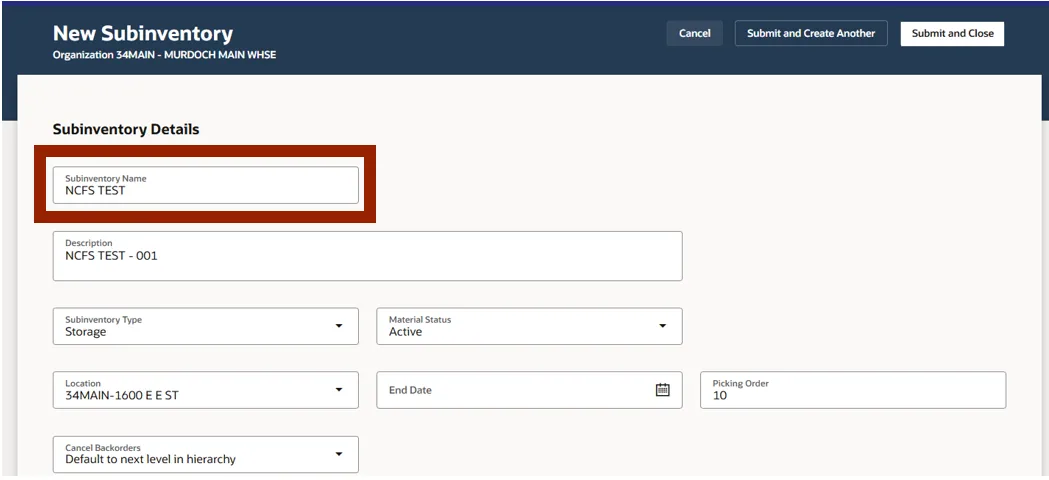
Step 11. Enter the subinventory description in the Description field.
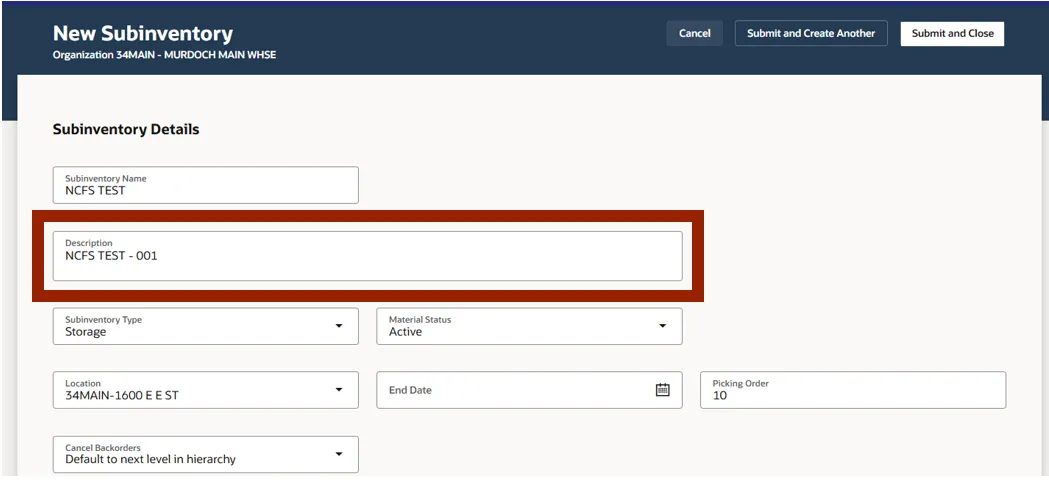
Step 12. From the Subinventory Type drop-down menu, select the appropriate type.
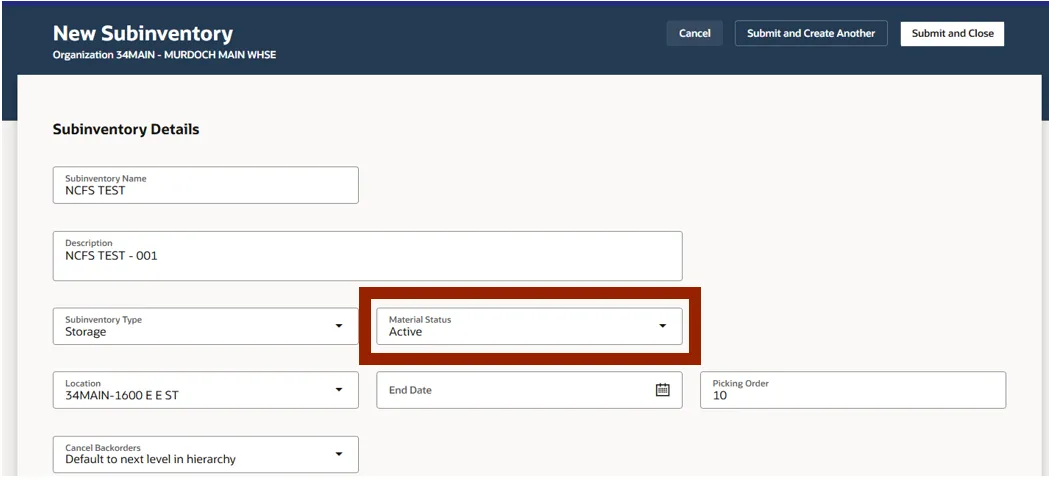
Step 13. Select the corresponding Material Status from the Material Status drop-down menu.
NOTE: Subinventories have damaged as Material Status only.
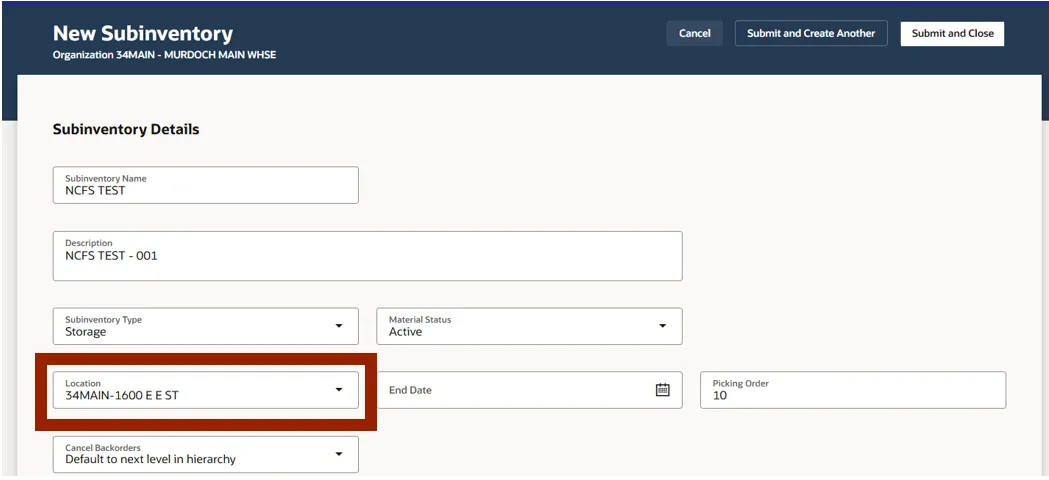
Step 14. Select the correct location from the Location drop-down menu.
Step 15. The Picking Order field is only to be completed for DHHS, for DAC this field should be left blank.
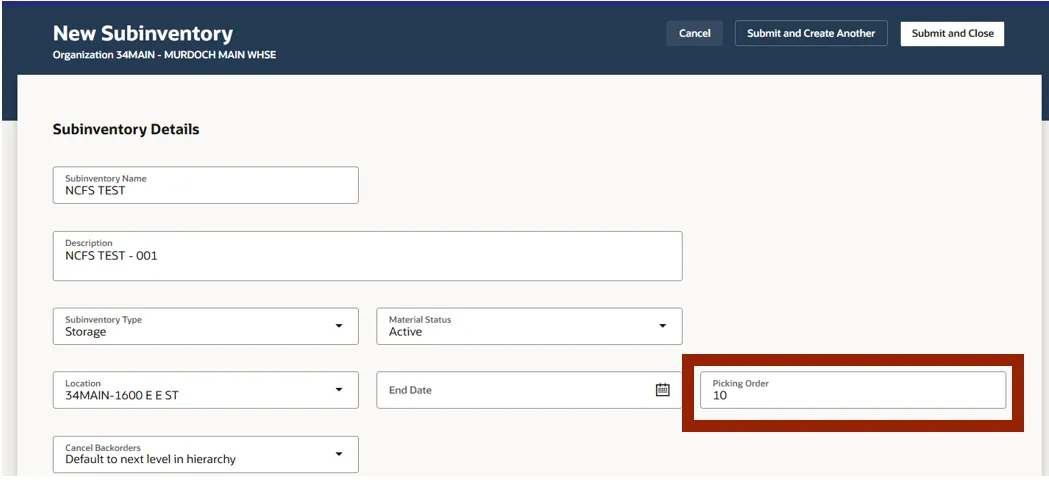
Step 16. Select the appropriate information from the Cancel Backorders drop-down menu.
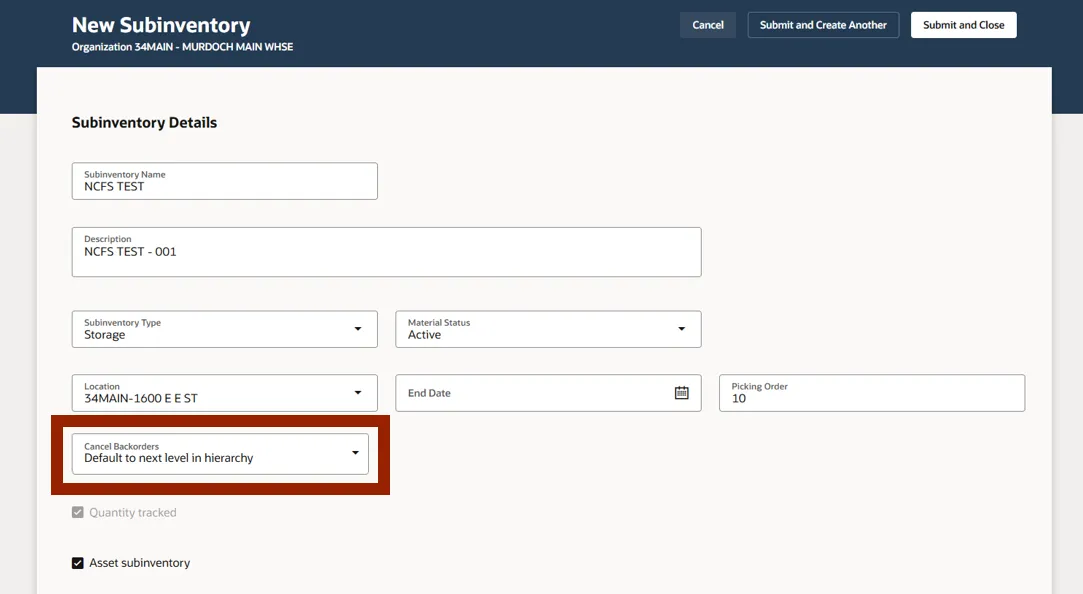
Step 17. If necessary select the Asset Subinventory option.
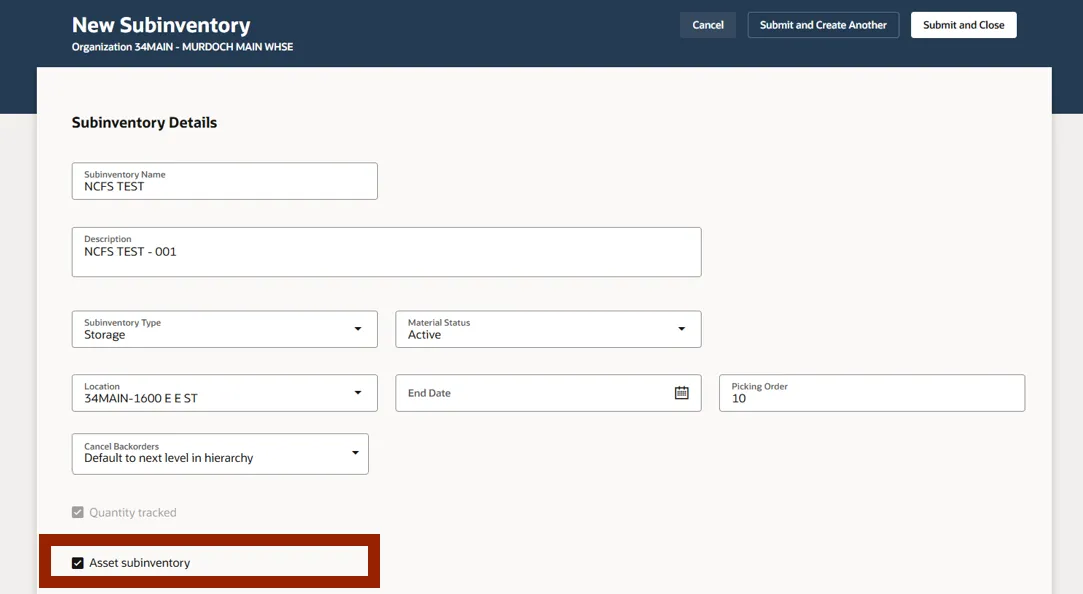
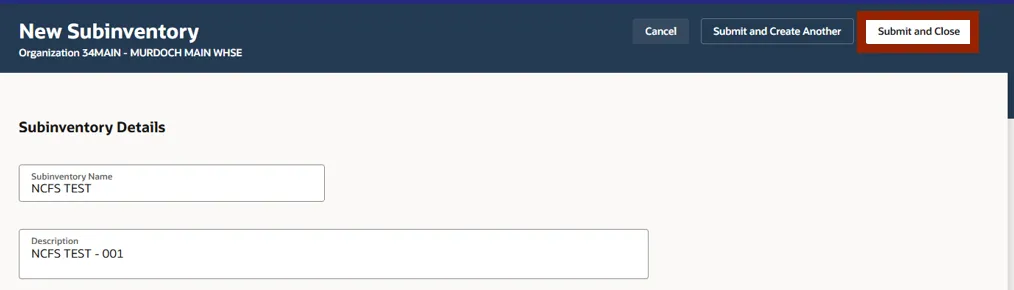
Step 18. Click the Submit and Close button.
Step 19. A Confirmation pop-up will appear to acknowledge the created subinventory briefly then disappears.

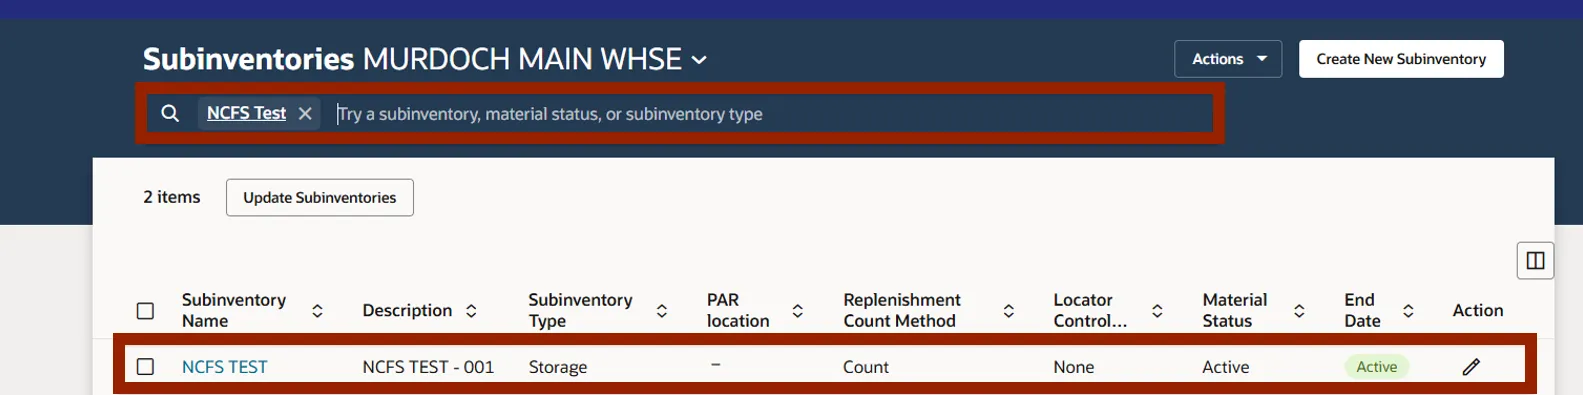
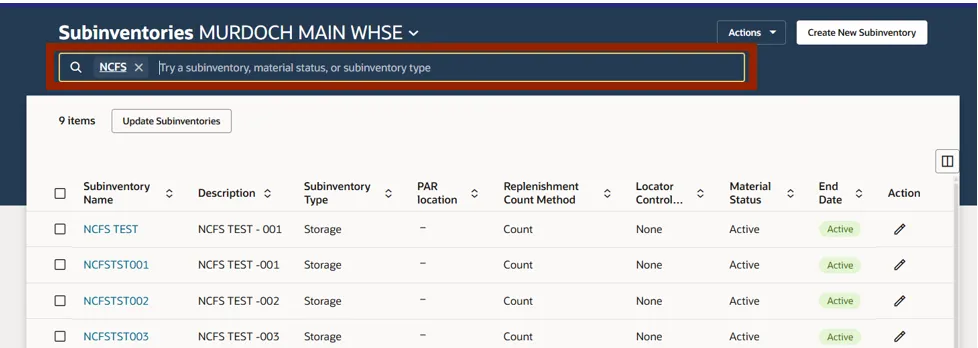
Step 20. The newely created subinventory can be located using the Search Bar.
Creating a New Subinventory from an Existing Subinventory
Please use the following steps to create a new subinventory from an existing subinventory in NCFS. There are 11 steps to complete this process.
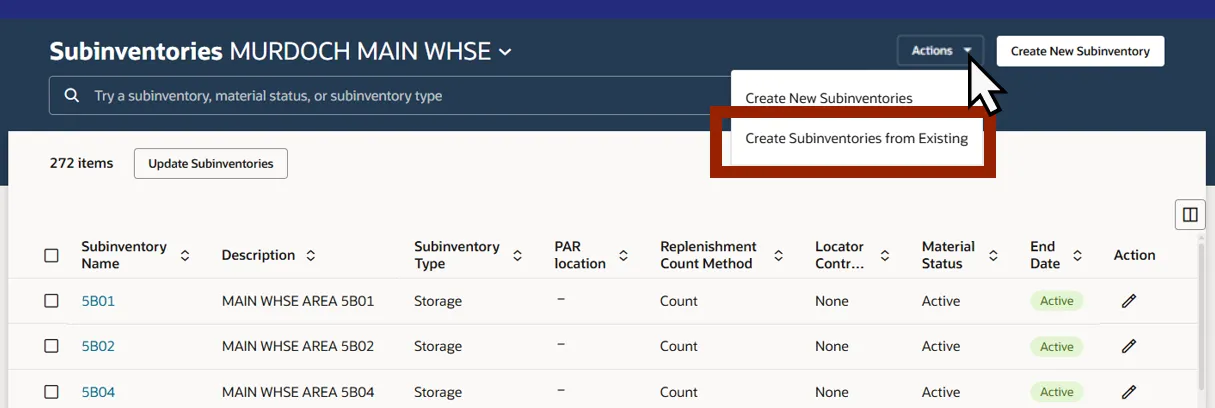
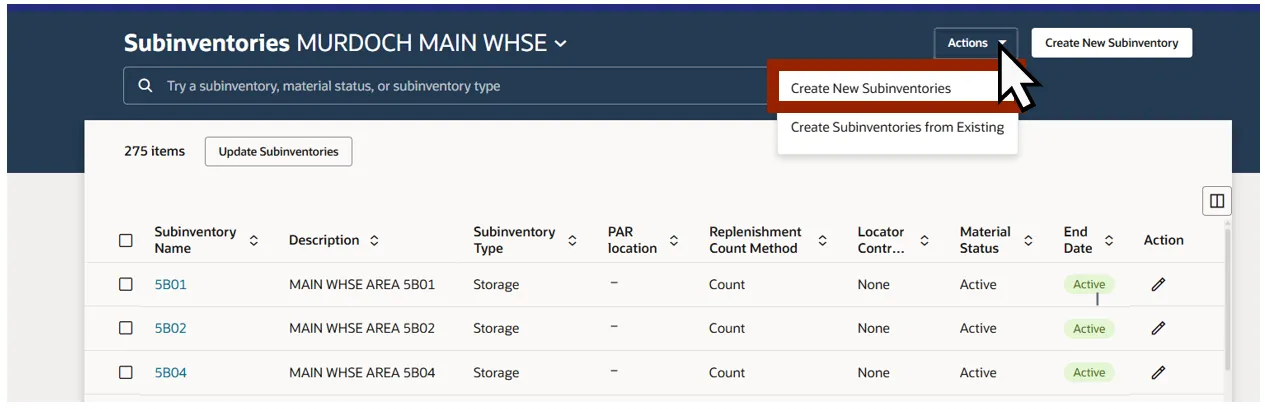
Step 1. Select Create Subinventories from Existing from the Actions drop-down menu.
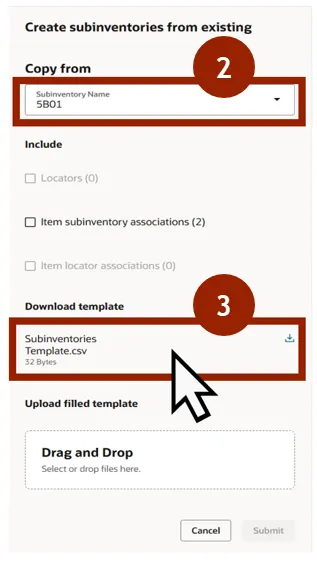
Step 2. Select the subinventory to be copied from the Copy From section in the Subinventory Name from the drop-down menu.
Step 3. Click on the Download icon for Subinventories Template.csv to download the template.
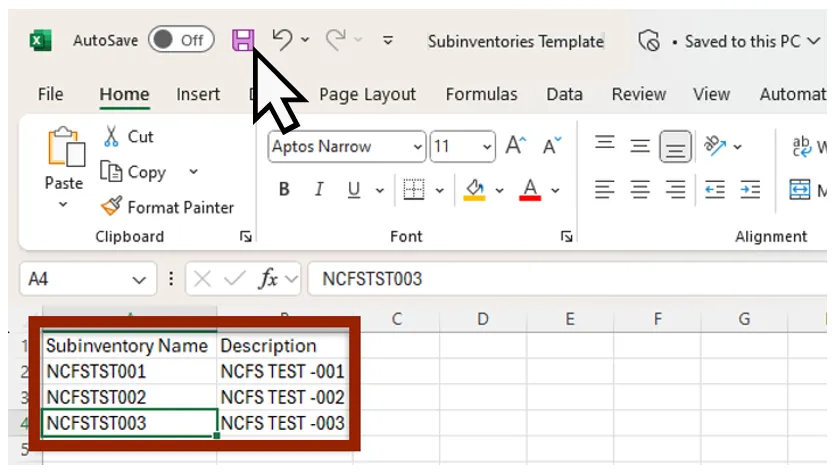
Step 4. Open the downloaded Subinventories Template.CSV file from your computer. This file will open in Excel.
Step 5. Fill in the Subinventory Name and Description columns accordingly, then save the changes to the file on your computer.
NOTE: The Subinventory Name field is limited to a maximum of 10 characters.
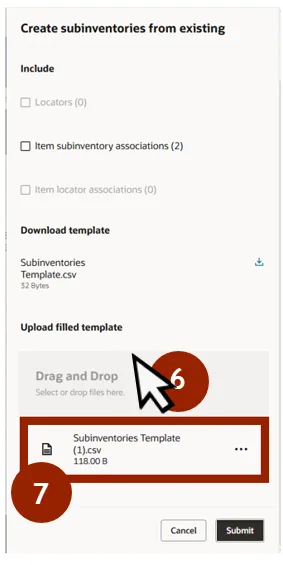
Step 6. The completed Subinventories Template can be uploaded by using the Drag and Drop feature to upload the Subinventories Template file into NCFS.
Step 7. Once the file attachment is complete and visible under the uploaded filled template, click Submit.
Step 8. After submission, a window will briefly appear with the process number.

Step 9. Click Action Status to display the submitted file’s status.

Step 10. The Process ID information and status are displayed in the Action Status Table.

Step 11. The newely created subinventory(s) can be found by entering the name into the SEARCH field.
Creating Multiple Subinventories for an Inventory Organization
Please use the following steps to create multiple subinventory(s) from an existing subinventory in NCFS. There are 9 steps to complete this process.
Step 1. Select Create New Subinventories from the Actions drop-down menu.
Step 2. Click the Download icon to download the Create Subinventories.csv template.

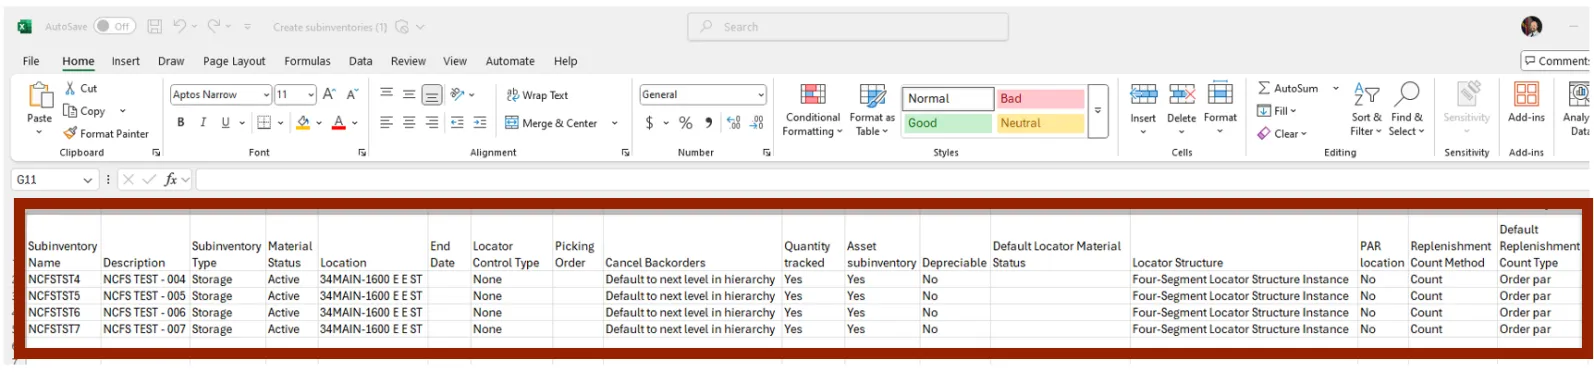
Step 3. Open the downloaded Subinventories Template .CSV file from your computer. This file will open in Excel file
4. Enter the required Subinventories and complete each column as described below:
- Subinventory Name
- Maxiumum of 10 characters
- Description
- Enter the Subinventory description
- Subivnentory Type
- Storage for all subinventories, except RCV which this is the Receiving type
- Material Status
- Enter Active
- Location
- Enter the location and ensure it exactly matches the locations format
- Locator Control Type
- Enter None
- Cancel Backorders
- Enter Default to next level in hierarchy
- Quantity tracked
- Select Yes to ensure inventory is being tracked.
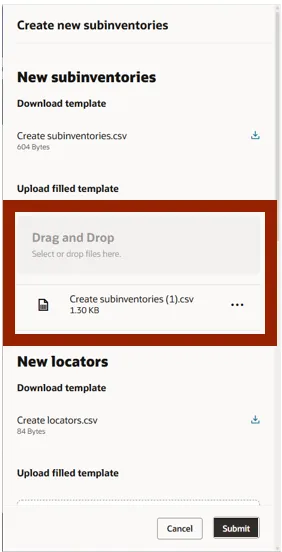
Step 5. Drag and Drop the saved Create Subinventories.csv file from your computer into the Upload filled template section within Drag and Drop field. The file will be visible once completed. Click Submit when the file has been uploaded.
Step 6. A pop-up window will appear briefly with the process number.

Step 7. Click Action Status to see the status of the submitted file.

Step 8. The Process ID information and status are displayed in the Action Status Table.

Step 9. Enter the Subinventory name in the SEARCH field, to locate the newely created subinventory(s).
Editing a Single Subinventory for an Inventory Organization
The following steps describe how to edit a single subinventory in NCFS. There are 8 steps to complete this process.
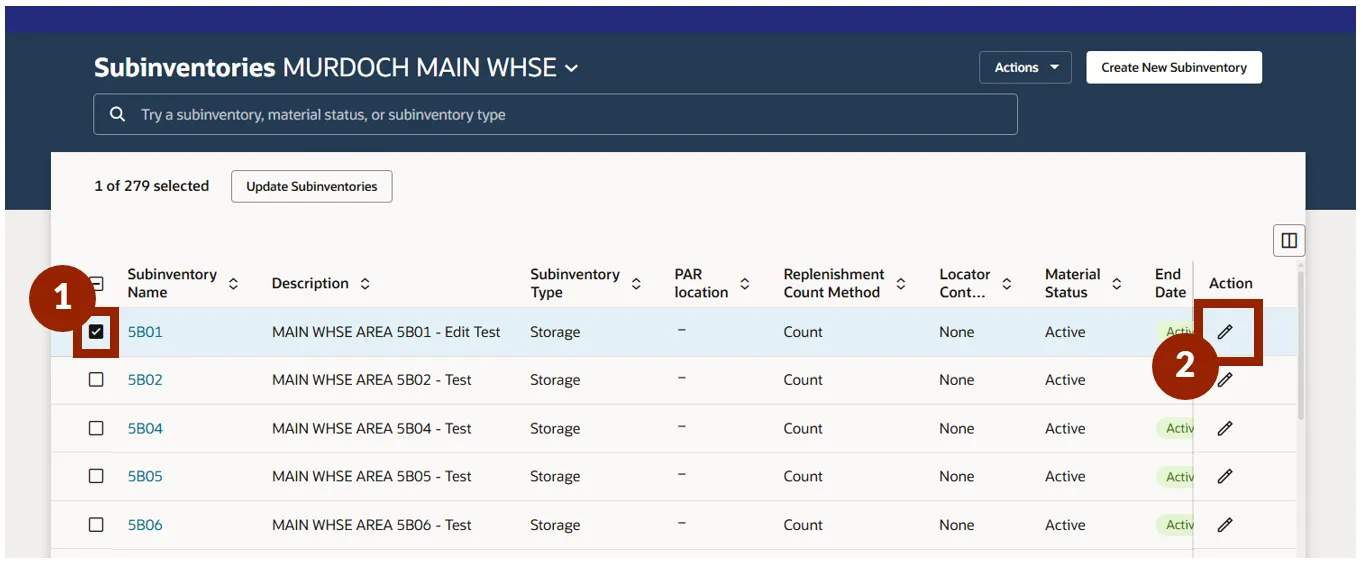
Step 1. Select the subinventory to be edited from the Subinventory Name selection box.
Step 2. Click the corresponding subinventory’s Pencil icon in the Action column.
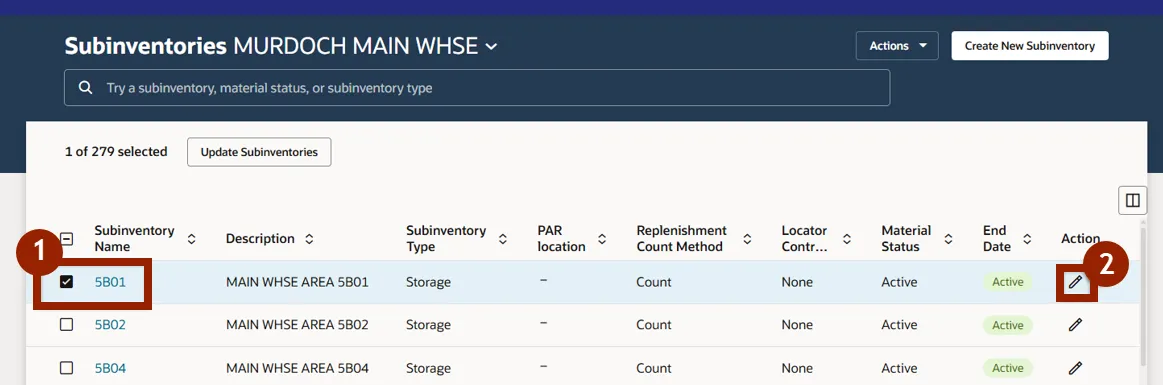
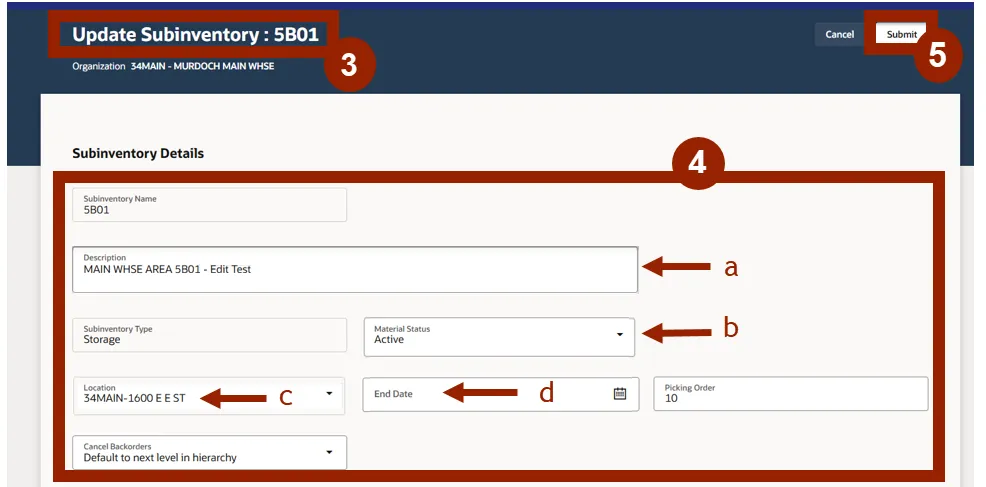
Step 3. The Update Subinventory screen appears with the selected subinventory to edit.
Step 4. The following fields are Editable.
- a. Description
- b. Material Status
- c. Location
- d. End Date
Step 5. Click the Submit button, when finished editing.
Step 6. A pop-up window will briefly appear with the process number.

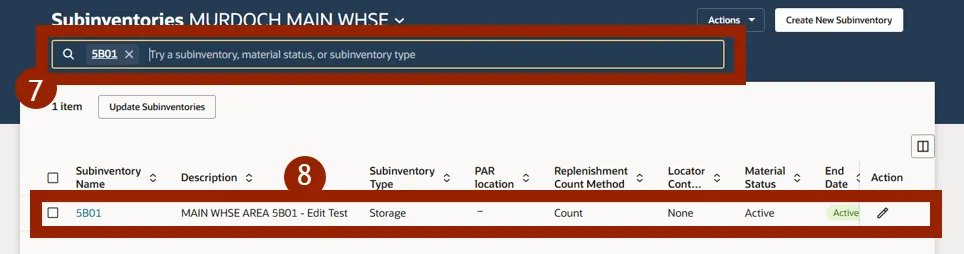
Step 7. Type the edited subinventory name in the SEARCH field, to locate it.
Step 8. The search results will populate in the Subinventory table.
Editing Multiple Subinventories for the Same Inventory Organization
Please use the following steps to edit multiple subinventories in NCFS. There are 11 steps to complete this process.
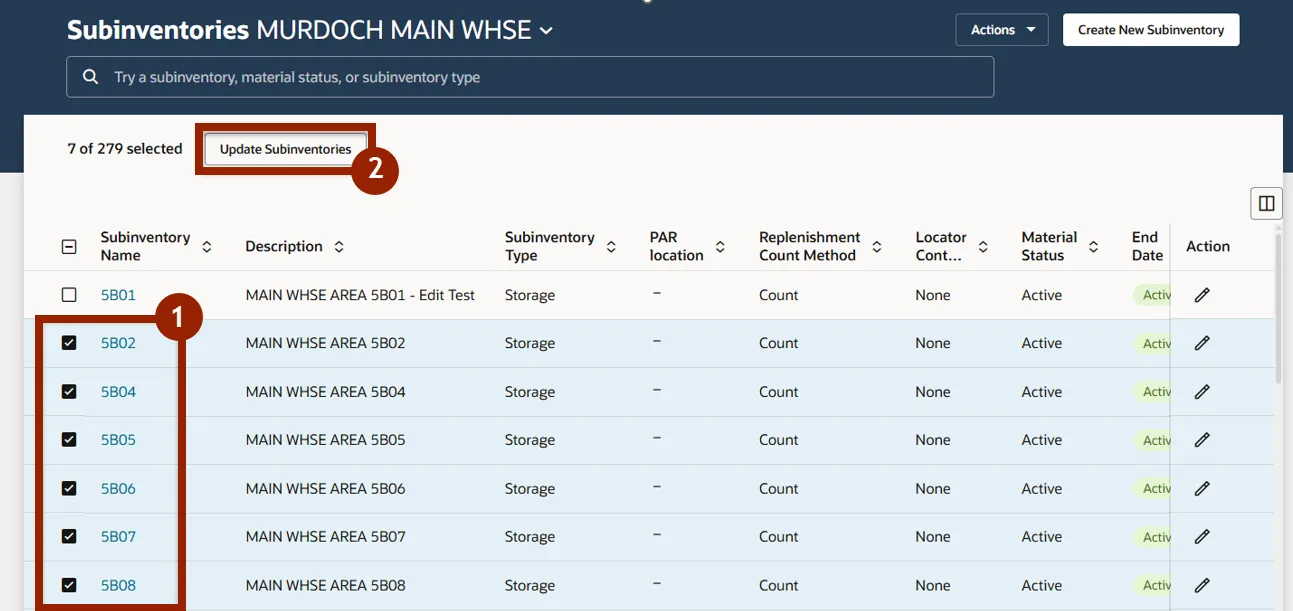
Step 1. Select the selection box next to the Subinventory name of all subinventories being edited.
Step 2. Click Update Subinventories.
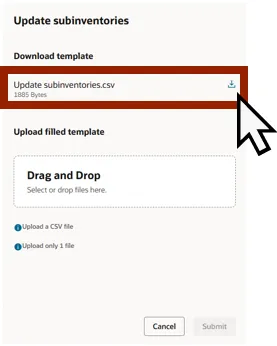
Step 3. Click the Download icon in the Download template section next to the Update subinventories.csv file.
Step 4. Click on the Downloaded Update subinventories.CSV Template file from your computer This will file will open in EXCEL.
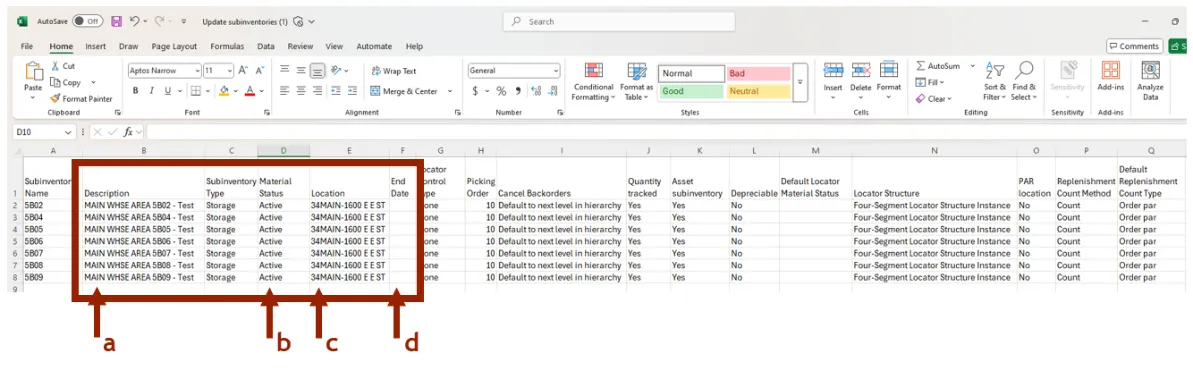
Step 5. Editable fields that could be updated include:
- a. Description
- b. Material Status
- c. Location
- The location must match location formatting exactly
- d. End Date
- Adding YYYY-MM-DD format will inactivate the Subinventory
- Removing the End Date will activate the Subinventory
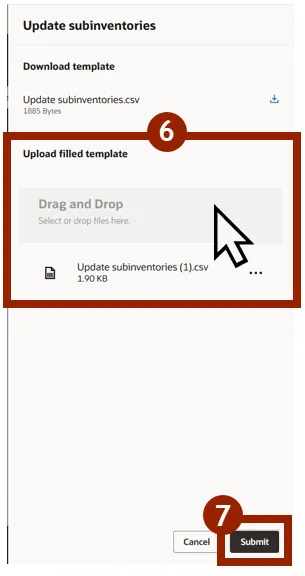
Step 6. Drag and Drop the saved Update subinventories.csv file from your computer into the Upload filled template Drag and Drop Box. Once the upload is complete the file will be visiable.
Step 7. Click Submit.
Step 8. A process number will appear briefly in a pop-up window.

Step 9. Click the Action Status selection to see the status of the submitted file.

Step 10. The Process ID information and status are displayed in the Action Status Table.

Step 11. Type the newely created subinventory(s) in the SEARCH BAR and inquire.
End Dating/Inactivating Subinventory(s)
Use the following steps to place and end date on a subinventory(s) in NCFS. There are 6 steps to complete this process.
Step 1. Select the desired Subinventory selection box of the subinventory to End Date/Inactivate.
Step 2. Click the Pencil icon under in the action column.
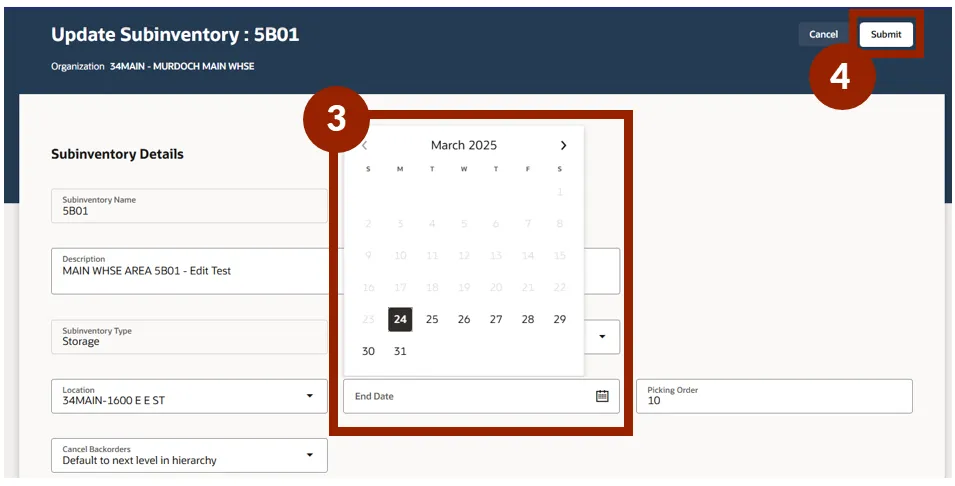
Step 3. Select the End Date from the calendar menu on the Update Subinventory screen.
Step 4. Click Submit.
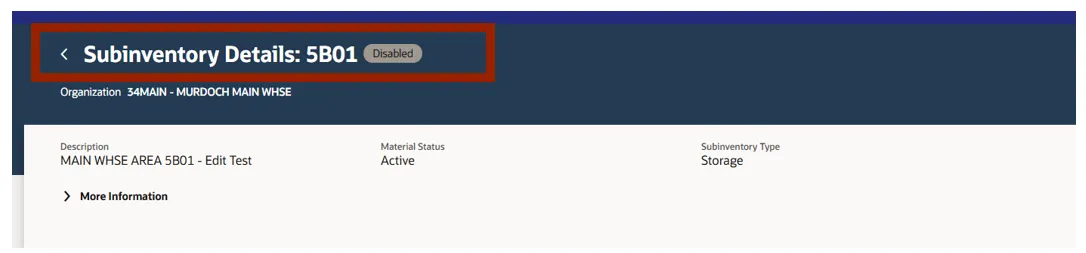
Step 5. Search for the Subinventory. The End Date will show Inactive.
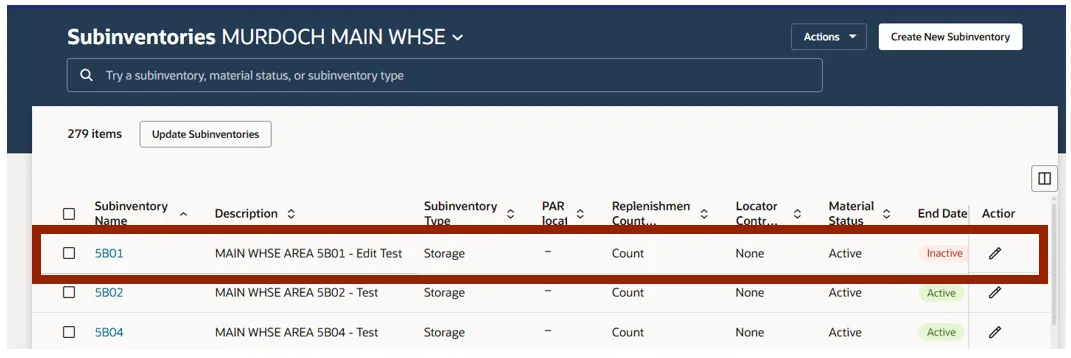
Step 6. Selecting the inactive Subinventory shows the status as Disabled.
Single Inventory Item Associating to Subinventory
Use the following steps to Associate a single inventory item to a subinventory in NCFS. There are 6 steps to complete this process.
Step 1. Select the Subinventory by selecting the Subinventory Name selection box.
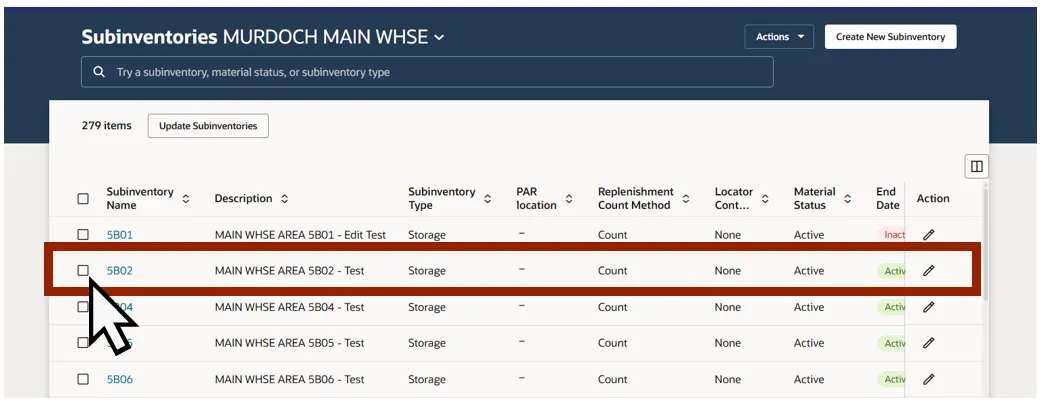
Step 2. On the Subinventory Details screen, click the Associate Item button.

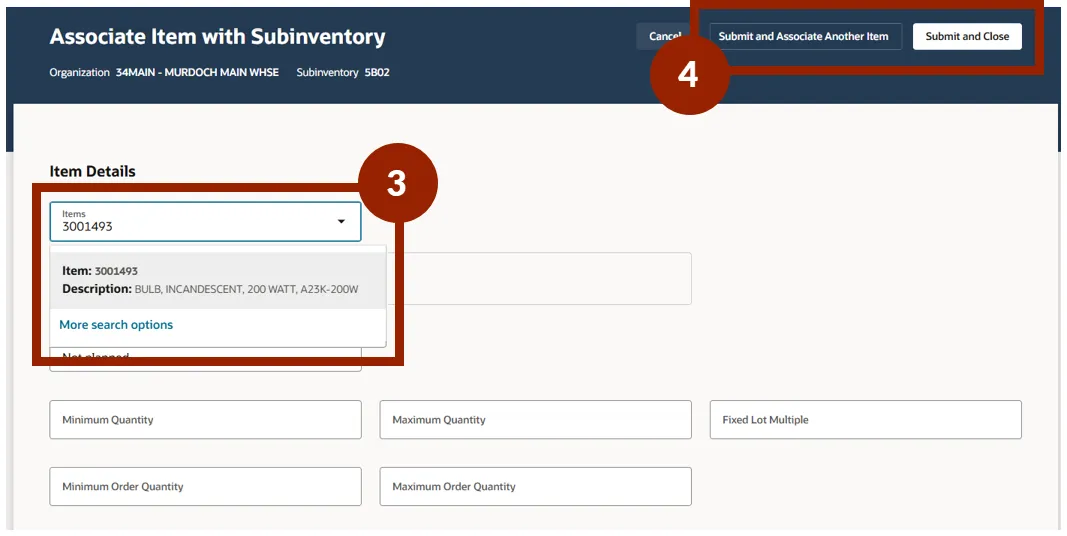
Step 3. On the Associate Item with Subinventory screen, select the item to associate. The item can be located by typing in the item or using the more search options in the items drop-down menu.
Step 4. Click the Submit and Close button, or click the Submit and Associate Another Item button to add additional items to the selected Subinventory.
Step 5. A pop-up window with the process number will briefly appear.

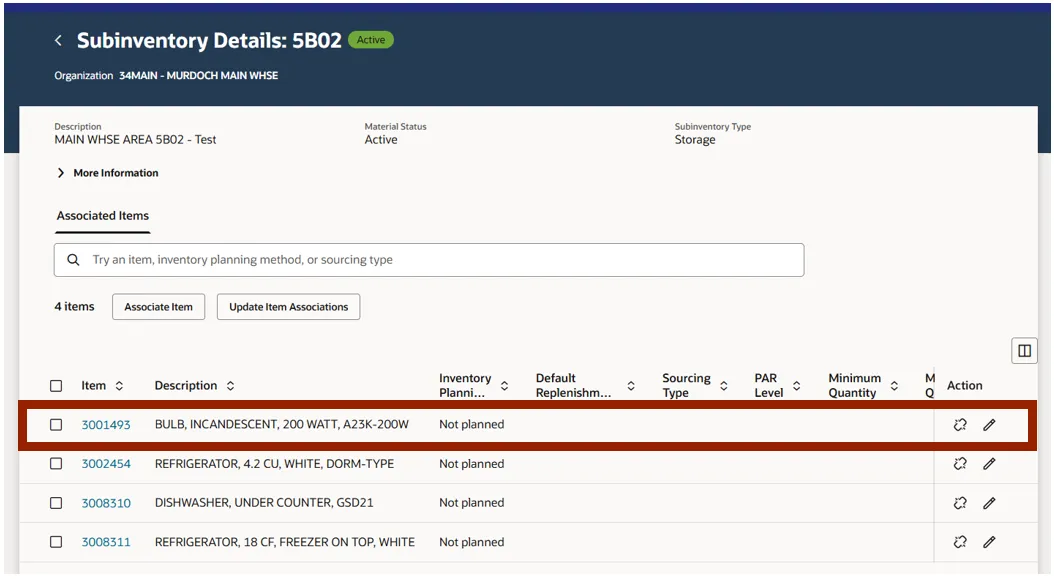
Step 6. Items are now added under the subinventory.
Multiple Items Associating with a Subinventory (Upload)
Use the following steps to Associate multiple inventory items into a subinventory in NCFS using a template upload. There are 11 steps to complete this process.
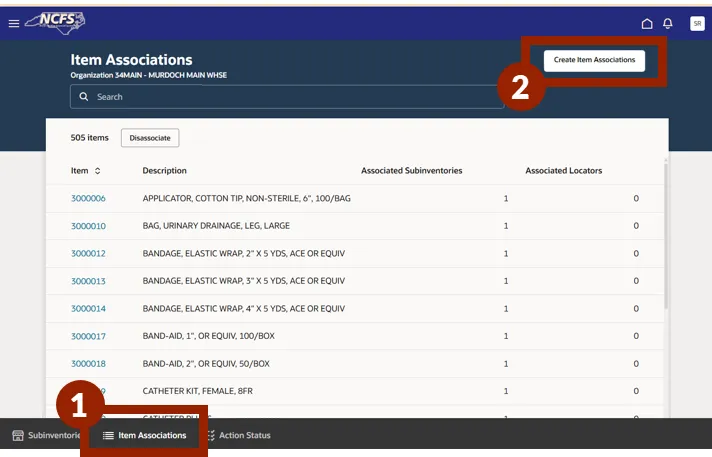
Step 1. From the Subinventory screen, select the Item Associations tab on the bottom toolbar.
Step 2. Click the Create Item Associations button.
Step 3. Click the Download Icon to download the Create item subinventory associations.csv file template.
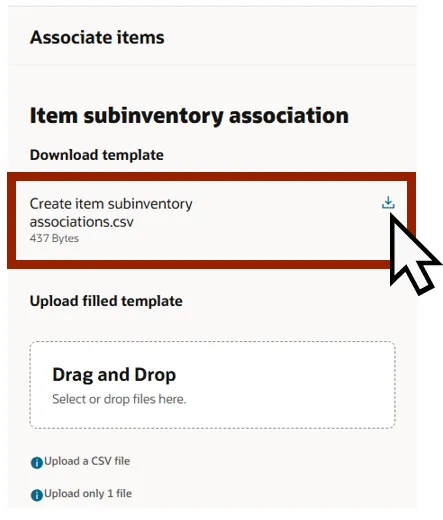
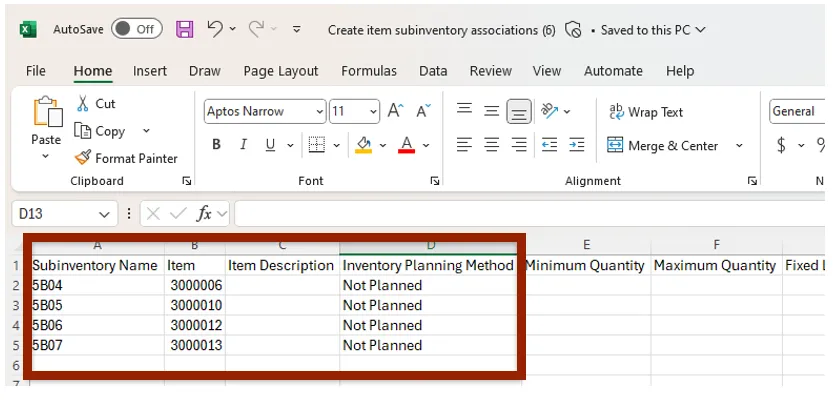
Step 4. Open the downloaded Create item subinventory associations.csv file from your computer. This file will open in EXCEL.
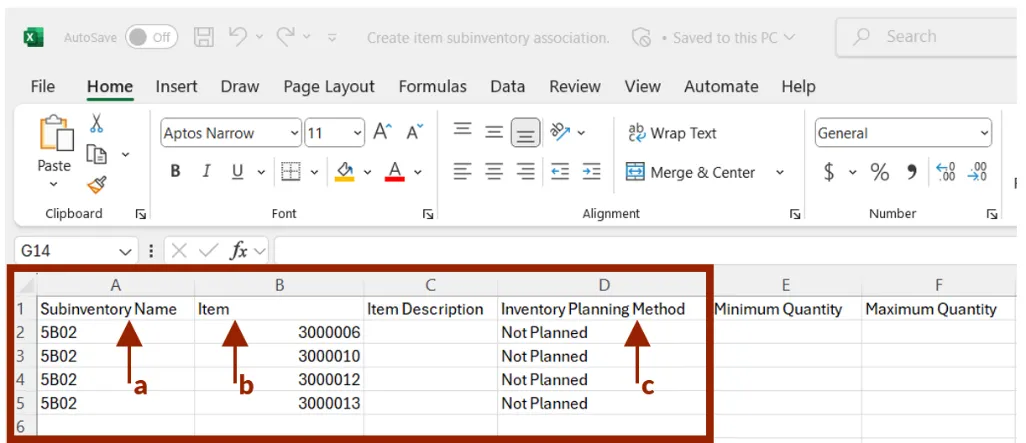
Step 5. Editable fields to be updated include:
- a. Subinventory Name
- b. Item
- The item column format must be set “TEXT” to include the preceeding zeros.
- c. Inventory Planning Method
- Not Planned
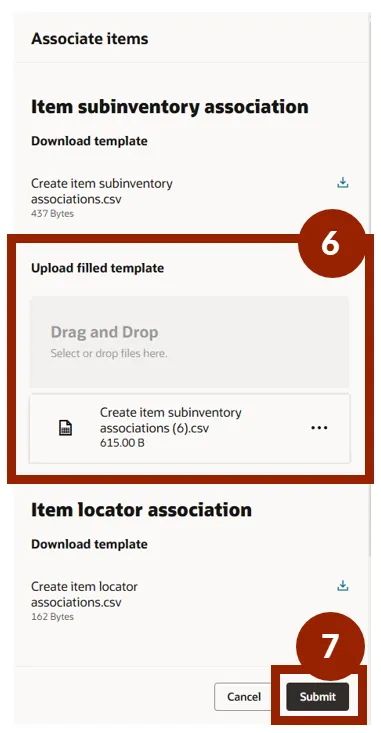
Step 6. Drag and Drop the saved Create item subinventory associations.csv file, from your computer, into the Drag and Drop field in the Upload filled template. Once the upload is complete the file will be visiable.
Step 7. Click Submit.
Step 8. A pop-up window with the process number will briefly appear.

Step 9. The Action Status selection shows the status of the submitted file.

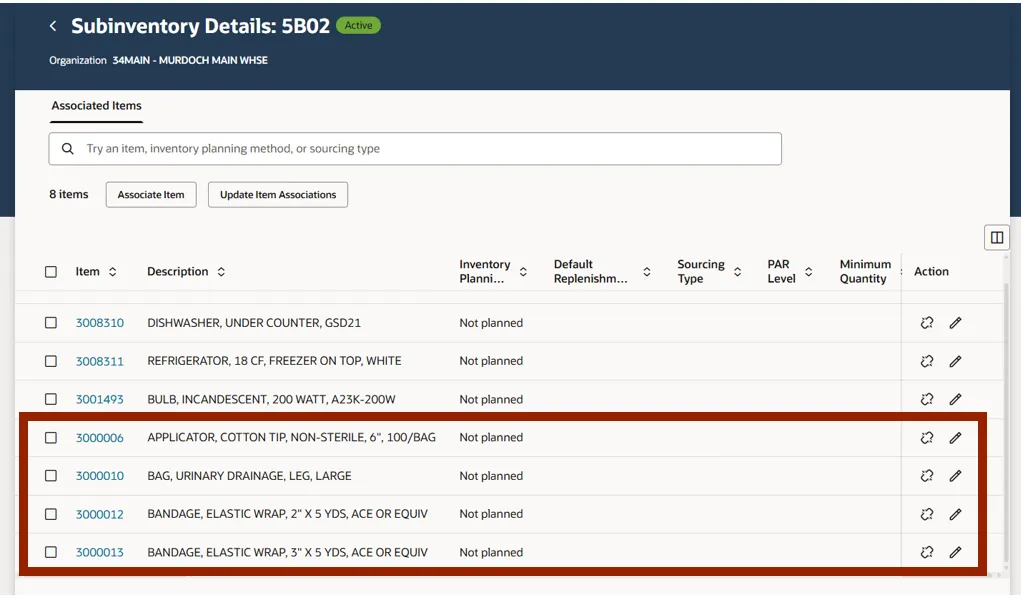
Step 10. Navigate to the Subinventories screen and select the subinventory to view the newly associated inventory items
Step 11. Newly associated inventory items are shown on the Subinventory Details screen.
Multiple Items Associating with Multiple Subinventories at the Same Inventory Organization (Upload)
Please follow the step to Associate multiple inventory items to multiple subinventories at the same Inventory Organization in NCFS. There are 2 steps to complete this process.
Step 1. Follow steps 1-10 under the Multiple Items Associating with a Subinventory (Upload) section above.
Step 2. Update the Create Item subinventory associations.csv file to include multiple subinventory locations with the items needed for association.

Single Inventory Item Association to Subinventories for Multiple Inventory Organizations (Import via Action Button from Setup and Maintenance Screen)
Follow these steps to Associate a single inventory item, to subinventories for multiple Inventory Organization in NCFS. There are 27 steps to complete this process.
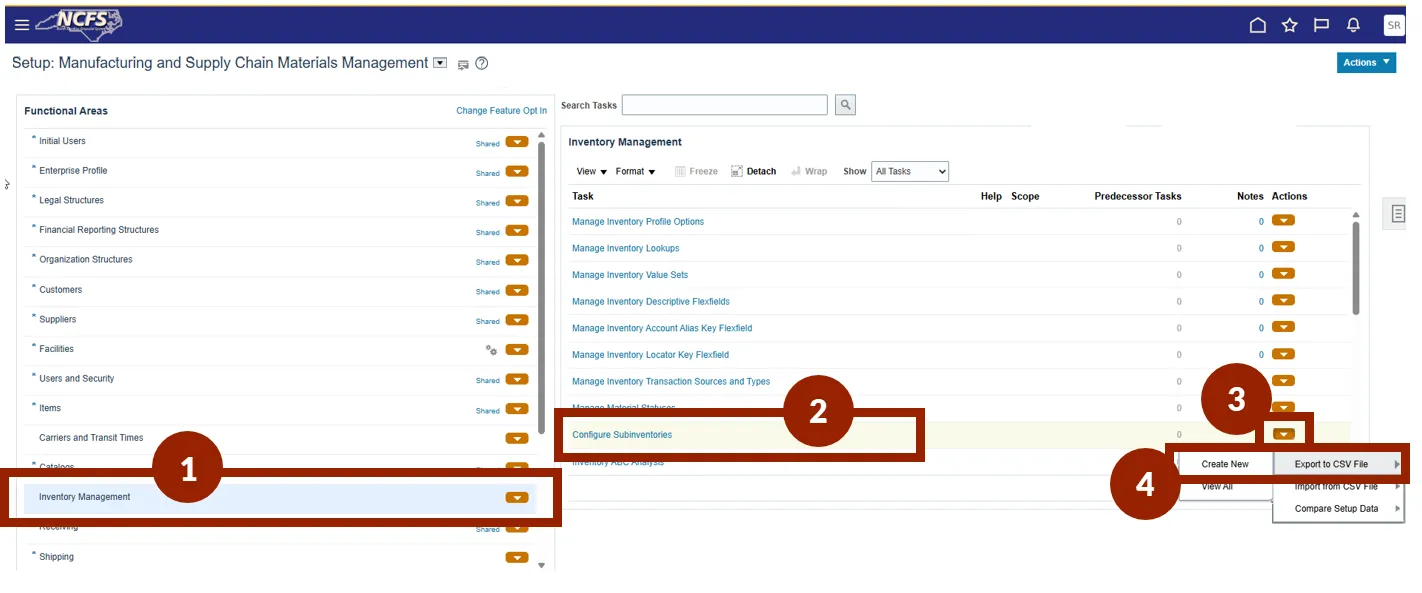
Step 1. Navigate to the Setup and Maintenance screen and select Inventory Management from the functional Areas left side panel.
Step 2. Select the Configure Subinventories task.
Step 3. Click the Action button.
Step 4. Select Export to CSV file and then Create New from the submenu.
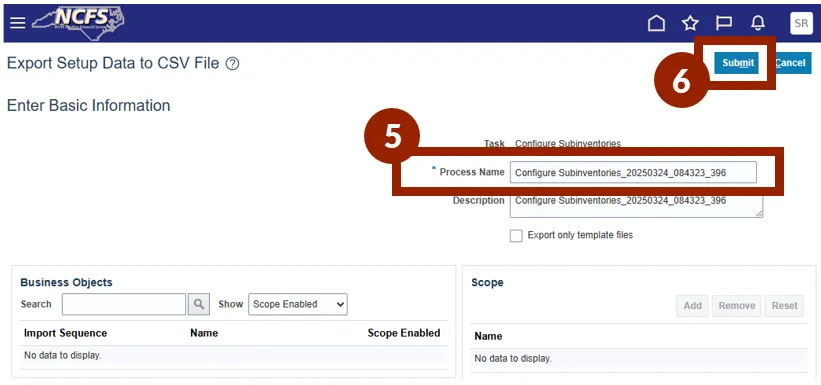
Step 5. On the Export Setup Data to CSV File screen, review the Process Name field.
Step 6. Click Submit.
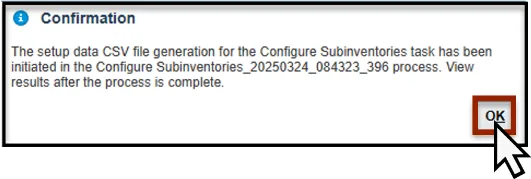
Step 7. A Confirmation window will appear, stating that the configure subinventories task has been initiated. Click OK to close the window.
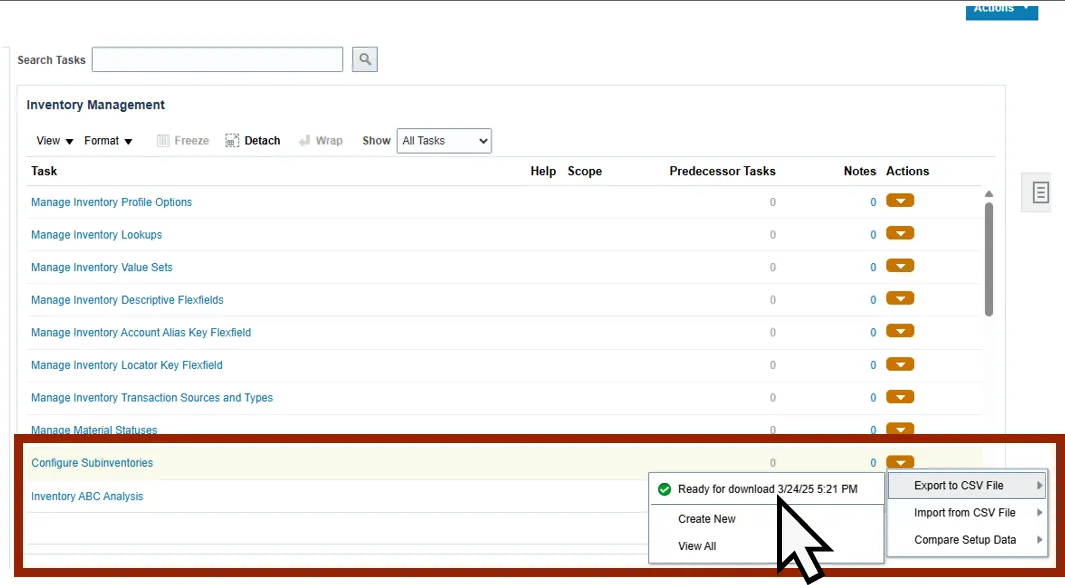
Step 8. Click the Configure Subinventories Actions button, select Export to CSV File, then select Ready for Download X/XX/XX. The file will download.
NOTE: OSC recommends downloading a new Export to CSV File when processing, to ensure the latest data is captured.
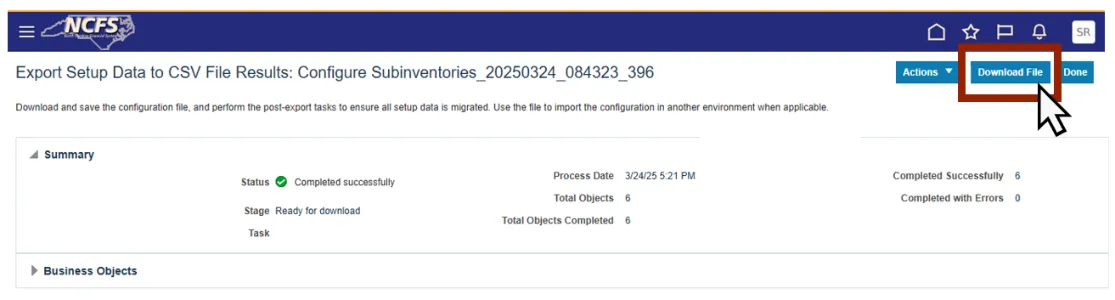
Step 9. On the Export Setup Data to CSV File Results screen, click the Download File button. This prompts the CSV file to download.
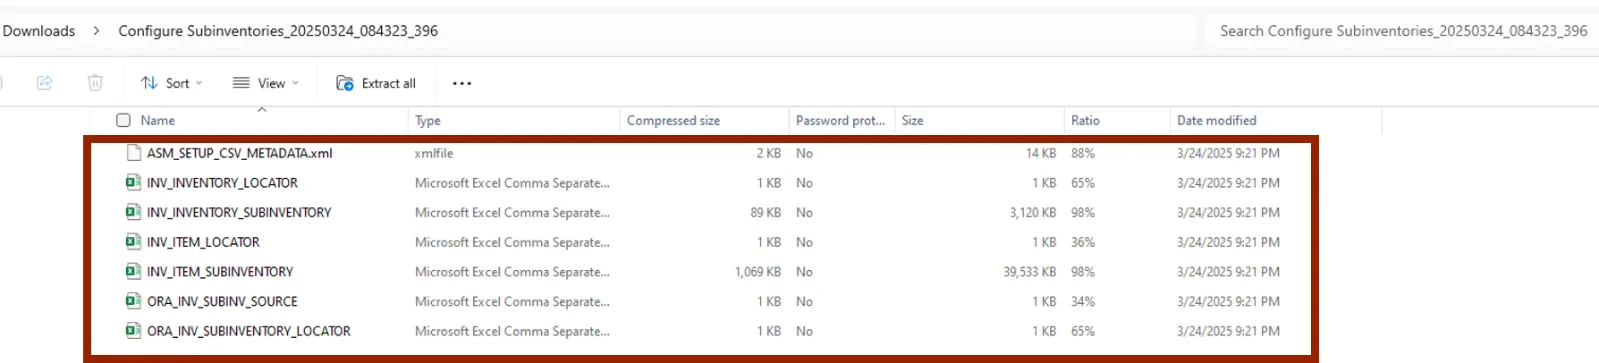
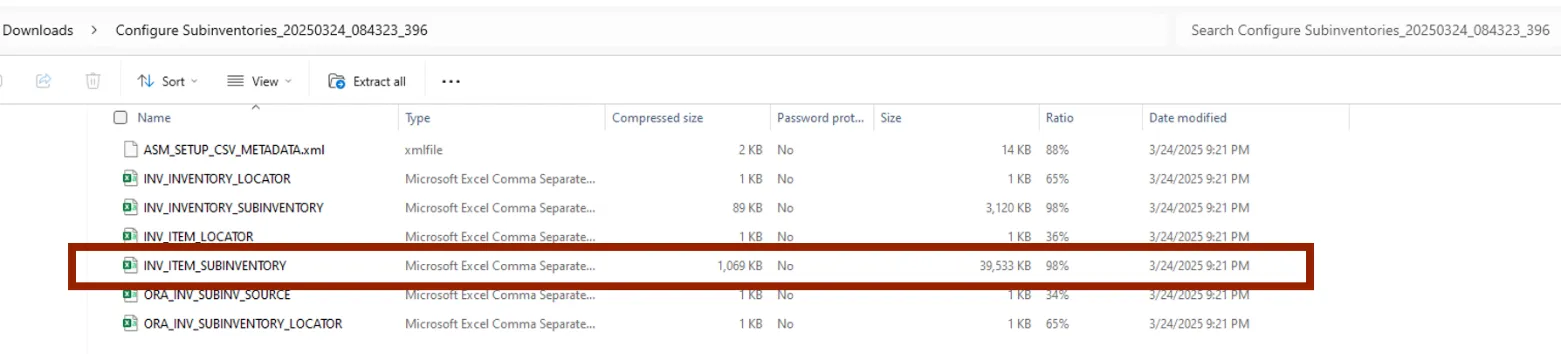
Step 10. Open the downloaded Configure Subinventories_XXXXXXXX_XXXXXX_XXX file. The file contains a collection of six EXCEL spreadsheet files.
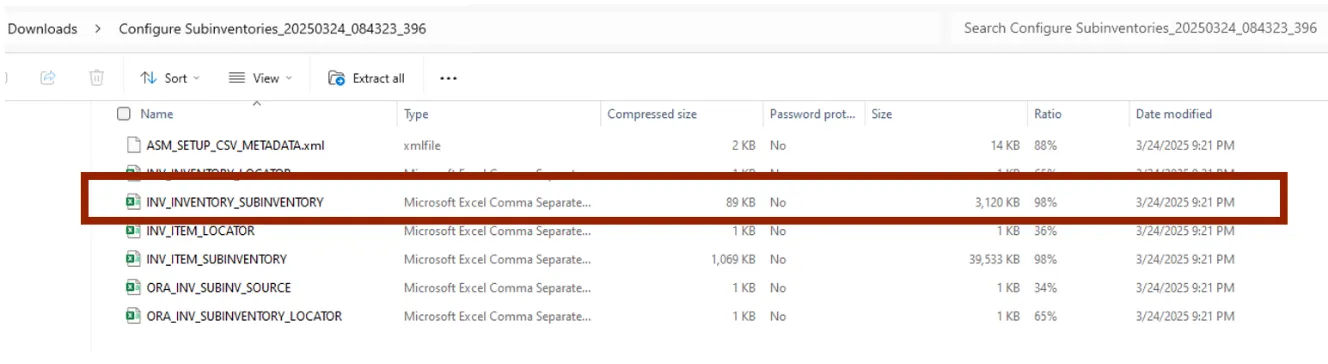
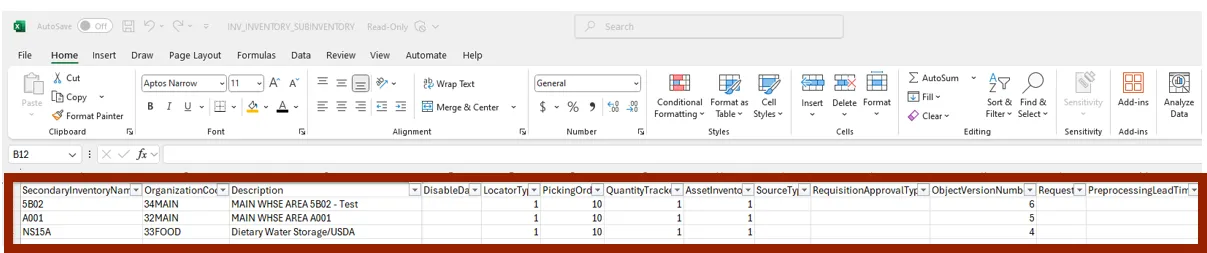
Step 11. Open the INV_INVENTORY_SUBINVENTORY EXCEL spreadsheet.
Step 12. Remove all subinventories that are not being updated. Only the subinventories rows being updated should be left in the spreadsheet.
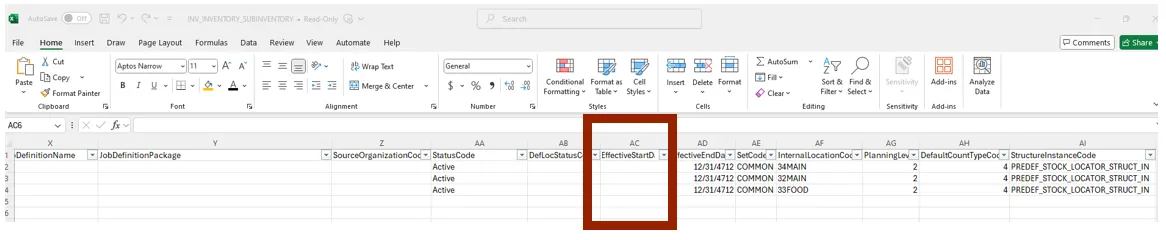
Step 13. Delete the data in AC (EffectiveStartDate) column and Save the spreadsheet.
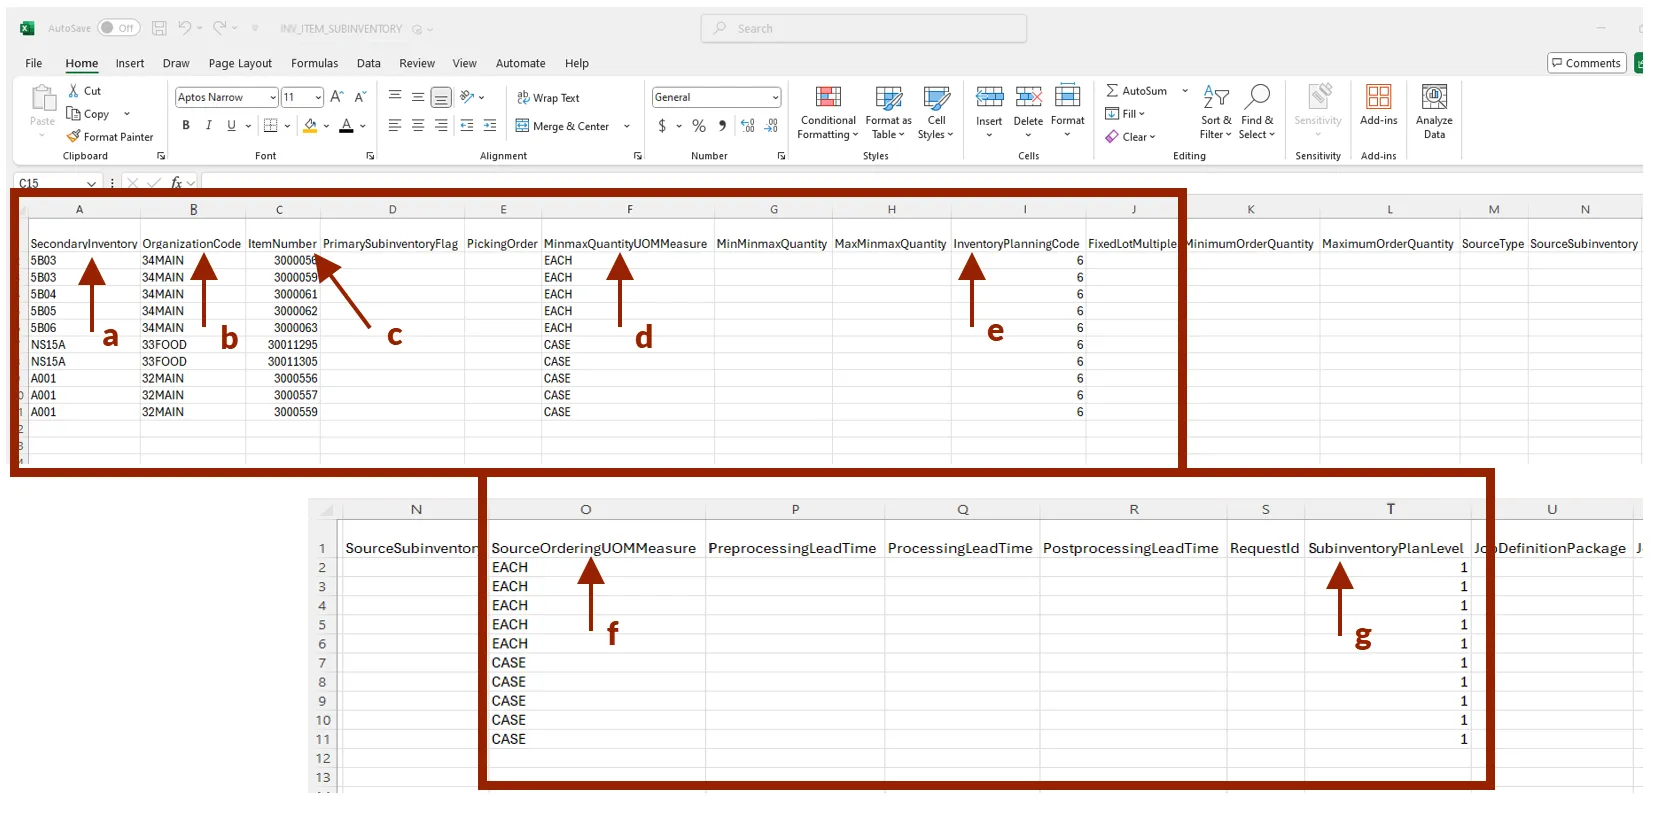
Step 14. Next open the INV_ITEM_SUBINVENTORY Excel spreadsheet.
Step 15. Remove all existing data below the column headers.
Step 16. Enter the required information in each of the following columns:
- a. SecondaryInventory enter the Subinventory ID
- b. OrganizationCode enter the Inventory Organization code
- c. ItemNumber enter the Item Number
- NOTE: DAC the ItemNumber column must be formatted as Text. This format keeps the necessary preceding zeros.
- d. MinmaxQuantityUOMMeasure enter the Unit of Measure
- e. InventoryPlanningCode enter the number 6
- f. SourceOrderingUOMMeasure enter the Unit of Measure
- g. SubinventoryPlanlevel enter the number 1
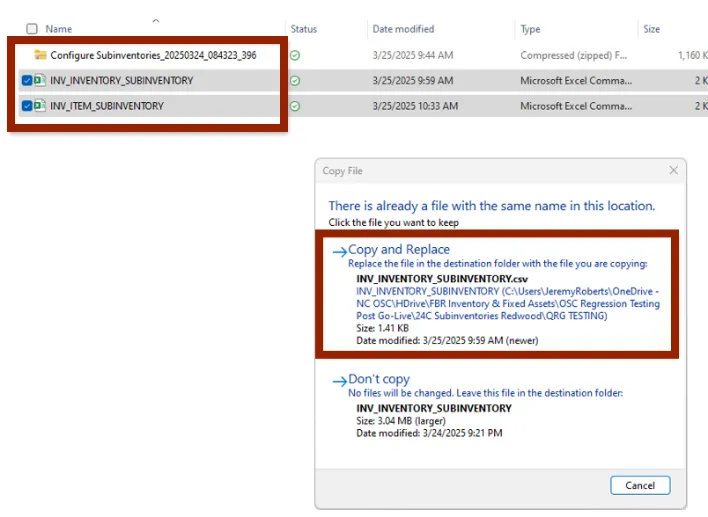
Step 17. Save the EXCEL spreadsheet as INV_ITEM_SUBINVENTORY.
Step 18. Move the new INV_INVENTORY_SUBINVENTORY and INV_ITEM_SUBINVENTORY EXCEL spreadsheets into the ZIP file Configure Subinventories_XXXXXXXX_XXXXXX_XXX, using the Copy and Replace option.
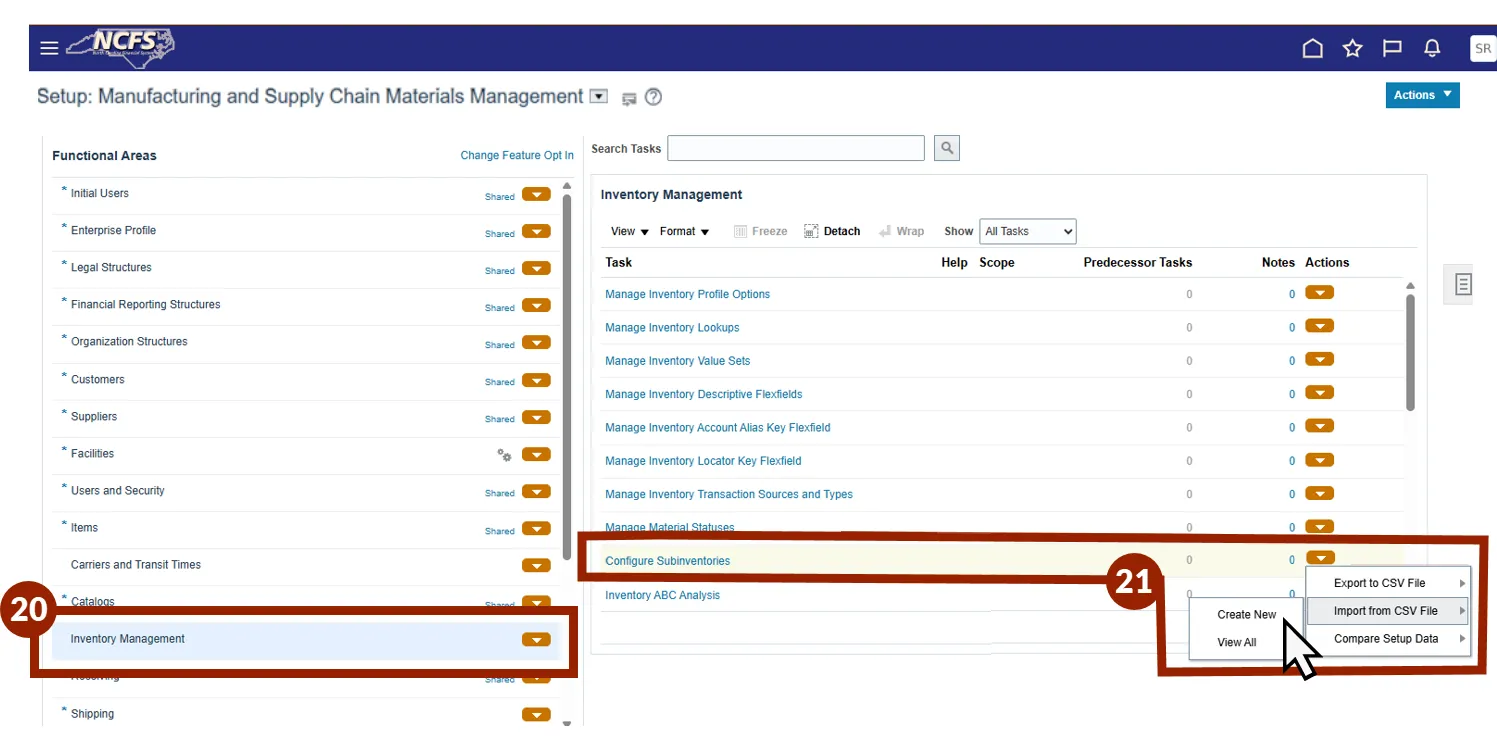
Step 19. Navigate to the Manufacturing and Supply Chain Materials Management screen from the setup and maintenance app within the My Enterprise module.
Step 20. Select Inventory Management from the Functional Areas left side panel.
Step 21. Click the Configure Subinventories Actions button, select Import from CSV File and then Create New from the sub menu.
Step 22. Click the Choose File button and select the Configure Subinventories_XXXXXXXX_XXXXXX_XXX Zip file. A preview of the file is displayed below the source header.
Step 23. Click the Submit Button.
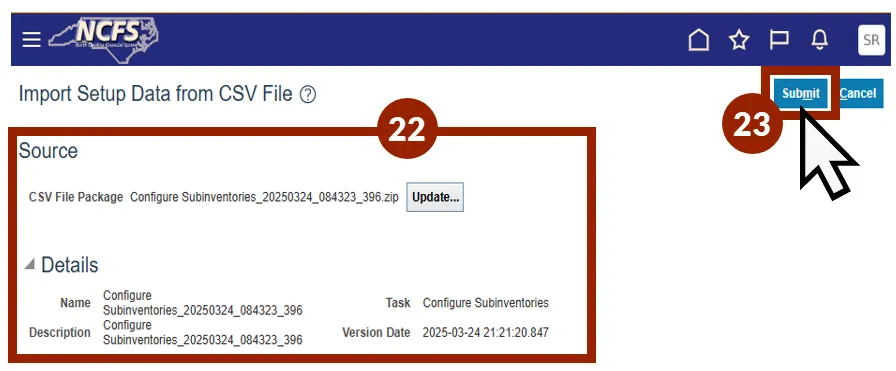
Step 24. Click OK to close the Confirmation pop-up.

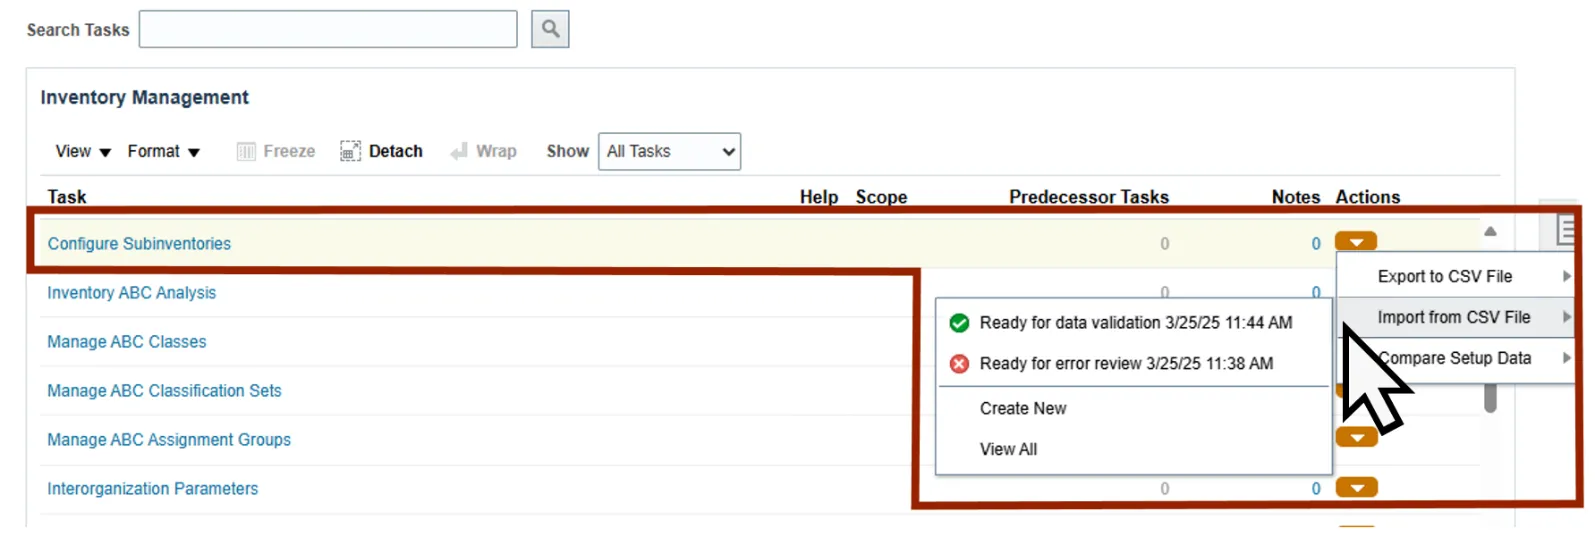
Step 25. Verify the Import file process completed successfully by navigating to the Configure Subinventories task.
NOTE: The imported CSV file is shown from the action drop-down menu on the Configure Subinventories tasks.
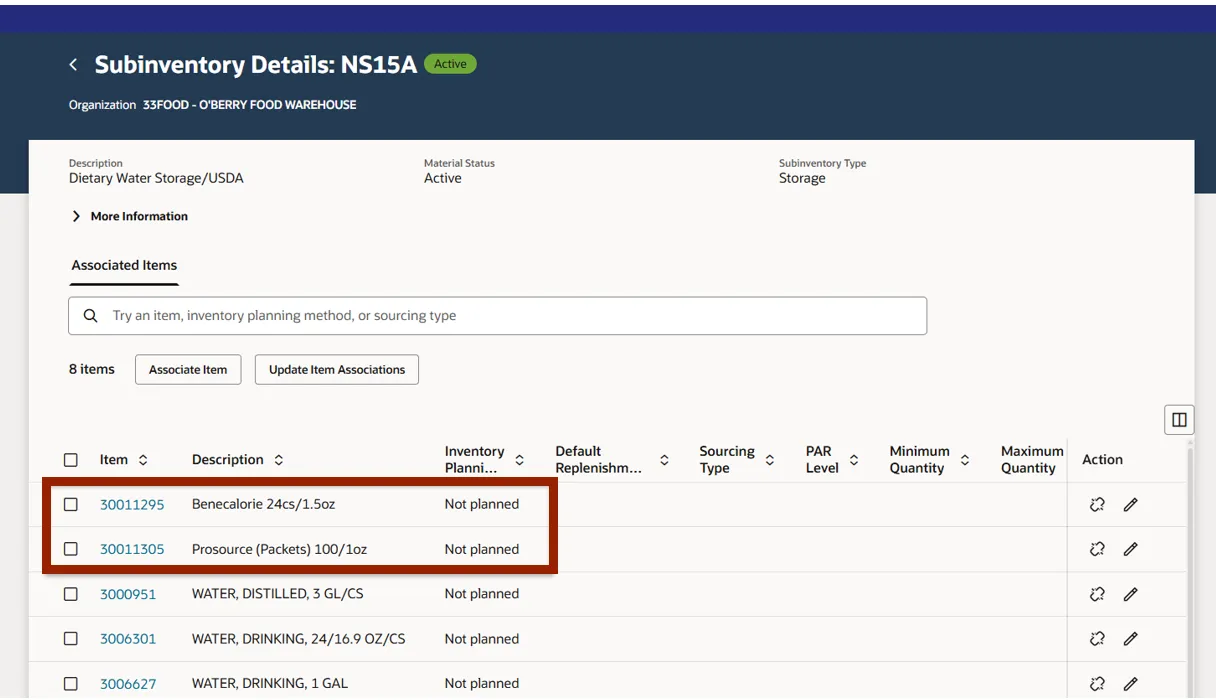
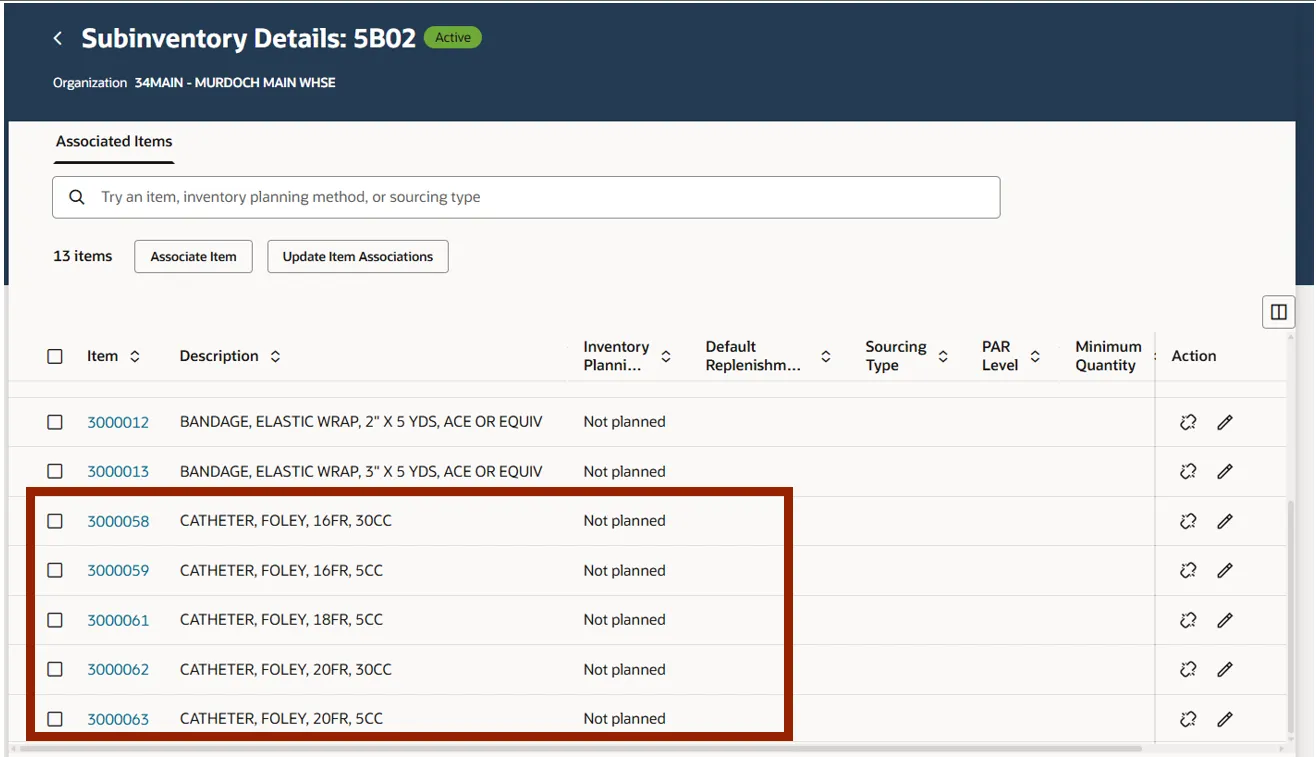
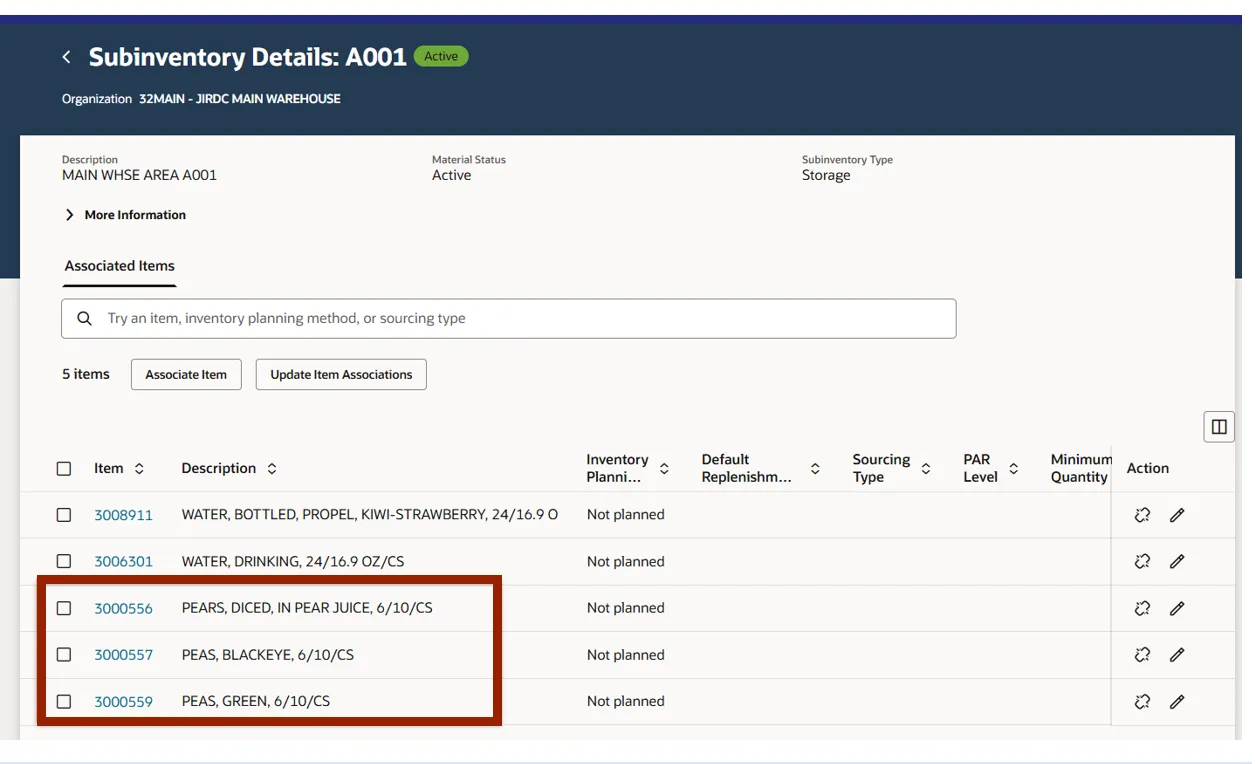
Step 26. Select the Inventory Organization.
Step 27. Select the Subinventory to view the updated items. Examples of displaying updated subinventories from imported spreadsheets are displayed below.
Disassociate an Inventory Item from a Subinventory
Follow these steps to Disassociate an inventory item from a subinventory. There are 7 steps to complete this process.
Step 1. Navigate to the Configure Subinventories task.
Step 2. Select Inventory Organization screen.
Step 3. Select the Subinventory Name selection box in which an item is to be disassociated from the subinventory.

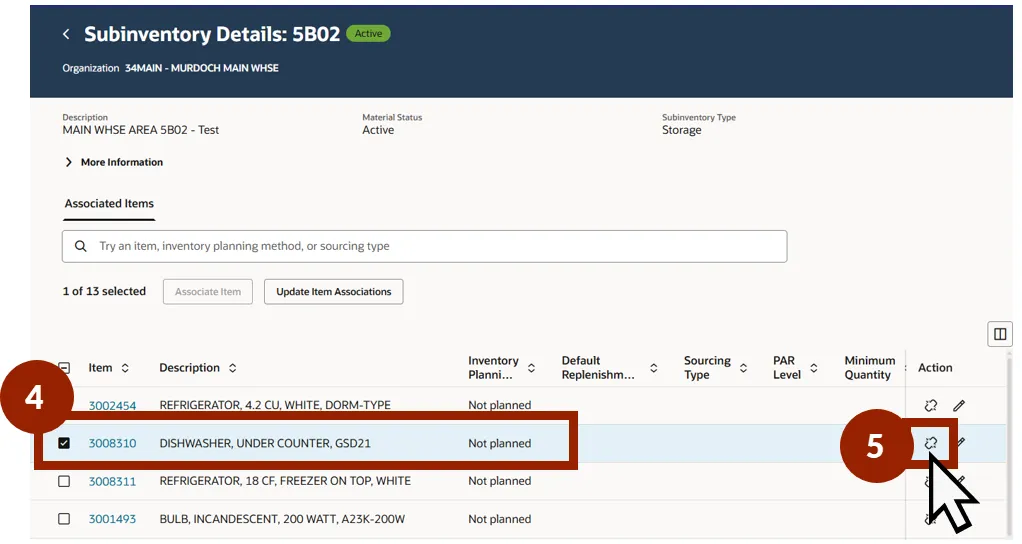
Step 4. Click the selection box beside the inventory item to disassociate.
Step 5. Click the Disassociate icon under Action.
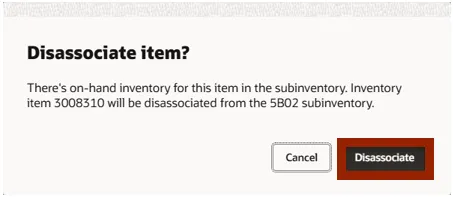
Step 6. Click the Disassociate button from the Disassociate item? pop-up.
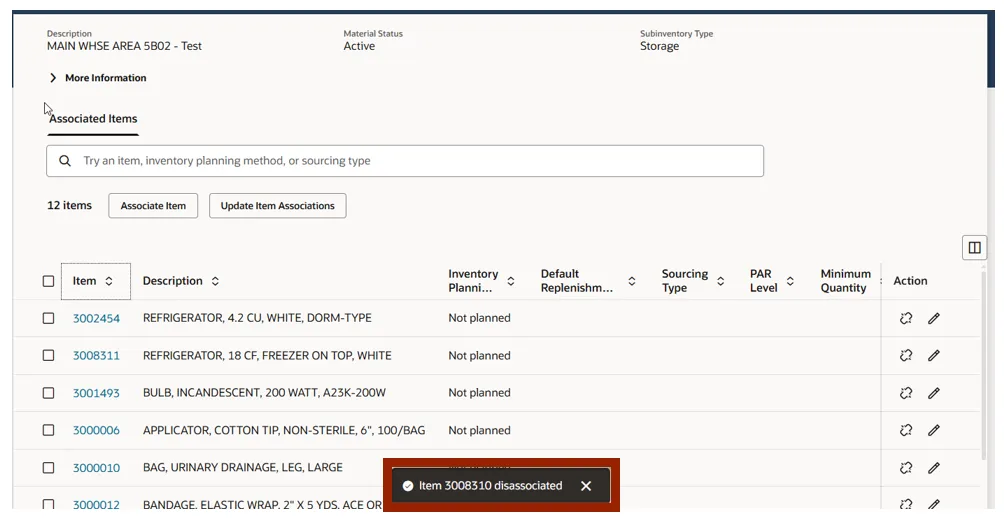
Step 7. A confirmation message confirming the disassociation of the item from the subinventory appears at the bottom of the screen.
Subinventory Reporting
Follow these steps for subinventory reporting. There are 6 steps to complete this process.
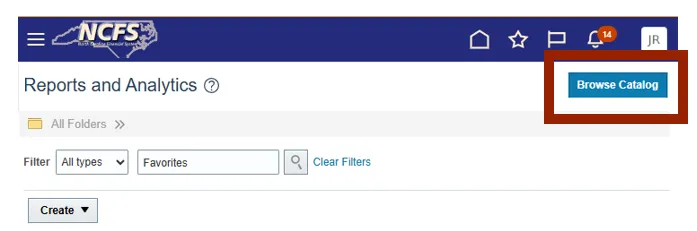
Step 1. Navigate to the Reports and Analytics section within NCFS by navigating to the Tools -> Reports and Analytics
Step 2. Click Browse Catalog.
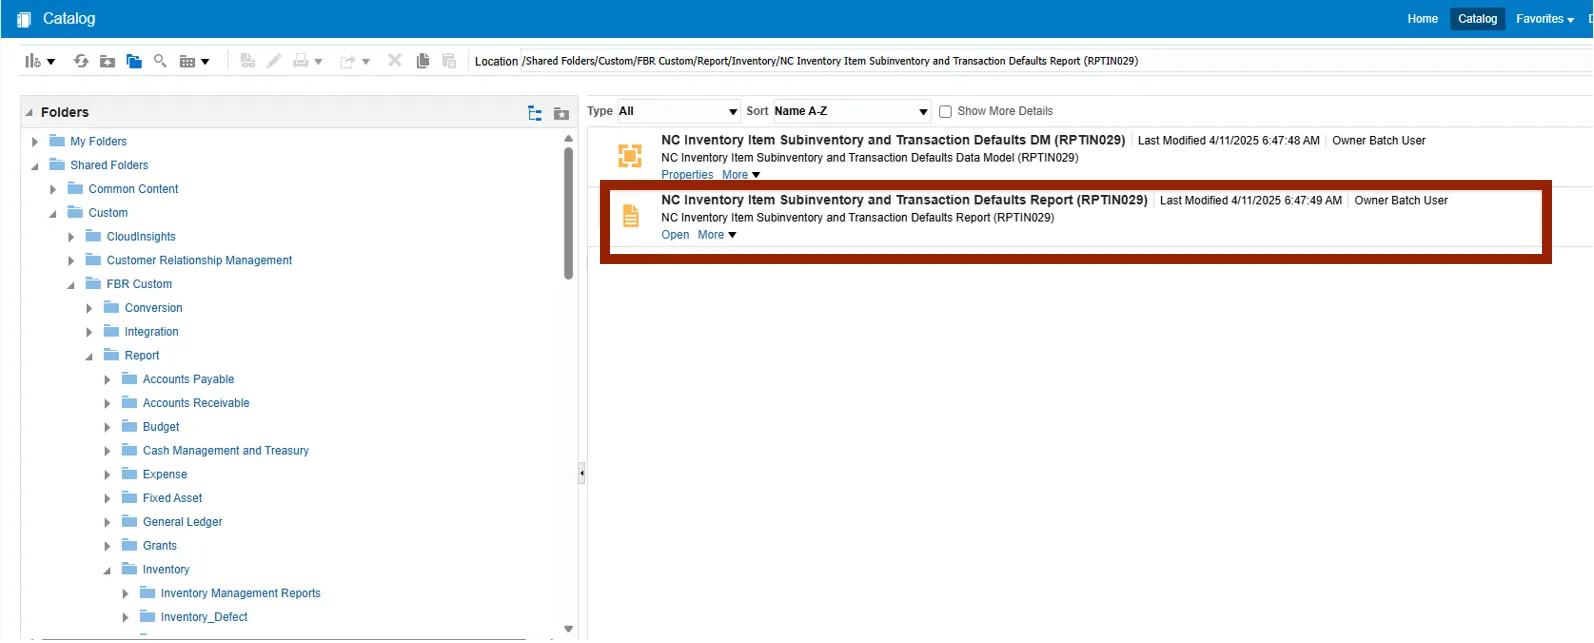
Step 3. In the folders panel select Shared Folders -> Custom -> FBR Custom ->Report ->Inventory -> NC Inventory Item Subinventory and Transaction Defaults Report (RPTIN029).
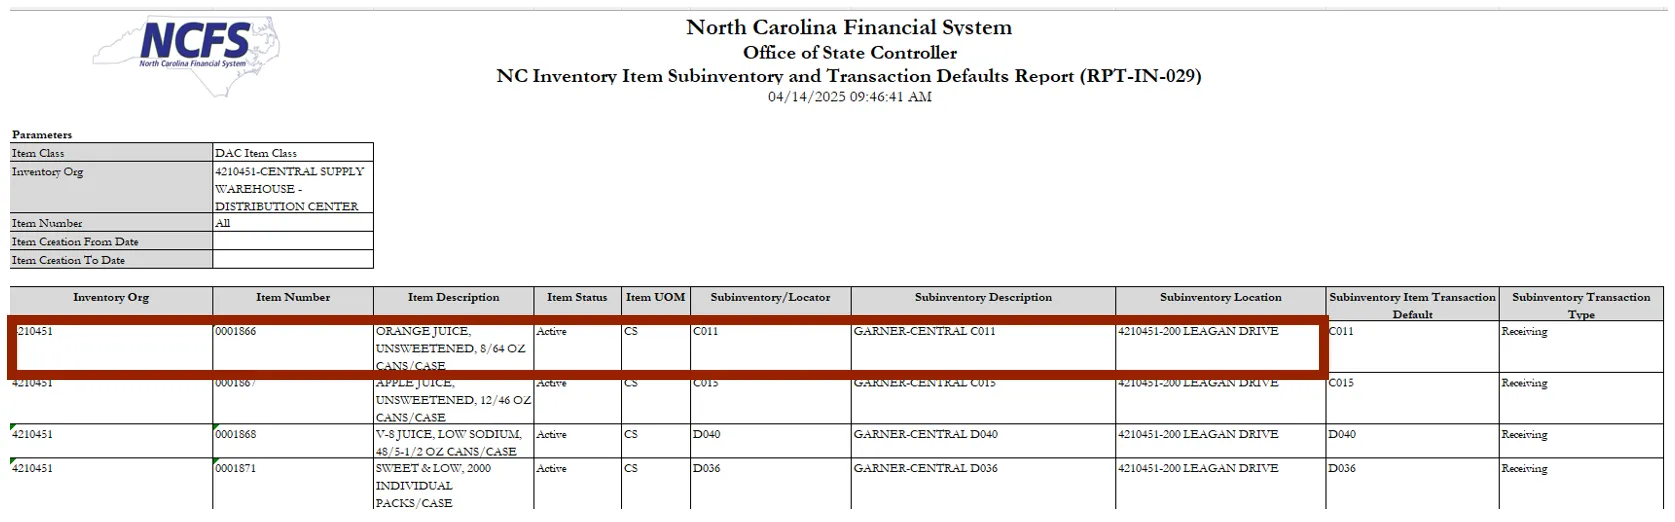
Step 4. Enter the Report Parameters:
- Item Class: DAC Item Class or DHHS Item Class
- Inventory Org: All or select the appropriate Inventory Organization(s)
- Item Number: All or select the appropriate Item Number(s)
- Item Creation From Date: Can be left blank or enter specific date
- Item Create To Date: Can be left blank or enter specific date
Step 5. Click the Apply button.

Step 6. Review Report once completed
- Review the Subinventory/Locator column to verify the Subinventory used to setup the Item with.
NOTE: If the Subinventory/Locator field is blank, please follow the necessary steps in this QRG to complete the setup.
Additional Resources
- Virtual Instructor-Led Training (vILT)