Purpose
The purpose of this Quick Reference Guide (QRG) is to provide an understanding of how to interpret and then take corrective action (ignore, correct, or delete) on one or more records that appear within the Import Errors tab on the Journals Dashboard in the North Carolina Financial System (NCFS).
Overview
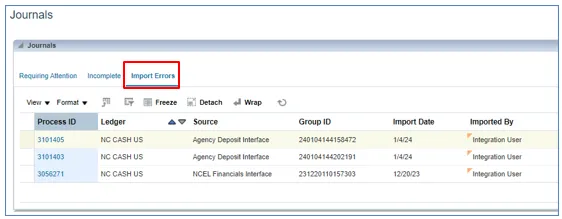
In NCFS, the Import Errors tab contains a listing of Journal Batches that could not be successfully imported for all agencies. The rows listed often come from a variety of journal sources (ADFDI spreadsheet, FBDI, custom interface, etc.) and fail the journal import process for a variety of reasons. The list is not restricted to just your agency.
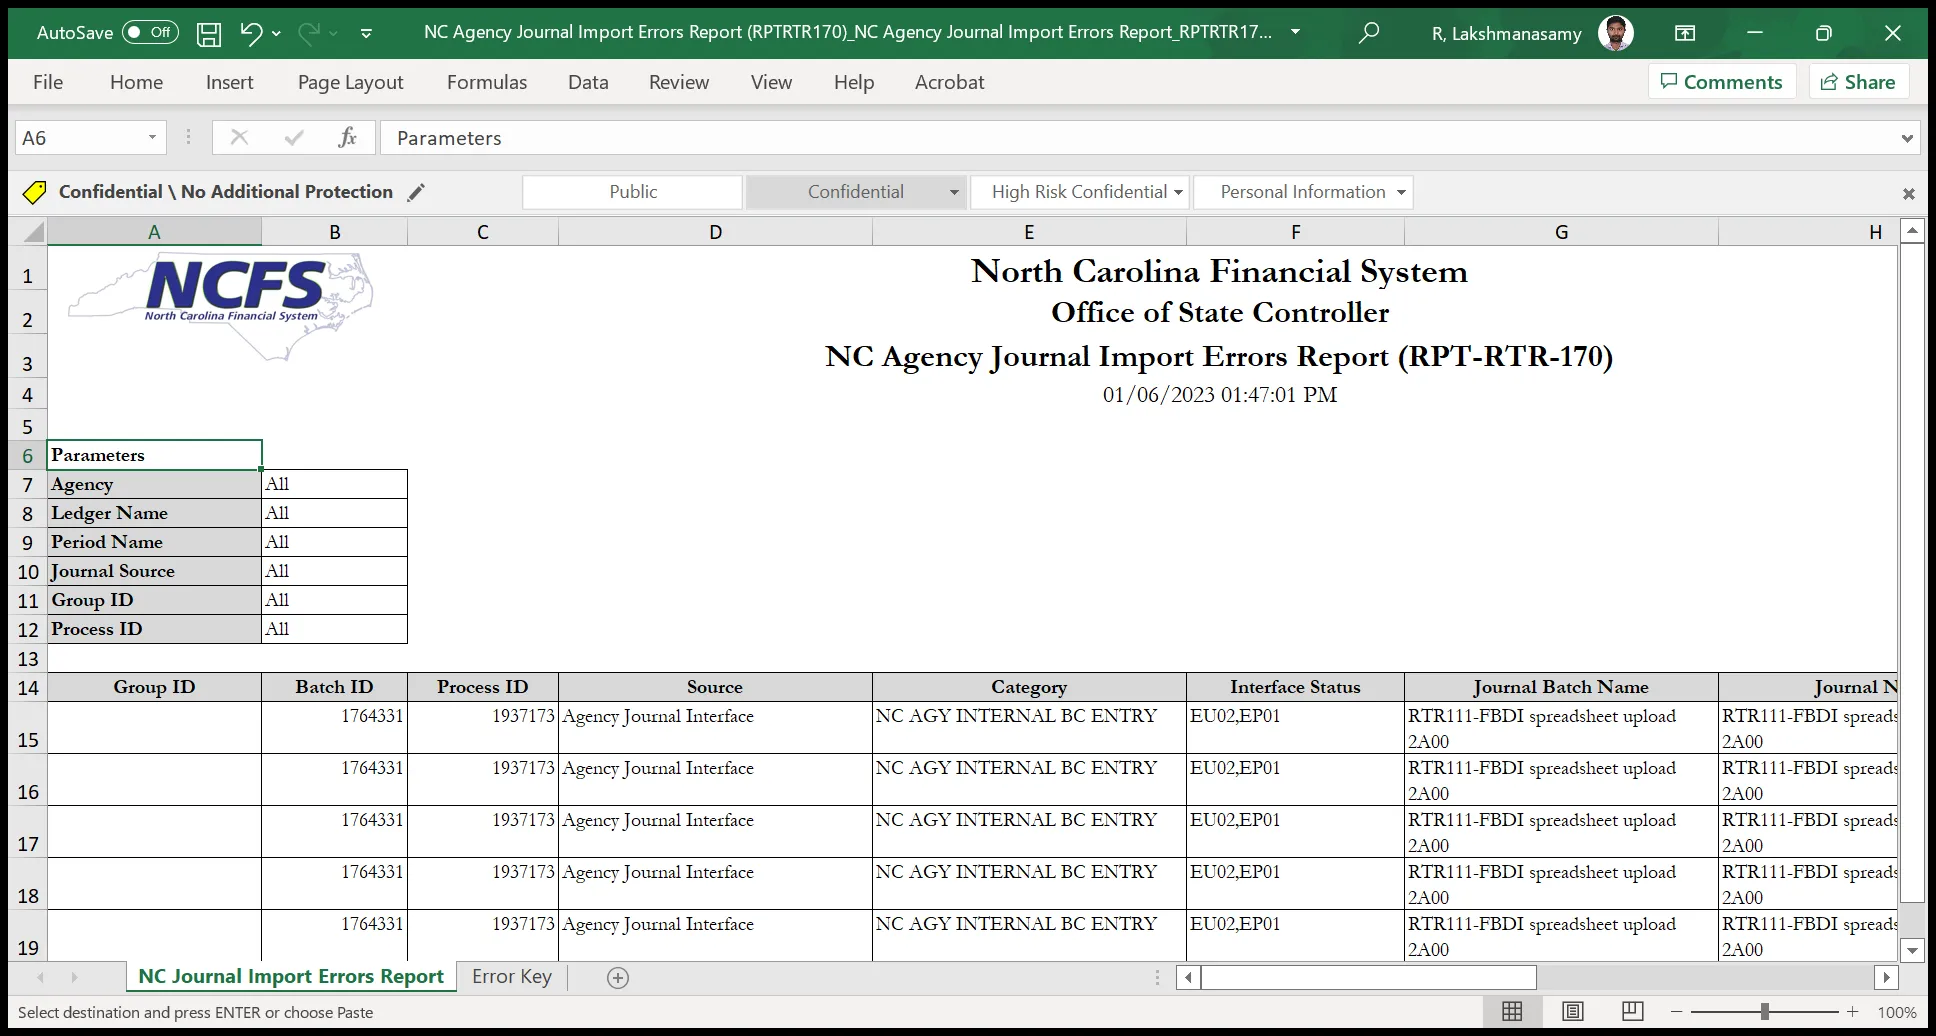
NC Agency Journal Import Errors Report (RPT_RTR_170)
This custom prebuilt report was created because the 'as-is' Journal dashboard does not indicate for which agency the error relates. It is important that you only take corrective action to the Process IDs related to your agency. Process ID is an identification number which is system-generated during Journal Import.
The NC Agency Journal Import Errors Report (RPT-RTR-170) helps you determine which import error rows (and Process IDs) relate to your agency and the reason(s) they errored out. The report contains two tabs: one which will display critical fields associated with each errored row (Process ID, Interface Status, Journal Batch Name), and the other contains an Error Key for each Interface Status (Error Code).
To generate the report, use the following navigation path: Home icon > Tools tab > Report and Analytics app> Browse Catalog button > Shared Folder > Custom > FBR Custom > Report > General Ledger > NC Agency Journal Import Error Report (RPT_RTR_170) > Open > Enter input parameters > Click Apply button > Download/Save/Open report.
Based on journal Source, Category, Journal Batch Name, and Journal Name, determine and then take note of the Process ID numbers that relate to your agency and the error code(s) associated with each of those Process ID numbers.
Ignore all Process ID numbers that do not relate to your agency since you will only need to take corrective action on the Process IDs related to your agency.
Click the Error Key tab and determine the description for each of your error codes. You may need to scroll down to locate the desired error code.
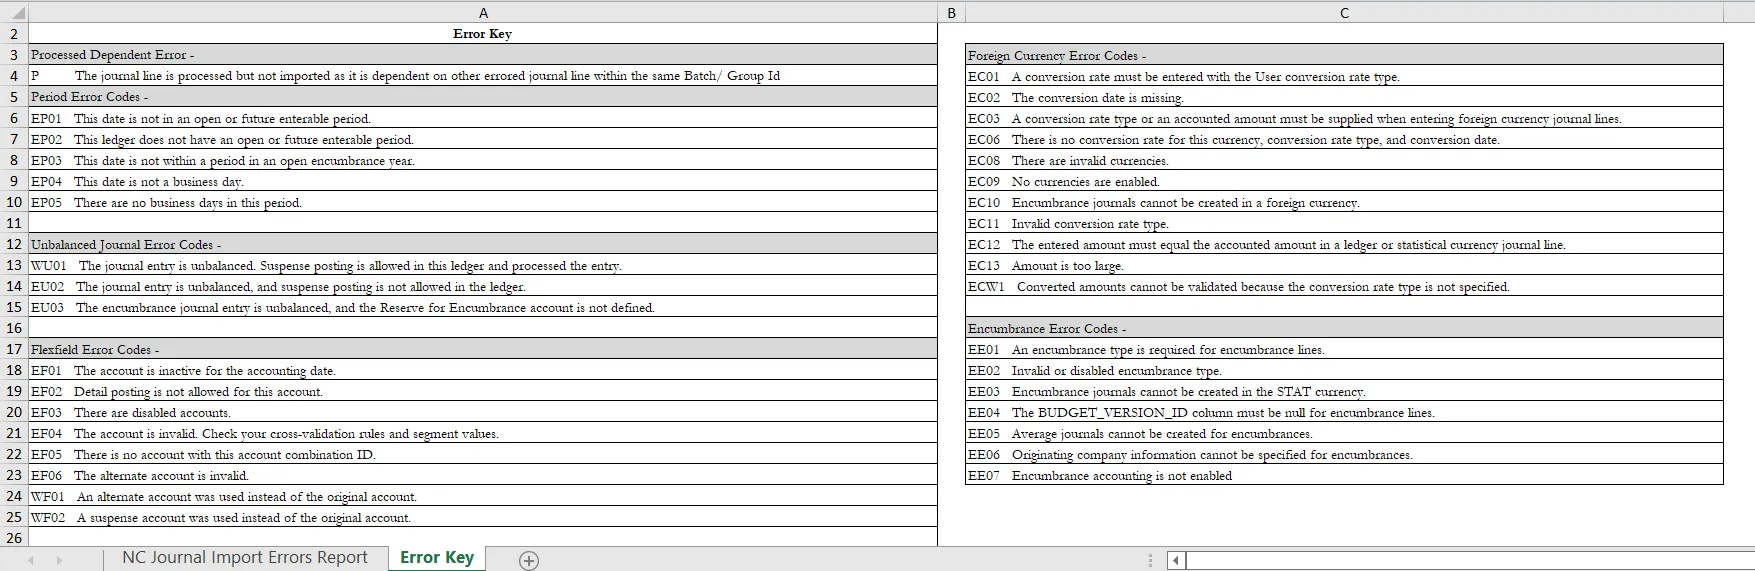
Note: The Error Key tab will always contain exactly the same information, regardless of which error codes exist in the first tab.
Correcting Import Errors
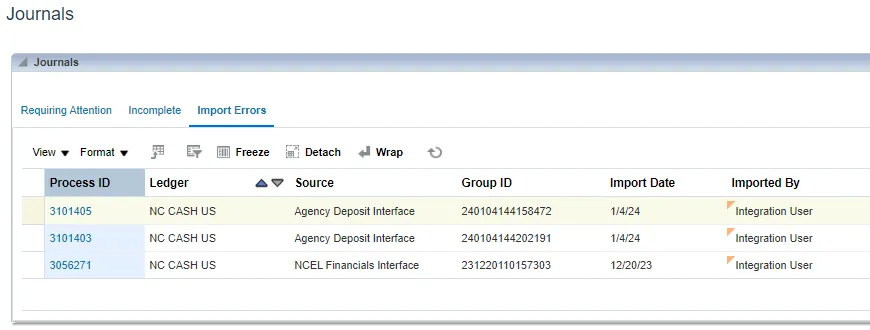
Once you have identified the Process ID you need to correct, navigate to the Journals Dashboard page and simply click on the desired Process ID link to generate the Correct Journal Import Data spreadsheet. The filename created within your Downloads folder is: JournalCorrection.xls.
Note: You can use the QBE feature to locate the desired Process ID. For details on how to use the QBE feature, see QRG GEN07 – Query By Example.
Once the spreadsheet has been created, perform the following tasks:
- Open the spreadsheet
- Enable editing
- Connect to NCFS
- Make the necessary corrections
- Upload the corrected data
- Submit Journal Import
Note: The Error Key tab will always contain exactly the same information, regardless of which error codes exist in the first tab. This is the same information that is available in the Agency Journal Import Error Report (RPT_RTR_170) report.
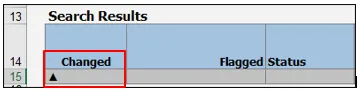
In the Search Results section, make the necessary changes/corrections, keeping the following in mind:
- This is a (very wide spreadsheet. Scroll to the right to access additional columns, such as the distribution account segments and the descriptive flex field columns.
- For each row you change (via one or more keystrokes) the row will be flagged with the triangle symbol within in the Changed column.
In the menu bar, click the Correct Journal Import Data tab.
Click the Upload icon.

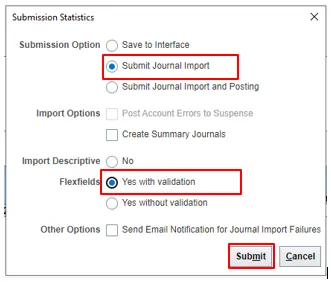
When the Submission Statistics pop-up window appears:
- Select Submit Journal Import
- Select Yes with Validation
- Click the Submit button
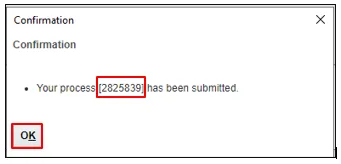
When the Confirmation pop-up window appears:
- Take note of the Process ID
- Click the OK button
Tip: Consider using the Scheduled Processes app to verify that Journal Import did in fact run successfully. If the user mistakenly selects ‘Save to Interface’ rather than ‘Submit Journal Import’ in the Submission Statistics pop-up window, the job may finish with a Status of ‘Success’ (for your above Confirmation number), but data simply stays in the interface table and will not be imported.
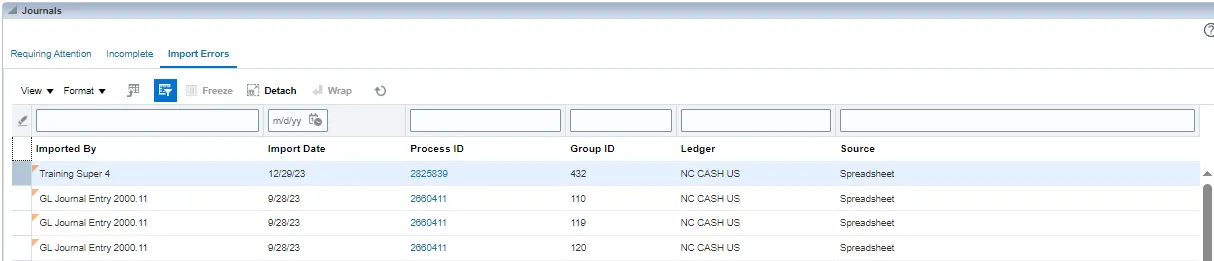
From Journals Dashboard, check whether your original Process ID is still displayed within the Import Errors tab. It should disappear from the Import Errors tab once the new Journal Import process is completed. You may need to click the Refresh icon a few times.
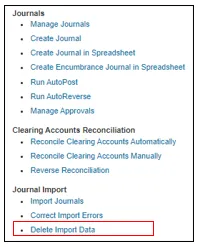
Deleting Import Errors
Sometimes, correcting the errors is best achieved by deleting the rejected journal batch and then reloading it into the GL_INTERFACE table. This method of resolution should only be used if the rejected journal batch can be fixed in the source system and transferred again, in full, to NCFS’ GL module.
Navigation: General Accounting > Journals > Tasks icon > Delete Import Data
From the dropdown choice lists, select a valid value for each of the five parameters then click the Submit button. Each of the five parameters are required. Be sure to select values that pertain to your agency.

Below is a sample of populated parameters values:
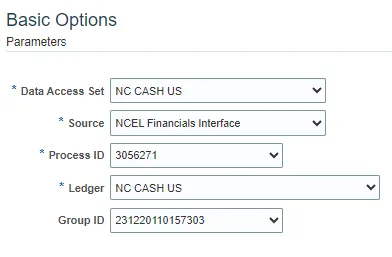
Note: Use the output from the NC Agency Journal Import Error Report (RPT-RTR-170) to determine the correct parameter values (for your agency)!
Note: After corrected data has been loaded into the GL_INTERFACE table, the updated records must once again attempt to be imported. It is only upon successful import that the corrected journal batch(es) can proceed to the next steps of the process.
Wrap Up
This QRG covered how to interpret and take corrective action on journal batches that appear in the Import Errors tab of the Journals Dashboard page.
Additional Resources
- Virtual Instructor-Led Training (vILT)
• GL100c – GL Journal Entry
• GL103 – FBDI Journal Upload - Web-Based Training (WBT)
• GEN106 – Submitting and Scheduling Existing Reports - Quick Reference Guides (QRG)
• GL-09 – Run Custom Pre-Built Reports
• GEN-07 – Query By Example