Purpose
The purpose of this Quick Reference Guide (QRG) is to provide a step-by-step explanation of how to add and create asset transactions using the Application Development Framework Desktop Integration (ADFDI) spreadsheet in the North Carolina Financial System (NCFS).
Introduction and Overview
This QRG covers the steps to create asset transactions using the Application Development Framework Desktop Integration (ADFDI) spreadsheet, which will enable you to make asset additions in the spreadsheet and post it back to the system.
Create Asset Transactions by Spreadsheet
To add assets and create asset transactions using spreadsheet, please follow the steps below. There are 40 steps to complete this process.
Step 1. Log in to the NCFS portal with your credentials to access the system.
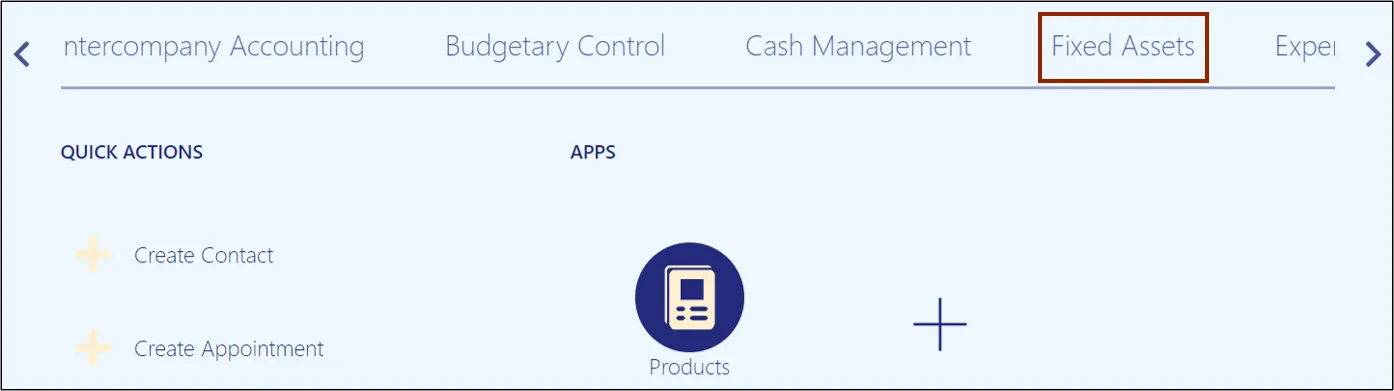
Step 2. On the Home page, click the Fixed Assets tab.
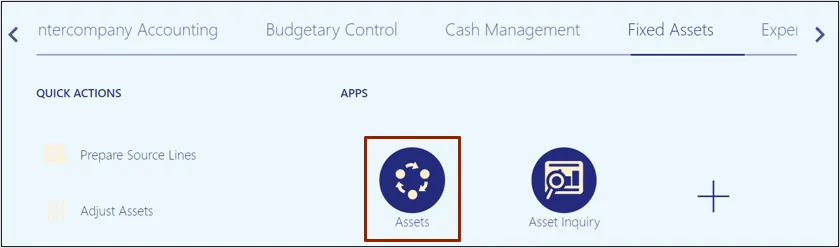
Step 3. Click the Assets app.
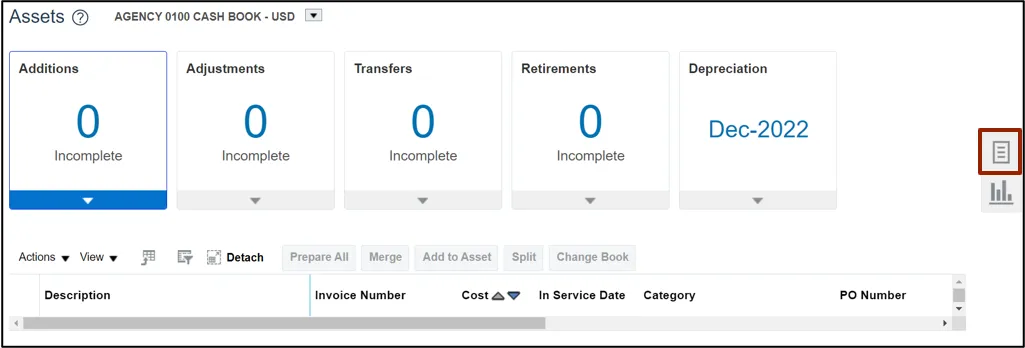
Step 4. On the Assets page, click the Tasks icon.
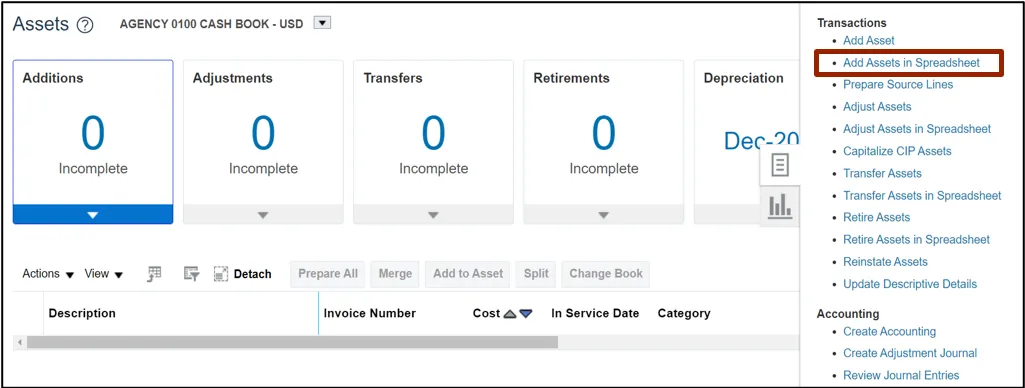
Step 5. From the Transactions section, click Add Assets in Spreadsheet.
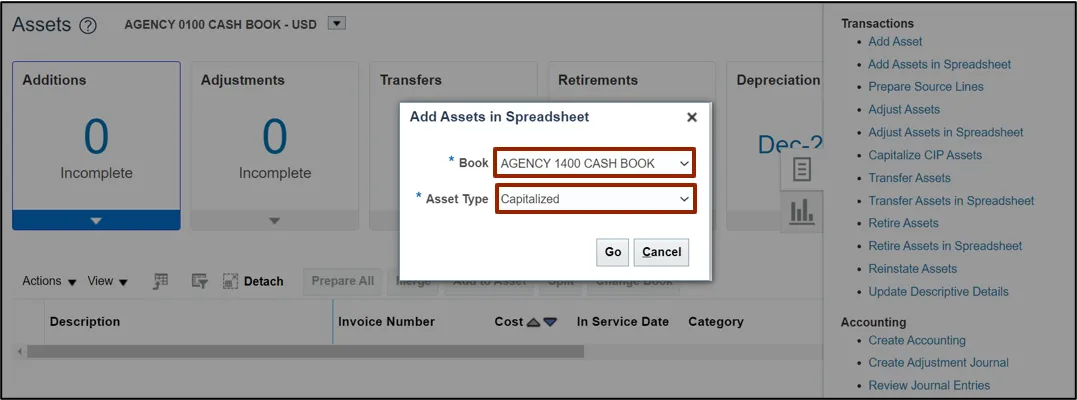
Step 6. On the Add Assets in Spreadsheet pop-up, select the applicable Book and Asset Type from the respective drop-down choice lists.
In this example, we choose AGENCY 1400 CASH BOOK for Books field and Capitalized for Asset Type field.
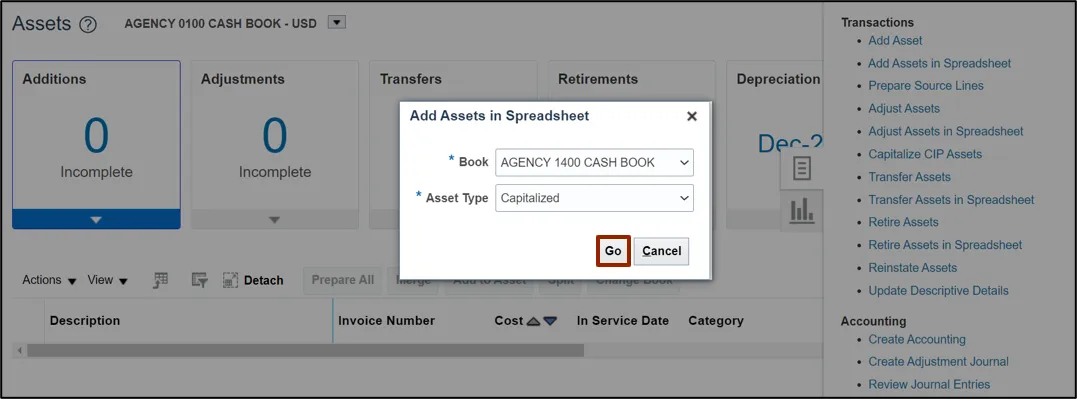
Step 7. Click the Go button to download the excel file for the respective asset book and type.
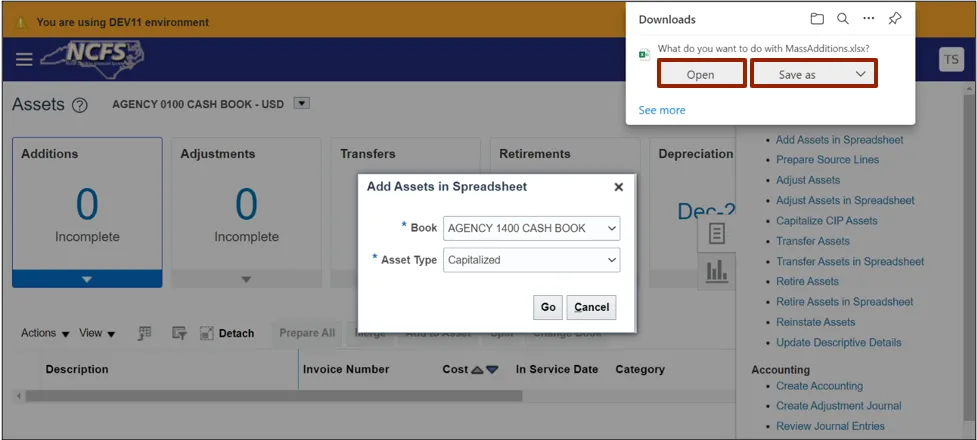
Step 8. Click the Open button to open the downloaded excel file or click the Save As button to save a copy of the downloaded Excel file.
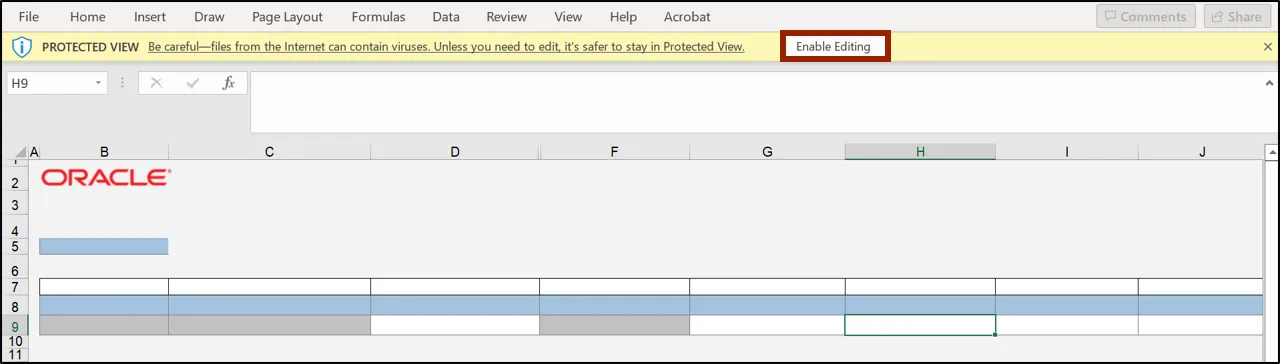
Step 9. Open the spreadsheet and click the Enable Editing button on top of the Excel file.
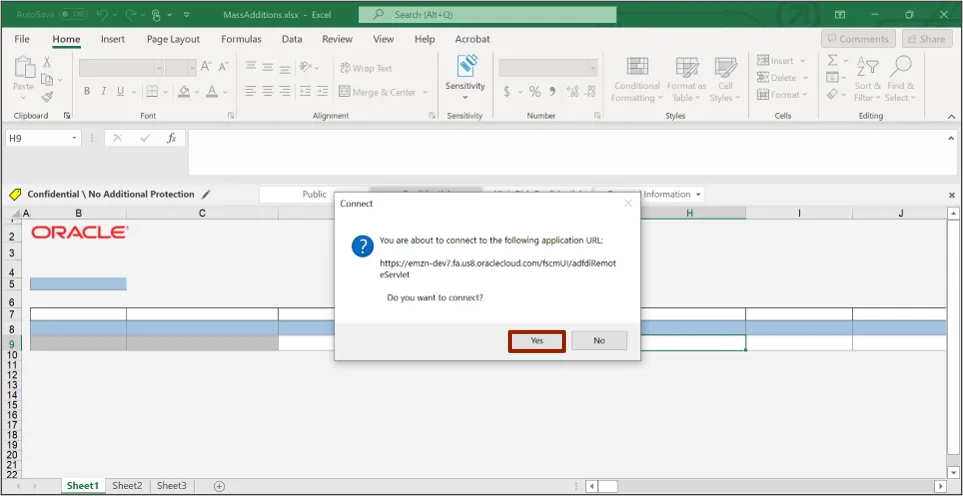
Step 10. Once the Excel file is opened, click Yes on the Connect pop-up message to successfully connect to the server.
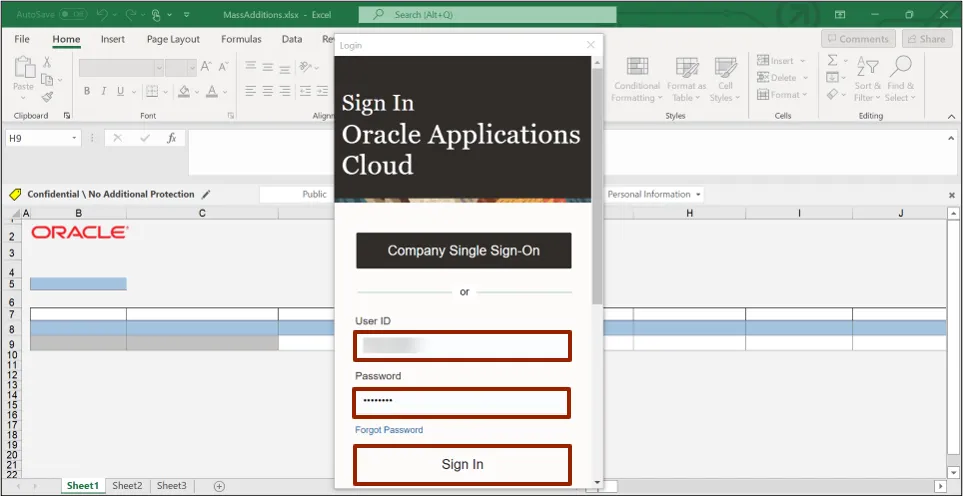
Step 11. On the NCFS portal Login pop-up, enter the User ID and Password credentials and click the Sign In button.
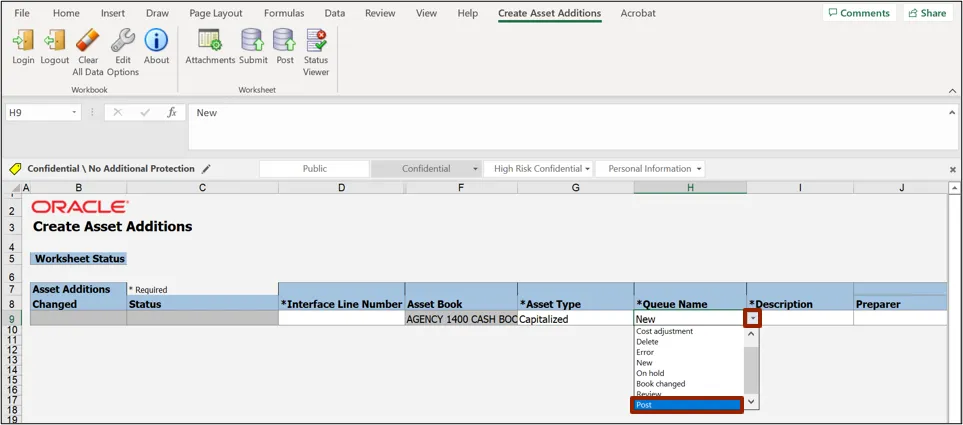
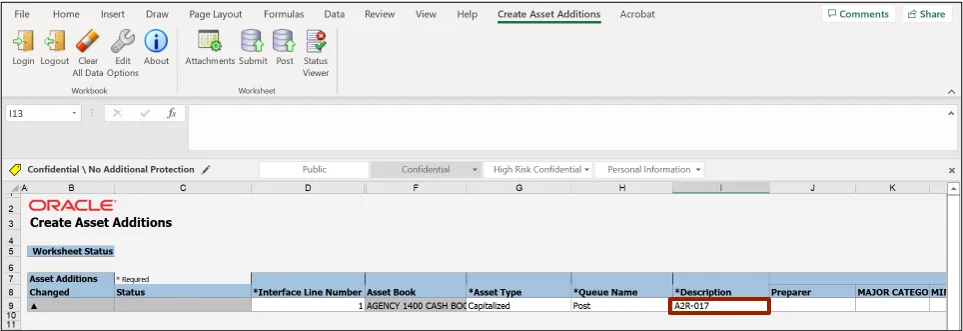
Step 12. On the Queue Name field, click the drop-down choice list icon and change the status to Post.
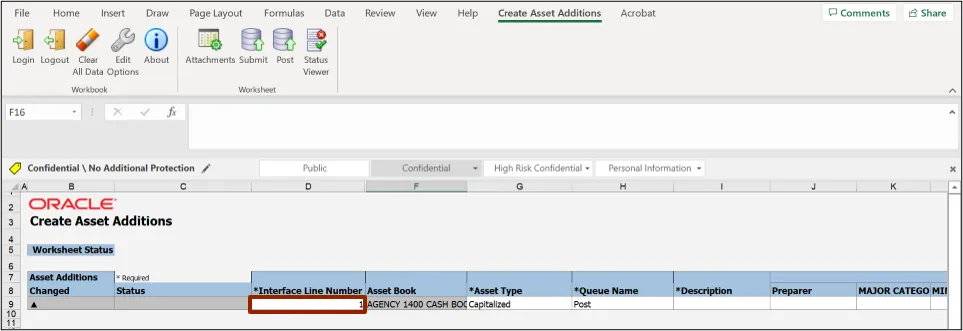
Step 13. Next, fill in the information on the specified fields with unique identifiers for the Interface Lines to match with each created asset. An asterisk (*) next to a column header indicates that it is a required field. Enter a number on the Interface Line Number field.
In this example, we entered 1.
Step 14. Enter the Asset Description on the Description field.
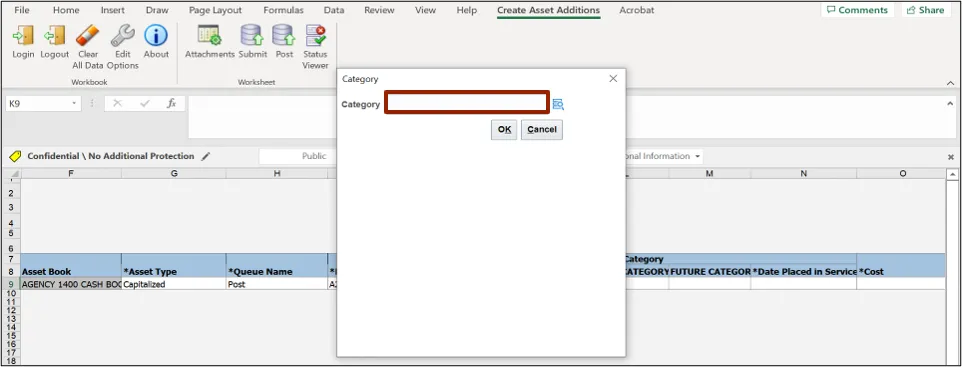
Step 15. Scroll right to find the Category section. To fill in the field information under this section, double click the cell below the Major Category field to open a pop-up.

Step 16. The Category pop-up appears. Enter the required asset category on the Category field. Alternatively, select the Category by clicking the Magnifying Glass icon.
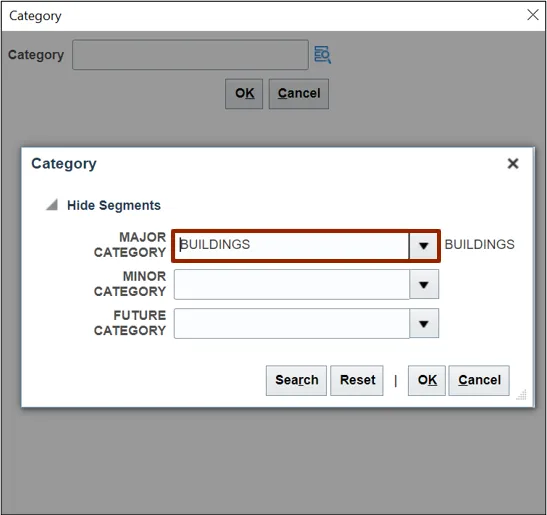
Step 17. The Category pop-up appears. Enter the specific major asset category, such as Buildings, on the Major Category field. Alternatively, select the Major Category from the respective drop-down choice list.
In this example, we choose BUILDINGS.
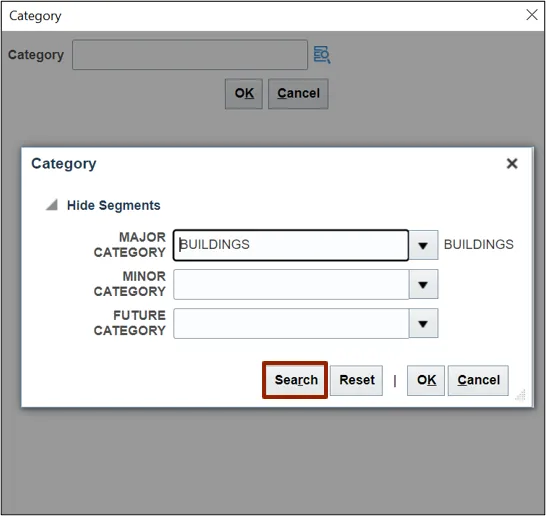
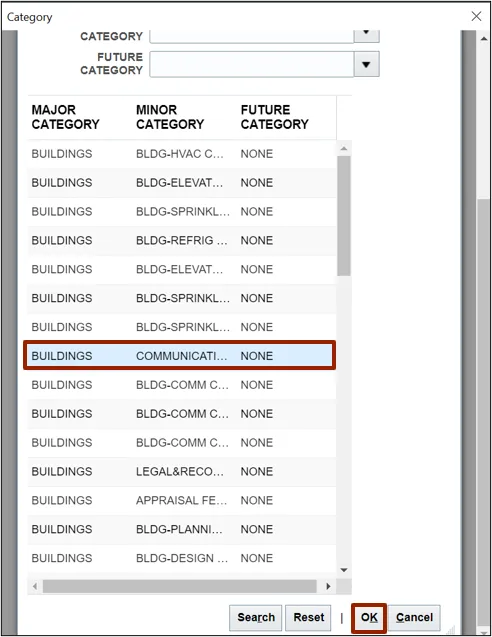
Step 18. Click the Search button to get a list of all the relevant Major, Minor, and Future Categories.
Step 19. Select the required Minor Category from the list.
In this example, we choose COMMUNICATION CABLE Click the OK button.
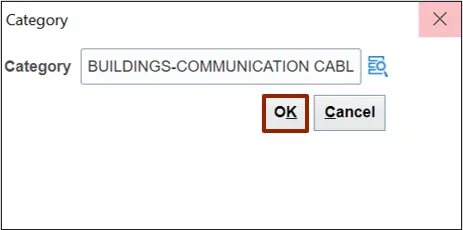
Step 20. On the main Category pop-up, click the OK button. The selected information will auto-populate in the relevant fields of the Excel file.
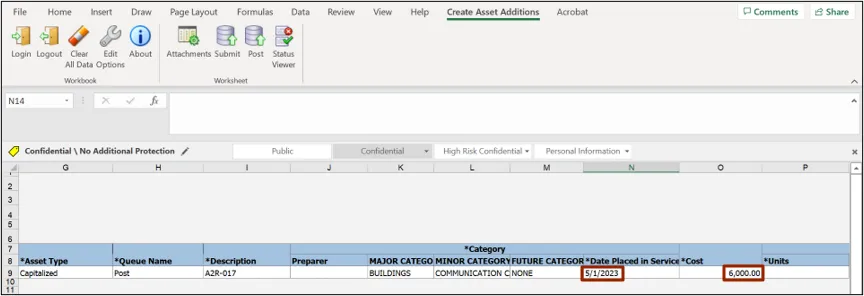
Step 21. Enter the relevant date on the Date Placed in Service field, and the cost of the asset on the Cost field.
In this example, we choose 6000.
Step 22. On the Units field, enter the number of asset units.
In this example, we choose 1.

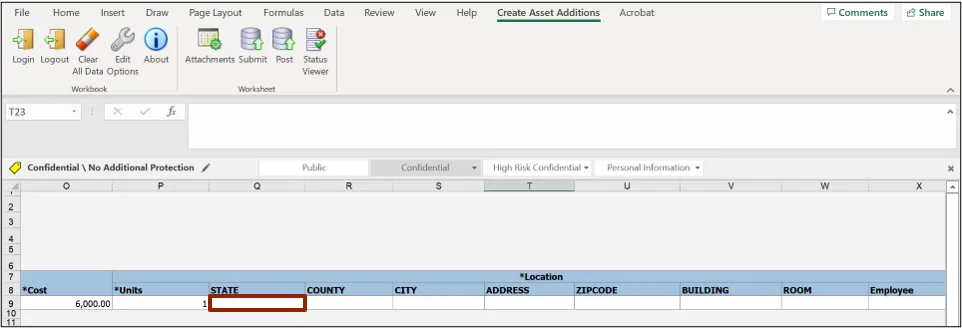
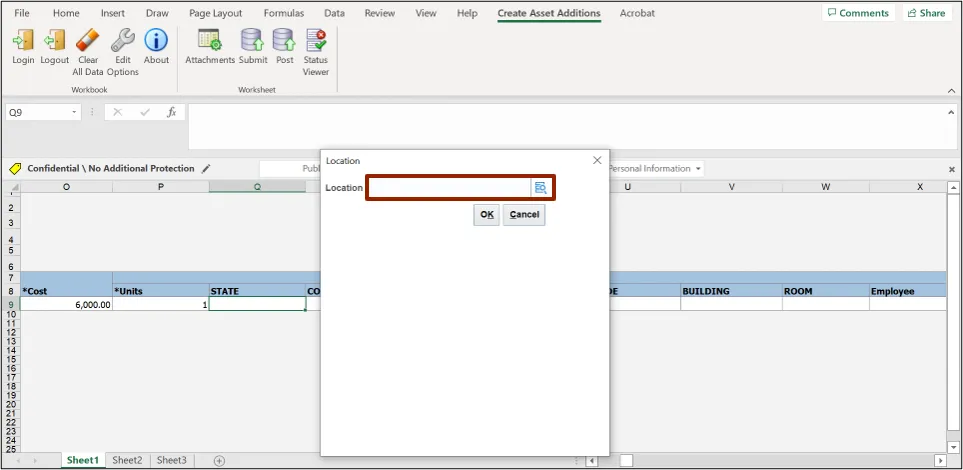
Step 23. Scroll right to find the Location section. To fill in the field information under the Location section, double-click the cell below the State field to open a pop-up.
Step 24. The Location pop-up appears. Enter the required asset location on the Location field. Alternatively, select the Location by clicking the Magnifying Glass icon.
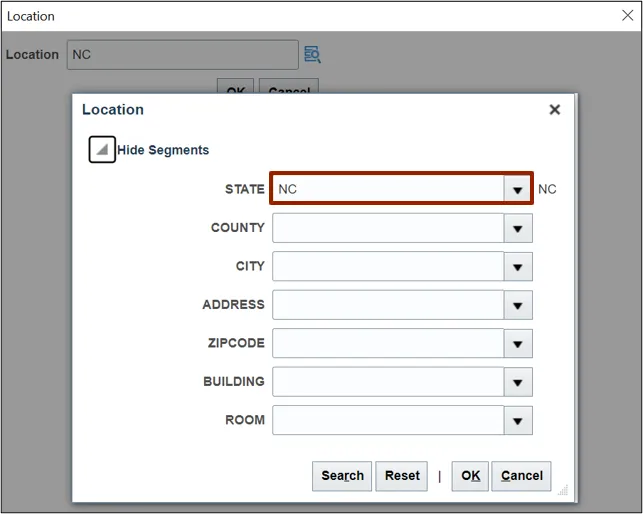
Step 25. The Location pop-up appears. On the State field, enter NC. Alternatively, select NC from the drop-down choice list.
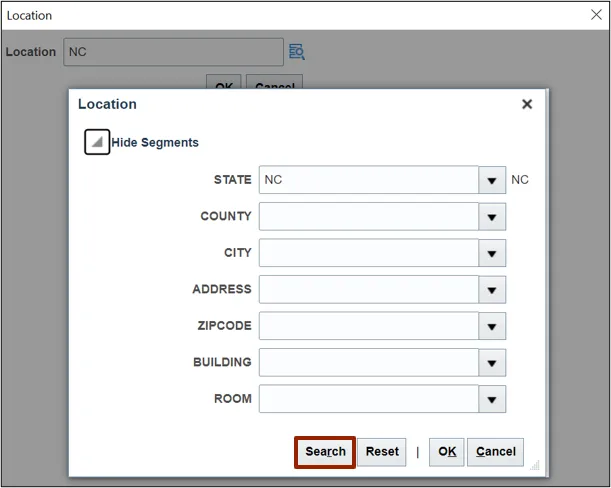
Step 26. Click the Search button to get a list of all the location details.
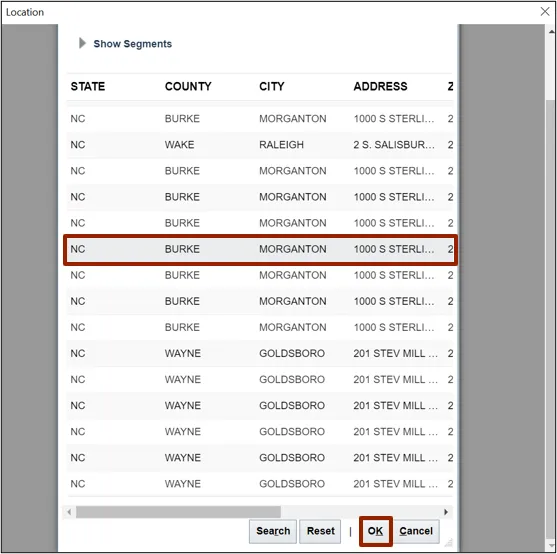
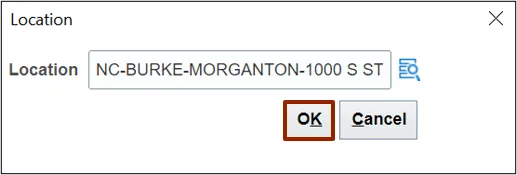
Step 27. Select the required location details from the list. Click the OK button.
In this example, we choose BURKE MORGANTON 1000 S STERLING 2.
Step 28. On the main Location pop-up, click the OK button. The information will auto populate on the relevant fields of the Excel file.
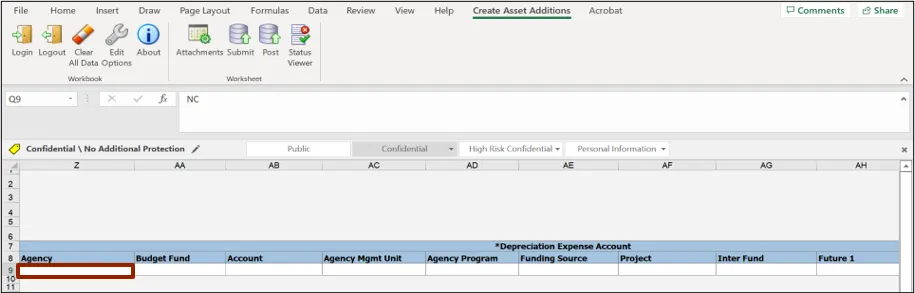
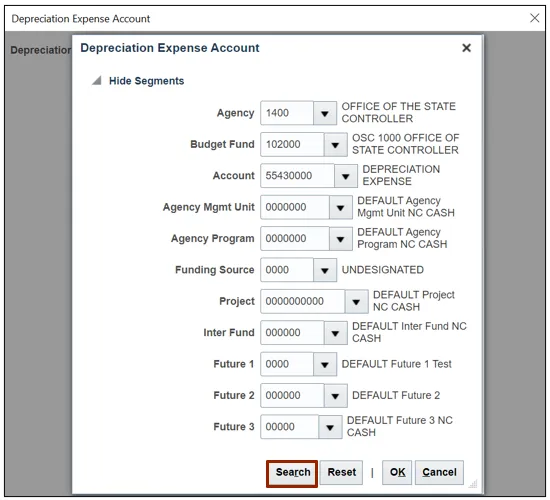
Step 29. Scroll right to find the Depreciation Expense Account section. To fill in the field information under this section, double-click the cell below the Agency field to open a pop-up.
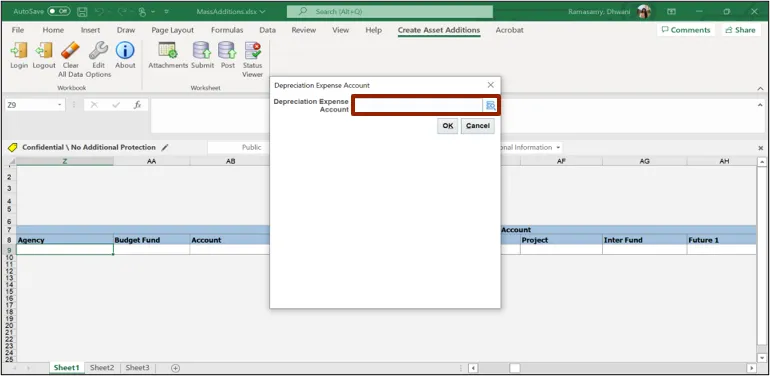
Step 30. The Depreciation Expense Account pop-up appears. Enter the required account on the Depreciation Expense Account field. Alternatively, select the account by clicking the Magnifying Glass icon.
Step 31. The Depreciation Expense Account pop-up appears. Enter the Agency, Budget Fund, Account Number. Alternatively, select these options from the respective drop-down choice list.
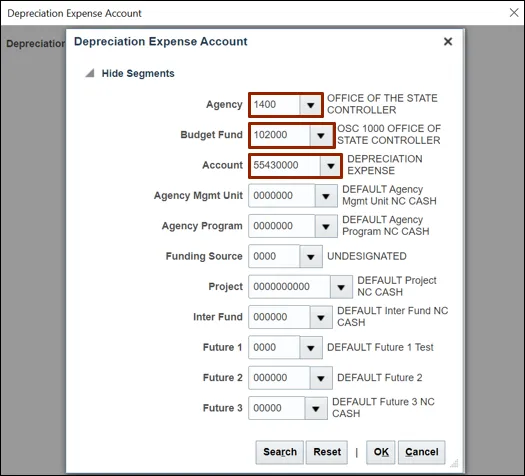
Step 32. Click the Search button to get a list of all the depreciation expense details.
Step 33. Select the required depreciation expense details from the list. Click the OK button.
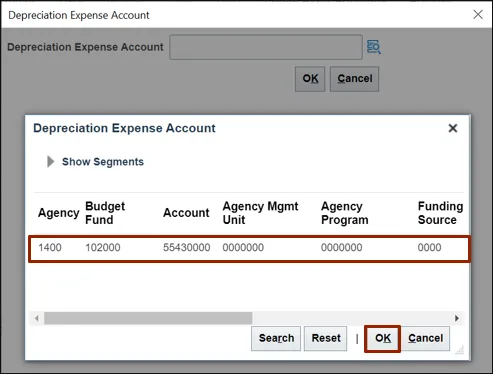
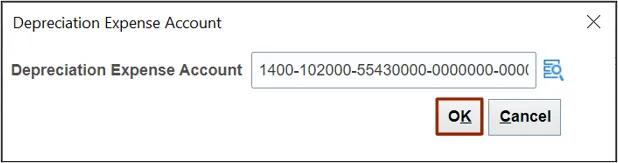
Step 34. On the main Depreciation Expense Account pop-up, click the OK button. The information will auto populate on the relevant fields of the Excel file.
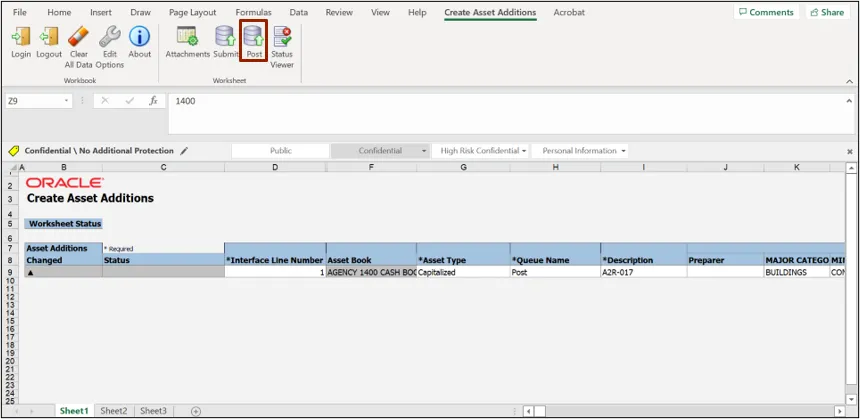
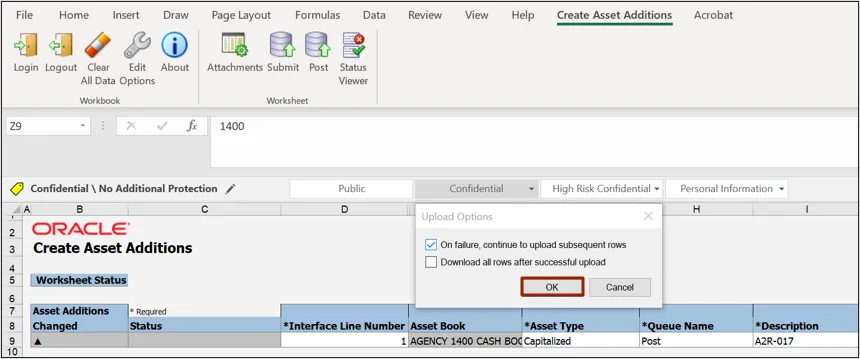
Step 35. Click the Post button to post the asset addition into the system.
Step 36. On the Upload Options pop-up, click the OK button.
Step 37. A Confirmation pop-up appears. Click the OK button.
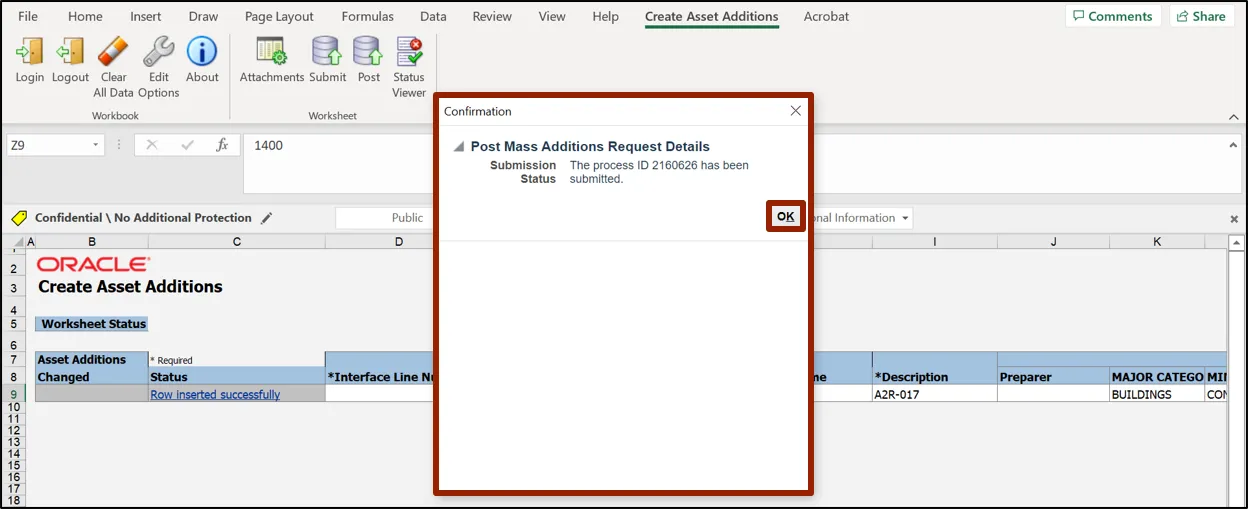
Step 38. Once the Submission Status states that the asset addition has been submitted, the Status field has been updated with Row Inserted Successfully.

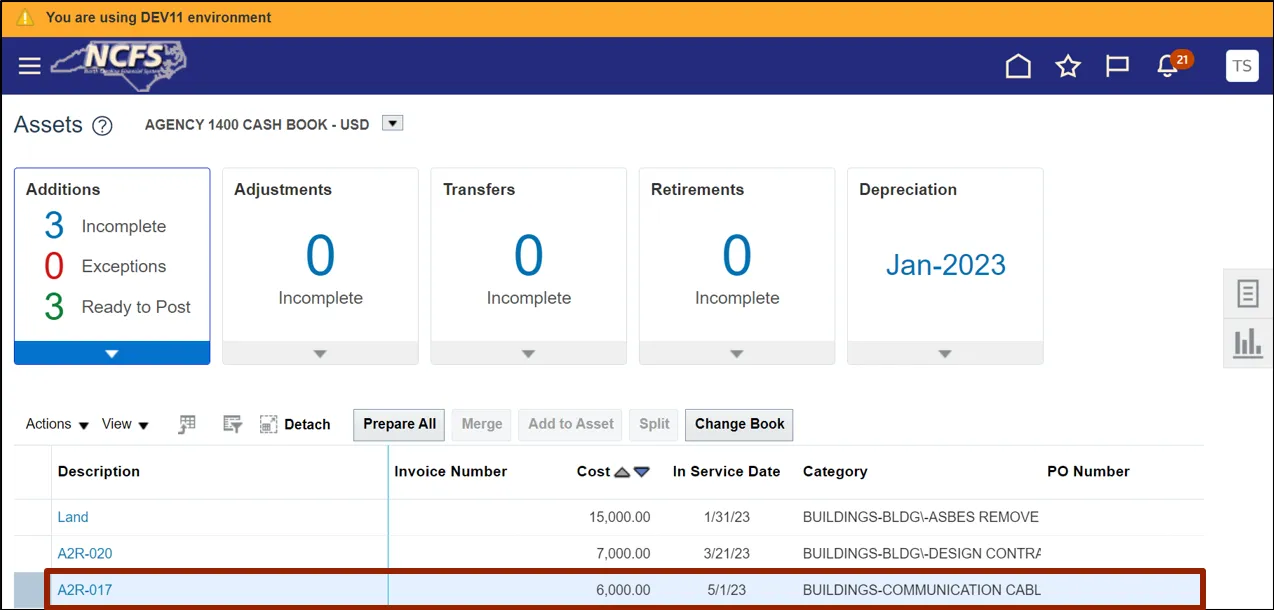
Step 39. To confirm that the asset addition has been posted into the system, navigate back to the Assets page in NCFS. Select the appropriate Asset Book by clicking the Drop-Down Choice List icon.
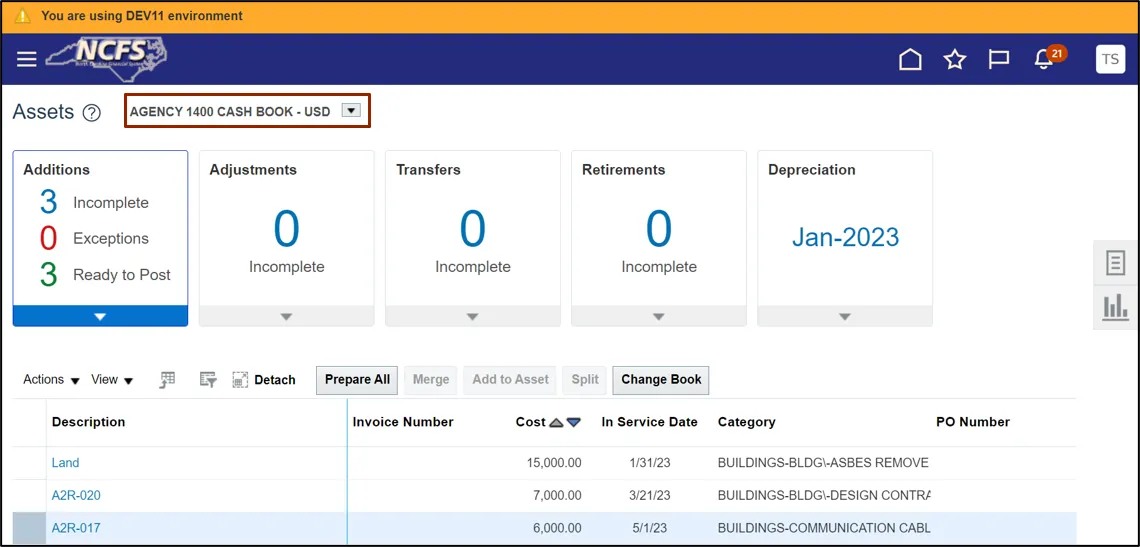
Step 40. Find the newly added assets in the table below.
Wrap-Up
Create asset transactions by adding assets in the ADFDI spreadsheet using the steps above.
Additional Resources
- Virtual Instructor-Led Training (vILT)