Purpose
The purpose of this Quick Reference Guide (QRG) is to provide a step-by-step explanation of how to Create and Manage Employee Information, including bank account and manager information, in the North Carolina Financial System (NCFS).
Introduction and Overview
This QRG covers the process of creating and managing employee information. This includes setting up employee’s bank account, editing or end dating employee’s bank account, and managing employee’s manager.
Setup Employee’s Bank Account
To setup employee’s bank account, please follow the steps below. There are 15 steps to complete this process.
1. Log in to the NCFS portal with your credentials to access the system.
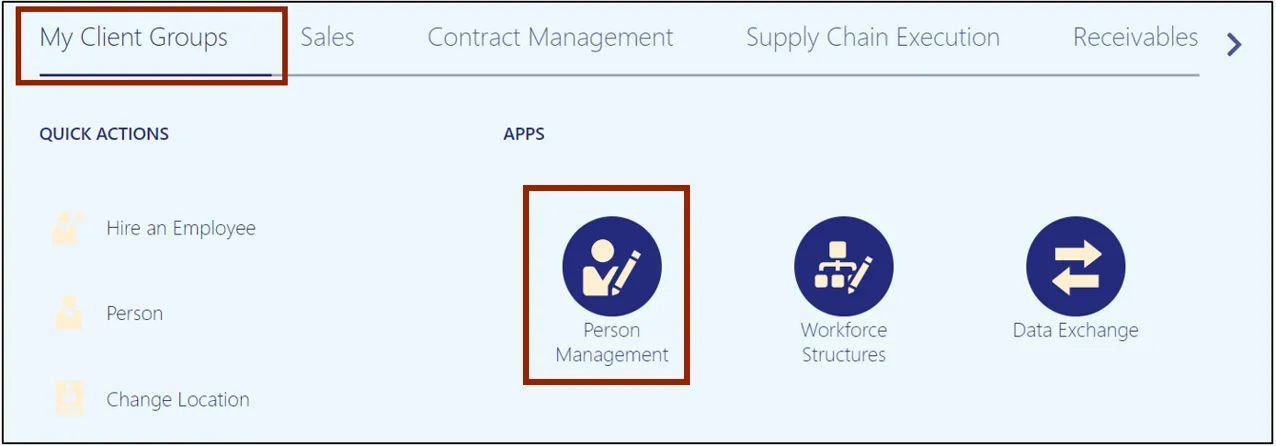
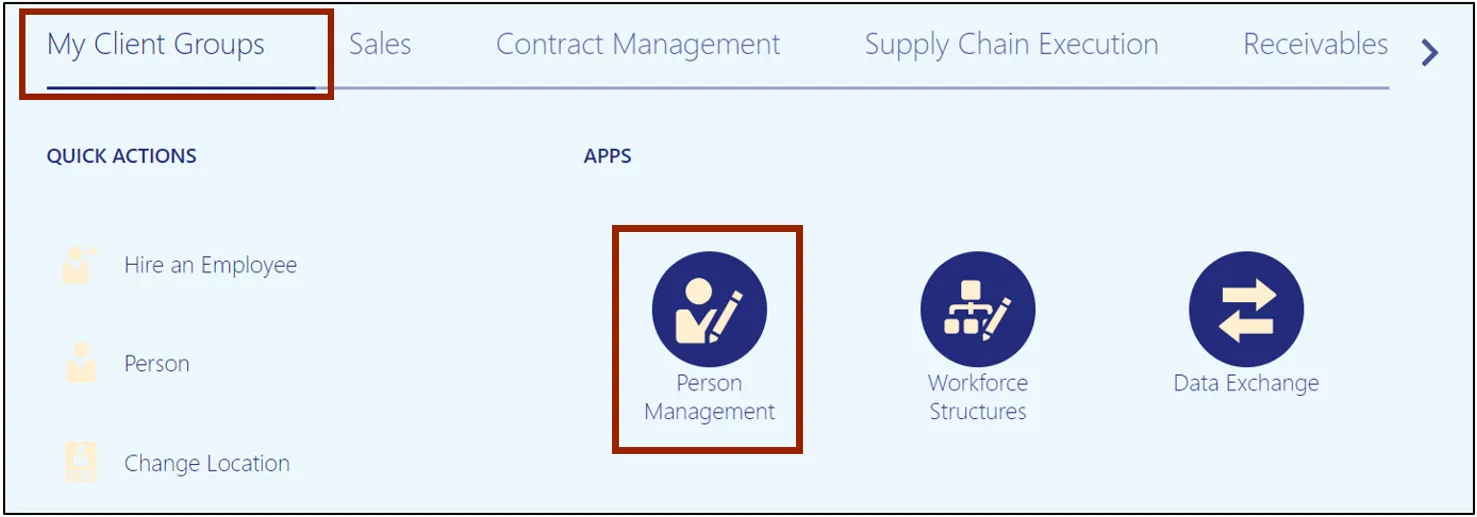
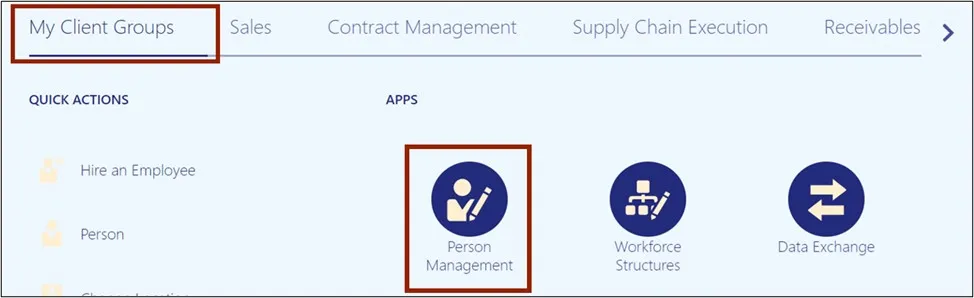
2. On the Home page, click the My Client Groups tab and click the Person Management app.
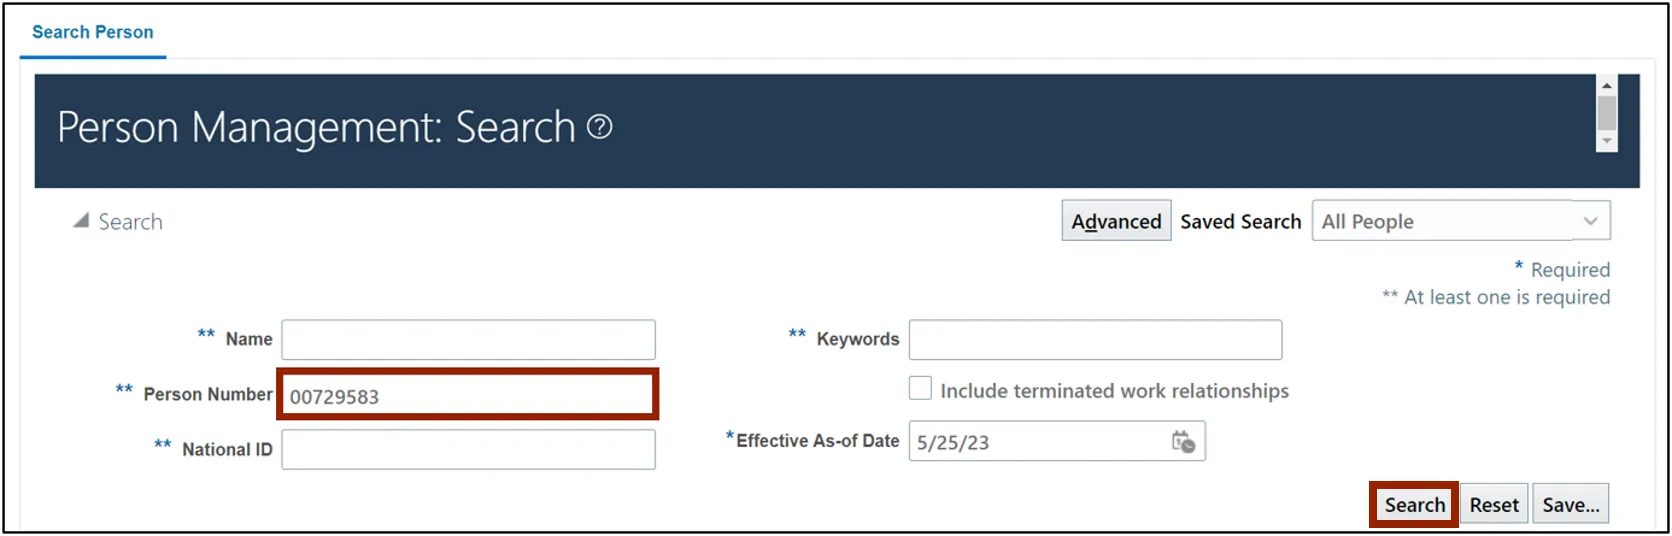
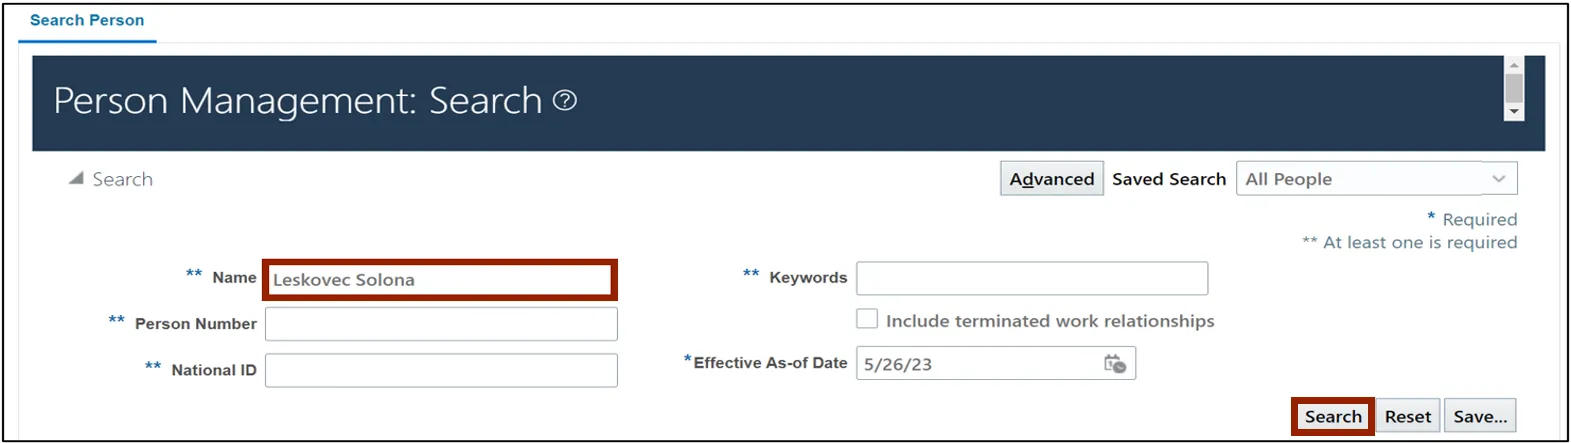
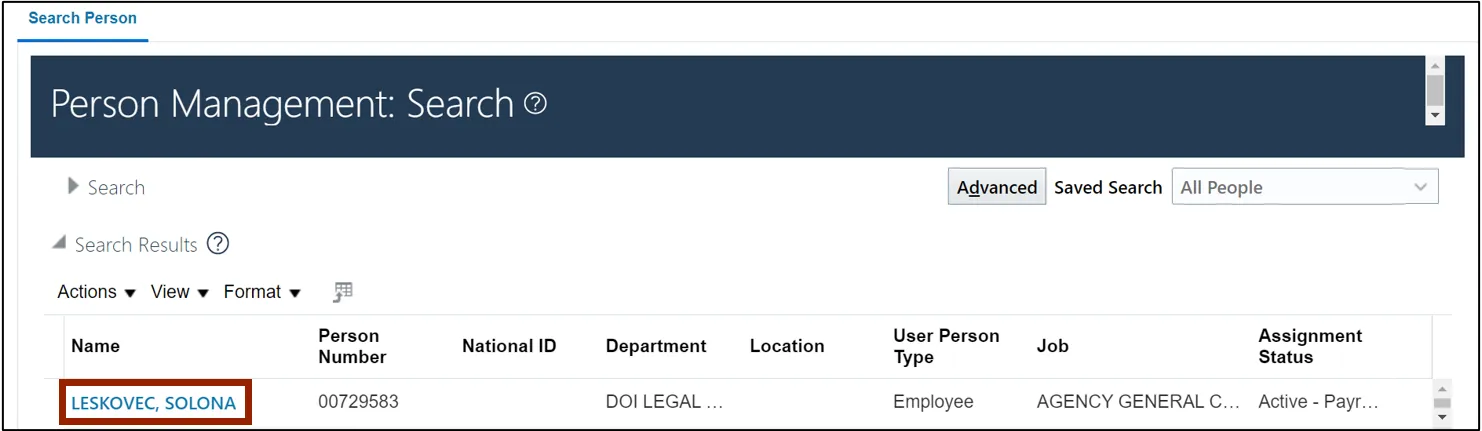
3. The Person Management: Search page opens. Enter information on at least one of the fields marked with **. Then, click the Search button.
In this example, we choose Person Number as 00729583.
Note: In HR Payroll, the person number starts with zeros and must include 8 digits in total.
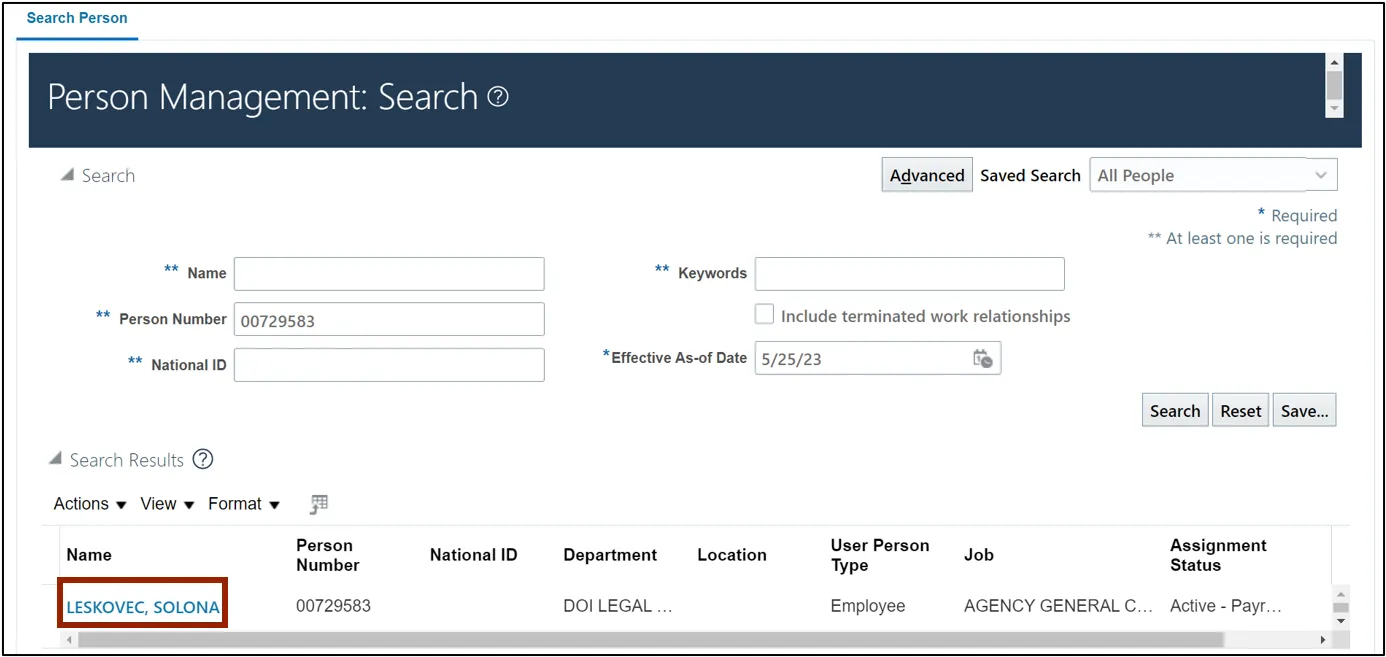
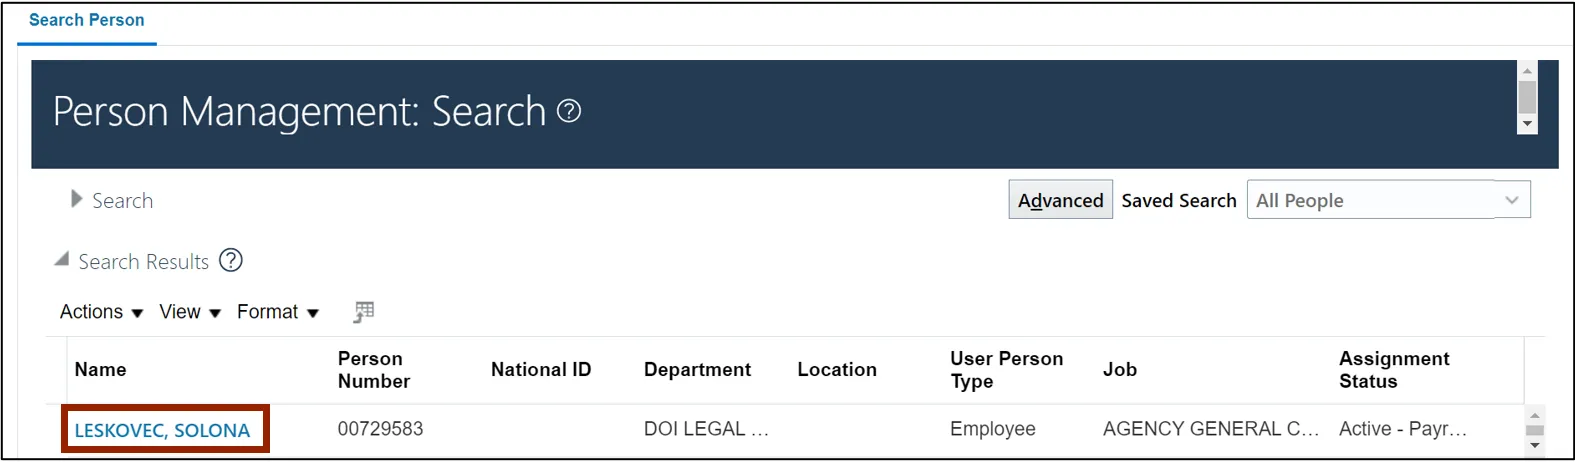
4. On the Search Result section, click the Employee Name link.
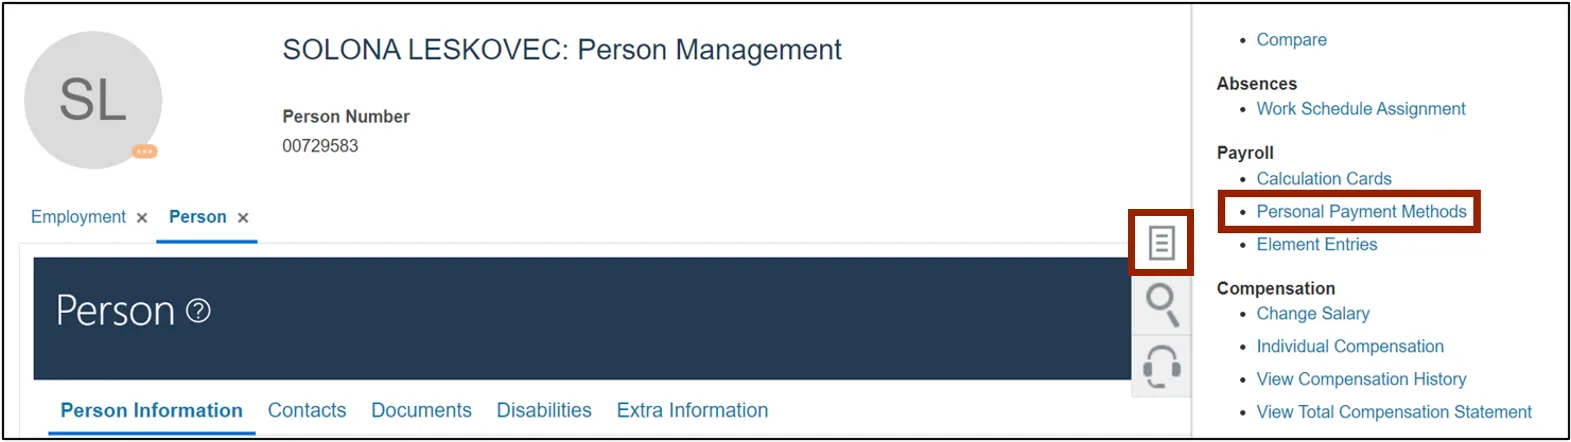
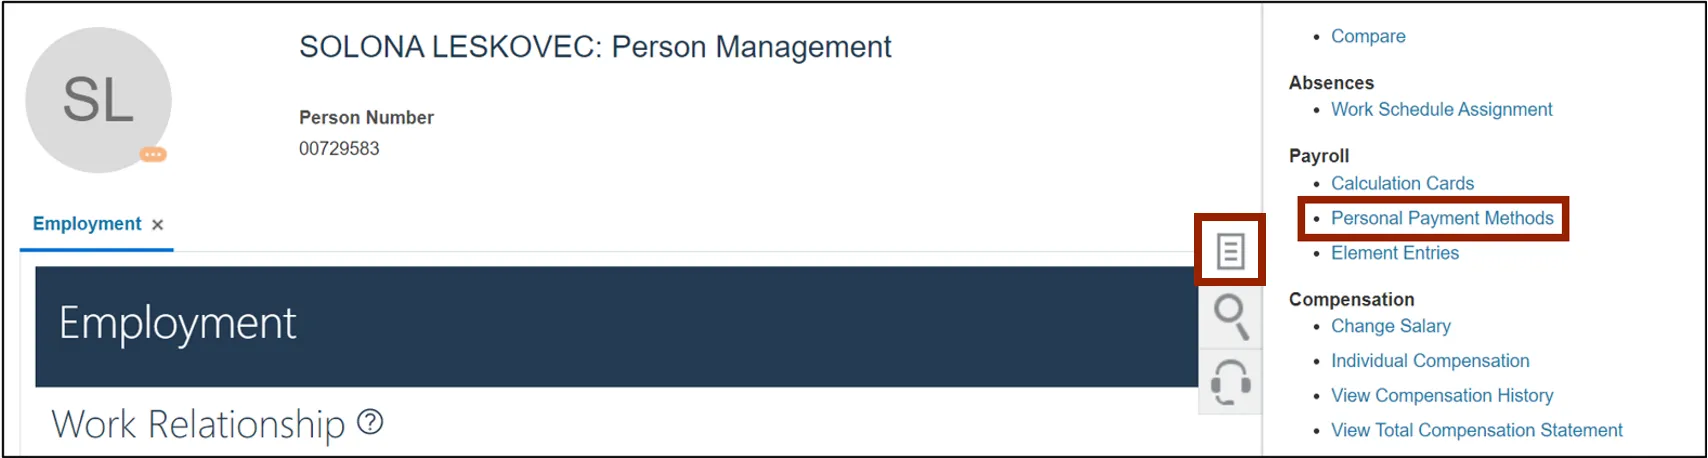
5. On the Person Management page, click the Tasks icon and under Payroll, select Personal Payment Methods.
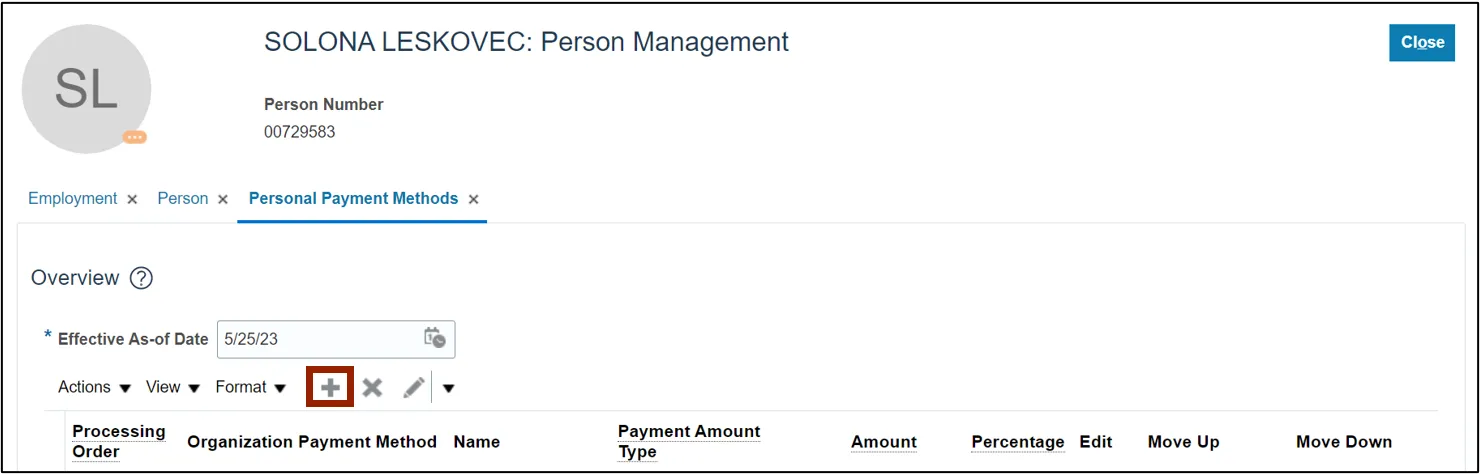
6. The Person Management page opens. Click the Create icon.
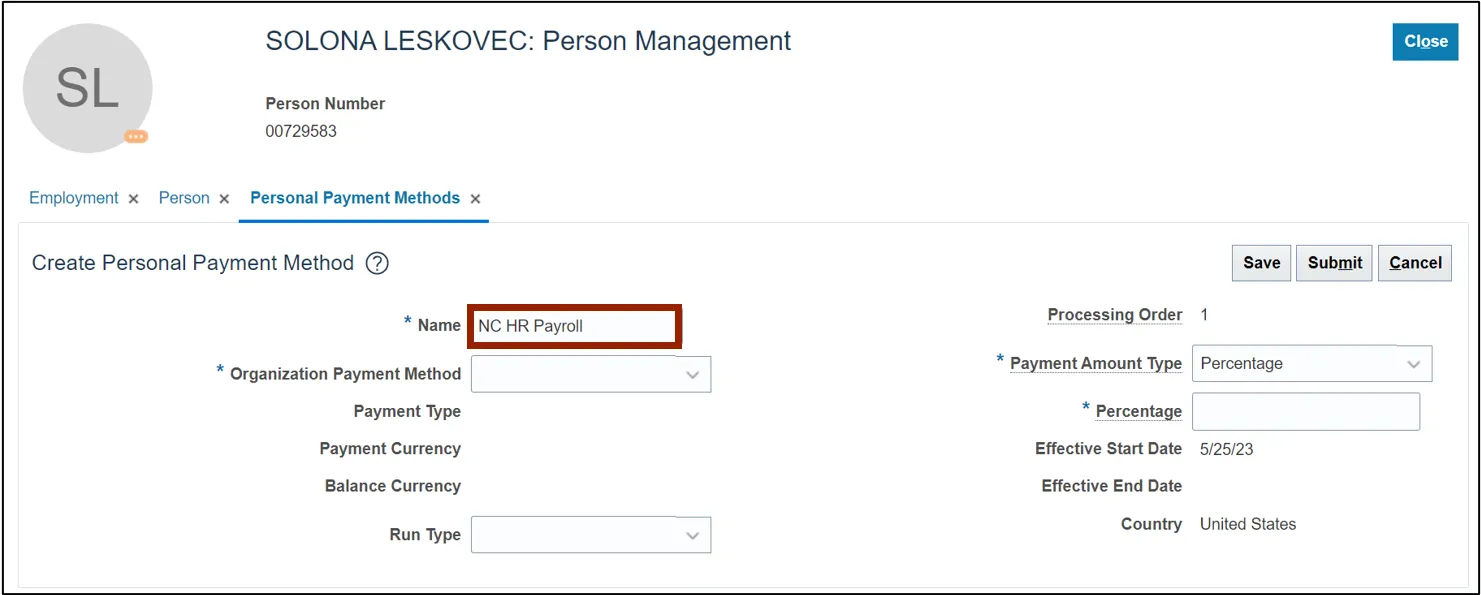
7. On the Create Personal Payment Method section, enter the Name.
In this example, we choose NC HR Payroll.
Note: If you are adding a bank account manually that you do want to get updated from the HR Payroll interface in the future, then the Personal Payment Method name should equal “NC HR Payroll Interface”.
If you are adding a bank account manually that you do not want to get updated from the HR Payroll interface in the future, then the Personal Payment Method name should be something other than “NC HR Payroll Interface” and that account will not get replaced by the HR Payroll interface.
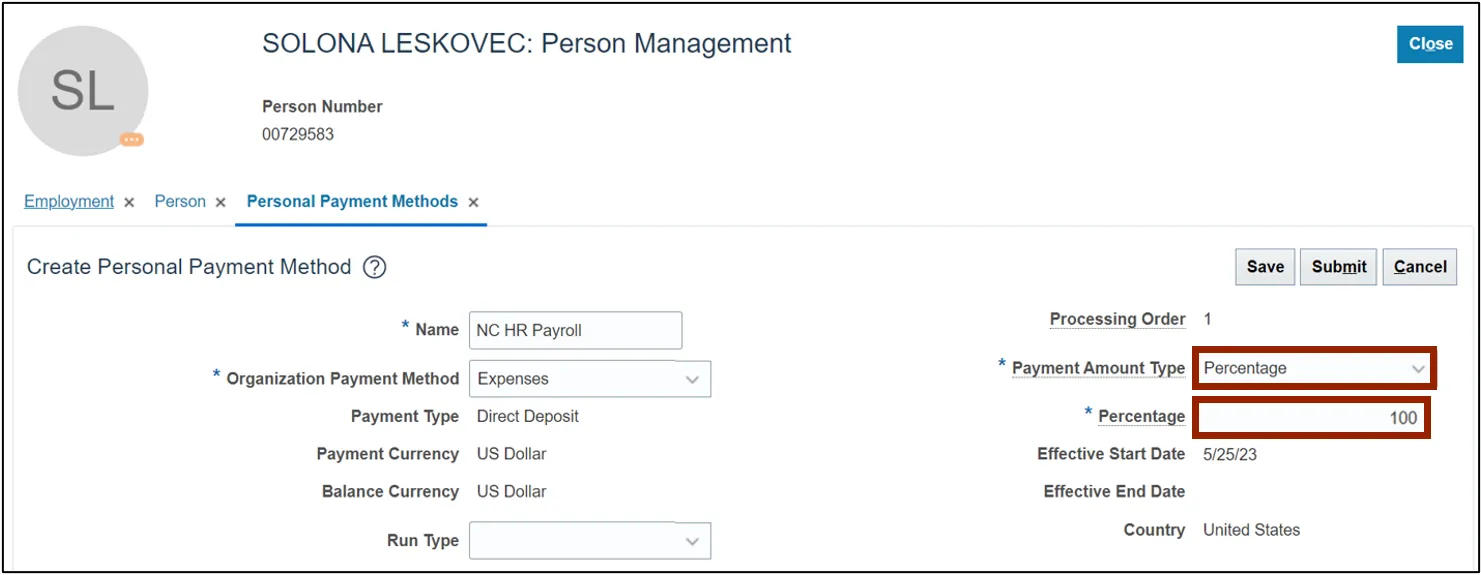
8. On the Organization Payment Method drop-down, select Expenses. The Payment Type, Payment Currency, and Balance Currency fields get auto filled once Expenses is selected.

9. The Payment Amount Type defaults to Percentage. Enter 100 on the Percentage field.
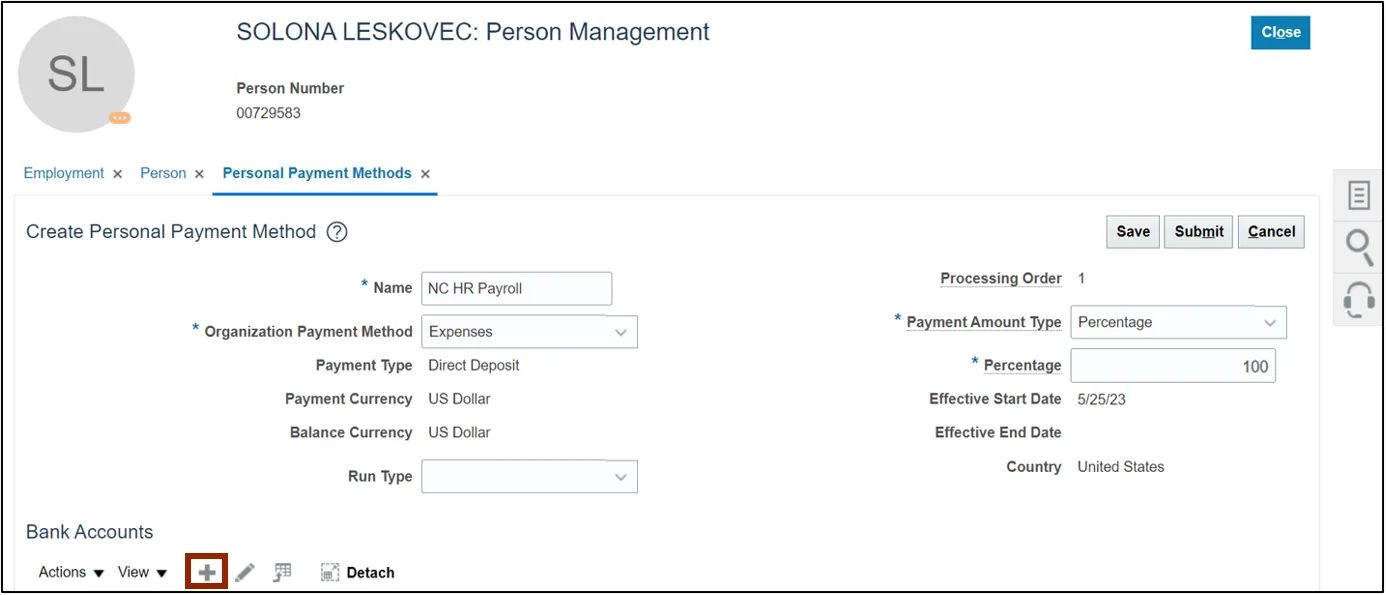
10. On the Bank Accounts section, click the Create icon.
11. The Create Bank Account pop-up appears. Select or enter information on fields *Account Number, *Account Type, *Bank, and *Routing Number.
In this example, we choose:
- *Account Number: 987654321
- *Account Type: Checking
- *Bank: FEDERAL
- *Routing Number: 123456789
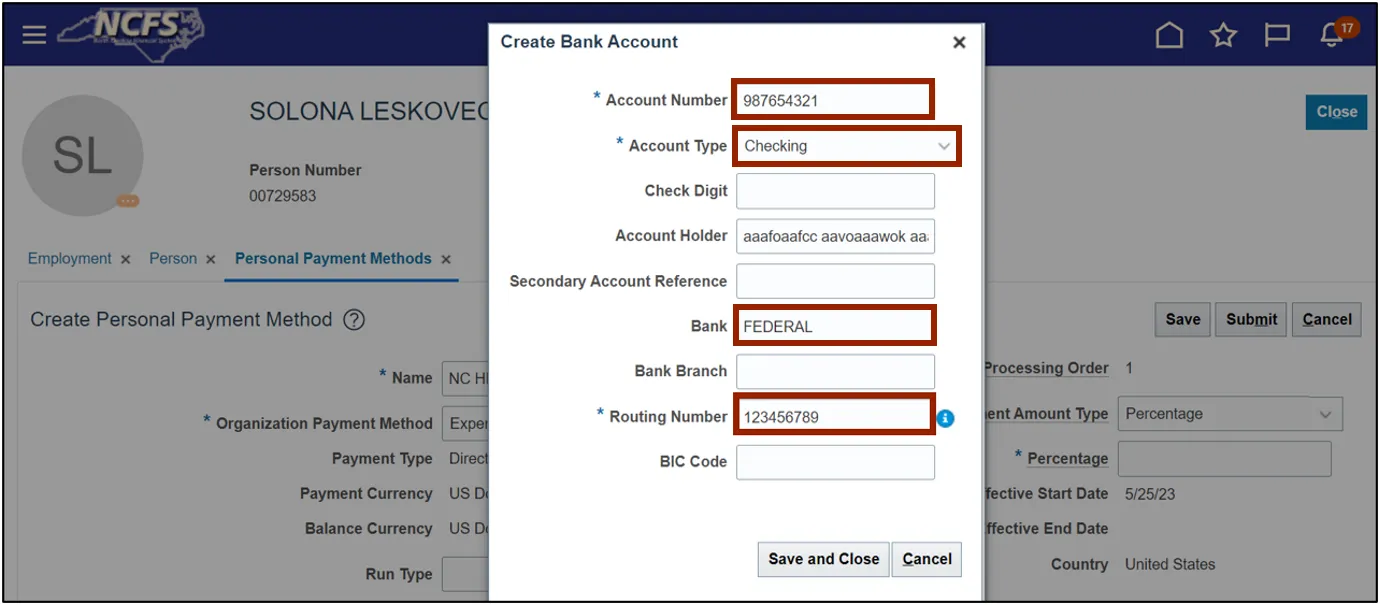
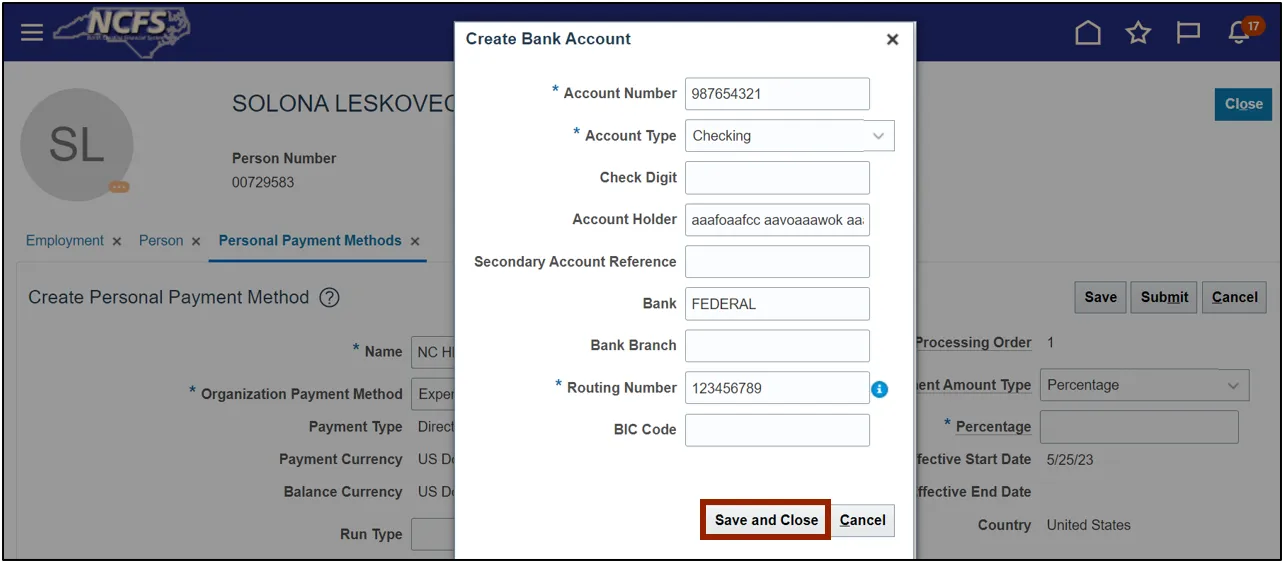
12. Click the Save and Close button.
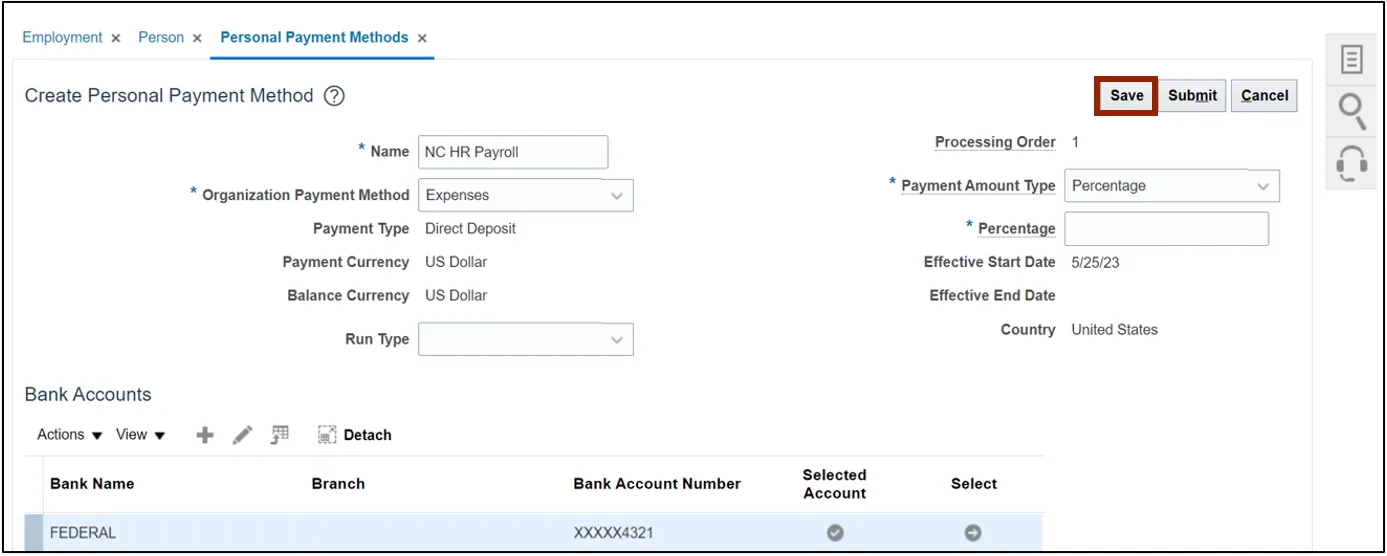
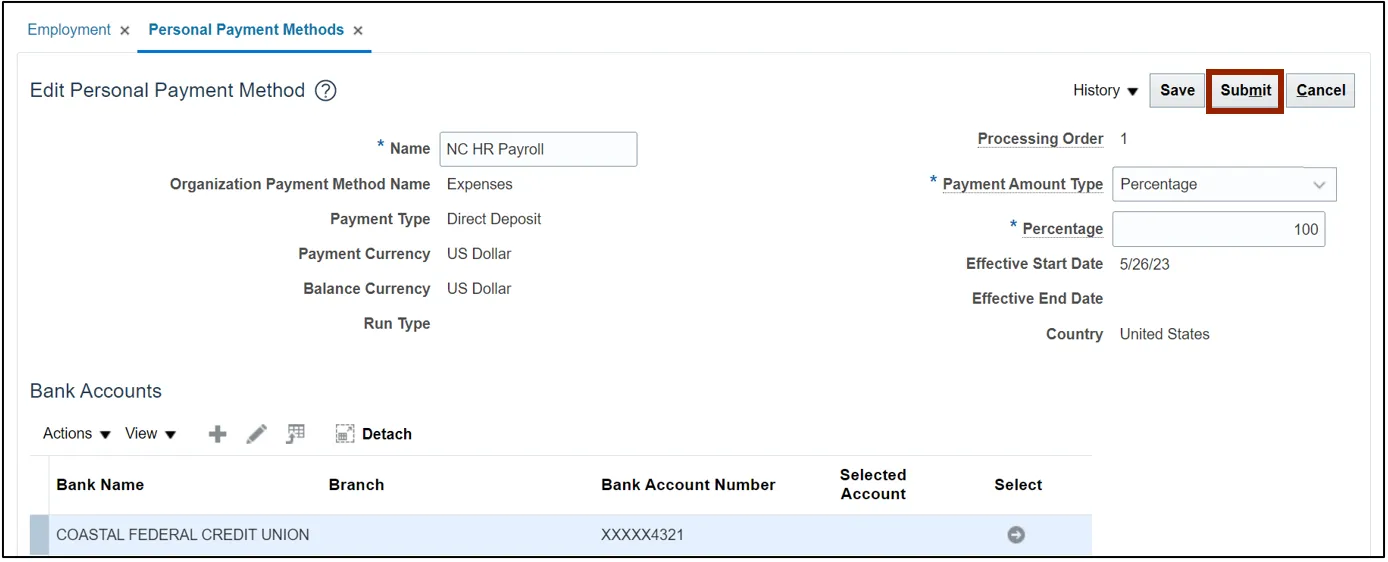
13. Click the Save button.
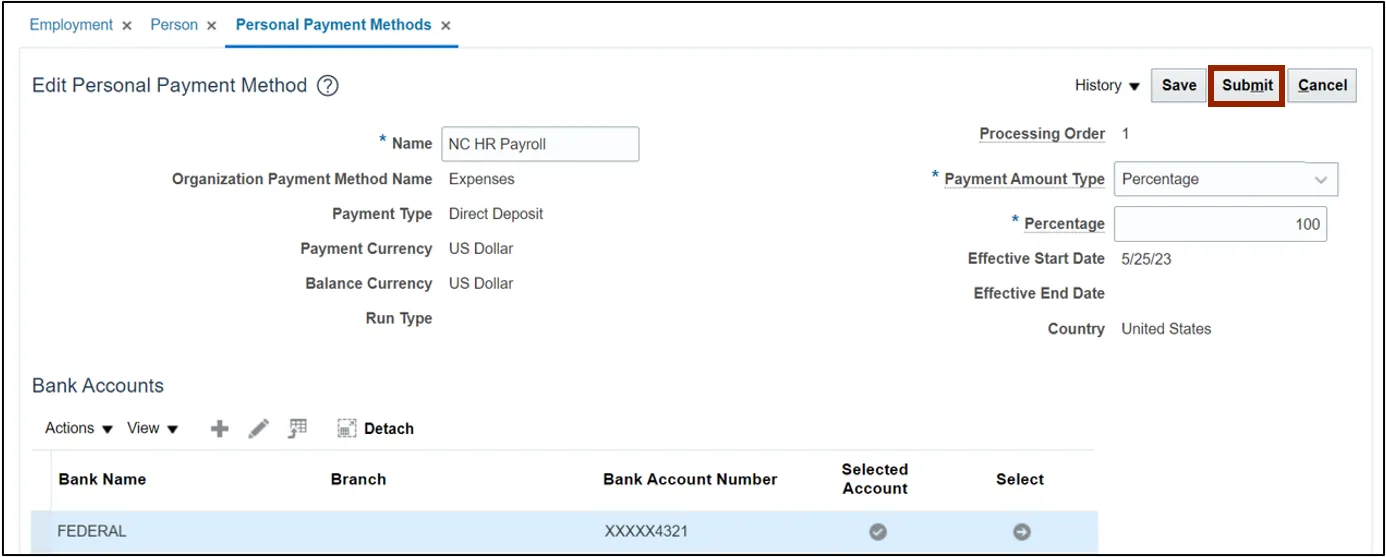
14. Click the Submit button.
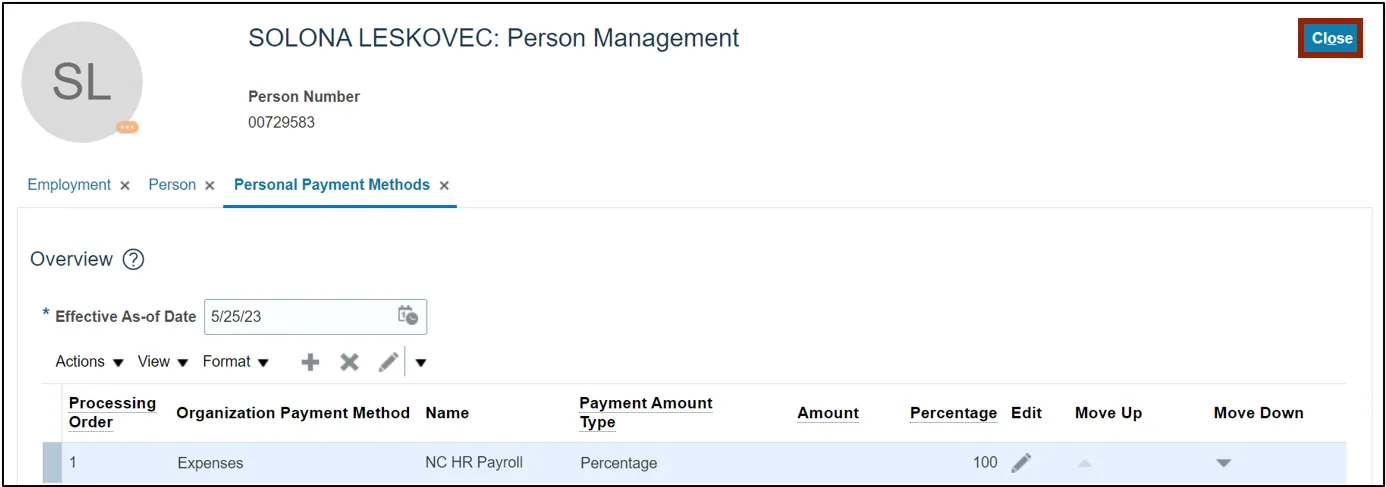
15. The created bank account can be viewed here. Click the Close button.
Edit or End Employee’s Bank Account
To edit or end employee’s bank account, please follow the steps below. There are 12 steps to complete this process.
Step 1. On the Home page, click the My Client Groups tab and click the Person Management app.
Step 2. The Person Management: Search page opens. Enter information on at least one of the fields marked with ** and click the Submit button.
In this example, we choose to fill the Name field.
Step 3. Click the Employee Name link.
Step 4. Click the Tasks icon and under Payroll, select Personal Payment Methods.
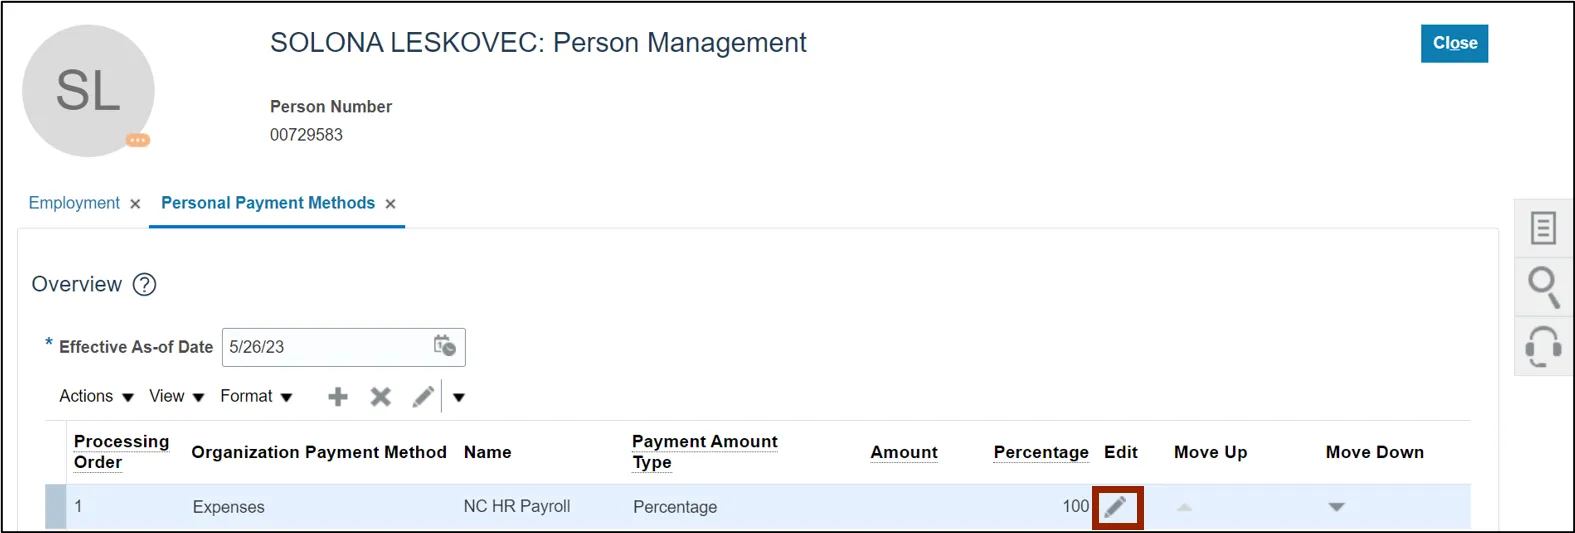
Step 5. Click the Edit icon.
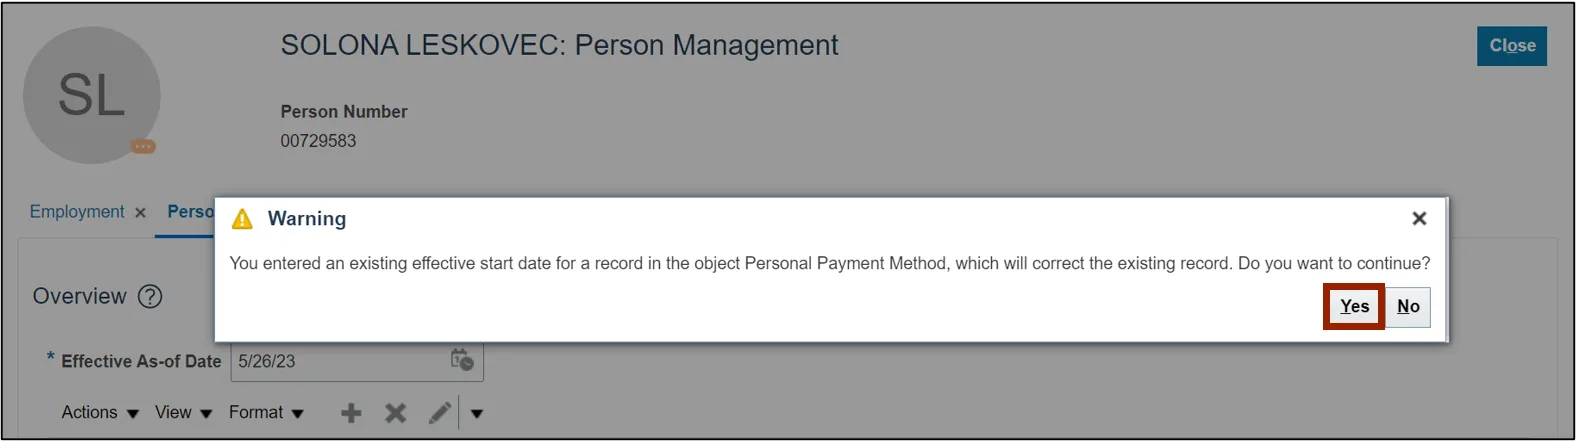
Step 6. A Warning pop-up appears. Click the Yes button.
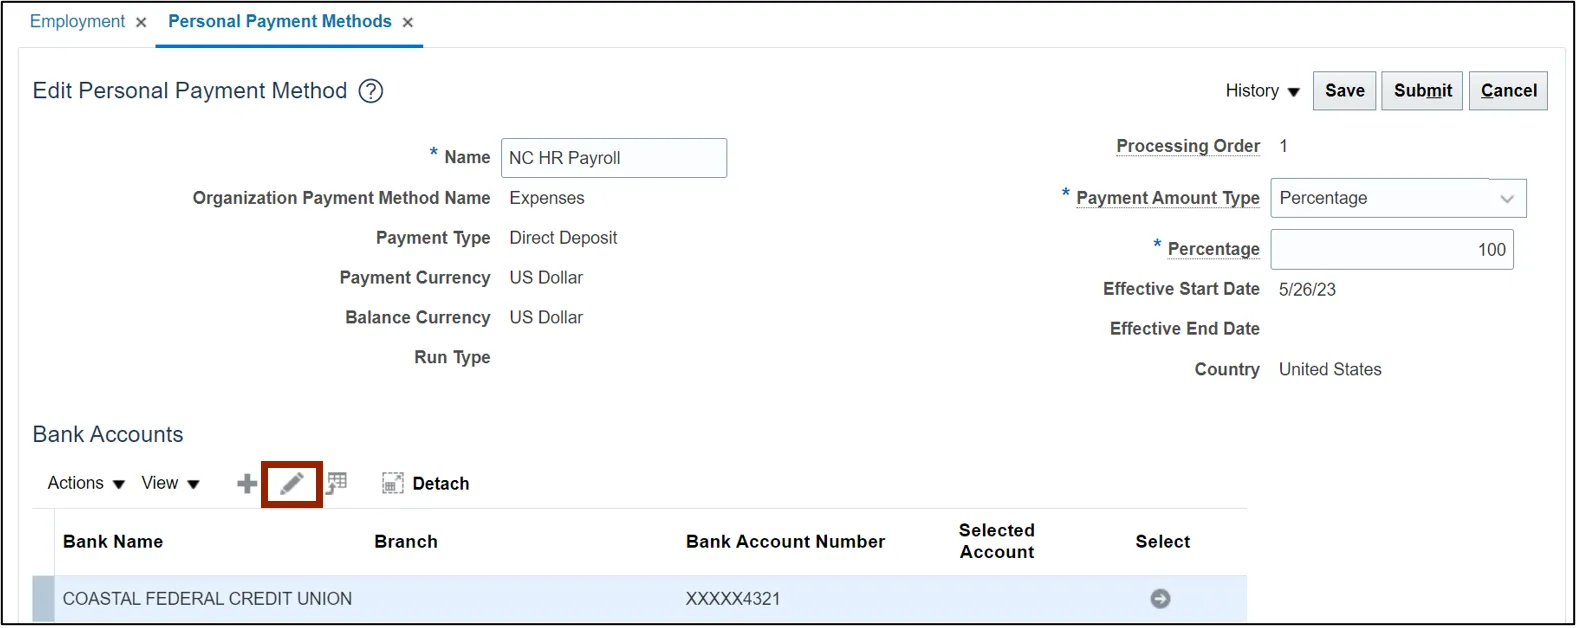
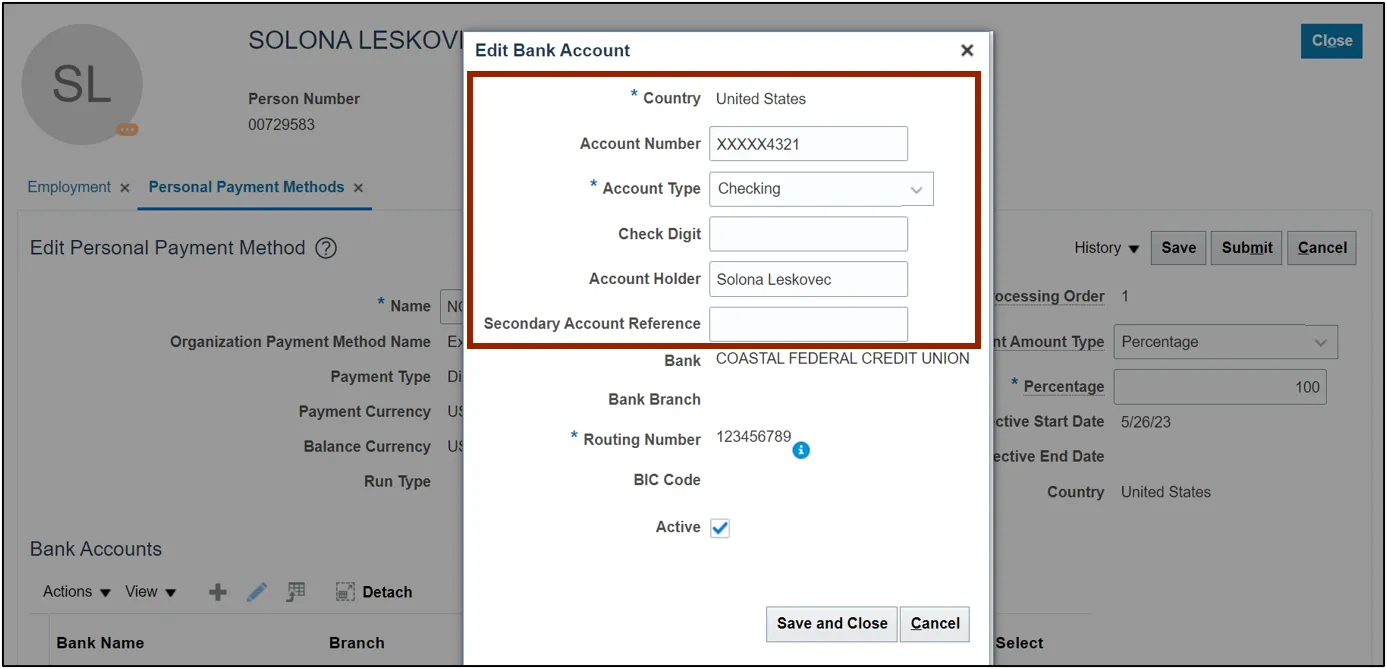
Step 7. Scroll down to find the Bank Accounts section. Click the Edit icon for the bank account which must be updated.
Step 8. On the Edit Bank Account pop-up, enter the required account details to be updated.
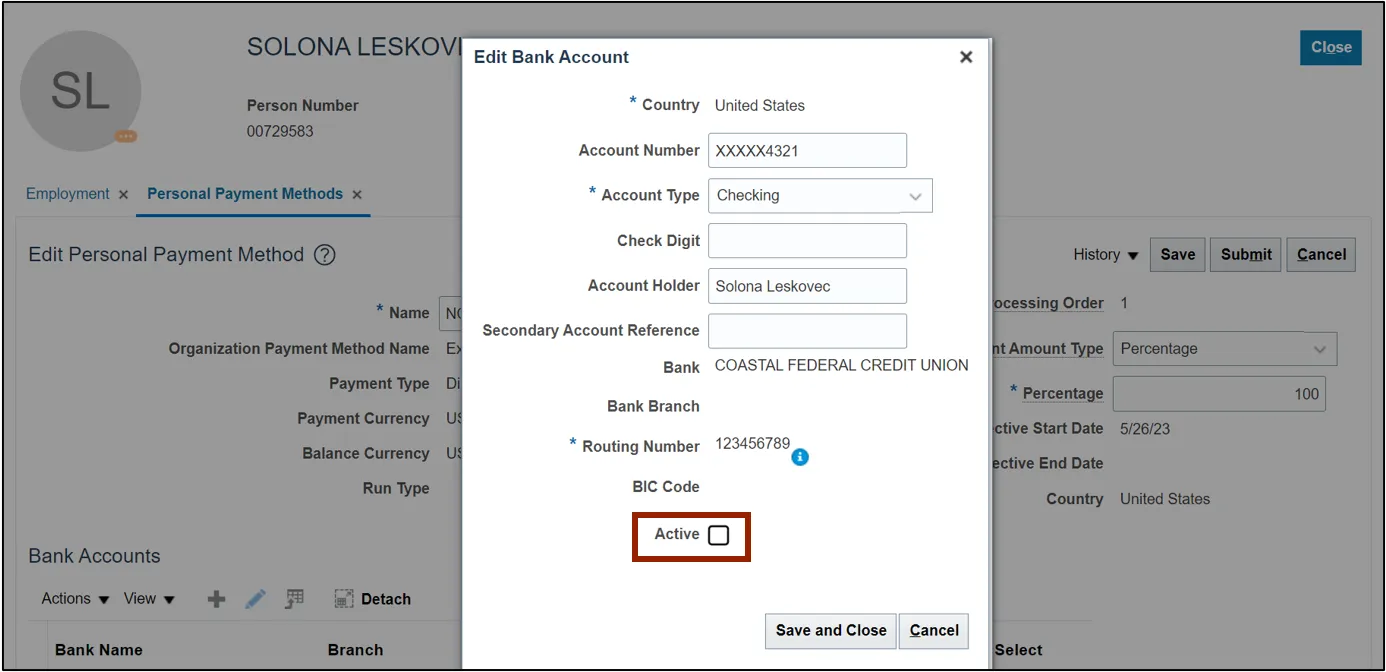
Step 9. To end date for the bank account, uncheck the Active check box. All previous and unused bank accounts should be end dated by unchecking the Active check box.
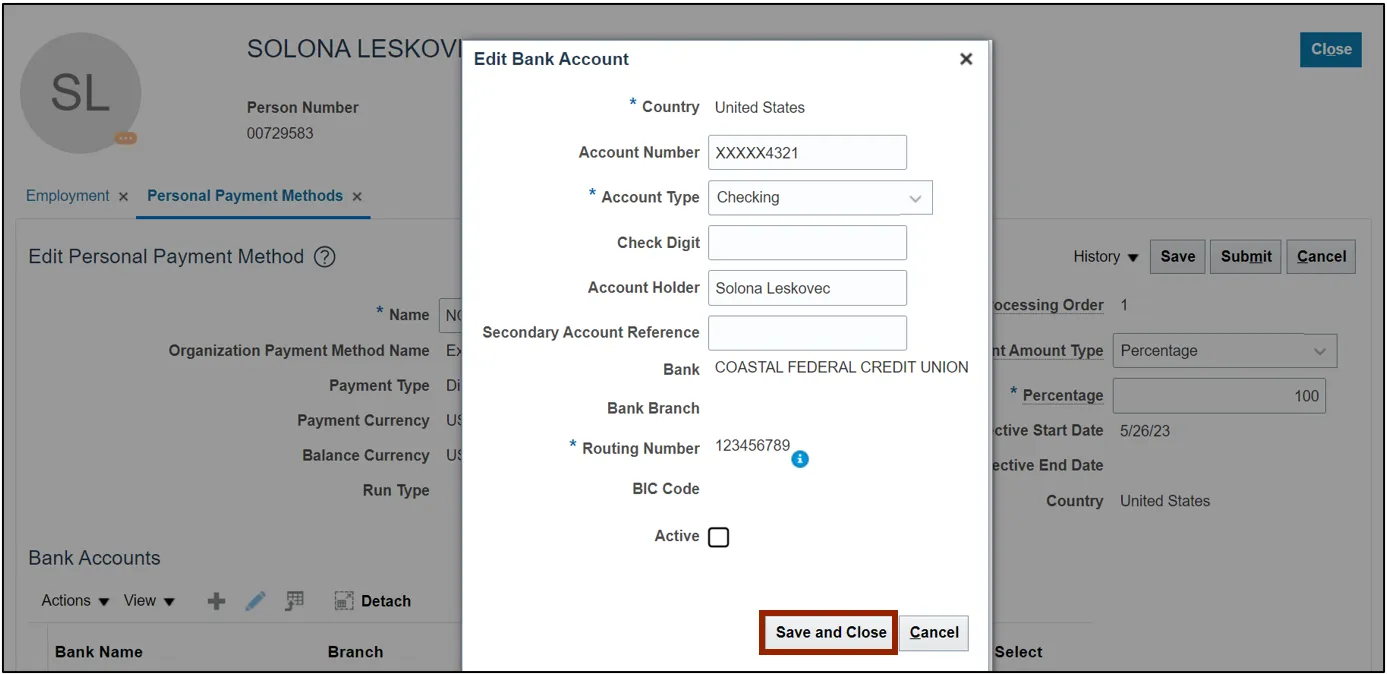
Step 10. Click the Save and Close button.
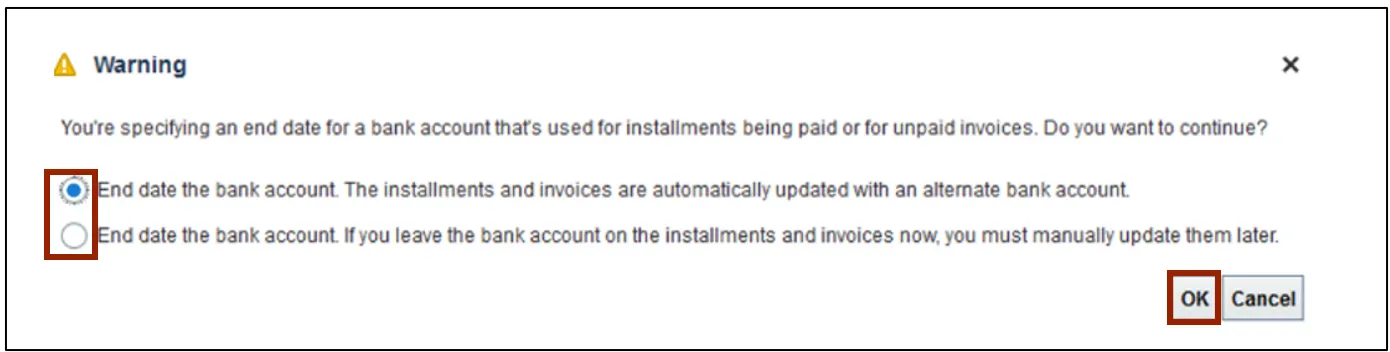
Step 11. A Warning pop-up appears. Select the required radio button and click the OK button.
Note: If the User would like to update the outstanding expense report invoices for reimbursement, they must create an alternate bank account first (if any) before end dating the old bank account.
Step 12. Click the Submit button to submit the changes.
Manage Employee’s Manager
To manage an employee’s manager, please follow the steps below. There are 16 steps to complete this process.
Step 1. On the Home page, click the My Client Groups tab and click the Person Management app.
Step 2. The Person Management: Search page opens. Enter information on at least one of the fields marked with ** and click the Search button.
In this example, we choose to fill the Name field.

Step 3. Click the Employee Name link.
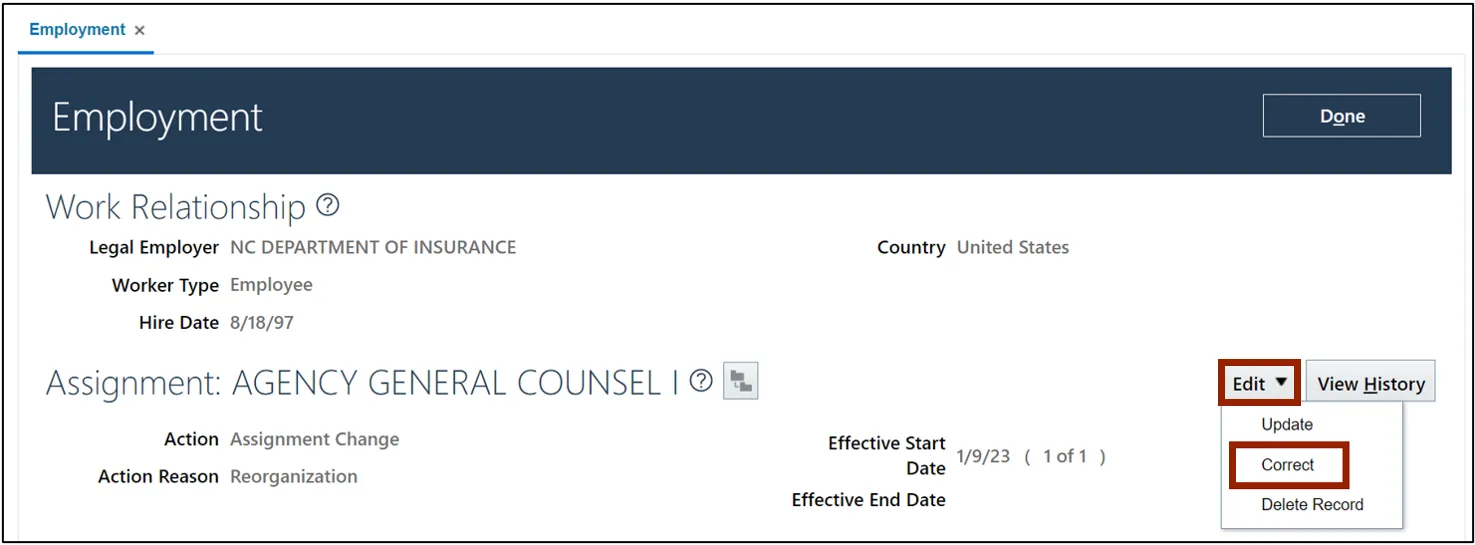
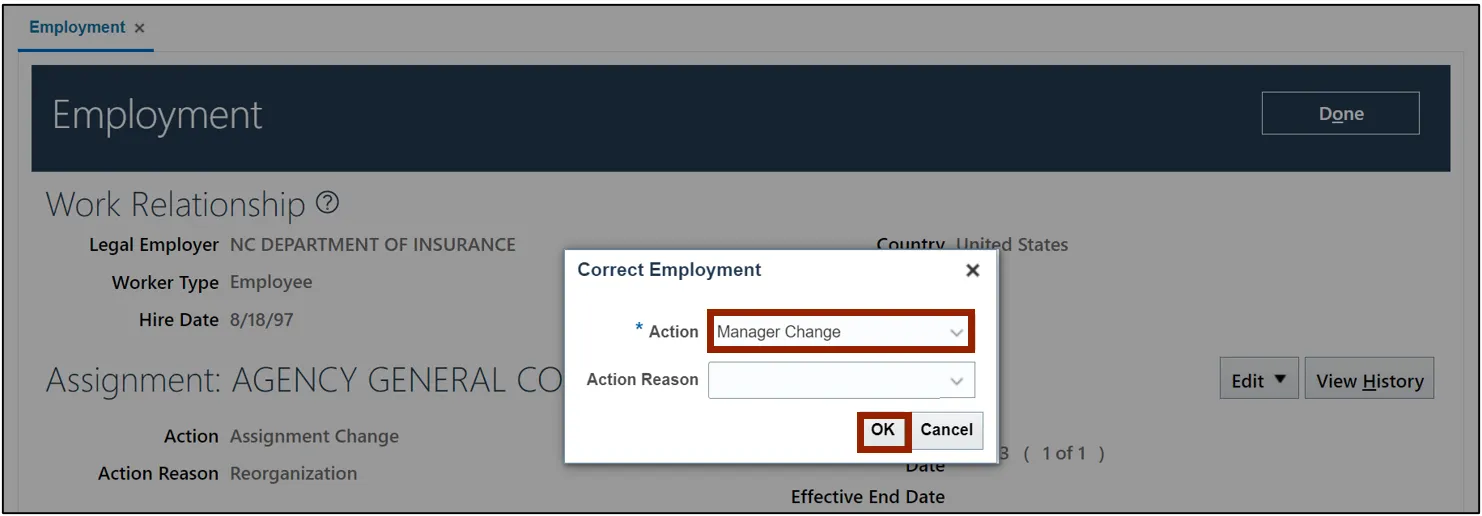
Step 4. Click the Edit drop-down choice list and select Correct.
Step 5. On the Action drop-down choice list, select Manager Change and click the OK button.
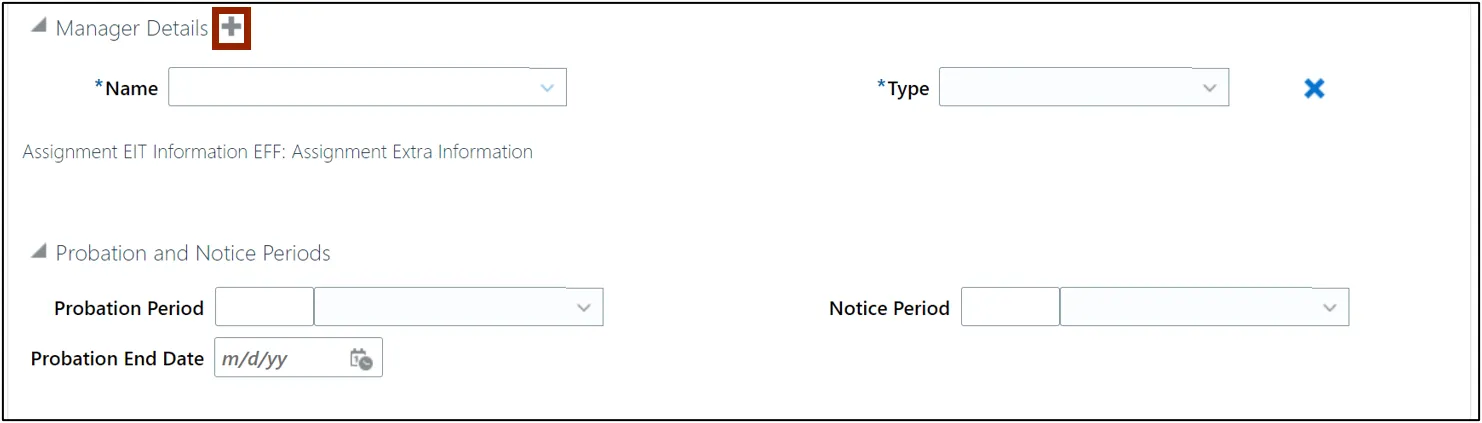
Step 6. Scroll down to find the Manager Details section and click the Create icon.
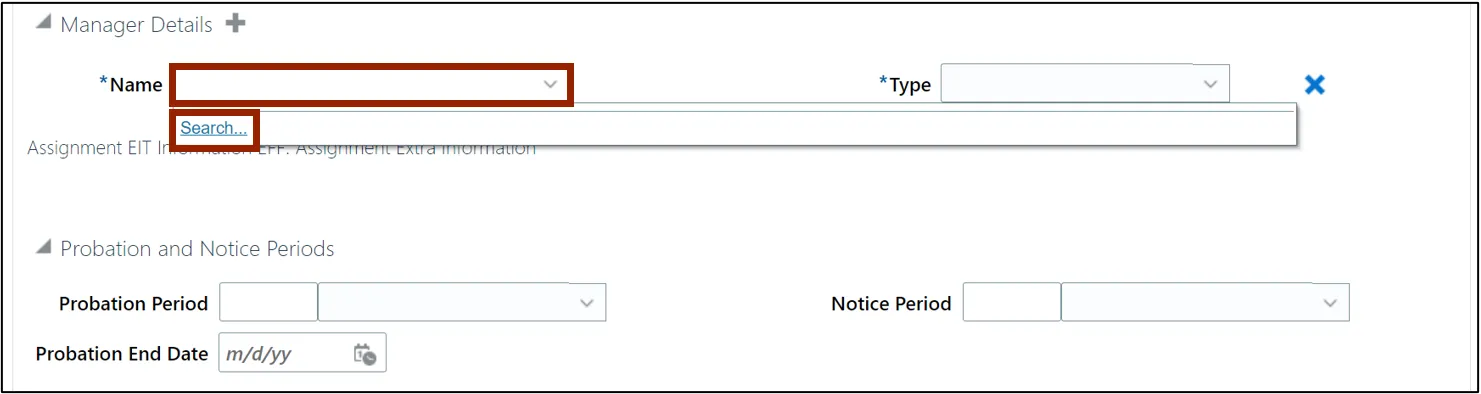
Step 7. Click the Name drop-down choice list, and click the Search link.
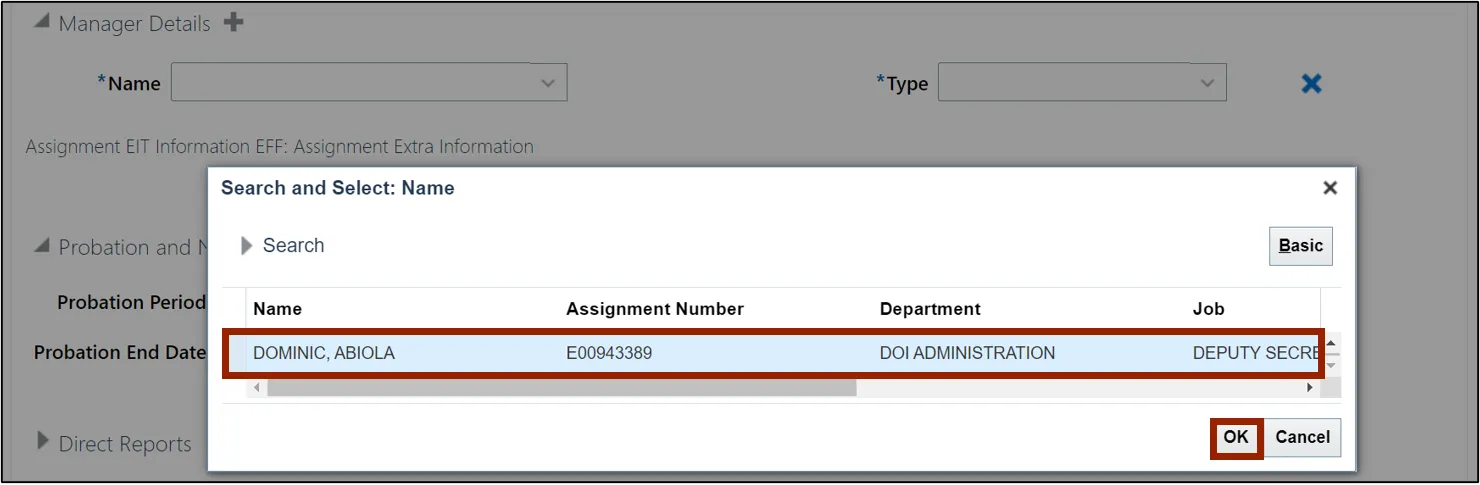
Step 8. Enter the required manager details on either of the parameters (Name, Department, Job, Email) and click the Search button.
In this example, we choose Name.

Step 9. Select the manager record and click the OK button.
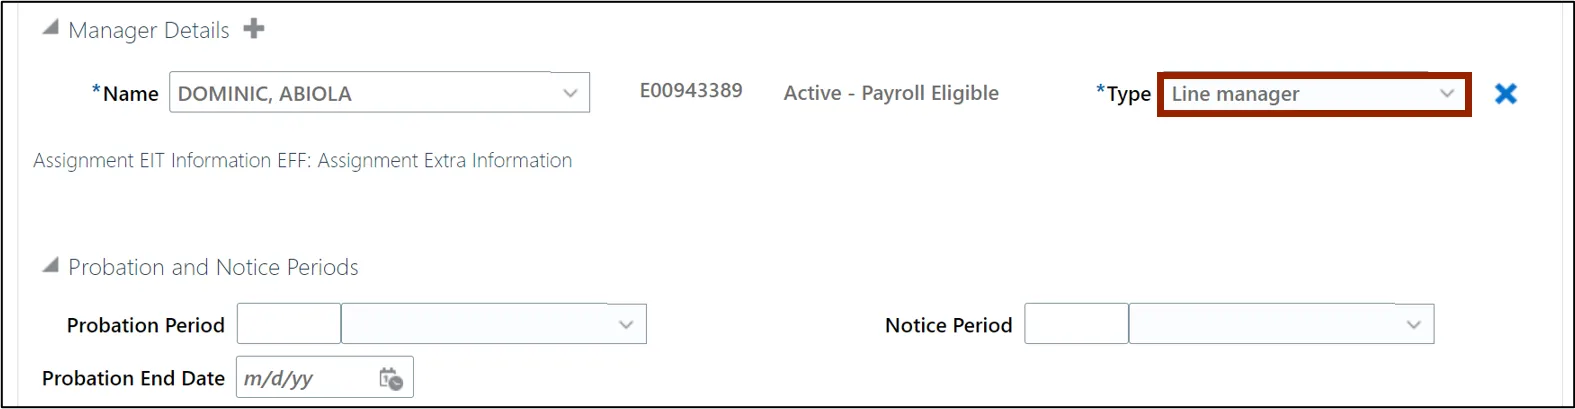
Step 10. On the Type drop-down choice list, select Line Manager.
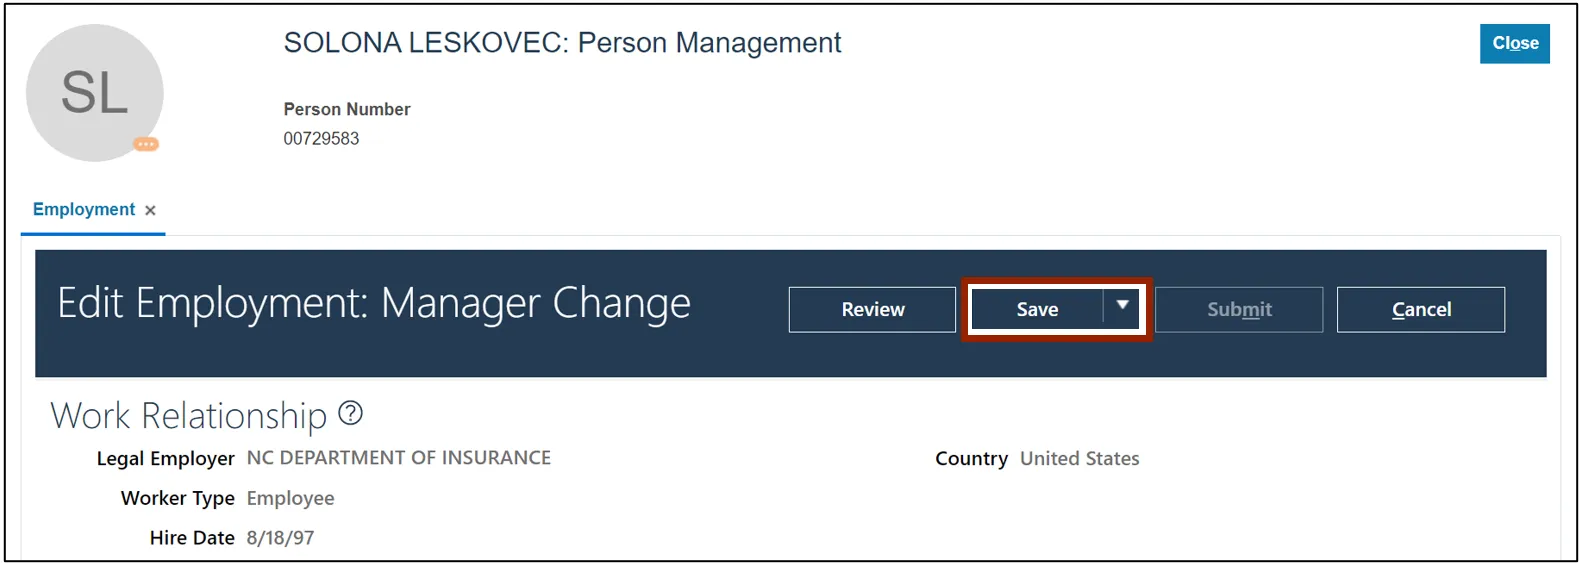
Step 11. Scroll up and click the Save button.
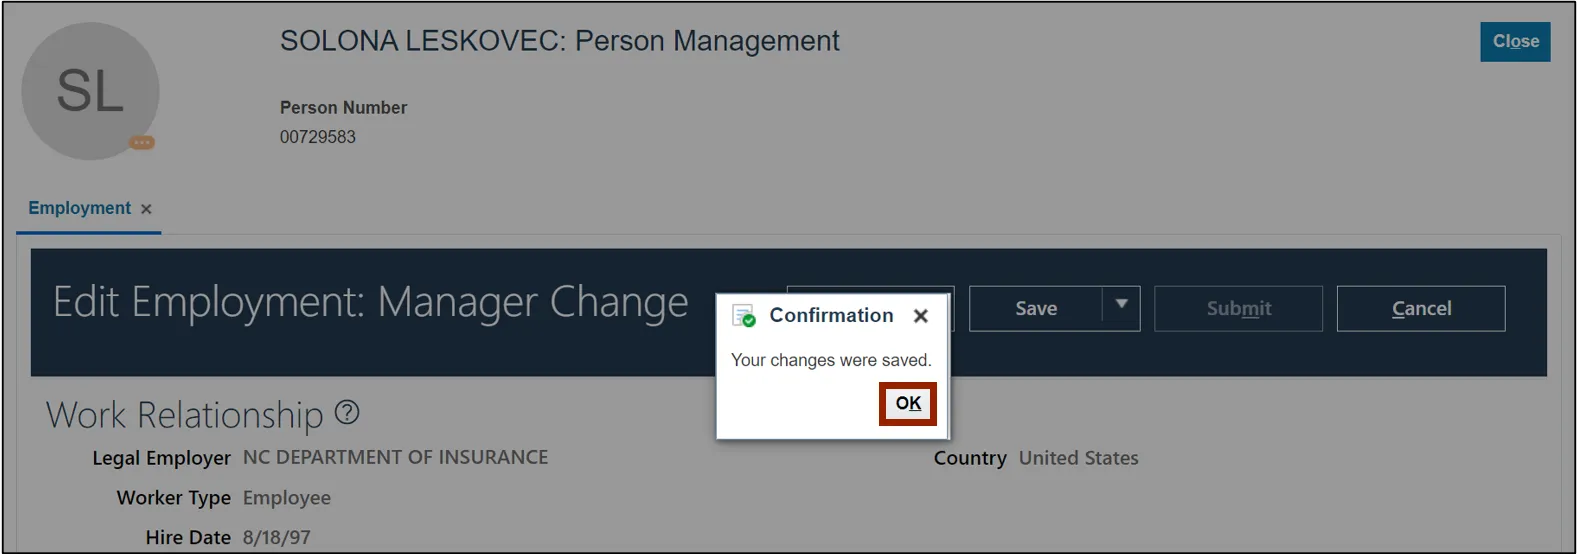
Step 12. The Confirmation pop-up appears. Click the OK button.
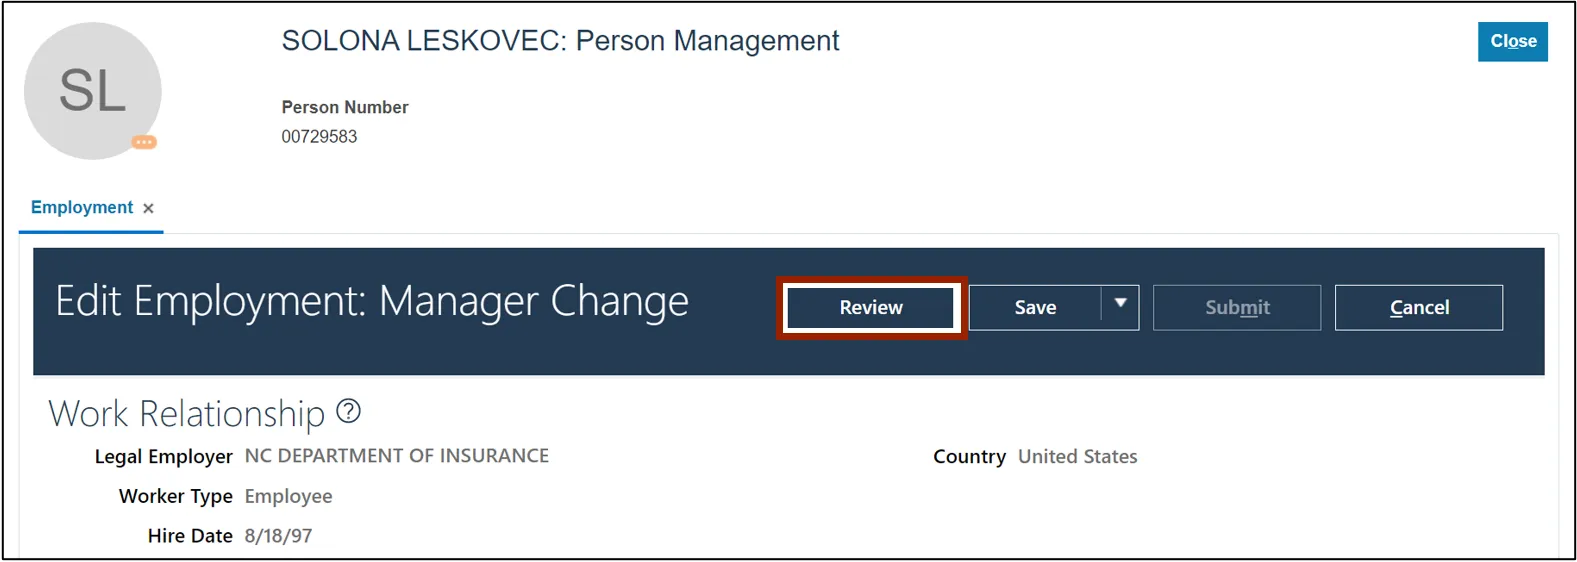
Step 13. Click the Review button.
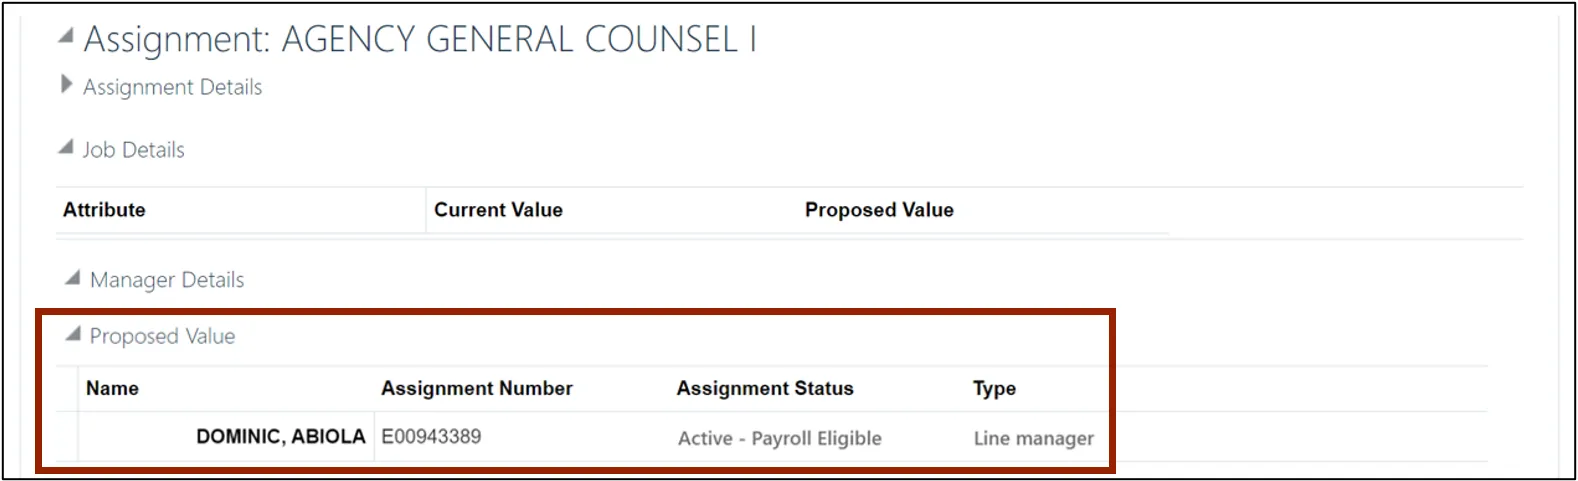
Step 14. Scroll down to the Manager Details section and review the updates made. A manager has been added under the Proposed Value section.
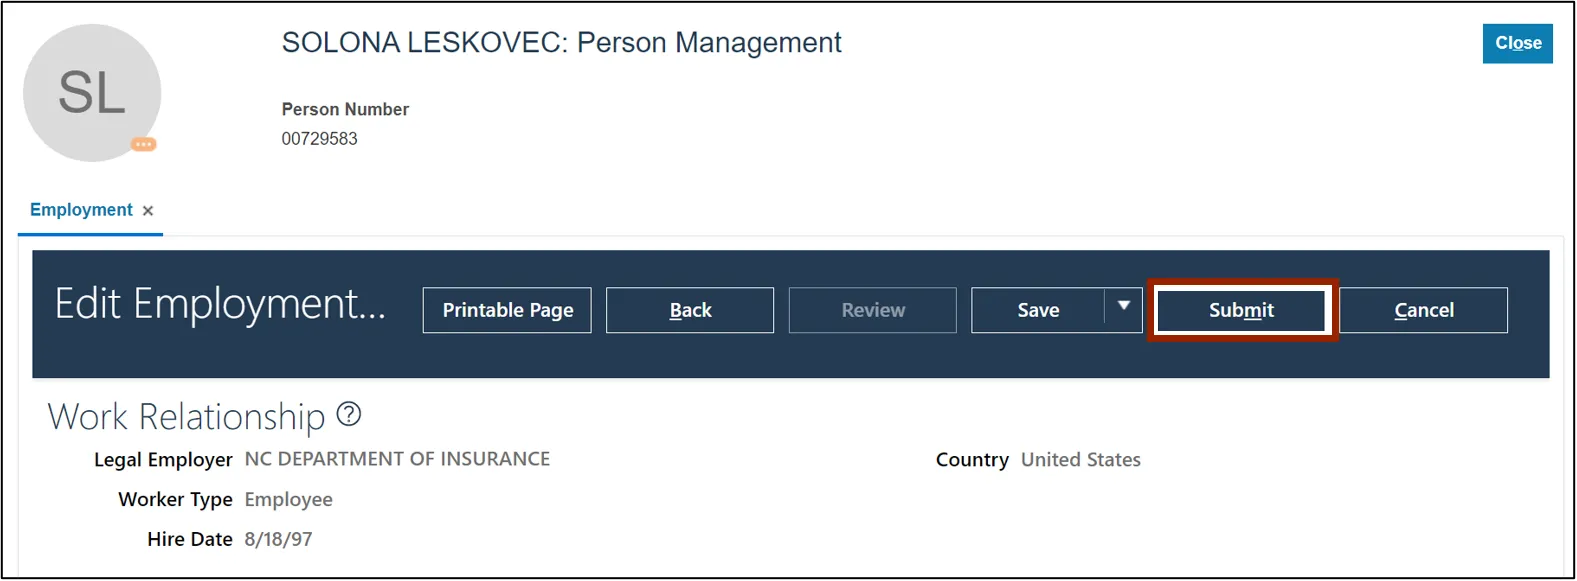
Step 15. Scroll up and click the Submit button to submit the changes made.
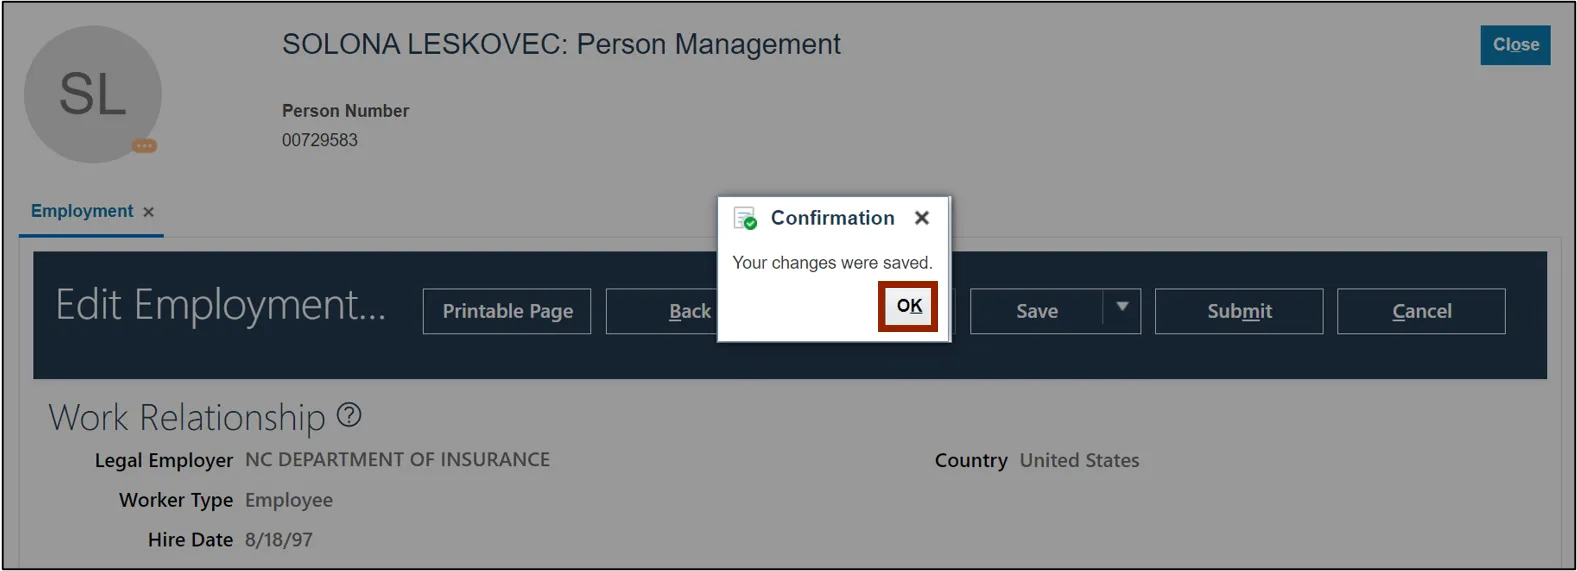
Step 16. The Confirmation pop-up appears. Click the OK button.
Wrap-Up
Create and manage employee information by setting up employee bank accounts, edit or end employee bank accounts, and manage employee managers using the steps above.
Additional Resources
- Web-Based Training (WBT)