Purpose
The purpose of this Quick Reference Guide (QRG) is to provide a step-by-step guide of Expense Module Setup Including Manage Expense Policies, Templates, or Delegates in the North Carolina Financial System (NCFS).
Introduction and Overview
This QRG covers the process of Expense Module Setup Including Manage Expense Policies, Templates, or Delegates in the NCFS. This will enable users to edit Expense Report templates to accommodate modifications in Expense Policies.
Expense Module Setup – Manage Expense Policies
To perform Expense Module Setup – Manage Expense Policies in the NCFS, please follow the steps below. There are 17 steps to complete this process.
Step 1. Log in to the NCFS portal with your credentials to access the system.
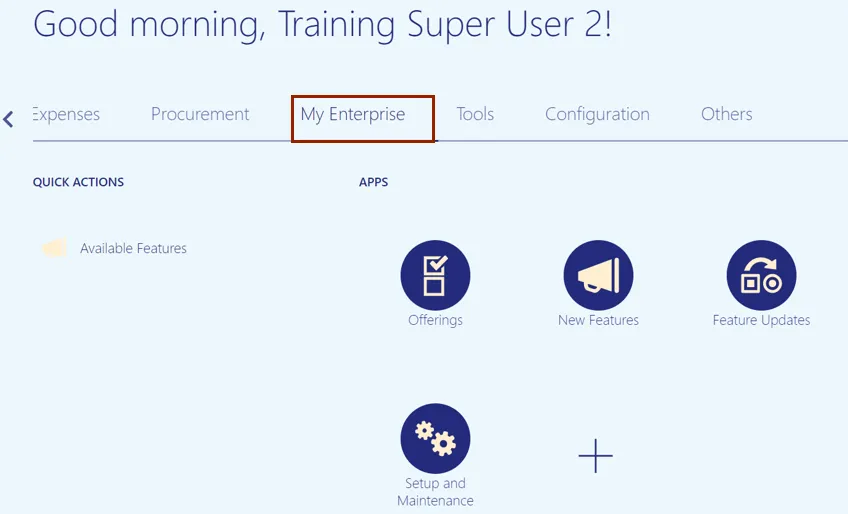
Step 2. On the Home page, click the My Enterprise tab.
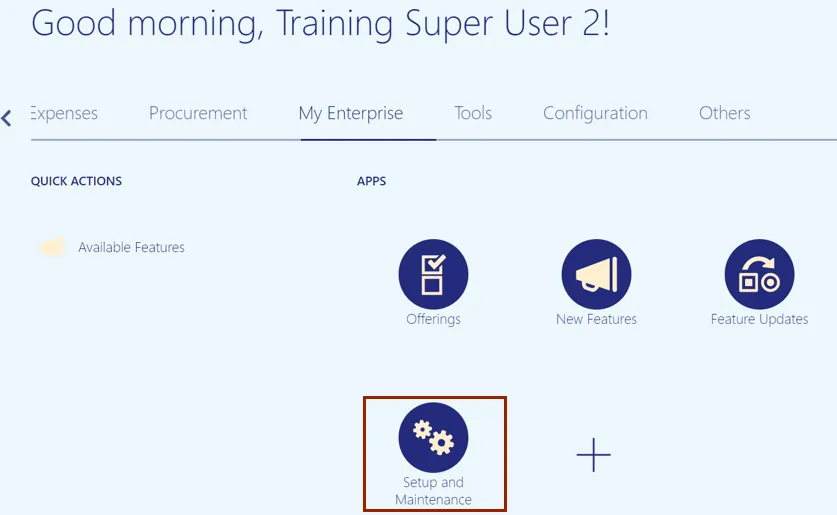
Step 3. Click the Setup and Maintenance app. The Setup page opens.
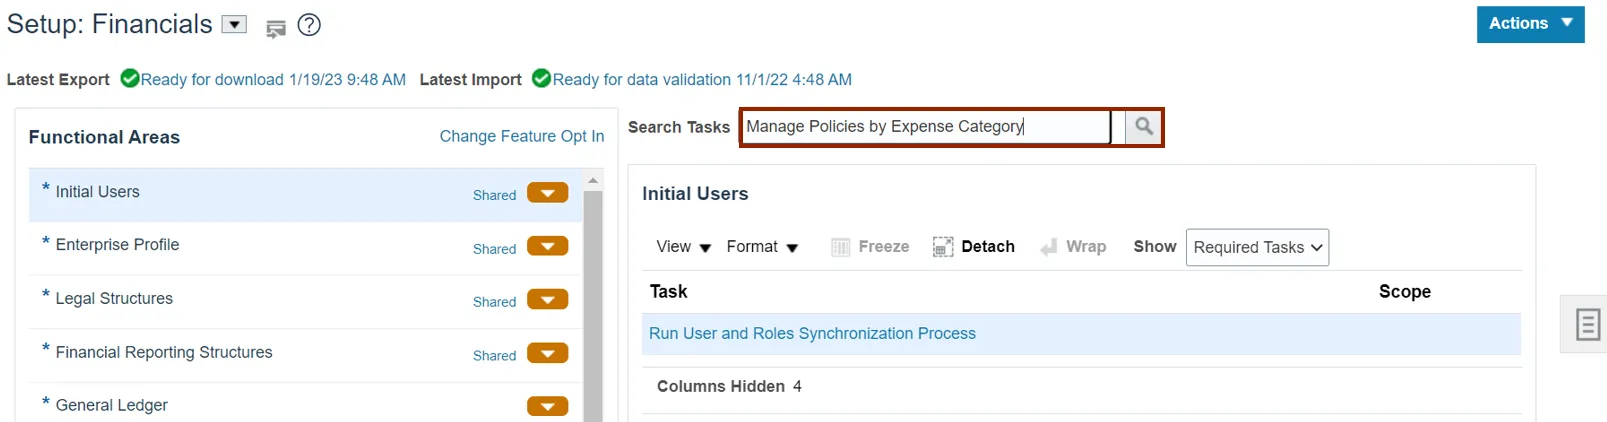
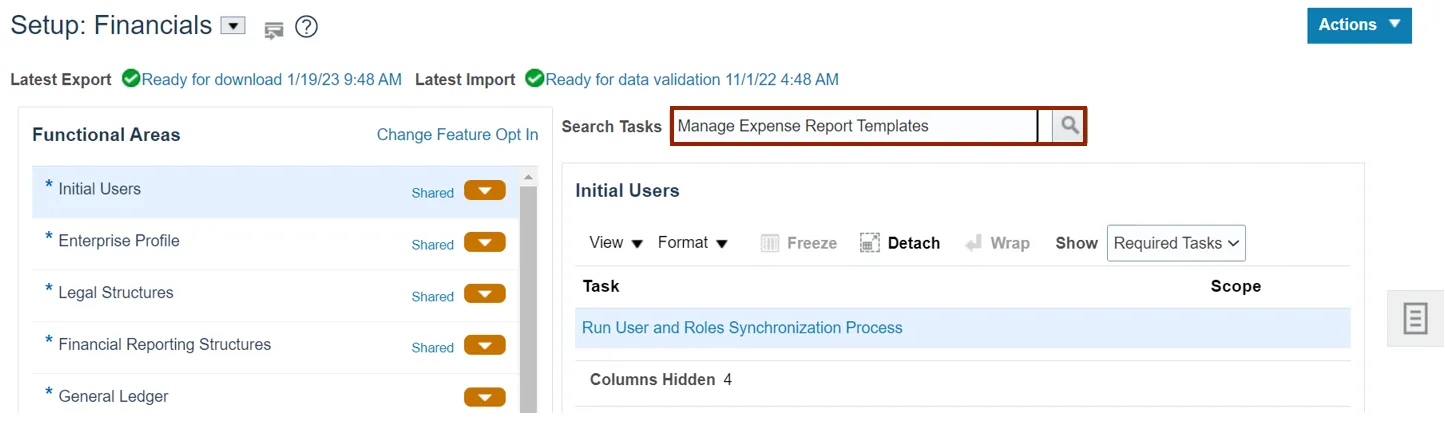
Step 4. On the Setup: Financials page, in the Search Tasks section, enter Manage Policies by Expense Category and click the Search icon.
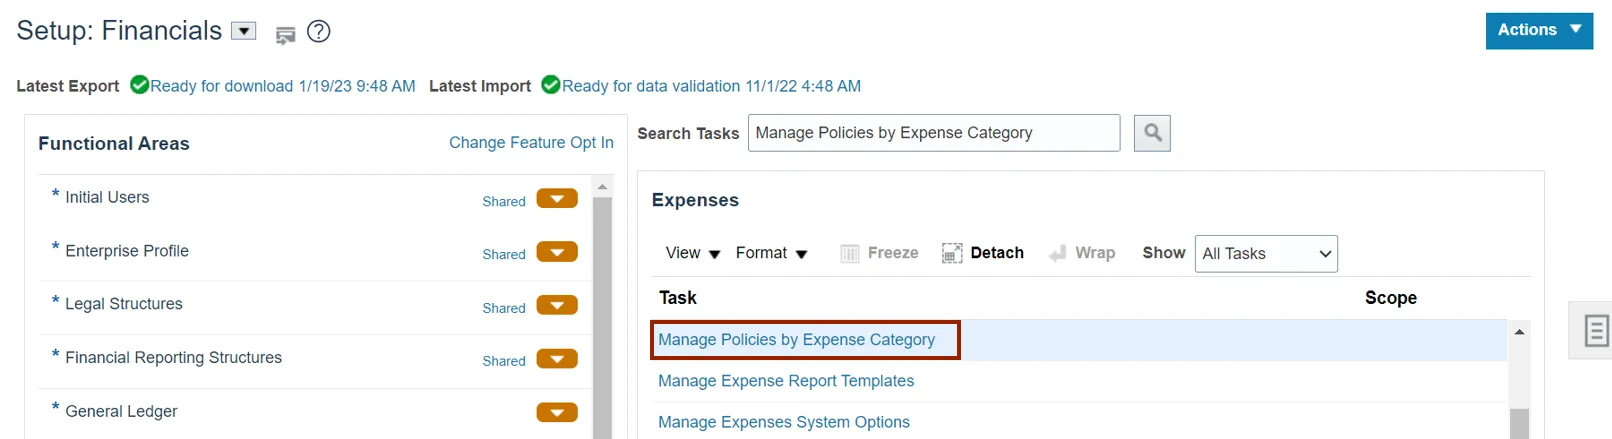
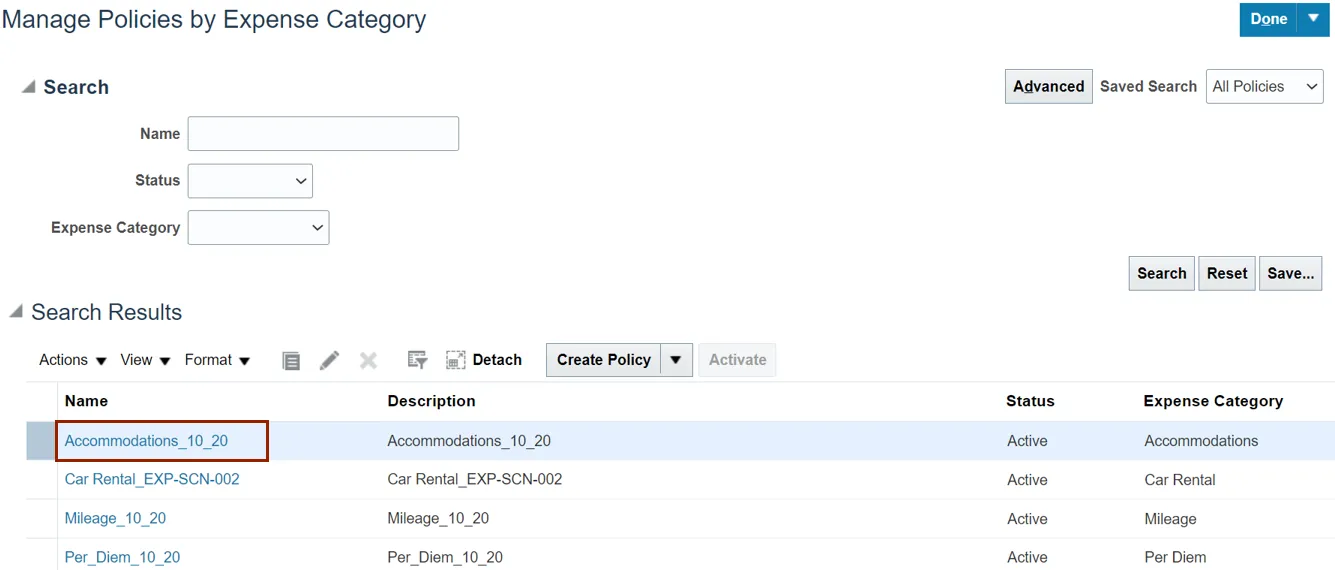
Step 5. From the Task section, select Manage Policies by Expense Category. The Manage Policies by Expense Category page opens.
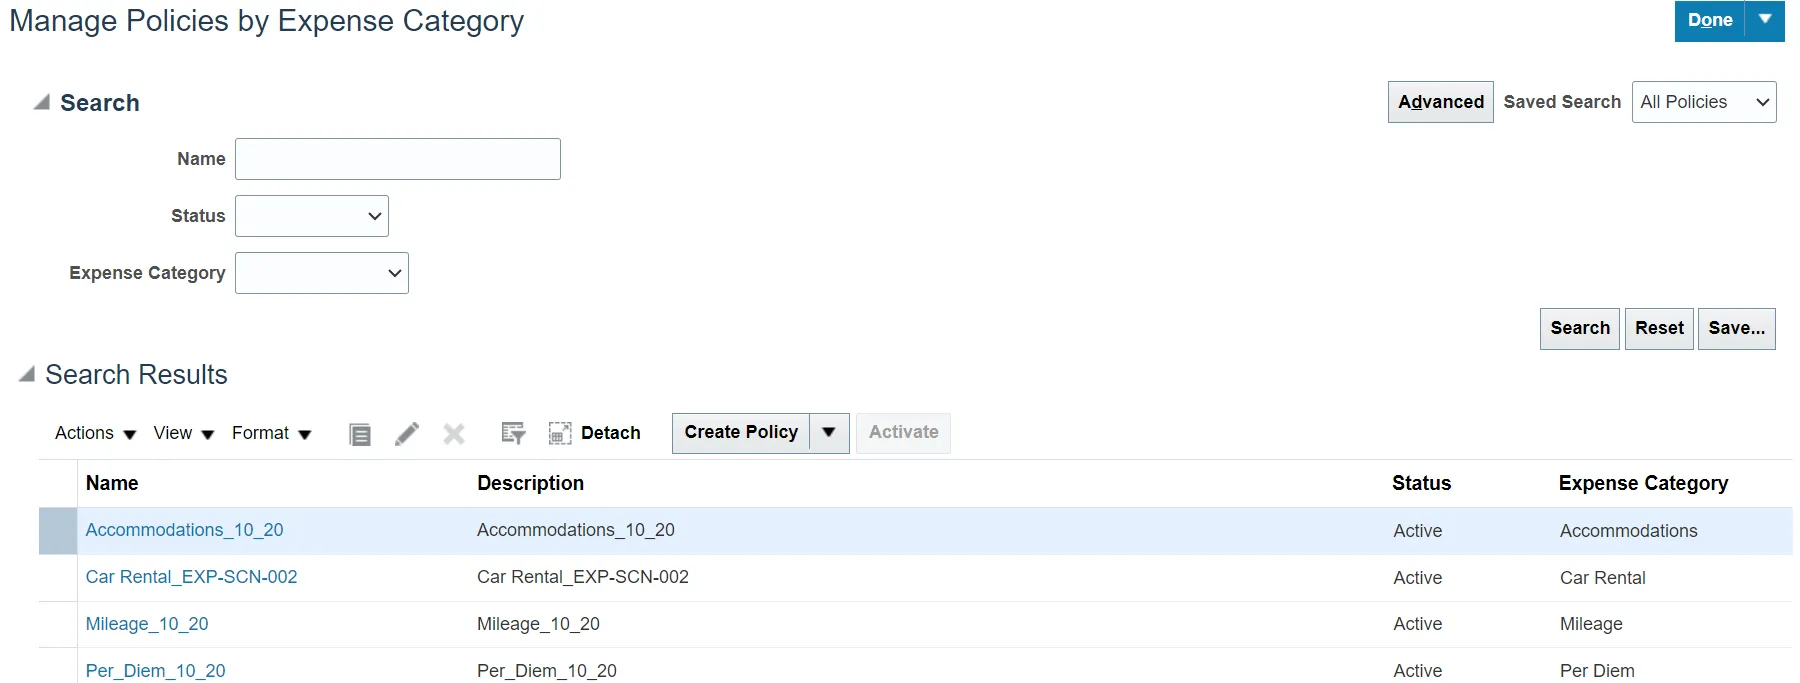
Step 6. On the Manage Policies by Expense Category page, select the Policy that needs to be modified from the Search Results section.
In this example, we choose Accomodation_10_20. The Edit Accommodations Policy page opens.
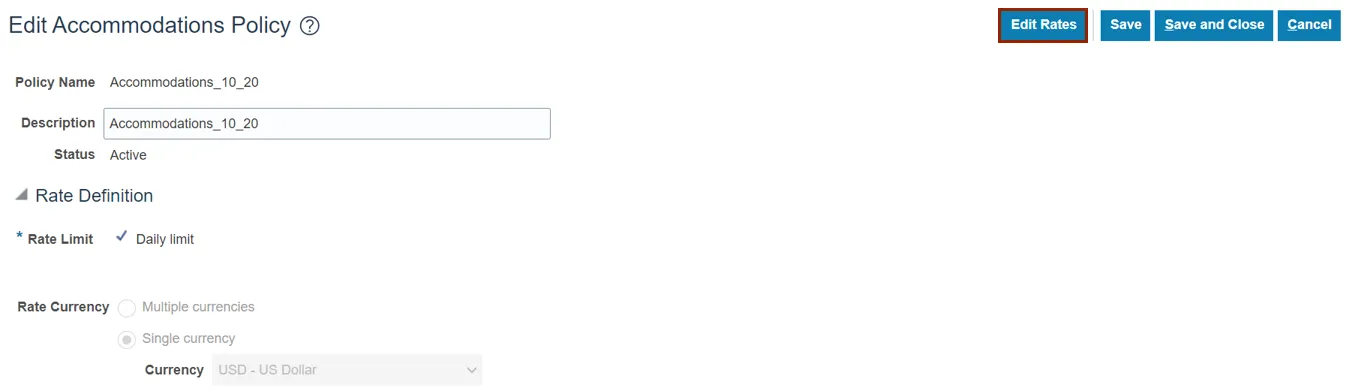
Step 7. On the Edit Accommodations Policy page, click the Edit Rates button. The Downloads pop-up appears.
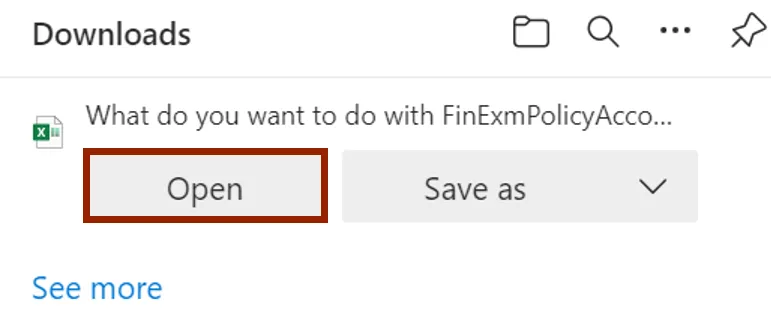
Step 8. On the Downloads pop-up, click the Open button.
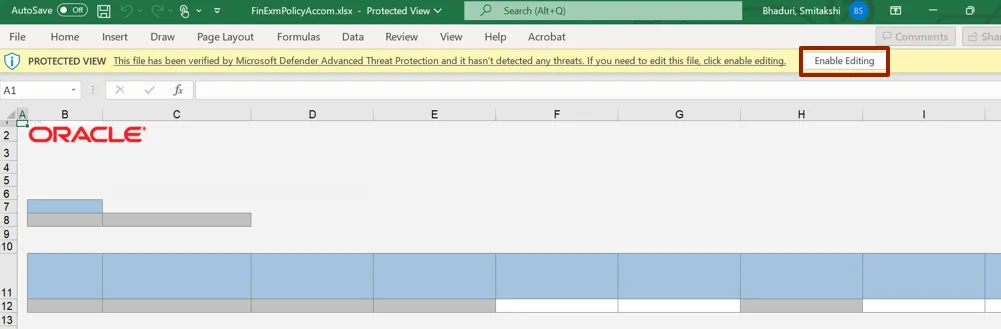
Step 9. The Create Accommodations Rates spreadsheet opens. Click the Enabling Editing button.
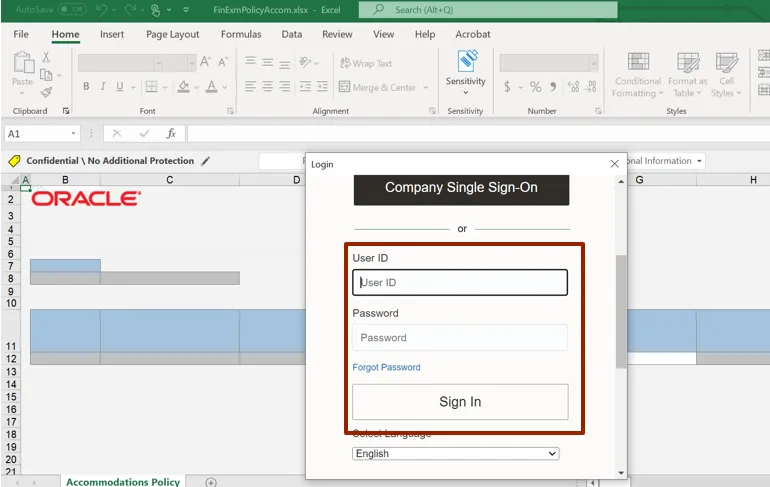
Step 10. A Login pop-up appears. Insert your credentials to login to the system.
Step 11. On the Create Accommodations Rates spreadsheet, the Accommodation Rate details are displayed.
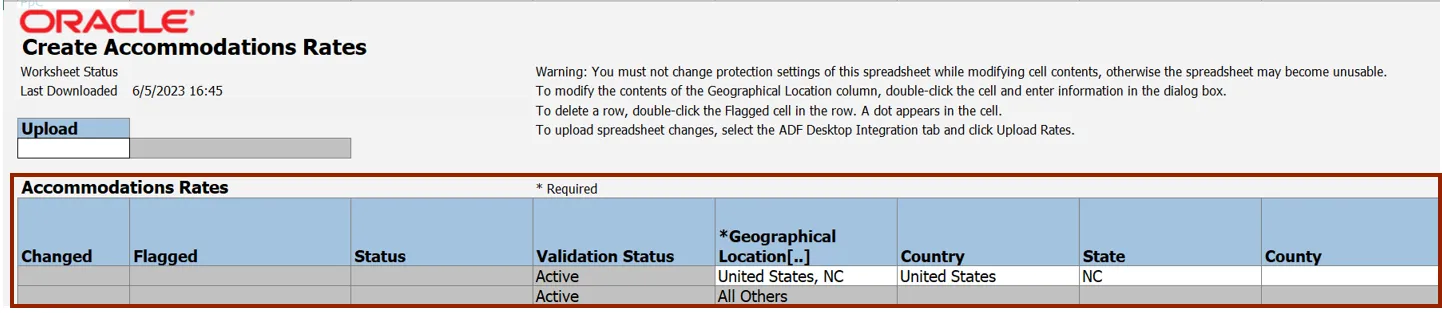
Step 12. Enter the desired data on the *Daily limit and *Start Date fields.

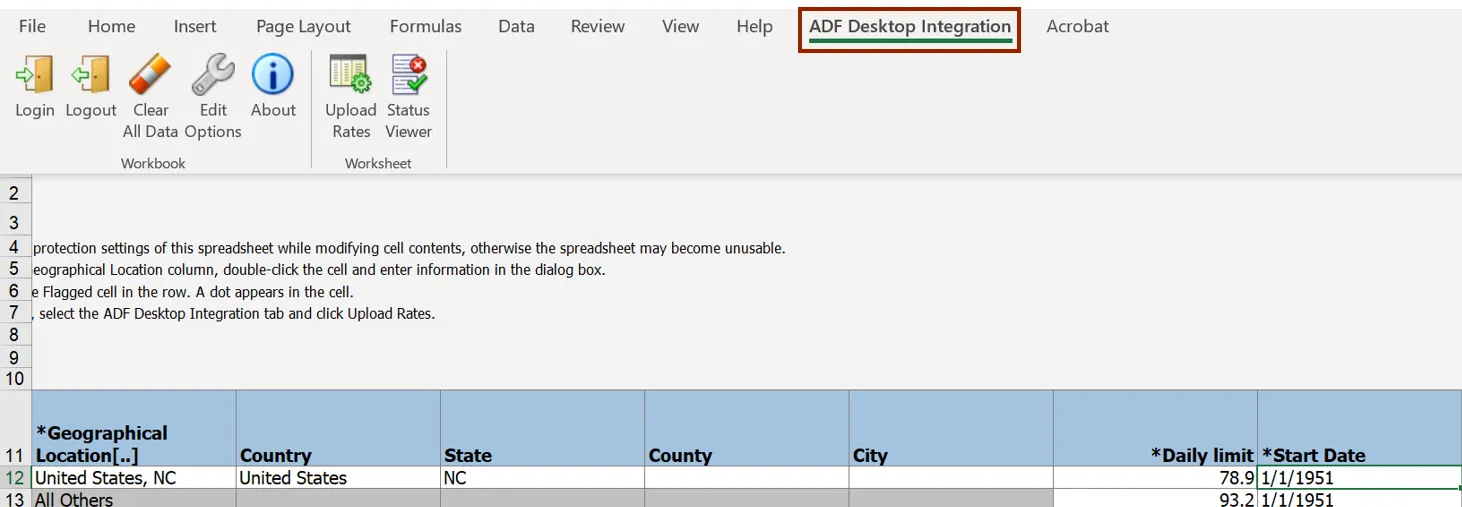
Step 13. On the spreadsheet, click the ADF Desktop Integration tab.
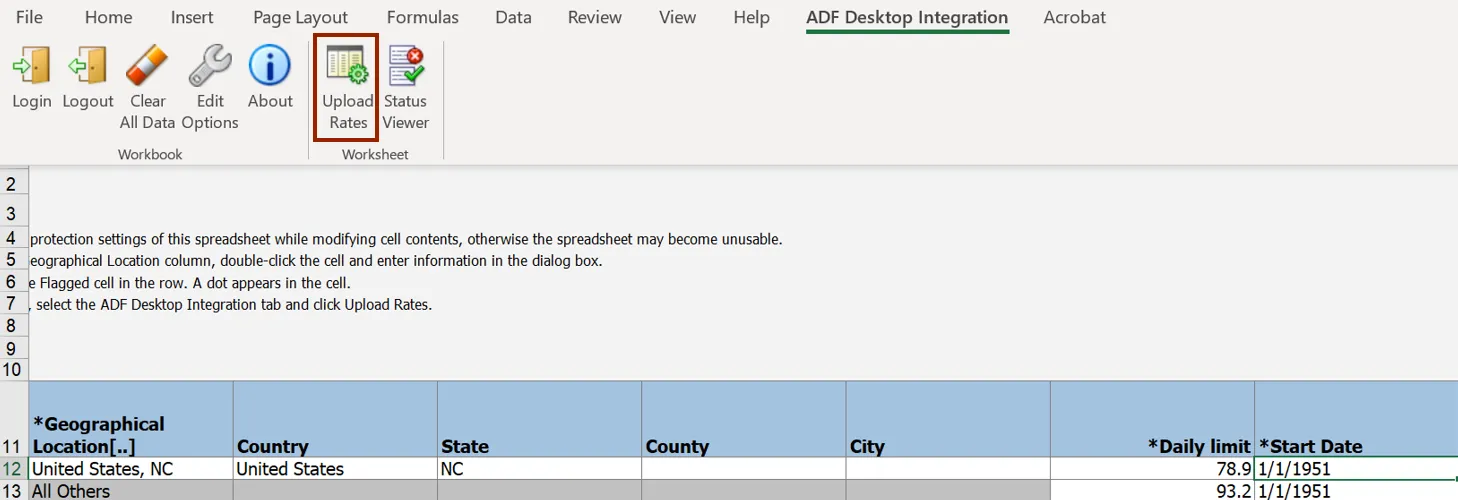
Step 14. Click the Upload Rates button. The Upload Options pop-up appears.
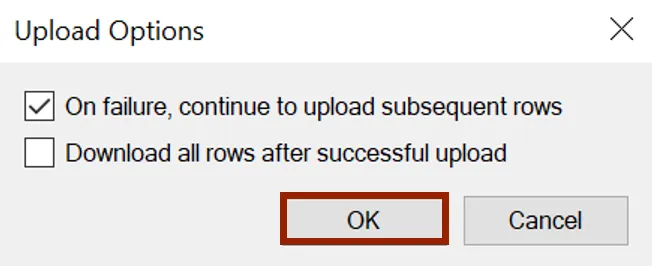
Step 15. The Upload Options pop-up appears. Select the checkboxes as per the requirement.
In this example, we choose the On failure, continue to upload subsequent rows checkbox. Now, click the OK button.
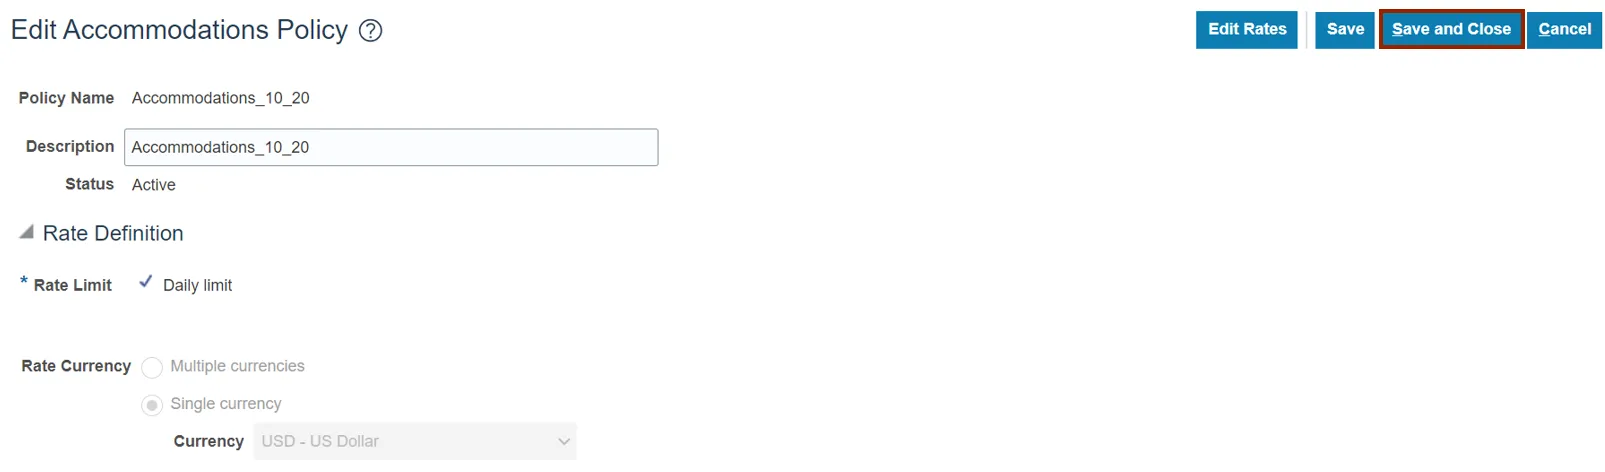
Step 16. Go back to the Edit Accommodations Policy page and click the Save and Close button. You are redirected to the Manage Policies by Expense Category page.
Step 17. On the Manage Policies by Expense Category page, the Expense Policies are displayed with the changes.
Expense Module Setup – Manage Expense Templates
To perform Expense Module Setup – Manage Expense Templates in NCFS, please follow the steps below. There are 14 steps to complete this process.
Step 1. Follow steps 1-3 above to navigate to the Setup: Financials page.
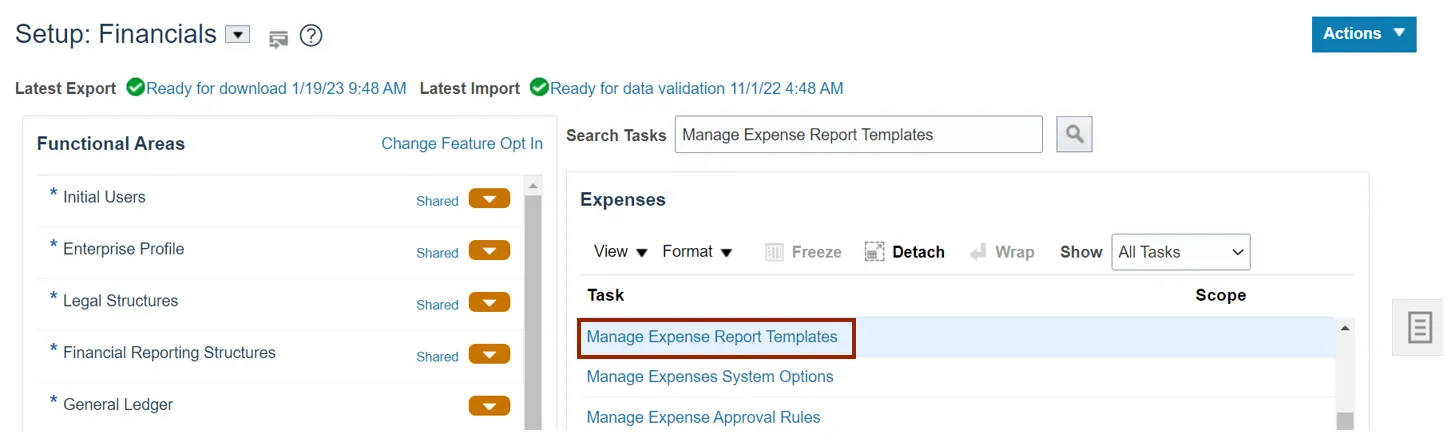
Step 2. On the Setup: Financials page, in the Search Tasks section, enter Manage Expense Report Templates and click the Search icon.
Step 3. From the Task section, select Manage Expense Report Templates. The Manage Expense Report Templates page opens.
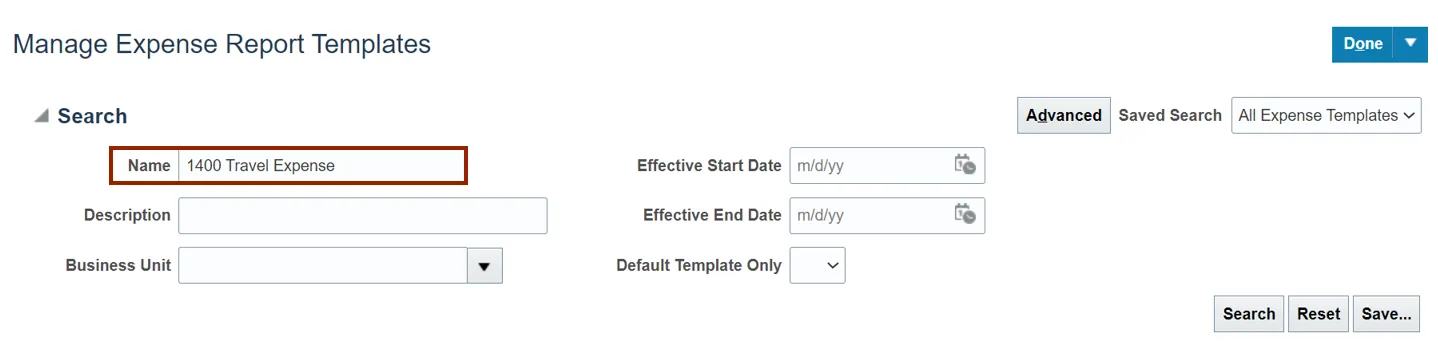
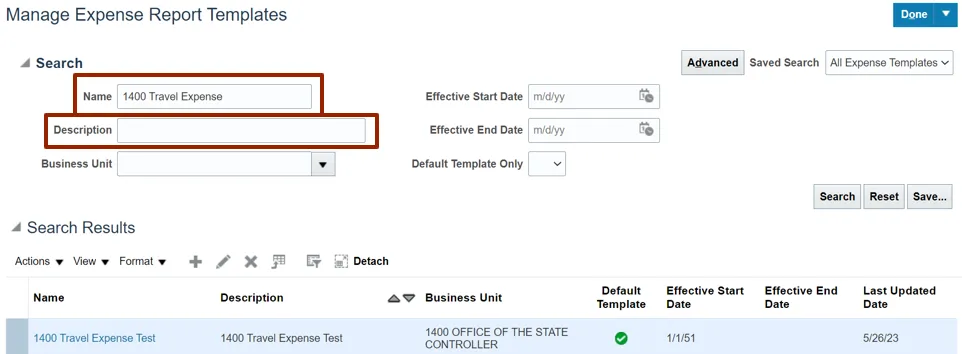
Step 4. On the Manage Expense Report Templates page, enter data in any one of the fields to search for a template.
In this example, we choose 1400 Travel Expense for the Name field.
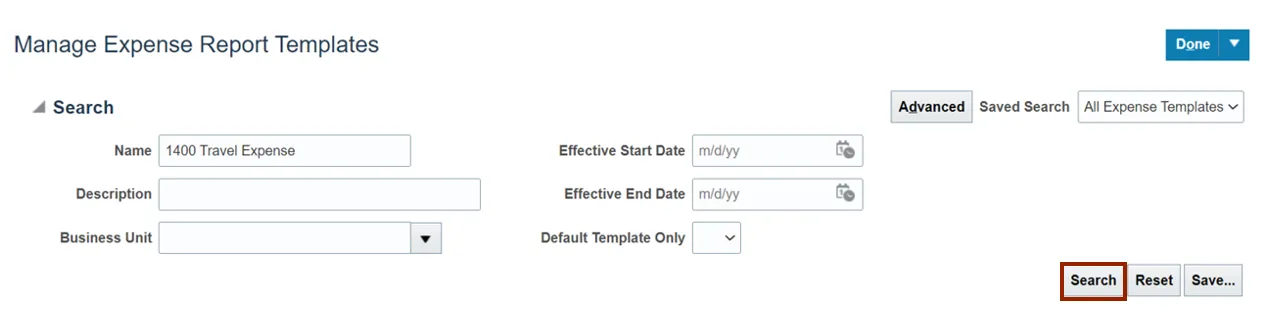
Step 5. Click the Search button.
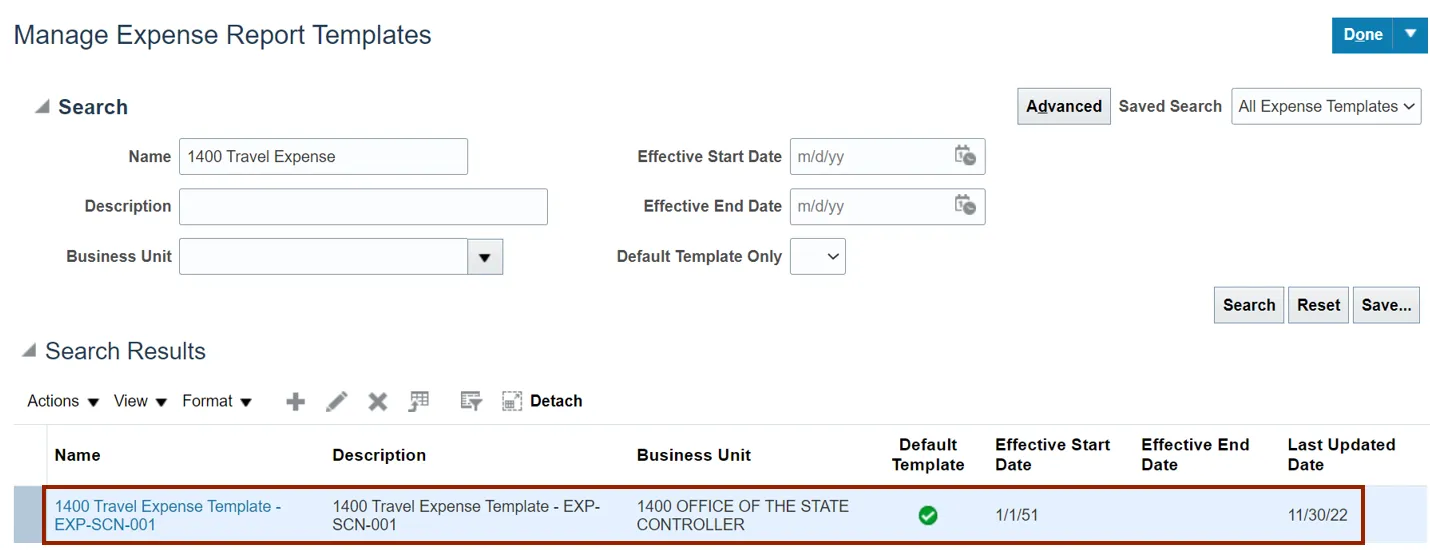
Step 6. Select the name of the Expense Report Template from the Search Results. The Edit Expense Report Template page opens.
Step 7. On the Edit Expense Report Template page enter *Name, Effective Start Date, and Description.
In this example, we choose 1400 Travel Expense Test for *Name, 1400 Travel Expense Test for Description, and 1/1/51 for Effective Start Date.

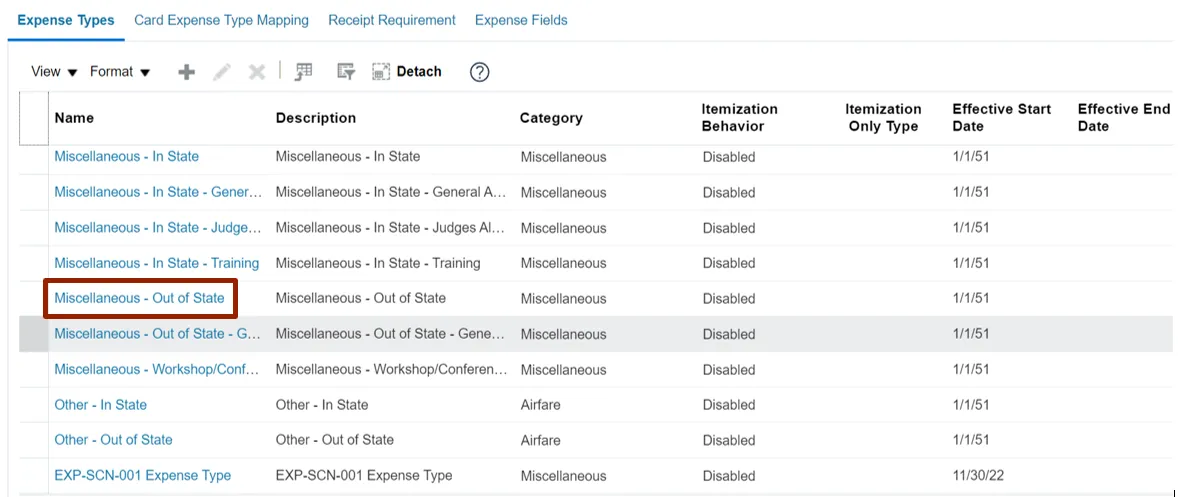
Step 8. Scroll down to the bottom section of the page and review the types of expenses under the Expense Types tab. Select an expense type from the available options.
In this example, we choose Miscellaneous – Out of State.
Step 9. The Edit Expense Type: Miscellaneous – Out of State page appears. Click the Receipt Requirement tab.
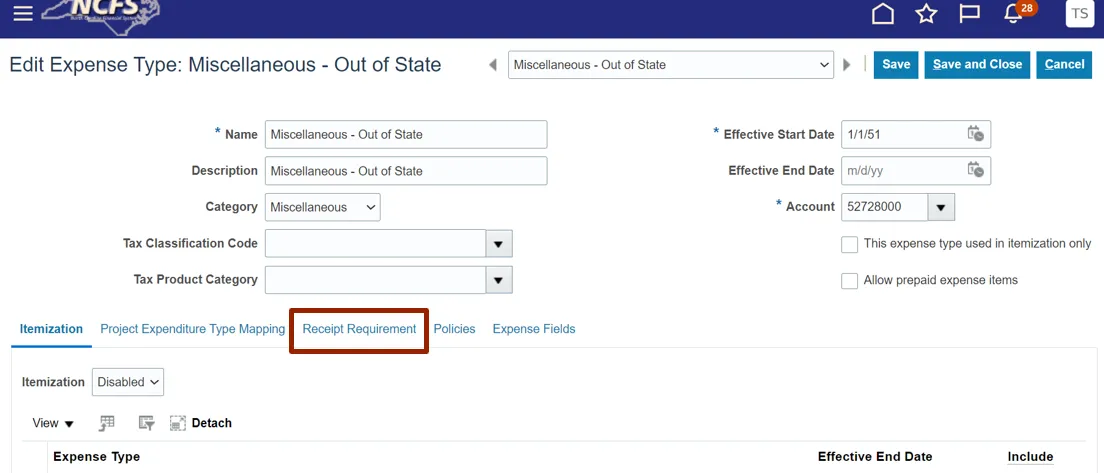
Step 10. Under thew Receipt Reimbursement tab, validate that the Receipt Requirements are accurate for the specific expense type being viewed. If required to change, update as needed.

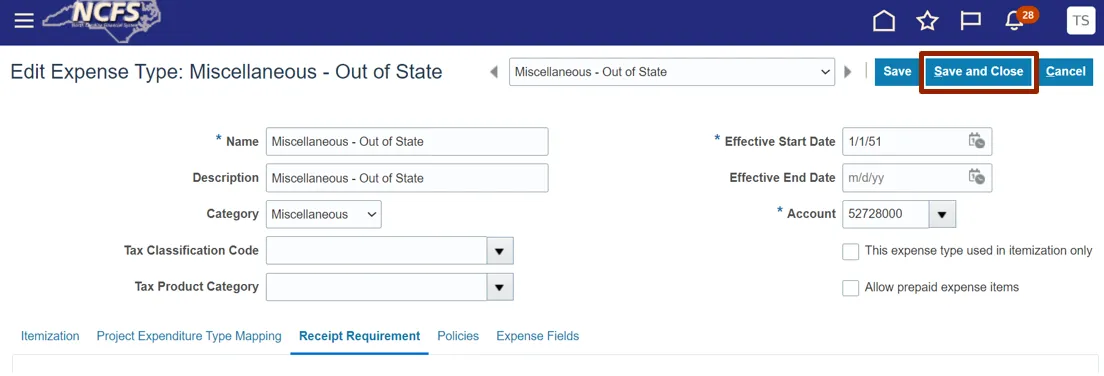
Step 11. Click the Save and Close button. You are redirected to the Edit Expense Report Template page.
Step 12. Click the Save and Close button to save the edits. You are redirected to the Manage Expense Report Templates page.

Step 13. A Warning pop-up appears. Click the Yes button.

Step 14. On the Manage Expense Report Templates page, you can search for the Expense Report template using the edited Name or Description Name.
Expense Module Setup – Manage Delegates
To perform Expense Module Setup – Manage Delegates in NCFS, please follow the steps below. There are 8 steps to complete this process.
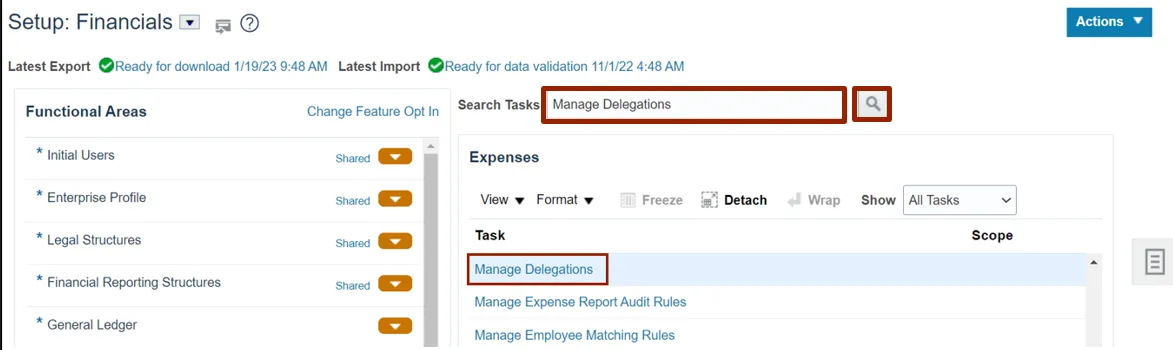
Step 1. Follow steps 1-3 above to navigate to the Setup: Financials page.
Step 2. On the Setup: Financials page, in the Search Tasks section, enter Manage Delegations and click the Search icon and from the Task section, select Manage Delegations. The Manage Delegations page opens.
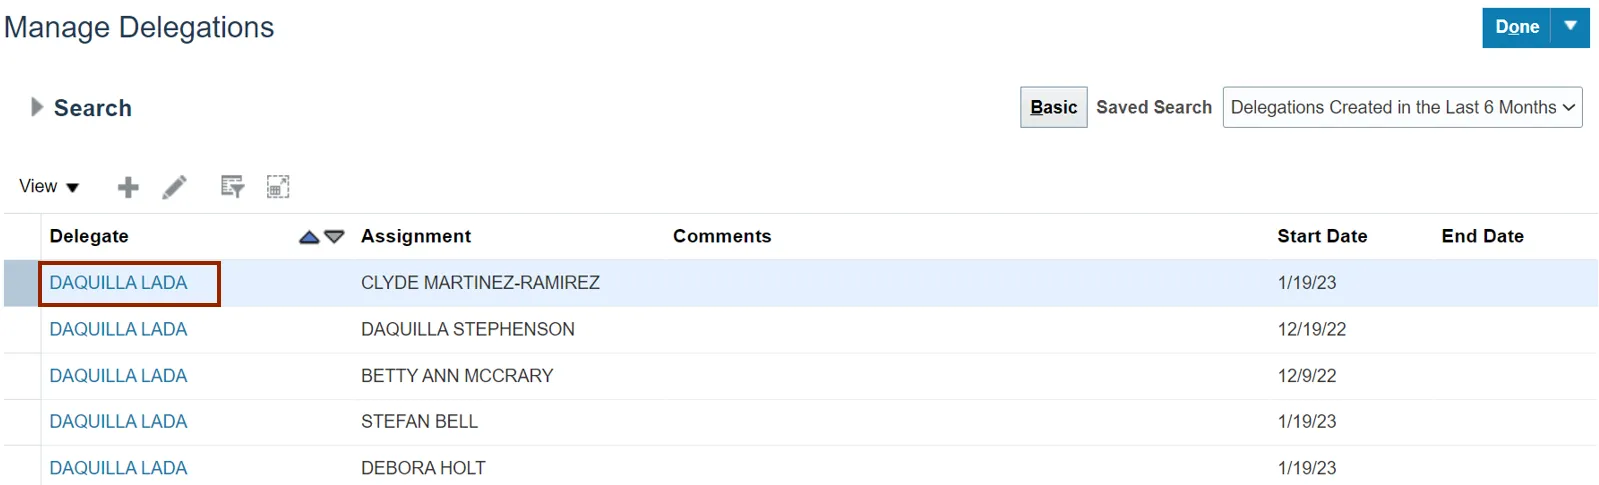
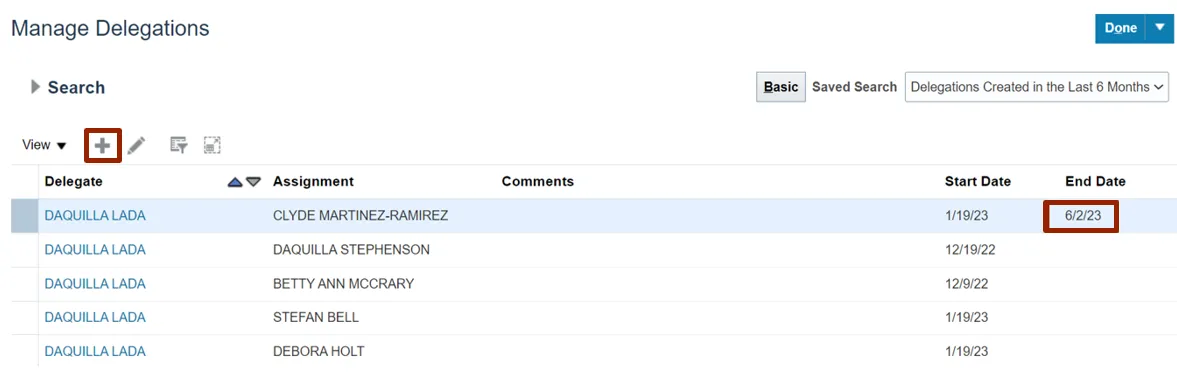
Step 3. On the Manage Delegations page, select the Delegate from the list displayed. In this example, we choose DAQUILLA LADA.
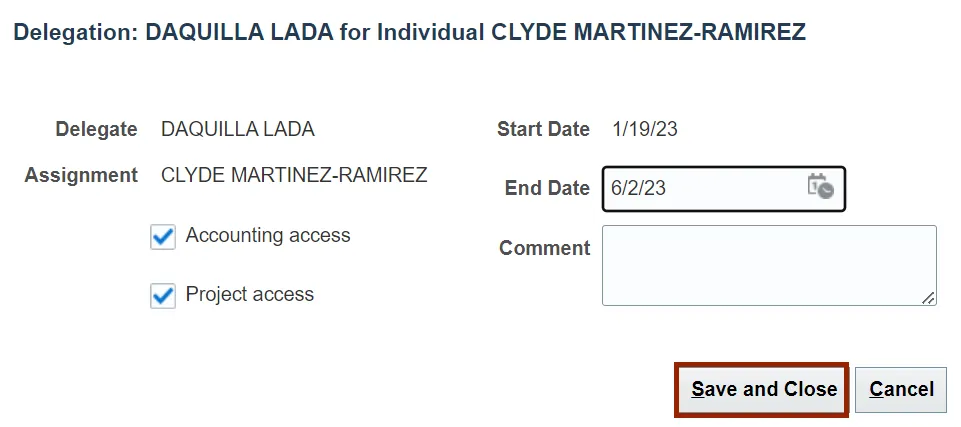
Step 4. On the Delegation: DAQUILLA LADA for Individual CLYDE MARTINEZ-RAMIREZ pop-up, select the End Date by clicking on the Calendar icon.
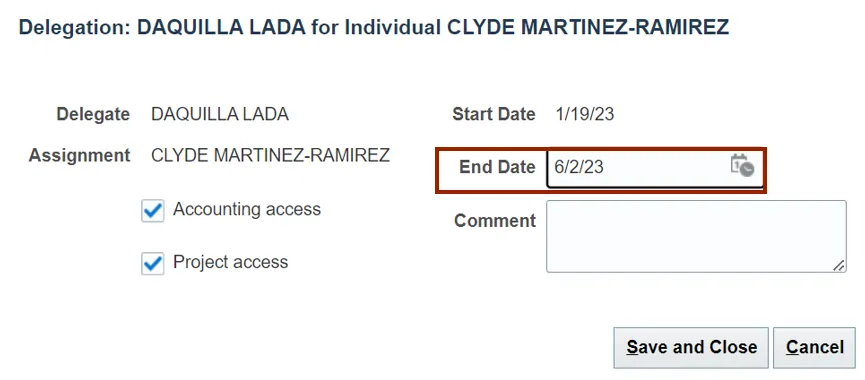
Step 5. Click the Save and Close button. You are redirected to the Manage Delegations page.
Step 6. On the Manage Delegations page, the Delegate End Date column is updated.
Click the Add icon to add a new delegation relationship.
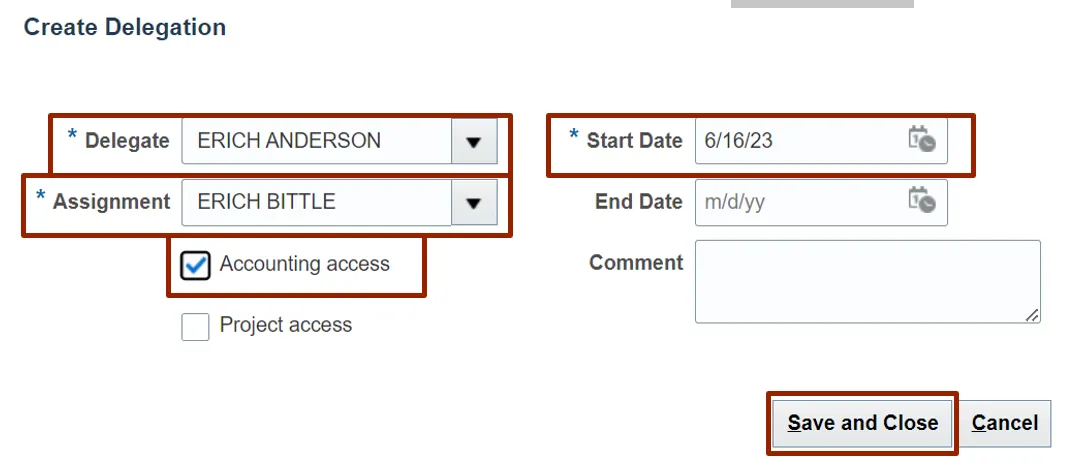
Step 7. A Create Delegation pop-up appears. Enter the required details in the fields displayed.
In this example, we choose ERICH ANDERSON for *Delegate, ERICH BITTLE for *Assignment, and 6/16/23 for *Start Date. Select the Accounting access checkbox and click the Save and Close button.
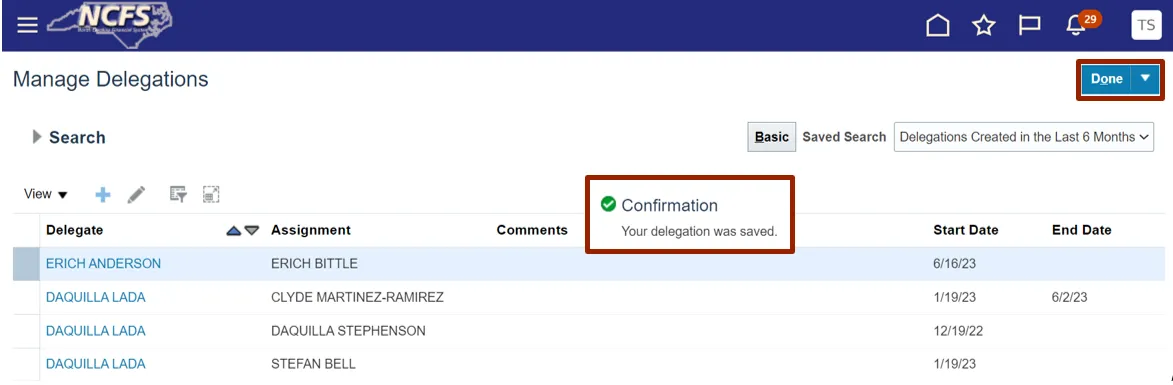
Step 8. On the Manage Delegations page, a Confirmation pop-up appears. Click the Done button. You are redirected to the Setup: Financials page.
Wrap-Up
Setup an Expense Module, Including Manage Expense Policies, Templates, or Delegates in NCFS using the steps above.
Additional Resources
- Virtual Instructor Led Training (vILT)