Purpose
The purpose of this Quick Reference Guide (QRG) is to provide a step-by-step explanation of how to Create and Process Check Payments in the North Carolina Financial System (NCFS).
Introduction and Overview
This QRG covers the procedure of creating and processing Payment Process Requests (PPR) to enable check payments.
User Tip
The following are prerequisites to Create and Process Check Payments:
-
Invoices should be validate and approved.
-
Invoices should not have any holds.
Submit Check Payments
To submit check PPR in NCFS, please follow the steps below. There are 7 steps to complete this process.
Step 1. Log in to the NCFS portal with your credentials to access the system.
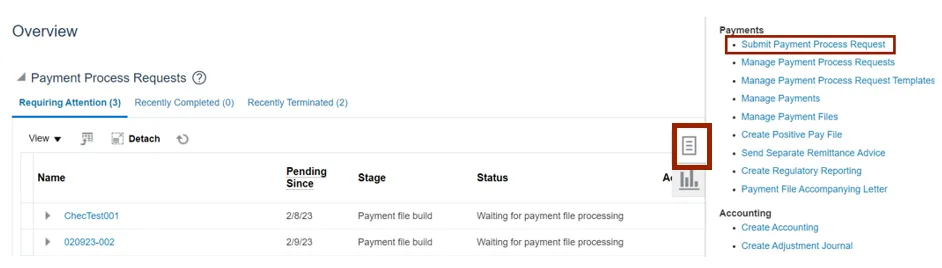
Step 2. On the Home page, click the Payables tab and then click the Payments app.

Step 3. On the Overview page, click the Tasks icon and then click Submit Payment Process Request.
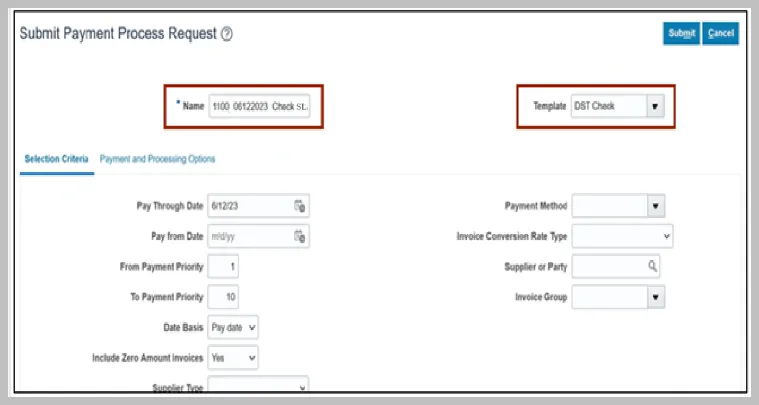
Stpe 4. Click the Template drop-down choice list and select the appropriate template. In this example, we choose DST Check.
Enter the name in the Name field in the given format “BU Payment Method MMDDYYYY Initials”.
In this example '0800 Check 04182023 SL’.
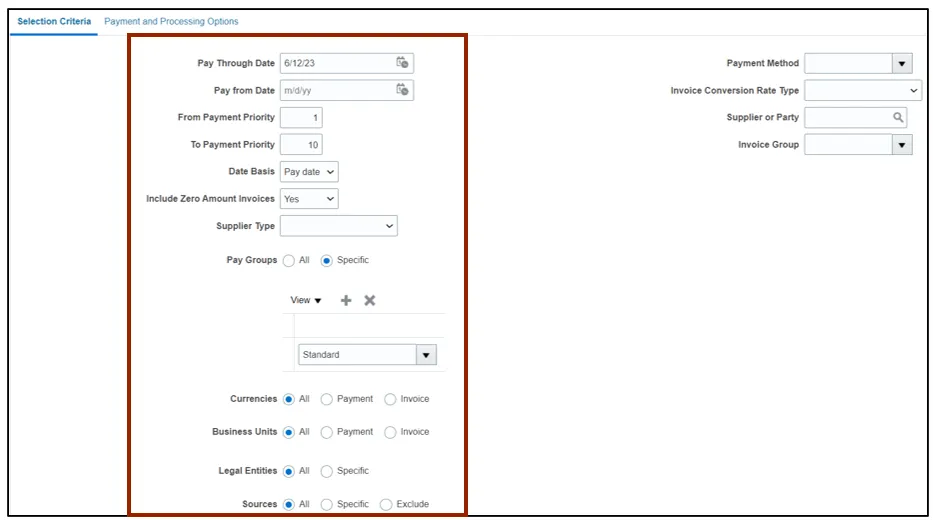
Step 5. On the Selection Criteria tab, the details are auto-populated based on the template selected. Review the details and modify if required. Pay Through Date will determine the invoices picked in your PPR based on the invoice due date.
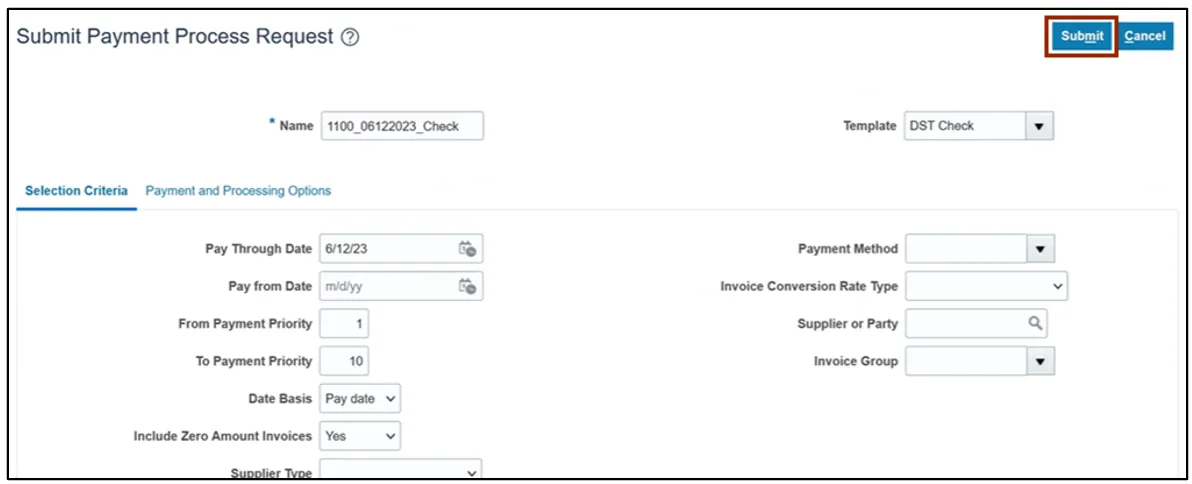
Step 6. Scroll up on the Submit Payment Process Request page and click the Submit button. This will redirect you to Overview dashboard.
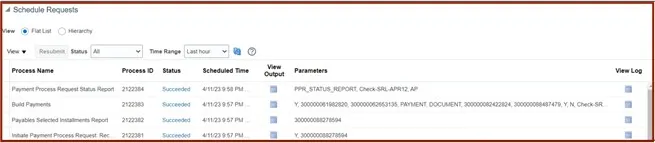
Step 7. These programs will run when you submit the PPR.

Review Installments (Add/Delete)
To review installments in NCFS, please follow the steps below. There are 8 steps to complete this process.
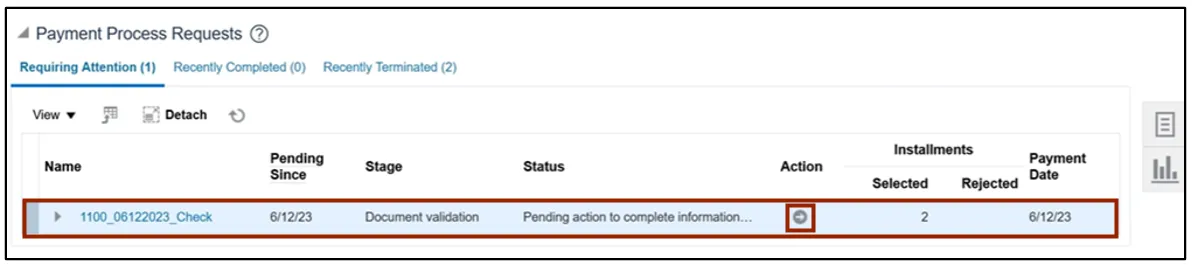
Step 1. You will be directed to the Overview page, click the refresh icon to view your PPR. On the Requiring Attention tab, select the required PPR and then click the Action icon.
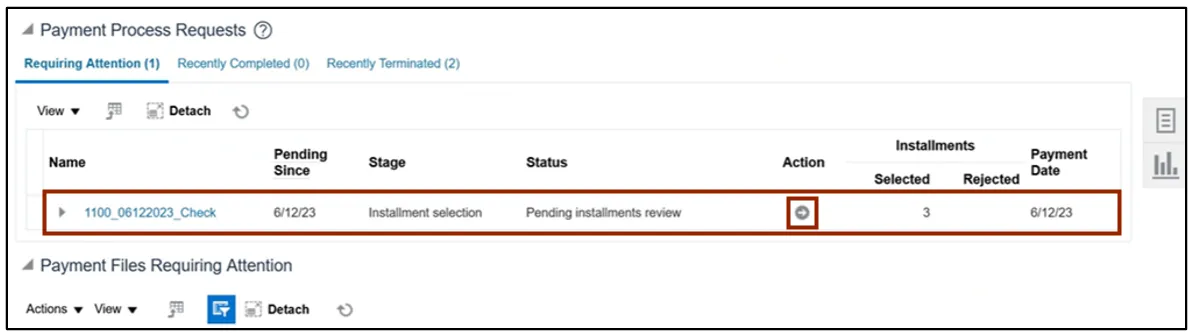
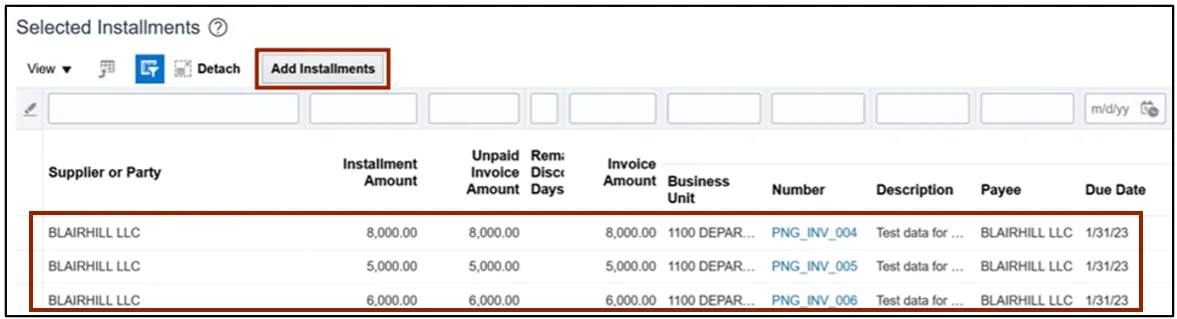
Step 2. On the Review Installments page, review the list of Installments. NCFS will automatically pick up current invoices that ready for check payment. Optionally, to add or remove installs follow step 5 through step 7, if not skip to step 8. Click the Add Installments button to add/remove an installment optionally.
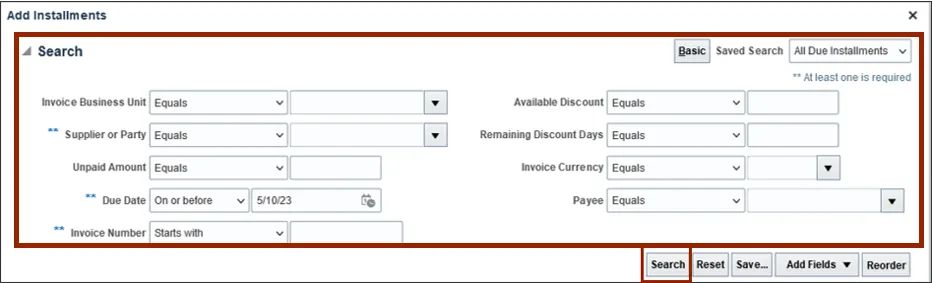
Step 3. In the Search section, enter details in at least one field (marked as **) for the required Installment and click the Search button.
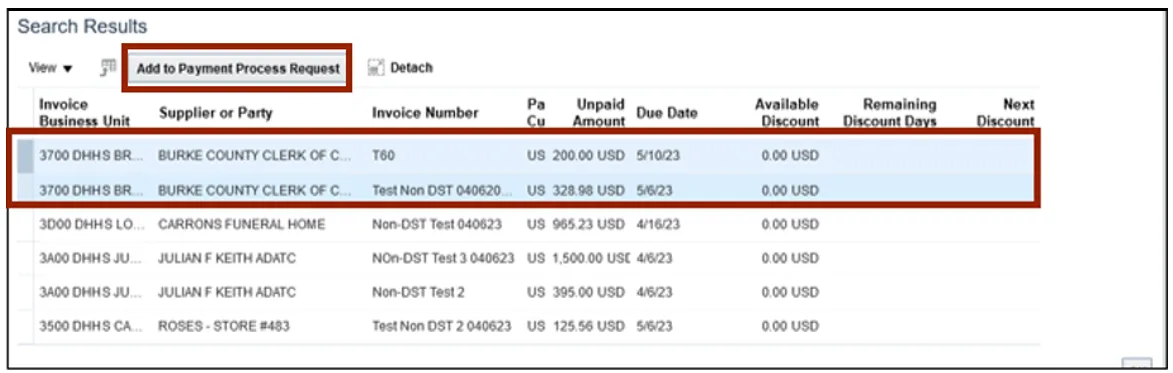
Step 4. List of Installments will appear. Select the Installments which need to be added and click the Add to Payment Process Request button. Make sure to select invoices which are only check payments.
Step 5. Alternatively, to delete an installment, select the Installment and click the Delete icon.
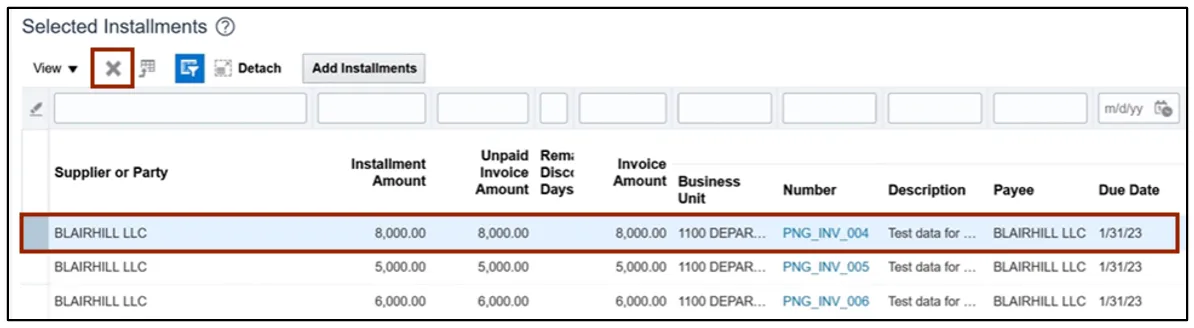
Step 6. A Confirmation pop-up appears. Click the OK button.

Step 7. On the Review Installments page, click the Submit button.

Step 8. These programs will run when you submit the Installments.
Complete Pending Information Required
To add disbursement bank account, please follow the steps below. There are 2 steps to complete this process.
Step 1. You will be directed to the Overview page, click the refresh icon to view your PPR. On the Requiring Attention tab, select the required PPR and click the Action icon.
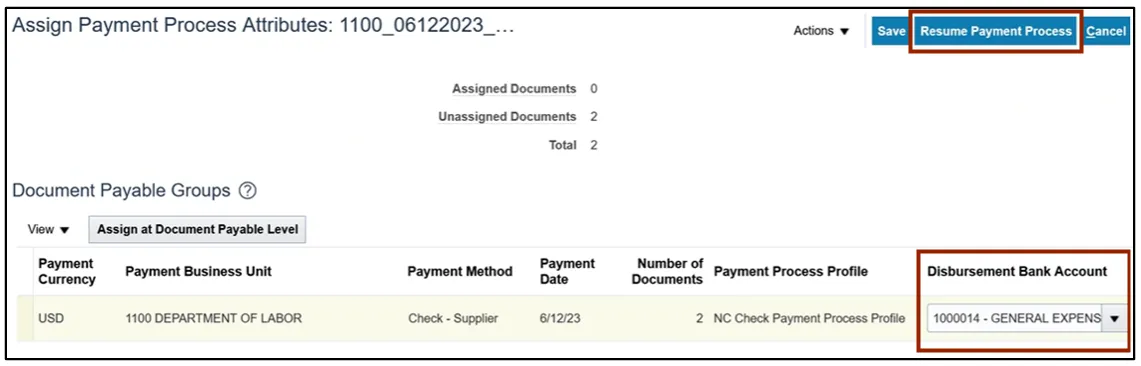
Step 2. From the Disbursement Bank Account drop-down choice list, select the required Account. Please select your agency’s disbursement bank account only.
In this example, we choose 1000014 – GENERAL EXPENSE – DOL. Click the Resume Payment Process button. This will redirect you to the Payment Process Requests page.
Complete Pending Proposed Payment Review
To review pending proposed payment, please follow the steps below. There are 6 steps to complete this process.
Step 1. You will be directed to the Overview page, click the refresh icon to view your PPR. On the Requiring Attention tab, select the required PPR and then click the Action icon.
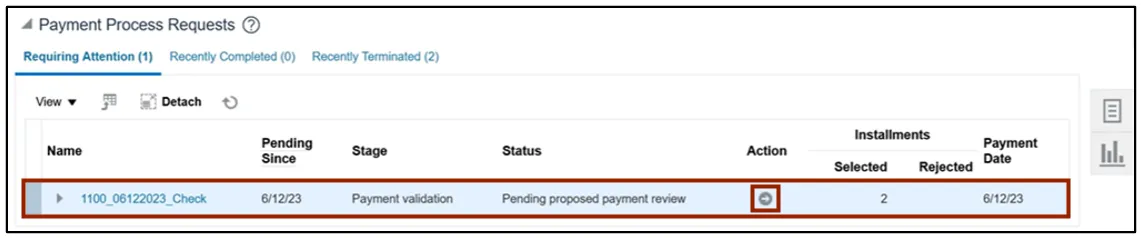
Step 2. On the Review Proposed Payments page, click the Resume Payment Process button.
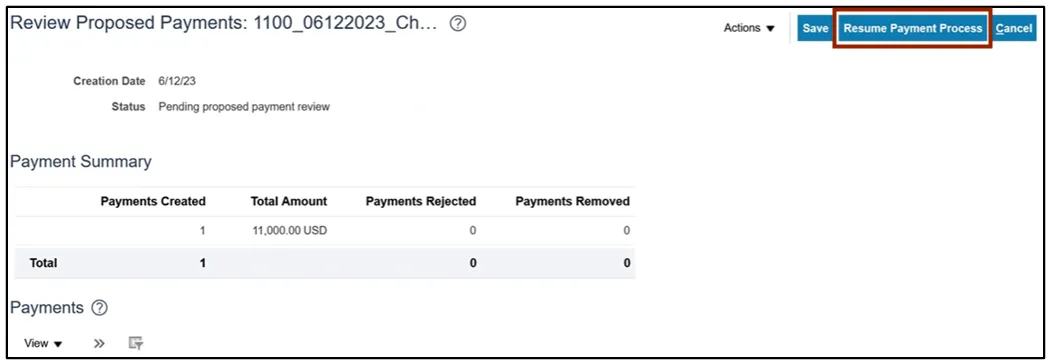
Step 3. These programs will run when you resume the payment process.
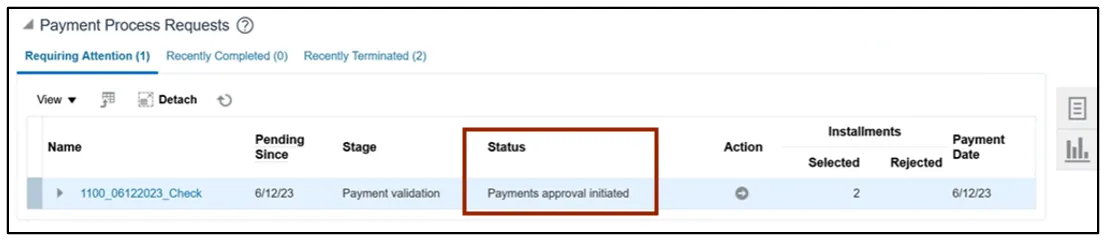
Step 4. Under the Requiring Attention tab, the status is available as Payments approval initiated for the selected PPR.
Note: Once you have completed the payment review, the payment approval is initiated, and Payment Approval is performed by the OSC Central Compliance Team typically between 10:30 a.m. and 1:00 p.m.
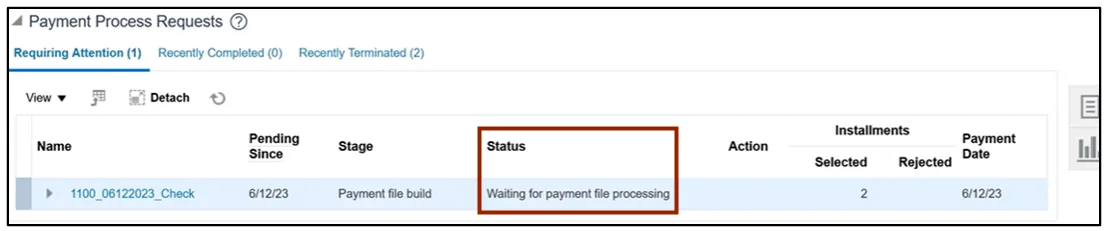
Step 5. Once all the steps are completed, under the Requiring Attention tab, the status is available as Waiting for payment file processing for the selected PPR.
Note: The Payments are now awaiting Printed files to be created by the Agency Payment Printer role can print checks, please refer to QRG AP31 for steps. Once your agency payment printer confirms the print job, your PPR should move to the Recently Completed tab. Its best practice to confirm your print job the same day as payment accounting won’t process until the print job is confirmed. However, please do not confirm your print job until you have the physical printed checks on hand and have inspected them for print issues.
Step 6. Click the Expand button to view the printing status. The status will be updated to Formatted and Ready for Printing.

Wrap-Up
Create check payments in NCFS using the steps above to submit PPR, review installments, complete pending information required, complete pending payment review and complete payment process.
Additional Resources
- Virtual Instructor-Led Training (vILT)
- Quick Reference Guide (QRG)