Purpose
The purpose of this Business Process Procedure is to explain how to view an employee’s time evaluation results in the Integrated HR-Payroll System.
Trigger
There is a need to view an employee's Time Evaluation results.
Business Process Procedure Overview
All employee time data is processed in Time Evaluation. The results of this processing are stored in the Integrated HR-Payroll System using structures known as clusters, specifically the B2 cluster. B2 clusters are both viewable and reportable using transaction PT66. Transaction PT66 can be used to troubleshoot Payroll and Time related inquiries.
Time Evaluation results are stored for every employee on a monthly basis regardless of the employee's Payroll Area. Each month is referred to as a Time Evaluation period. January is period "1," February is period "2," and so on. The stored results include Wage Types, Quota Accruals, Attendances, Absences, Current Actions, Time Evaluations messages and Substitutions.
This BPP will detail:
- Displaying B2 cluster data
- Drill down reporting on specific tables
Procedure
There are 21 steps in this process.
Step 1. Log into the Integrated HR-Payroll system.
Step 2. Type transaction code PT66 in the command field on the SAP Easy Access screen and click the Green Check button to the left or Enter on your keyboard. Note: No menu path is available for this transaction.
Step 3. Enter the Personnel number of the employee.
Step 4. Enter the fiscal year corresponding to the periods open for posting.
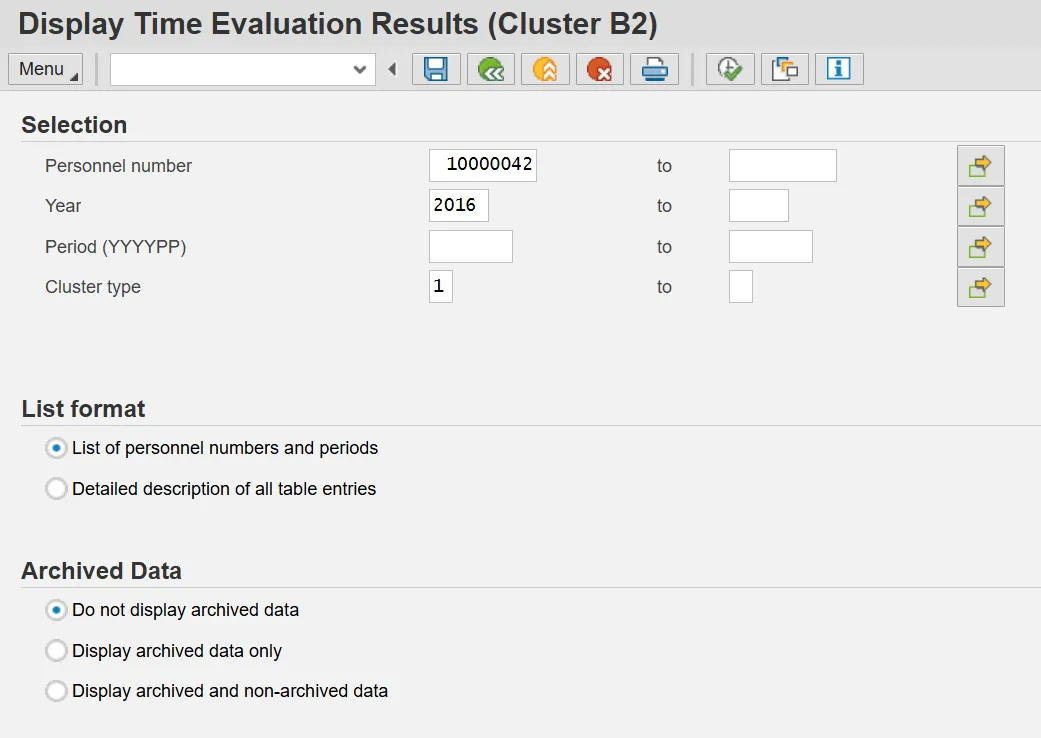
Step 5. Click the Execute (F8) button.
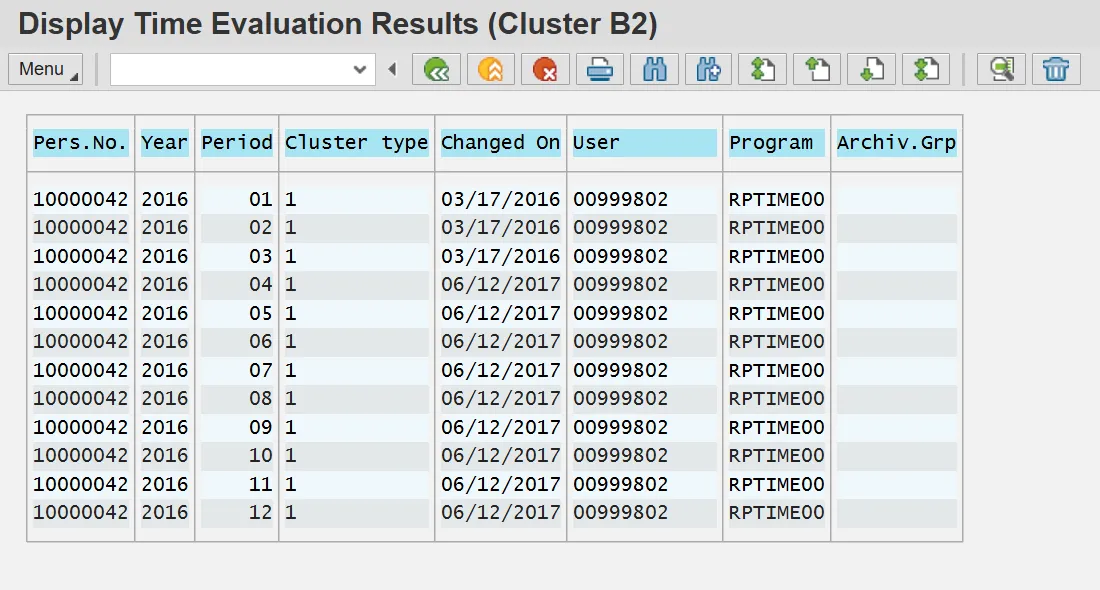
Step 6. Double click in the row for the period (month) you wish to view or click once and then click the Choose (F2) button.
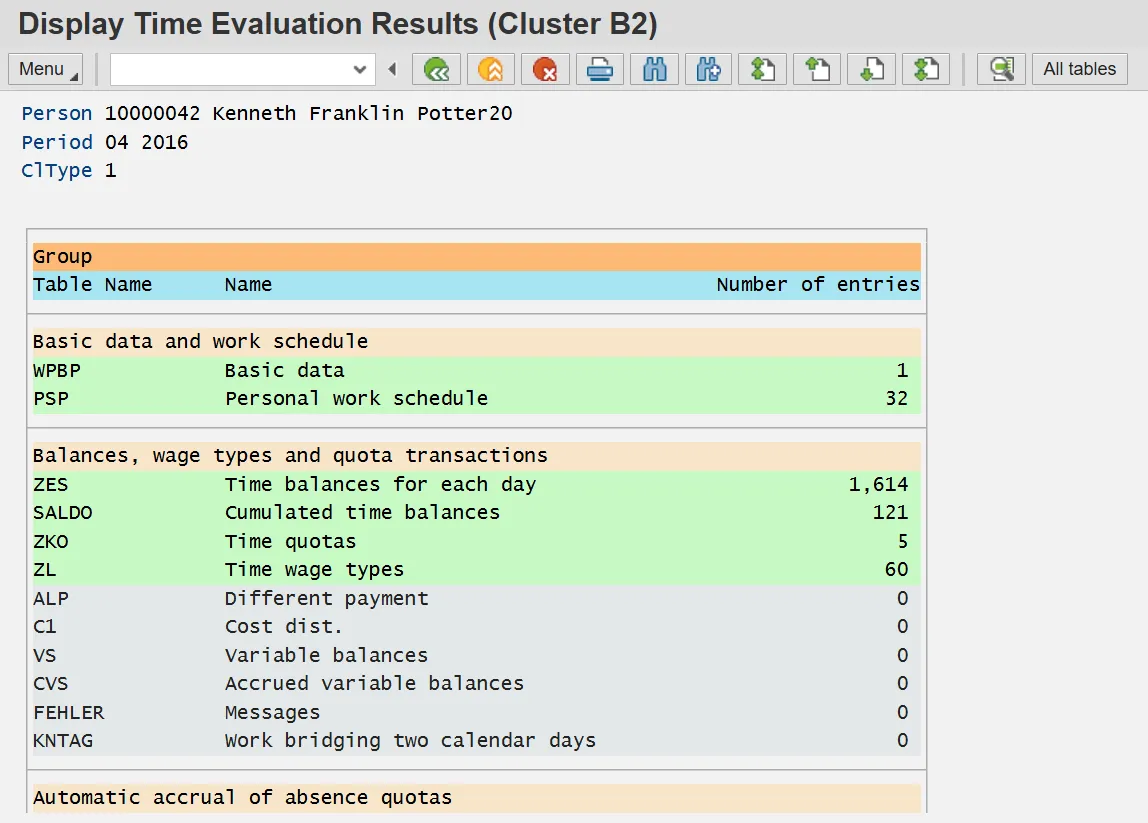
Note: The B2 clusters consist of many tables, all of which are displayed on the following screen for the Period selected. If results have been generated for a given table, that row will be green. If not, the row will be gray. This BPP details several of the most relevant tables. Double click on any line item of data in any of the tables discussed below for additional details.
WPBP: Basic Data
Step 7. Double click WPBP in the Basic data and work schedule group. The WPBP table lists the EE's current action(s). The Act. column displays the action code, and the Gr column displays the reason code for the action. The Start date and End date are not the dates of the action. Instead, they represent the day before and the day after the current Period selected for review. The data indicates that the example employee, Kenneth Potter, received a Salary Adjustment with reason code 22 in May 2016.
Step 8. Click the Back (F3) button to go back to the previous screen for the same period (month) or back to the main screen to select a different period (month).
ZKO: Time Quotas
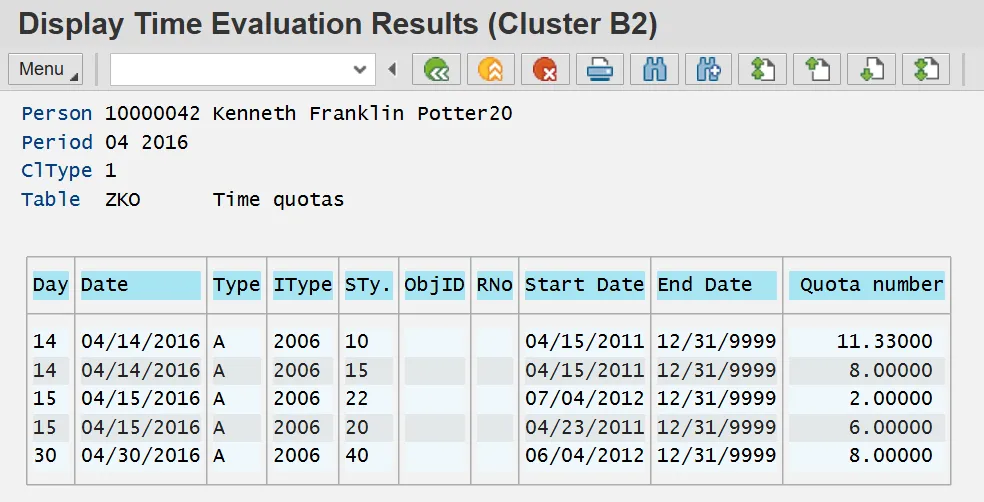
Step 9. Double click ZKO in the Balances, wage types and quota transactions group. The ZKO table lists the employee's quota accruals for the selected period. The Day column displays the day of the period on which the quota was accrued. The Sty. column displays the quota number of the quota accrued. The Quota number column displays the amount of the accrual. These rows of data indicate that the example employee, Kenneth Potter, earned 11.33 hours of vacation leave and 8 hours of sick leave on 4/14/2016.
Step 10. Click the Back (F3) button to go back to the previous screen for the same period (month) or back to the main screen to select a different period (month).
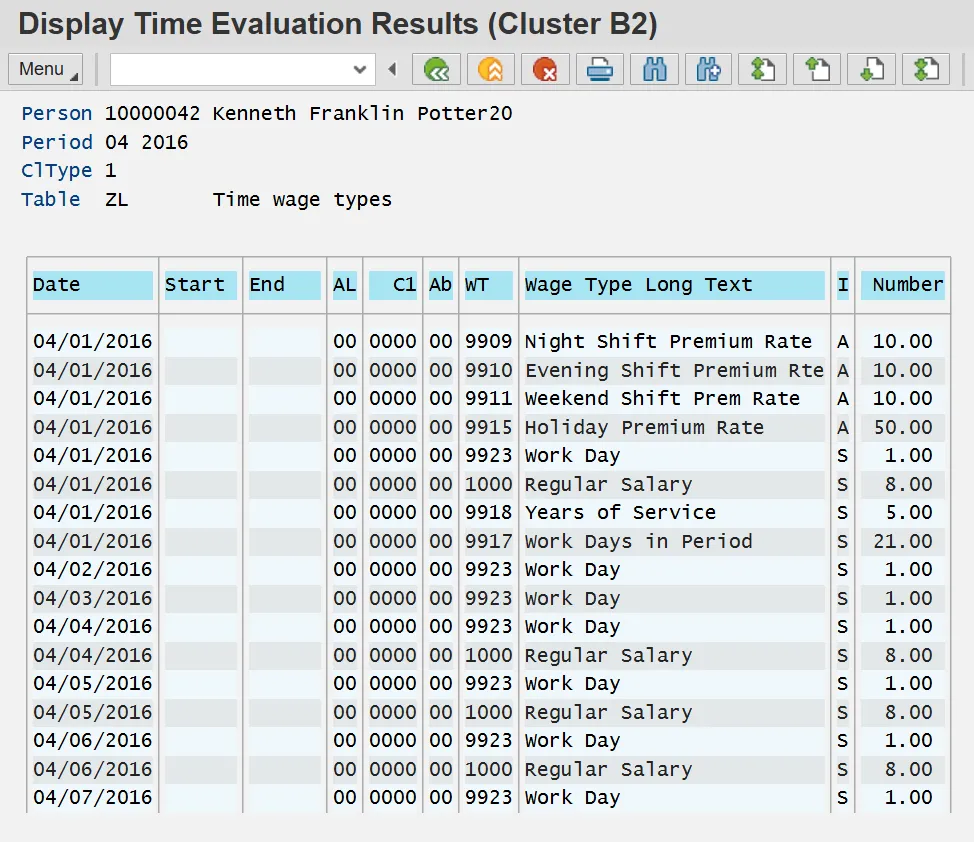
ZL: Time Wage Types
Step 11. Double click ZL in the Balances, wage types and quota transactions group. The ZL table lists the wage types generated for the employee on each day of the selected period. The Date column displays the day of the period on which the wage type was generated. The WT column displays the wage type generated. The Number column displays the amount for the given wage type that was sent to Payroll. Scroll down the screen to view all additional dates for the selected Period.
Step 12. Click the Back (F3) button to go back to the previous screen for the same period (month) or back to the main screen to select a different period (month).
FEHLER: Messages
Step 13. Double click FEHLER in the Balances, wage types and quota transactions group. The FEHLER table lists the messages generated by Time Evaluation for the employee during the selected period. The Log. date column displays the date on which the message was generated. The MessTy column displays the code for the generated message. The Long text column provides a short description of the generated message. There are three messages for the example employee, Kenneth Potter, for the Period of February 2016. The first indicates that his Holiday Leave moved to Holiday Comp on 2/16/2016. The second indicates that he did not enter hours as of 2/21/2016 as required for a Positive time employee. The third indicates he did not reach 50% of his scheduled workdays for the period and therefore did not accrue leave as of 2/29/2016.
Step 14. Click the Back (F3) button to go back to the previous screen for the same period (month) or back to the main screen to select a different period (month).
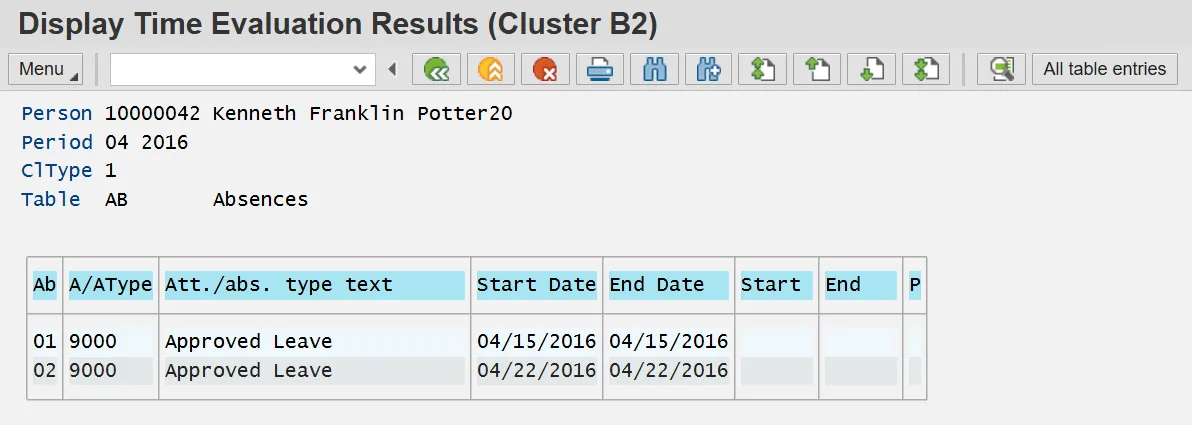
AB: Absences
Step 15. Double click AB in the Time data group. The AB table lists the absences an employee reported for selected period as well as the dates of the absences. The Ab column displays the sequential number of the absence for the period. The A/AType column displays the absence code reported on the time sheet. The Start Date and End Date columns represent the duration of the absence. The example employee, Kenneth Potter, had 2 absences in April 2016. Both were for Approved Leave on 4/15 and 4/22.
Note: Time Evaluation processes time data for the day before and the day after any given period.
Step 16. Click the Back (F3) button to go back to the previous screen for the same period (month) or back to the main screen to select a different period (month).
ANWES: Attendances
Step 17. Double click ANWES in the Time data group. The ANWES table lists attendances reported for the employee during the selected period. The Start Date and End Date columns represent the duration of the attendance. The A/AType column displays the attendance code reported on the timesheet. Double click on a date on the ANWES table to obtain more detailed information on a particular attendance, such as the hours reported.
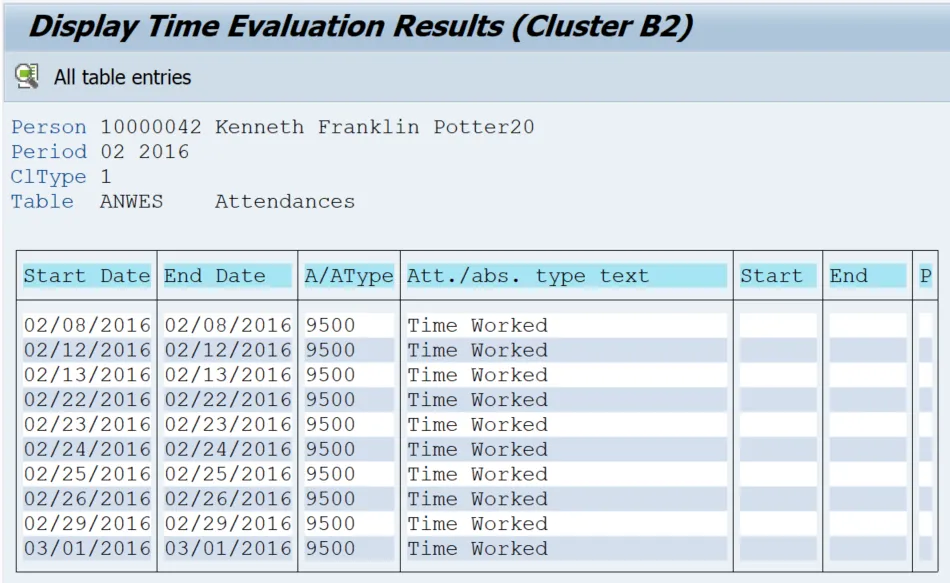
Note: Time Evaluation processes time data for the day before and the day after any given period.
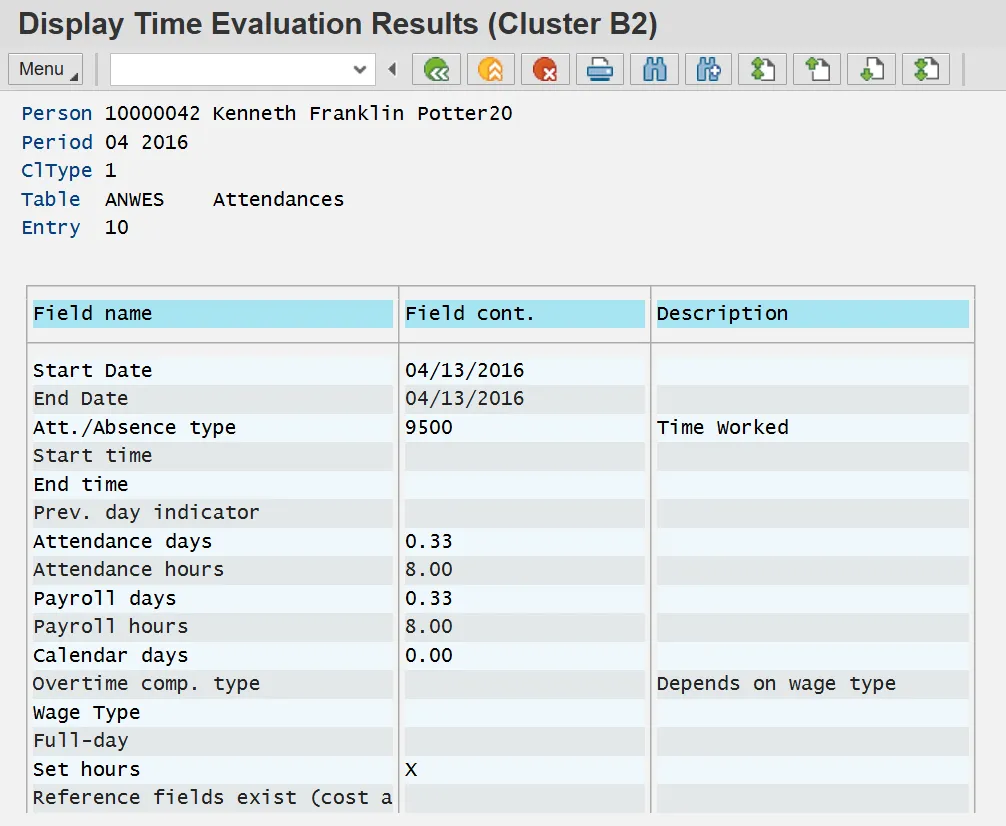
Step 18. Double click on any line item to see more details, such as the number of hours worked.
Step 19. Click the Back (F3) button to go back to the previous screen for the same period (month) or back to the main screen to select a different period (month).
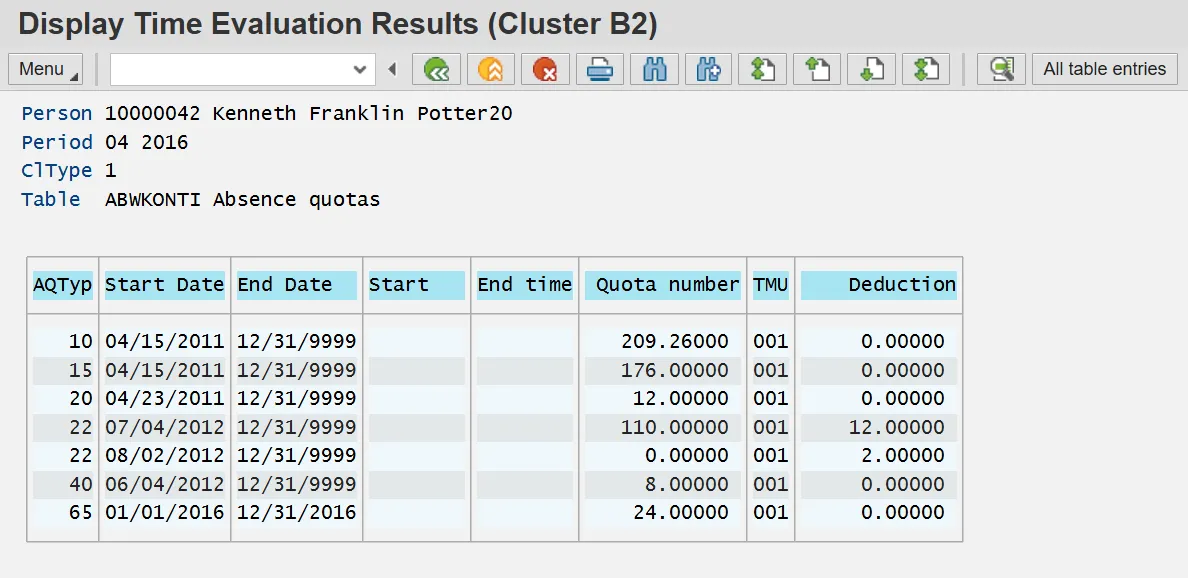
ABWKONTI: Absence Quotas
Step 20. Double click ABWKONTI in the Time data group. The ABWKONTI table lists an employee's current quota entitlement as well as the current deductions from that entitlement. The AQTYP column displays the quota number. The Start Date and End Date columns represent the duration of the quota. The Quota number column displays the employee's total entitlement (including both leave taken, and leave accrued but not yet taken). The Deduction column displays the total deductions that have been taken against the entitlement.
Tip: To determine an employee's current quota balance, reduce the amount of the quota entitlement by the amount of the deduction.
Step 21. Click the Back (F3) button to go back to the previous screen for the same period (month) or back to the main screen to select a different period (month). Click any line item to view another period for the selected employee. Otherwise, the system task is complete.