Purpose
The purpose of this Business Process Procedure is to demonstrate how to use transaction CATS_APPR_LITE to approve released time on behalf of an employee’s supervisor.
Business Need: Time Approval or Rejection is required.
Procedure: CATS_APPR_LITE
There are 9 steps in this process.
Step 1. Access transaction CATS_APPR_LITE.
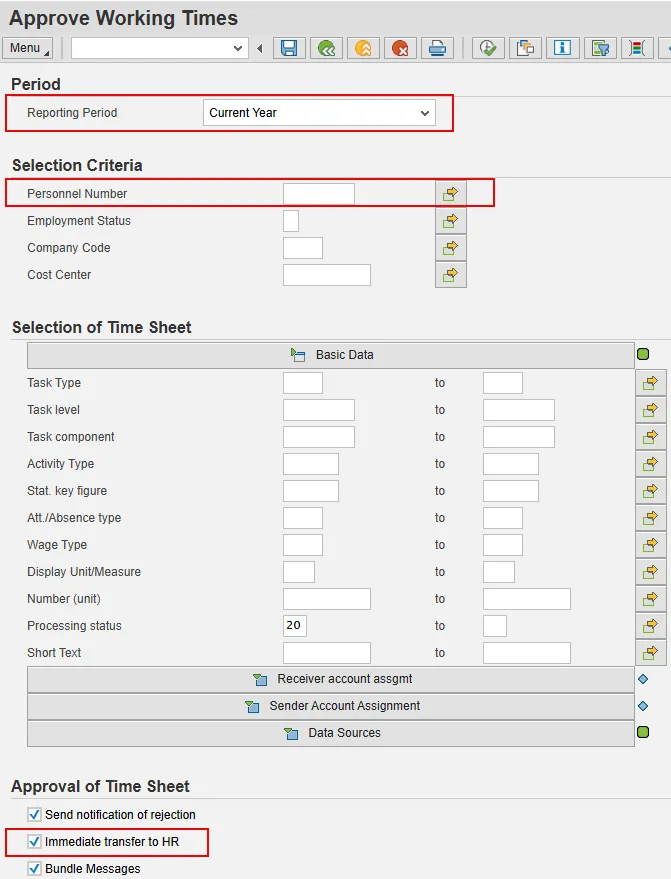
Step 2. Click the Reporting Period dropdown and select Current Year. Other possible selections are Current Payroll Period, Current Month, Current Year, etc.
Step 3. Enter the personnel number in the Personnel Number field.
- If you need to approve/reject time for more than one person, click the Multiple Selection button to the right of the personnel number field to enter multiple personnel numbers.
- On the Multiple Selection for Personnel Number screen, the system will default to the Select Single Values tab. Type each personnel number into the Single Value column.
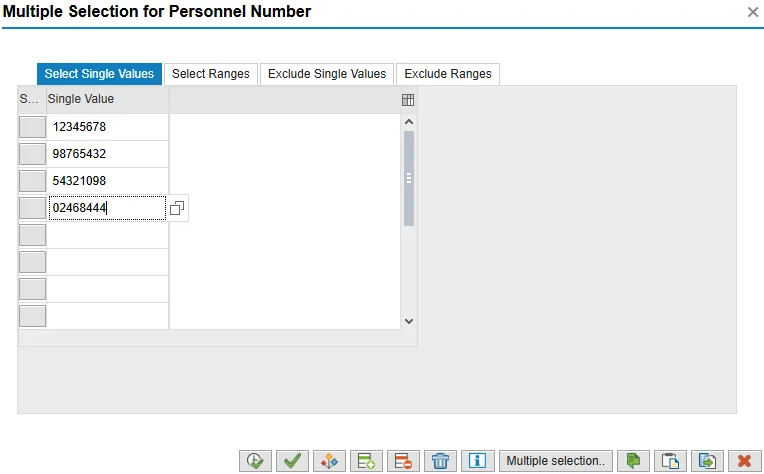
- Information: You can use the other tab options to Exclude Single Values or to select or exclude (personnel number) ranges. For ranges, remember that personnel numbers are not often in order within your Agency, but you will not be able to view personnel numbers outside of your approved organizational structure view.
- When you have finished entering personnel numbers, select the Copy icon.
Step 4. Under Approval of Time Sheet, check the Immediate transfer to HR checkbox if time transfer cannot wait for the overnight process.
Step 5. Select Execute to view the list of time entries requiring attention.
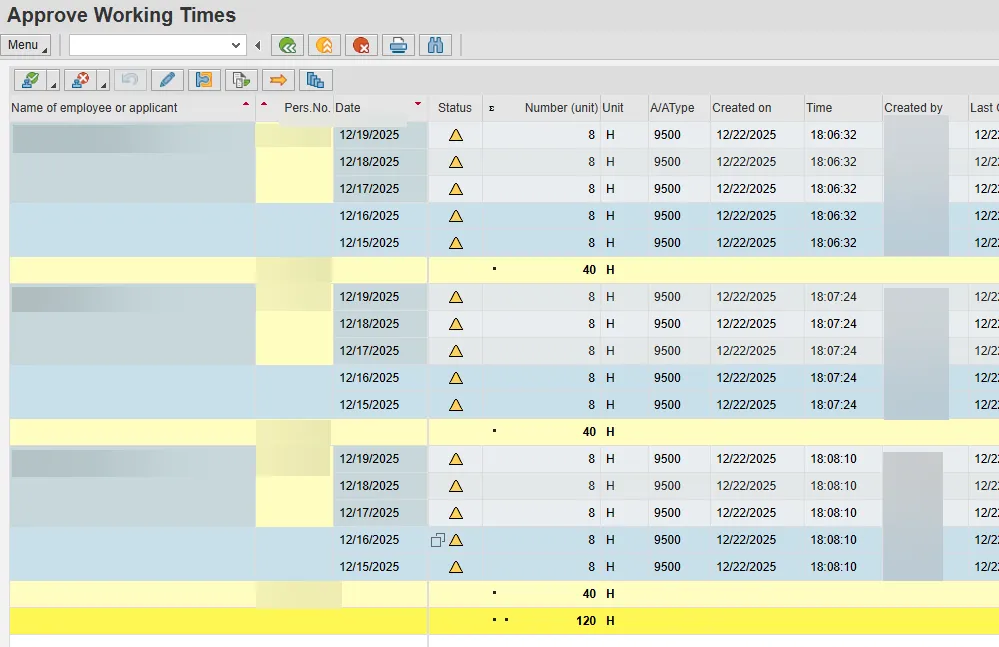
Step 6. Select the time entry row or rows to be approved. The rows selected will be highlighted. You can select multiple rows by holding down the CTRL key on your keyboard as you select the rows. In the example above, the time entries dated 12/15/2025 and 12/16/2025 have been selected/highlighted.
Tip: If you want to select all the rows displayed, select the top time entry row, press the Shift key, and then select the bottom row in the list.
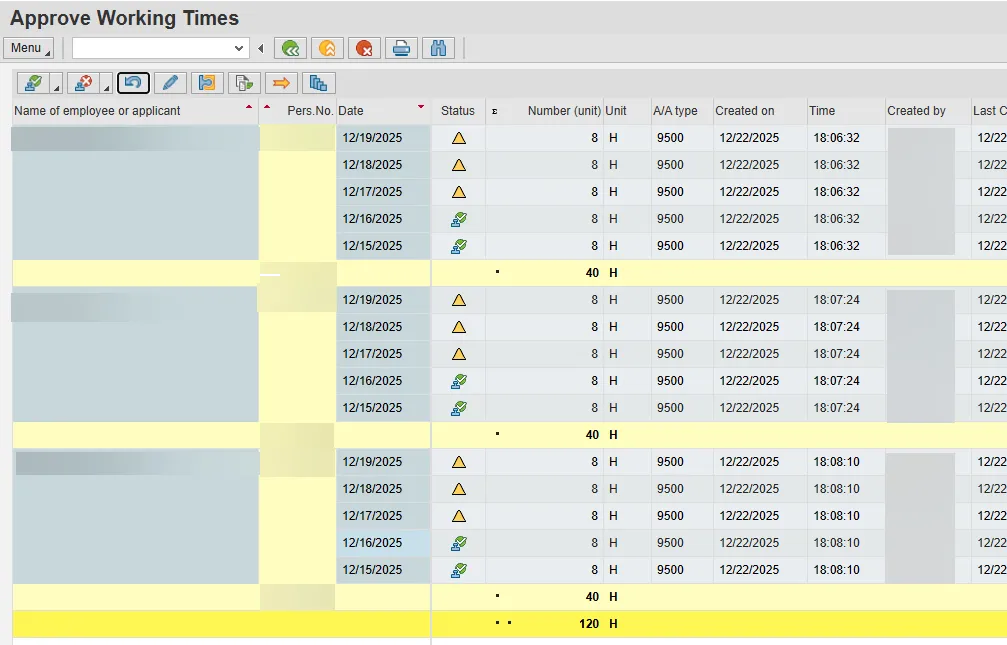
Step 7. Click the Approve icon (green check) to approve the highlighted rows. In the following example, you can see that the highlighted rows from the previous example are now approved.
Step 8. When finished, click the Back (F3) button to return to the main screen.
Step 9. To verify that the lines you have approved were successfully approved, click Execute again to re-run the list.
REJECTING TIME ENTRIES
There are 3 steps in this process.
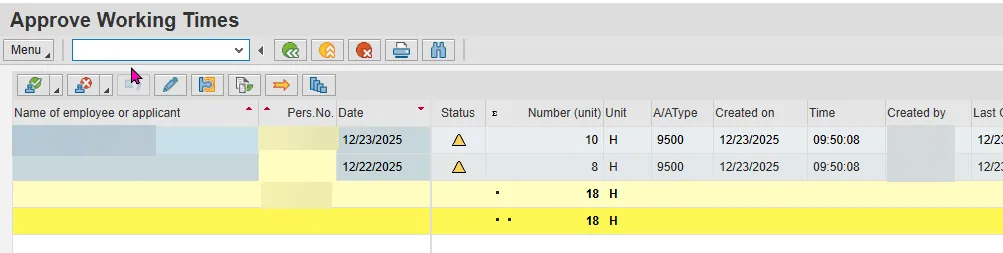
Step 1. Select the time entry row to be rejected.
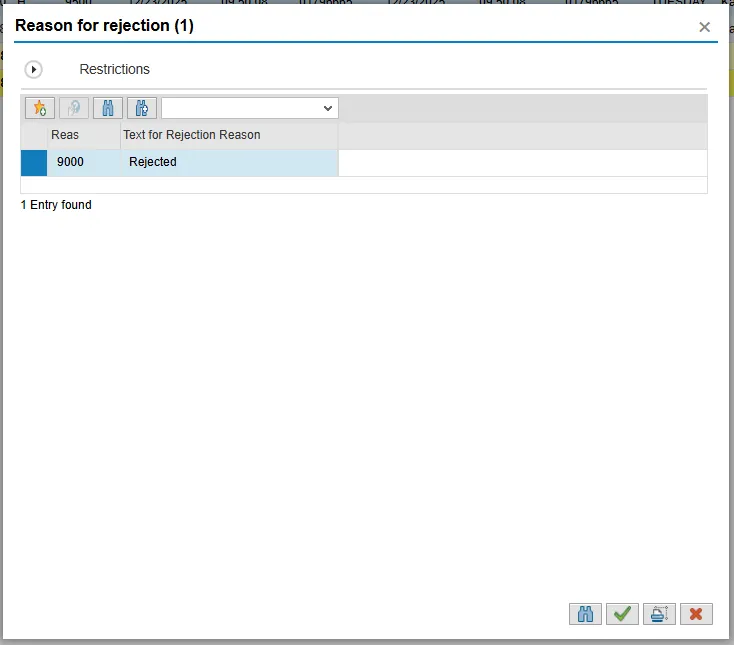
Step 2. Select the Reject icon (red X). At the Reason for rejection pop-up, select Copy (green check).
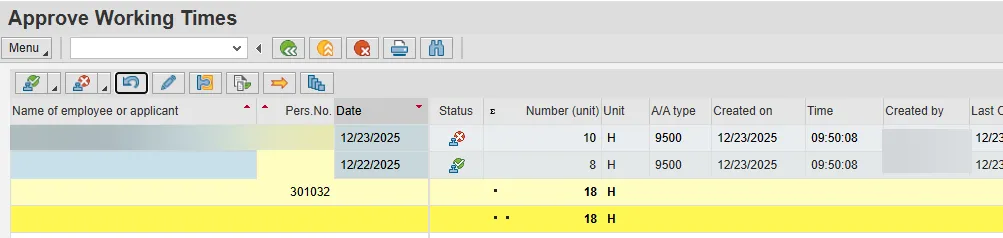
Step 3. Select the Back (F3) button. The system task is complete.
Important: While you can still see the approval or rejection status on this screen, you can highlight the last line or group of lines you approved or rejected and revoke the approval or rejection status with the Undo approve/Undo reject button. Once you have left this list, you will no longer have this option.