Purpose
The purpose of this Quick Reference Guide (QRG) is to provide a step-by-step explanation of how to Update Fixed Assets Setup and Configurations in the North Carolina Financial System (NCFS).
Introduction and Overview
This QRG covers the process of updating setup and configurations for Fixed Assets in NCFS which includes updates of locations, categories, and asset books etc.
User Tip
The following are prerequisites to update setup and configurations:
-
Gather all required information required for the new setup or updates to the existing configurations.
Update Fixed Assets Setup and Configurations
To update Fixed Assets Setup and Configuration in NCFS, please follow the steps below. There are 10 steps to complete this process.
Step 1. Log in to the NCFS portal with your credentials to access the system.
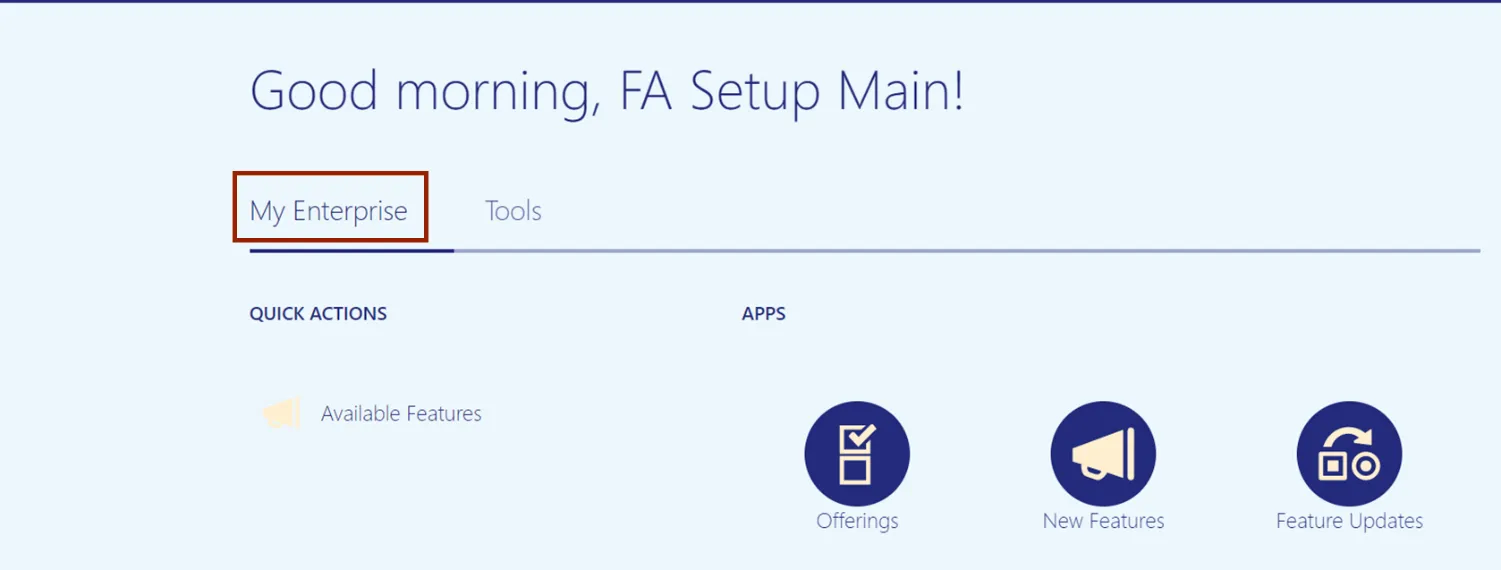
Step 2. On the Home page, Click on My Enterprise tab.
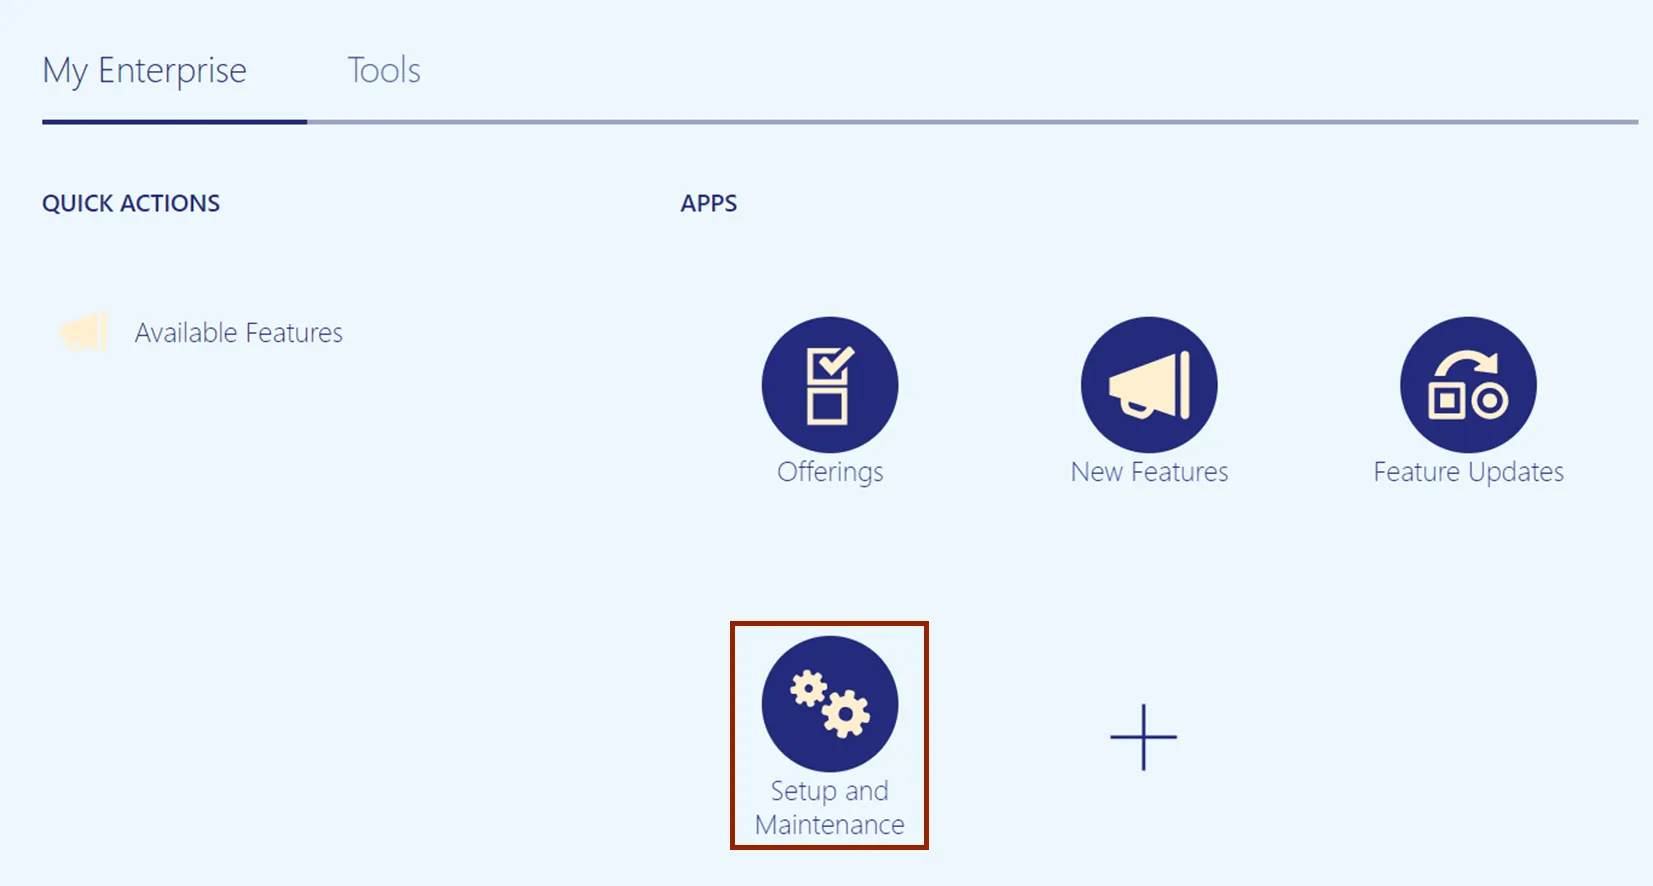
Step 3. Click on Setup and Maintenance app.
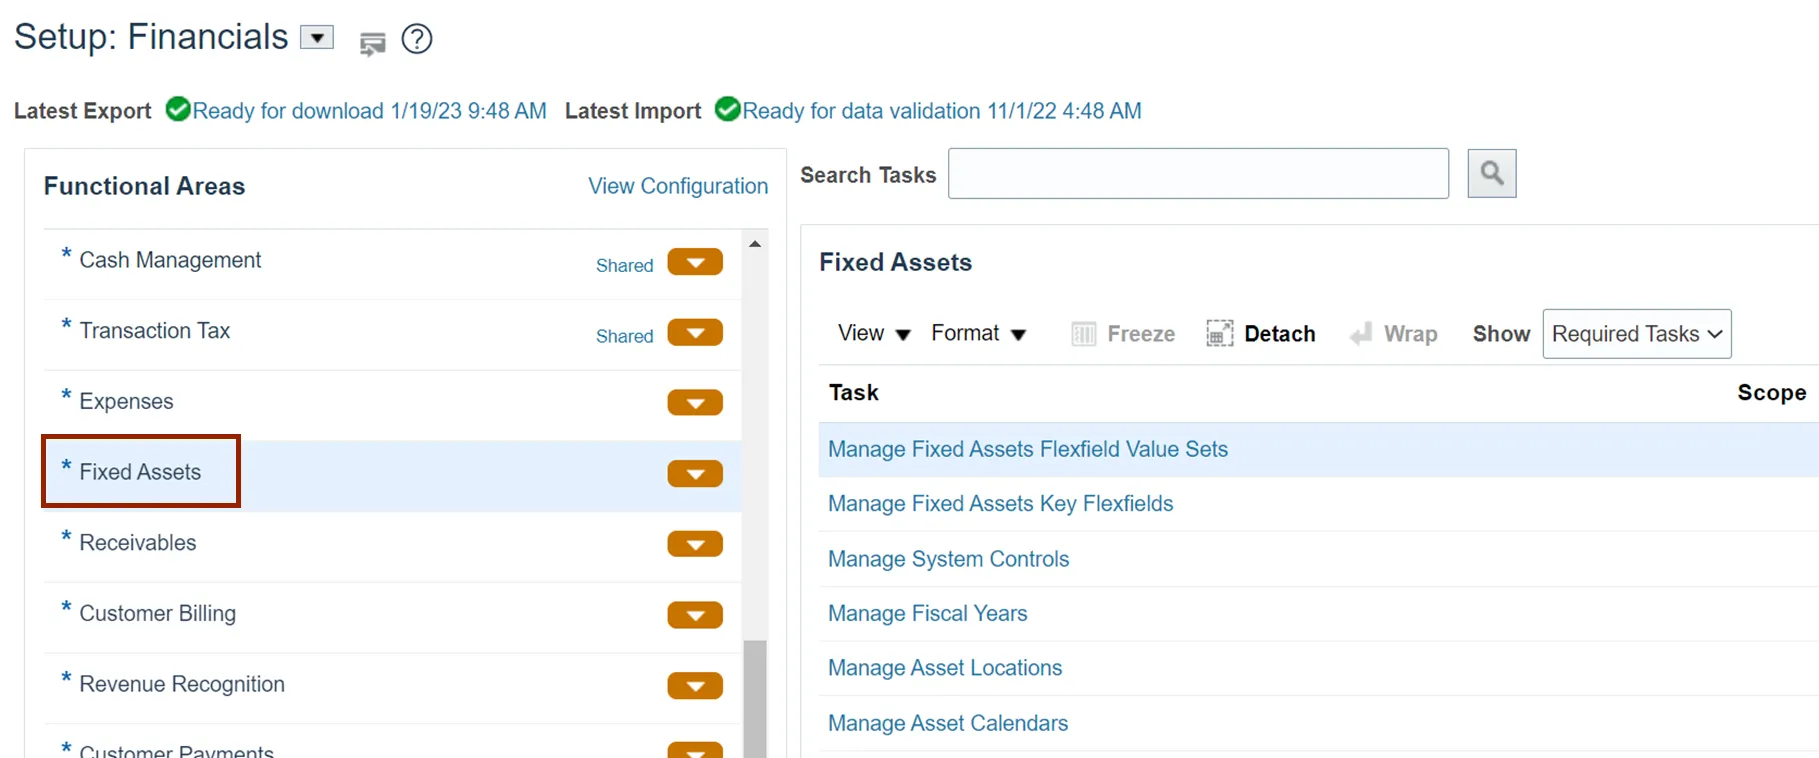
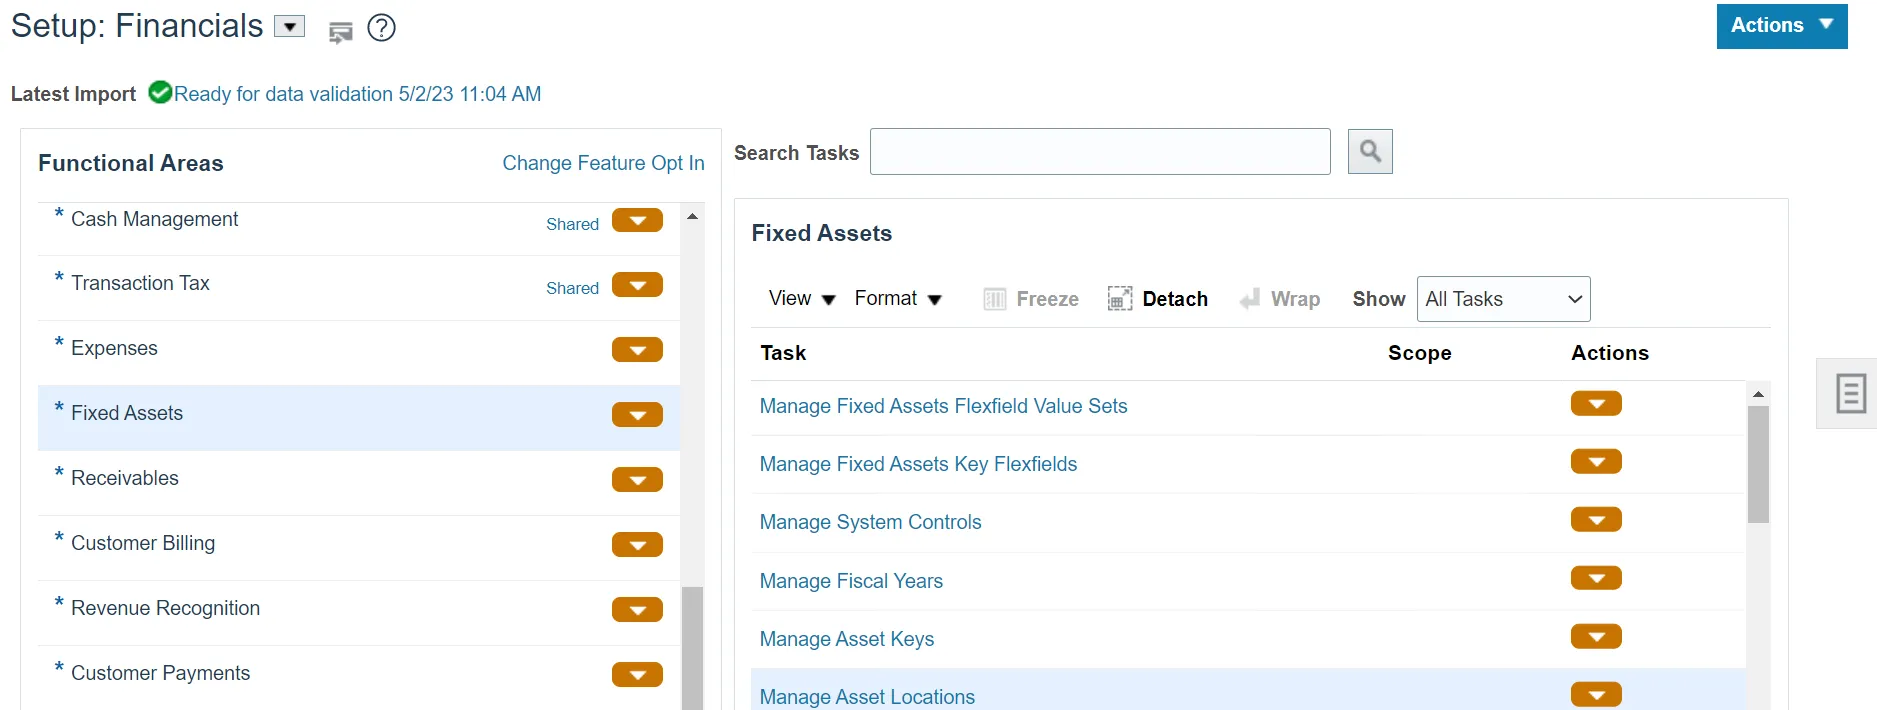
Step 4. On the Setup: Financials page, click *Fixed Assets under the Functional Areas.
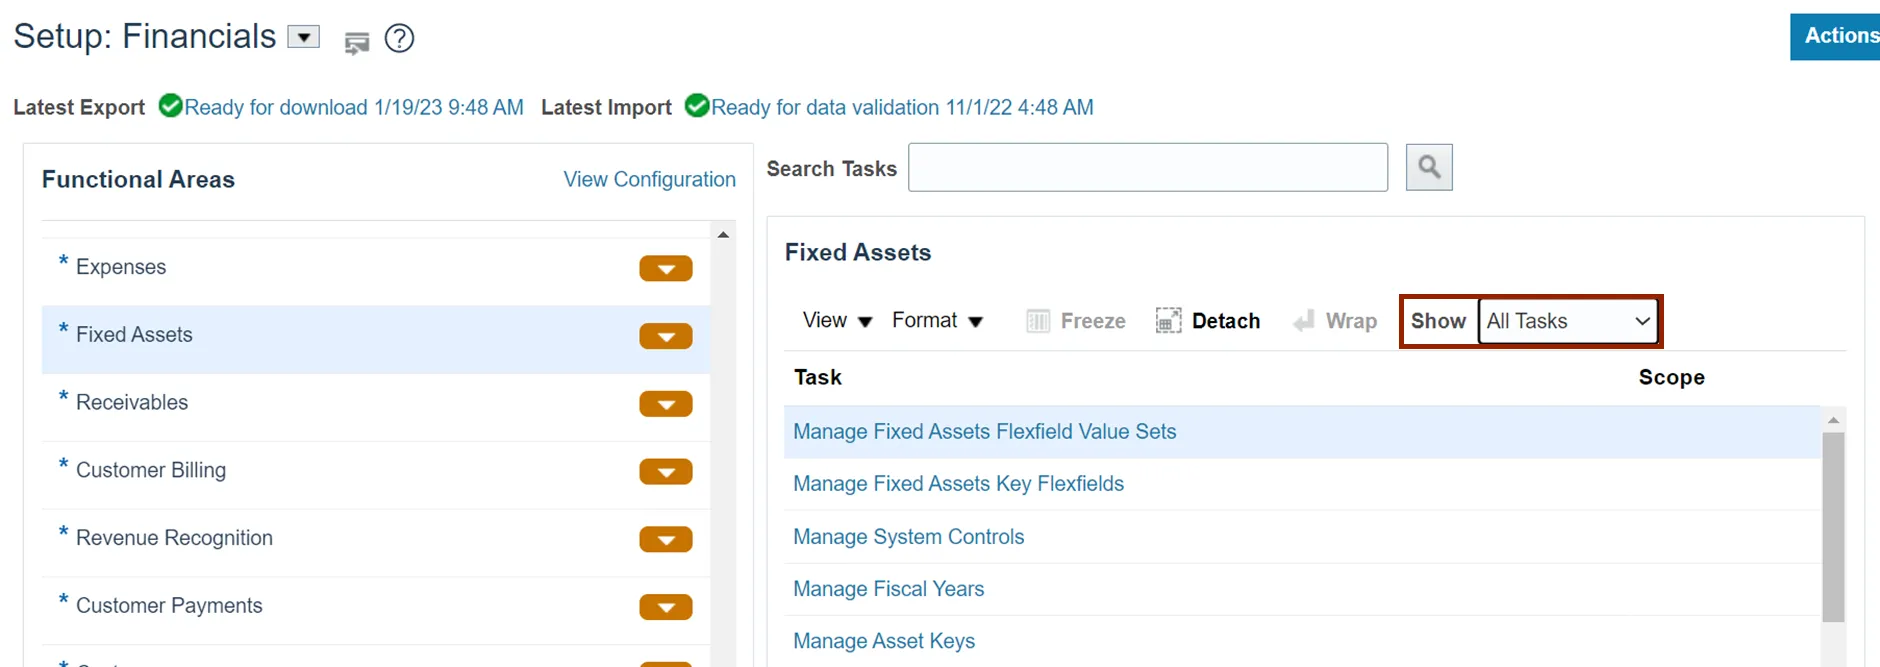
Step 5. On the right-hand side of the page, select All Tasks from the Show drop-down choice list.
Step 6. The Fixed Assets section will show all the configuration tasks that are available for Fixed Assets.
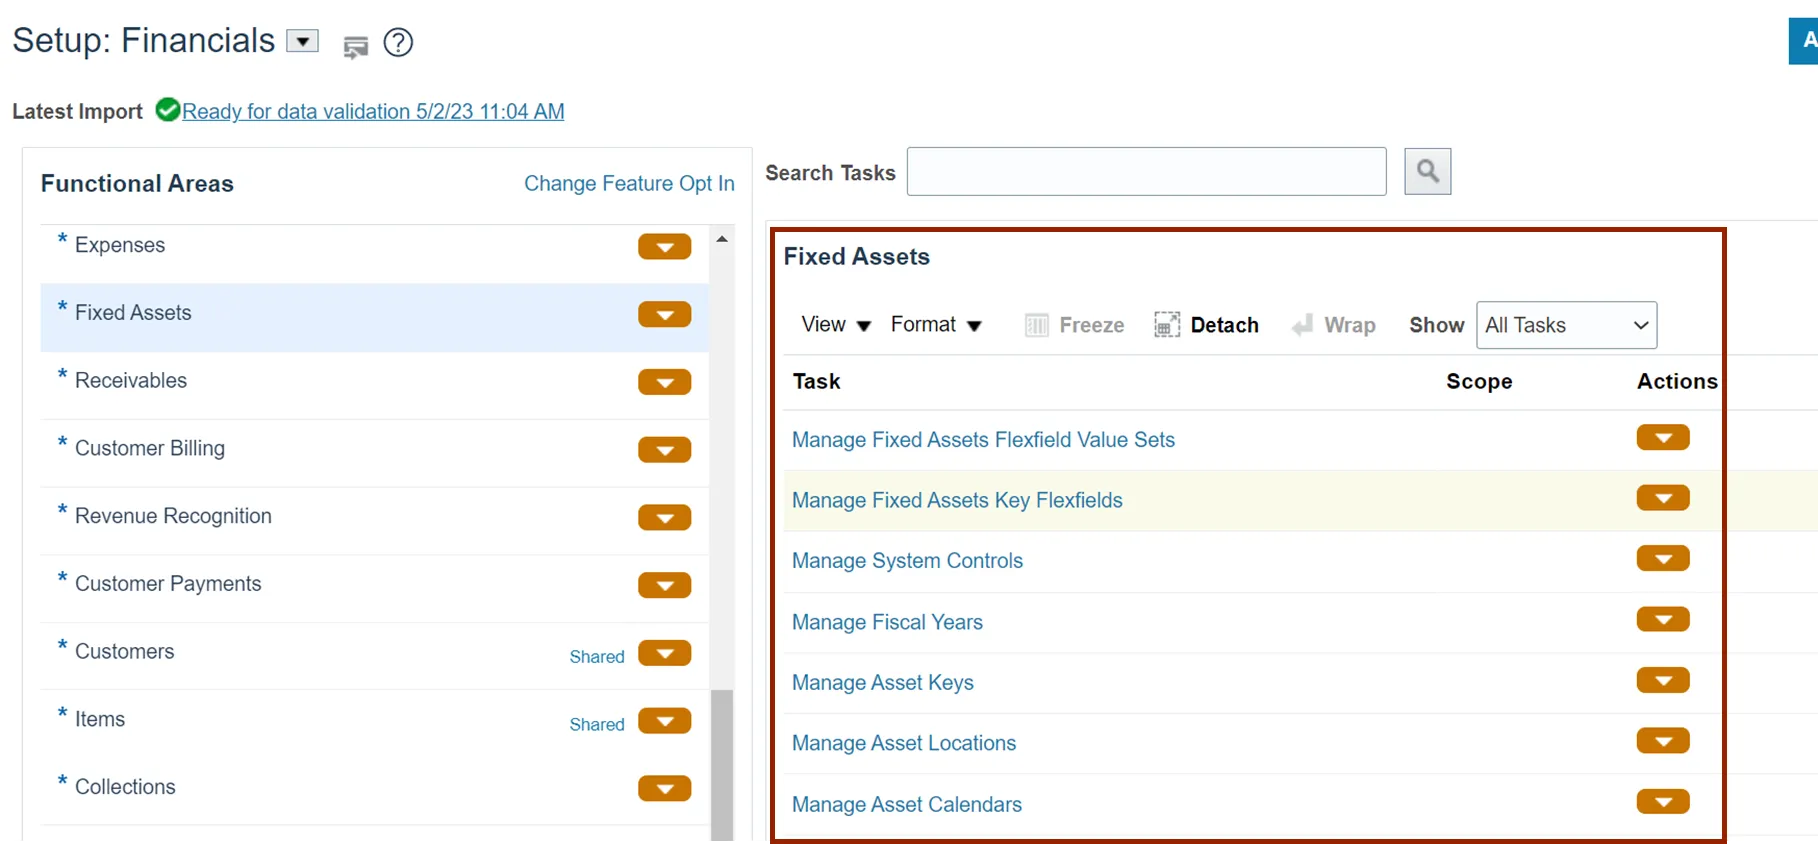
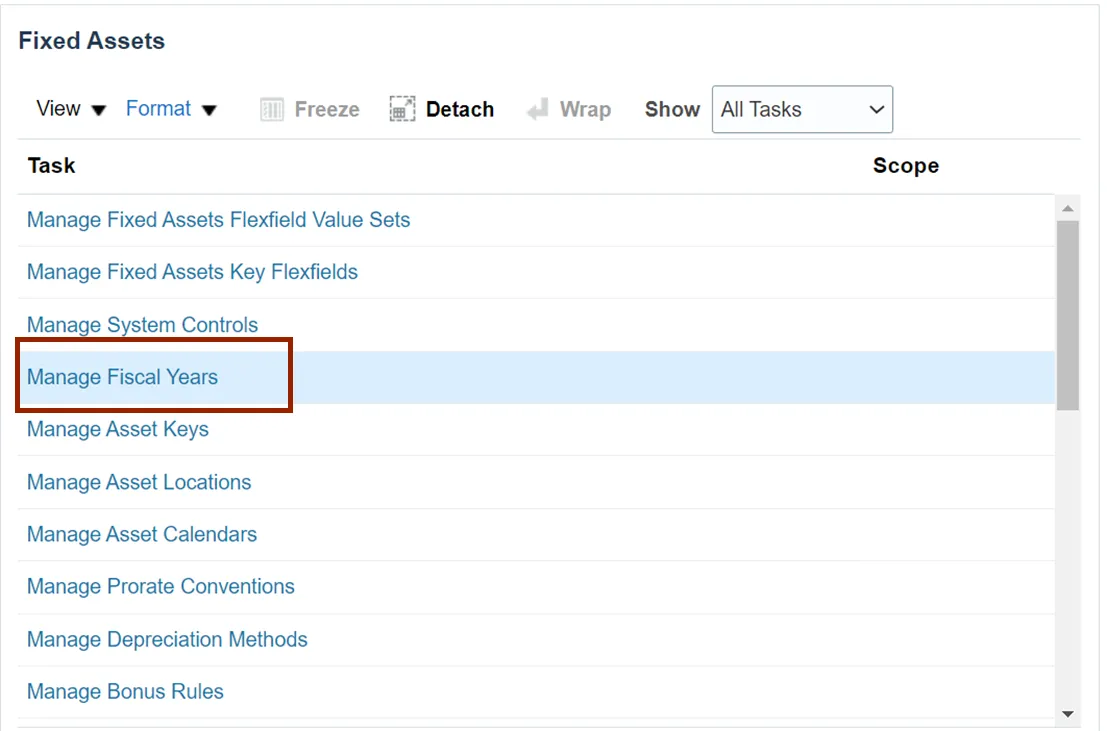
Step 7. Click the Manage Fiscal Years link.
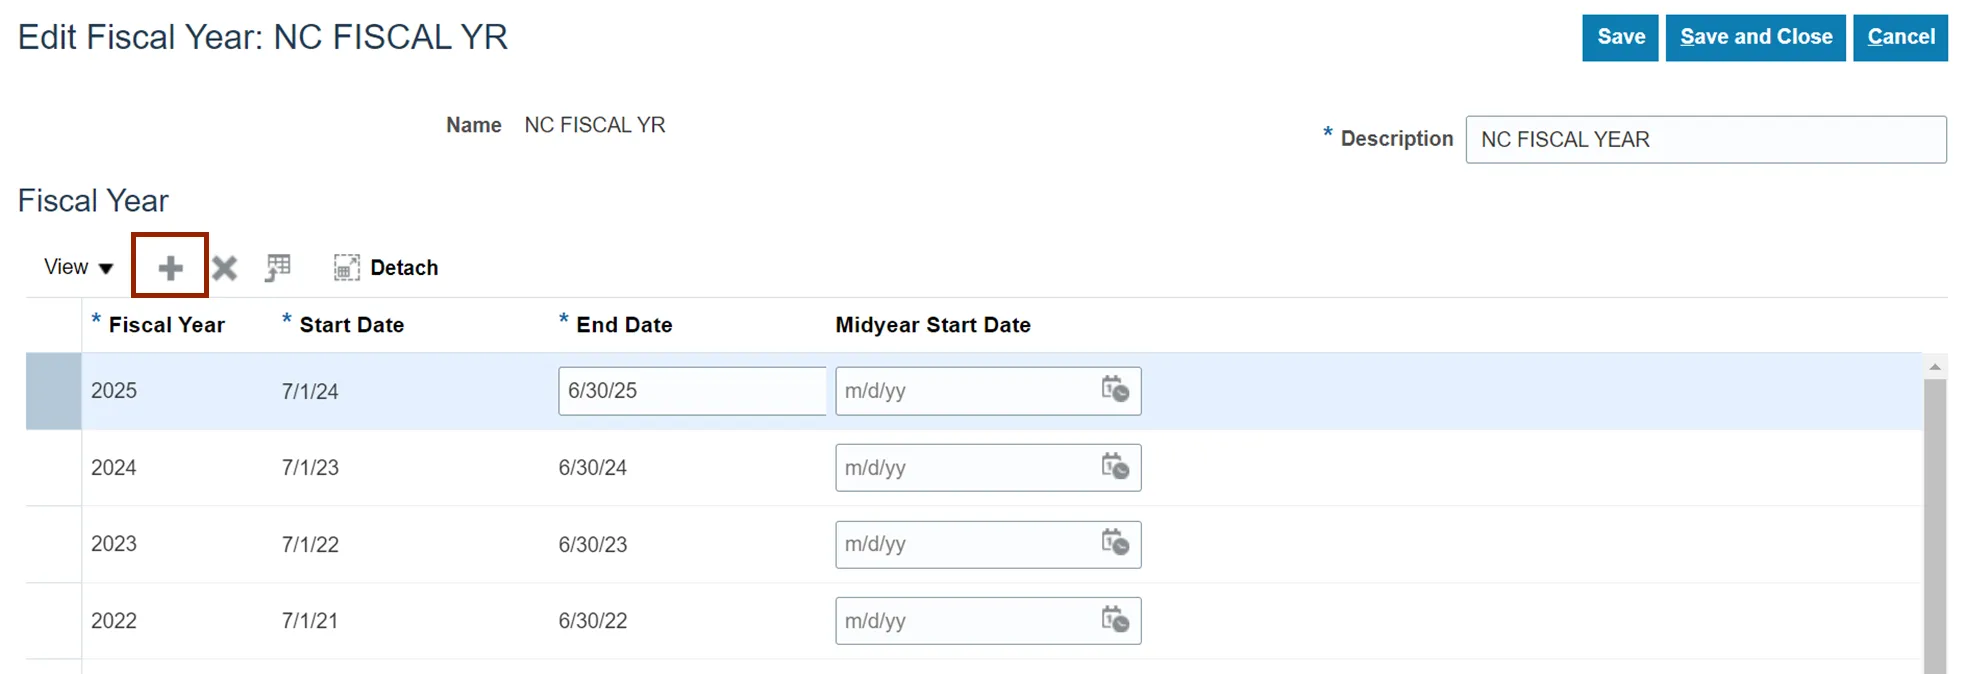
Step 8. The Manage Fiscal Years page opens. Click the NC FISCAL YR link.

Step 9. Click the Plus icon to add new fiscal year. A new row will be added automatically with the *Start Date and *End Date prefilled.
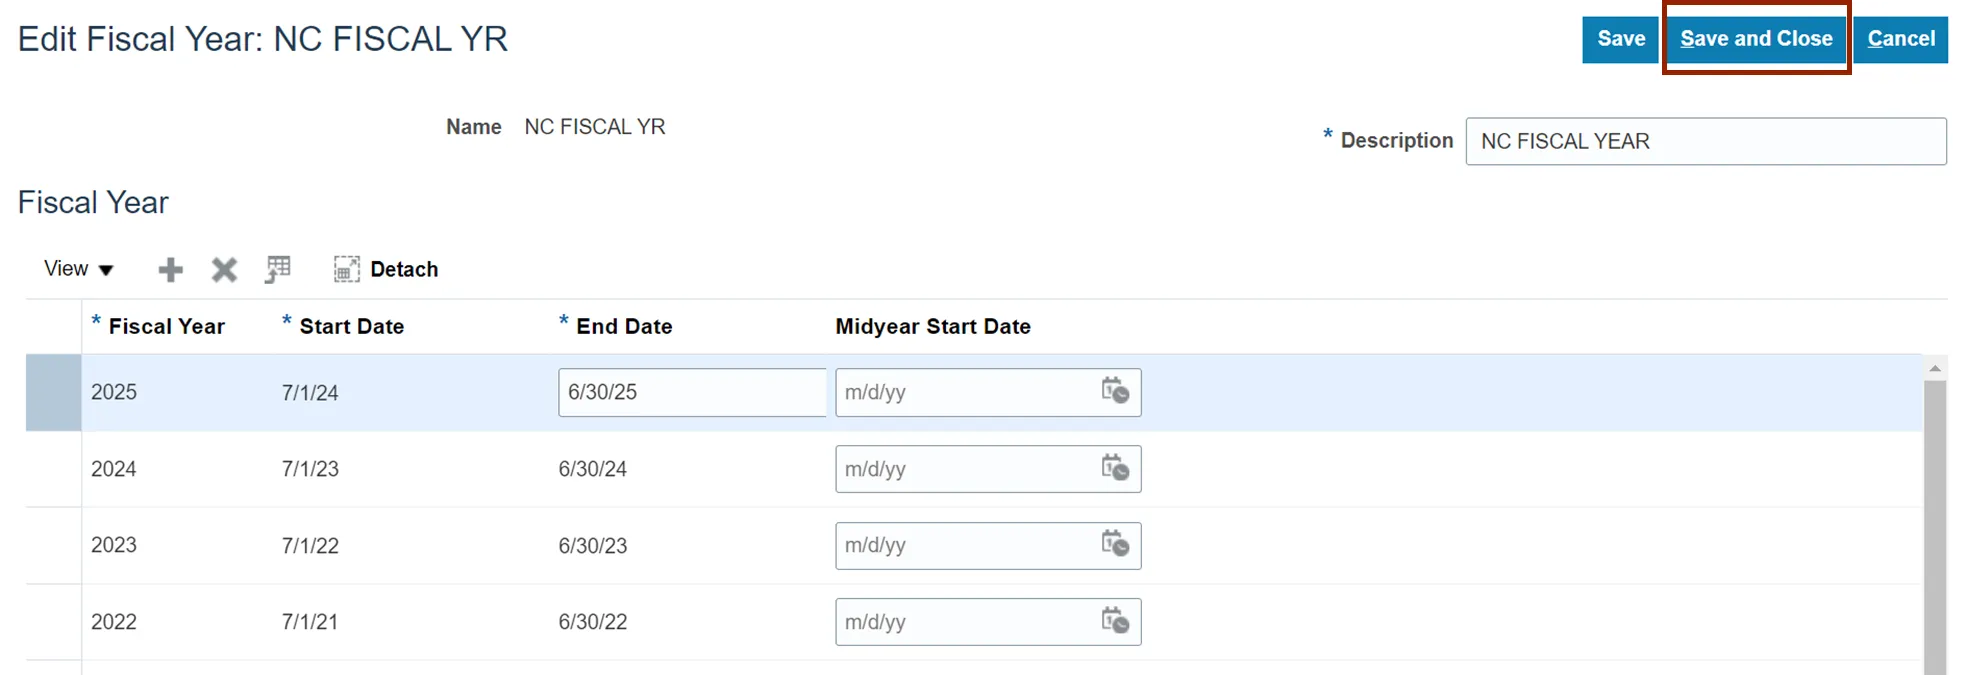
Step 10. Click the Save and Close button to save the updates.
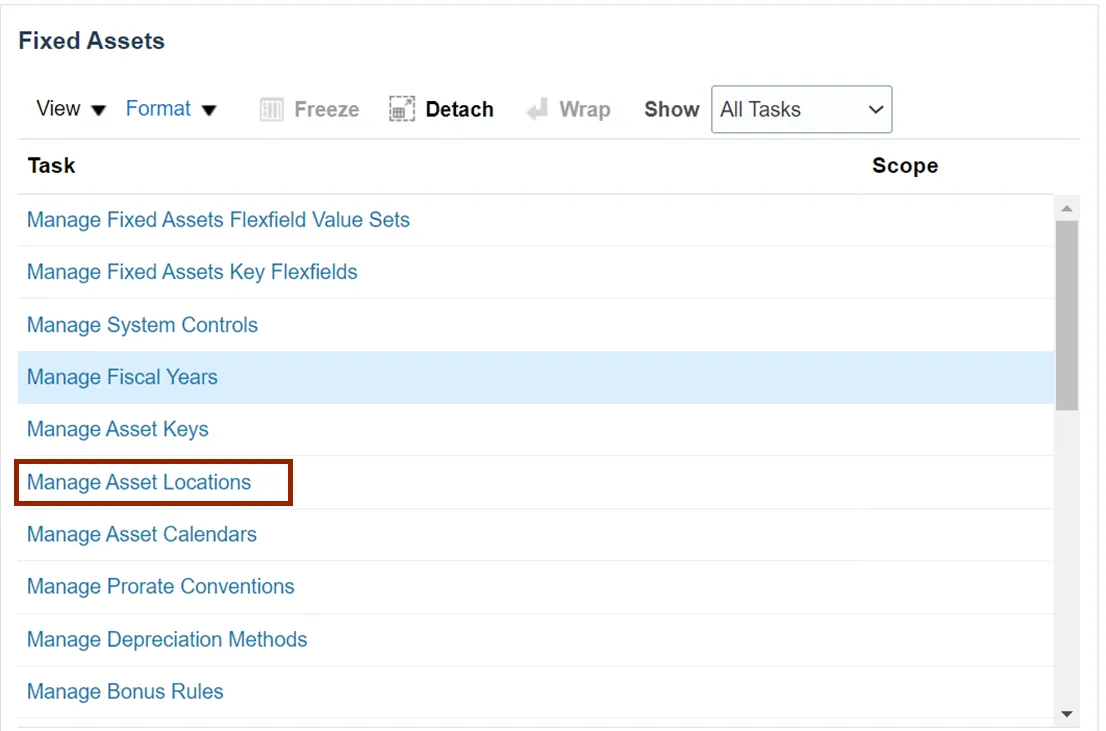
Manage Asset Locations
To manage Asset Locations in NCFS, please follow the steps below. There are 8 steps to complete this process.
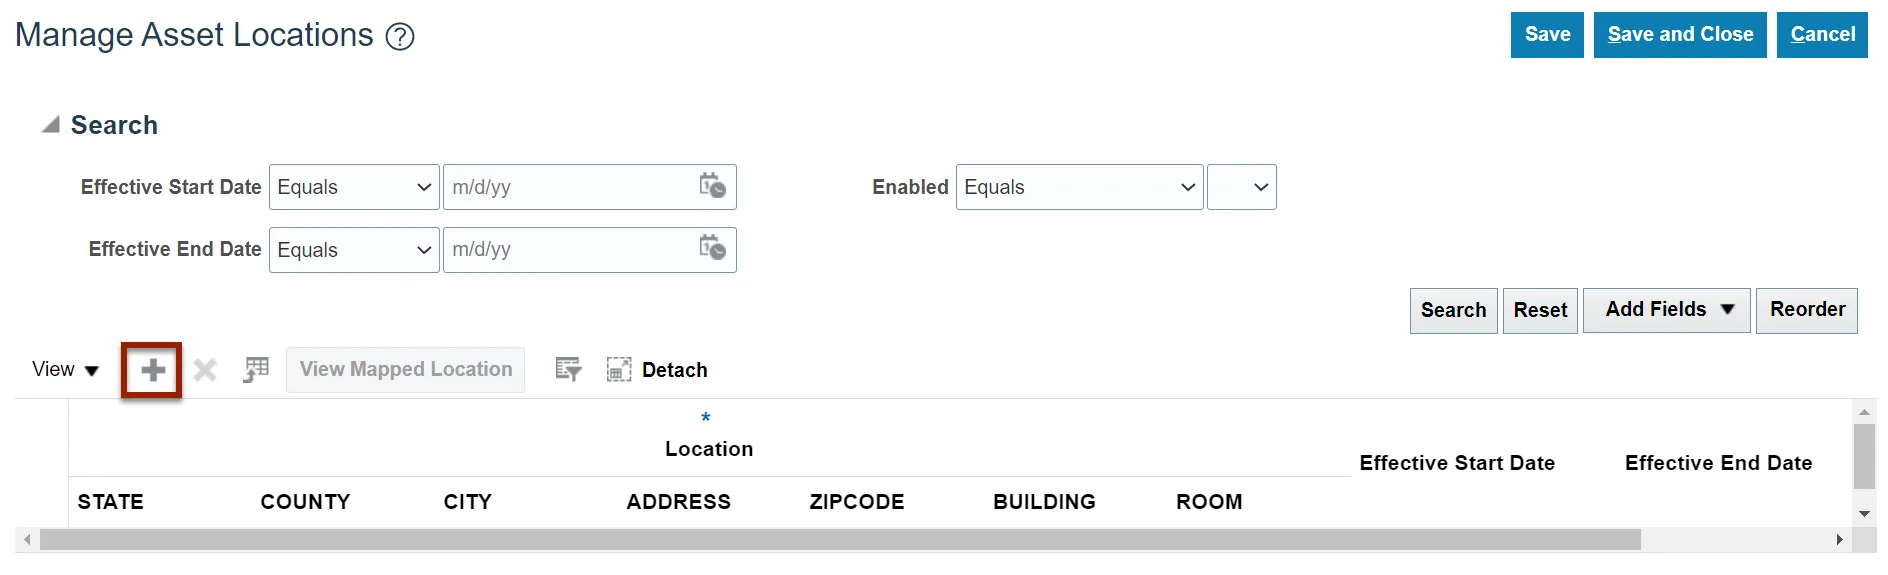
Step 1. Navigate to Setup and Maintenance (Home page > My Enterprise tab > Setup and Maintenance app) and click the Manage Asset Locations link.
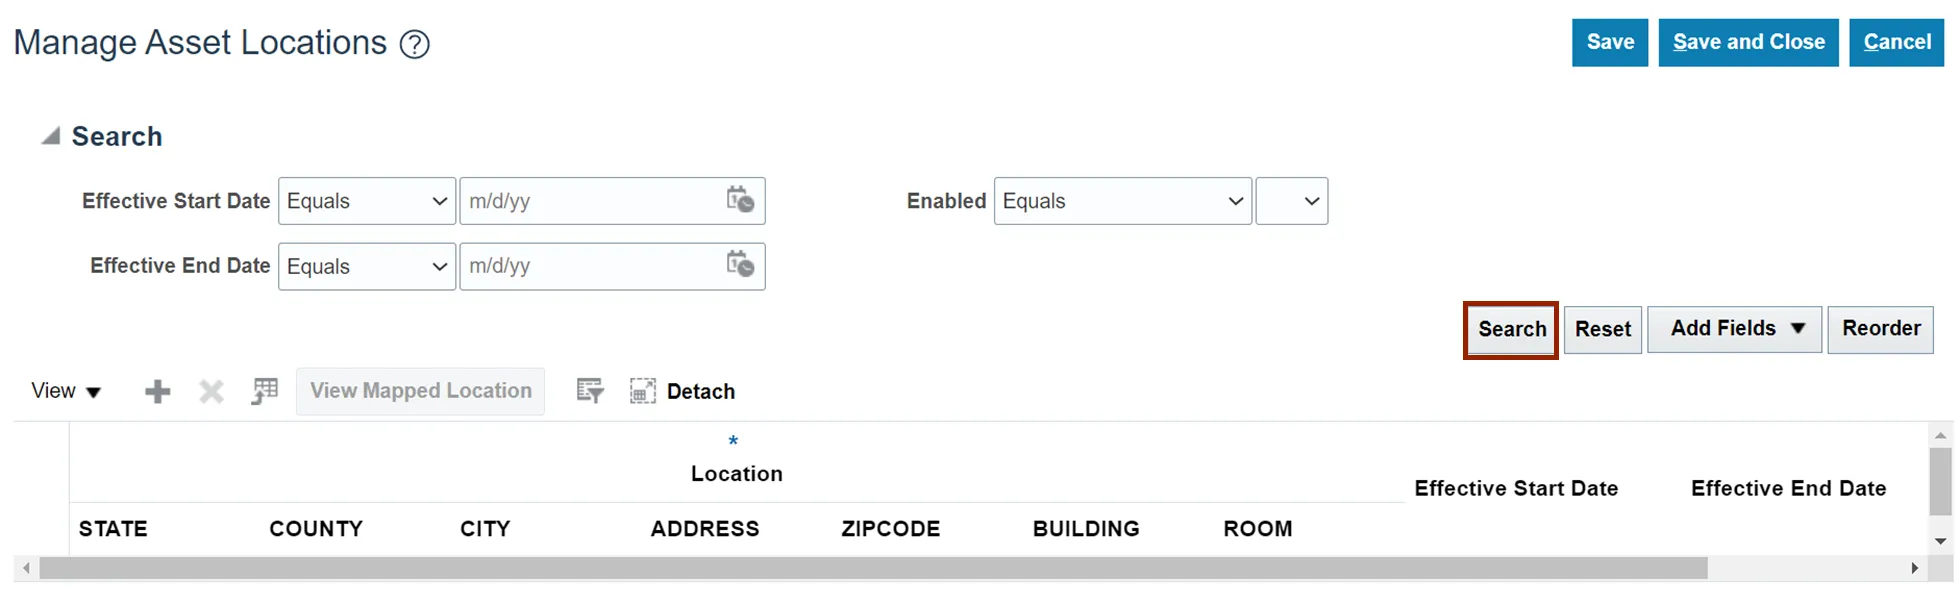
Step 2. On the Manage Asset Locations page, click the Search button to query existing locations.
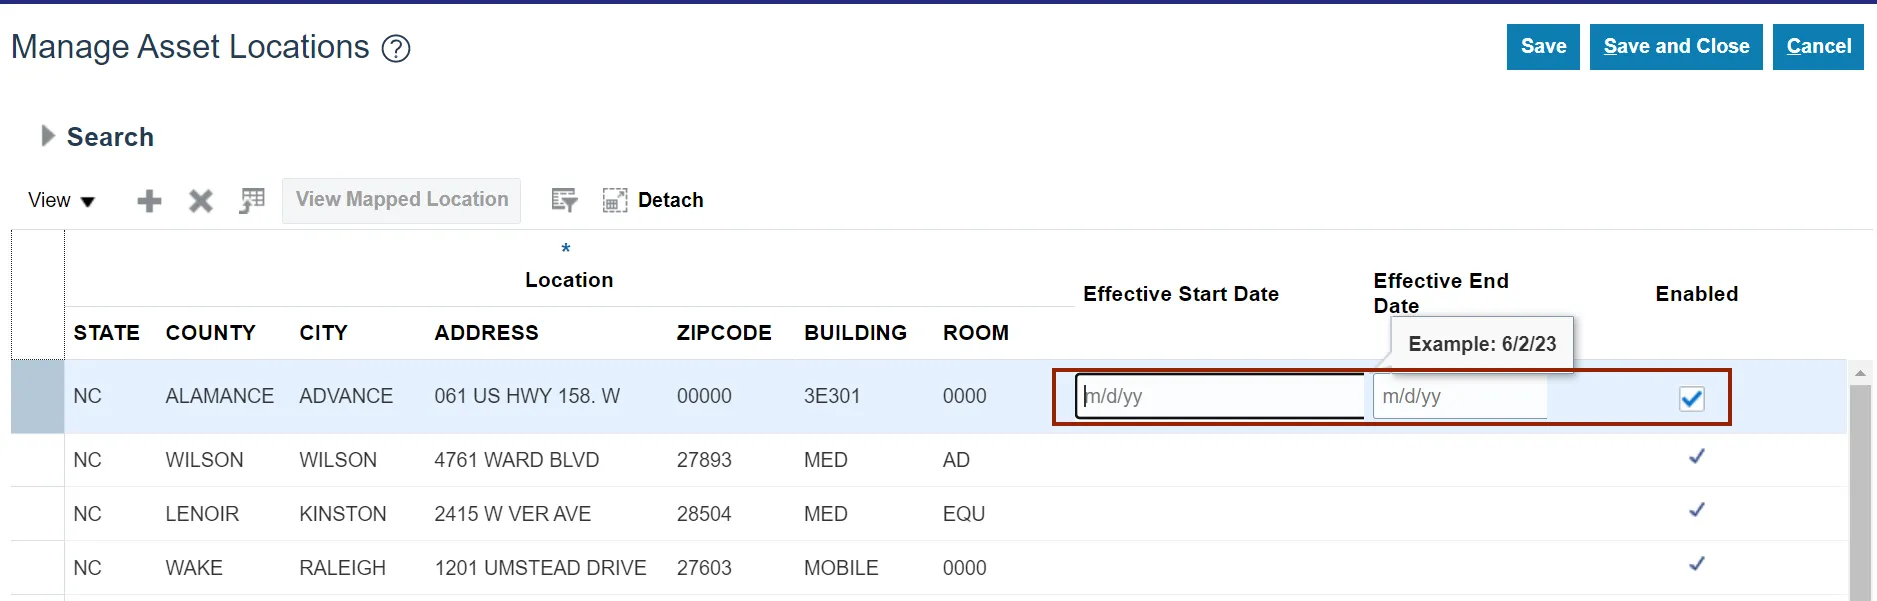
Step 3. Update the Effective Start Date, Effective End Date and Enabled flag as required.
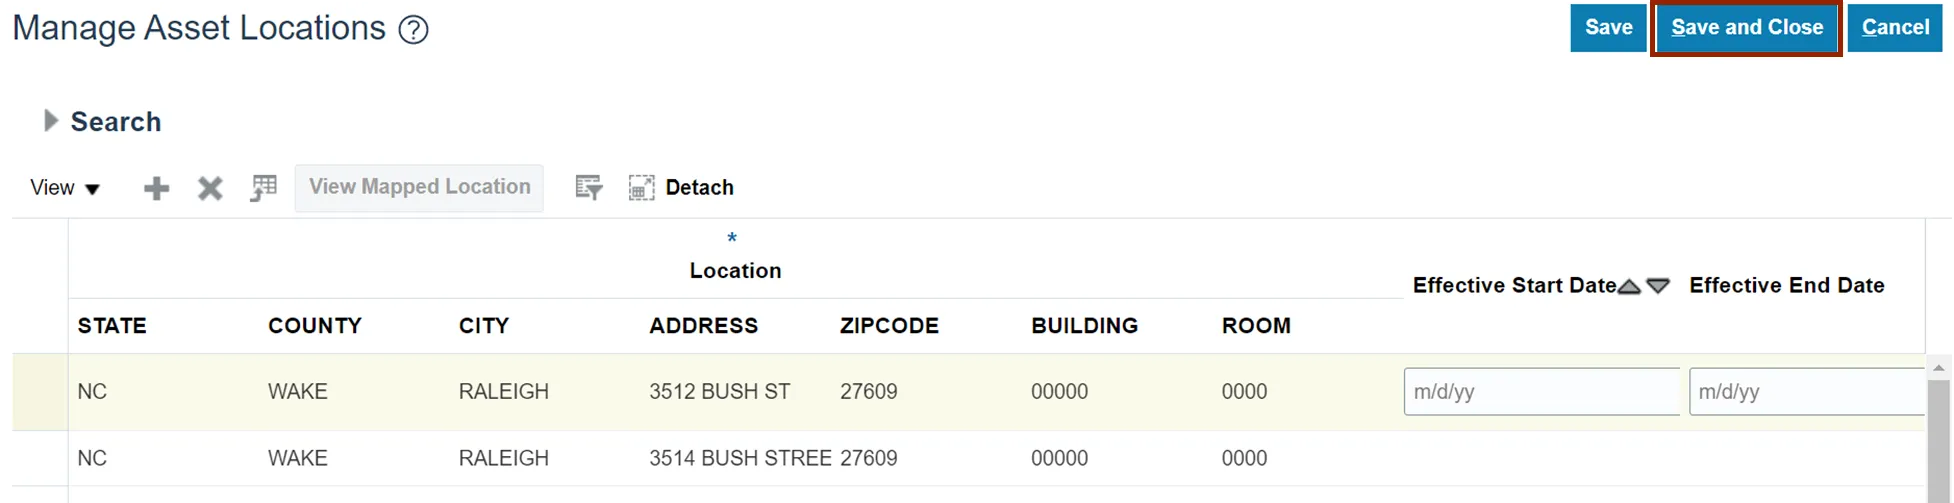
Step 4. Click the Save and Close to save the updates.
Step 5. Click the Plus icon to add a new asset location.
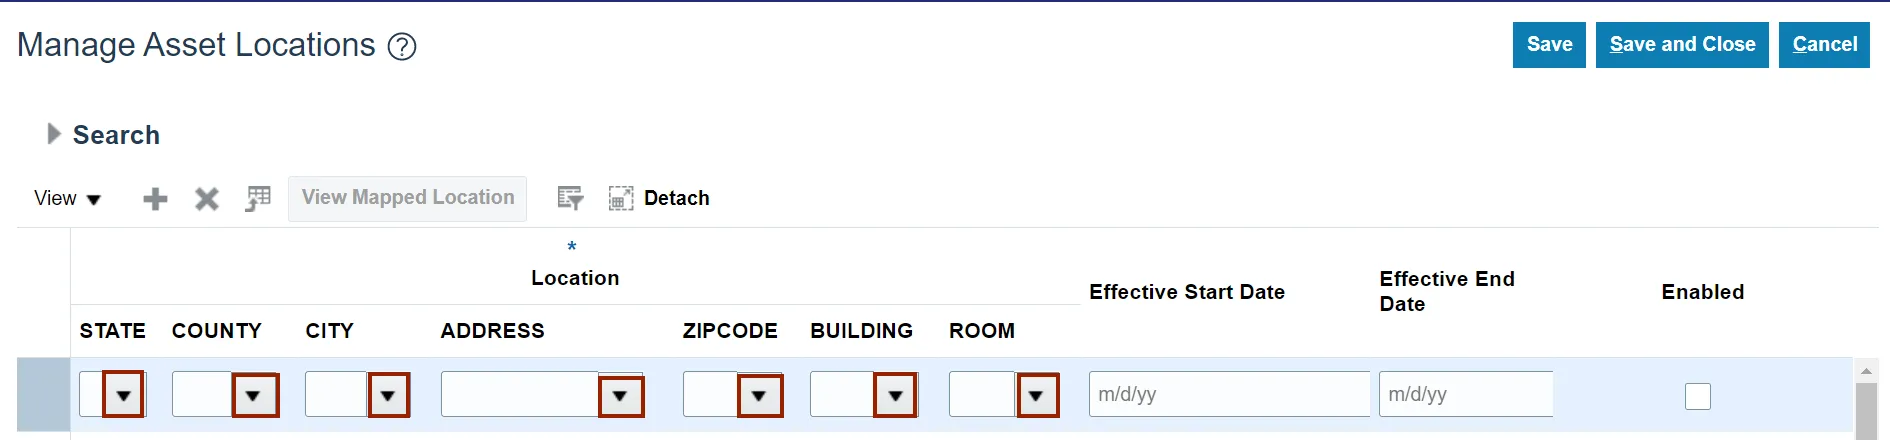
Step 6. Enter the information or select the available values by clicking on the drop-down choice list for each field.
Note: If a value is not available on the drop-down choice list, follow steps 40-52 to add the STATE, COUNTY, CITY, ADDRESS, ZIPCODE, BUILDING, and ROOM.
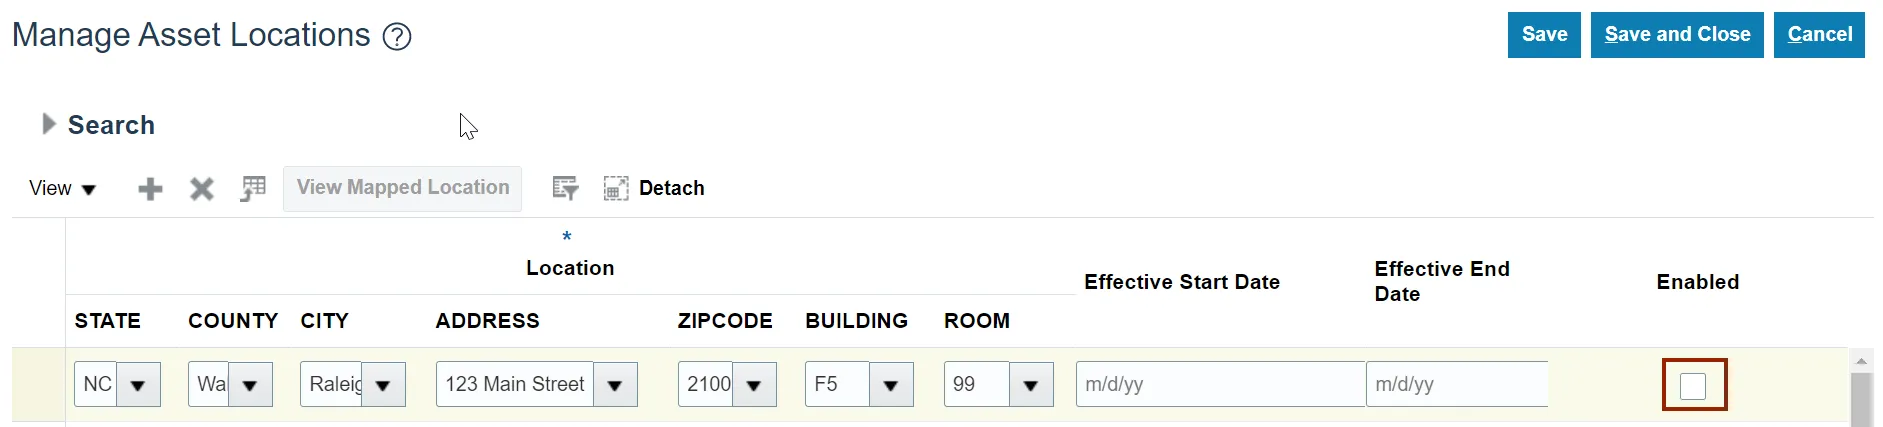
Step 7. Scroll to the right and click the Enabled checkbox to enable the location.
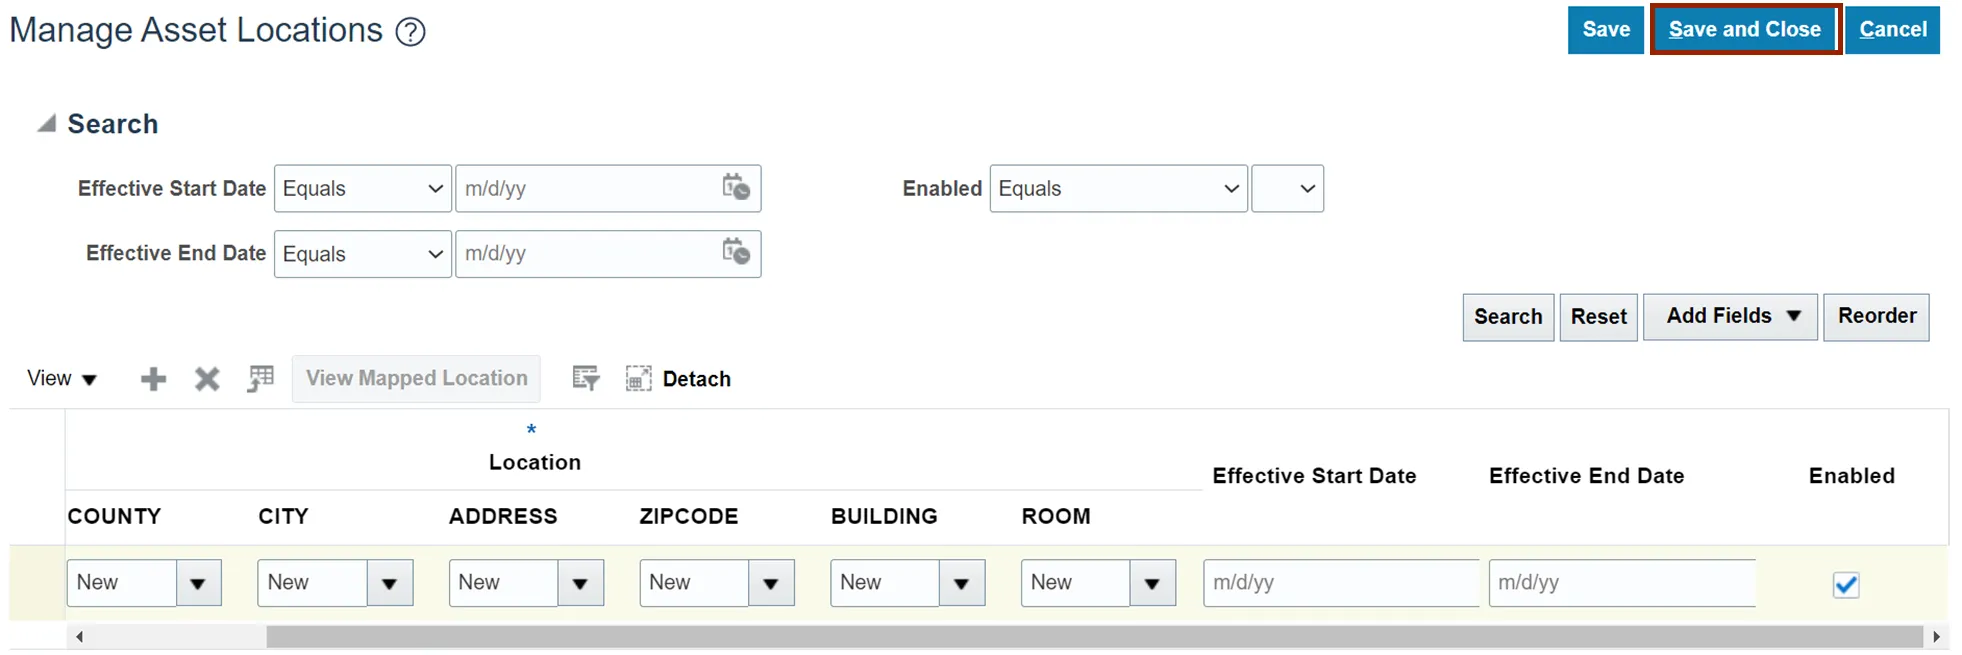
Step 8. Click the Save and Close button to save the new location.
Manage Asset Calendars
To manage Asset Calendars in NCFS, please follow the steps below. There are 4 steps to complete this process.
Step 1. Navigate to Setup and Maintenance (Home page > My Enterprise tab > Setup and Maintenance app) and click the Manage Asset Calendars link.

Step 2. Click the FA MONTHLY link to open the calendar.

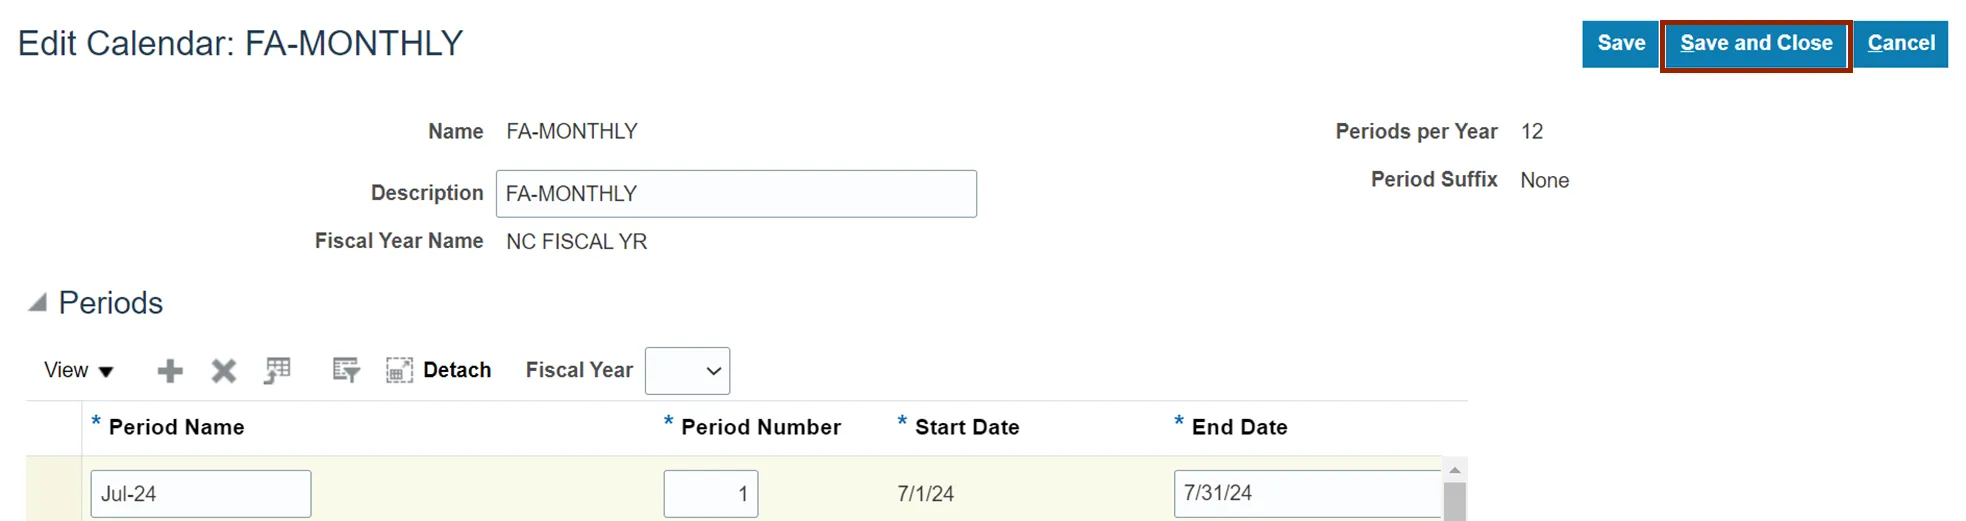
Step 3. Click the Plus icon to add new period to the calendar.
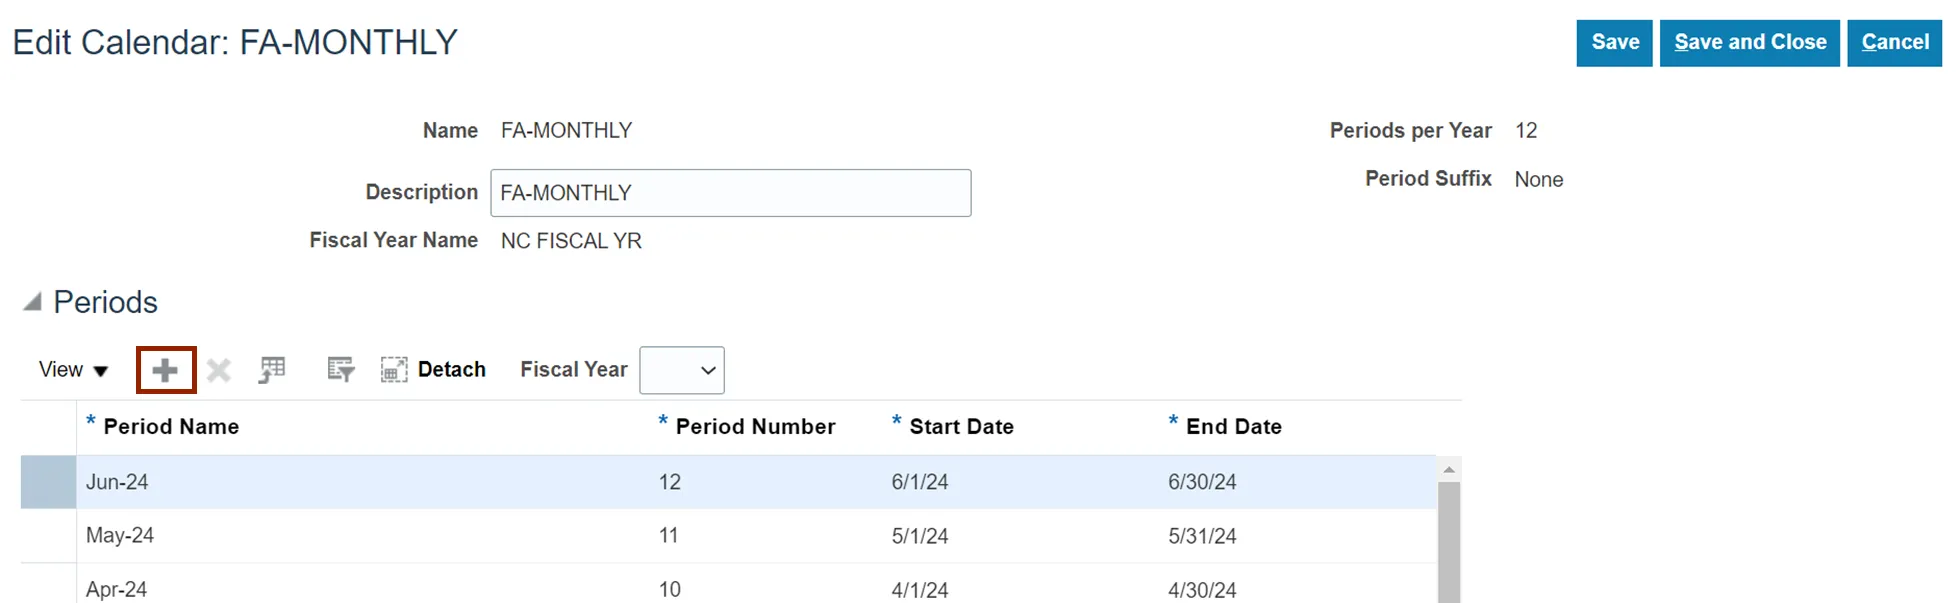
Step 4. Enter all the information for the period and click on Save and Close button when complete.
Manage Asset Books
To manage Asset Books in NCFS, please follow the steps below. There are 12 steps to complete this process.
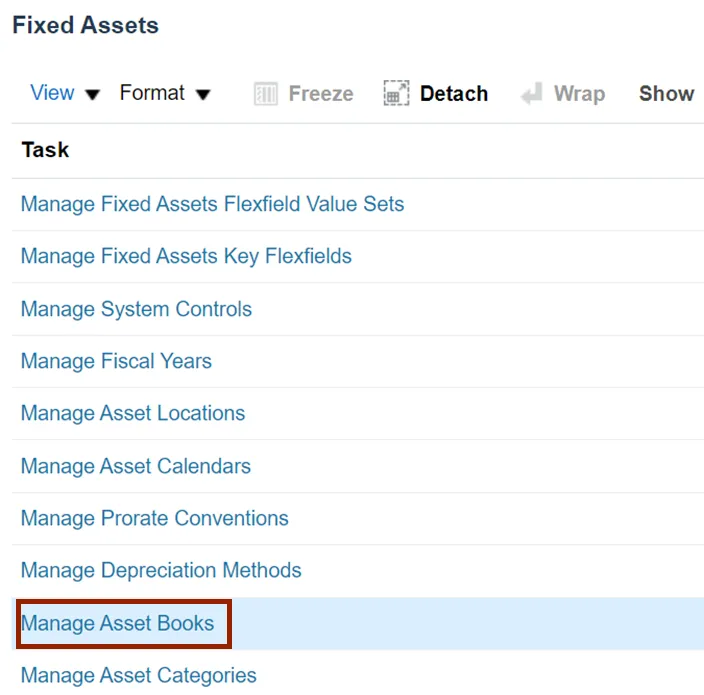
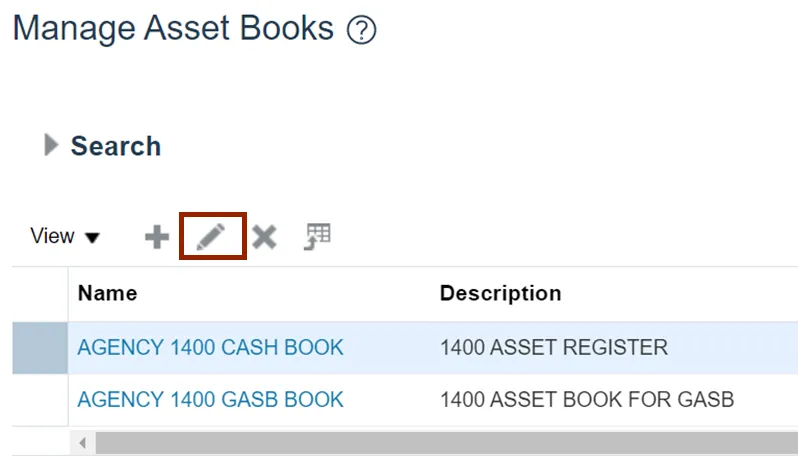
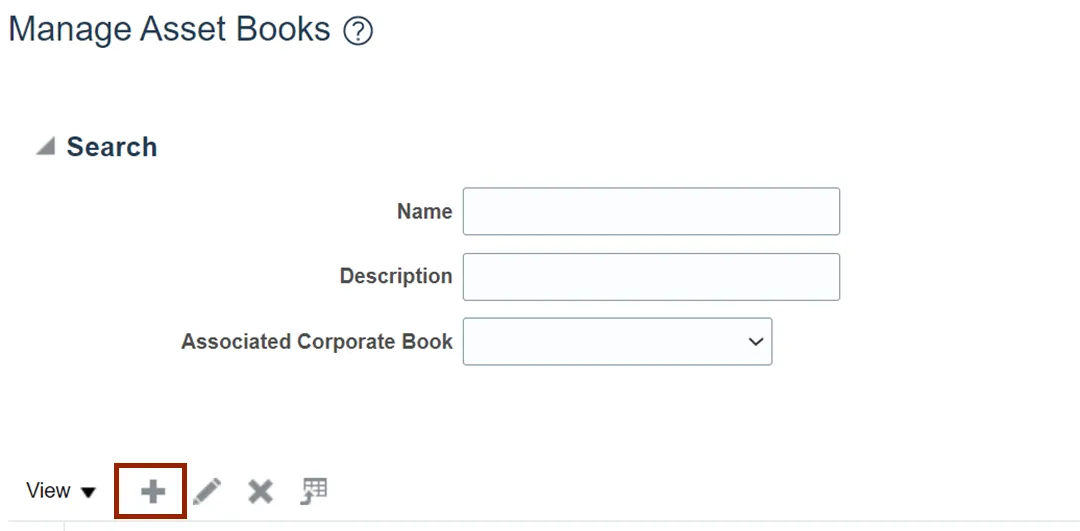
Step 1. Navigate to Setup and Maintenance (Home page > My Enterprise tab > Setup and Maintenance app) and click the Manage Asset Books link.
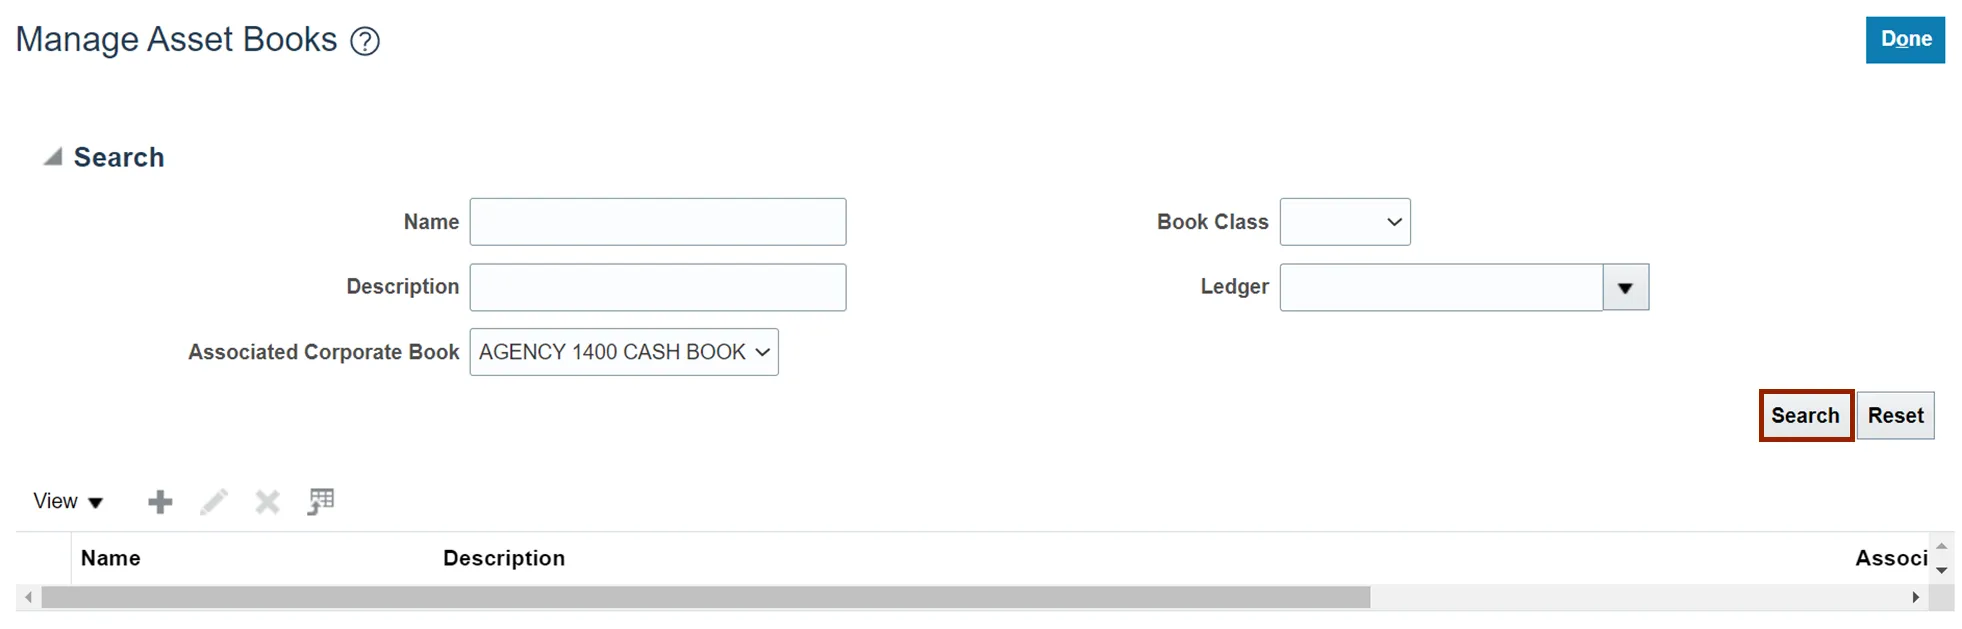
Step 2. Enter the search parameters and click the Search button.
Step 3. Click the Edit ‘pencil’ icon.
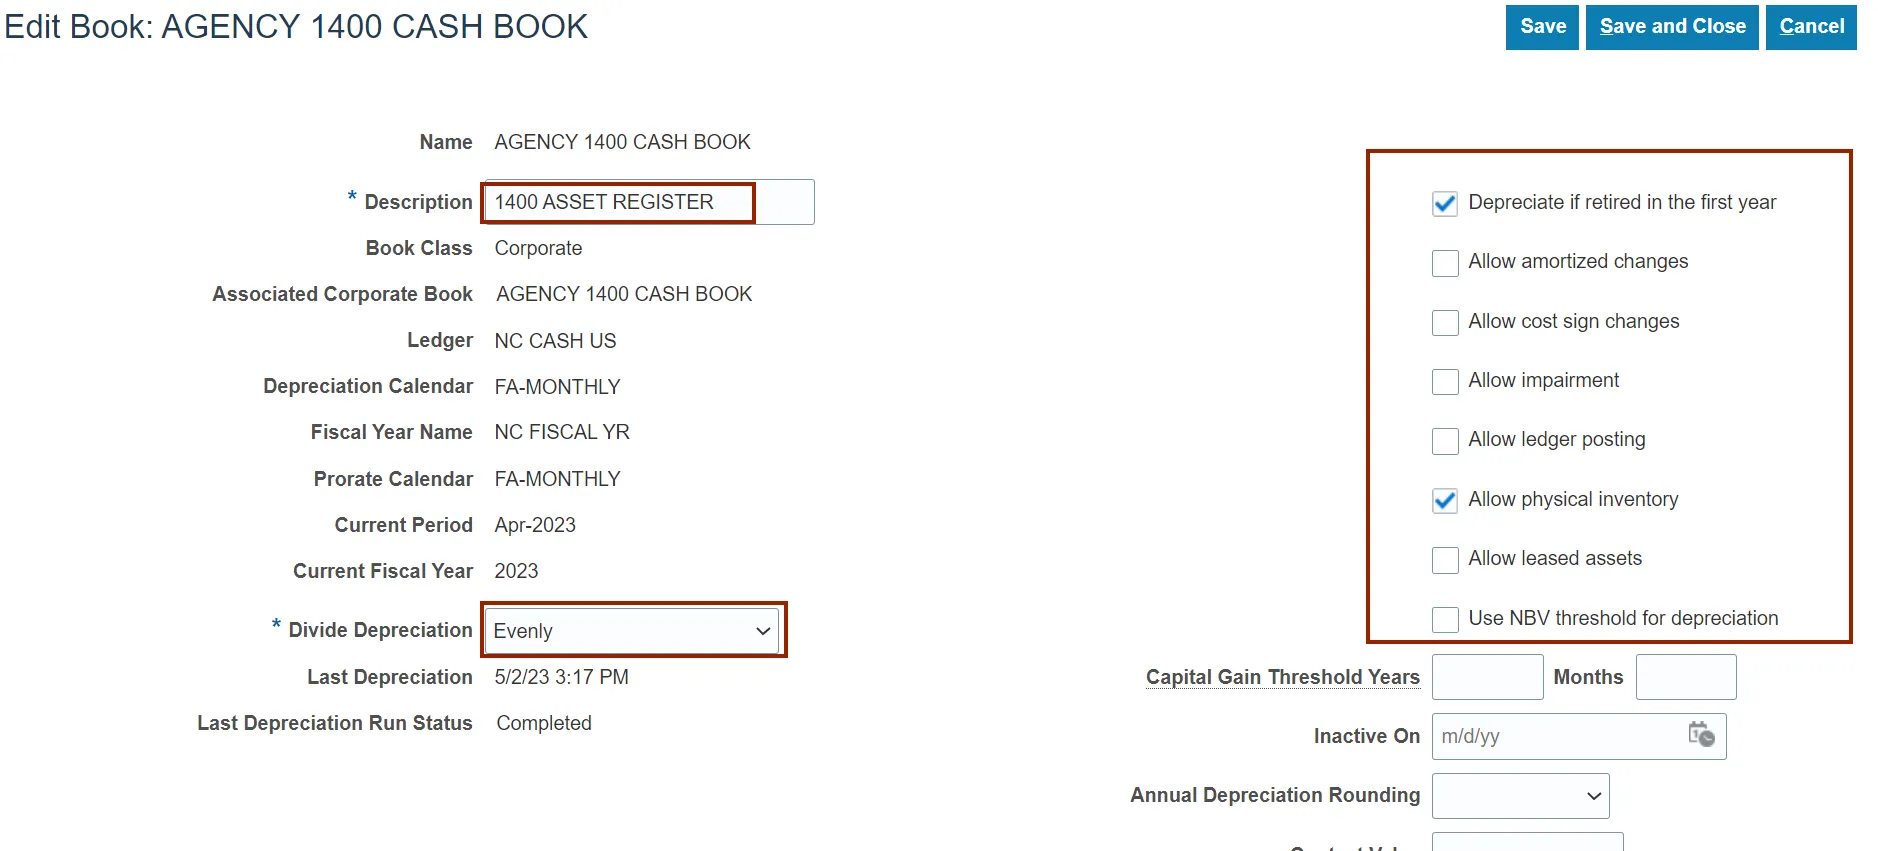
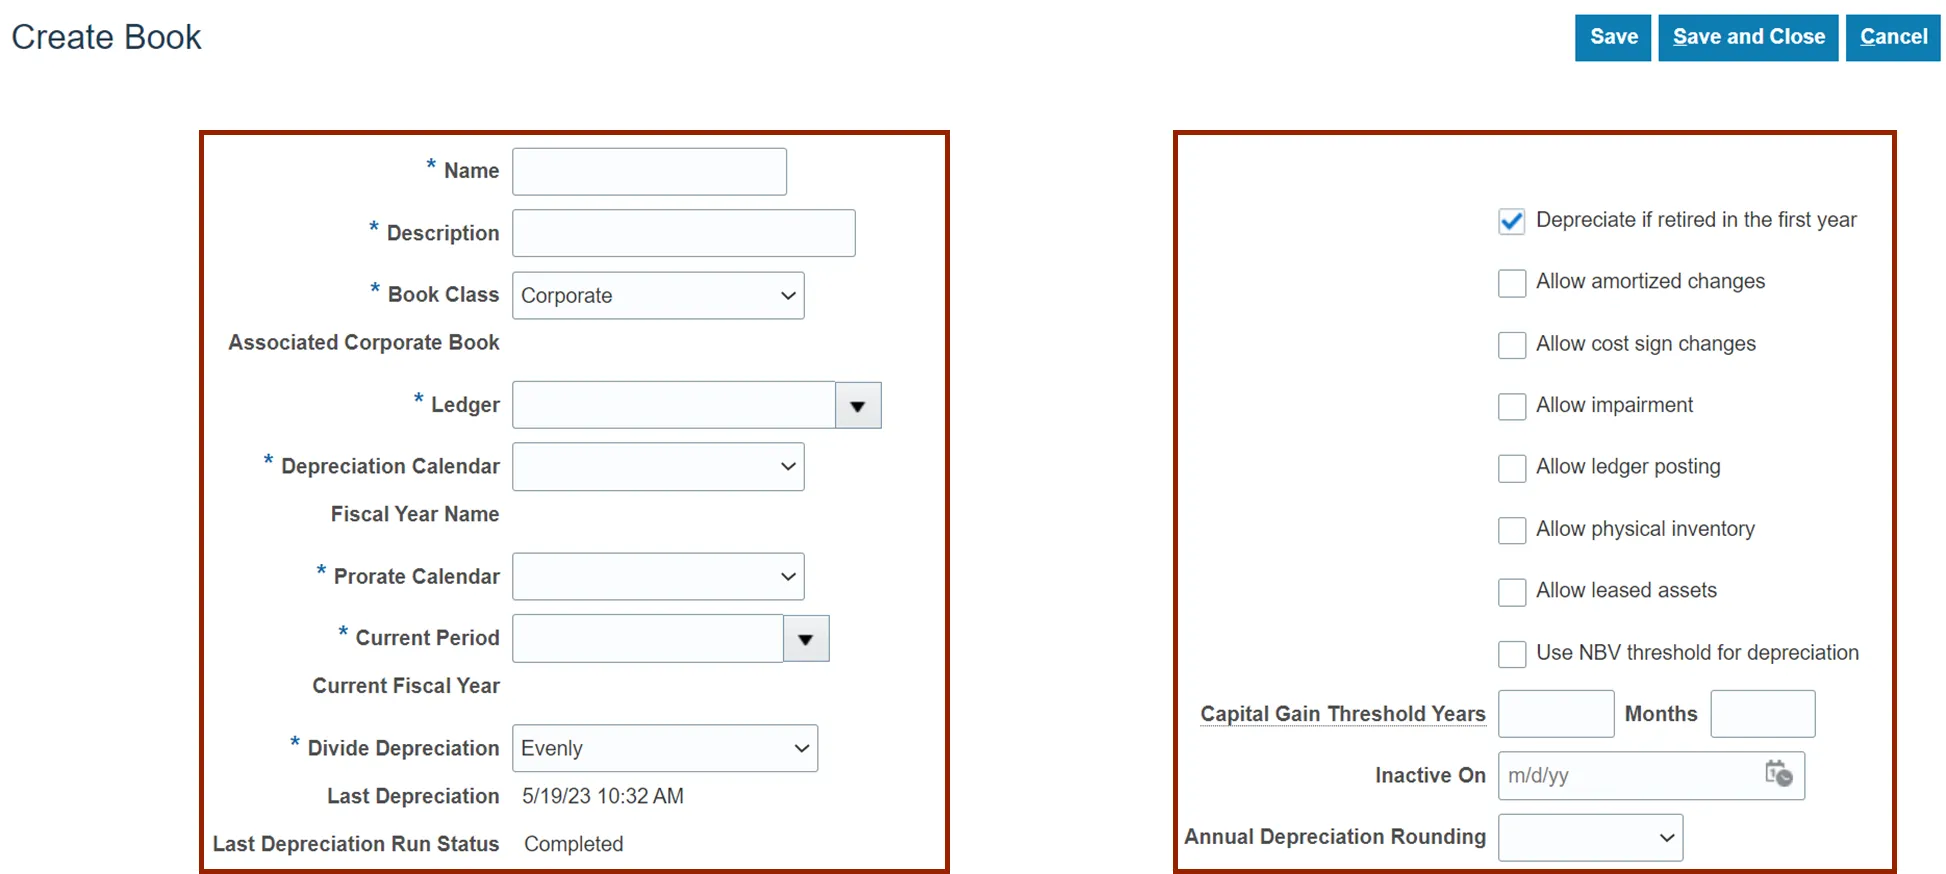
Step 4. Edit the Asset Book details as needed.
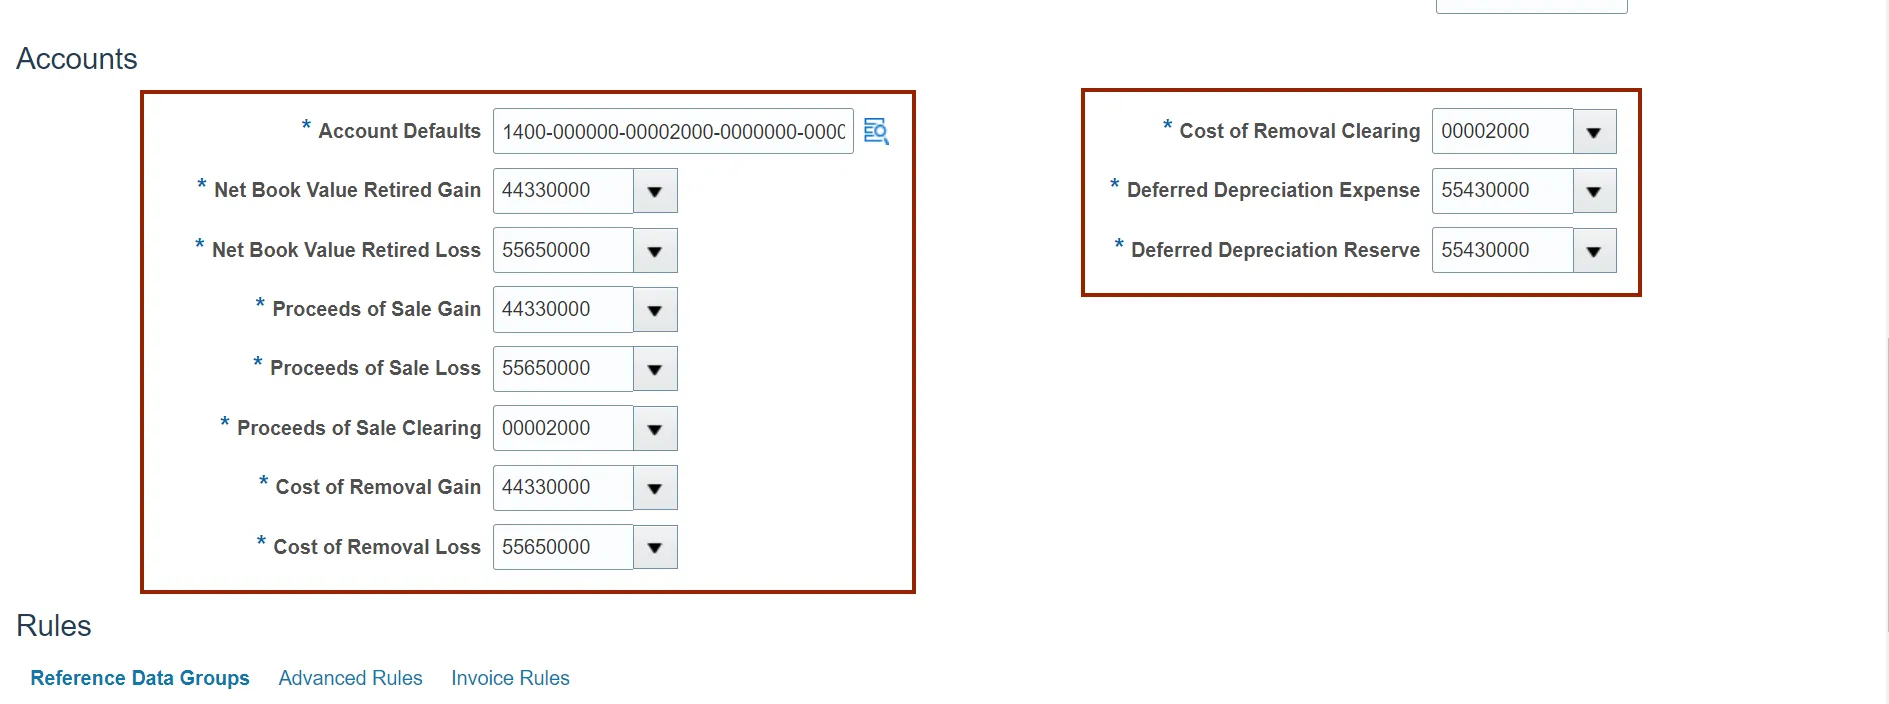
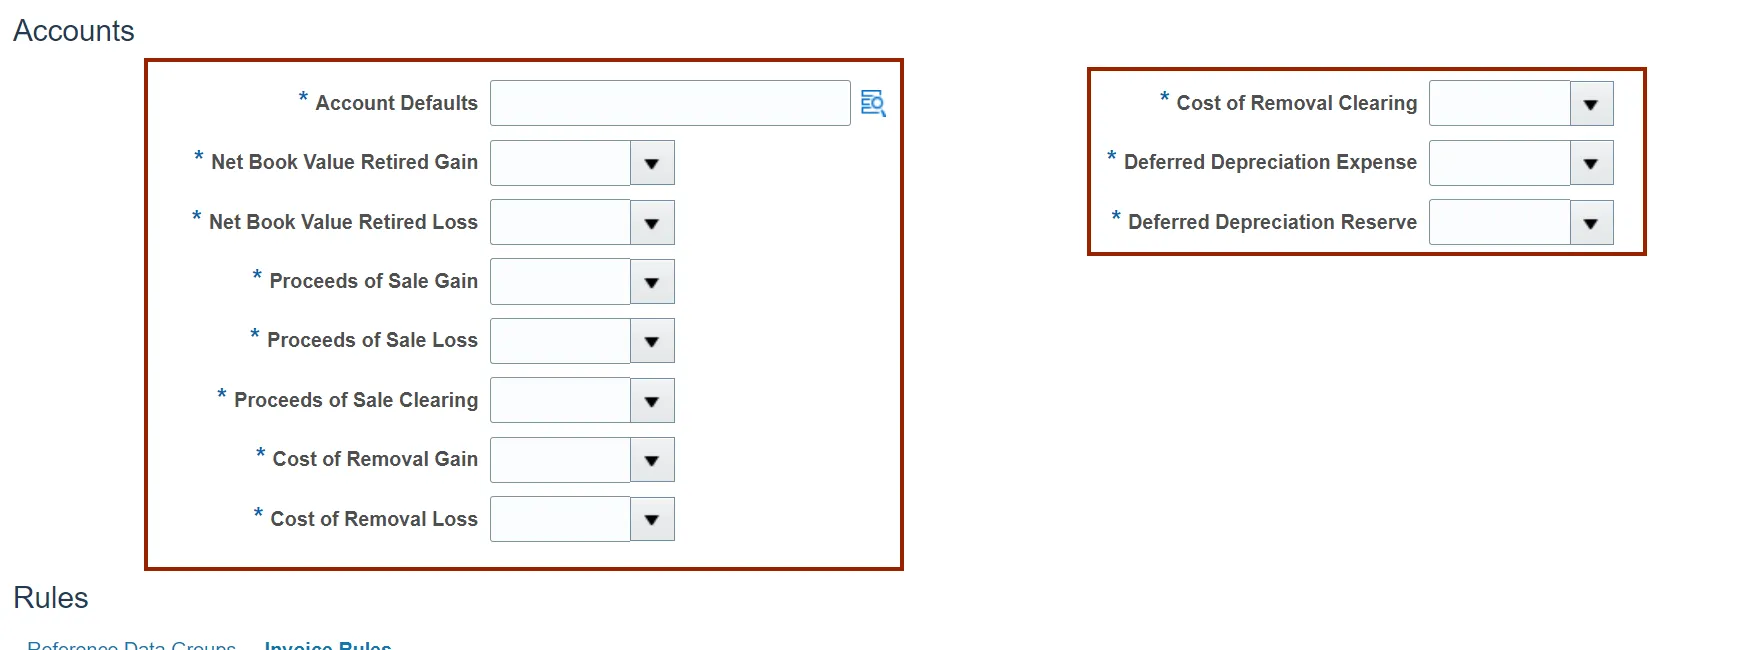
Step 5. Scroll to the bottom of the page to Accounts section to edit account details as needed.
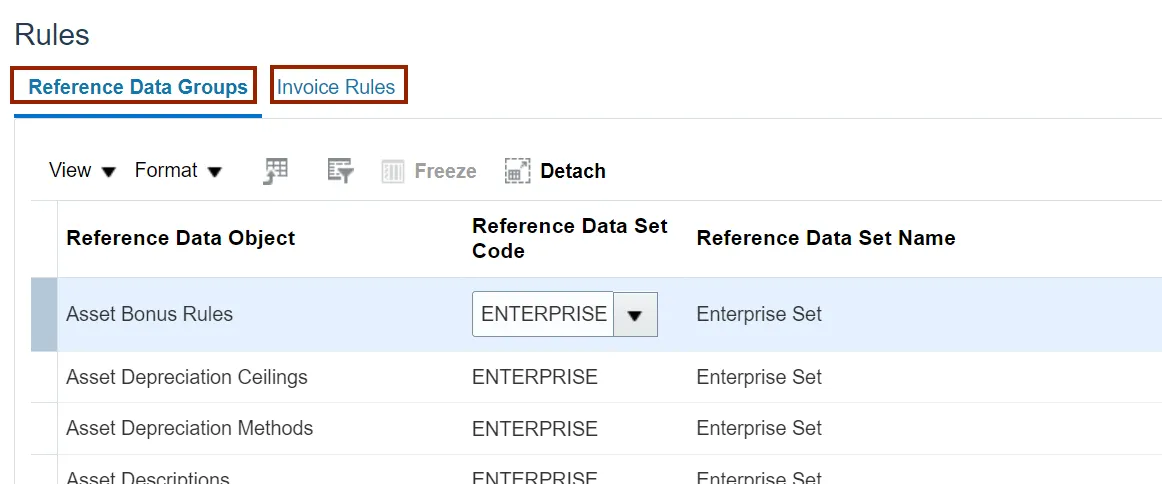
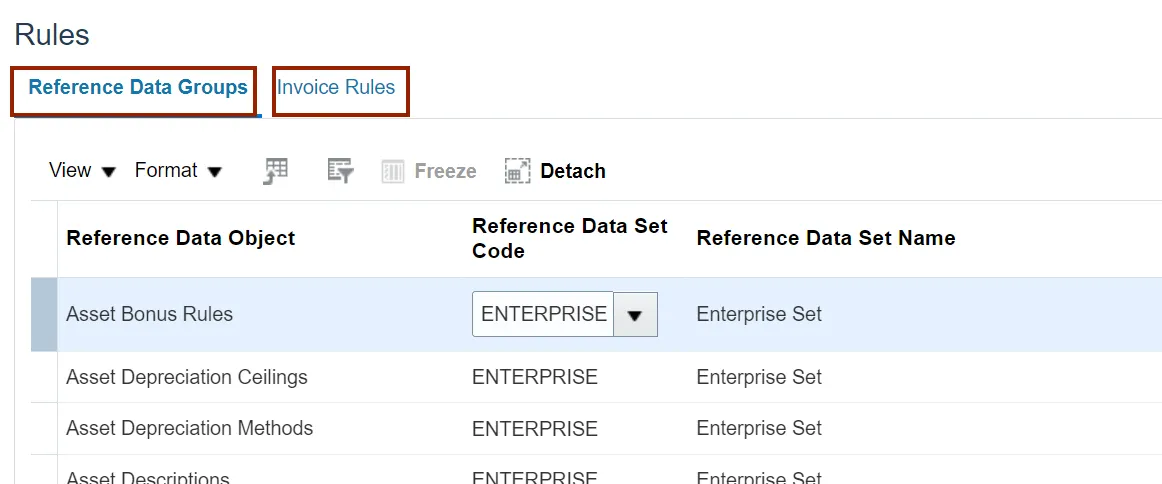
Step 6. Scroll down to the Rules section and edit the Reference Data Groups and Invoice Rules tabs as needed.
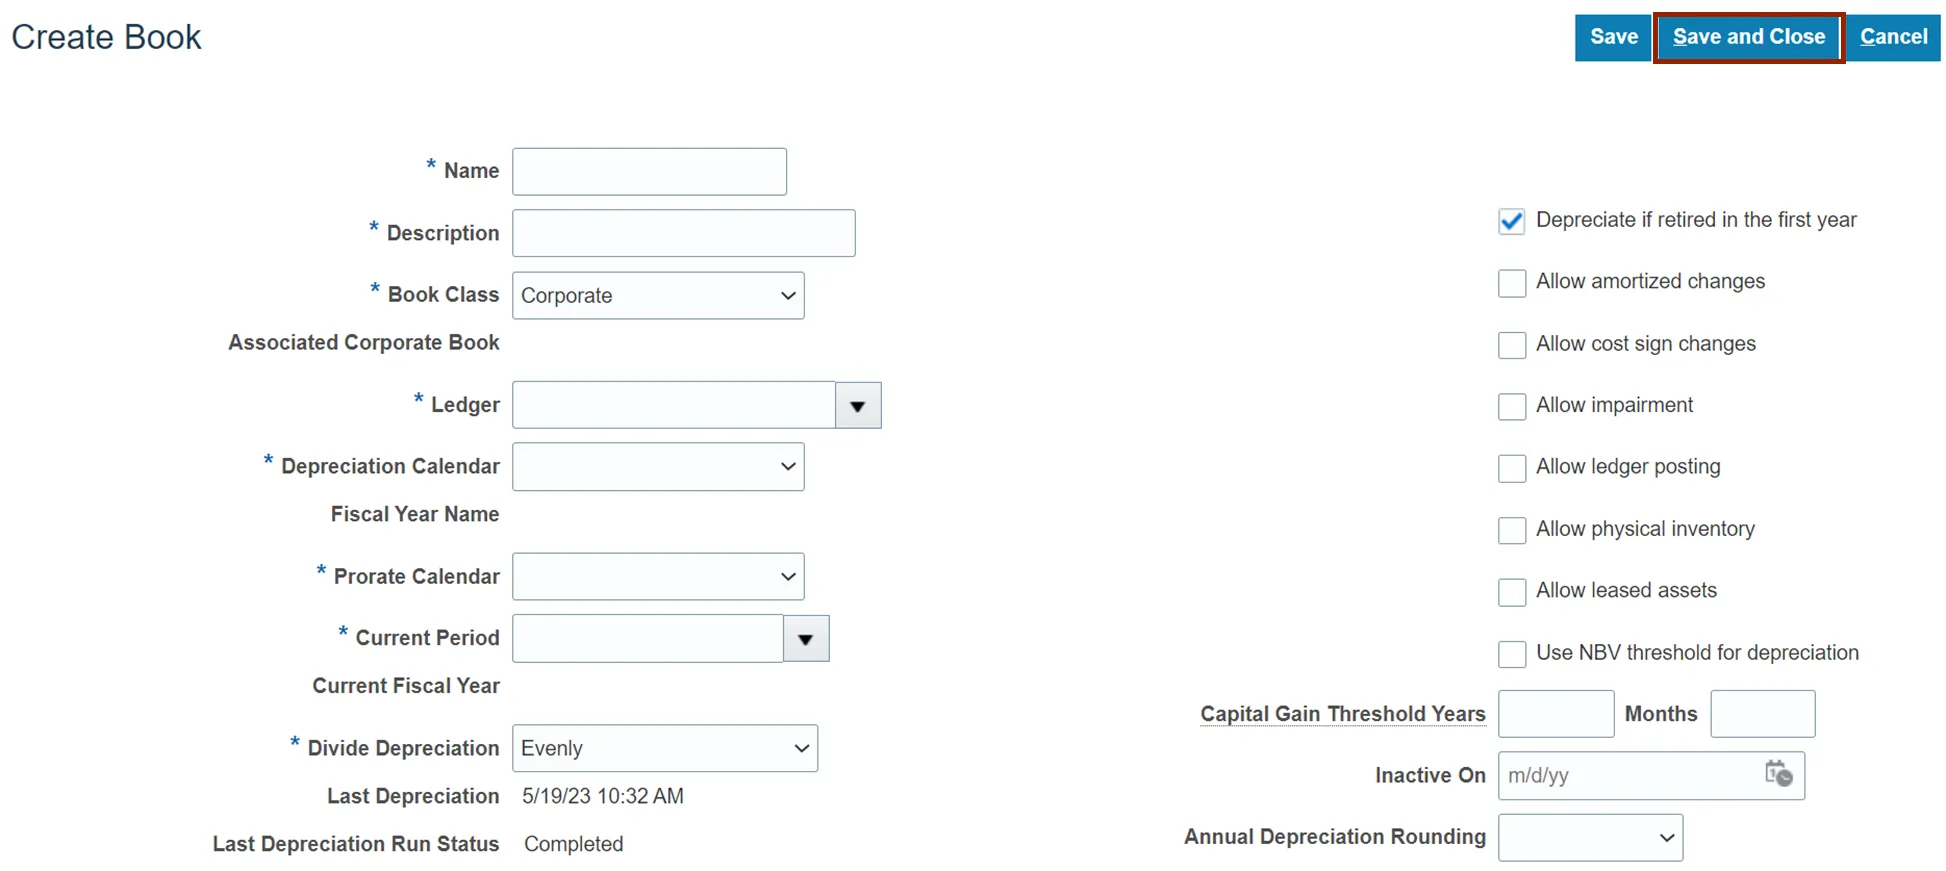
Step 7. Scroll to the top of the page and click the Save and Close button to save the update.

Step 8. Click the Plus icon to create new Asset Book.
Step 9. Enter all the details as required for the new asset book.
Step 10. Scroll to the Accounts section and add the account details.
Step 11. Scroll down to the Rules section and enter the details as required in Reference Data Groups and Invoice Rules.
Step 12. Scroll up and click the Save and Close button to save the new asset book.
Manage Asset Categories
To manage Asset Categories in NCFS, please follow the steps below. There are 25 steps to complete this process.
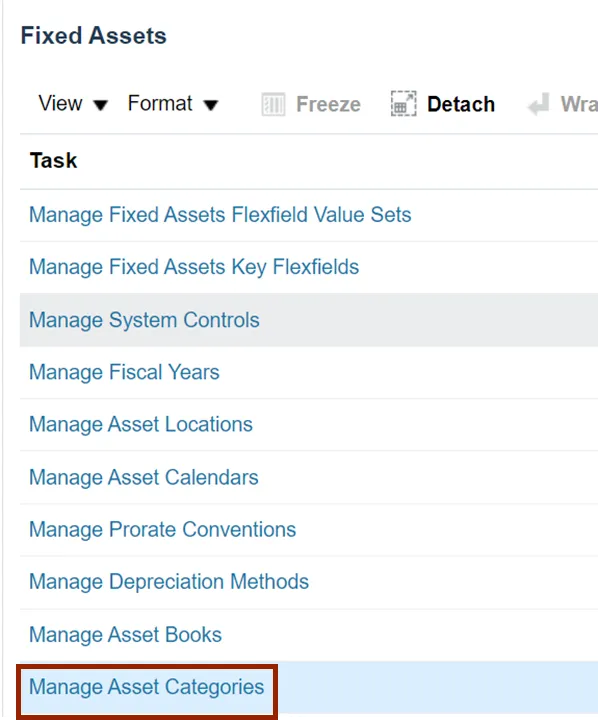
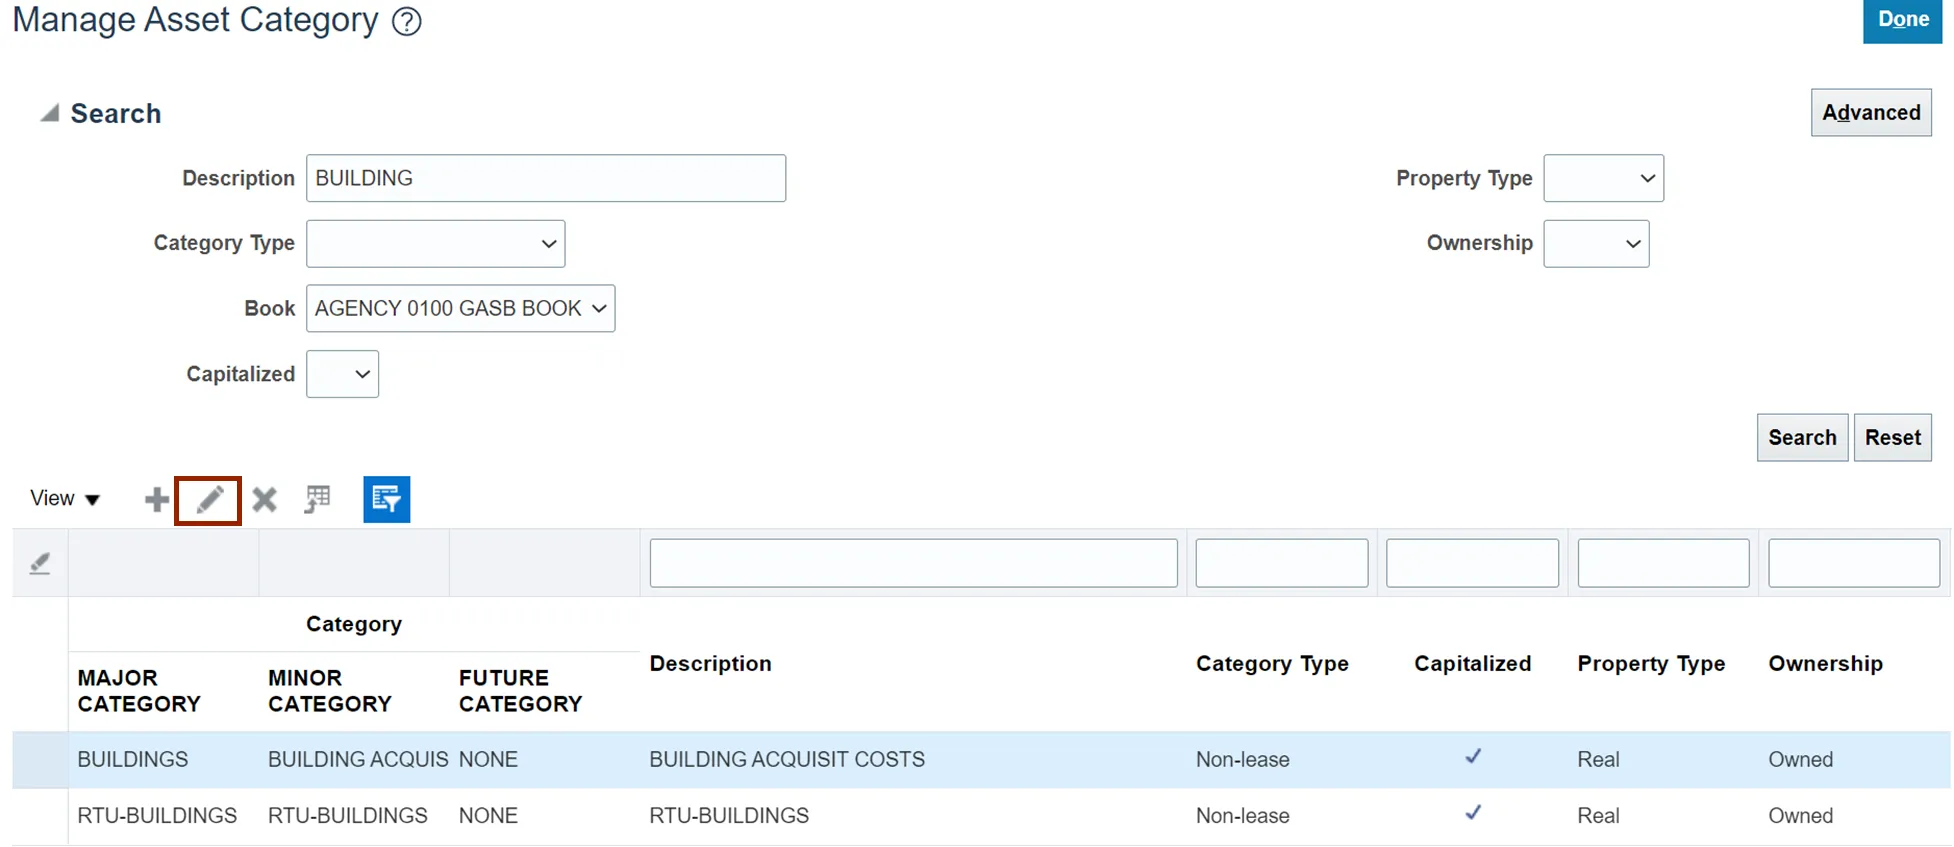
Step 1. Navigate to Setup and Maintenance (Home page > My Enterprise tab > Setup and Maintenance app) and click the Manage Asset Categories link.
Step 2. Enter the search parameters.
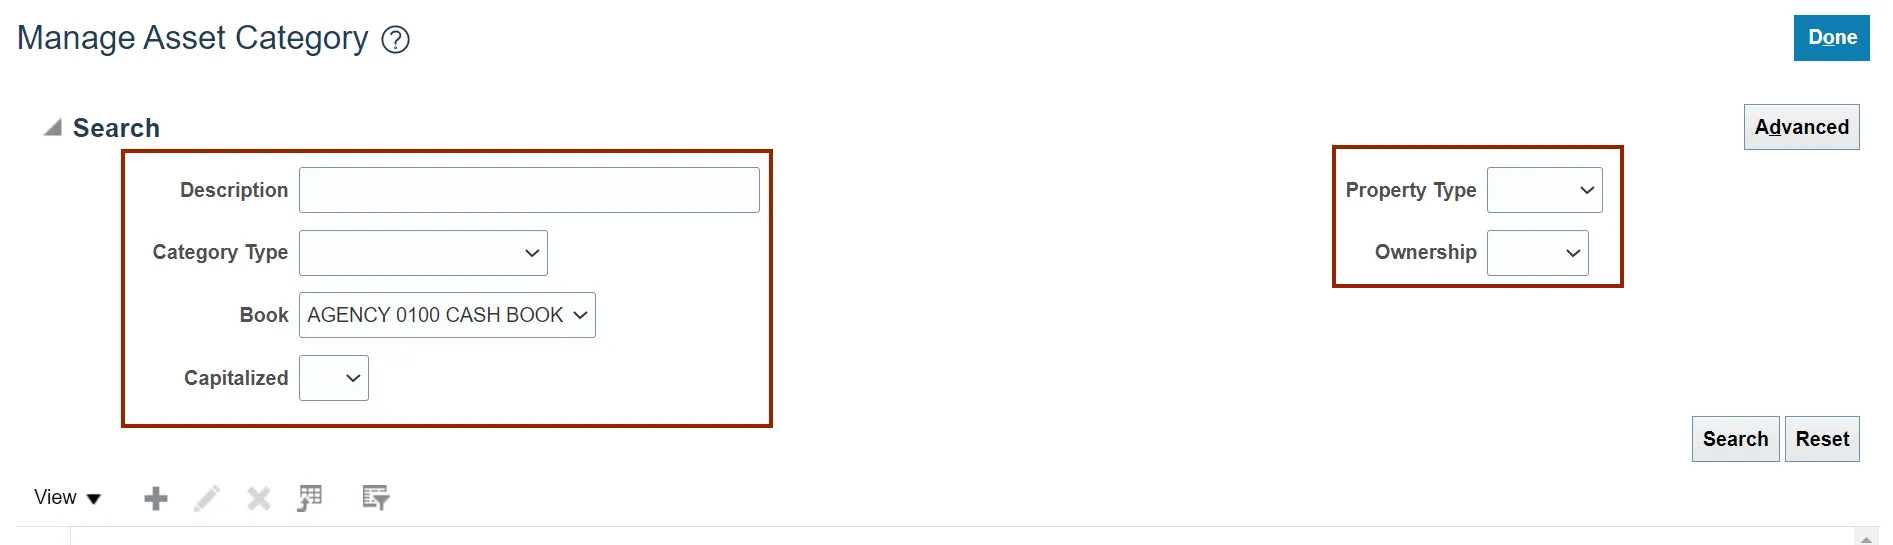
Step 3. Click the Search button.

Step 4. Select the Asset Category that you would like to update.
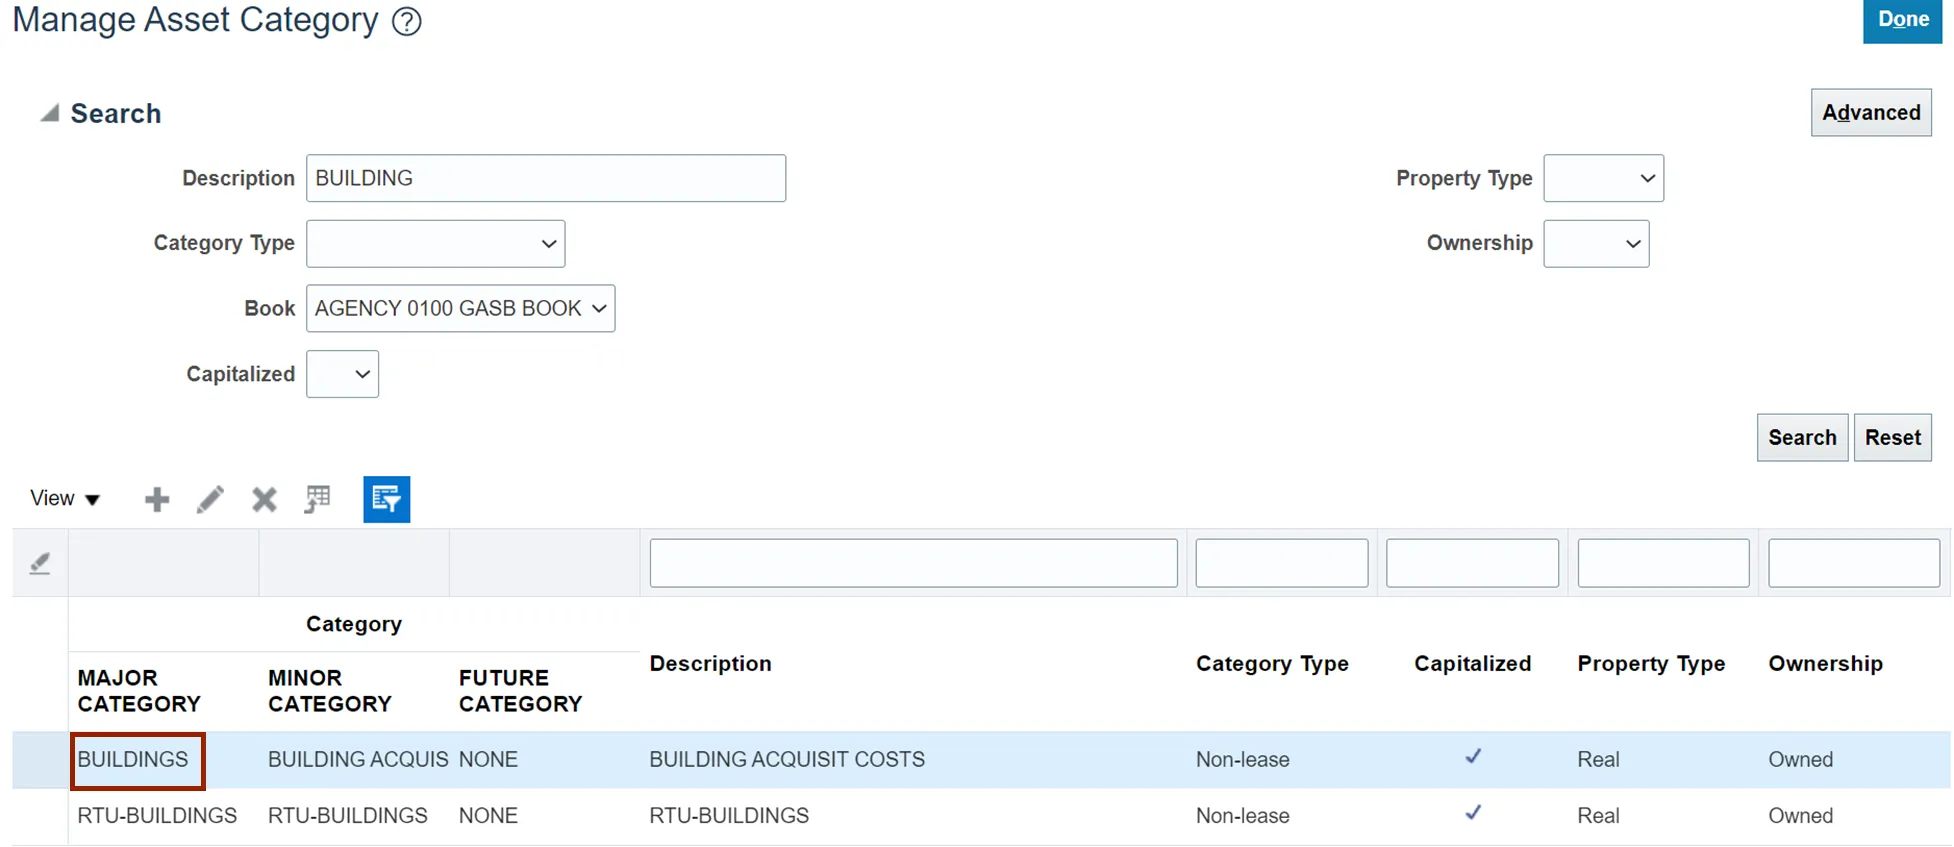
Step 5. Click on the Edit icon.
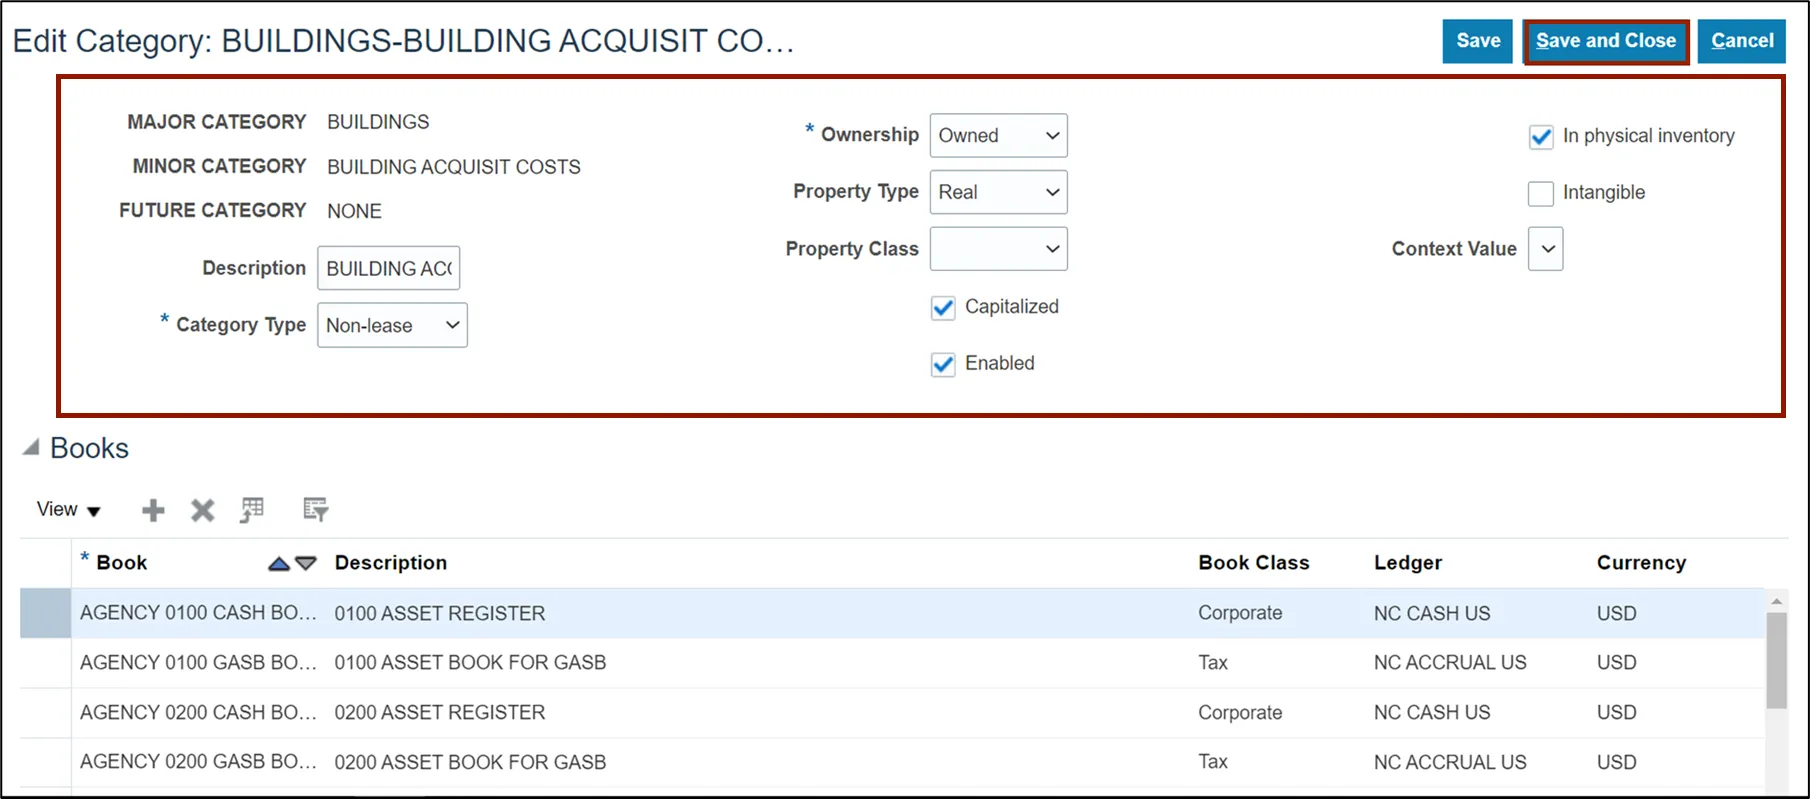
Step 6. Update the asset category details as required and click the Save and Close button.
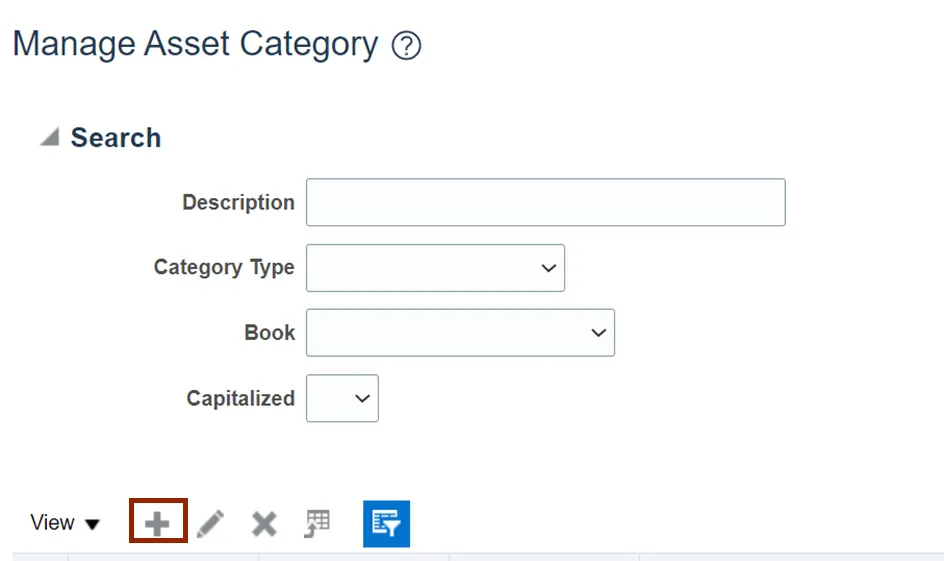
Step 7. To add a new Asset Category, click on the Plus icon from the Manage Asset Category page.
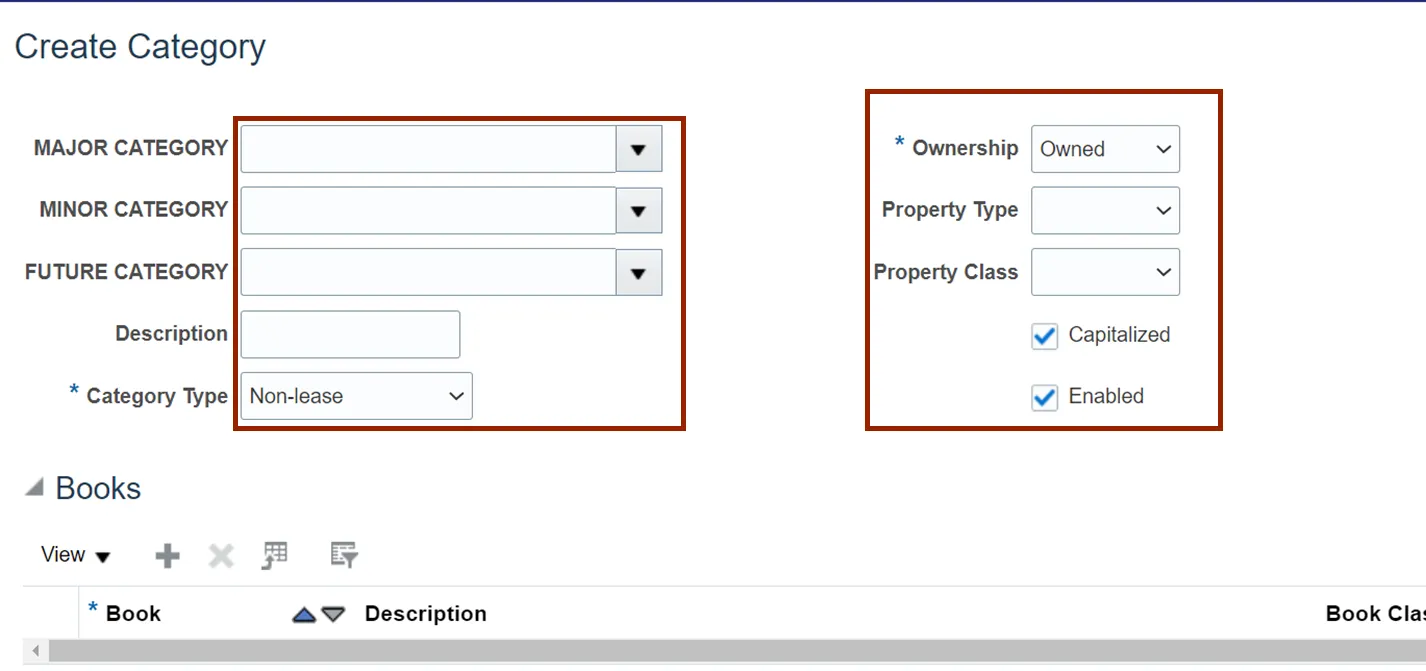
Step 8. Enter all the details or select from drop-down choice list to Create Category such as, CATEGORY TYPE, *Ownership, MAJOR CATEGORY, and MINOR CATEGORY.
Note: If MAJOR CATEGORY, MINOR CATEGORY, and FUTURE CATEGORY are not available on the list, please follow steps 12-24.
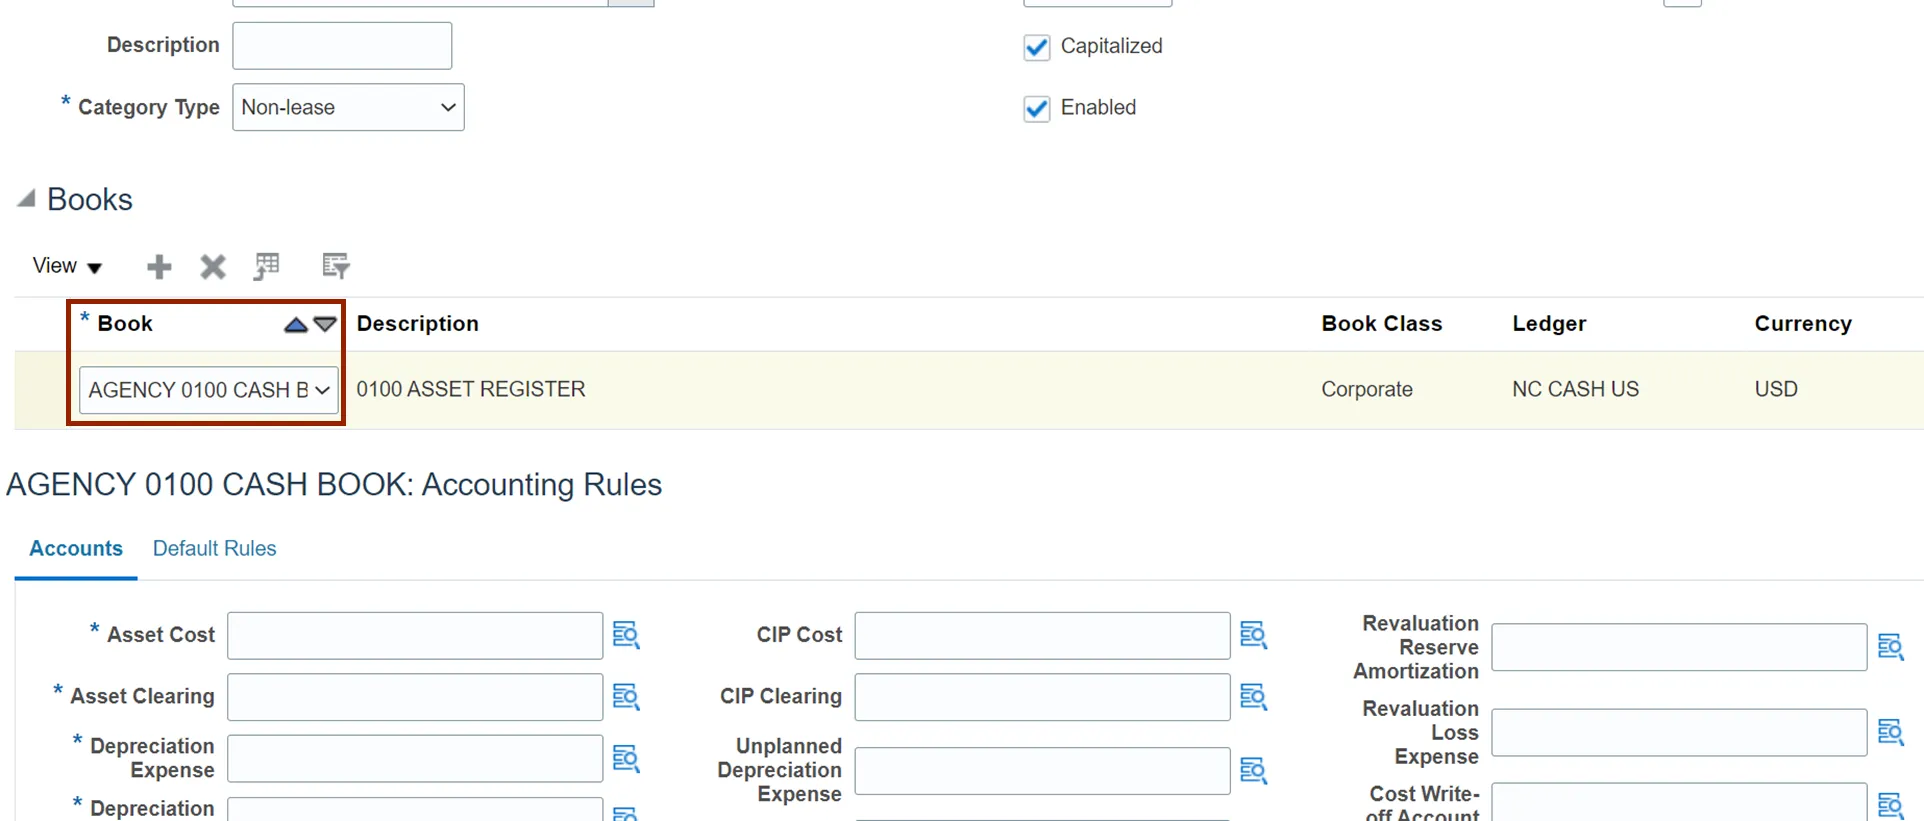
Step 9. Click the Plus icon to associate the new asset category with asset book(s) as required.
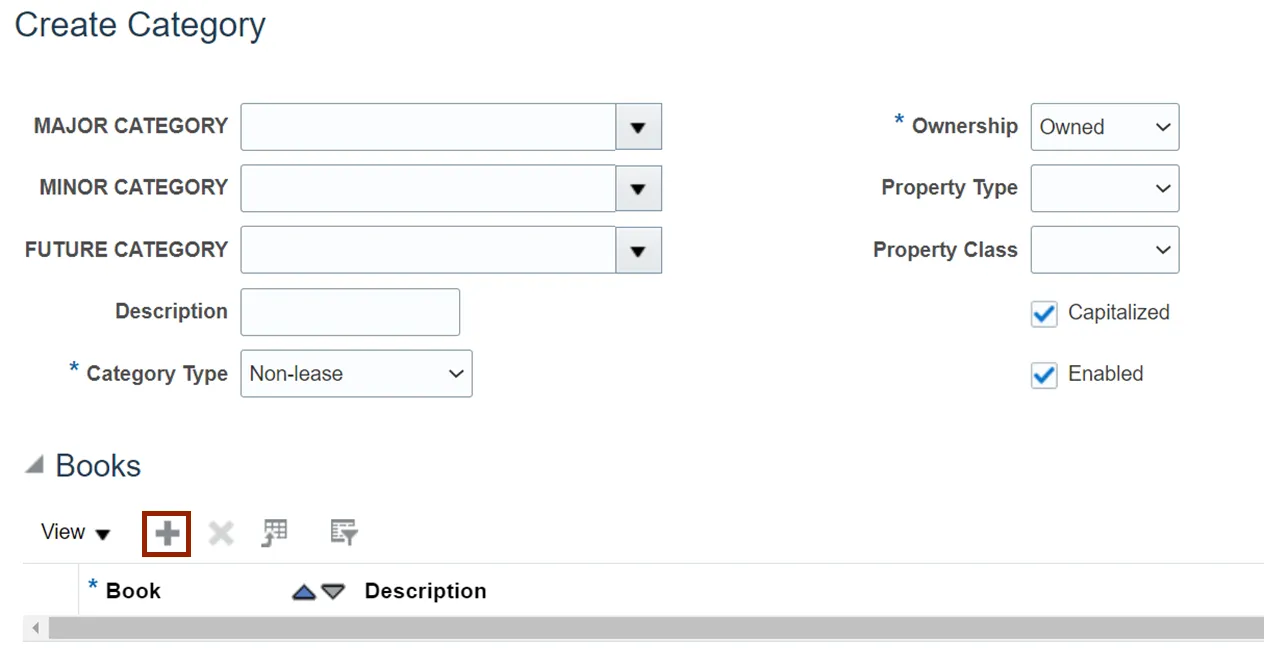
Step 10. Select the Asset Book from the drop-down and enter the Accounting Rules details as needed.
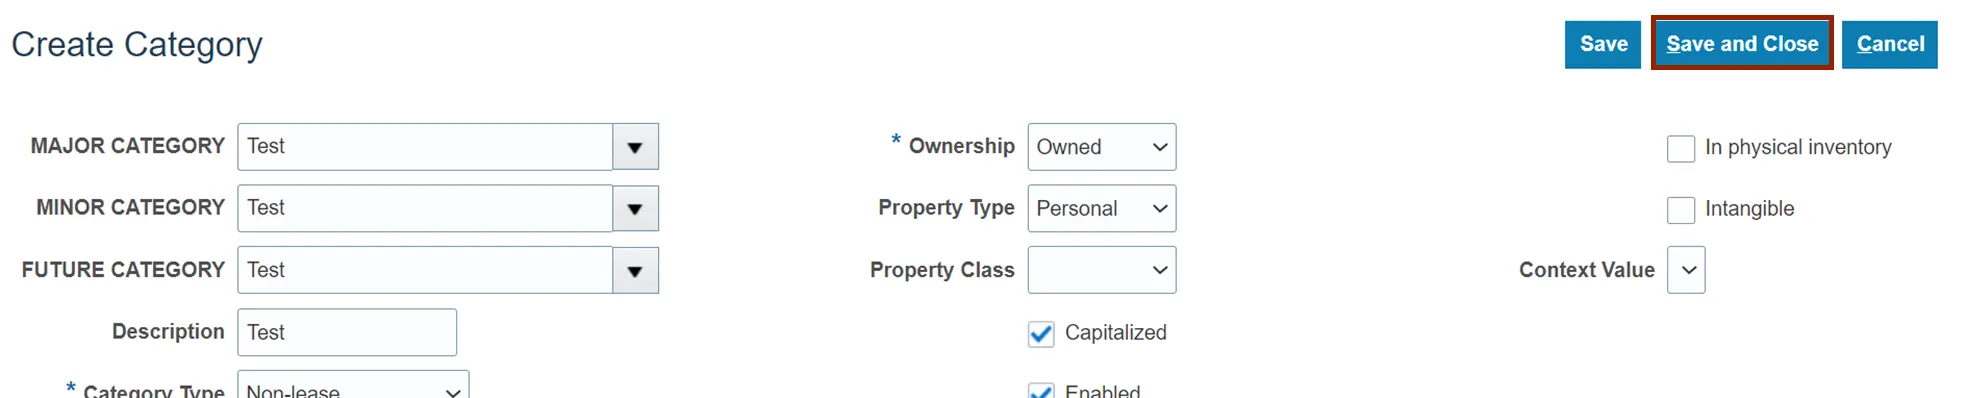
Step 11. Scroll to the top and click on Save and Close to save the new category.
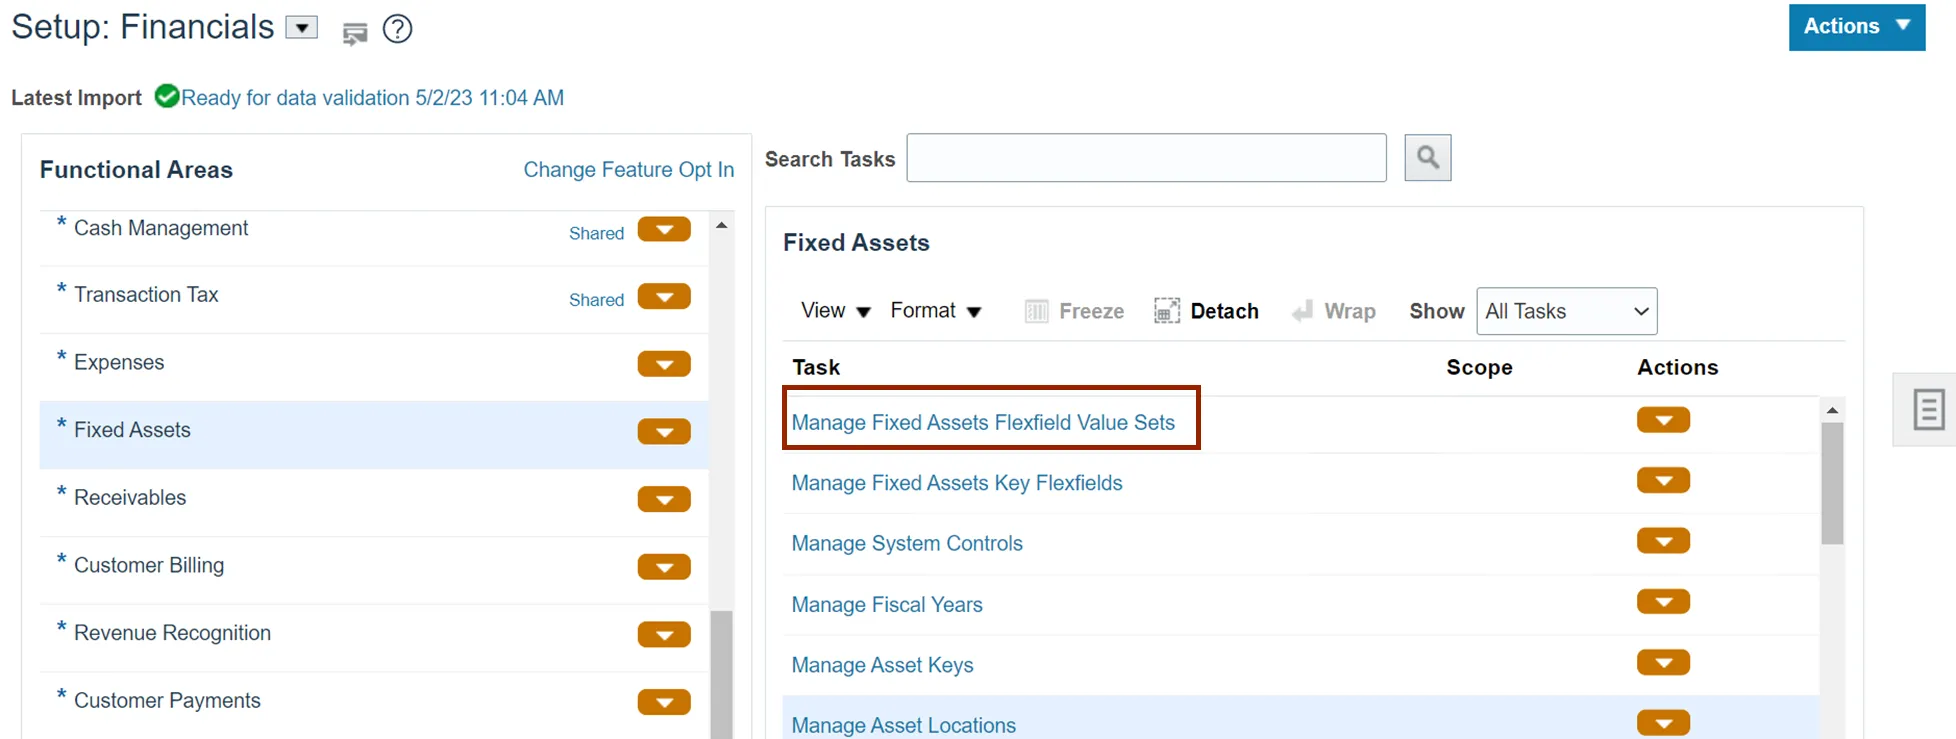
Step 12. The following steps are to be followed if the Asset Categories and Asset Locations values are not available on the drop-down choice list. Navigate to Setup and Maintenance page following steps 1-5 above.
Step 13. Under Fixed Assets tasks, click on Manage Fixed Assets Flexfield Value Sets.
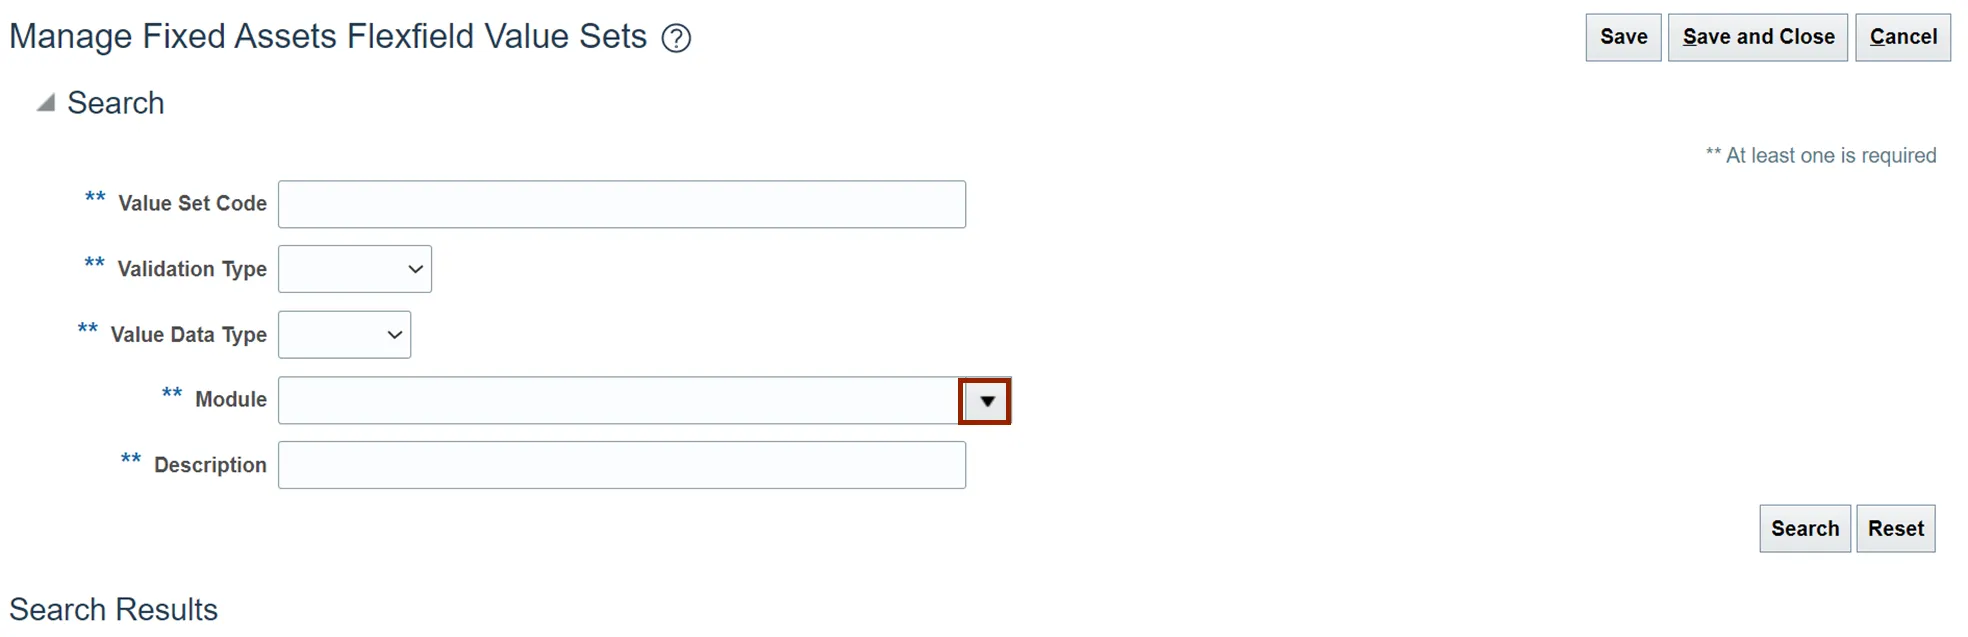
Step 14. On the Manage Fixed Assets Flexfield Value Sets page, click on the *Module drop-down choice list.
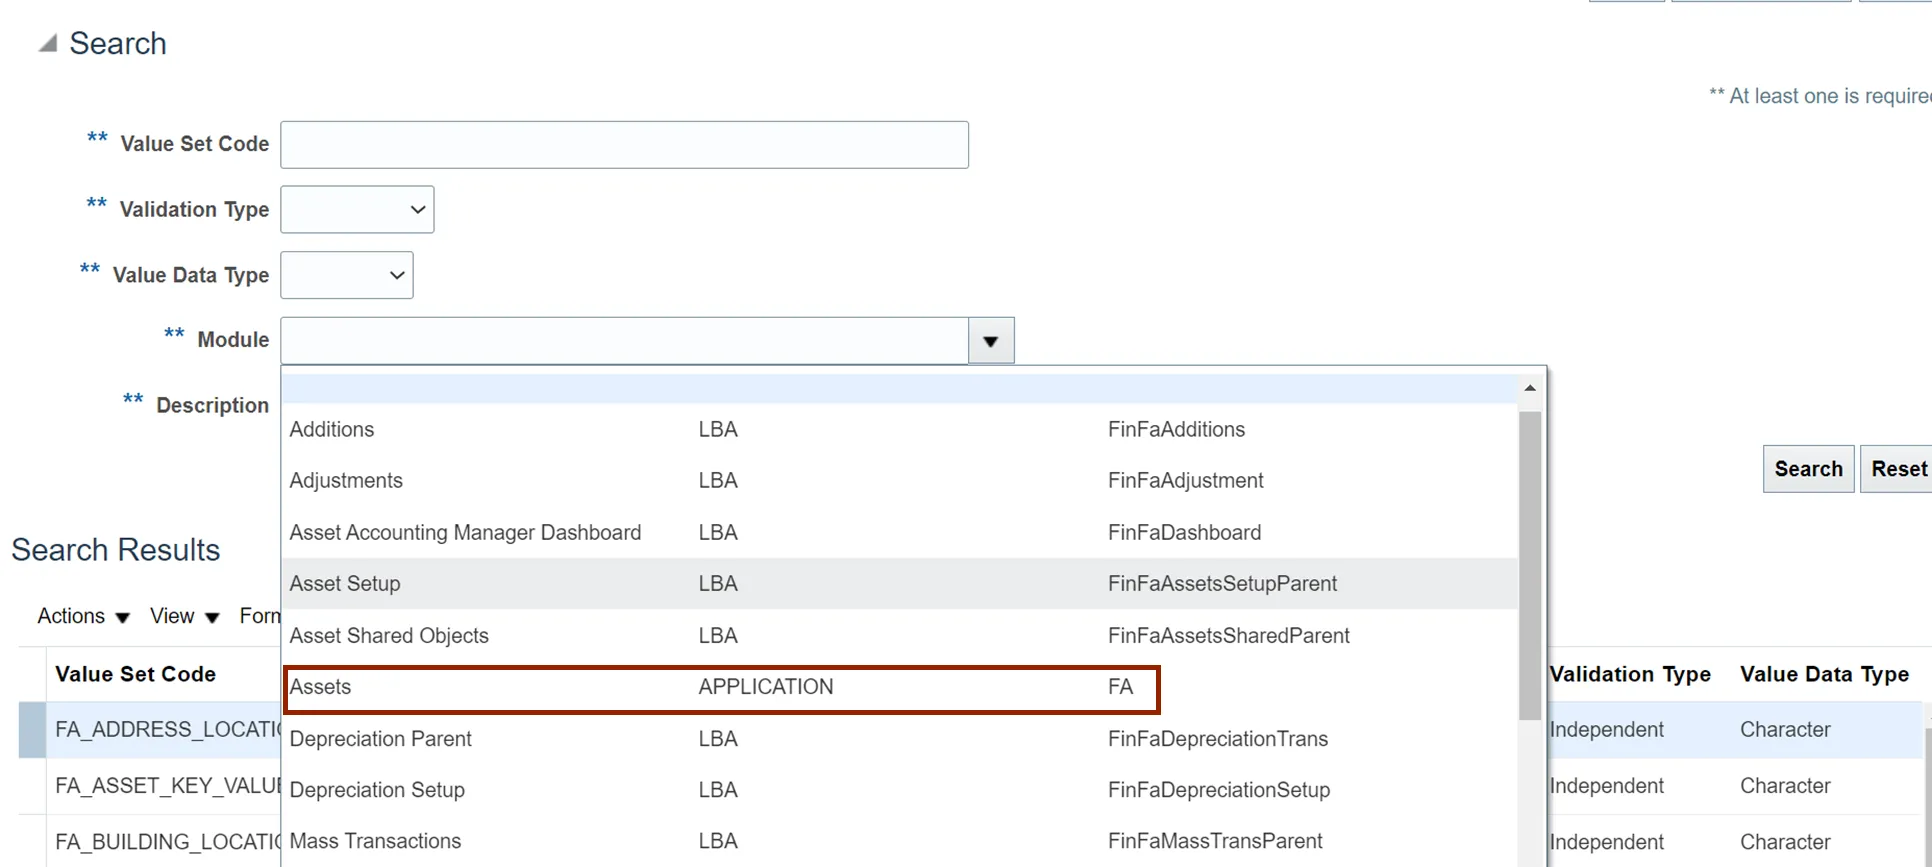
Step 15. Select Assets from the drop-down choice list.
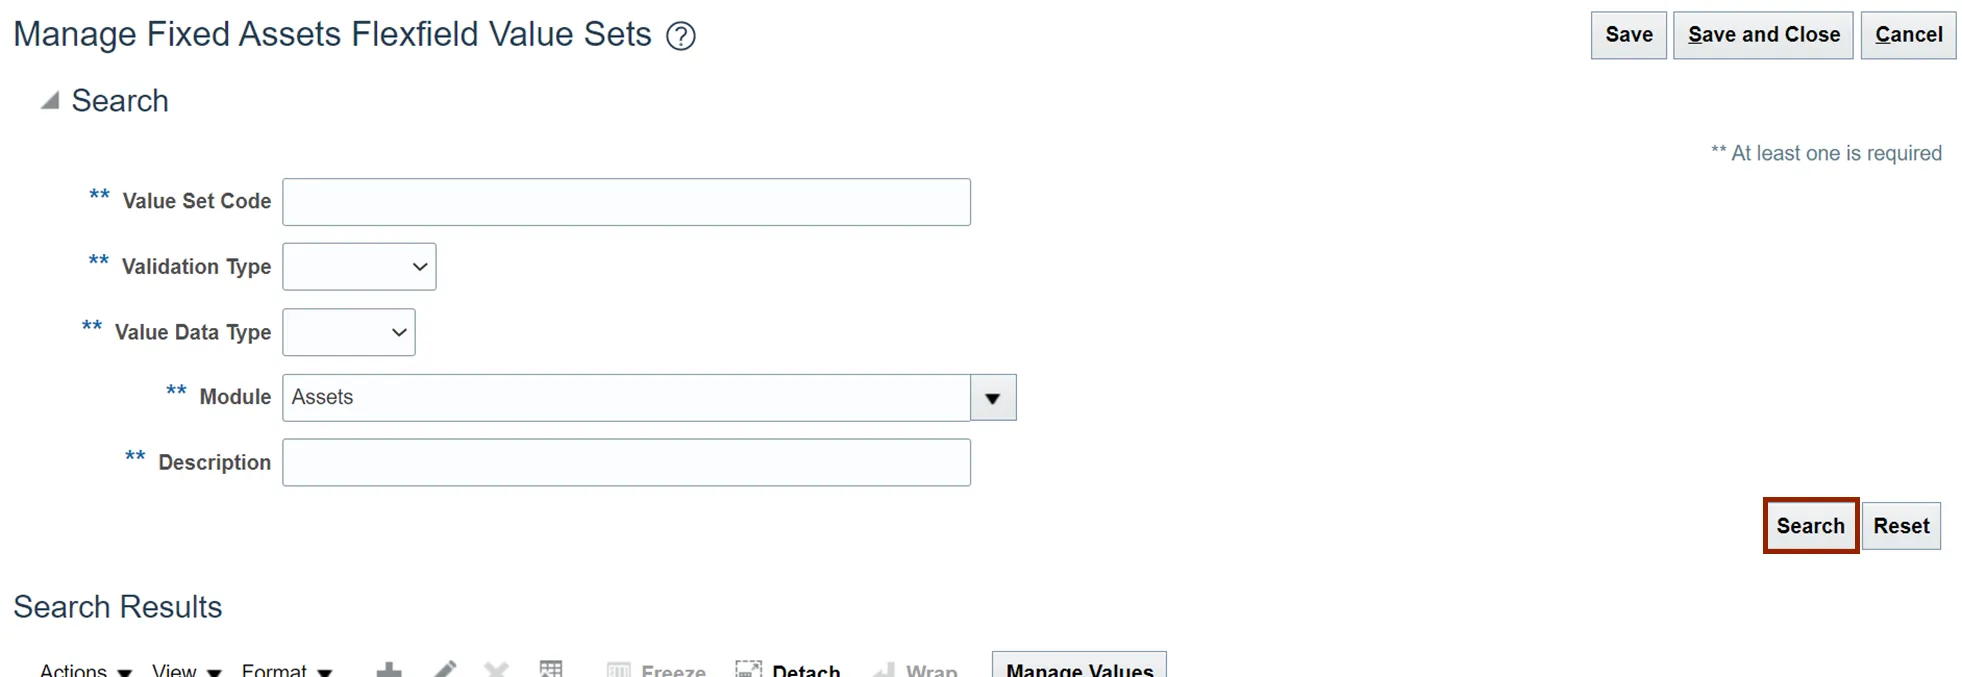
Step 16. Click the Search button.
Step 17. Search results are displayed.
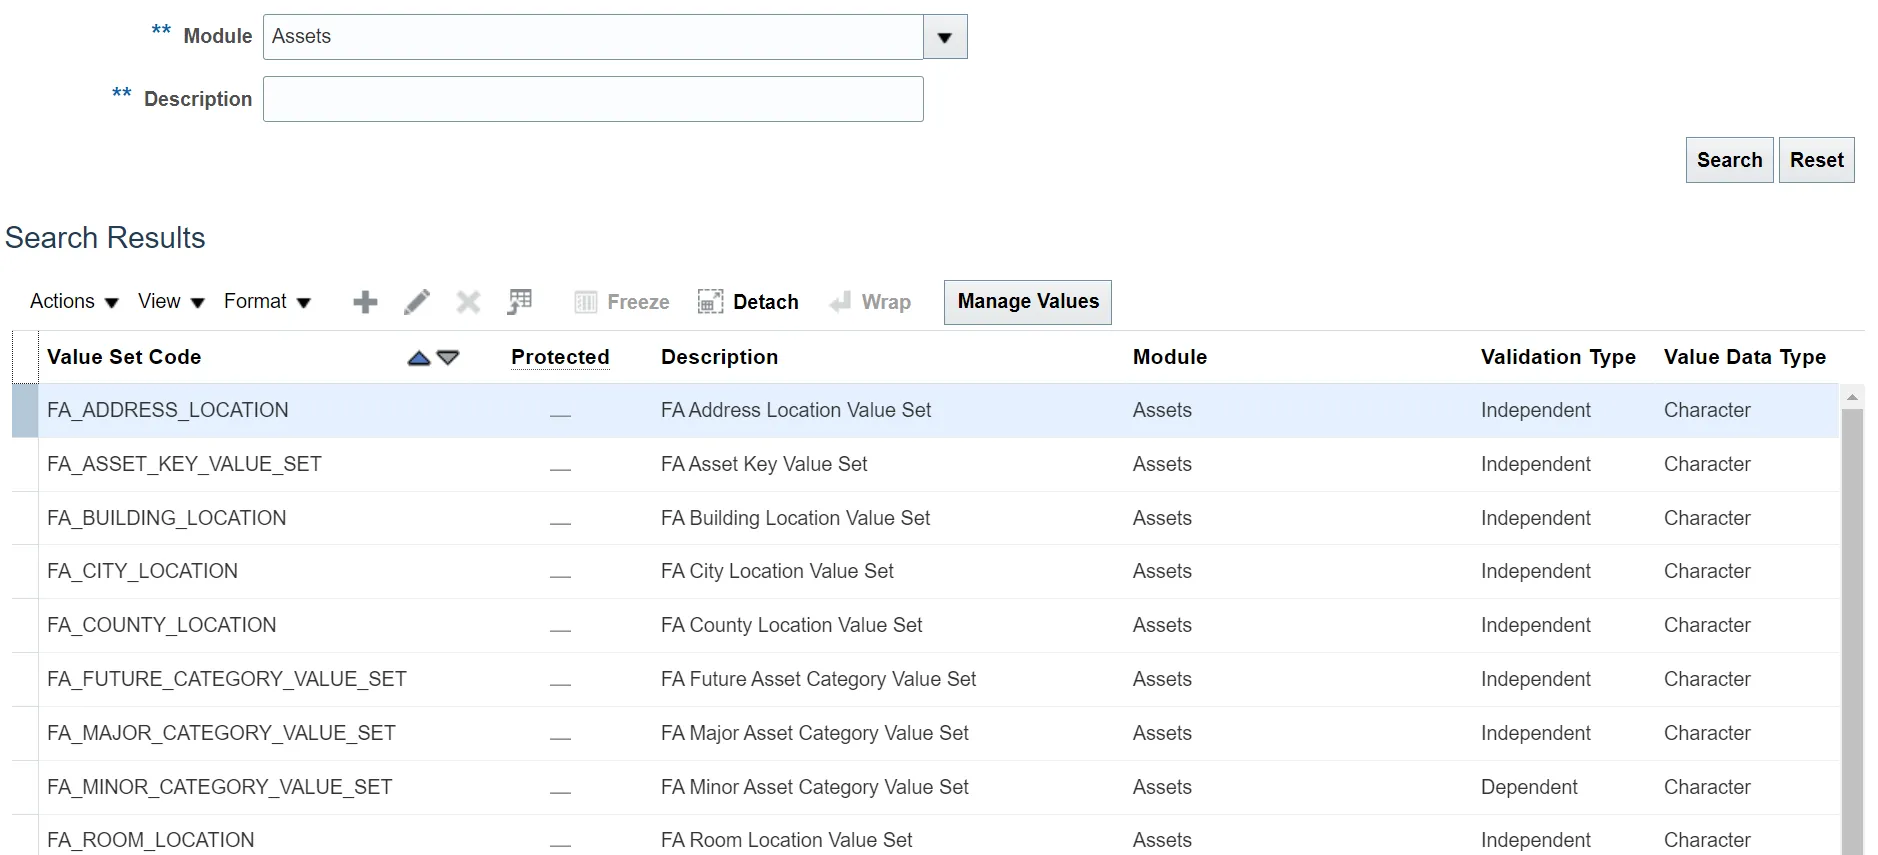
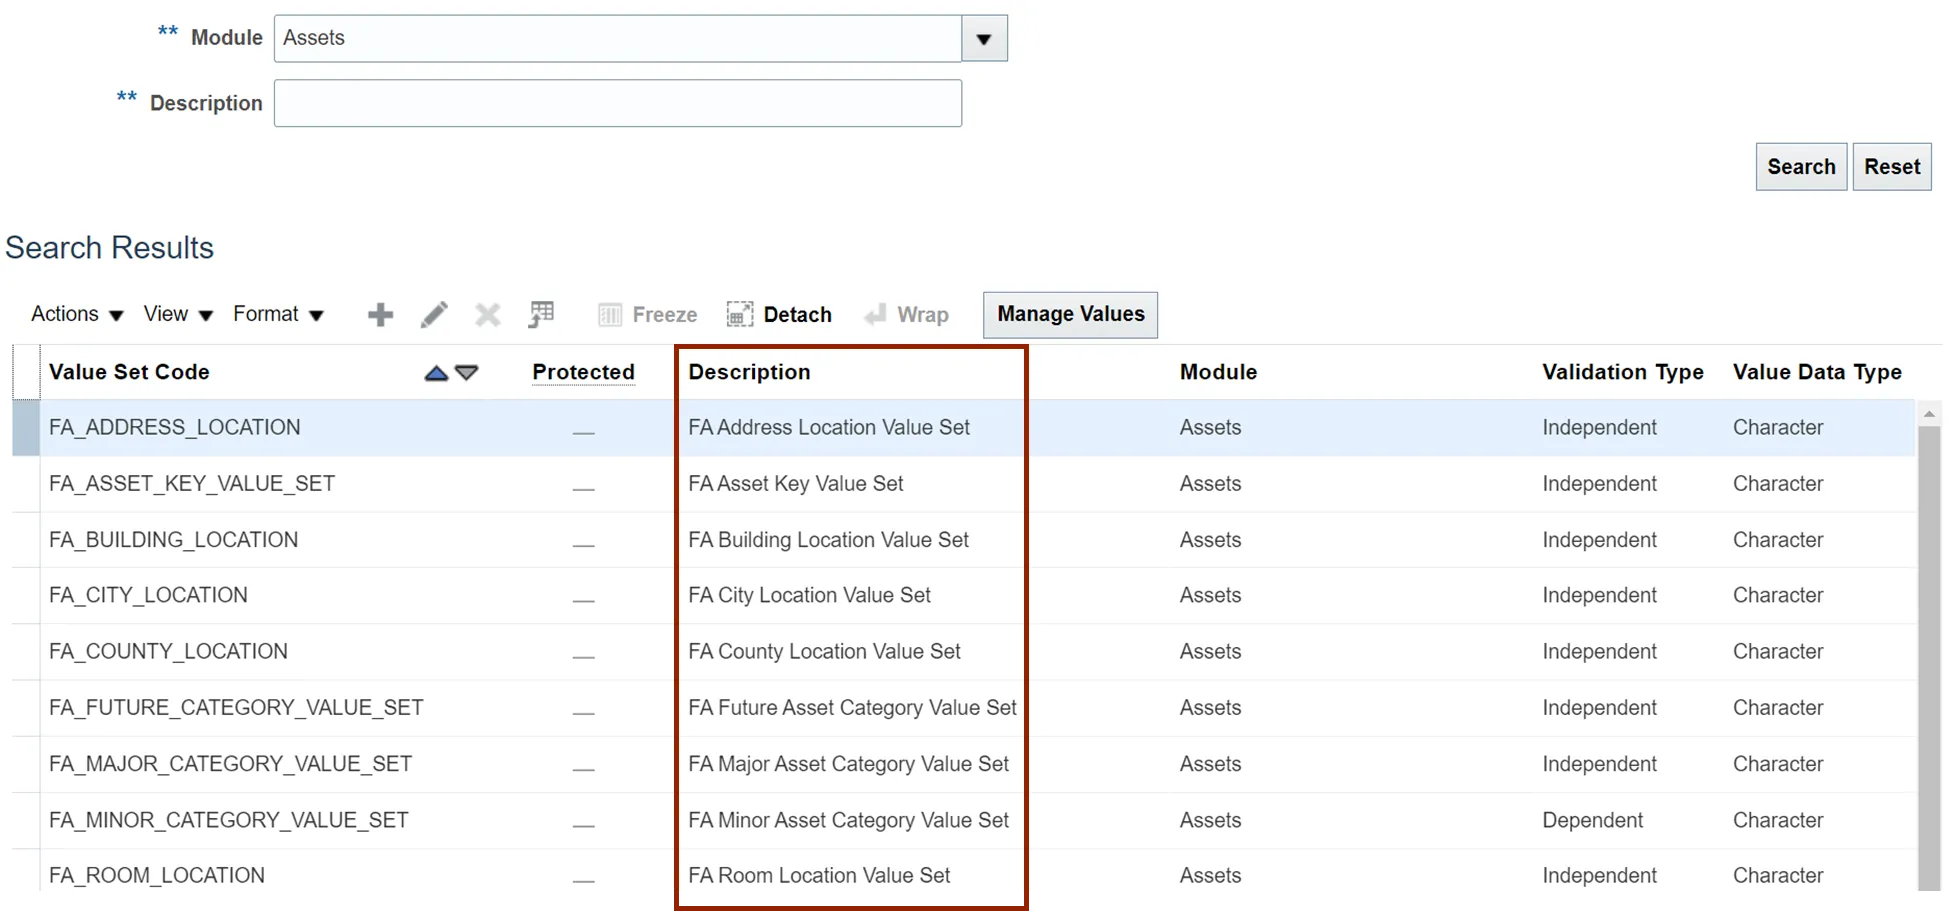
Step 18. The *Description of the value set states where the value will be added.
For Example: Adding values to FA City Location Value Set will make the new value available in the City field in step 17. Similarly, adding values to FA Major Asset Category Value Set will make the new value available in the Major Category.
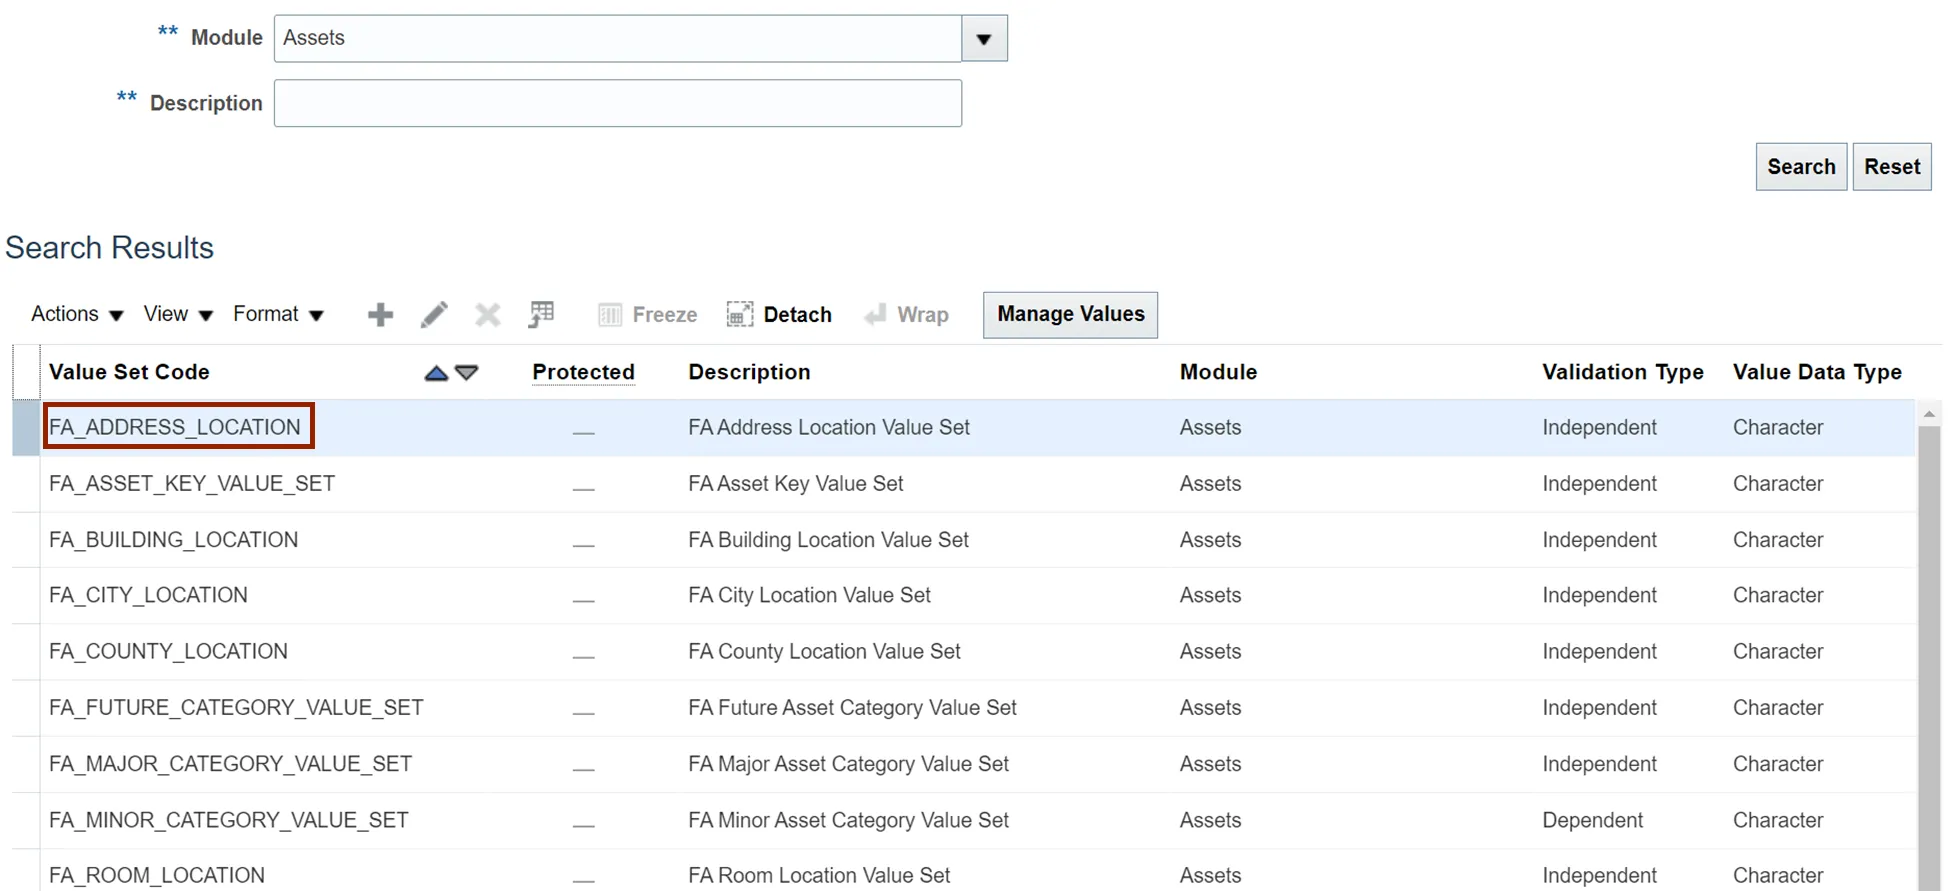
Step 19. To add new values to the value set code, click the specific Value Set Code.
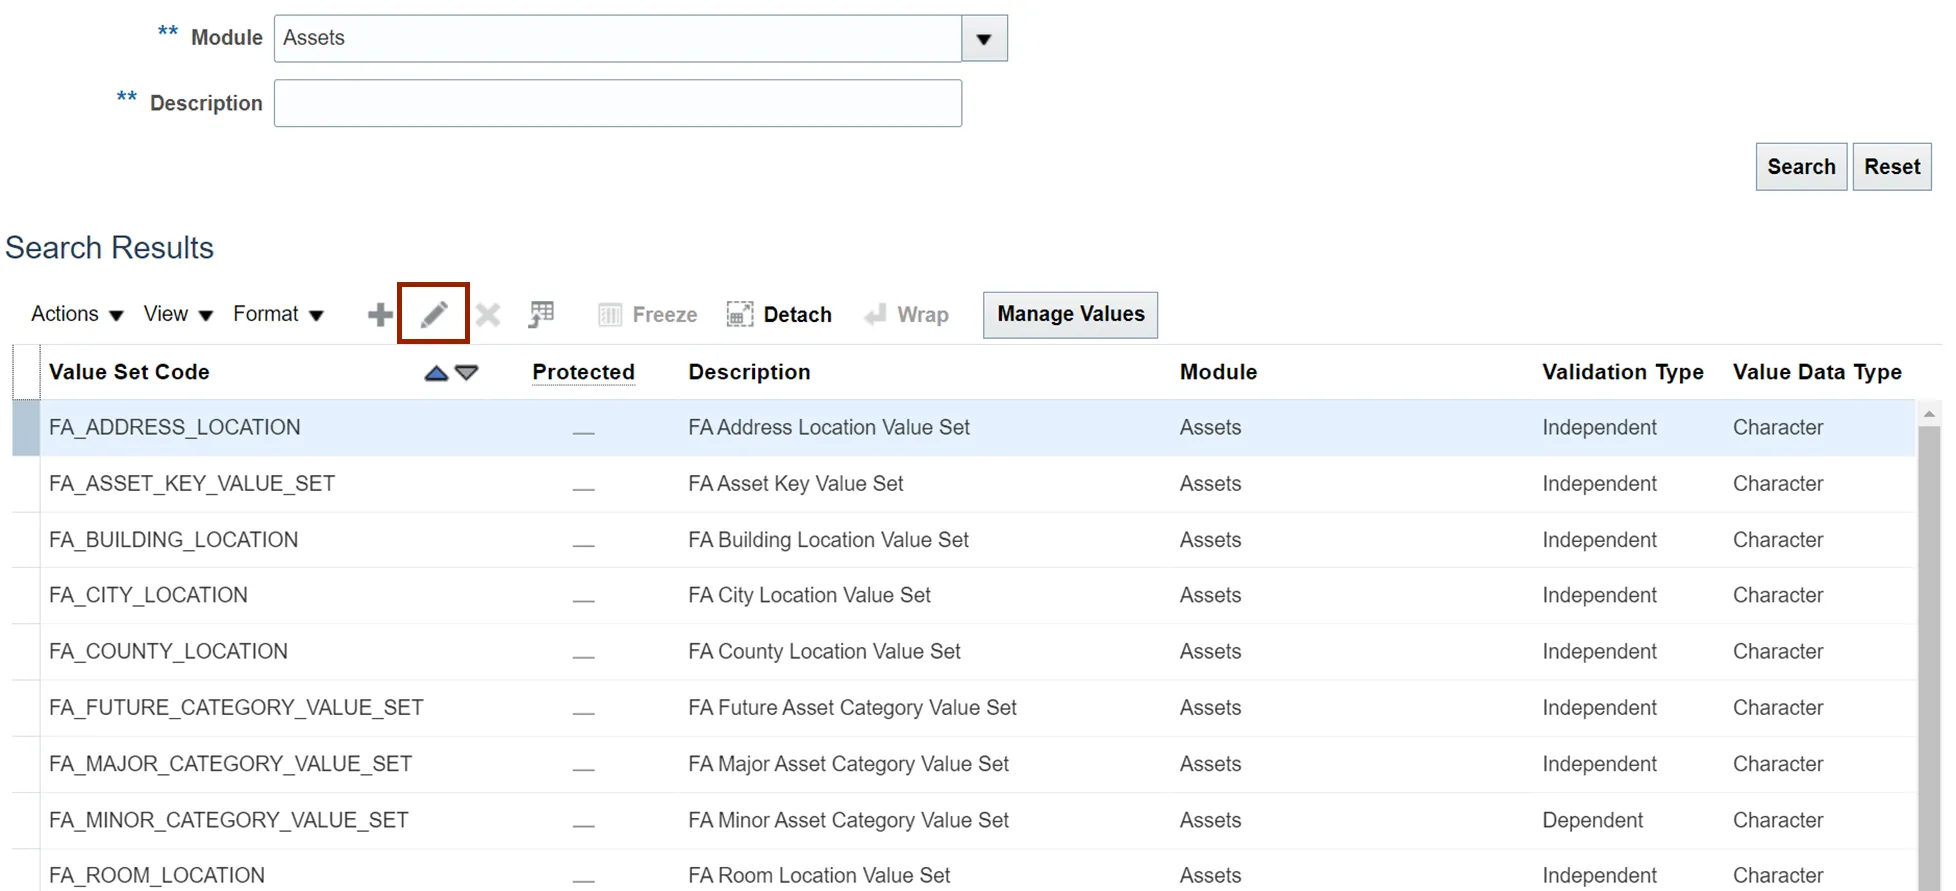
Step 20. Click the Edit icon.
Step 21. On the Edit Value Sets page, click the Manage Values button.

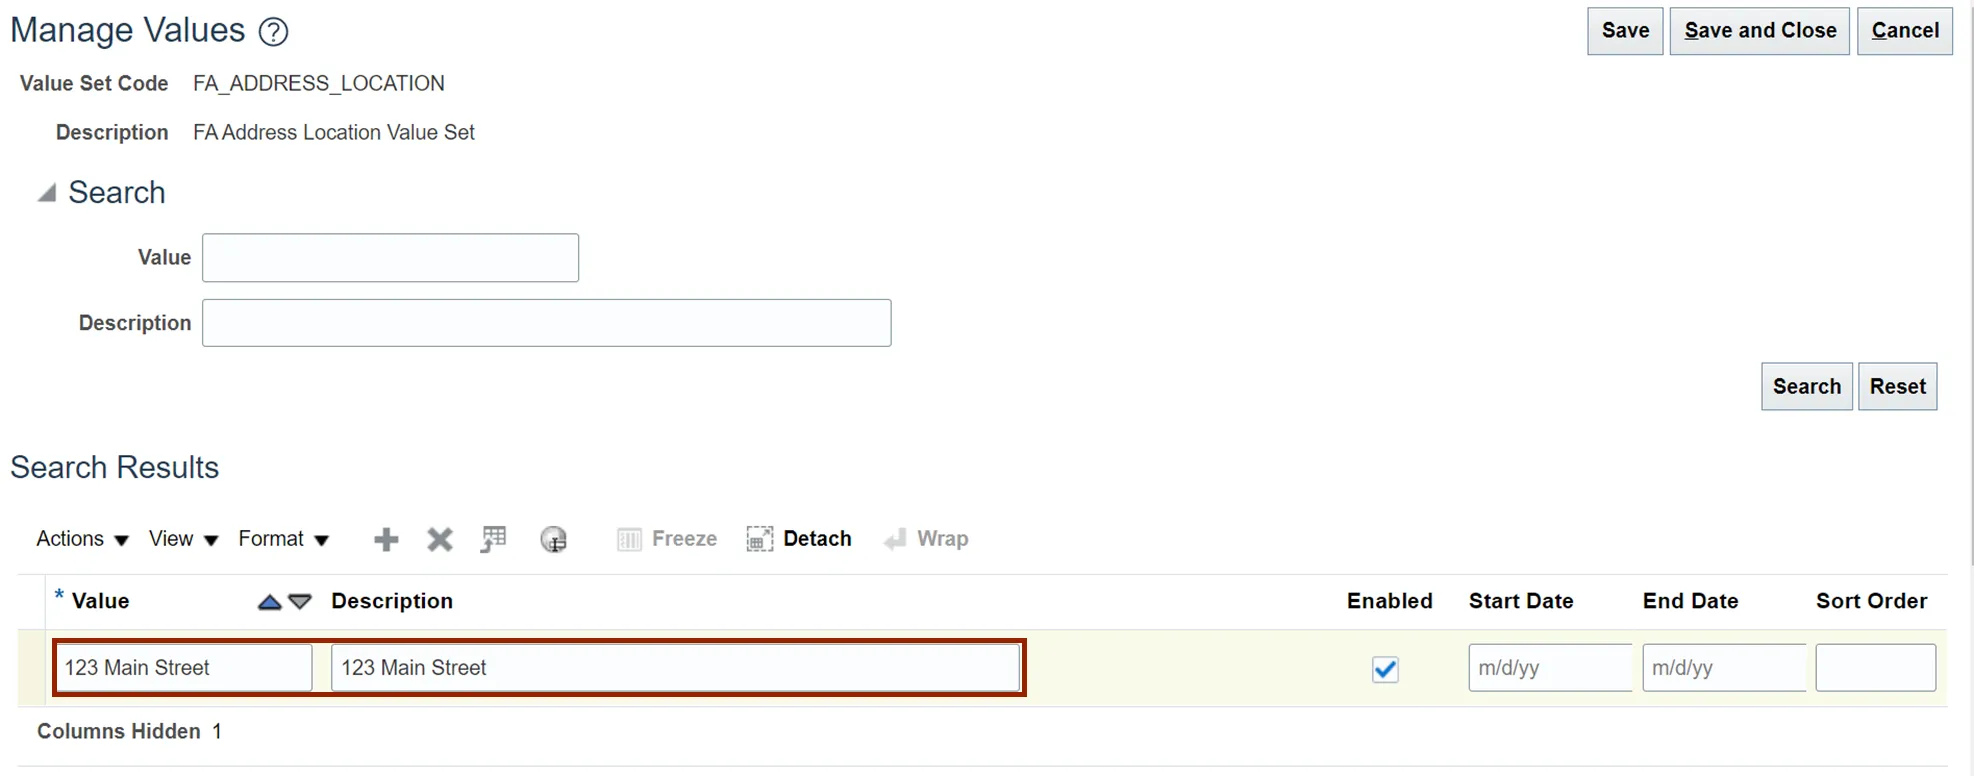
Step 22. On Manage Values page, click the Plus icon.
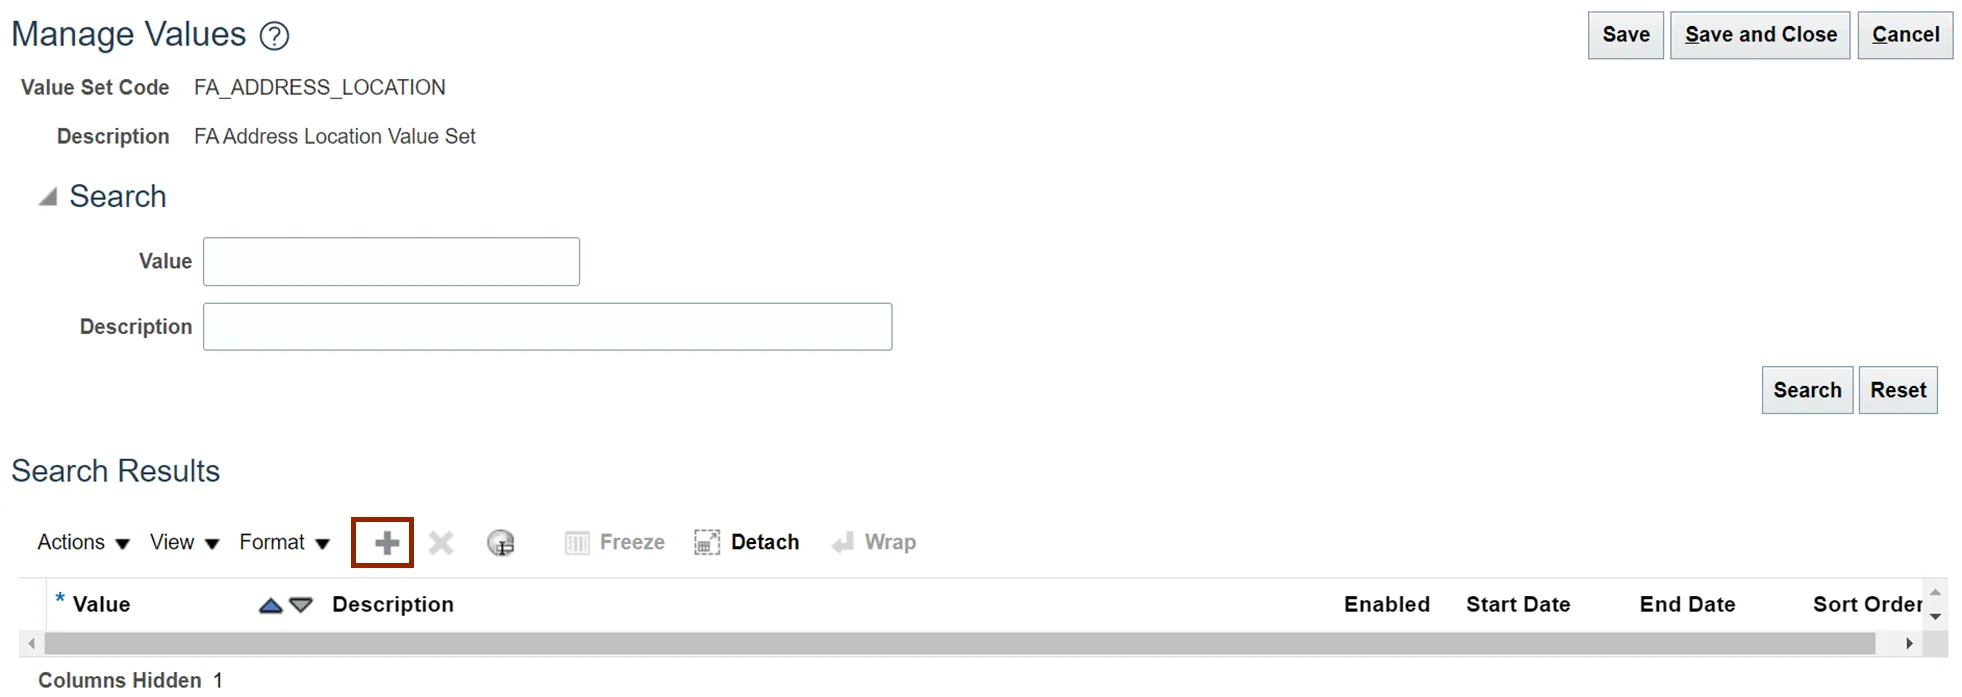
Step 23. Enter the *Value as needed.
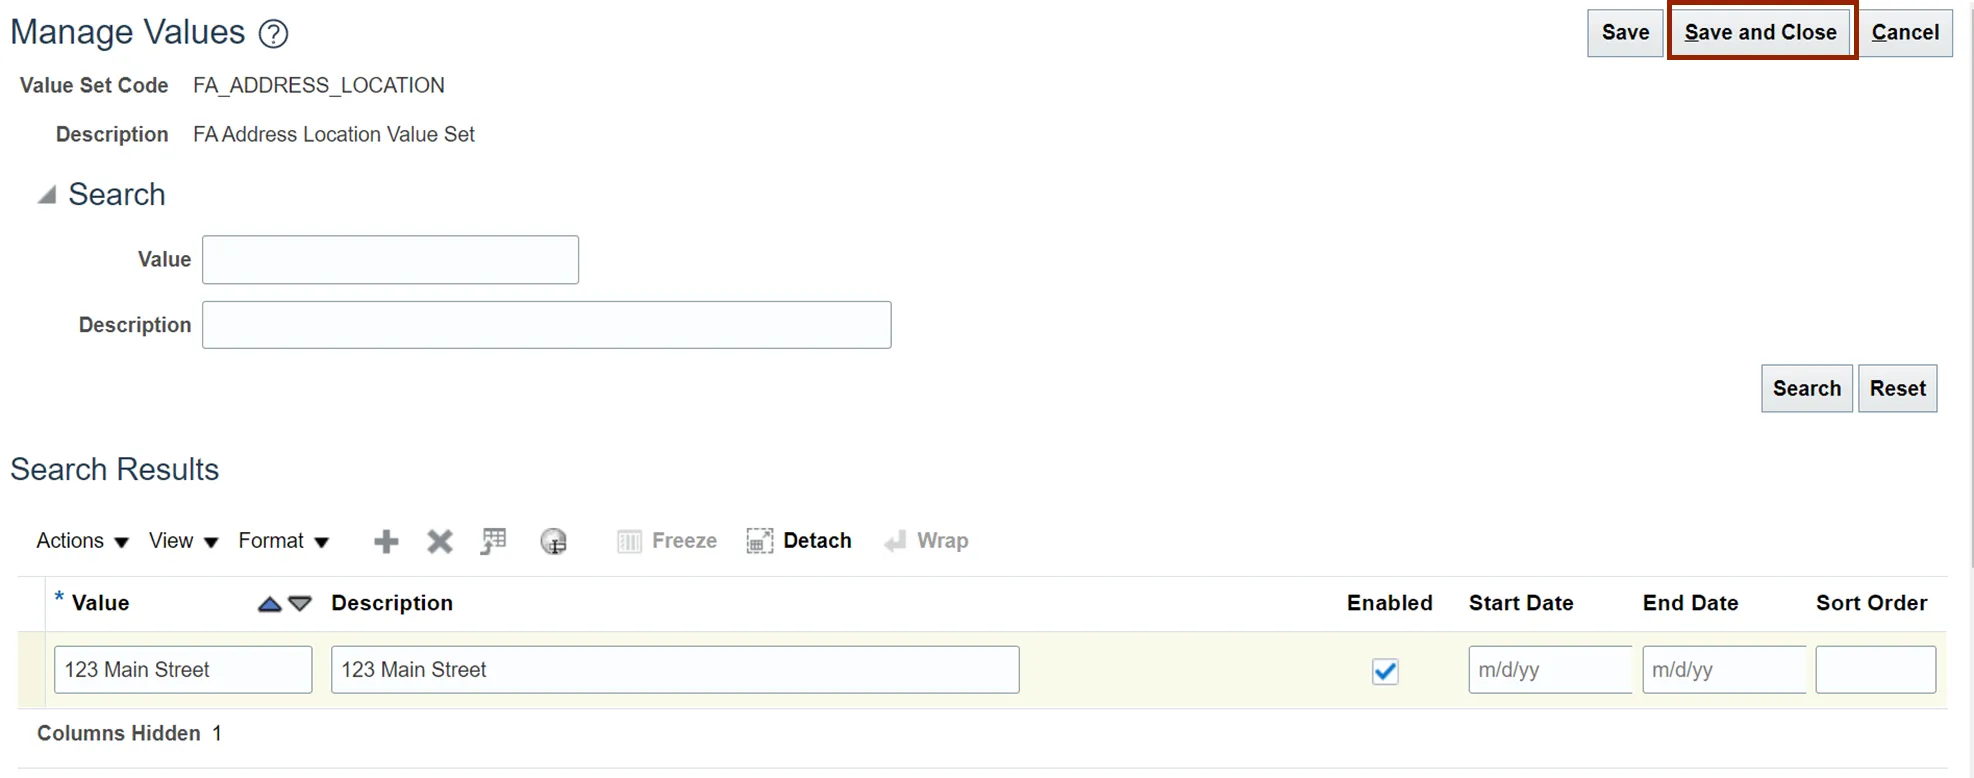
Step 24. Click the Save and Close button to save the updates. You must click on Save and Close button multiple times to return to Manage Fixed Assets Flexfield Value Sets page.
Step 25. Follow steps 12 - 24 to add values to any of the value sets listed in step 12.
Wrap-Up
Update the Fixed Assets Setup and Configuration using the steps above. This provides you the ability to add new configuration items as well as update existing configuration items based on business needs.
Additional Resources
- Virtual Instructor-Led Training (vILT)