Purpose
The purpose of this Quick Reference Guide (QRG) is to provide a step-by-step explanation of how to Correct a PO Line Closed for Invoicing due to incorrect quantity for a service PO in the North Carolina Financial System (NCFS).
Introduction and Overview
This QRG covers the procedure of correcting previously paid PO Matched Invoice.
User Tip
The following are prerequisites:
-
If you changed the Invoice Amount and/or Unit Price instead of Invoice quantity and as a result PO line is closed for invoicing.
-
If the Invoices are paid and need to be corrected.
Correct PO Matched Paid Invoice
To correct previously paid invoice in NCFS, please follow the steps below. There are 15 steps to complete this process.
Step 1. Log in to the NCFS portal with your credentials to access the system.
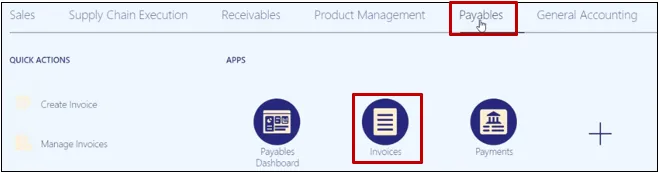
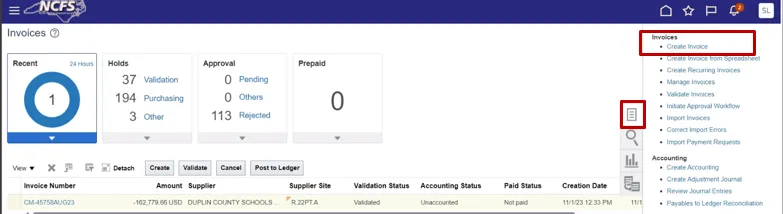
Step 2. On the Home page, click the Payables tab and then click the Invoices app.
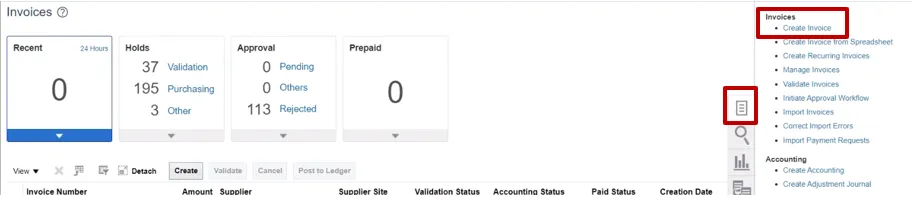
Step 3. Click on the Task panel and select Create Invoice.
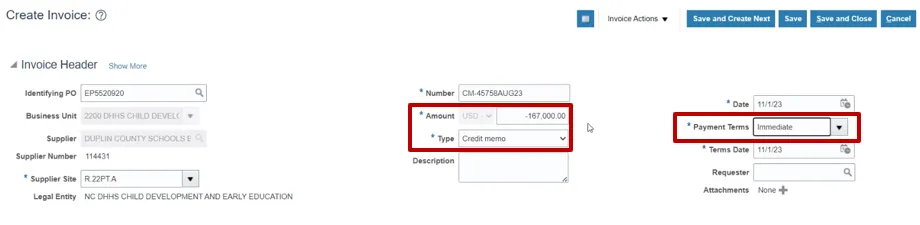
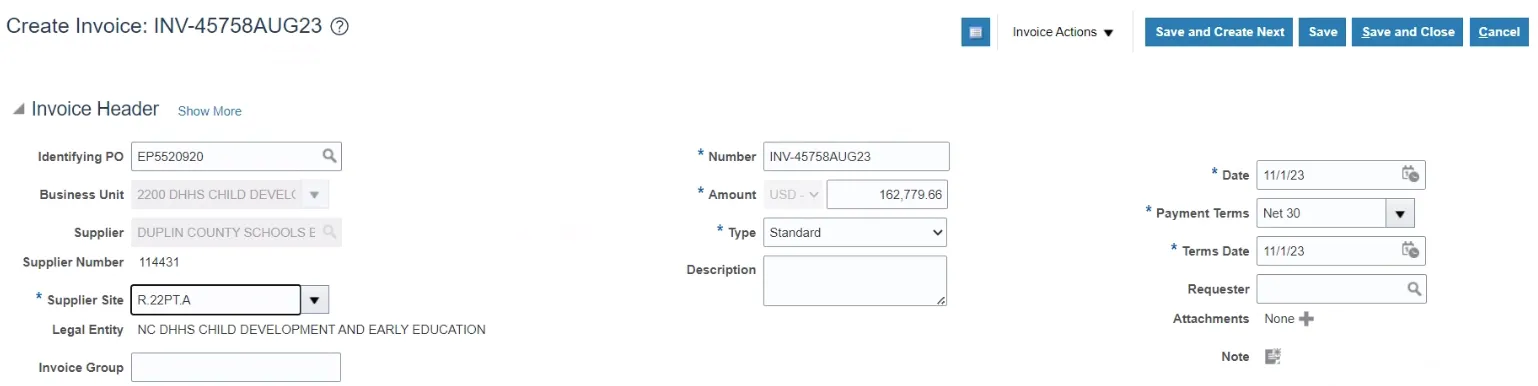
Step 4. Create Invoice page is displayed. Enter the PO Number (it will automatically populate BU, Supplier, Supplier Number), Invoice Number, Invoice Amount (enter the original invoice amount in Negative), Type – Credit Memo, Payment Terms change it to – Immediate.
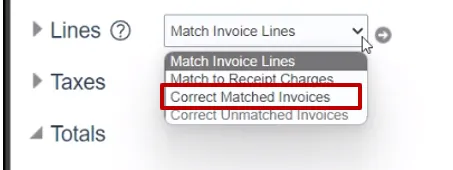
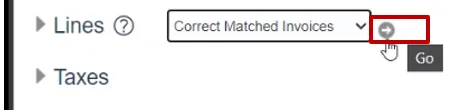
Step 5. Go to Lines section and click on the dropdown and select Correct Matched Invoices.
Step 6. Click on the Go button to match the lines.
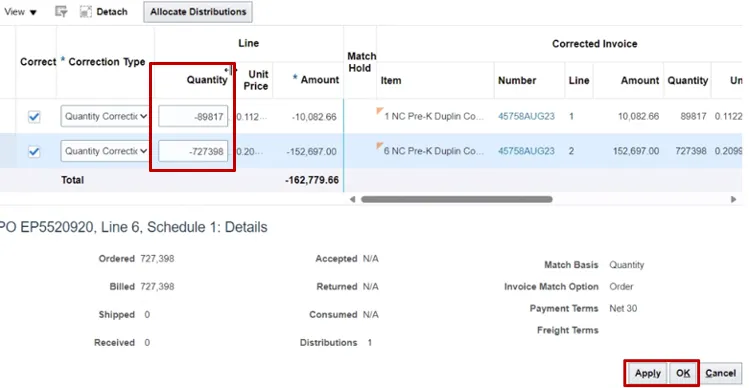
Step 7. The Correct Matched Invoices page is displayed and the lines to be corrected are listed.
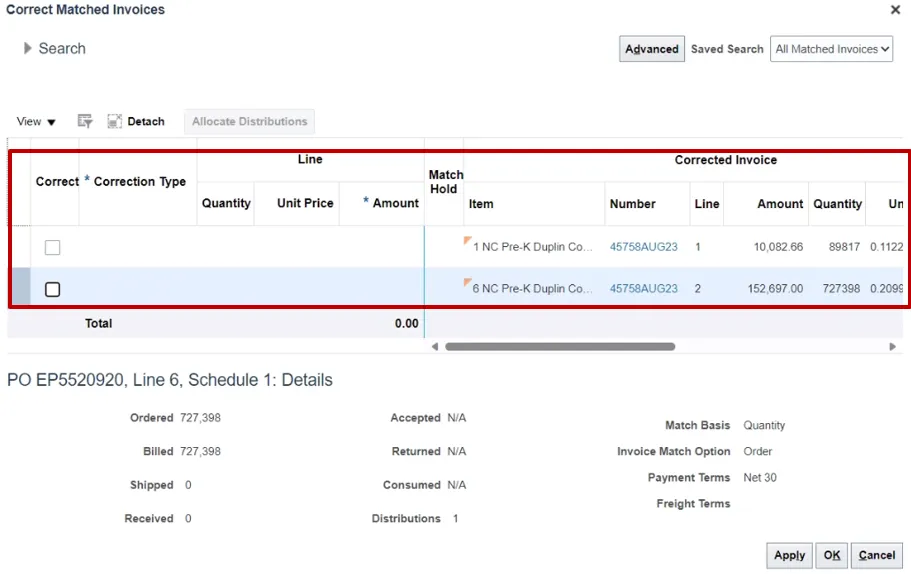
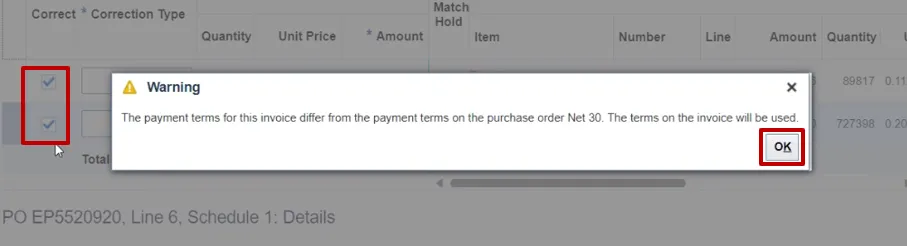
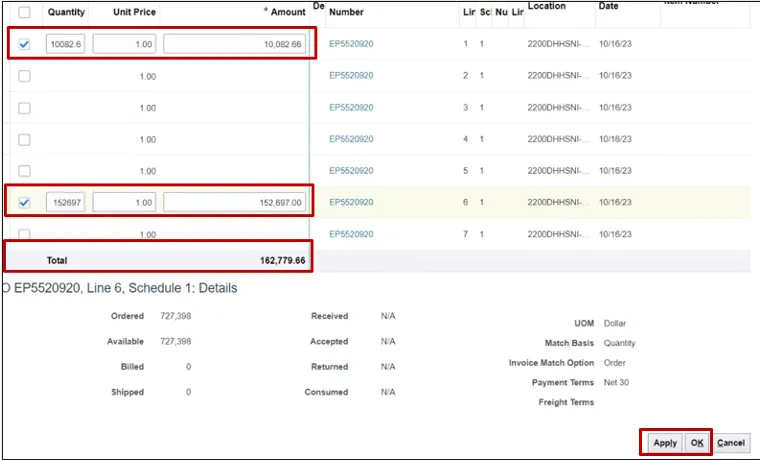
Step 8. Click the Check box to select the lines, you will receive a warning, click OK.
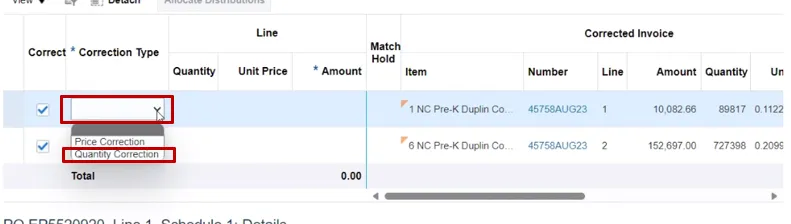
Step 9. Once the lines are selected, click on the Correction Type drop down and select Quantity Correction.
Step 10. Enter the Quantity in Negative. Click on the Apply and OK button.
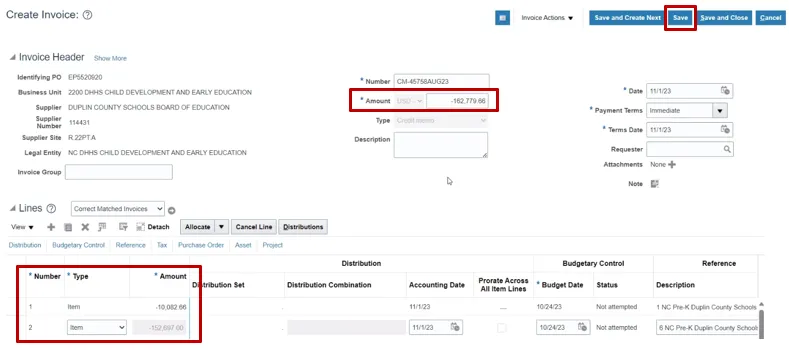
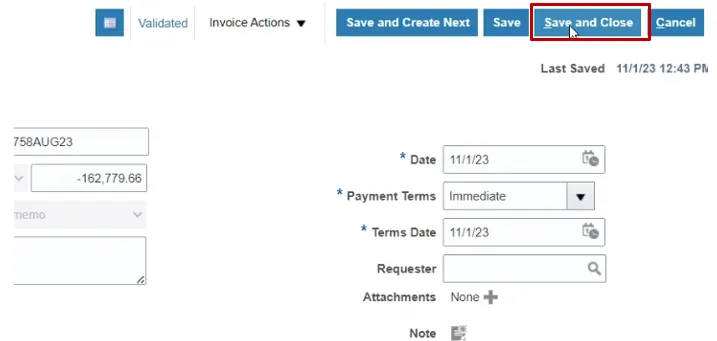
Step 11. Create Invoice page will be displayed. Review the negative amount in the invoice header and the lines. Click Save.
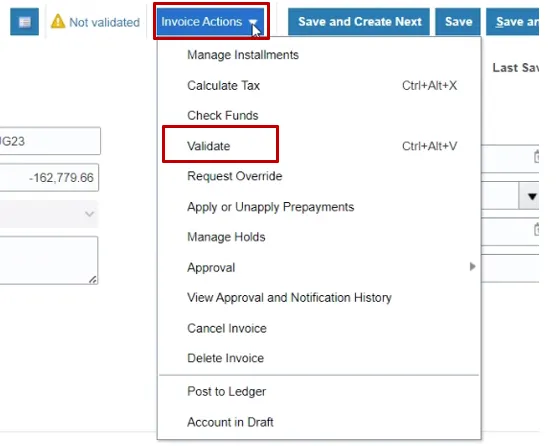
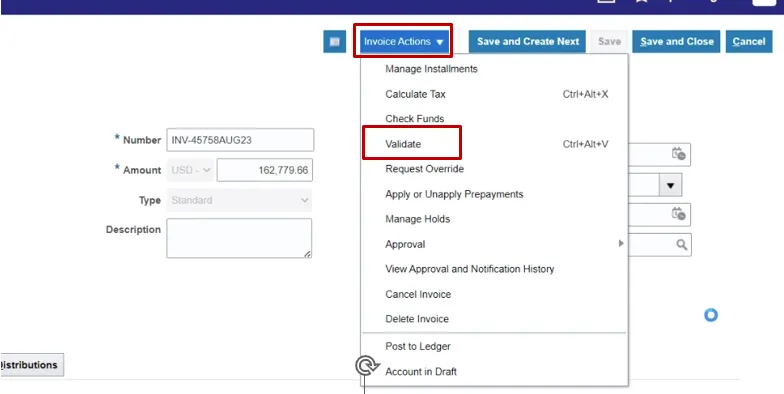
Step 12. Now click on Invoice Actions and Validate the invoice.
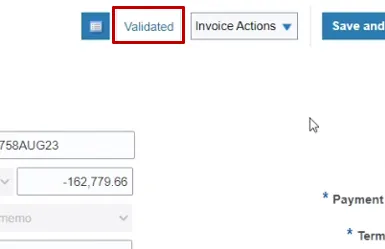
Step 13. The invoice is now Validated.
Step 14. Click on Invoice Actions again and Initiate approval (follow your agencies approval workflow process).

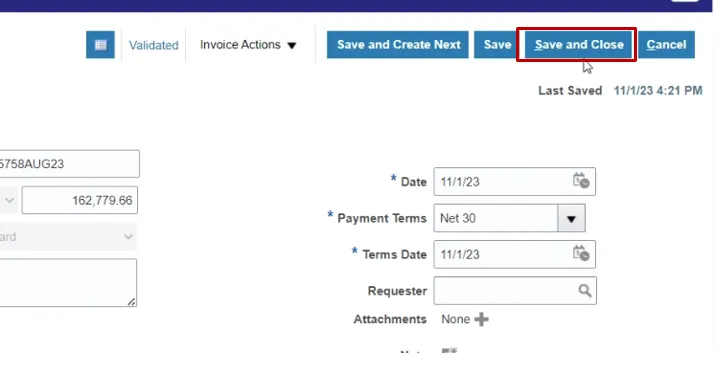
Step 15. Once the approval is initiated, Save and Close this invoice.
PO Matched Invoice
The next step is to Create a PO matched invoice. There are 7 steps to complete this process.
Step 1. Click on the Task panel and click on Create Invoice function.
Step 2. Create Invoice page is displayed. Enter the PO Number (it will automatically populate BU, Supplier, Supplier Number), Invoice Number, Invoice Amount (enter the original invoice amount) and Supplier Site (It must match the credit memo supplier site, or the credit memo won't post against the invoice, and you will duplicate payment to supplier).
Note: You will not be able to use the original Invoice Number, you must adjust the invoice number slightly by adding A or R (for revised).
Step 3. Navigate to the Lines section and click on the Arrow (Go) button to match the lines.

Step 4. Now notice all the lines are listed. Select the line in the original invoice by clicking on the check box next to the lines. Now, change ONLY the quantity to match the original amount in the original invoice, this calculates the correct total amount.
Click Apply and OK to continue.
Step 5. You will return to the create invoice page, click on Invoice Actions and Validate.
Step 6. Once the invoice is validated, click on Invoice Actions and Initiate Approval.

Step 7. Save and Close the invoice.
Wrap-Up
Correct PO Matched Paid Invoice in NCFS using the steps above.