Purpose
The purpose of this Quick Reference Guide (QRG) is to provide a step-by-step explanation of how to Print Checks in the North Carolina Financial System (NCFS).
Introduction and Overview
This QRG covers the steps to Print Checks.
Printing Checks
To Print Checks in NCFS, please follow the steps below. There are 11 steps to complete this process.
1. Log in to the NCFS portal with your credentials to access the system.
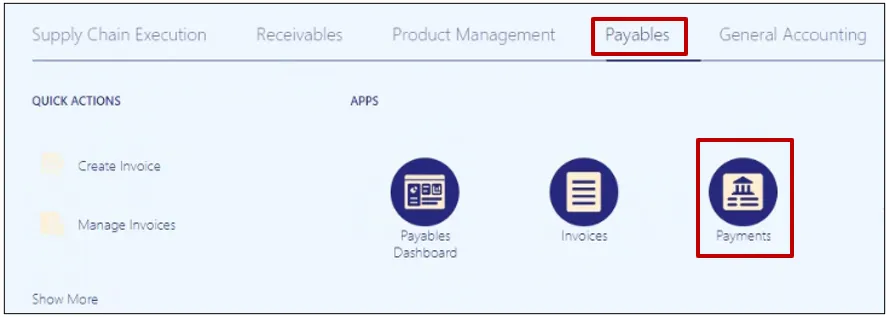
2. Click the Payables Tab. Click the Payments app.
3. Click the Tasks icon. Under Payments, click Create Printed Payment Files.

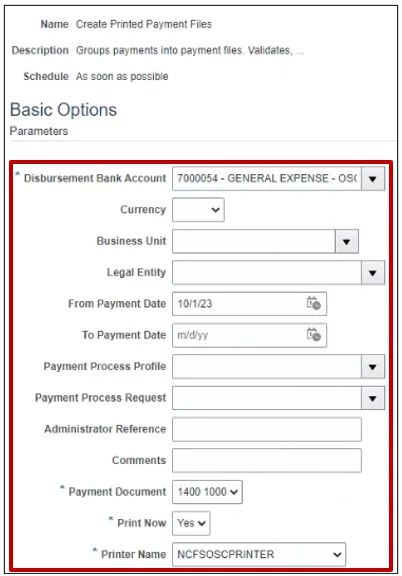
4. The Create Printed Payment Files page is displayed. Select the appropriate Disbursement Bank Account, Business Unit (if applicable), From Payment Date will default to the current date (you can change the From and To date if needed). Select the appropriate Payment Document, Print Now – Yes, and select the appropriate Printer Name.
5. Click the Submit button and you should get a confirmation message. This action will print the checks.

Note: Make sure the checks are printed before recording print status (Step 6 thru Step 10). If checks need to be reprinted, see Step 7.
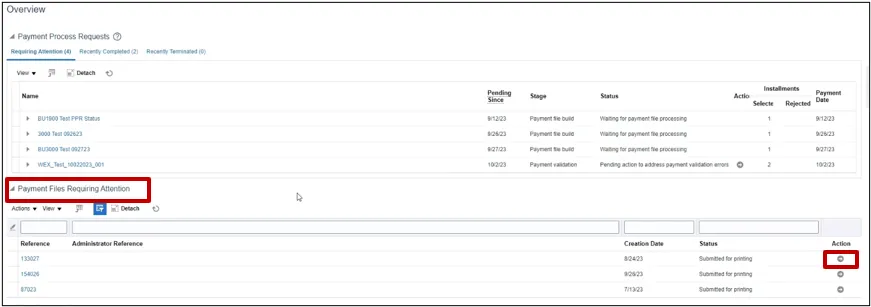
6. Overview page is displayed. All the Payment files requiring attention are listed under the Payment Files Requiring Attention section, click on the Action Arrow button related to the payment file to proceed to the next steps.
7. Payment File page is displayed. You can review details, Reprint the checks if needed. Click on Record Print Status.

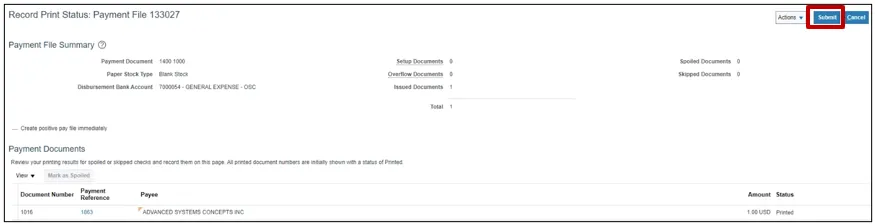
8. Record Print Status: Payment File page is displayed. Click Submit, you will receive a warning.
9. Click Record the Print Status.

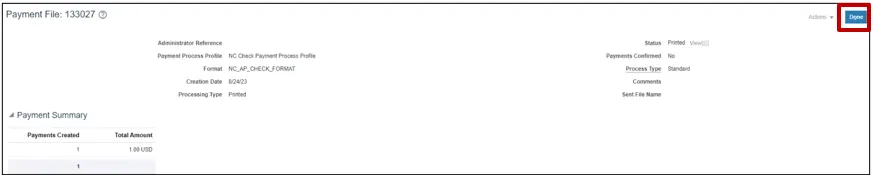
10. Click Done.
11. The Overview page will be displayed, click on the Refresh button and the payment reference number you printed will no longer be in the list, this shows that you have printed the checks and recorded print status.

Wrap-Up
Print checks and record print status using the steps above.
Additional Resources
- Virtual Instructor-Led Training (vILT)