Purpose
The purpose of this job aid is to provide an overview of the ZEMP transaction which is a snapshot of an employee’s information.
Employee Overview Screen
The transaction is initiated by entering data to define who and what timeframe an HR user needs to view a particular employee’s information. There are 4 steps to complete this process.
Step 1: Type ZEMP in the Command field on the Easy Access screen and press the Enter key.
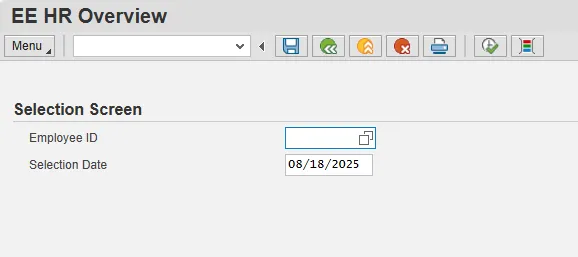
Step 2: Enter an Employee ID. You can enter the PERNR or click the matchcode to perform a search for the employee.
Step 3: The current date defaults into the Selection Date field. You have the option to enter any date that the employee has data in the system. If you enter a date that is not valid, you receive the message ‘No Information for the date Entered.’ If you are not authorized, you will receive a message indicating that you do not have authorization.
Step 4: Click the Execute button to perform the transaction.
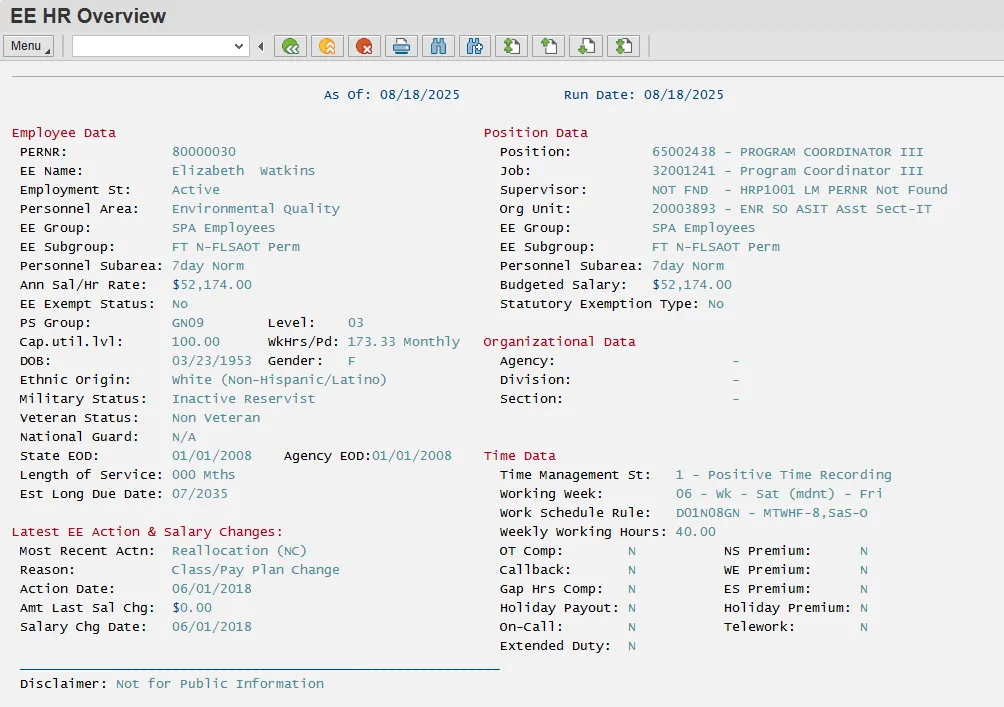
The Employee Overview screen will display as of the selection date you entered on the first screen. The Run Date is the current date. The other fields are pulled from existing infotypes.
Note: The data on the example below is not real data.