Purpose
The purpose of this Quick Reference Guide (QRG) is to provide a step-by-step guide of how to setup Cost Management in the North Carolina Financial System (NCFS).
Introduction and Overview
Using this document, the user will be able to set up and configure cost management structures, including cost elements, to remain in compliance with policies and to utilize system navigation to locate, review, and interpret cost information such as materials, labor, and overhead.
Cost Management Setup
There are 10 steps to complete this process.
Step 1. Click the Company Single Sign-On (SSO) button.
Step 2. Enter your @dac.nc.gov email address.
Step 3. Click Next, then enter password.
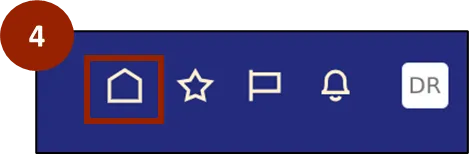
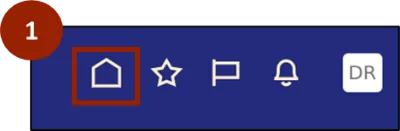
Step 4. Begin from the Home page, or click the Home icon.
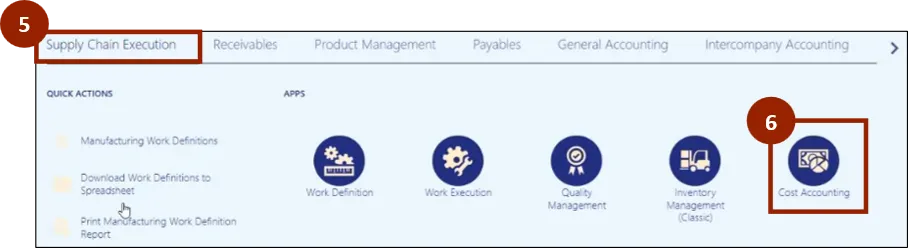
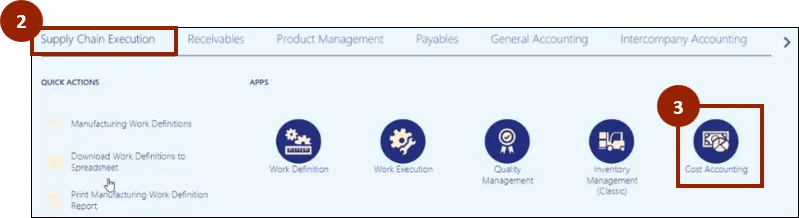
Step 5. On the Home page, select Supply Chain Execution.
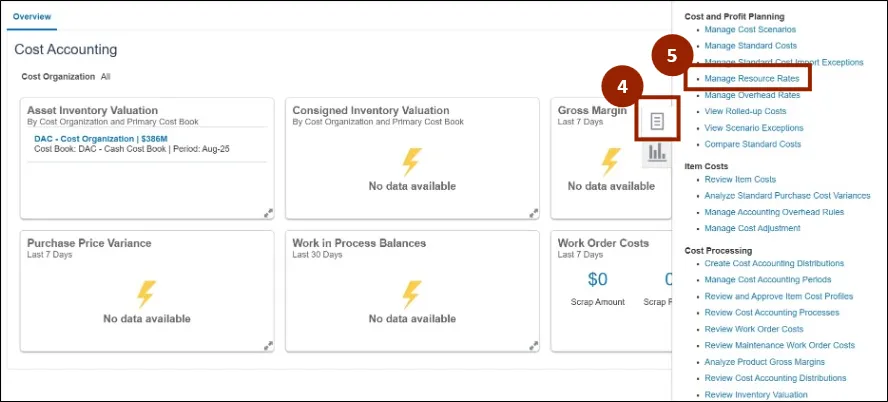
Step 6. Within the Supply Chain Execution tab, select Cost Accounting.
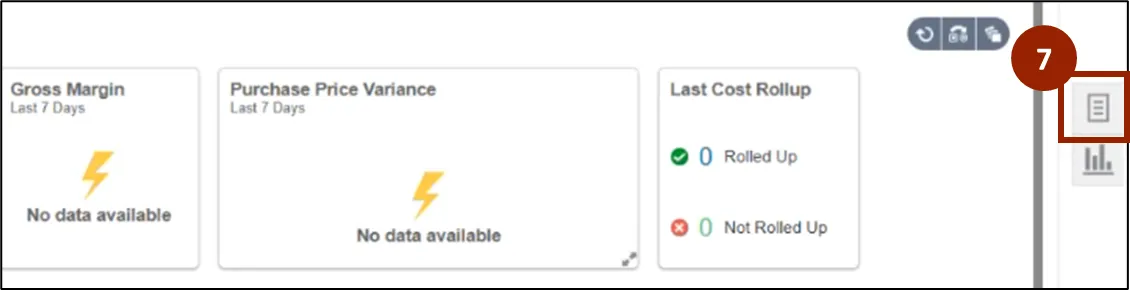
Step 7. On the Cost Accounting Page, navigate to the Tasks icon.
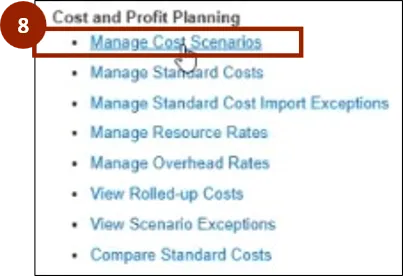
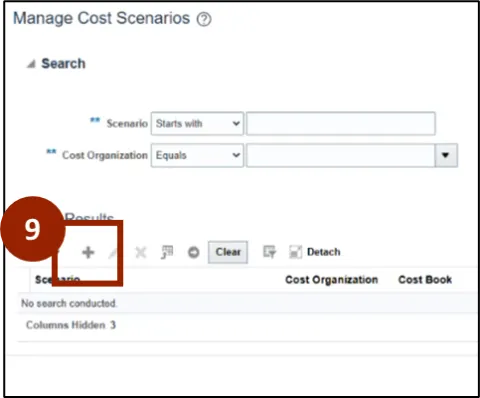
Step 8. Within the Tasks tab, select Manage Cost Scenarios to begin creating a cost scenario.
Step 9. On the Manage Cost Scenario Page, navigate to the Plus (+) icon.
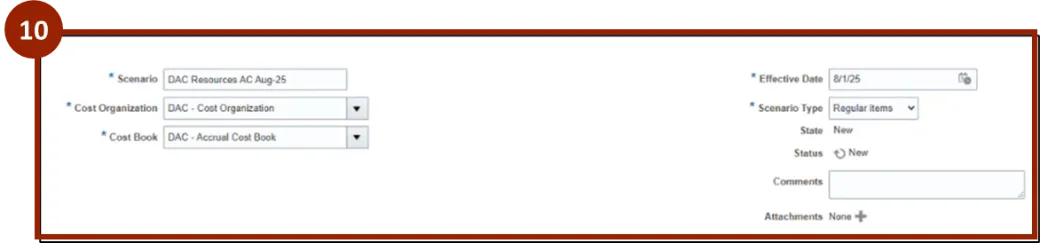
Step 10. Within the Edit Cost Scenario tab, input and/or select the appropriate option from the following:
- Scenario
- Cost Organization
- Cost Book
- Effective Date
- Scenario Type
Select Save once you select the option.
Manage Resource Rates
There are 10 steps to complete this process.
Step 1. Begin from the Home page, or click the Home icon.
Step 2. On the Home page, select Supply Chain Execution.
Step 3. Within the Supply Chain Execution tab, select Cost Accounting.
Step 4. On the Cost Accounting Page, navigate to the Tasks icon.
Step 5. Within the Tasks tab, select Manage Resource Rates.
To add resource rates individually.
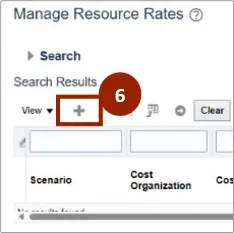
Step 6. On the Manage Resource Rates page, navigate to the Plus (+) icon.
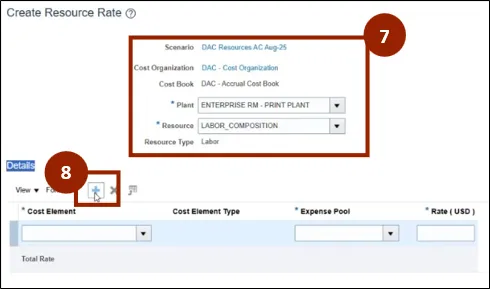
Step 7. Within the Create Resource Rate tab, input and/or select the appropriate option from the following:
- Scenario
- Plant
- Resource
Step 8. In the Details section select the Plus (+) icon.
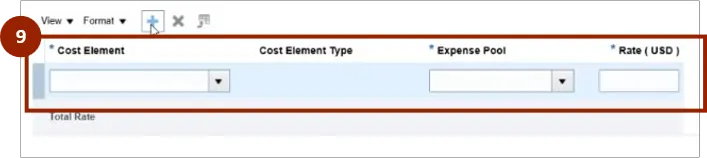
Step 9. Within the new row select the appropriate from the following:
- Cost Element: Select Overhead.
- Expense Pool: Select the appropriate expense pool depending on the Resource type (Labor or Equipment).
- Rate: Enter 0 as rate value.
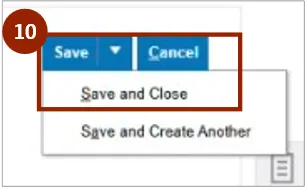
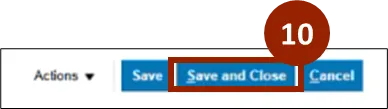
Step 10. Click Save and Close.
Manage Resource Rates in Spreadsheet
There are 15 steps to complete this process.
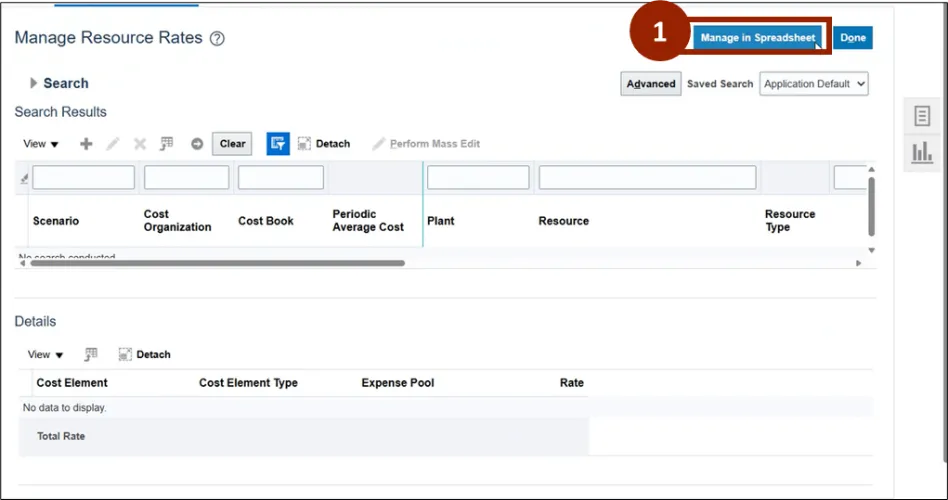
Step 1. Select Manage in Spreadsheet button to download the Manage Resource Rates file.
Step 2. Download and open the Manage Resource Rates spreadsheet and enable editing.

Step 3. Click Yes from the pop-up window.

To continue, you may need to reenter your log in credentials.
Step 4. Click the Company Single Sign-On (SSO) button.
Step 5. Enter your @dac.nc.gov email address.
Step 6. Click Next then enter password.
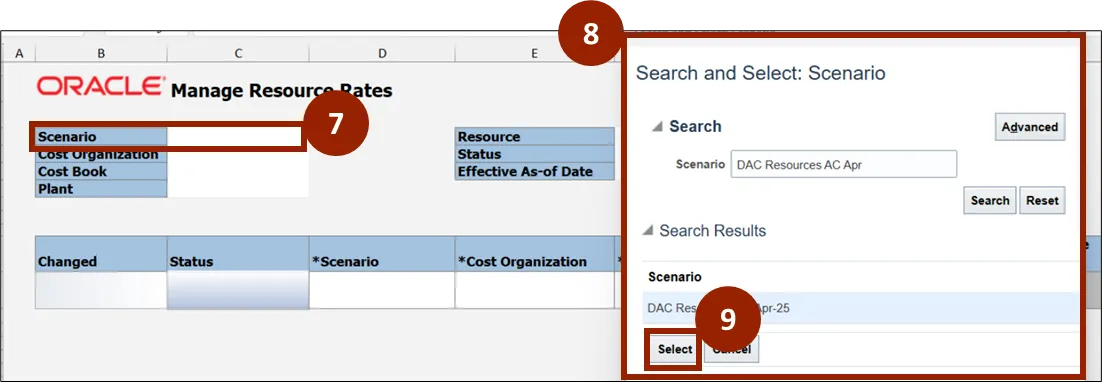
Step 7. Double click in Scenario cell.
Step 8. Manually enter Scenario Name and search Cost Scenario.
Step 9. Click Select.
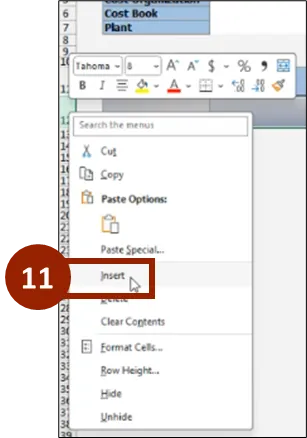
Step 10. Select the entire row by clicking on the cell number to the far left under the blue title row.

Step 11. Use the Insert row feature in Excel to add new lines as needed.
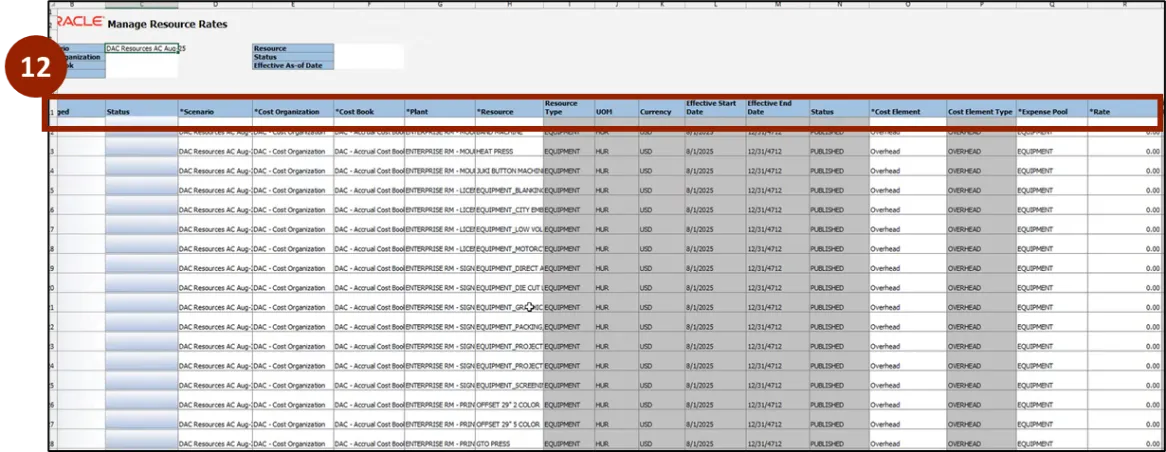
Step 12. Within the new rows enter the following information:
- Scenario: Enter the Cost Scenario Name.
- Cost Organization: DAC - Cost Organization.
- Cost Book: Enter the Cost Book Name.
- Plant: Enter the Plant Name.
- Resource: Enter the Resource Name.
- Cost Element: Select Overhead.
- Expense Pool: Select the appropriate expense pool depending o the Resource type (LABOR or EQUIPMENT).
- Rate: Enter 0 as rate value.
Step 13. Select Manage Resource Rates.
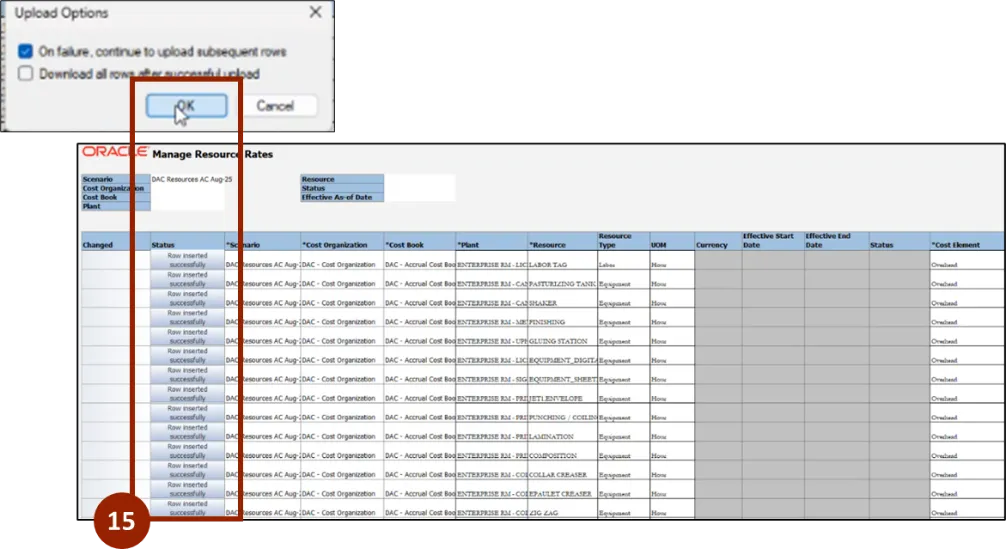
Step 14. Select Upload.

Step 15. Select OK from the pop-up to view status of rows after import.
Note: Once rows are inserted successfully, return to the NCFS screen in your web browser to access the Manage Resource Rates screen.
Publish Cost Scenarios
After cost scenario(s) are created and resource rates are added, the cost scenario should be published to view the manufacturing cost rate per unit.
The upcoming steps will show how to publish cost scenarios. There are 10 steps to complete this process.
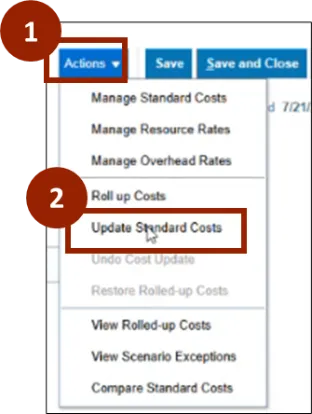
Step 1. From the Manage Cost Scenario screen, click Actions.
Step 2. Select Update Standard Costs.
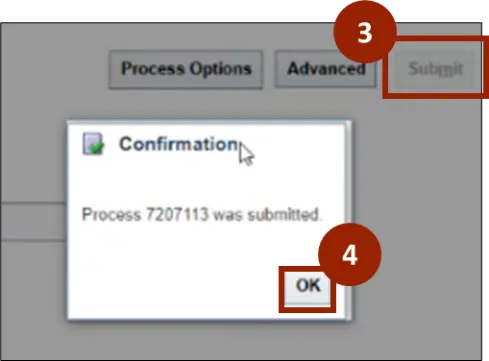
Step 3. Select Submit.
Step 4. Click OK to make resource rates effective.
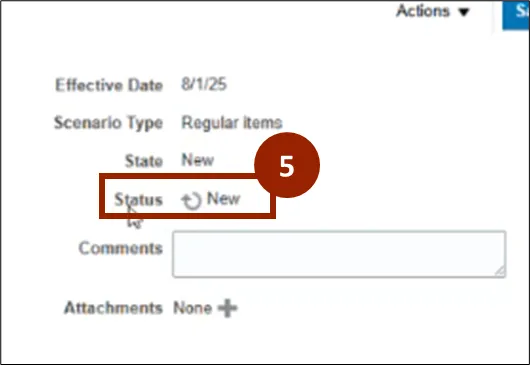
Step 5. To verify successful completion, select the refresh icon by the status option to see Completed Successfully.
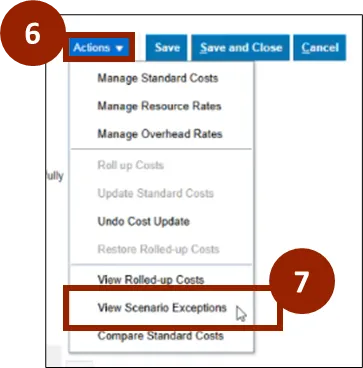
Step 6. Select Actions.
Step 7. Select View Scenario Exceptions.
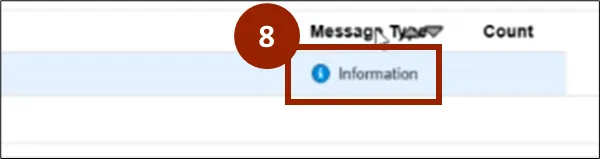
Step 8. In the Message field, click the Information icon to view errors and make corrections.
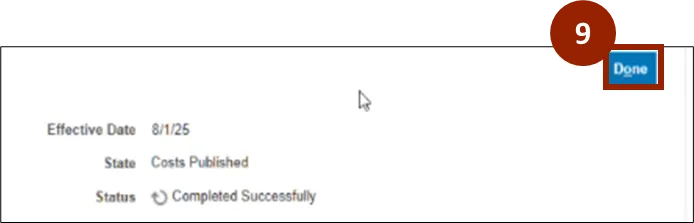
Step 9. Once reviewed, click Done.
Step 10. Click Save and Close.
Wrap-Up
NCFS users can setup cost management by following the steps outlined above.
Additional Resources
- Instructor Led Training (ILT)
- Web-based Training (WBT)