Purpose
The purpose of this Quick Reference Guide (QRG) is to provide a step-by-step guide of how to Manage Inventory Transactions in the North Carolina Financial System (NCFS).
Introduction and Overview
This QRG covers the process of Manage Inventory Transactions on different transaction types and determine when each should be used in inventory management scenarios. How to create, Miscellaneous Transactions, Subinventory Transfers and create and manage SSP orders and Transfer orders using spreadsheets in NCFS
Create Miscellaneous Transactions
Once logged in to NCFS, follow these steps. There are 17 steps to complete this process.
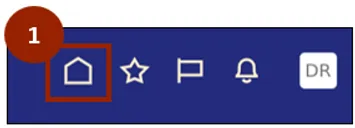
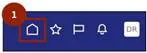
Step 1. Begin from the Home page, or click the Home icon.
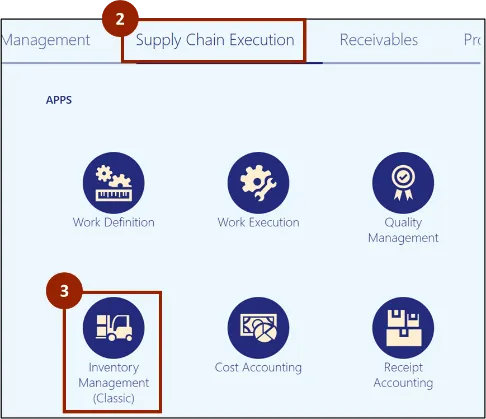
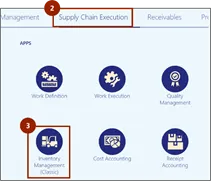
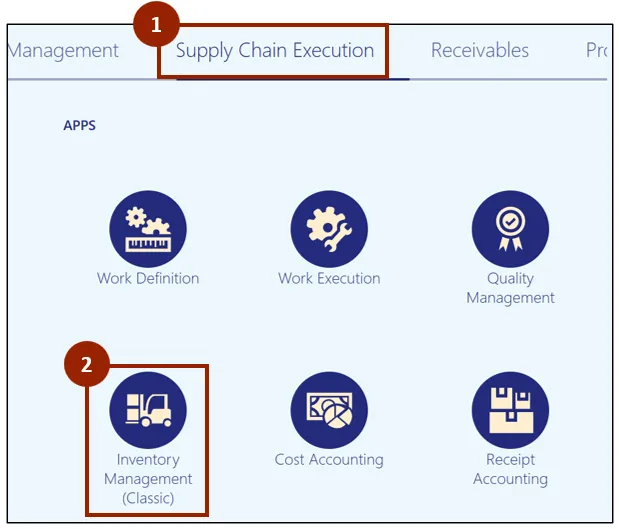
Step 2. On the Home page, select Supply Chain Execution.
Step 3. Within the Supply Chain Execution tab, select Inventory Management.
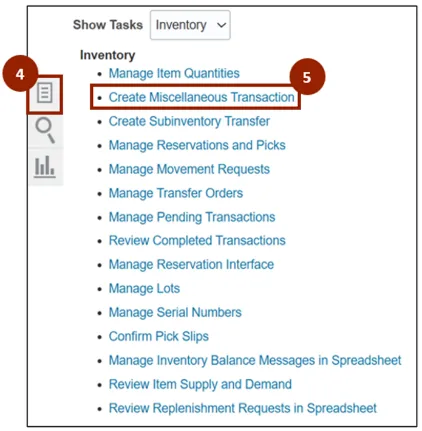
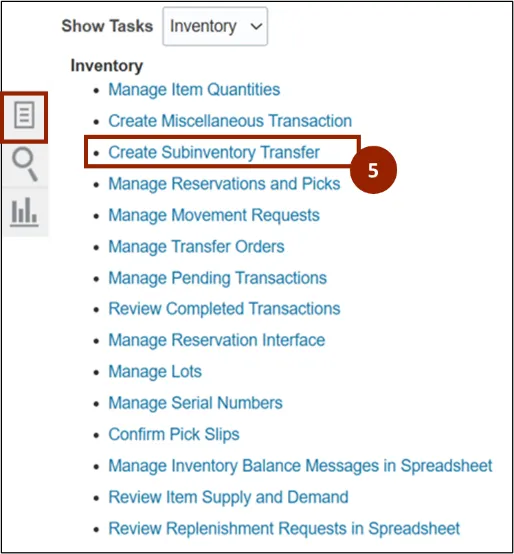
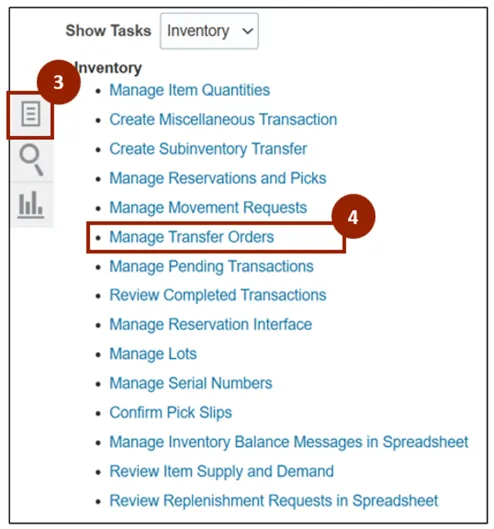
Step 4. Click the Task icon.
Step 5. Under the Inventory header, click Create Miscellaneous Transaction.
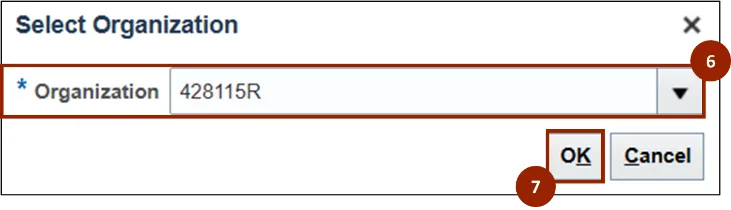
Step 6. In the Organization field of the Select Organization pop-up window, enter or search for the desired organization (i.e., 428115R).
Step 7. Click OK.
Step 8. The Create Miscellaneous Transaction screen displays for the selected organization with the Date field automatically populated.
Step 9. In the Type field, select the appropriate transaction type (i.e., NC Add Inventory Adjustments).
Note: Choose the transaction Type based on the required action. For example, select NC Add Inventory Adjustments to add quantity, NC Deduct Inventory Adjustments to deduct quantity, or options like NC Direct Issue or NC Direct Return, as needed. For this example, select NC Add Inventory Adjustments.

Step 10. In the Use Current Item Cost field, select Yes.
Step 11. In the Account field, enter or search the account combination aligned to this transaction.
Note: If needed, use the Search icon to access the Account pop-up window to search and select the appropriate account for the transaction.

Step 12. Under the Transaction Lines section, click the Plus (+) icon to add a line.
Step 13. In the Item field, enter or search for the item number (i.e., 0002443).
Step 14. In the subinventory drop-down field, select the desired subinventory (i.e., FG428115R).
Step 15. In the Quantity field, enter the desired quantity for the UOM (i.e., 10 packages).

Step 16. Click Submit.
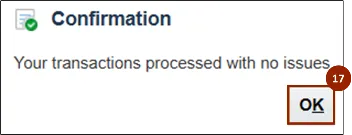
Step 17. A Confirmation pop-up window displays, click OK to close the window.
Create Subinventory Transfer
Once logged in to NCFS, follow these steps. There are 14 steps to complete this process.
Step 1. Begin from the Home page, or click the Home icon.
Step 2. On the Home page, select Supply Chain Execution.
Step 3. Within the Supply Chain Execution tab, select Inventory Management.
Step 4. Click the Task icon.
Step 5. Under the Inventory header, click Create Subinventory Transfer.
Step 6. The Create Subinventory Transfer screen displays for the selected organization, in the Type field, select the Subinventory Transfer.

Step 7. Under the Transaction Lines section, click the Plus (+) icon to add a line.
Step 8. In the Item field, enter or search for the item number (i.e., 0002443).
Step 9. In the Source column’s subinventory drop-down field, select the desired subinventory source (i.e., FG428115R for finished good).
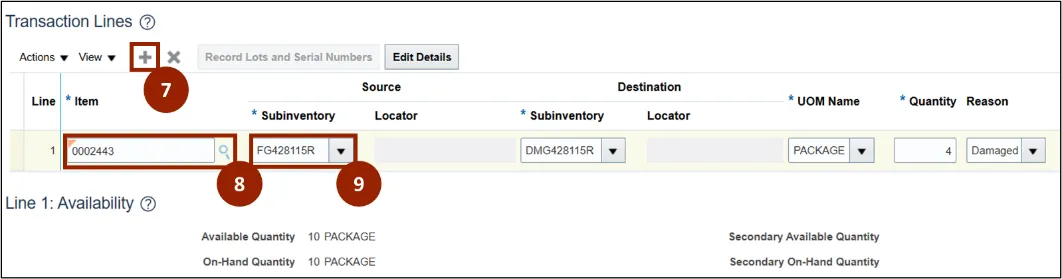
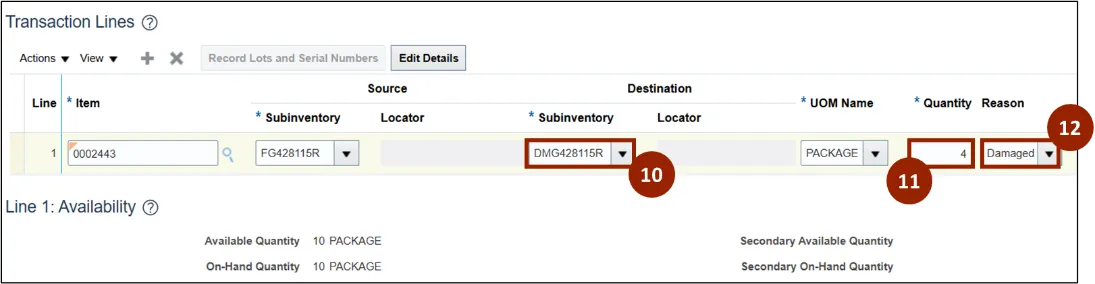
Step 10. In the Destination column’s subinventory drop-down field, select the desired subinventory destination (i.e., DMG428115R for damaged good).
Step 11. In the Quantity field, enter the desired quantity to transfer related to the selected UOM (i.e., 4 packages).
Step 12. (Optional) In the Reason drop-down field, select the appropriate reason for the transfer (i.e., Damaged).
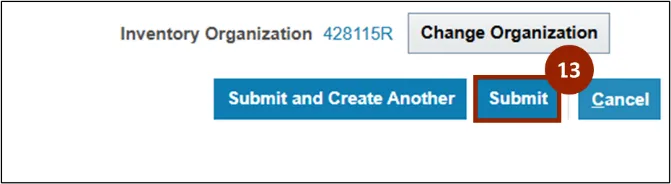
Step 13. Click Submit.
Step 14. A Confirmation pop-up window displays, click OK to close the window.
Create SSP Orders Using Spreadsheet
There are 29 steps to complete this process.
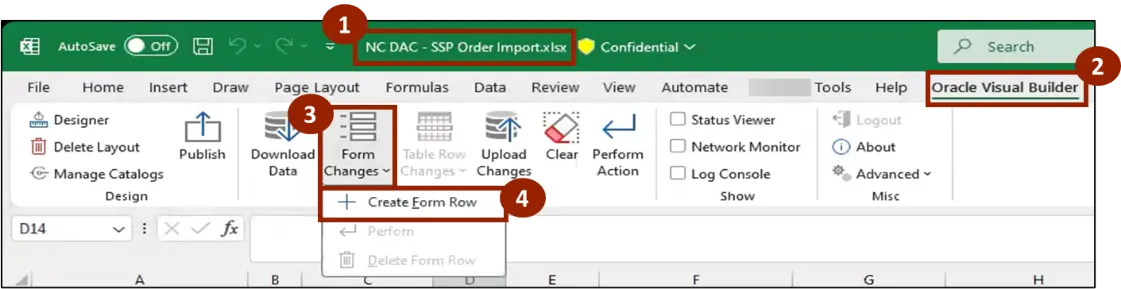
Step 1. Open the SSP Order Import spreadsheet you have been provided.
- The NC DAC - SSP Order Import file is located in the “CE NCFS Information” folder within the DAC_Correction Enterprises Teams Channel.
Step 2. Click on the Oracle Visual Builder tab.
Step 3. Click on Form Changes.
Step 4. Select Create Form Row.
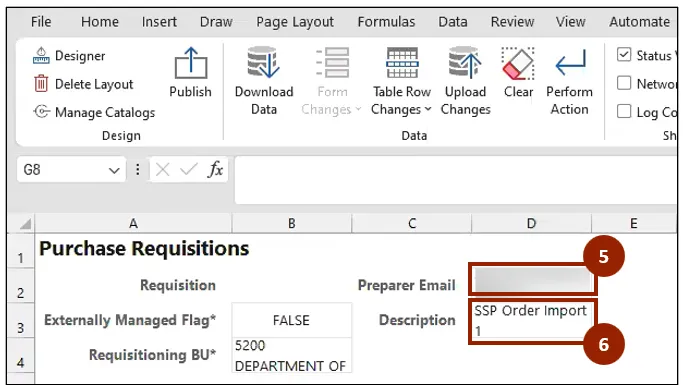
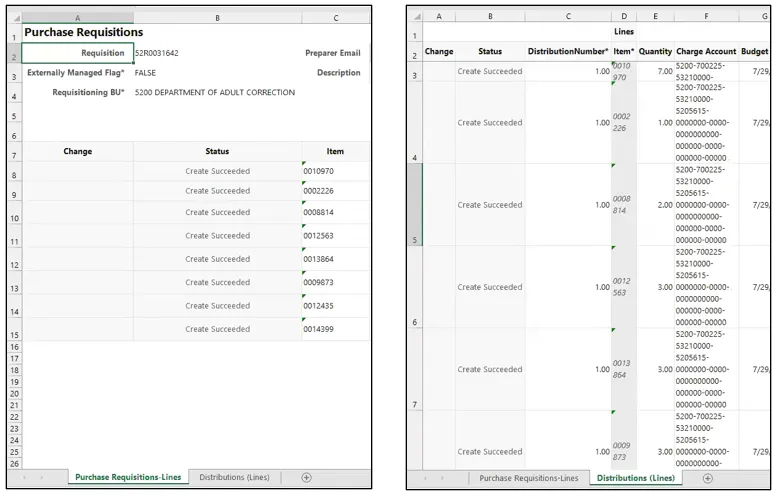
Step 5. You will be working in the Purchase Requisitions-Lines tab. In the Preparer Email field, enter the preparer’s email address.
Step 6. In the Description field, enter a description of the order (i.e., SSP Order Import 1).
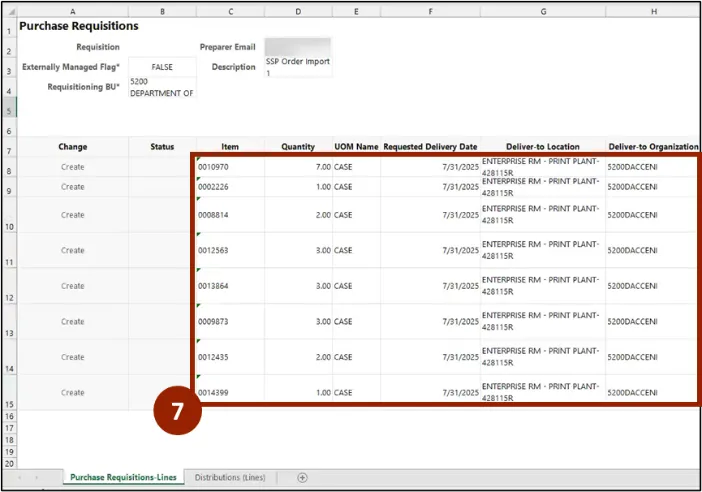
Step 7. Enter information into each of the following fields:
- Item
- Quantity
- UOM Name (The unit of measure should match in all lines)
- Requested Delivery Date
- Deliver-to Location
- Deliver-to Organization
Note: If the Deliver-to Location is a CE Location enter 5200DACCENI, if it is not a CE Location enter 5200DACNI.
Note: The information needs to be entered manually. Item Number, Quantity and UOM Information will be received via email from the requester.
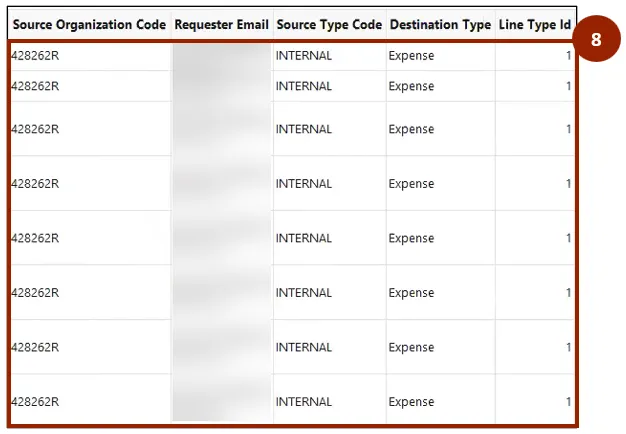
Step 8. Enter information into each of the following fields:
- Source organization code (i.e., plant, distribution center, etc.)
- Requester’s email address
- Source type (Enter INTERNAL)
- Destination type (Enter Expense)
- Line type ID (Enter 1)
Note: Remove any lines that are duplicates. Any lines with missing information will need to be deleted.
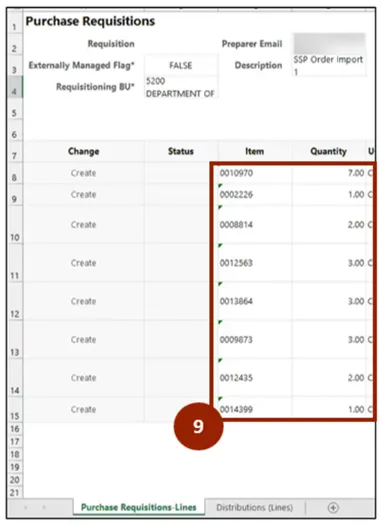
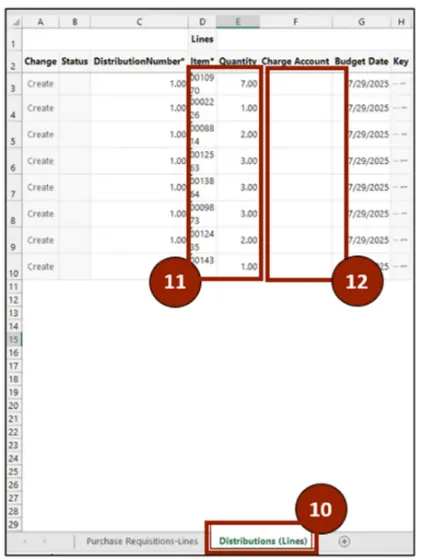
Step 9. Copy the information from the Item and Quantity columns.
Step 10. Click the Distribution tab at the bottom of the spreadsheet.
Step 11. Paste the info into the Item and Quantity Columns in the Distributions Tab.
Step 12. Populate the Charge Account field.
Note: Other cells in the spreadsheet will then auto-populate. Make sure other columns (i.e., distribution number, etc.) are filled in as needed. Leave the budget date as today’s date.
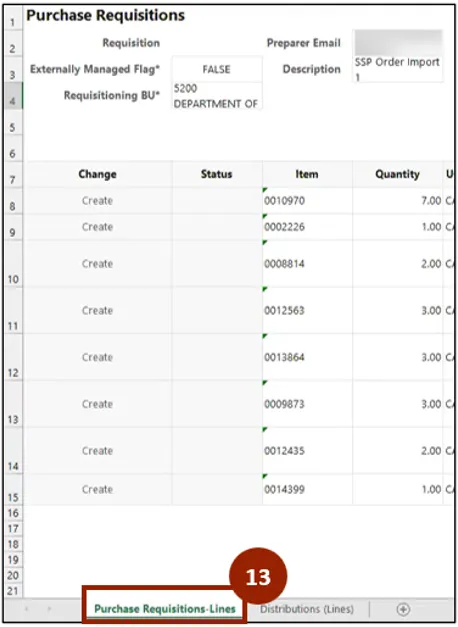
Step 13. Once all information is entered correctly, return to the Purchase Requisition-Lines tab.
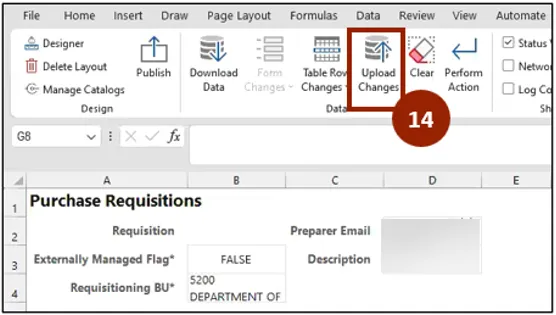
Step 14. Click Upload Changes.
Step 15. Click the Company Single Sign-On (SSO) button.
Step 16. Enter your @dac.nc.gov email address.
Step 17. Click Next then enter password.
Note: The Upload pop-up window will appear. The blue progress bar will show when your changes have been uploaded. Notice the Requisition/SSP Order Number has been auto populated.
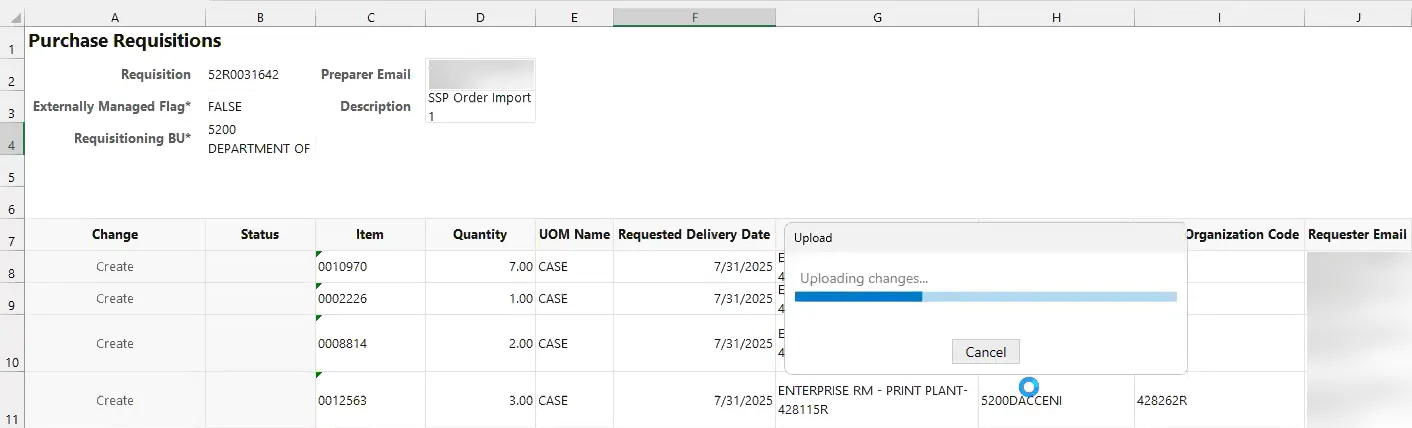
The status has changed to Create Succeeded in the Purchase Requisitions tab.
The status has also changed to Create Succeeded in the Distribution (Lines) tab.
Step 18. Click the Company Single Sign-On (SSO) button.
Step 19. Enter your @dac.nc.gov email address.
Step 20. Click Next then enter password.
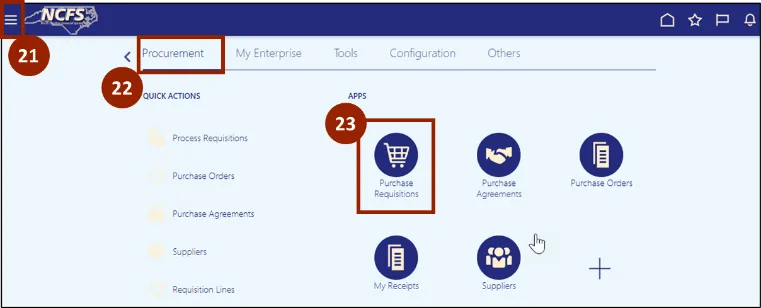
Step 21. Begin from the Home page, or click the Home icon.
Step 22. On the Home page, select Procurement.
Step 23. Within the Procurement tab, select Purchase Requisitions.
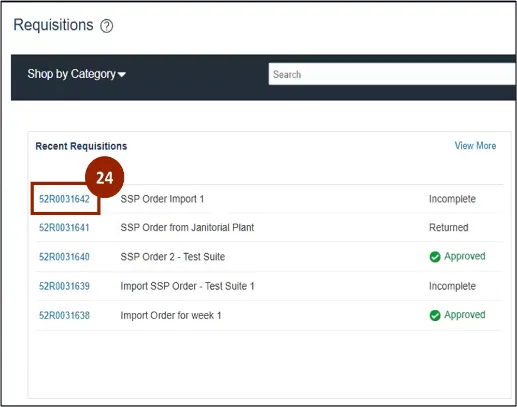
Step 24. On the Requisition screen, the status is Incomplete, click the Requisition/SSP Order Number.
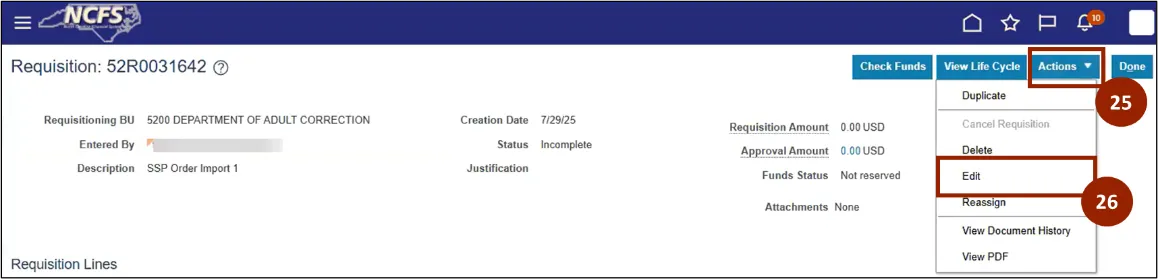
Step 25. Review the information on the Requisitions screen. To submit the SSP Order, click Actions.
Step 26. Select Edit from the drop-down to make the necessary changes.
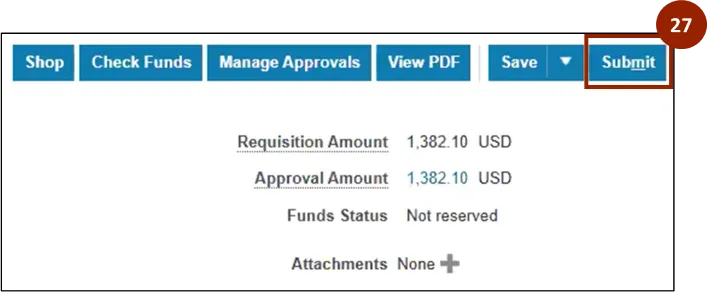
Step 27. Once all the information is confirmed, click Submit.
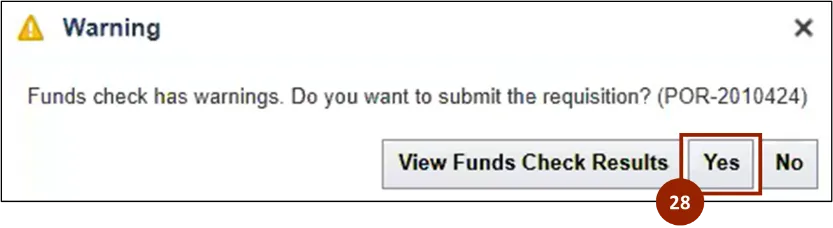
Step 28. A Warning pop-up will appear, read the warning and click Yes to continue.
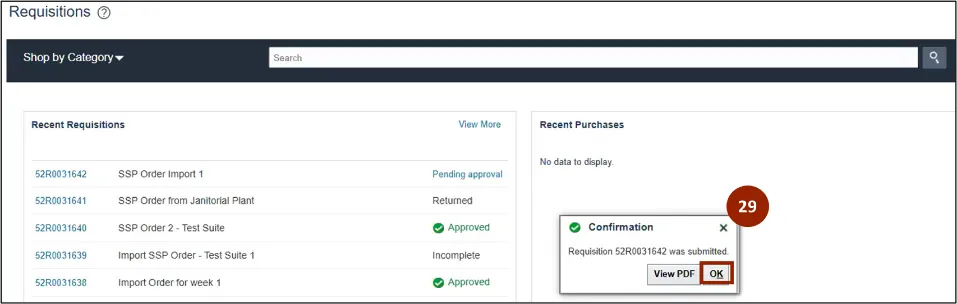
Step 29. A Confirmation pop-up screen will appear, click OK.
Note: The status will now say Pending Approval. This approval process could take several minutes.
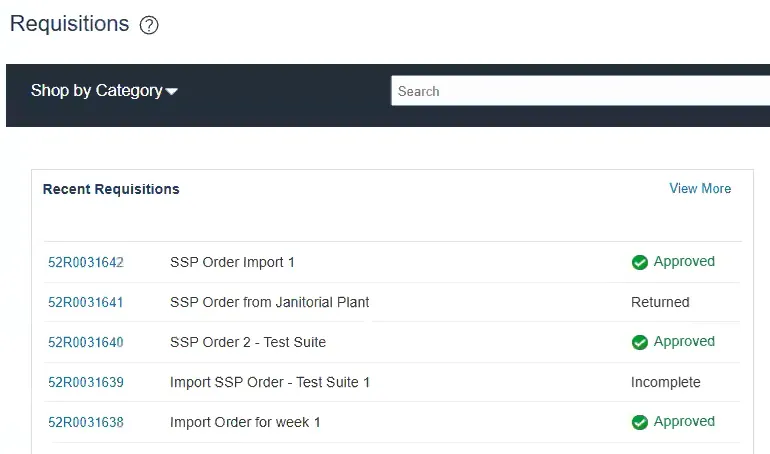
Once the requisition has been approved, the procurement application will create a transfer order, and the shipment process can begin.
Create Transfer Orders Using Spreadsheet
There are 29 steps to complete this process.
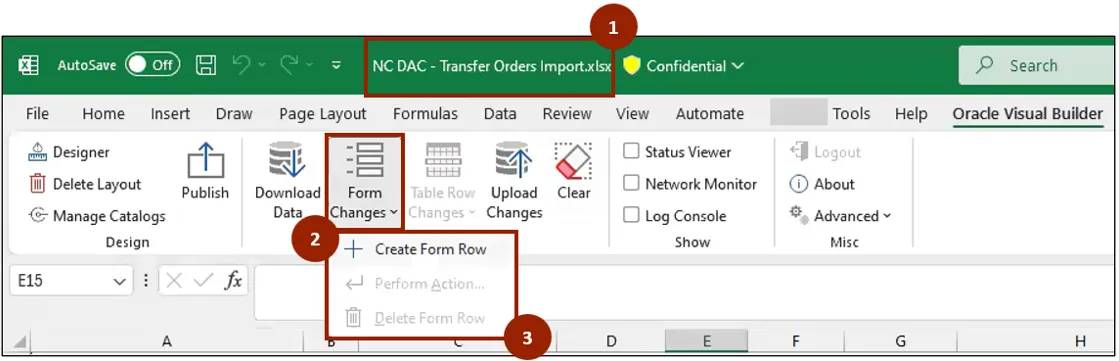
Step 1. Open the Transfer Orders Import spreadsheet you have been provided.
- The NC DAC - Transfer Orders Import file is located In the CE NCFS Information folder within the DAC_Correction Enterprises Teams Channel.
Step 2. Click on Form Changes.
Step 3. Select Create Form Row.
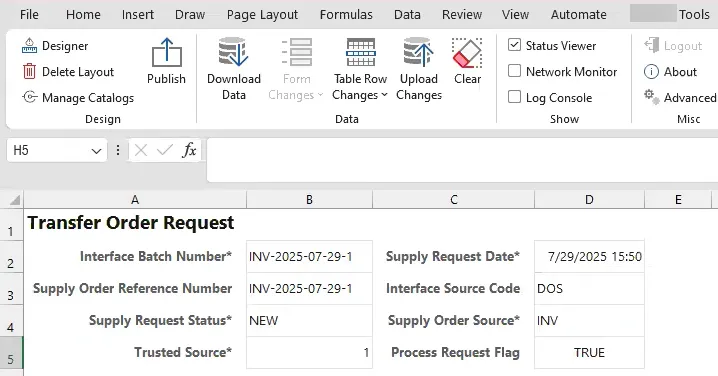
Note: The Interface Batch Number will be autogenerated. The number will consist of the letters INV plus the year plus month plus date (i.e., INV-2025-07-29).
If you are making more than one order in a day, add a dash and a number to the interface Batch number (i.e., INV-2025-07-29-1).
The Interface Batch Number and Supply Order Reference Number must match. You do not need to change any other values in the header.
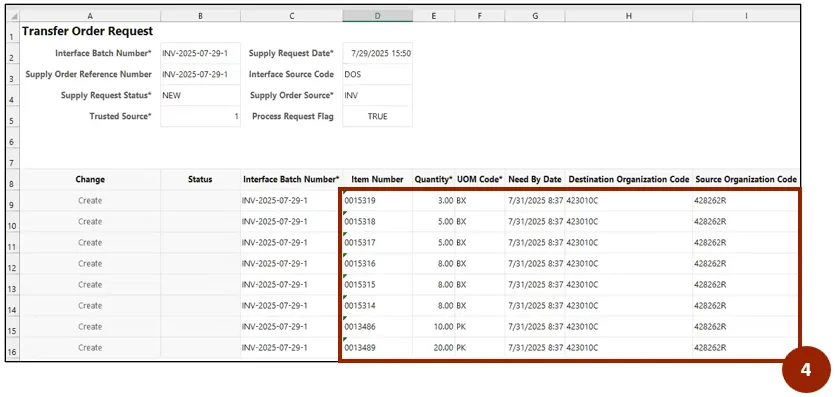
Step 4. Complete each of the following fields:
- Item Number
- Quantity
- UOM Code
- Need By Date
- Destination Organization Code
- Source Organization Code
Note: The information needs to be entered manually. Item Number, Quantity and UOM Code information will be received via email from the requester.
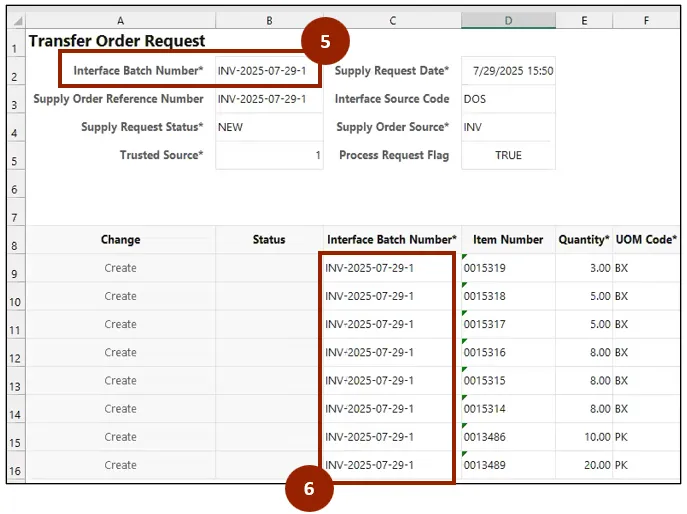
Step 5. Copy the Interface Batch Number from the header.
Step 6. Paste the Interface Batch Number into each cell of the Interface Batch Number column.
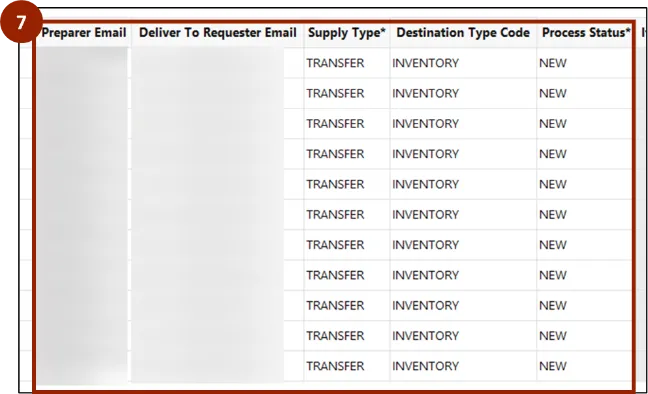
Step 7. Complete each of the following fields:
- Preparer Email
- Deliver-to Requester Email
- Supply Type (enter TRANSFER)
- Destination Type Code (enter INVENTORY)
- Process Status (enter NEW)
Step 8. Click Upload Changes.

Step 9. Click the Company Single Sign-On (SSO) button.
Step 10. Enter your @dac.nc.gov email address.
Step 11. Click Next then enter password.
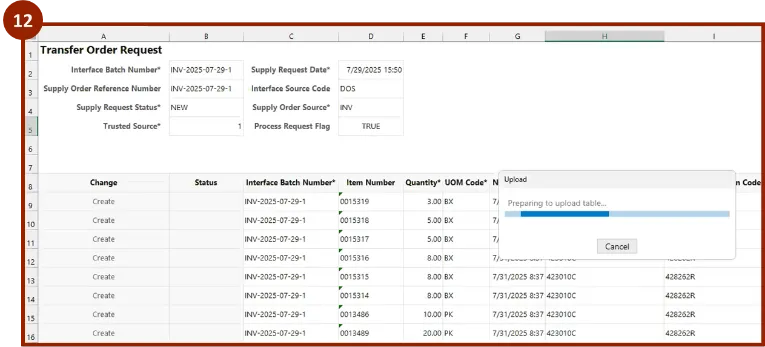
Step 12. The Upload pop-up window will appear. The blue progress bar will show when your changes have been uploaded. Notice the status in the Change column is now Succeeded.
Step 13. To review the Transfer Order that was imported, complete the following steps to log in to NCFS: Click the Company Single Sign-On (SSO) button.
Step 14. Enter your @dac.nc.gov email address.
Step 15. Click Next then enter password.
Step 16. Begin from the Home page, or click the Home icon.
Step 17. On the Home page, select Supply Chain Execution.
Step 18. Within the Supply Chain Execution tab, select Inventory Management.

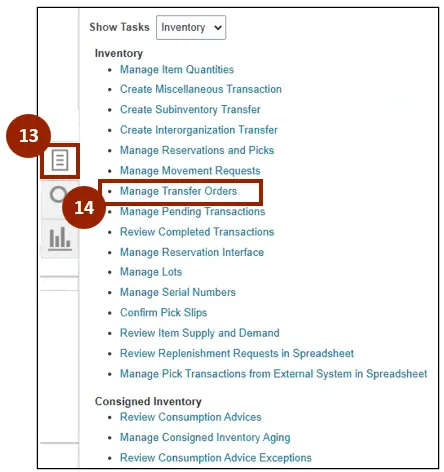
Step 19. Click the Tasks icon.
Step 20. Select Manage Transfer Orders from the Inventory drop-down.
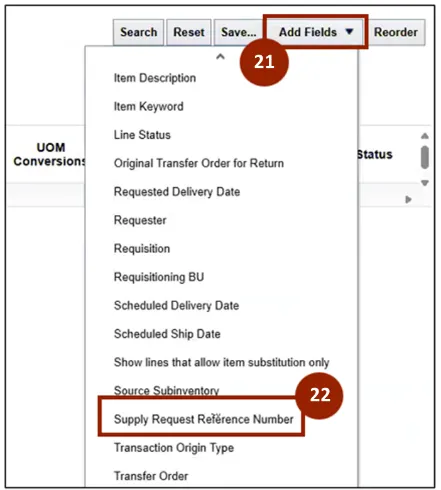
Step 21. Click the Add Fields drop-down.
Step 22. Scroll down and select Supply Request Reference Number.
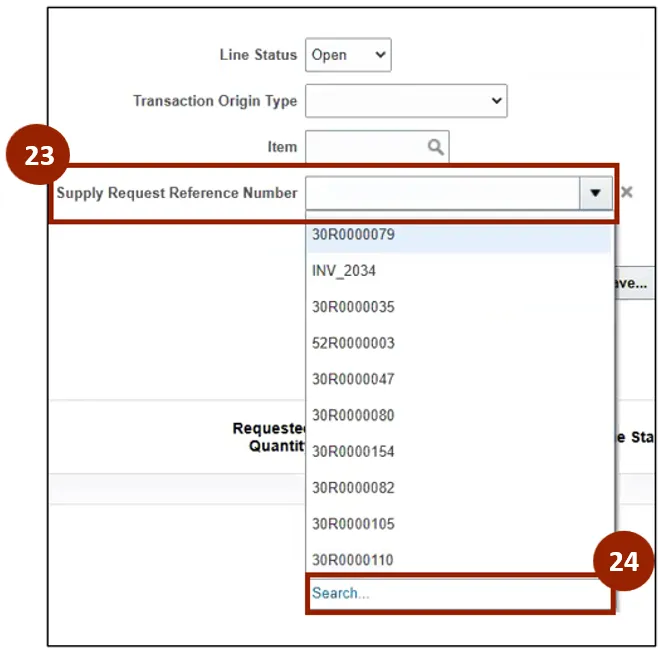
Step 23. Click the Supply Request Reference Number drop-down arrow.
Step 24. Click Search.
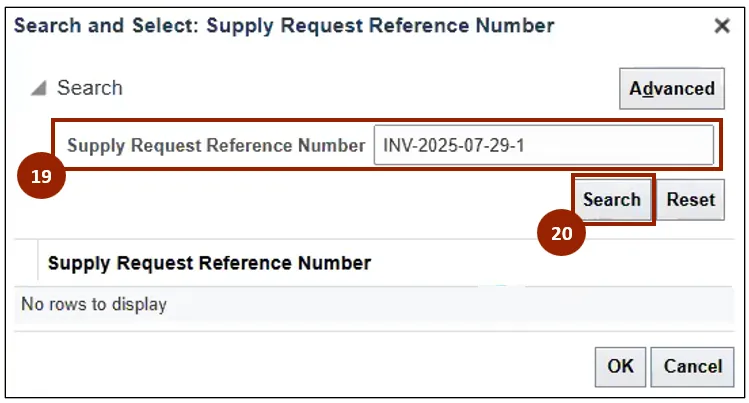
Step 25. The Search and Select Supply Request Reference Number pop-up window will appear. Enter the Supply Request Reference Number in the Supply Request Reference Number field.
Step 26. Click Search.
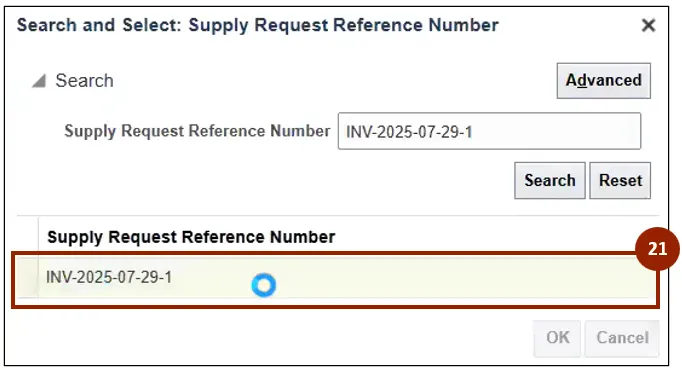
Step 27. Click the Supply Request Reference Number.
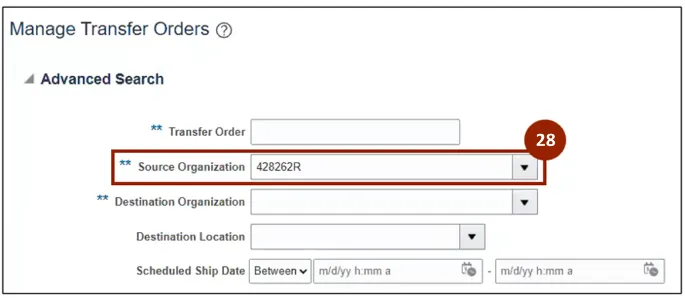
Step 28. In the Source Organization field, enter the Source Organization.
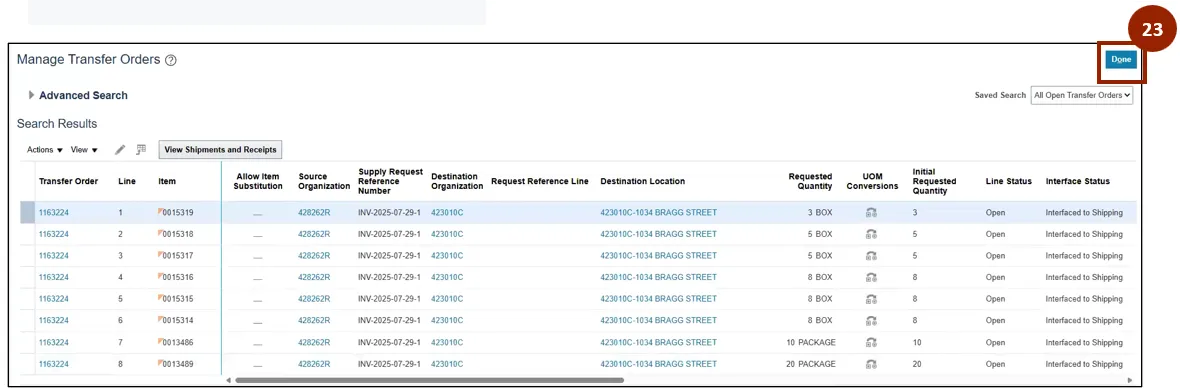
Step 29. The Transfer Order will appear. Review the information and verify that all information is correct. Click Done.
View Transfer Orders
There are 8 steps to complete this process.
Step 1. From the Home screen, select the Supply Chain Execution tab.
Step 2. Click Inventory Management.
Step 3. Click the Tasks icon.
Step 4. Under the Inventory header, click Manage Transfer Orders.
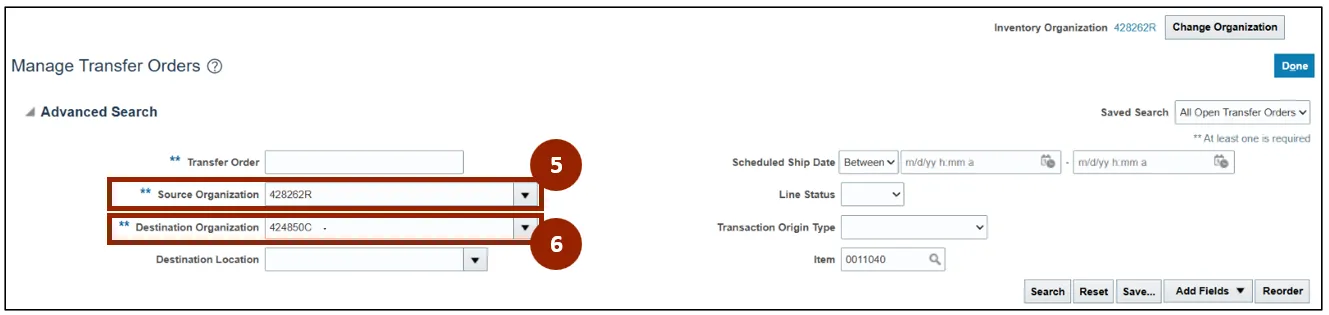
Step 5. In the Source Organization field, enter or select the desired source organization (i.e., 428262R).
Note: At least one of the fields marked with a double asterisk (**) must be completed before clicking the Search button.
Step 6. In the Destination Organization field, enter or select the desired destination organization (i.e., 424850C).
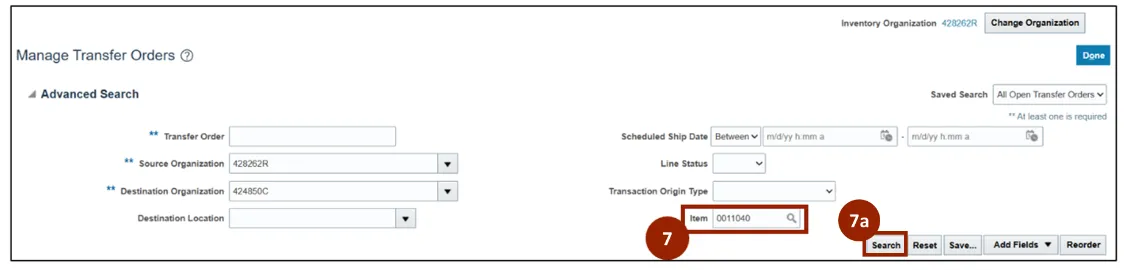
Step 7. In the Item field, enter or select the item number.
Step 7a. Click Search.
Note: Complete any additional fields to further narrow your search results. The fields outlined above are recommended best practices to fill in before clicking Search. Adding the item number is optional.
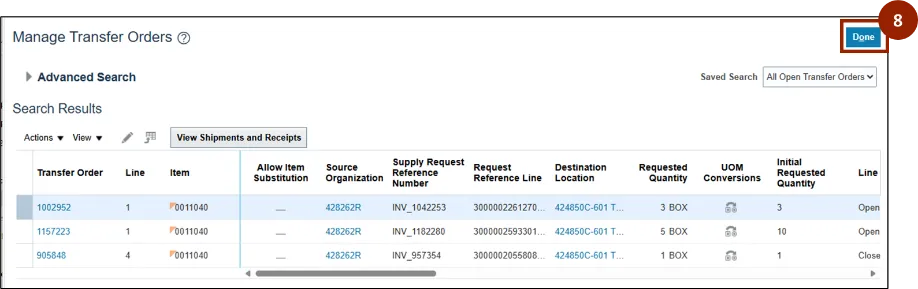
Step 8. The Transfer Order will appear. Review the information and verify that all information is correct. Click Done.
Wrap-Up
NCFS users can reference the Manage Inventory 1 using the steps above.
Additional Resources
- Virtual Instructor Led Training (vILT)