Purpose
The purpose of this Business Process Procedure is to explain how to reject a Work Item in the Integrated HR-Payroll System.
For the procedure on how to approve an item, use this document instead: WF-09 HR-PY System Workflow Approval.
Trigger
A PCR (Personnel Change Request) workflow item has arrived in your SAP Inbox for review.
Business Process Procedure Overview
All PCRs initiated/requested via workflow will go through an approval process. Depending on the action being processed (type of personnel action such as New Hire or Separation), different levels of approval are required. The levels of approval may include Division, Agency, OSHR or Funding.
Review the data within the PCR, add any comments as appropriate using the Services for Objects functionality (notes/attachments/URLs), and either approve or reject the PCR. If you approve the PCR, it will be sent to the next defined stage of the approval process.
Tips and Tricks
SAP Business Workplace Inbox Functionality
- The SAP Business Workplace inbox is where all workflow documents will be initiated/requested, and where all workflow documents will arrive for approvers to review and respond.
- For more information on the SAP Business Workplace, including an overview of all Tree Functions (folders, organization of the workplace), see the Business Workplace Overview Tree Functions Job Aid on the OSC Training Help website. See Additional Resources section at the end of this document.
Access Transaction
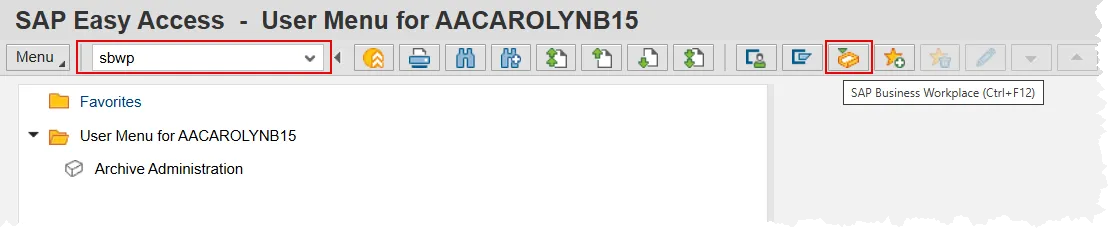
Via Transaction Code: SBWP
Click the SAP Business Workplace button. (see step #1).
Procedure
There are 16 steps to complete this process.
Step 1. Either click the SAP Business Workplace button or type ‘sbwp’ in the command field and press enter.
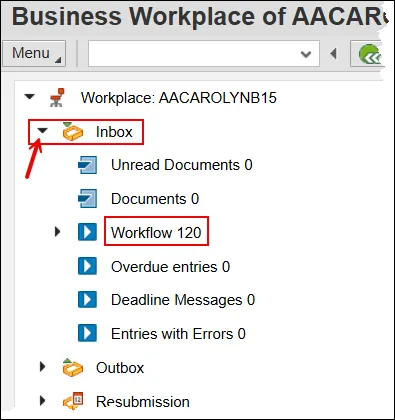
Step 2. Click on the node (triangle) next to Inbox then click on the word ‘Workflow #’ in the resulting list. The number represents the amount of Work Items awaiting review.
Although clicking on the word Inbox will produce Work Items to review, the button bar will be missing the Environment button, which is where you will access the Workflow Header. Following the instruction above will give you a list of Work Items and the Environment button.
Step 3. Identify and double click the PCR which needs your attention. In the below example, we will be using PCR 100005711. You can also single click the PCR and then click the Execute button.
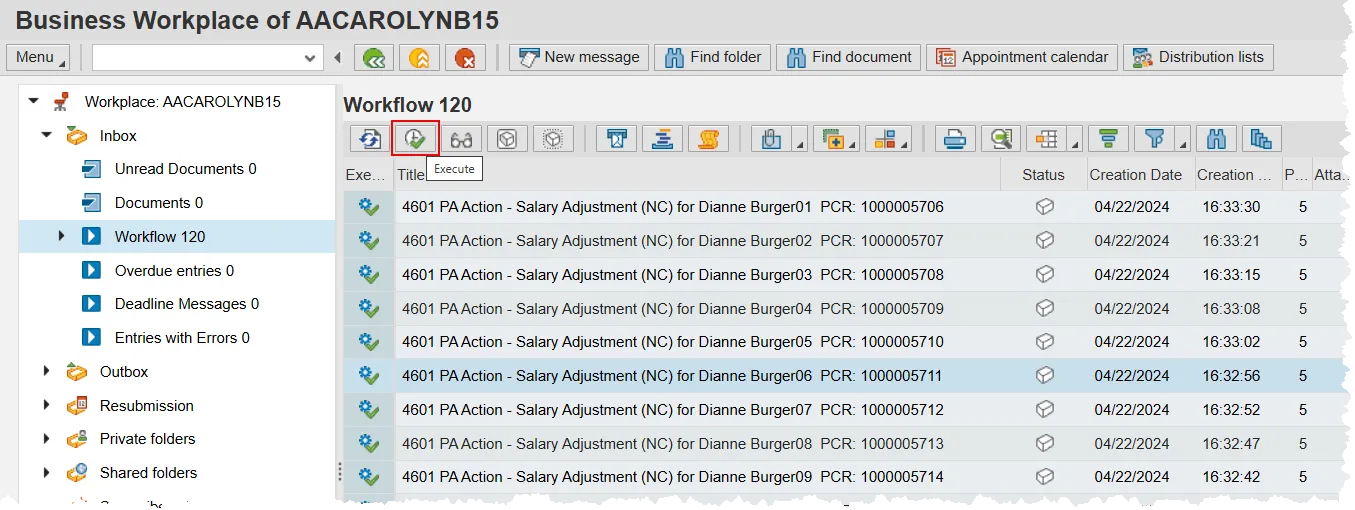
The list of PCRs has several columns. Some that are returned by default include: Title, Status, Creation Date, and Creation Time. These columns can be reordered and resized. Columns can be removed from the display and other columns not currently being displayed can be added to the results. See WF-14 for further information on these processes.
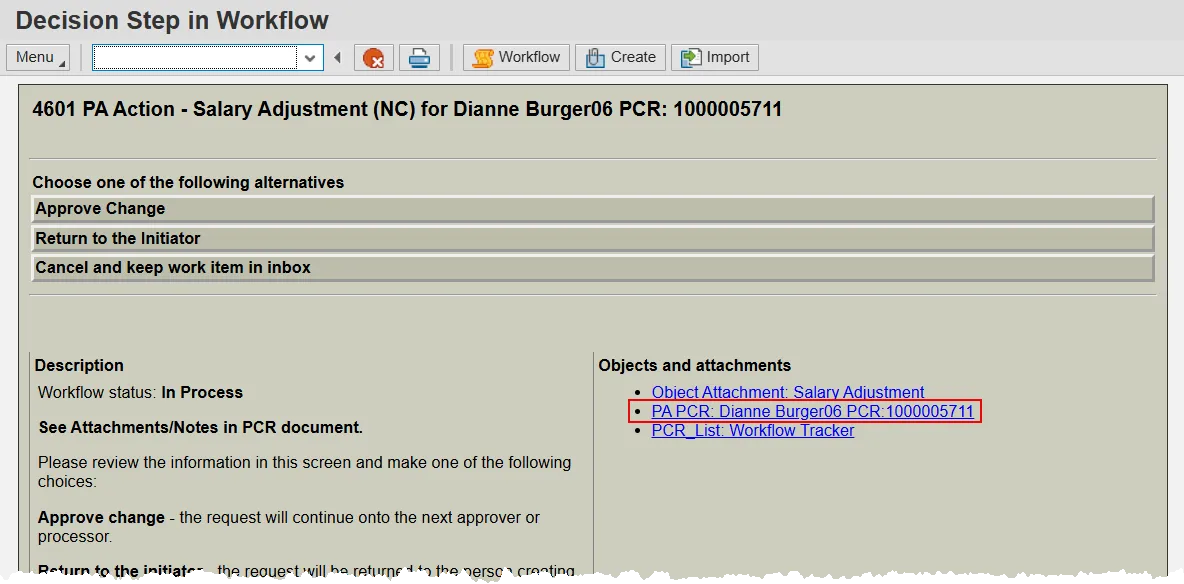
Step 4. Click on the Workflow Header. It is always the second link from the bottom in the ‘Objects and attachments’ area and will include the PCR number.
Step 5. Review the PCR details as appropriate.

Notes:
PA work items will all have the same look. The left hand side will display current employee data (and will be blank for New Hire actions). The right hand side will display the proposed new data, some of which may be the same as current.
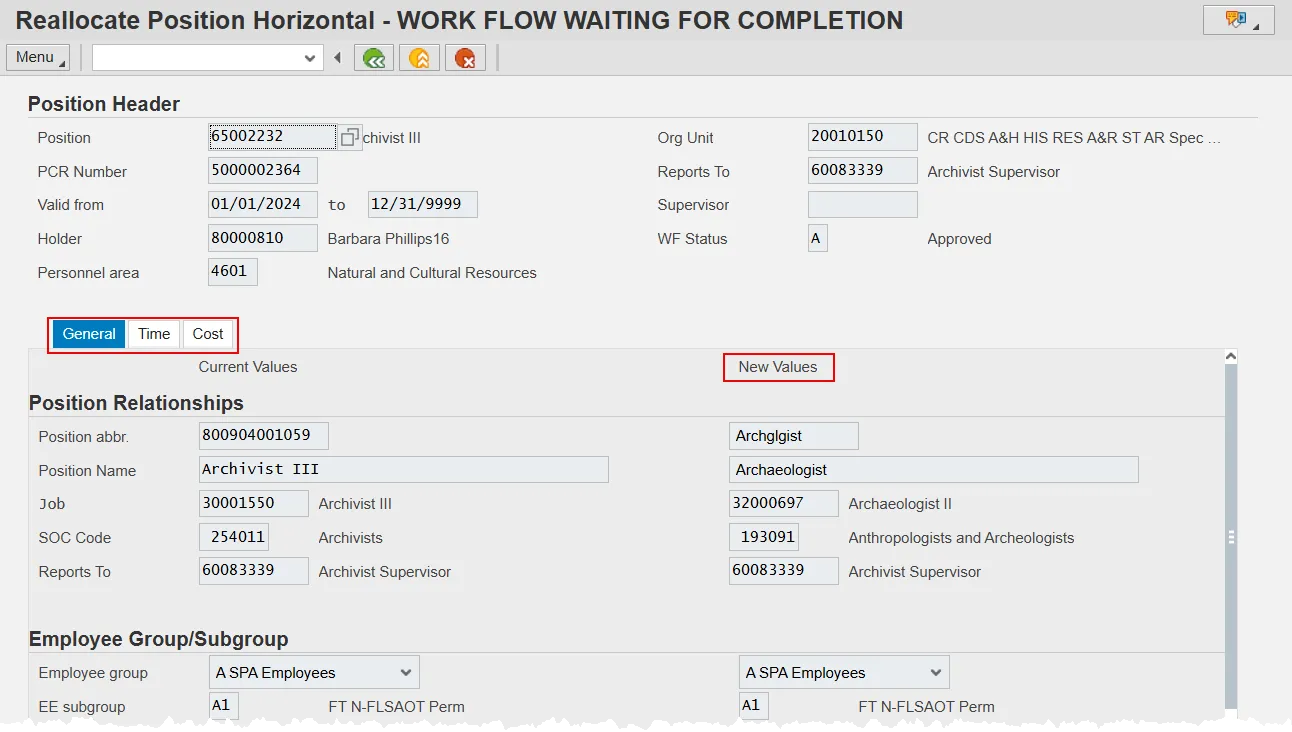
OM work items are dependent on the action being proposed. Similar to PA actions, most OM actions will have current data in a column on the left and proposed new data on the right. The notable exception to this standard is a Create New Position action since there is no current data to display. Each OM action will display the various fields that may be changed as part of the action. Some of these fields may appear on different tabs. Each of the fields is clearly labeled and there will be no question as to what data is being shown.
The picture below is an example of a Reallocate Position action with the General, Time, and Cost tabs highlighted.
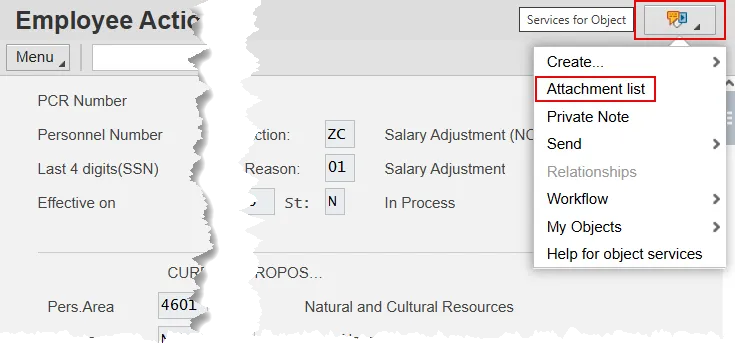
Step 6. Locate the note provided by the initiator by clicking on the Services for Object button and choosing ‘Attachment List’ in the resulting dropdown menu. If Attachment List is grayed out, then a note has not been attached. Initiators are required to include, and complete a note template for every action submitted to Workflow. If the note has not been attached, then the PCR should be rejected (barring an exceptional situation).
The Services for Object button can be found on the top right of your SAP screen.
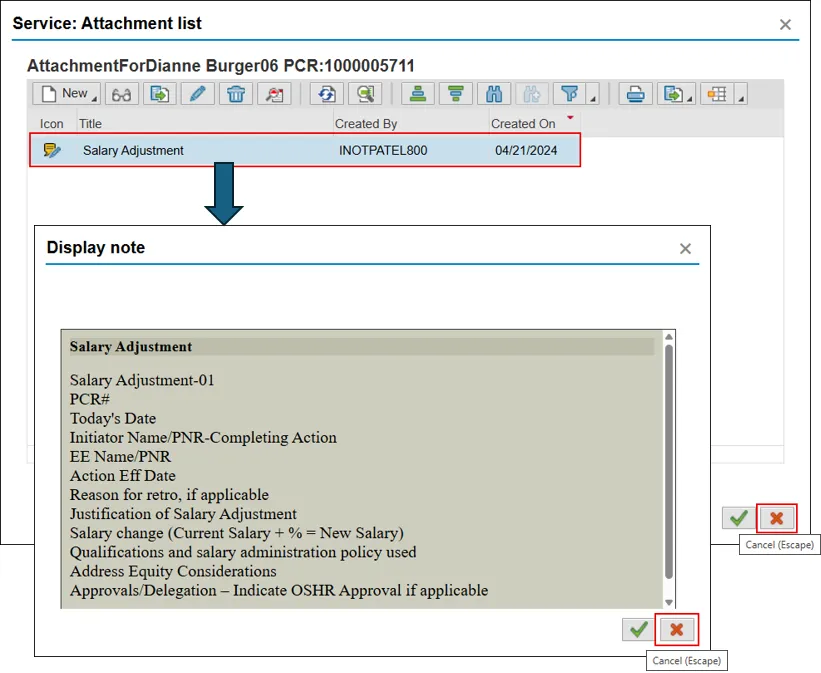
Step 7. Double click the note(s) you wish to read. Ensure that the initiator has used the OSHR designed template and that is is completed. The note may provide information that will help you to determine whether or not the action should be approved or rejected. (The image below is from the training database and only an empty template has been attached.)
Once you have reviewed an individual attachment, close the Display note pop-up by clicking on the cancel button (red ‘X’). Because you will be rejecting the item, do not close the Service: Attachment list pop-up yet.
Services for Objects are available on all Personnel Administration actions and allows you to link critical business documents to the PCR or an action. You may add notes, attachments, or hyperlinks on a PCR and/or an action.
- If a note, attachment or URL has been added, the Attachment list option will be live (it is grayed out in the list if there are no attachments). Click on Attachment list to view one or more items.
- As an approver, you have the option to create a note as well. When you click on the Services for Object button, choose the Create note option. Provide a title, write your note and then click the green check to save. If you will be rejecting the Work Item, this step will be mandatory and is detailed below.
- A Private note will be viewable by you only, using your user ID. It will follow the PCR or action, but no one else will be able to view it.
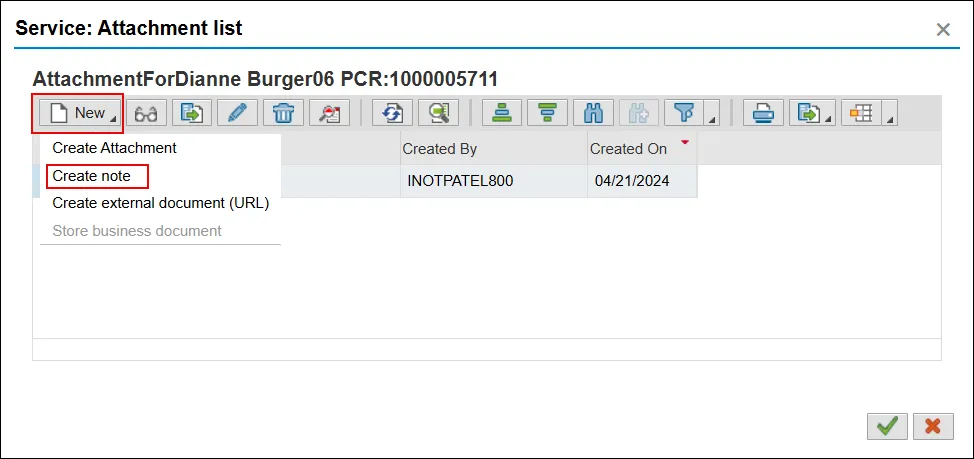
Step 8. When rejecting a Workflow Item, you are required to write a note explaining why. In the Service: Attachment list pop-up, click on the New button, and then on Create note in the resulting drop-down menu.
Step 9. Create a rejection note. Add a title in the Title of note field and then write a note that describes why the action is being rejected.
Pro tip: After writing your note, but before clicking the green check, copy it into your clipboard. Once it is highlighted, you can ‘<right-click>-copy’ or use the ‘ctrl-c’ keyboard shortcut. The note will need to be entered and saved again in a future step. Copying it now will alleviate having to type it back out at that time.
Click the Copy button (green check) on the bottom of the pop-up to save your note. Then click the Continue button (green check) on the bottom of the ‘Service: Attachment list’ pop-up to close it.
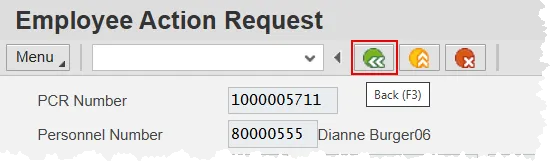
Step 10. When you have completed your review of the Workflow Header and created your rejection note, return to the Decision Step screen by clicking the green Back button.
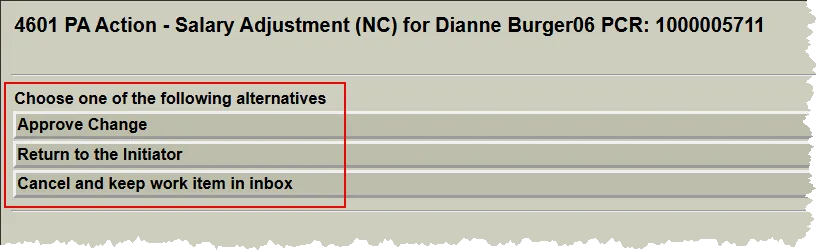
Step 11. Click the appropriate decision.
If you choose the Approve change option, the Work Item will go to the next level of approval or be returned back to the initiator for processing (depending on your specific role and the category of the Work Item). This choice will also complete the process for the chosen work item. Review WF-09 for information on this process.
If you don’t wish to approve nor reject the PCR at this time, choose the Cancel and keep work item in inbox button. The PCR is not canceled. Instead, it is returned to your inbox in an ‘In Process’ status. This status indicates that the PCR will appear only in your inbox. Once you have enough information to either approve or reject the item, you can double click it to be brought back to the Decision Step screen.
Finally, you may choose the Return to the Initiator option. This is the choice to make when there is incorrect data in the request or it otherwise needs to be rejected, and there are a couple of extra steps to complete.
IMPORTANT!: The next steps are crucial in completing the rejection of a work item. If they are not completed correctly, the PCR will not be routed back to the initiatior’s inbox.
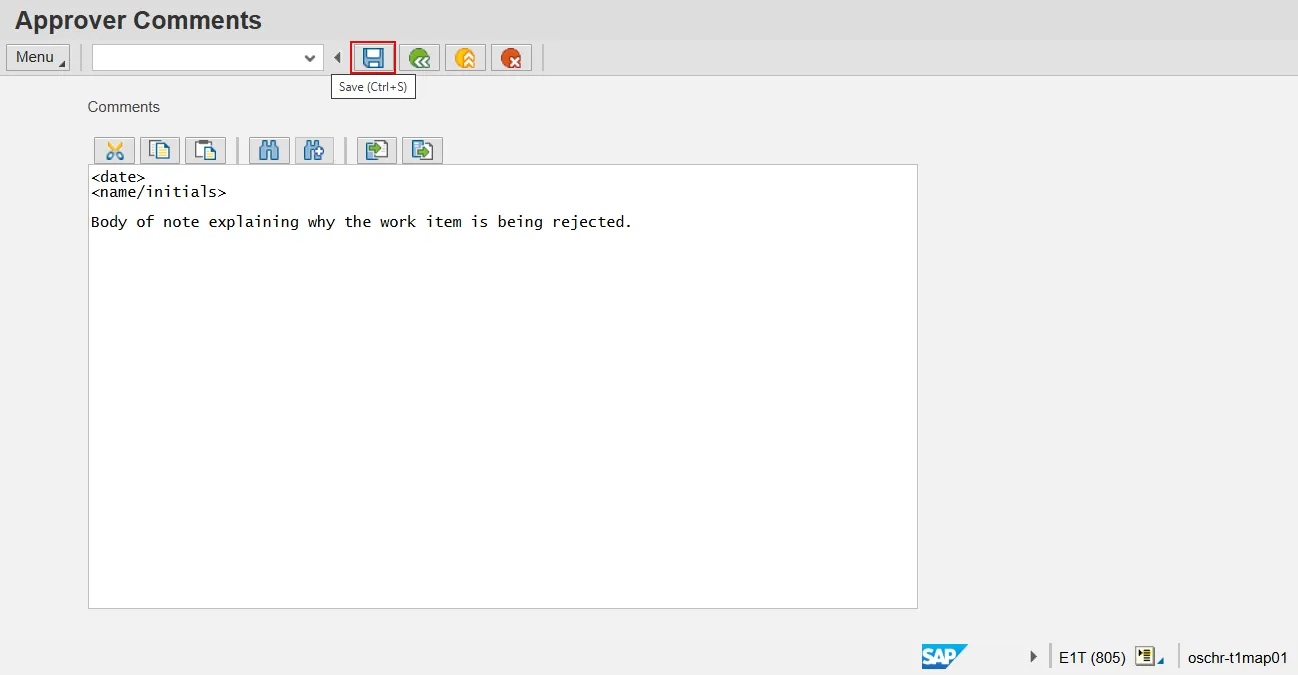
Step 12. For this document, you have chosen the ‘Return to the Initiator’ option. On the next screen, paste your note into the ‘Comments’ area, and then click the Save button.
Step 13. Close the Information pop-up by clicking the Continue button (green check) at the bottom.
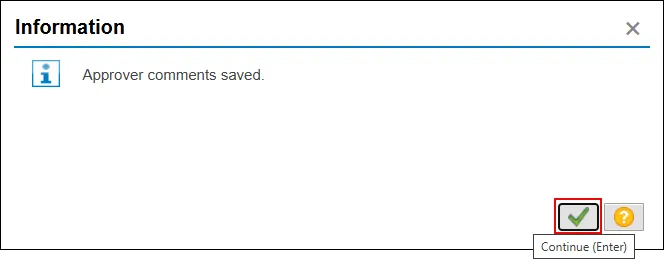
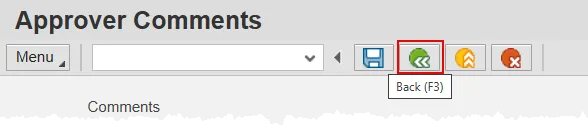
Step 14. The pop-up will close and you will remain on the Approver Comments screen. However, your note will be gone! This is expected behavior and you do not need to retype the note. Instead, click the green Back button.
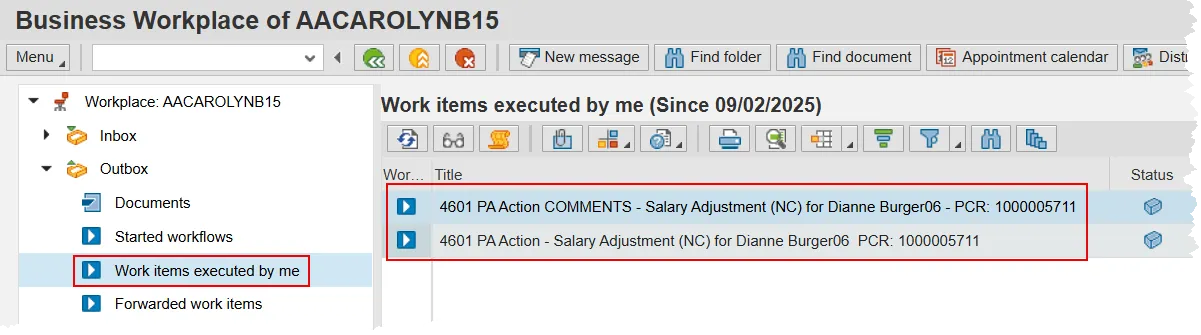
Step 15. You are returned to your SAP Business Workplace and the PCR can now be found in your ‘Outbox → Work items executed by me’ folder. When the item has been successfully rejected, you will find two entries for it in that folder.
Step 16. The process is complete.