Purpose
The purpose of this Business Process Procedure is to explain how to display payroll results information for one or more employees in the Integrated HR-Payroll System.
Trigger
There is a need to review an employee’s payroll results.
Business Process Procedure Overview
Use this procedure to display payroll results information for one or more employees.
Access Transaction
Via Menu Path: Human Resources >> Payroll >> Americas >> USA >> Tools >> PC_PAYRESULT
Via Transaction Code: PC_PAYRESULT
Procedure
There are 10 steps to complete this process.
SAP Easy Access
Step 1. Update the following required and optional fields.
| Field Name | Description | Values |
|---|---|---|
| Command | White alphanumeric box in upper left corner used to input transaction codes. |
Enter value in Command. Example: PC_PAYRESULT |
Step 2. Click Enter.
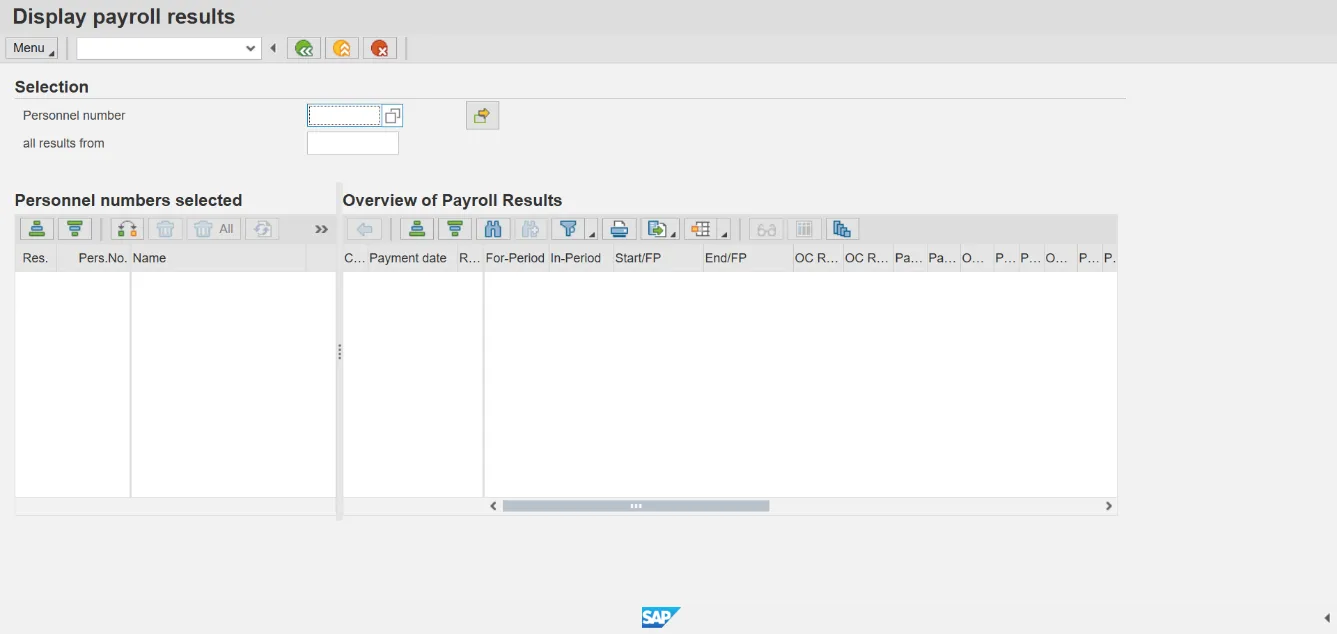
Step 3. Update the following required and optional fields.
| Field Name | Description | Values |
|---|---|---|
| Personnel number | Unique number identifying an individual’s master record data in the system. |
Enter value in Personnel number. Example: 80001035 |
Step 4. Click Transfer (Enter).
Note: To have multiple employees listed on the left, enter each employee's personnel number and click Enter.
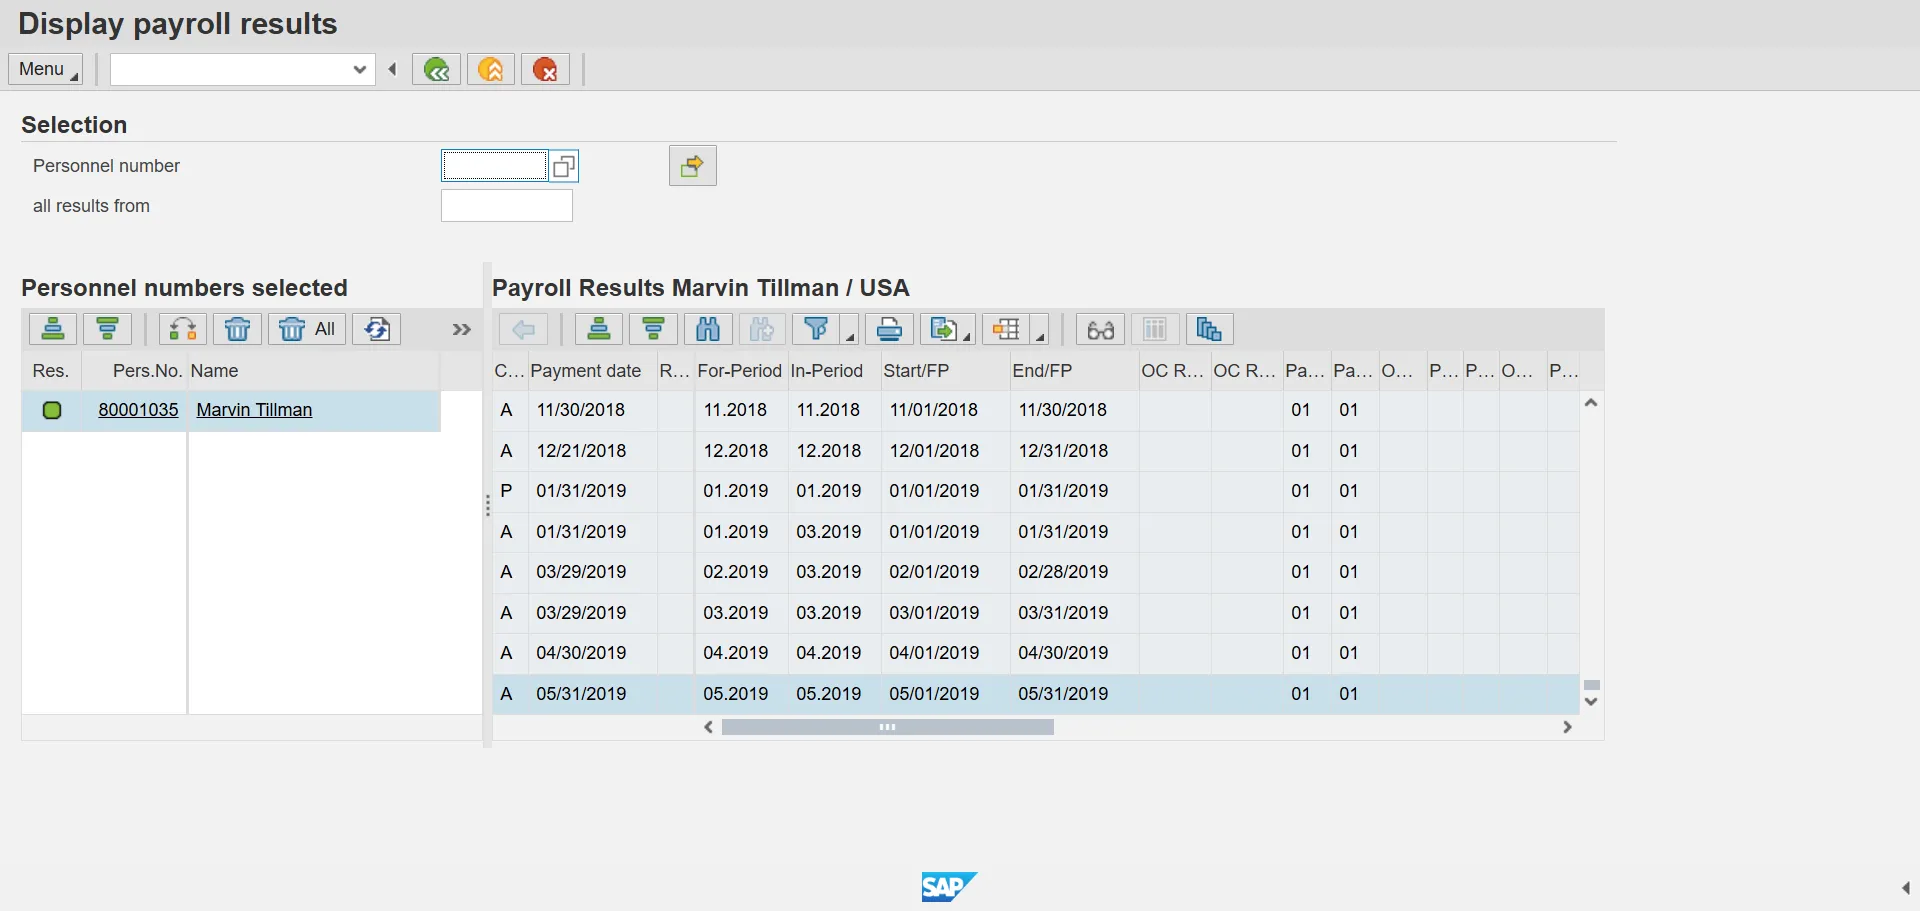
Step 5. Select the desired payroll result row.
You can view results on each employee by selecting that employee. When toggling between employees, always verify the name on the left task pane to ensure you are viewing the correct employee's results.
Note: Results Codes:
- Green Light – Results Exist
- Red Light – No Results Exist
- Grey Diamond – No Authorization to Display that Employee
Step 6. Click the Display Overview button.
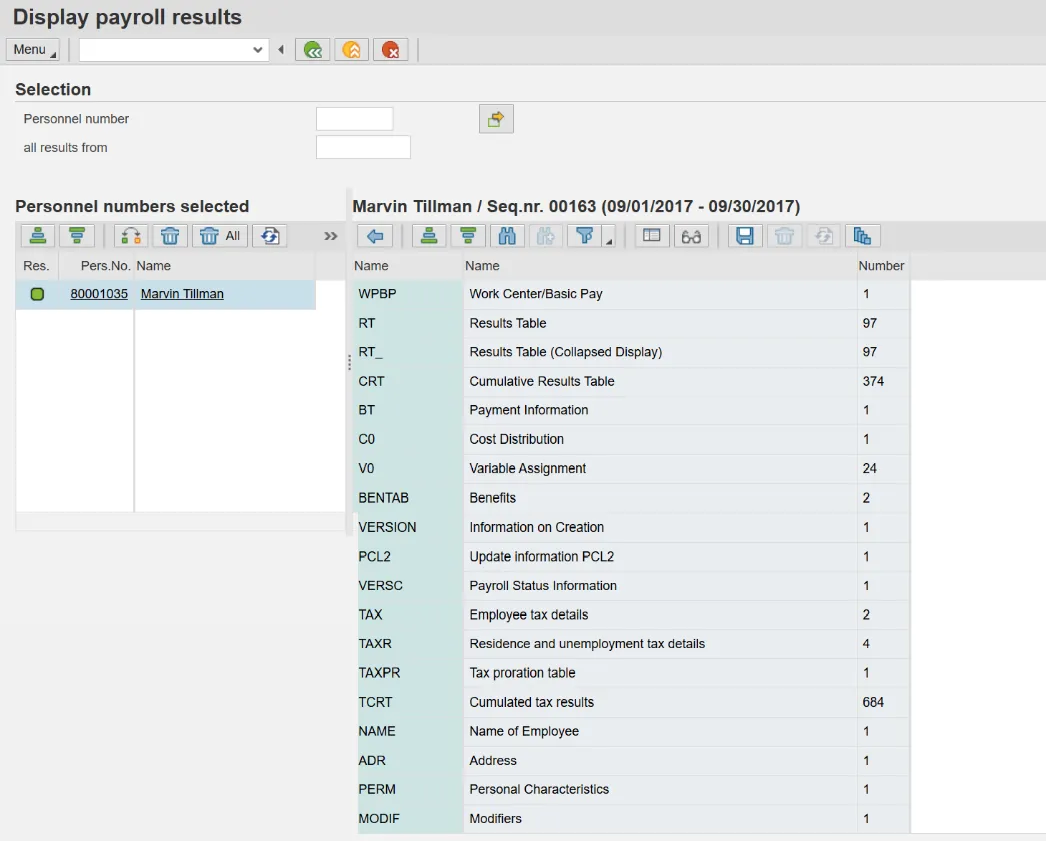
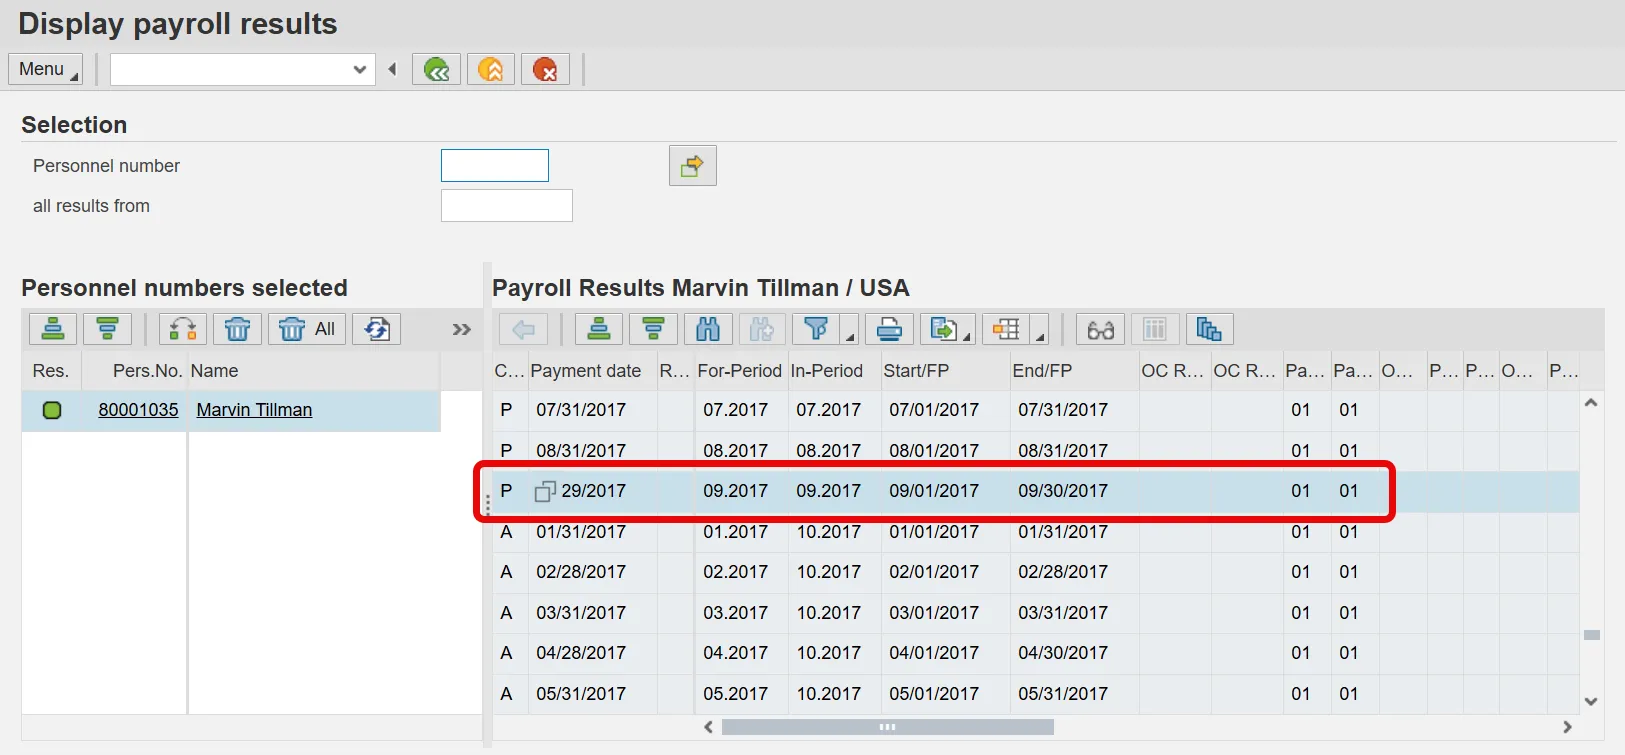
Step 7. Select the RT Results Table row.
List of Common tables:
- WPBP
- RT
- ARREARS
- DDNTK
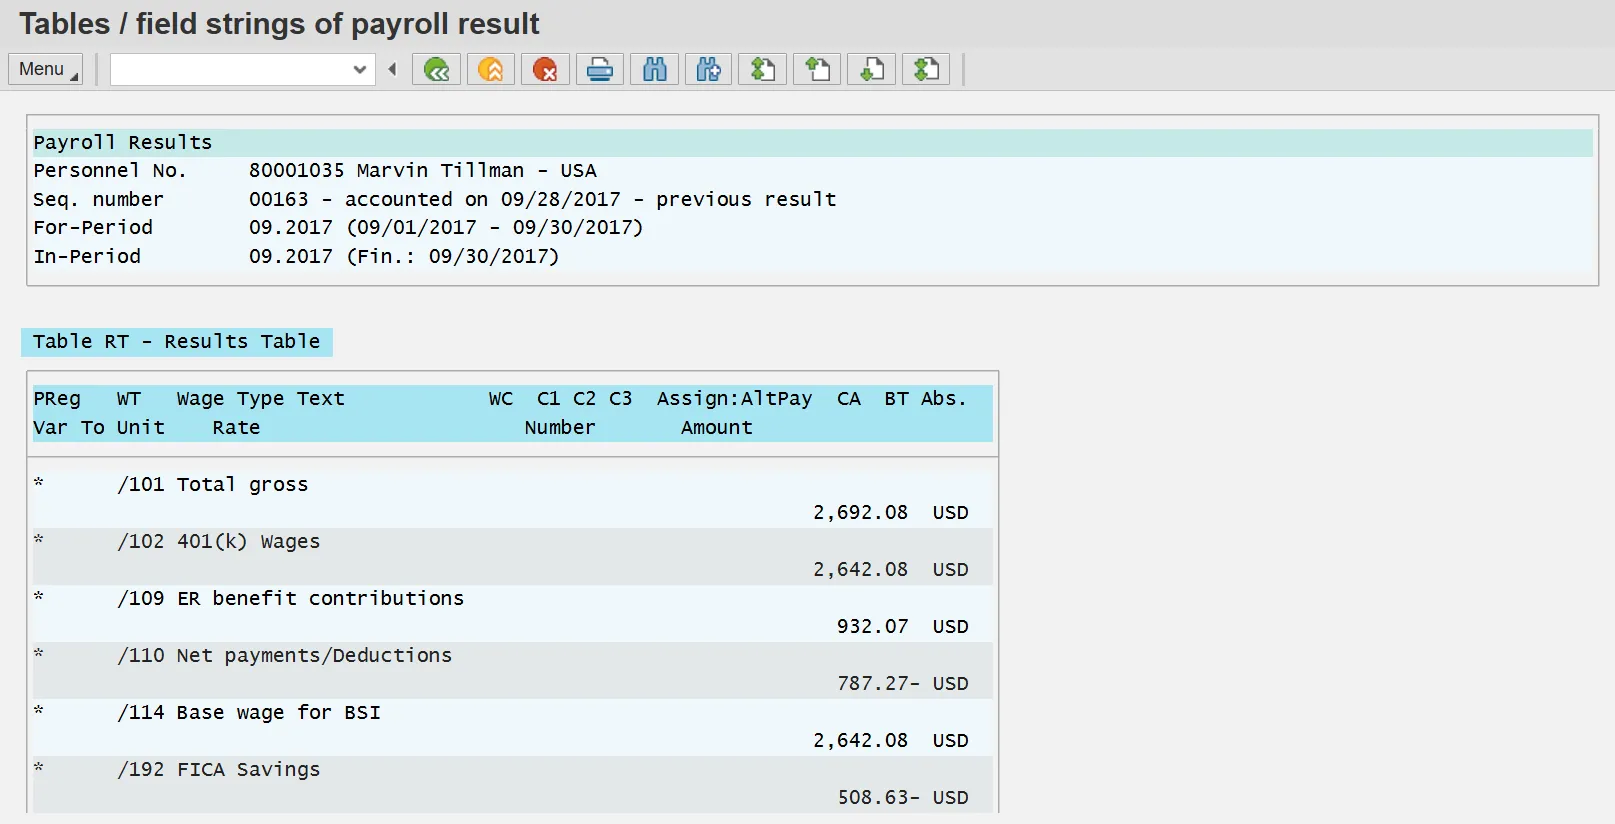
Step 8. Click Display.
Note: The Results table lists each wage type used in processing this payroll period for the employee.
Step 9. Click the Exit button.
Step 10. The system task is complete.