Purpose
The purpose of this Job Aid is to explain how to change an OM action prior to submitting to workflow in the Integrated HR-Payroll System.
If a position change request has been created, but not submitted to workflow, some of the data can be changed before the Initiate Workflow button is clicked.
This process demonstrates how users can change or add information to any position action request prior to workflow being submitted. If workflow has already been submitted, you will not be able to change the request unless it has been rejected back to you by one of the approvers.
You may need to add additional notes or attachments to provide approvers more information concerning this action.
Access Transaction
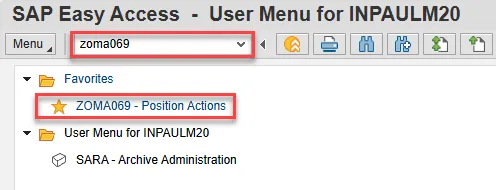
Via Transaction Code: ZOMA069
To edit your Position Change Request prior to submitting it for approval, retrieve it by using the ZOMA069 transaction.
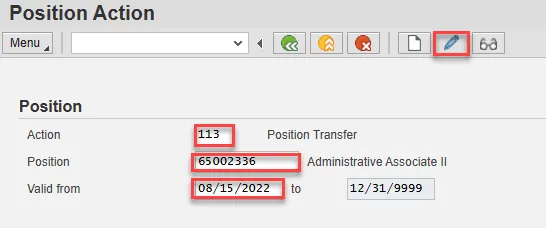
To access the PCR, you will need the Action Type, Position number, and the Valid From (effective) date. Start by entering the action type and hitting enter on your keyboard. The Position number and Valid From fields will appear. Input this data, choose Enter, and then click the Change button.
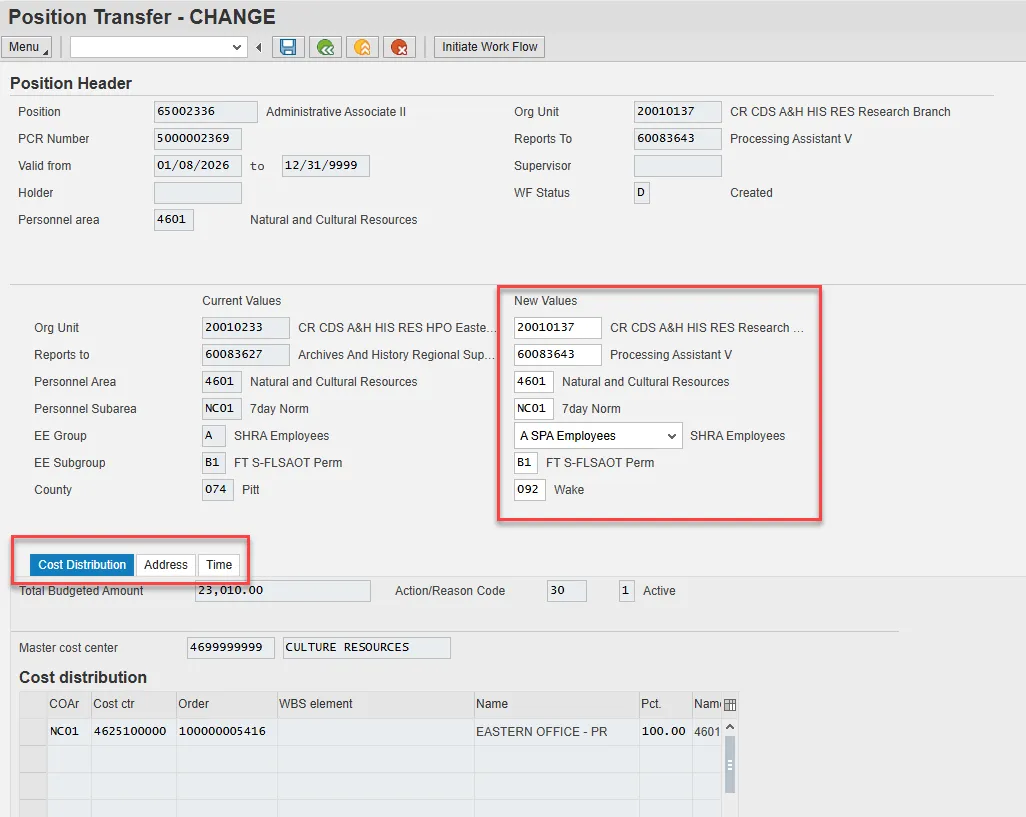
Your previously saved PCR will appear and the fields you originally filled in will be editable. Depending on the particular type of action you are editing, you may have additional tabs such as Address and Time that you can review/change as well. Note that you will be unable to change the type of action or the effective date of the action. If those data points are incorrect, you will need to delete this PCR (contact BEST Shared Services to assist) and begin anew.
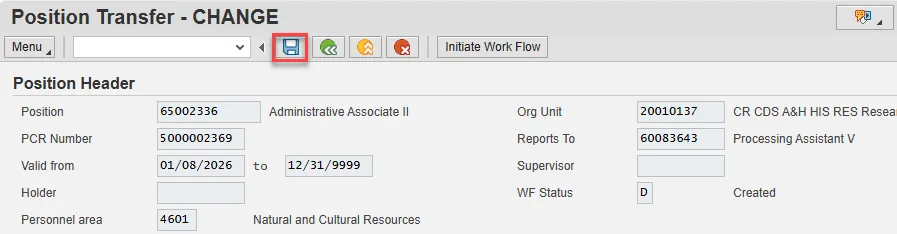
Once you have updated the fields as necessary, press enter on your keyboard to validate your data. Continue by clicking the Save button. Note that this step will lock in your data and the fields will no longer be editable. If further corrections are needed, you will have to back out of the transaction and start at the beginning of this process to make them.
In addition to making changes to the PCR data, you can add notes/attachments or edit any that have previously been created or attached. To do so, click on the right side of the Services for Objects button. Hovering over the resulting Create option will give you the opportunity to create a new note or attachment.
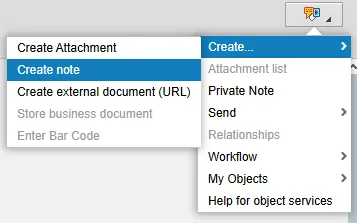
Alternatively, clicking the Attachment List option in the drop-down menu will produce a pop-up listing all previously created notes or attachments. To edit, click on the applicable item, then click on the Change button. The item can be deleted instead by clicking on the Delete button. Once all necessary changes have been made, click on the Continue button to close the pop-up.
After making applicable changes, you have the option to Initiate Workflow by clicking that button. If you are not ready to take this step, you can back out of the transaction as your other option. Then later, you can use the steps outlined above to access the PCR and press the button to send the request to Workflow.
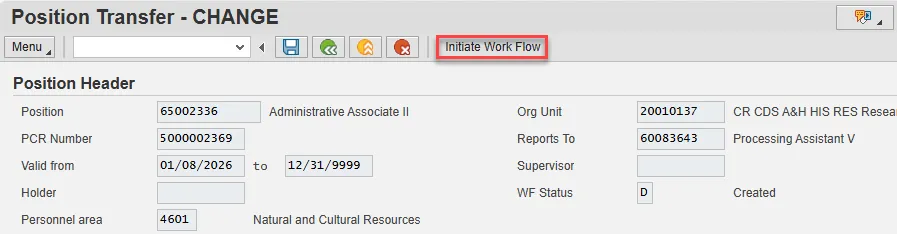
Once a PCR has been sent to Workflow, no further changes can be made to the data, though notes and attachments can still be created/edited through the Services for Objects button. If position data needs to be changed at this point, the PCR will need to be rejected by an approver. Once it arrives back in your inbox in the rejected status, you will have the option to cancel the PCR or to Change and Resubmit.