Purpose
The purpose of this Quick Reference Guide (QRG) is to provide a step-by-step explanation on how to set up a default receiving Subinventory area for an Inventory Item individually or with a mass upload in the North Carolina Financial System (NCFS).
Introduction and Overview
This QRG covers the setup process for adding a receiving Subinventory area to an Inventory Item in NCFS. All items must have a default receiving Subinventory area in NCFS.
Configure Item Transaction Defaults Individually
To update the Subinventory location(s) for an Inventory item in NCFS individually, please follow the steps below. There are 15 steps to complete this process.
Step 1. Log in to the NCFS portal with your credentials to access the system.
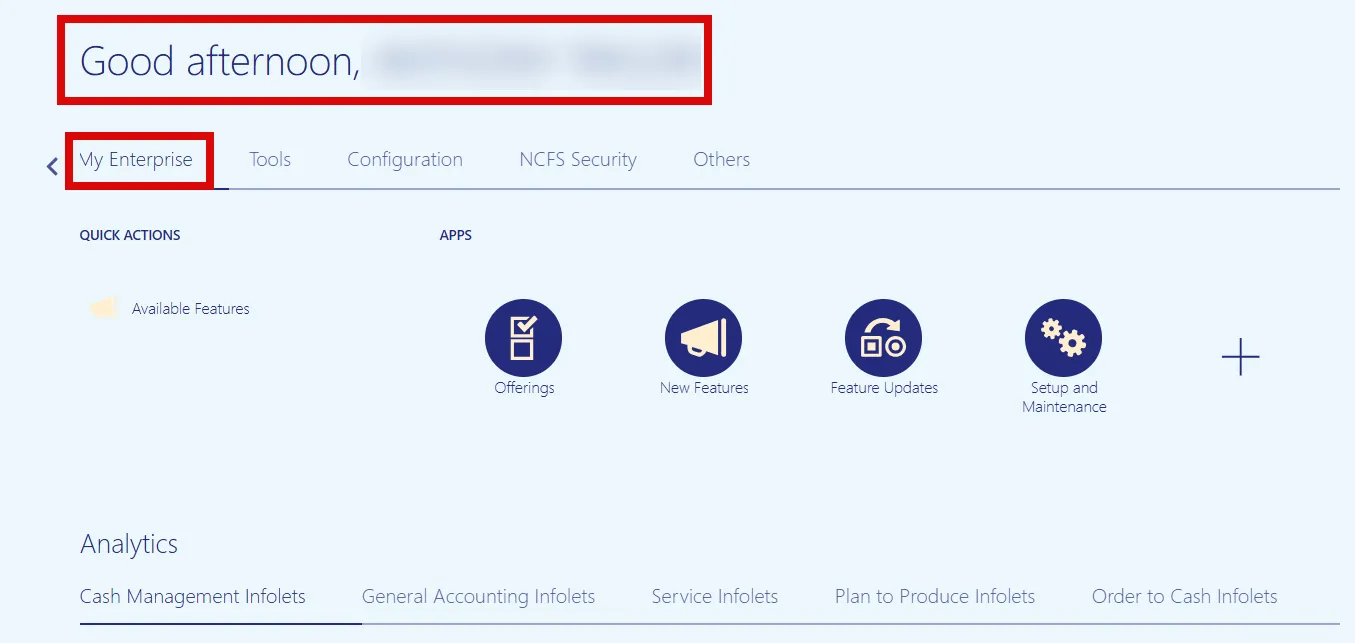
Step 2. On the Home page, click the My Enterprise tab.
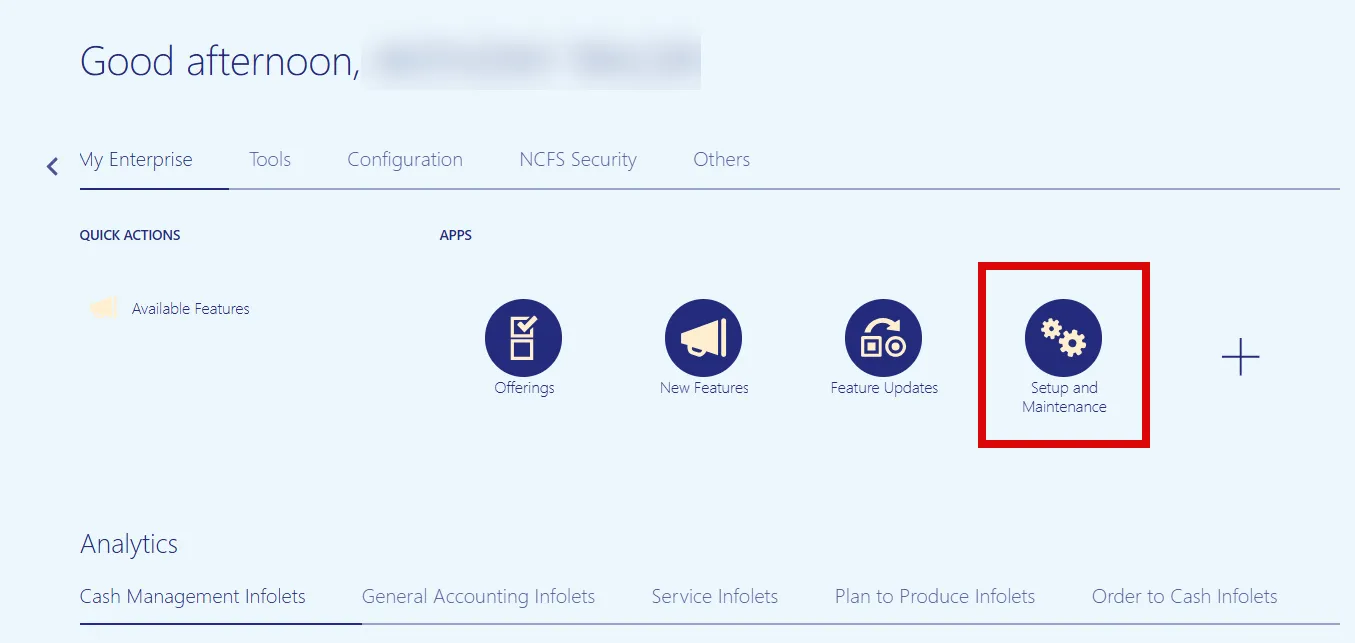
Step 3. Click the Setup and Maintenance app.
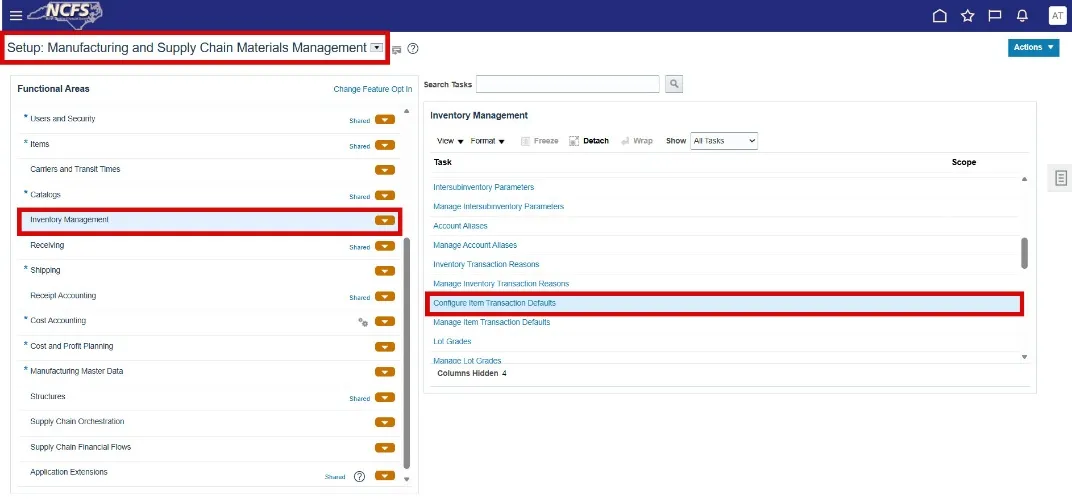
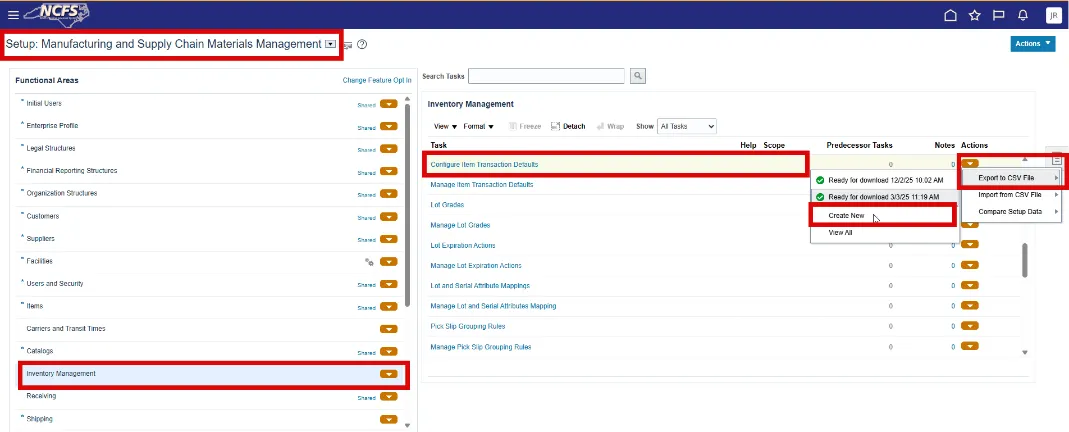
Step 4. Under Functional Areas, select Inventory Management.
Step 5. Select All Tasks in the Show field.
Step 6. Scroll down the list and select Configure Item Transaction Defaults.
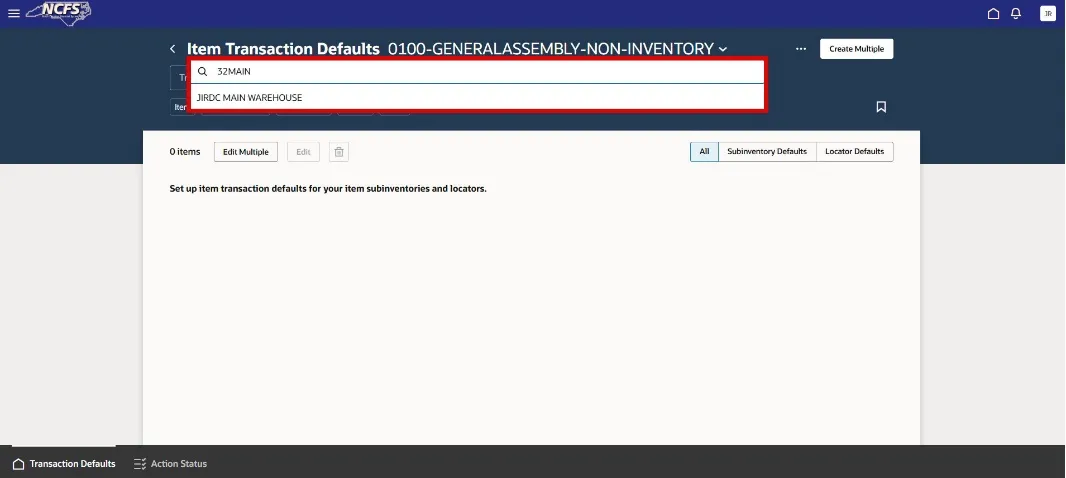
Step 7. Click the drop-down arrow to use the Search box to select the appropriate Inventory Organization.
Step 8. Click the three dots and select Create by Item.

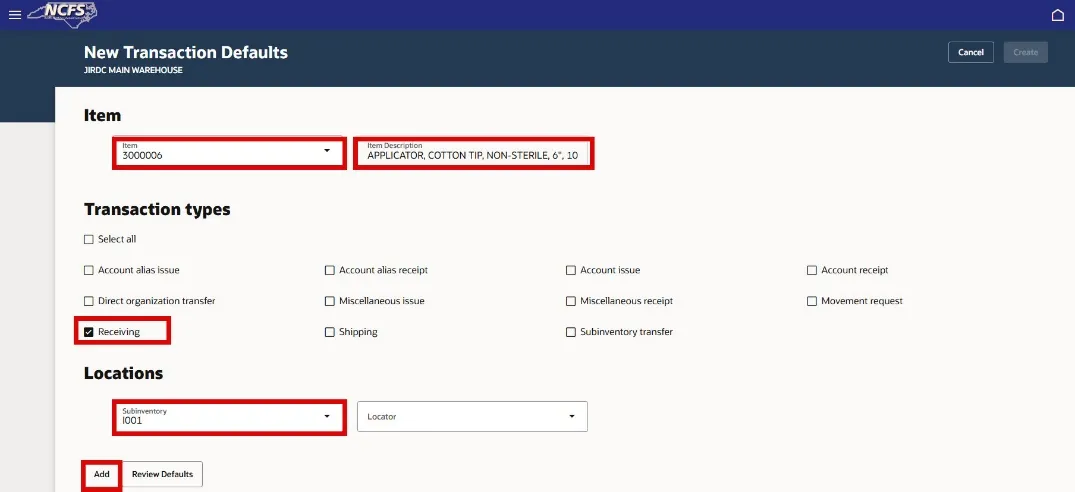
Step 9. Enter the Item number in the Item field. The Item Description will default. (Item drop down search does not pull up a list of items until you enter “300”).
Step 10. Check the Receiving checkbox under Transaction Types.
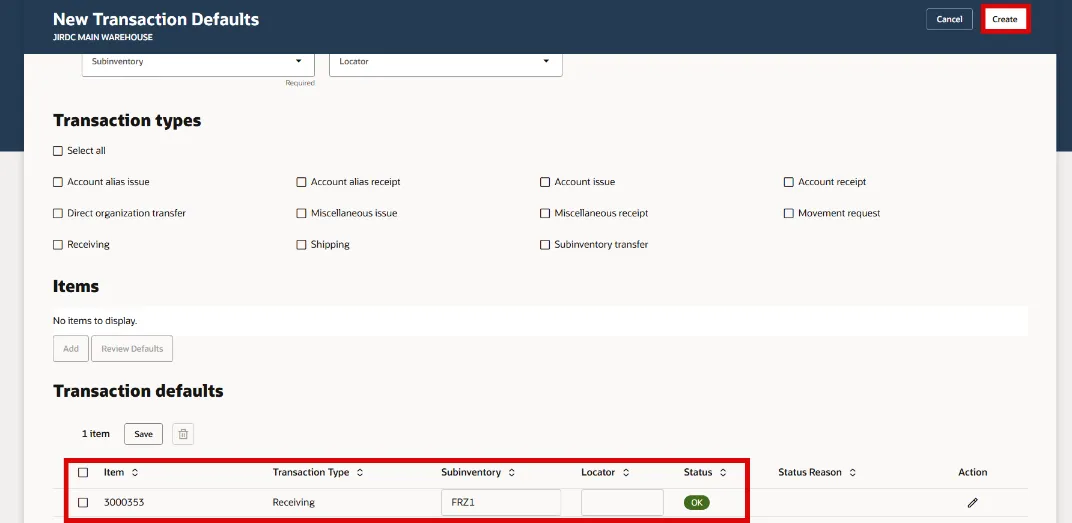
Step 11. Click the Add button under Locations and select the appropriate Subinventory in the Subinventory field.
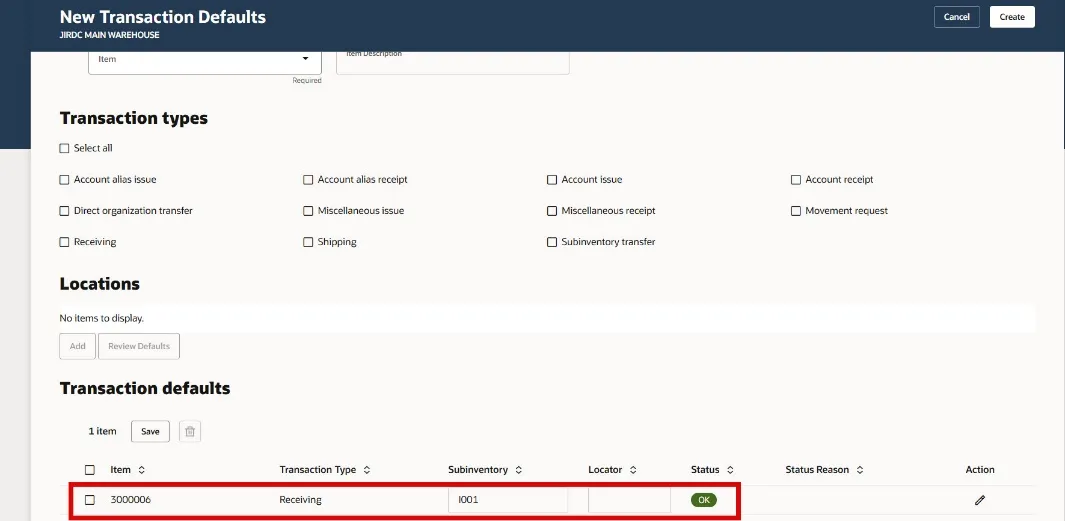
Step 12. Click the Review Defaults to validate the selection. This process checks to see if this item already belongs to a subinventory.
Step 13. If the Status is OK then click the Create button.
Step 14. A window will appear at the bottom of screen, “Default created”.

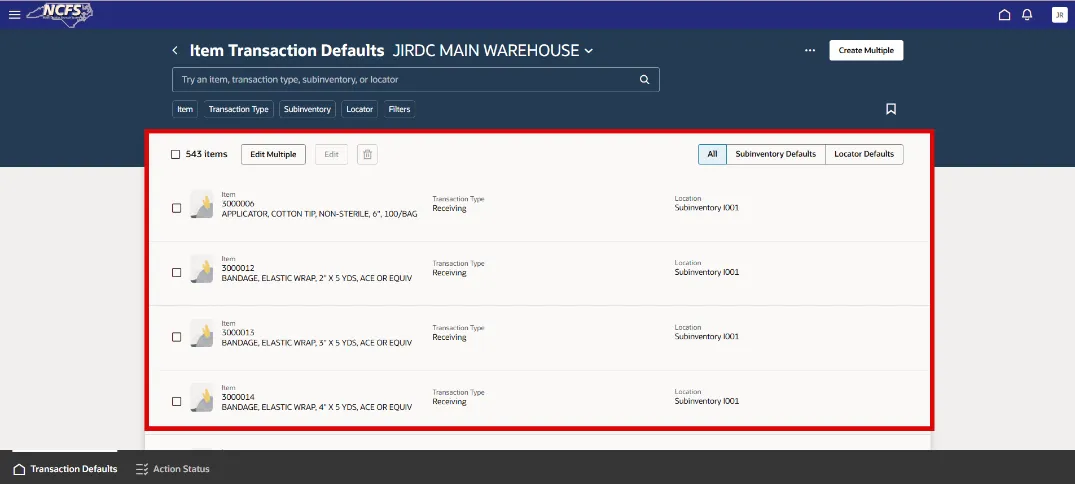
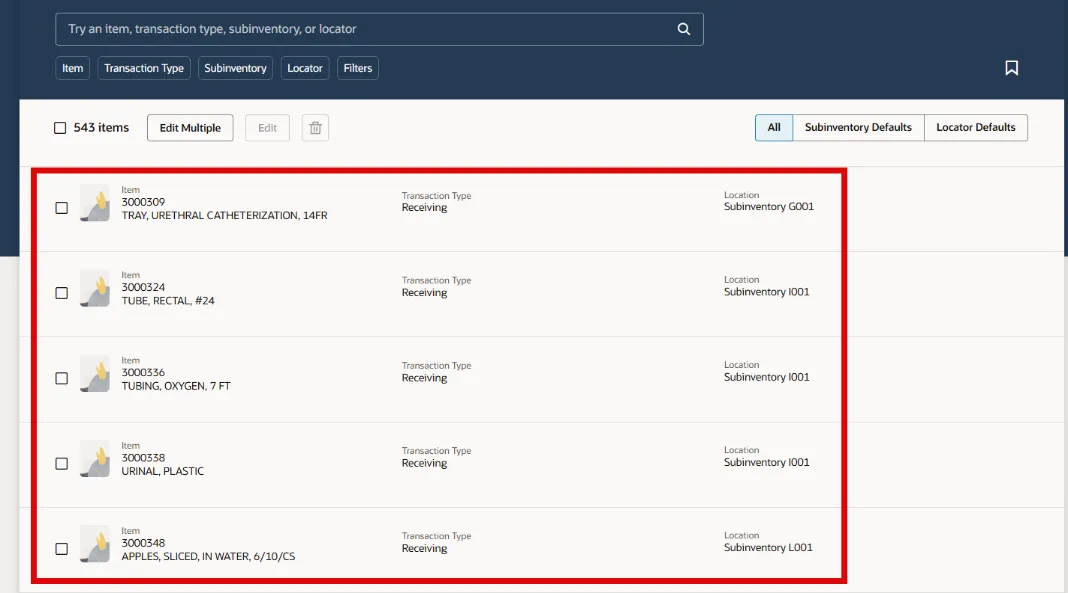
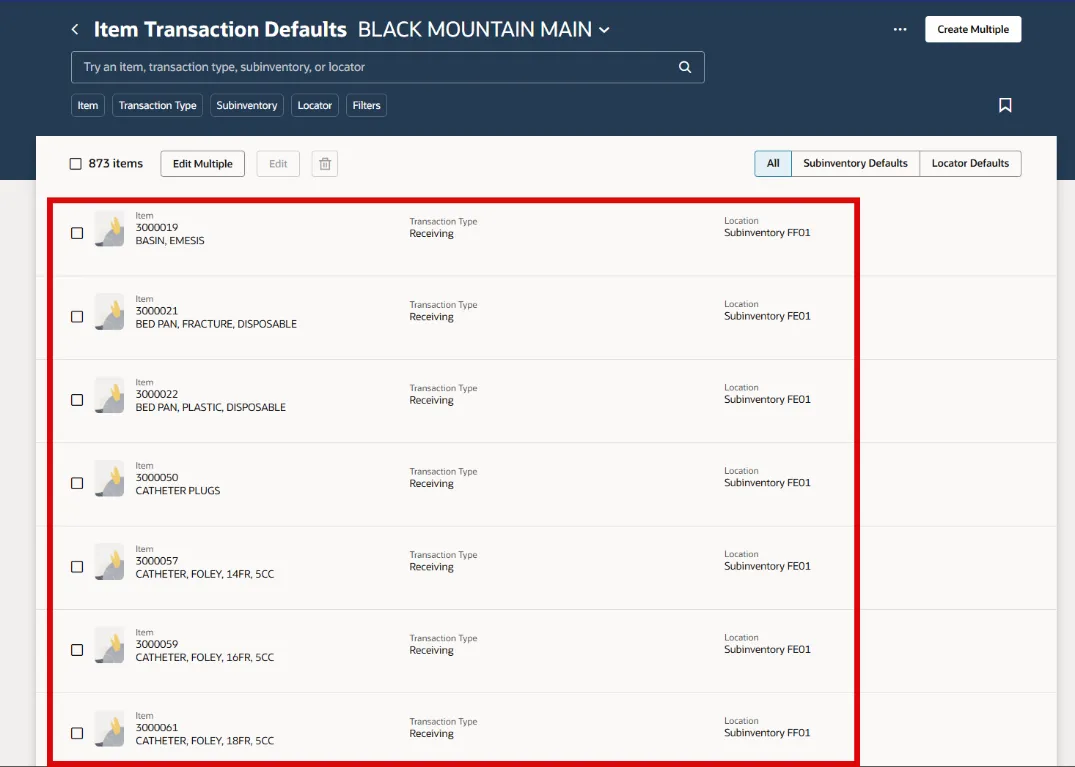
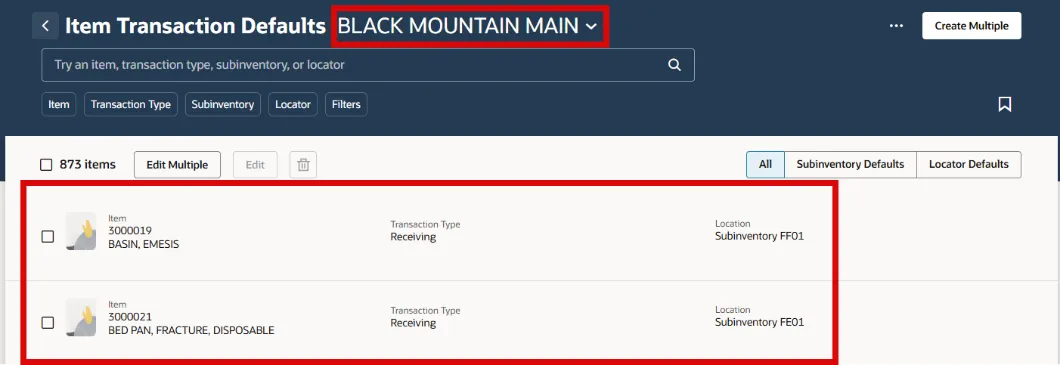
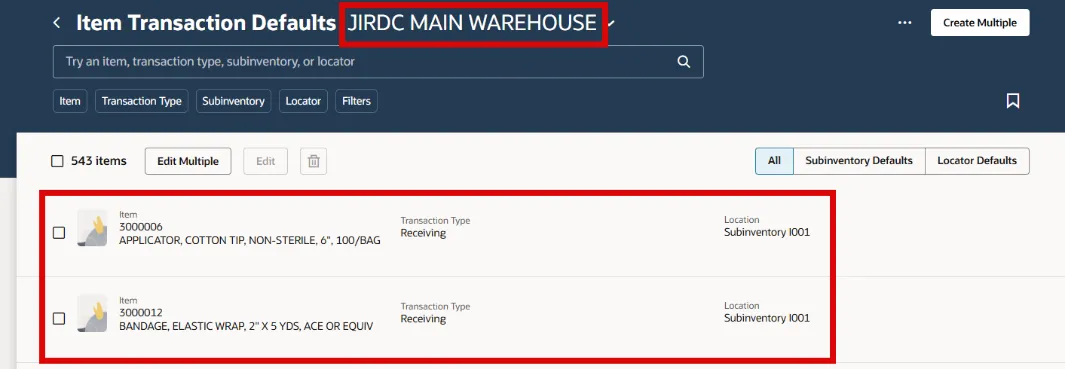
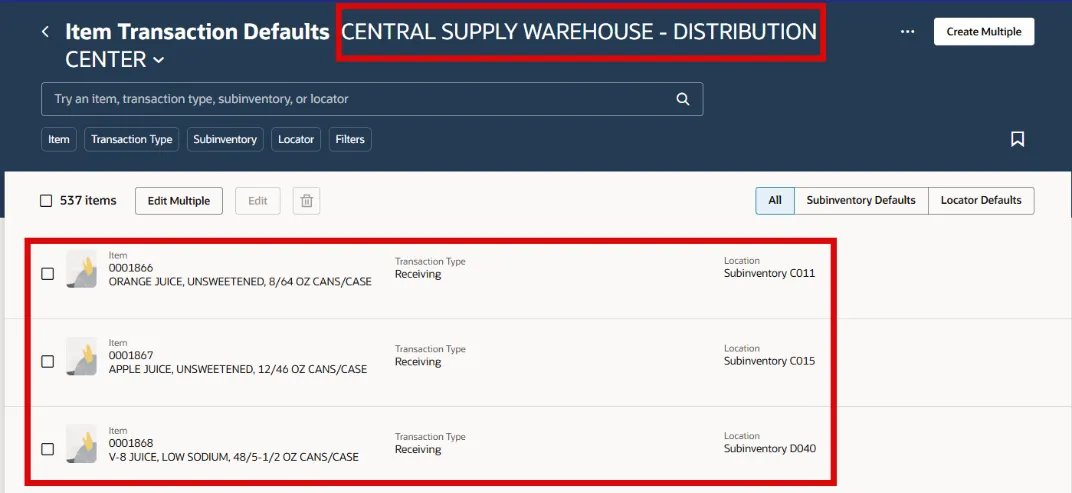
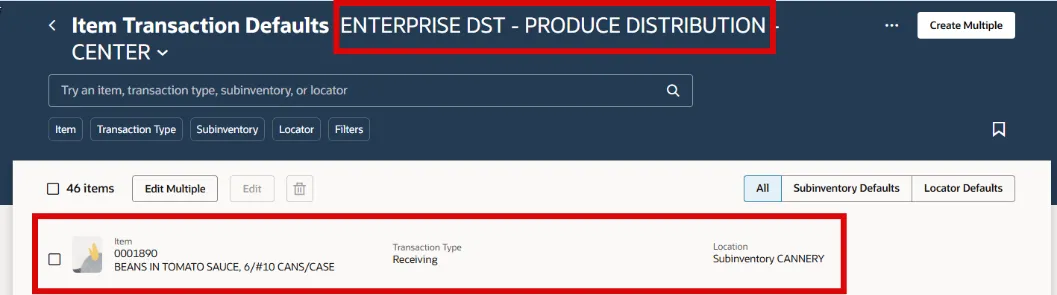
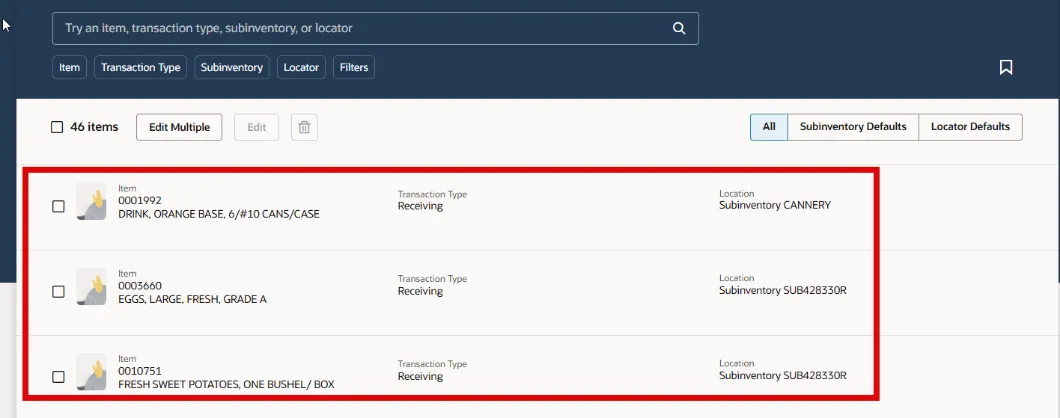
Step 15. The Item and Subinventory setup will now show on the Transaction Defaults page.
Configure Item Transaction Defaults by Location
To update the inventory items by location in NCFS, please follow the steps below. There are 8 steps to complete this process.
Step 1. Click the three dots and select Create by Location.

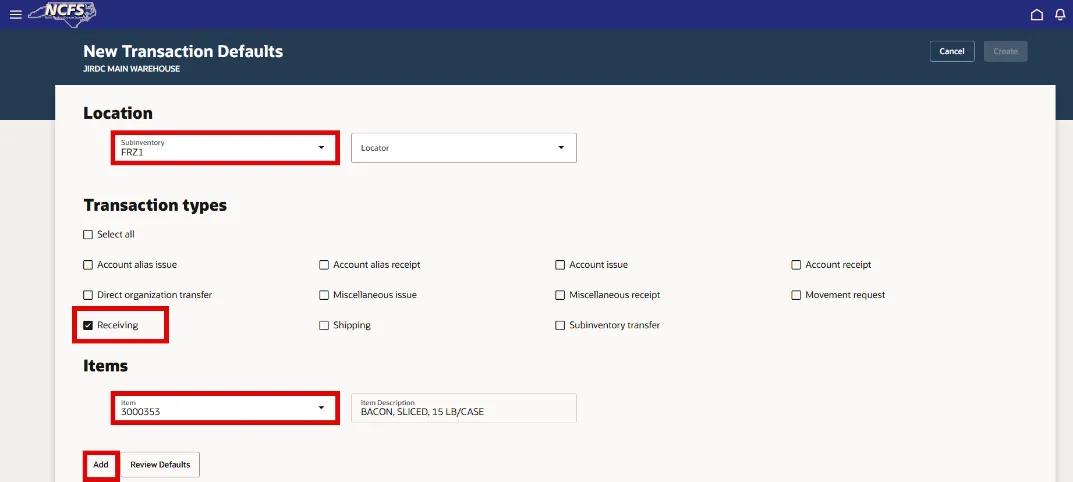
Step 2. Enter the Subinventory location in the Subinventory field.
Step 3. Check the Receiving check box under Transaction types.
Step 4. Click the Add button under Items to add the inventory items to this subinventory. (Multiple Items can be added to the same subinventory at one time).
Step 5. Click the Review Defaults to validate the selection. This process checks to see if this item already belongs to a subinventory.
Step 6. If the Status is OK, click the Create button.
Step 7. A window will appear at the bottom of screen “Default created”.
Step 8. The Item and Subinventory setup will now show on the Transaction Defaults page.
Configure Multiple Item Transaction Defaults for a single Inventory Organization
To configure multiple item transaction defaults for a single inventory organization in NCFS, please follow the steps below. There are 7 steps to complete this process.
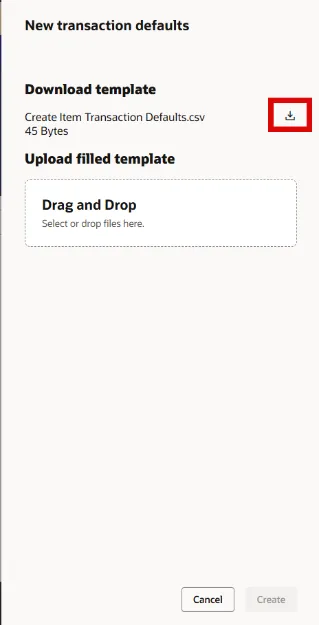
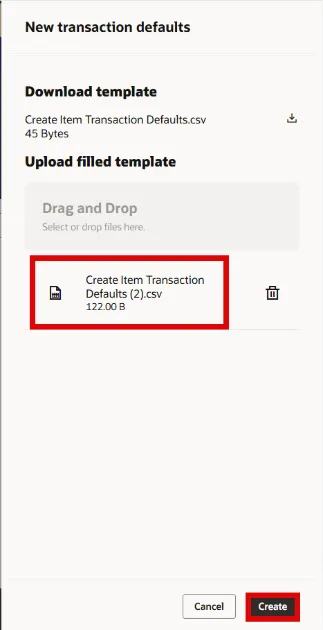
Step 1. Click the Create Multiple button.

Step 2. Click the Download button to download the Create Item Transaction Defaults template to your computer.
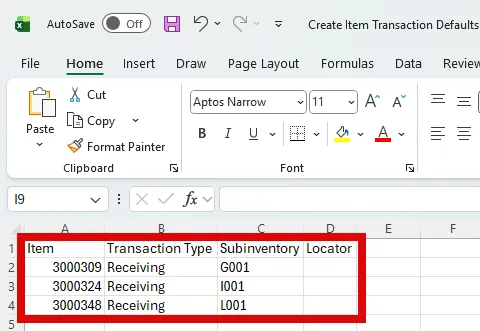
Step 3. Open the Create Item Transaction Defaults file on your computer.

Step 4. Enter the appropriate information on the spreadsheet and Save the file.
- Item Column: Item Number (Note: Make all DAC items TEXT format to include the preceding zeros or the upload will fail).
- Transaction Type Column: Receiving
- Subinventory Column: Subinventory
Step 5. Drag and Drop the file into the Drag and Drop window and then click the Create button.
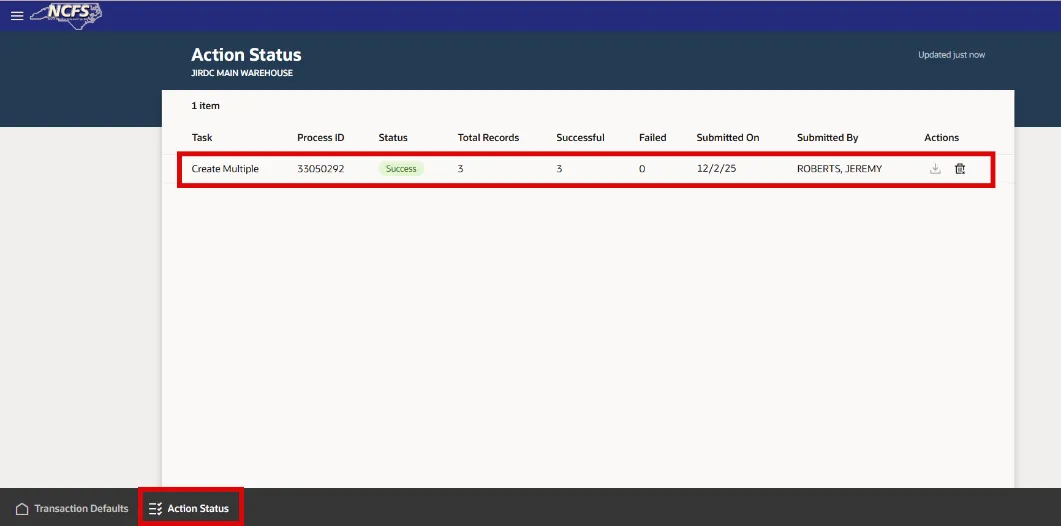
Step 6. Check the Actions tab at the bottom of the screen to see status of file upload.
Step 7. The Item and Subinventory setups will now show on the Transaction Defaults page.
Deleting Single and Multiple Items from Subinventory(s) for a single Inventory Organization
To delete a single item or multiple items from a single subinventory or multiple subinventories for an Inventory Organization, please follow the steps below. There are 4 steps to complete this process.
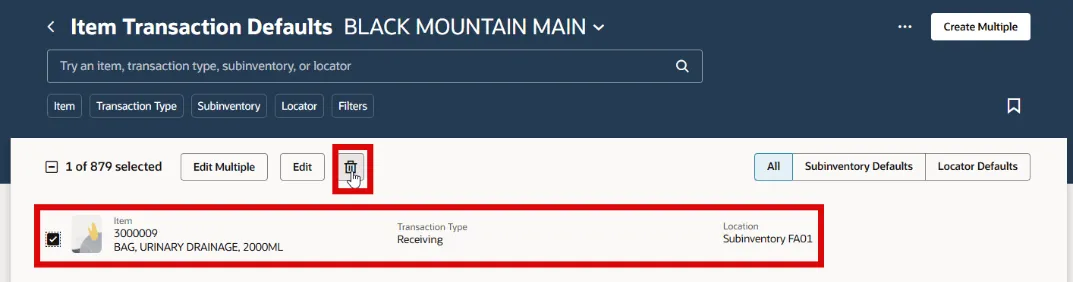
Step 1. To delete a single item setup, click the check box beside the inventory item and then click the trashcan button to delete the item and subinventory setup.
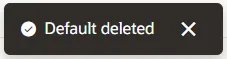
Step 2. A window box will appear at the bottom of the screen indicating a successful deletion.
Step 3. To delete multiple items and subinventory setups, click the check box beside all items desired for deletion and click the trashcan button.

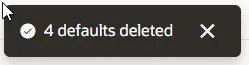
Step 4. A window box will appear at the bottom of the screen indicating a successful deletion.
Edit a Single or Multiple Item Transaction Defaults
To edit a single item or multiple items from a single subinventory or multiple subinventories for an Inventory Organization, please follow the steps below. There are 12 steps to complete this process.
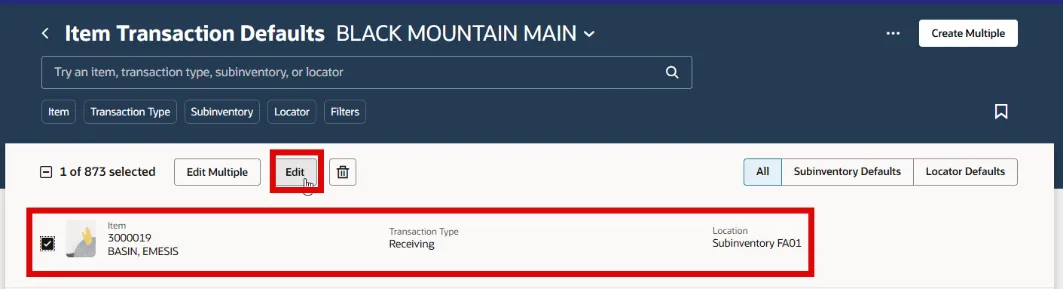
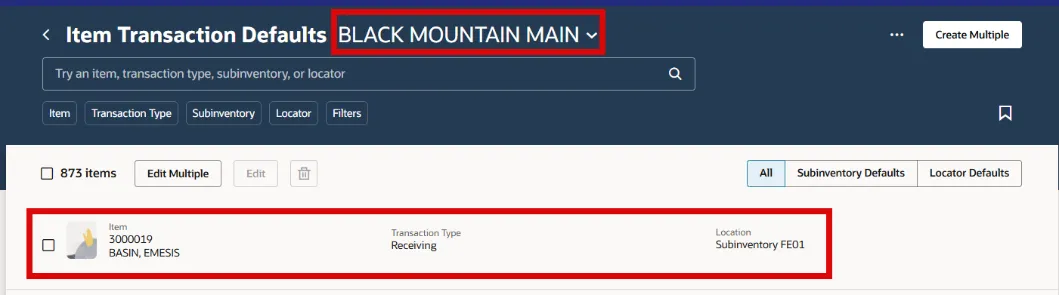
Step 1. To edit a single inventory item, click the check box beside the item and then click the Edit button.
Step 2. Enter the subinventory in the New Subinventory field and then click the View Defaults button. This validates the inventory item and subinventory combination. If status shows OK then click the Update button to finalize the edit.
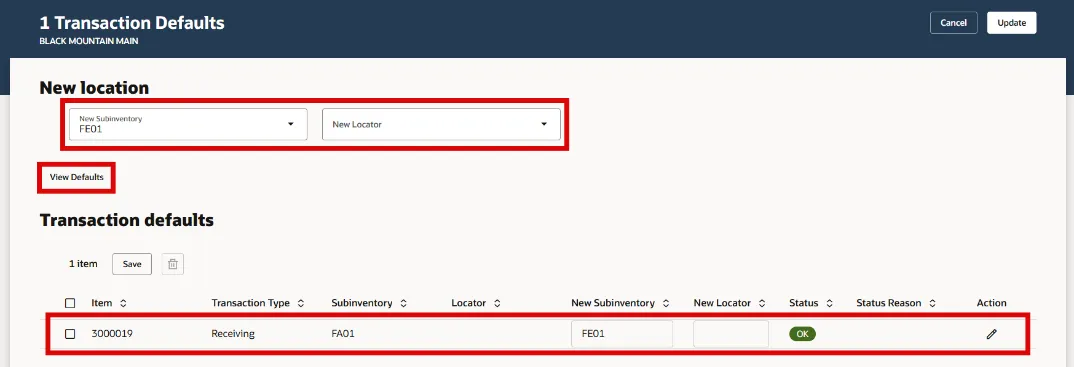
Step 3. This inventory item will now be associated with the new subinventory.
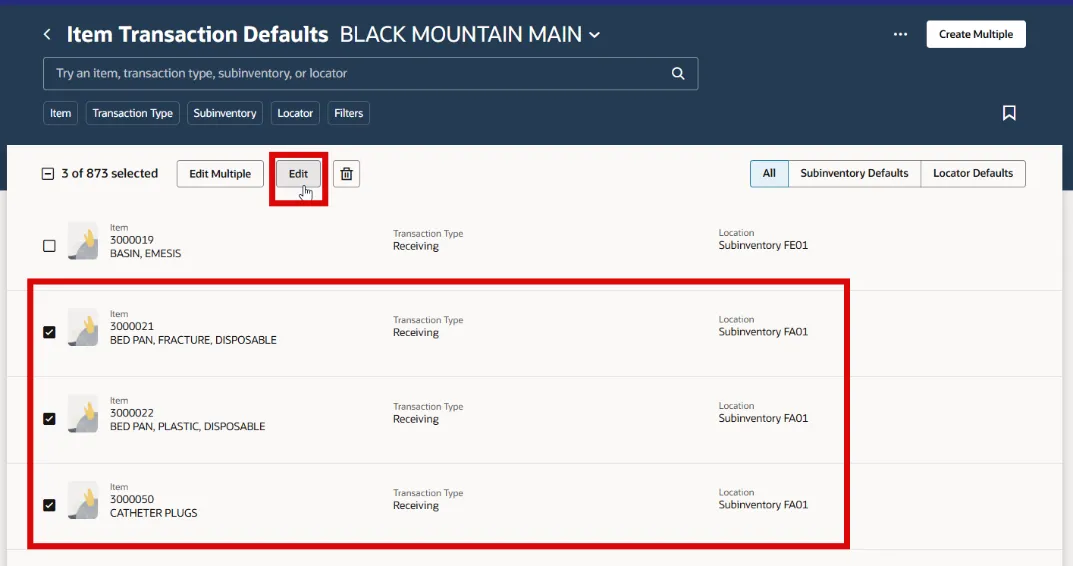
Step 4. To edit multiple inventory items, click the check box beside all the items that need editing and then click the Edit button.
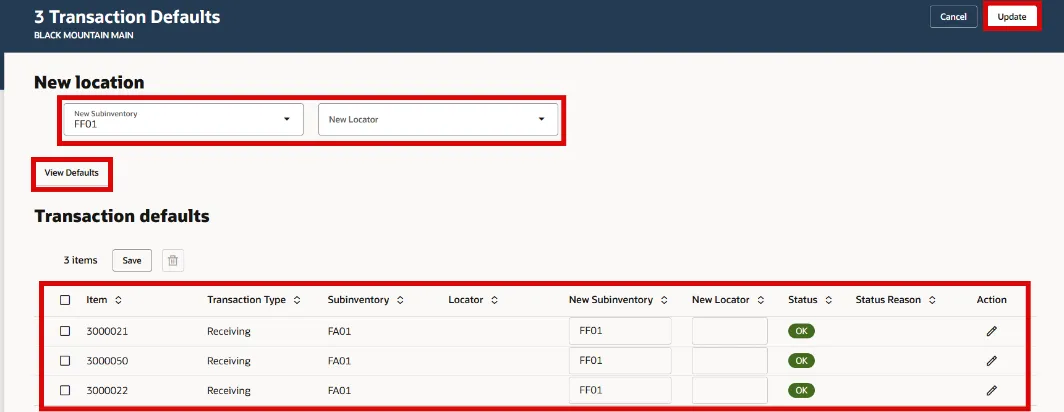
Step 5. Enter the subinventory in the New Subinventory field and then click the View Defaults button. This validates the inventory item and subinventory combination. If status shows OK then click the Update button to finalize the edit.
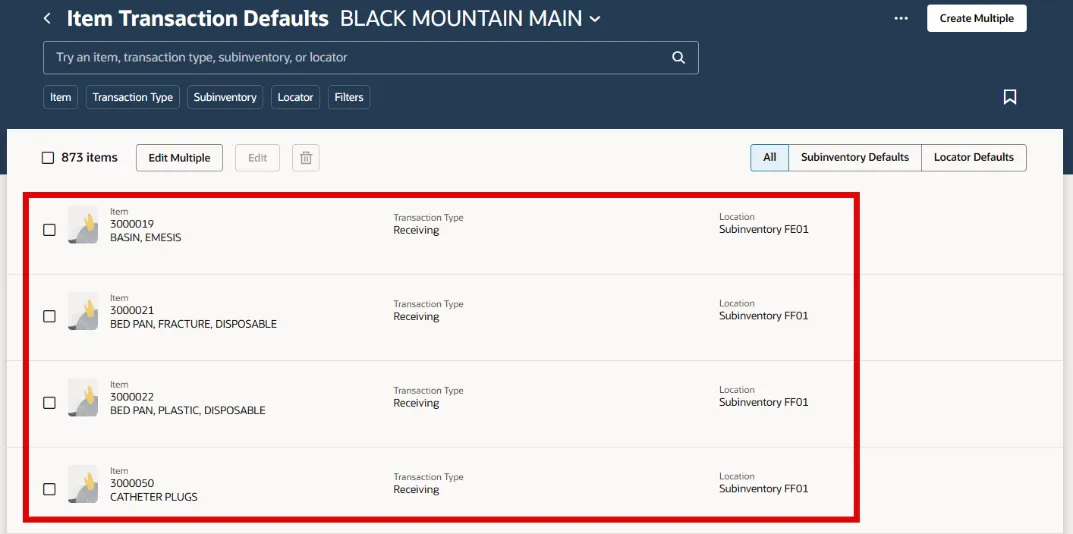
Step 6. These inventory items will now be associated with the new subinventory.
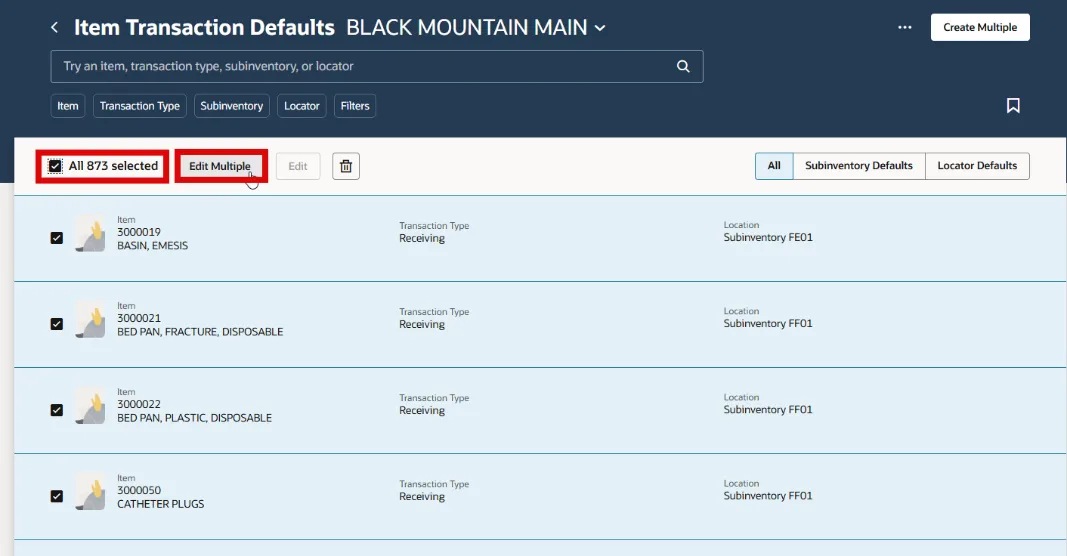
Step 7. To perform a Mass Edit for the entire inventory organization, click the check box beside the total number of items and then click the Edit Multiple button.
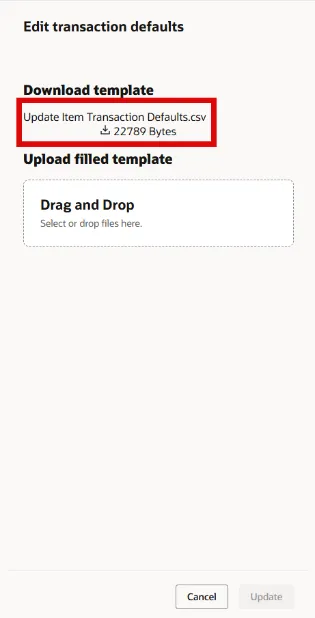
Step 8. Click the download arrow to download the Update Item Transaction Defaults.csv template file.
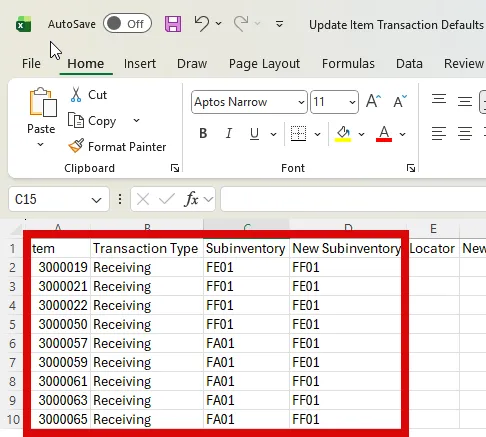
Step 9. Enter the New Subinventory for all records that need updating in the New Subinventory column. Delete all other lines that do not need to be updated from the spreadsheet. (Note: Make all DAC items TEXT format to include the preceding zeros or the upload will fail).
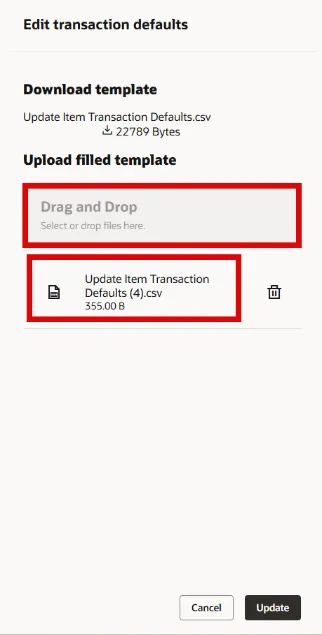
Step 10. Save the file to your computer and then Drag and Drop the file into the Edit transaction defaults Upload filled template box. Click the Update button.
Step 11. Click the Action Status tab at the bottom of page to monitor the status of the submitted task.
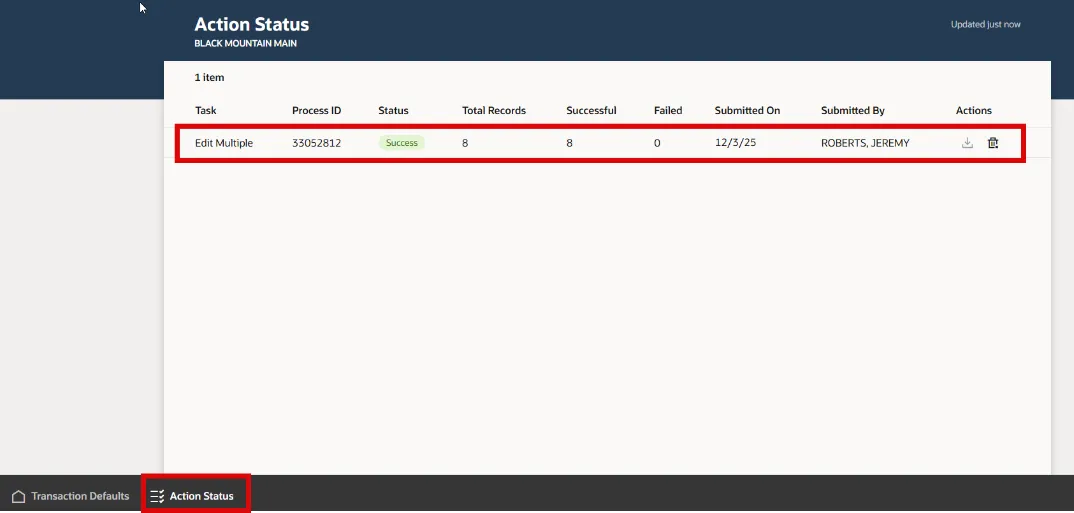
Step 12. The inventory items will now show the updated subinventories.
Configure Item Transaction Defaults with a Mass Upload
To add or update the Subinventory location(s) for an Inventory items across multiple Inventory Organizations in NCFS with a Mass upload, please follow the steps below. There are 24 steps to complete this process.
Step 1. Under Functional Areas, select Inventory Management.
Step 2. Select All Tasks in the Show field.
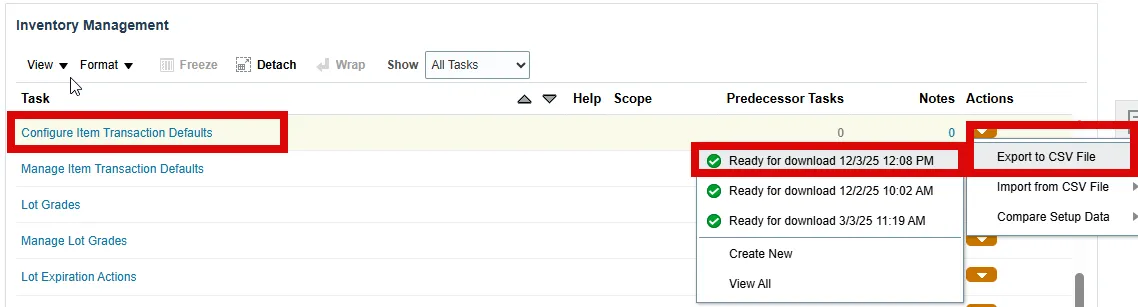
Step 3. Scroll down the list and select Configure Item Transaction Defaults.
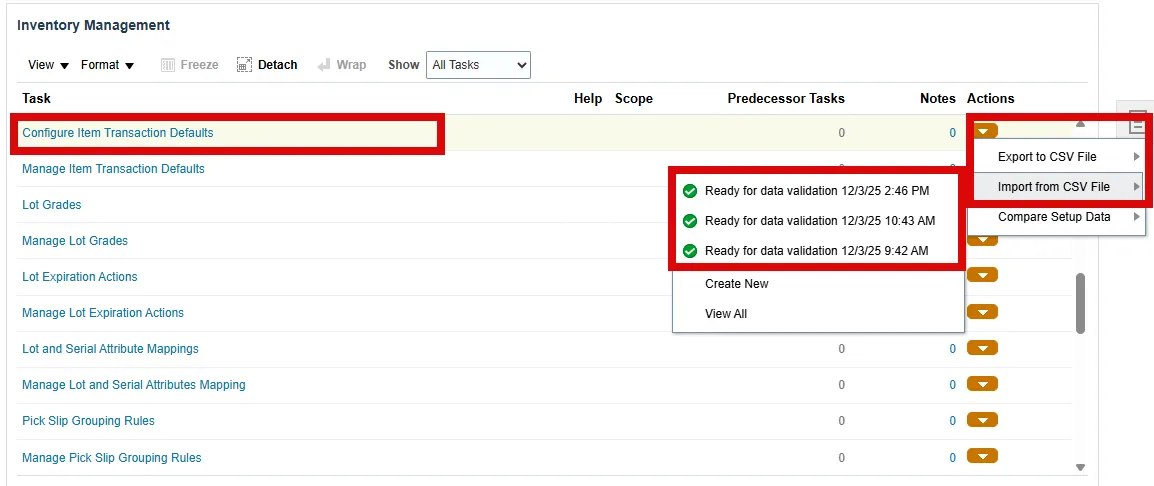
Step 4. Click the Actions drop-down arrow and select Export to CSV File.
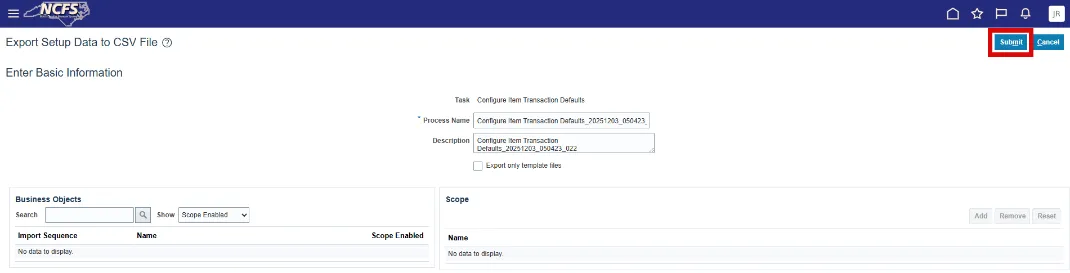
Step 5. Click Create New.
Step 6. Click the Submit button.
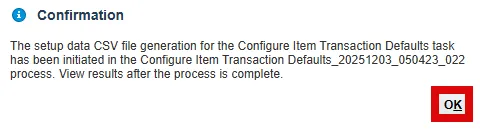
Step 7. A Confirmation window will appear, Click OK.
Step 8. To check the status of the Export to CSV File click the Actions and view the status. Click Ready for download and the date you ran it for.
Step 9. Click the Download File button.

Step 10. Open the Configure Item Transaction Defaults_XXXXXXXX_XXXXXX_XXX file on your computer.

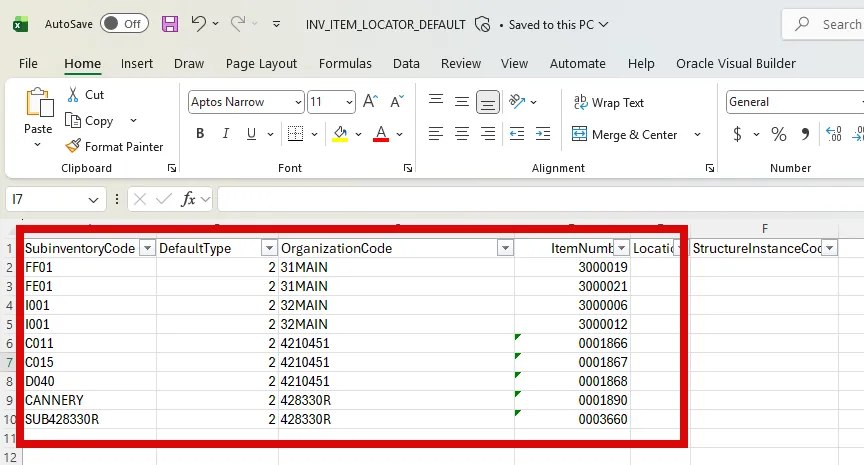
Step 11. Open the downloaded file INV_ITEM_LOCATOR_DEFAULT.

Step 12. Review and update the Subinventory Codes for each Organization and Item combination in the Excel Spreadsheet.
- Remove the all the data except for the column headers from the INV_ITEM_LOCATOR_DEFAULT Excel spreadsheet.
- Enter the Subinventory Area in the SubinventoryCode column.
- The DefaultType is always 2.
- Enter the Inventory Organization in the OrganizationCode column.
- Enter the Inventory Item number in the ItemNumber column. (Note: Make all DAC items TEXT format to include the preceding zeros or the upload will fail).
Step 13. Save Excel Spreadsheet to your computer using the same file name and to the zip file downloaded.
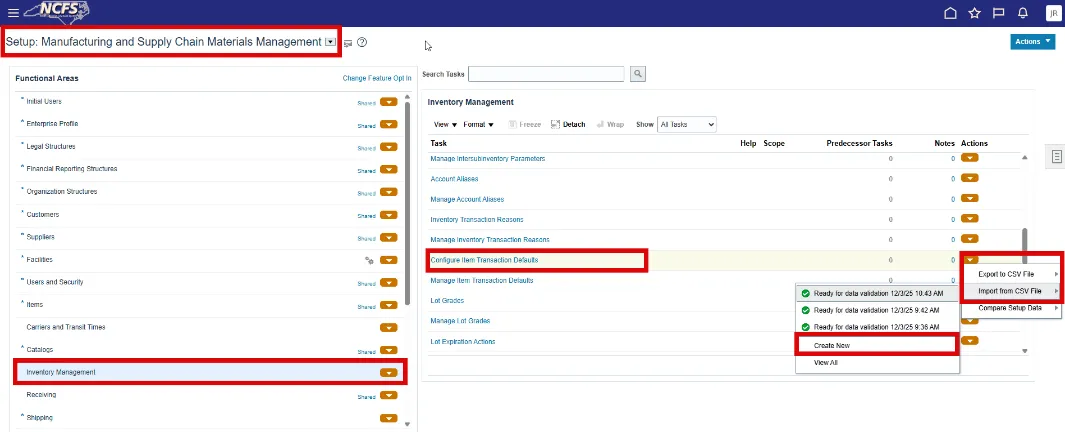
Step 14. To Import the new file, click the under Actions.
Step 15. Select Import From CSV File.
Step 16. Click Create New.
Step 17. Click the Choose File button.

Step 18. Select the new Configure Item Transaction Defaults zip file from your computer.

Step 19. The file details will display loaded.
Step 20. Click Submit.

Step 21. A Confirmation Window will appear, click OK.

Step 22. Check the Import from CSV file status under the Actions tab, click the Ready for data validation XX/XX/XX XX:XX AM/PM file to review.
Step 23. Under the Summary window, the status should read Completed Successfully. Click Done.
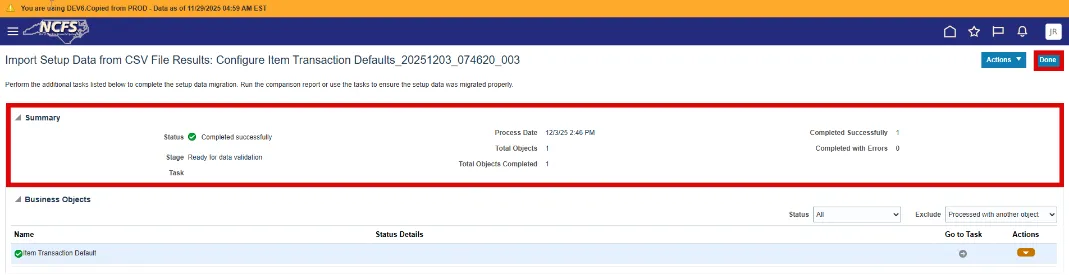
Step 24. Under the Configure Item Transaction Defaults page, review the newly added/edited inventory item and subinventory updates.
Wrap-Up
Configure Item Transaction Defaults using the steps above in NCFS.
Additional Resources
- Virtual Instructor Led Training (vILT)
- Quick Reference Guide (QRG)