Purpose
The purpose of this Quick Reference Guide (QRG) is to provide a step-by-step explanation of how to Create a Transfer via Spreadsheet Upload in the North Carolina Financial System (NCFS).
Introduction and Overview
This QRG covers the process of creating a transfer using the ADFDI spreadsheet template. The NCFS spreadsheet allows users to enter a single transfer or multiple transfers at a time.
User Tip
The following are prerequisites to creating a transfer (via spreadsheet upload):
-
Install the ADFDI Desktop Excel Integrator.
Creating a Transfer (via Spreadsheet Upload)
To create a transfer using the ADFDI spreadsheet, please follow the steps below. There are 20 steps to complete this process.
Step 1. Log in to the NCFS portal with your credentials to access the system.
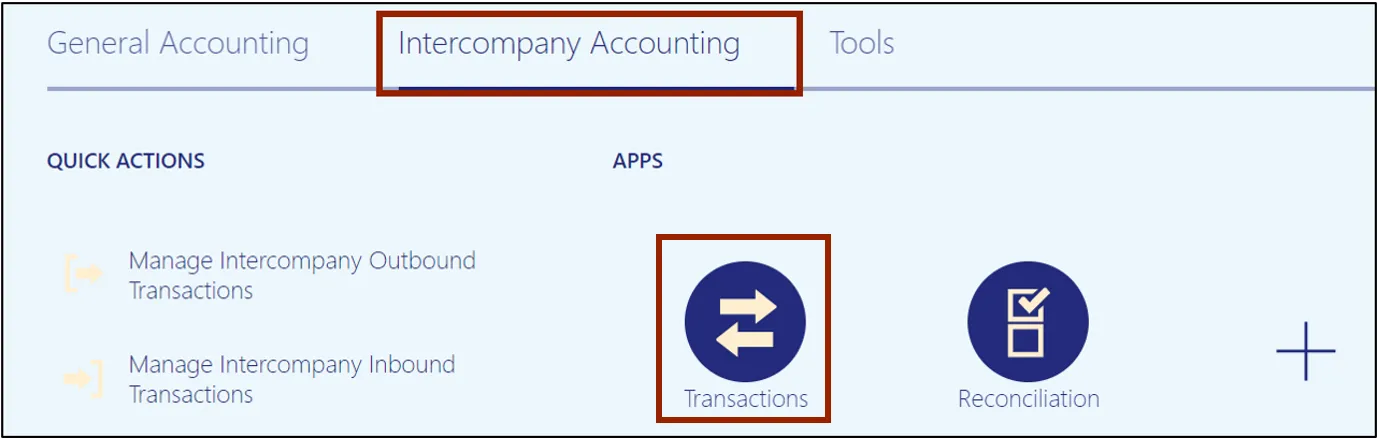
Step 2. On the Home page, click the Intercompany Accounting tab and select the Transactions app.
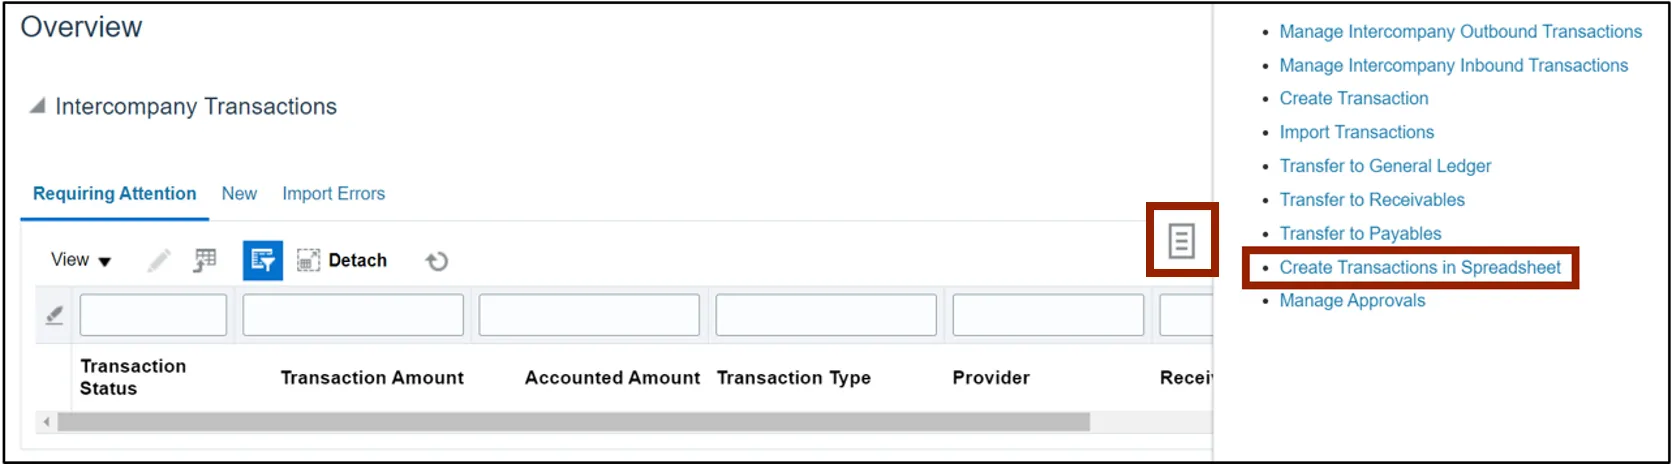
Step 3. Click the Tasks icon and select Create Transactions in Spreadsheet from the Tasks pane to download the ADFDI spreadsheet.
Step 4. Click the Open button to open the downloaded Excel file.

Step 5. Open the Excel file and click the Enable Editing button.

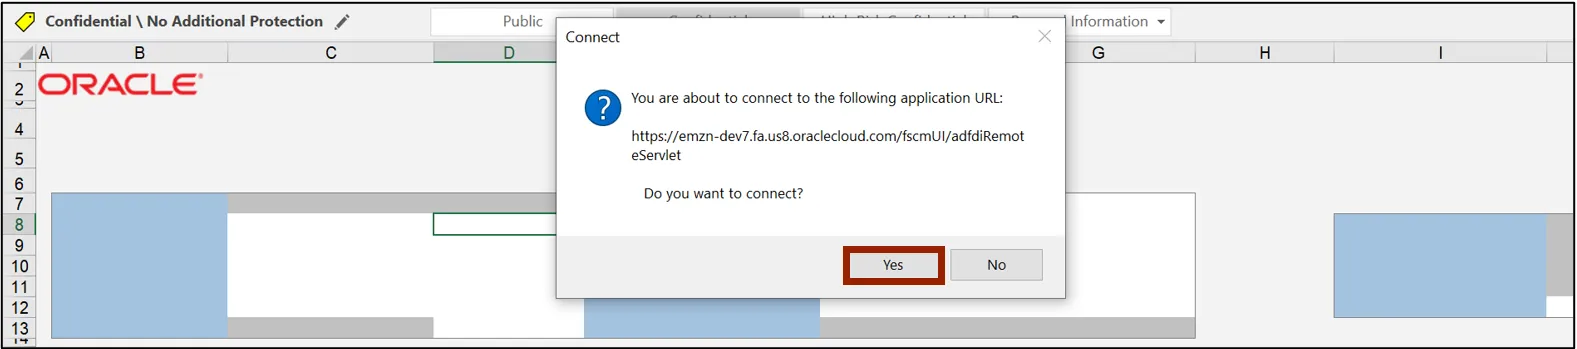
Step 6. On the Connect pop-up, click the Yes button to successfully connect to the server.
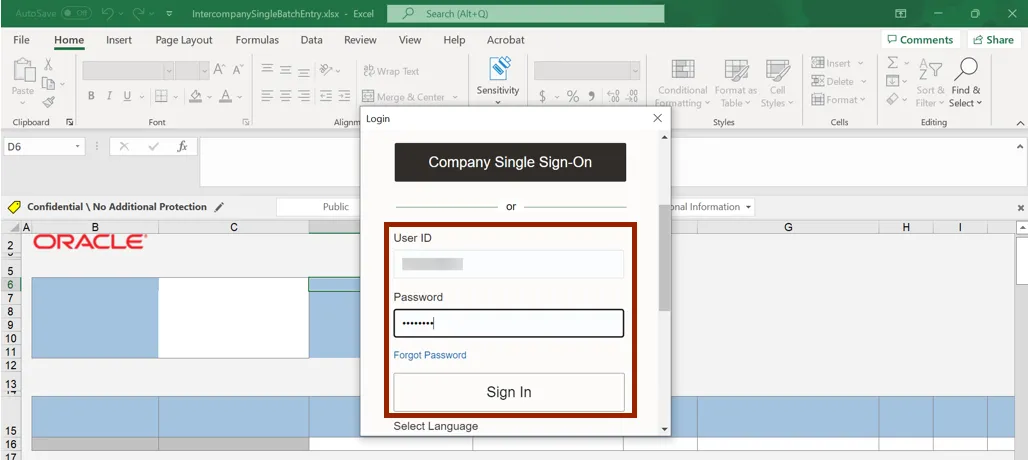
Step 7. On the NCFS portal Login pop-up, enter the User ID and Password credentials and click the Sign In button.
Notes:
- After Go-live, SSO will be used.
- Credentials must be manually entered. They will no longer default.
Step 8. Navigate to the Multiple Batches sheet from the sheet tabs.
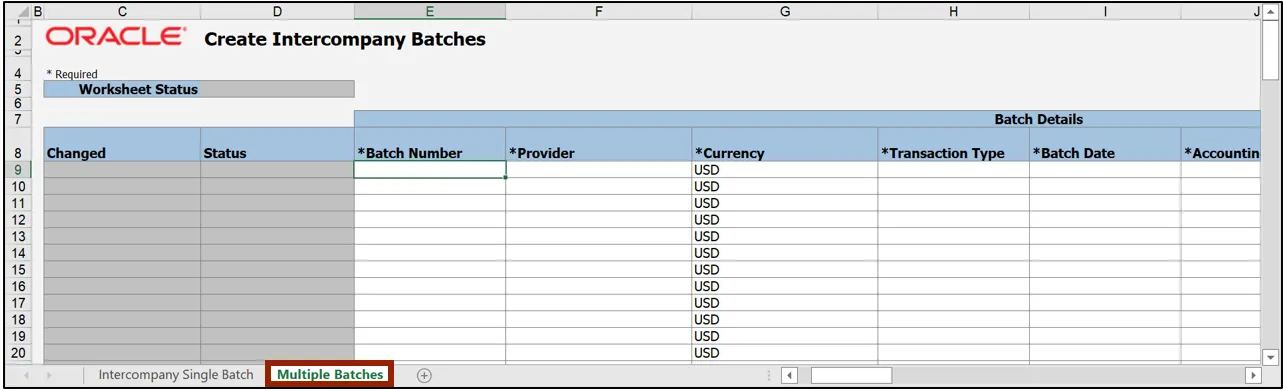
Step 9. Fill in the information under the Batch Details section. Enter the Batch Number and the Provider on the respective fields.
Note:
- Batch Number value entered here will be overridden with a different sequential number.
- Double-click for choice lists of values in the *Provider, *Transaction Type, *Account, *Receiver, and Context Value fields.

Step 10. Enter the Transaction Type, Batch Date, and Accounting Date on the respective fields.

Step 11. Scroll to the right. Under the Provider Accounting Line Details section, enter the Account Number on the Account field.
Note: Double click the field below Account to search and select the required account or paste from your supporting data sheet.

Step 12. On the Debit field, enter the Debit Amount.

Step 13. Enter the Transaction Number field (typically the same value as the Batch Number) field.

Step 14. Scroll to the right. Under the Receiver Accounting Line Details section, enter the Receiver number.
Note: For internal transfers, the provider can enter the receiver’s Account.

Step 15. Scroll to the right. Under the Batch Descriptive Flexfield section, double click the field below Context Value to enter the DFF value.

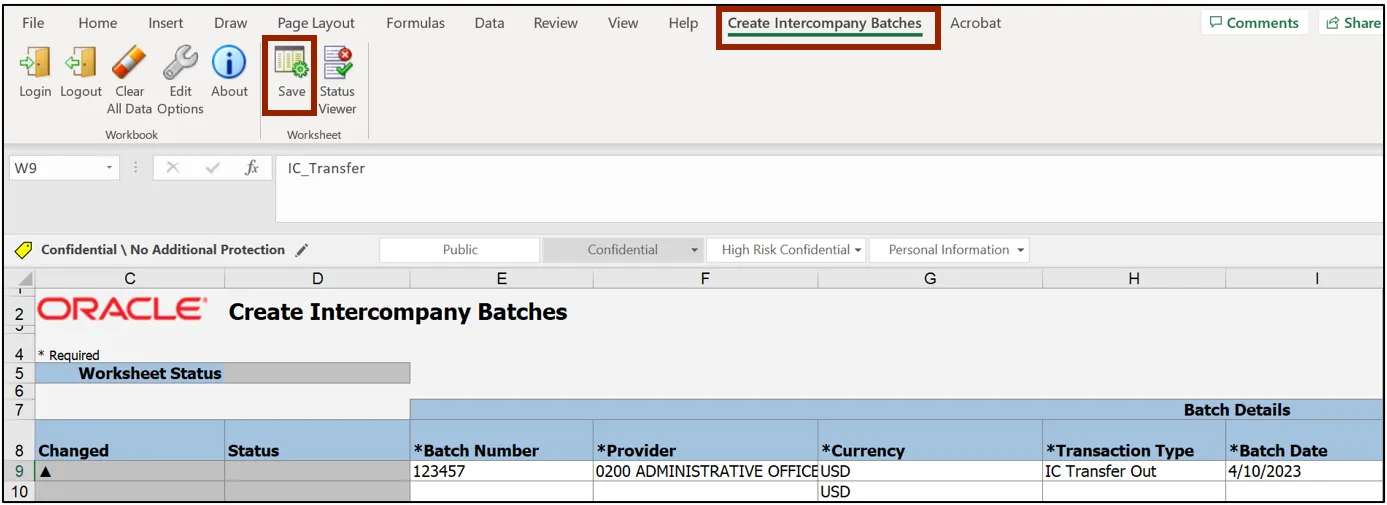
Step 16. The Batch Descriptive Flexfield pop-up appears. From the Additional Information Context drop-down choice list, select IC_Transfer. The IC_Transfer field appears. Select the required option from the IC_Transfer drop-down choice list.
In this example, we choose TF-1-OPERATING. Then, click the OK button.

Step 17. On the Create Intercompany Batches tab, click the Save icon.
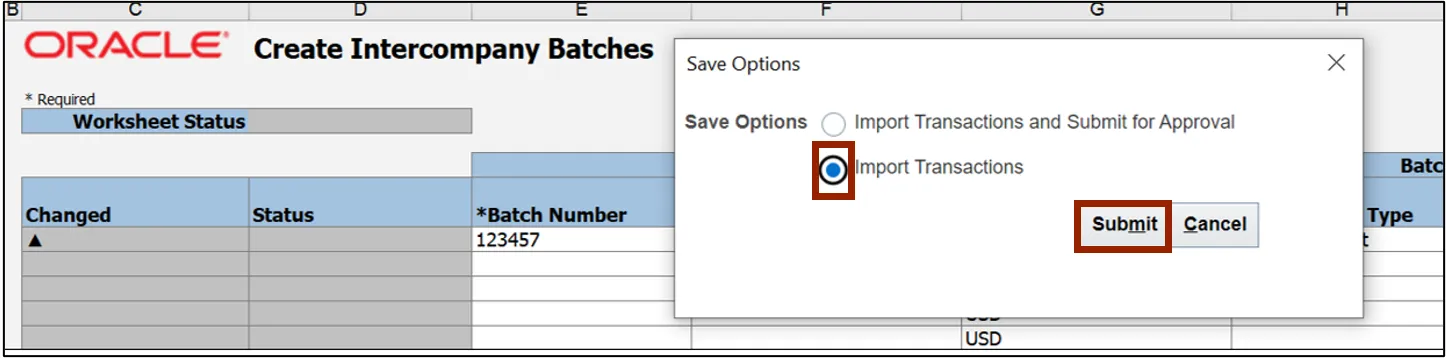
Step 18. The Save Options pop-up appears. Select the Import Transactions radio button and click the Submit button.
Step 19. The Confirmation pop-up appears. Click the OK button.
Notes:
- Make a note of the Process ID. It can be used as QBE filtering criteria within the Intercompany Transactions dashboard.
- Ensure to close Excel and/or save the file as template for future use.

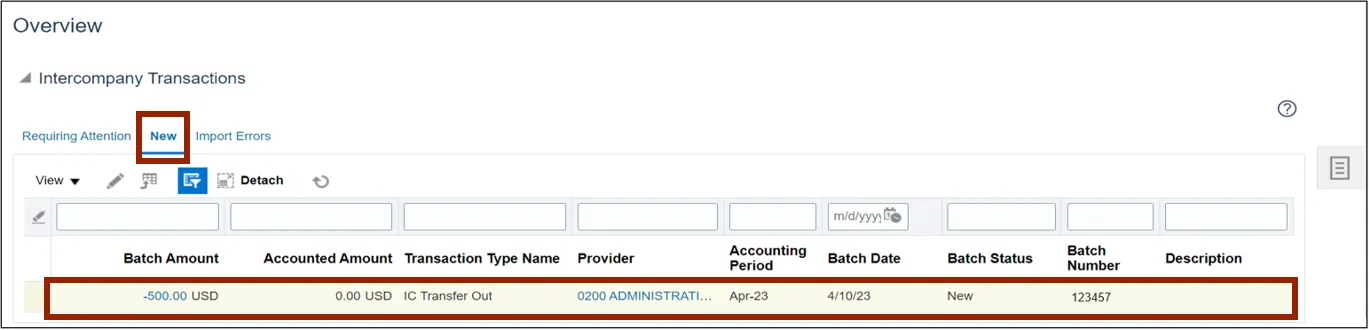
Step 20. Navigate back to the Intercompany Transactions dashboard. Click the New tab to view newly created batches. If multiple transactions appear, use the QBE filtering feature to view the one(s) desired.
Wrap-Up
Create a transfer through a spreadsheet using the steps above to upload single or multiple transfers.
Additional Resources
- Virtual Instructor-Led Training (vILT)