Purpose
The purpose of this Quick Reference Guide (QRG) is to provide a step-by-step explanation of how to perform Inventory Module Setup in the North Carolina Financial System (NCFS).
Introduction and Overview
This QRG covers how to perform Inventory Module Setup in NCFS.
Perform Inventory Module Setup
To Setup Preferred Stock Location for PO Receiving in Inventory Module Setup in NCFS, please follow the steps below. There are 12 steps to complete this process.
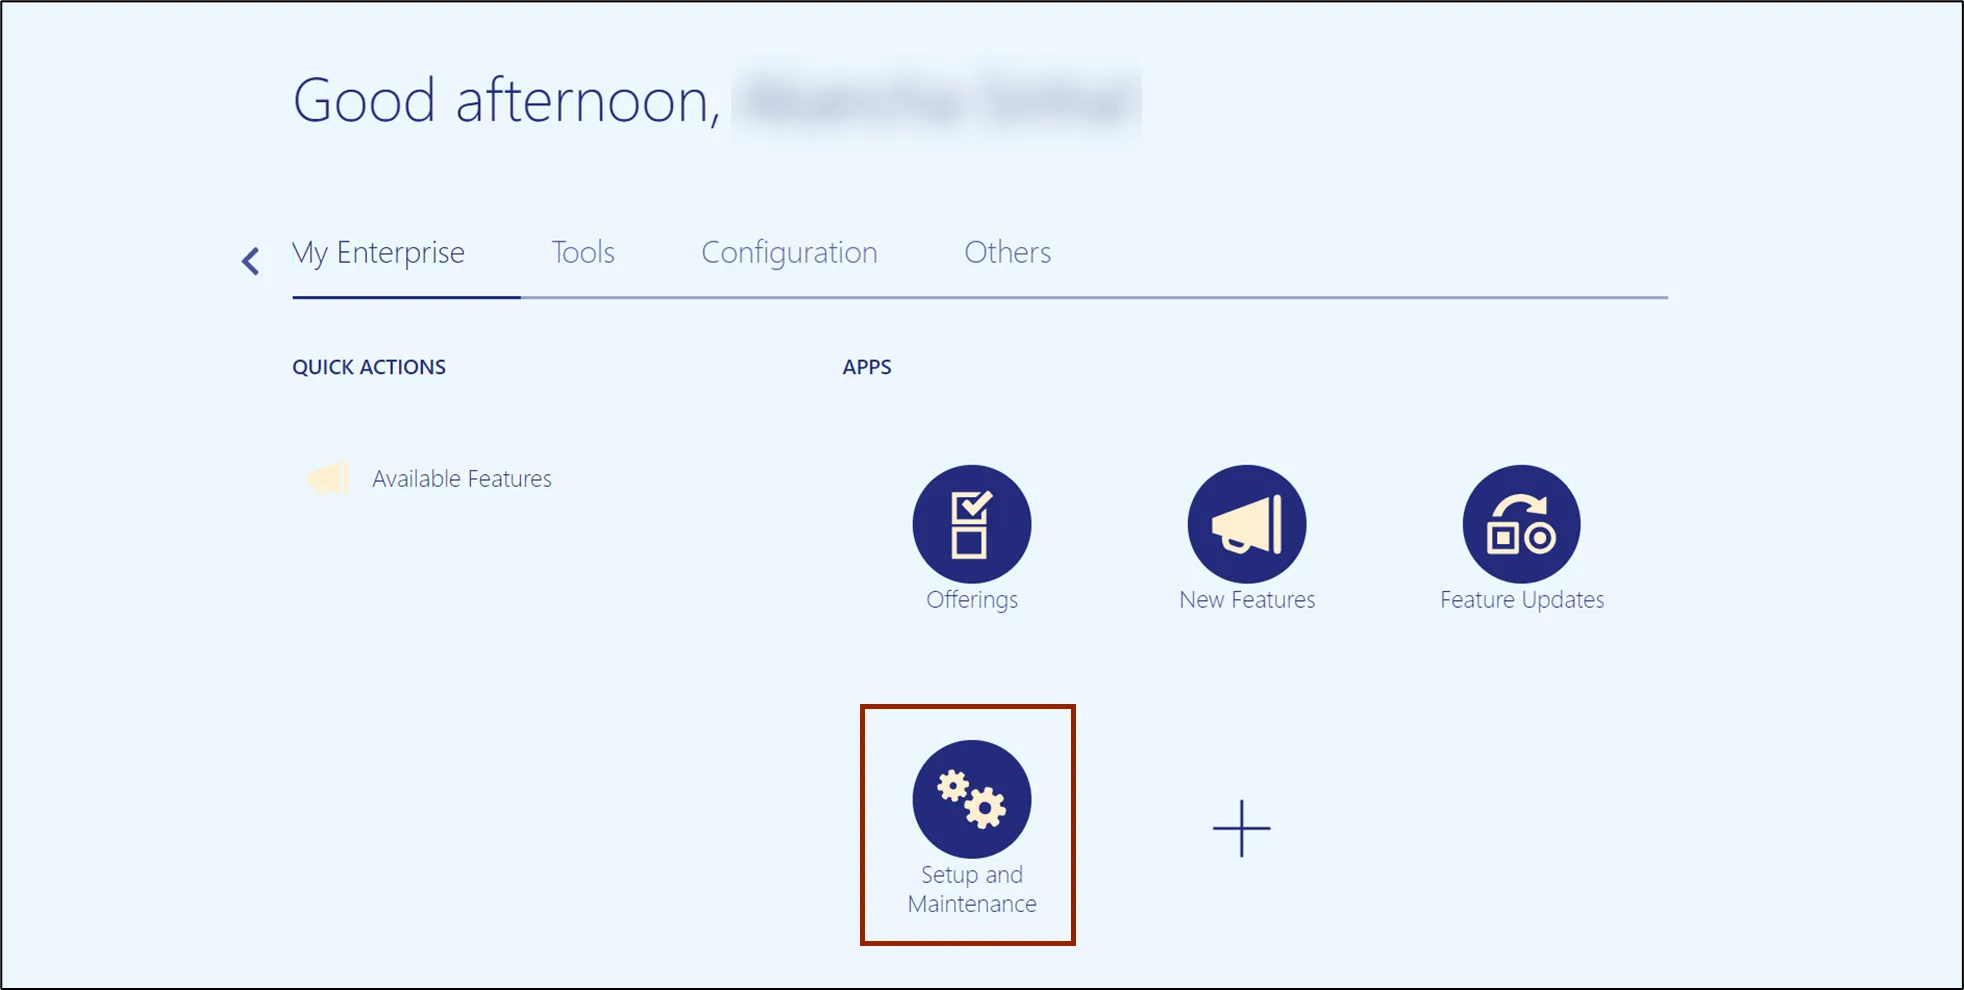
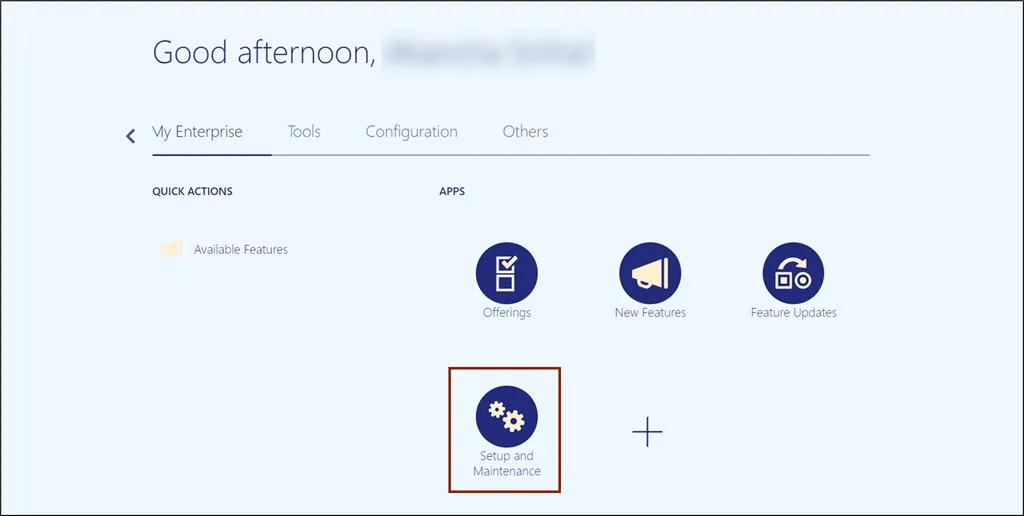
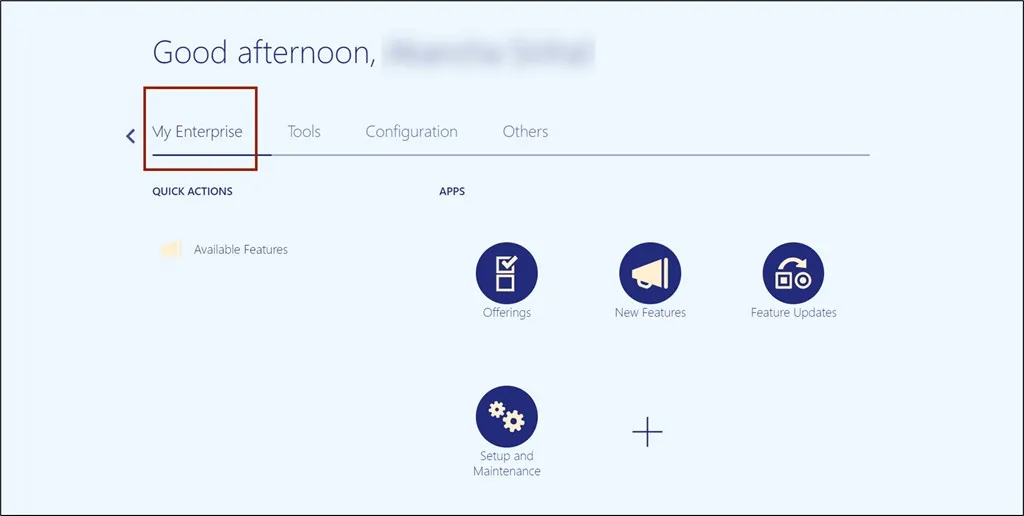
Step 1. On the Home page, click the My Enterprise tab.
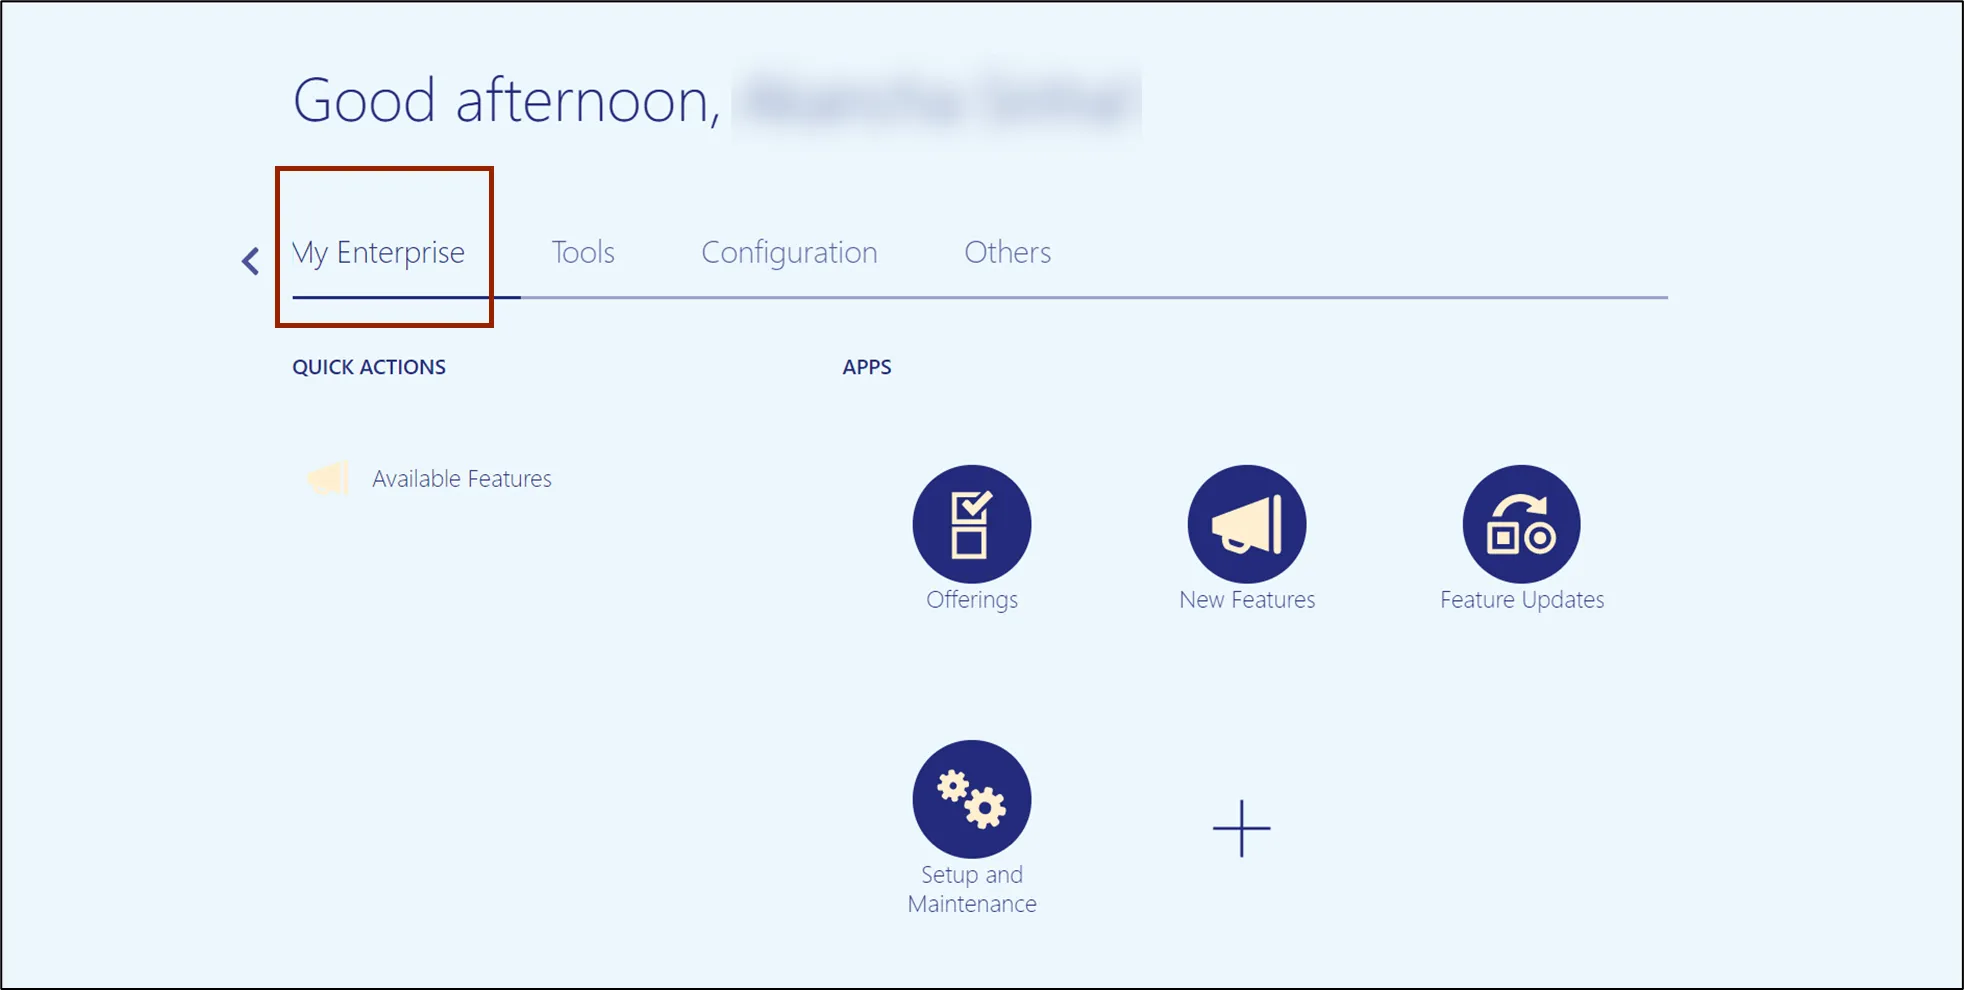
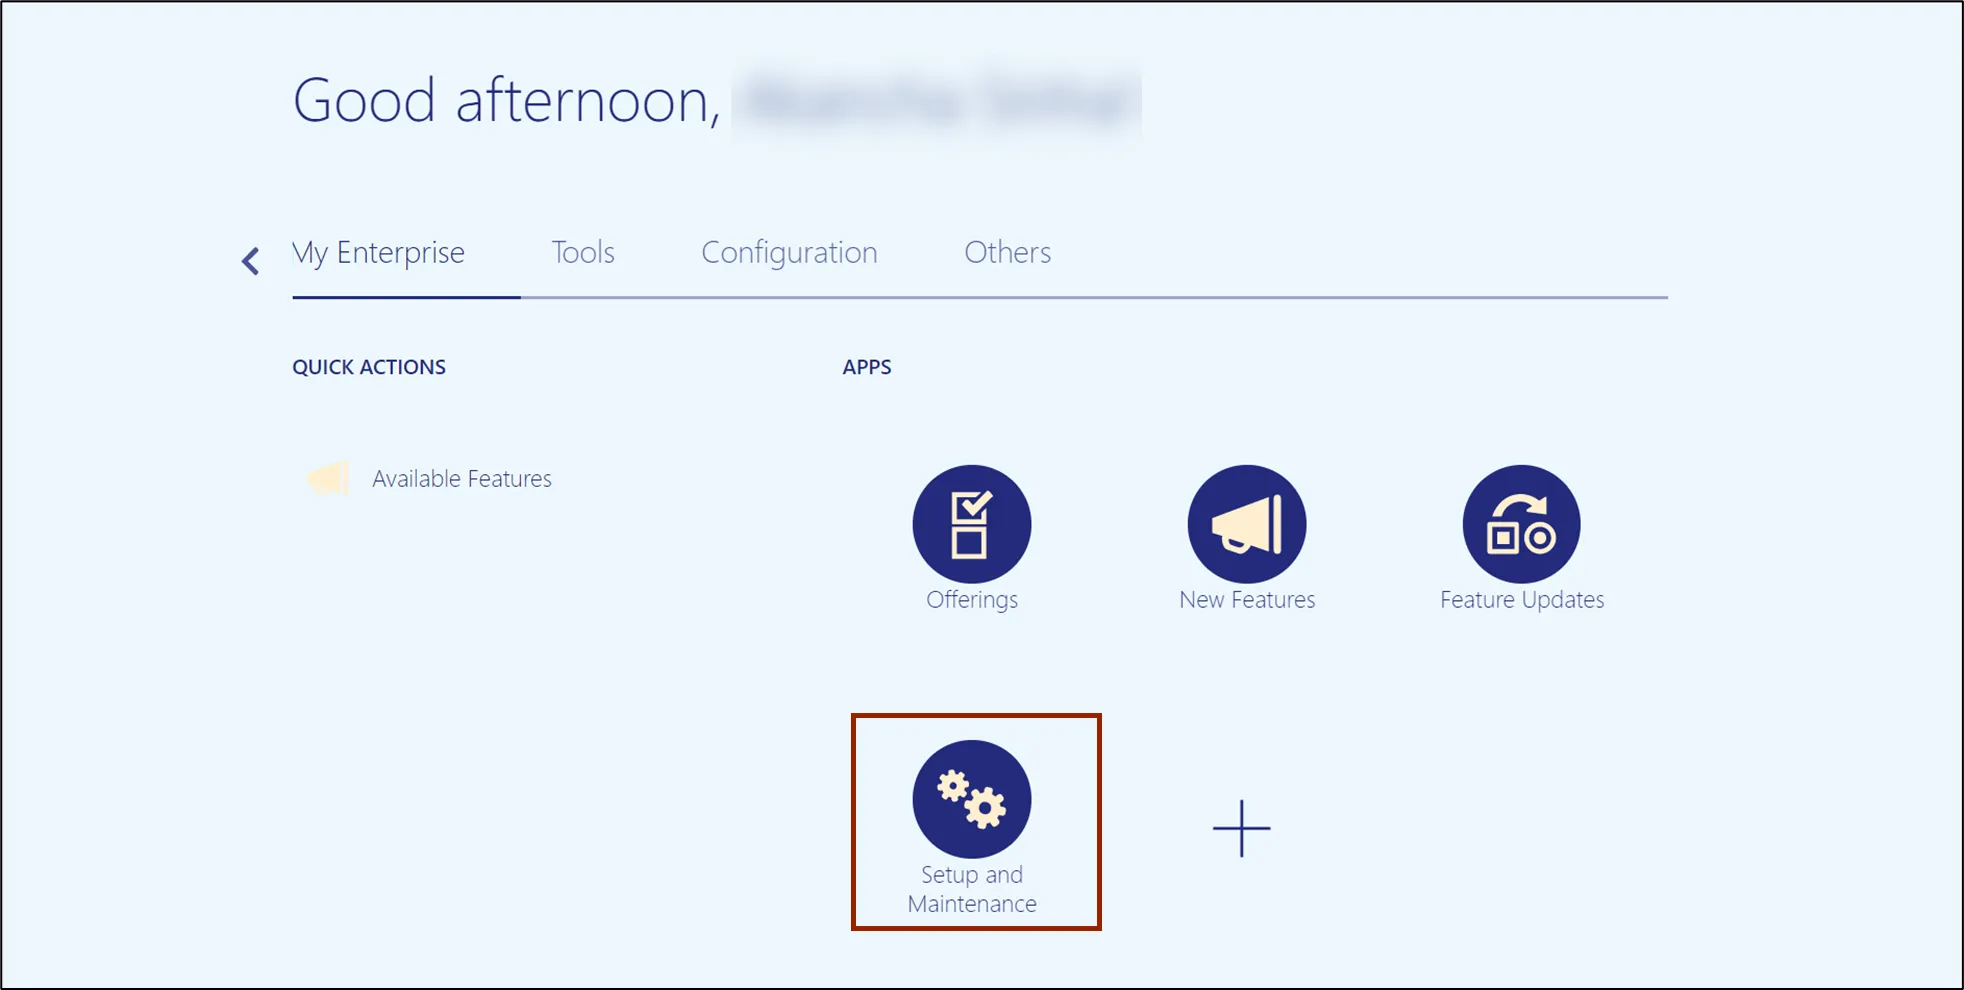
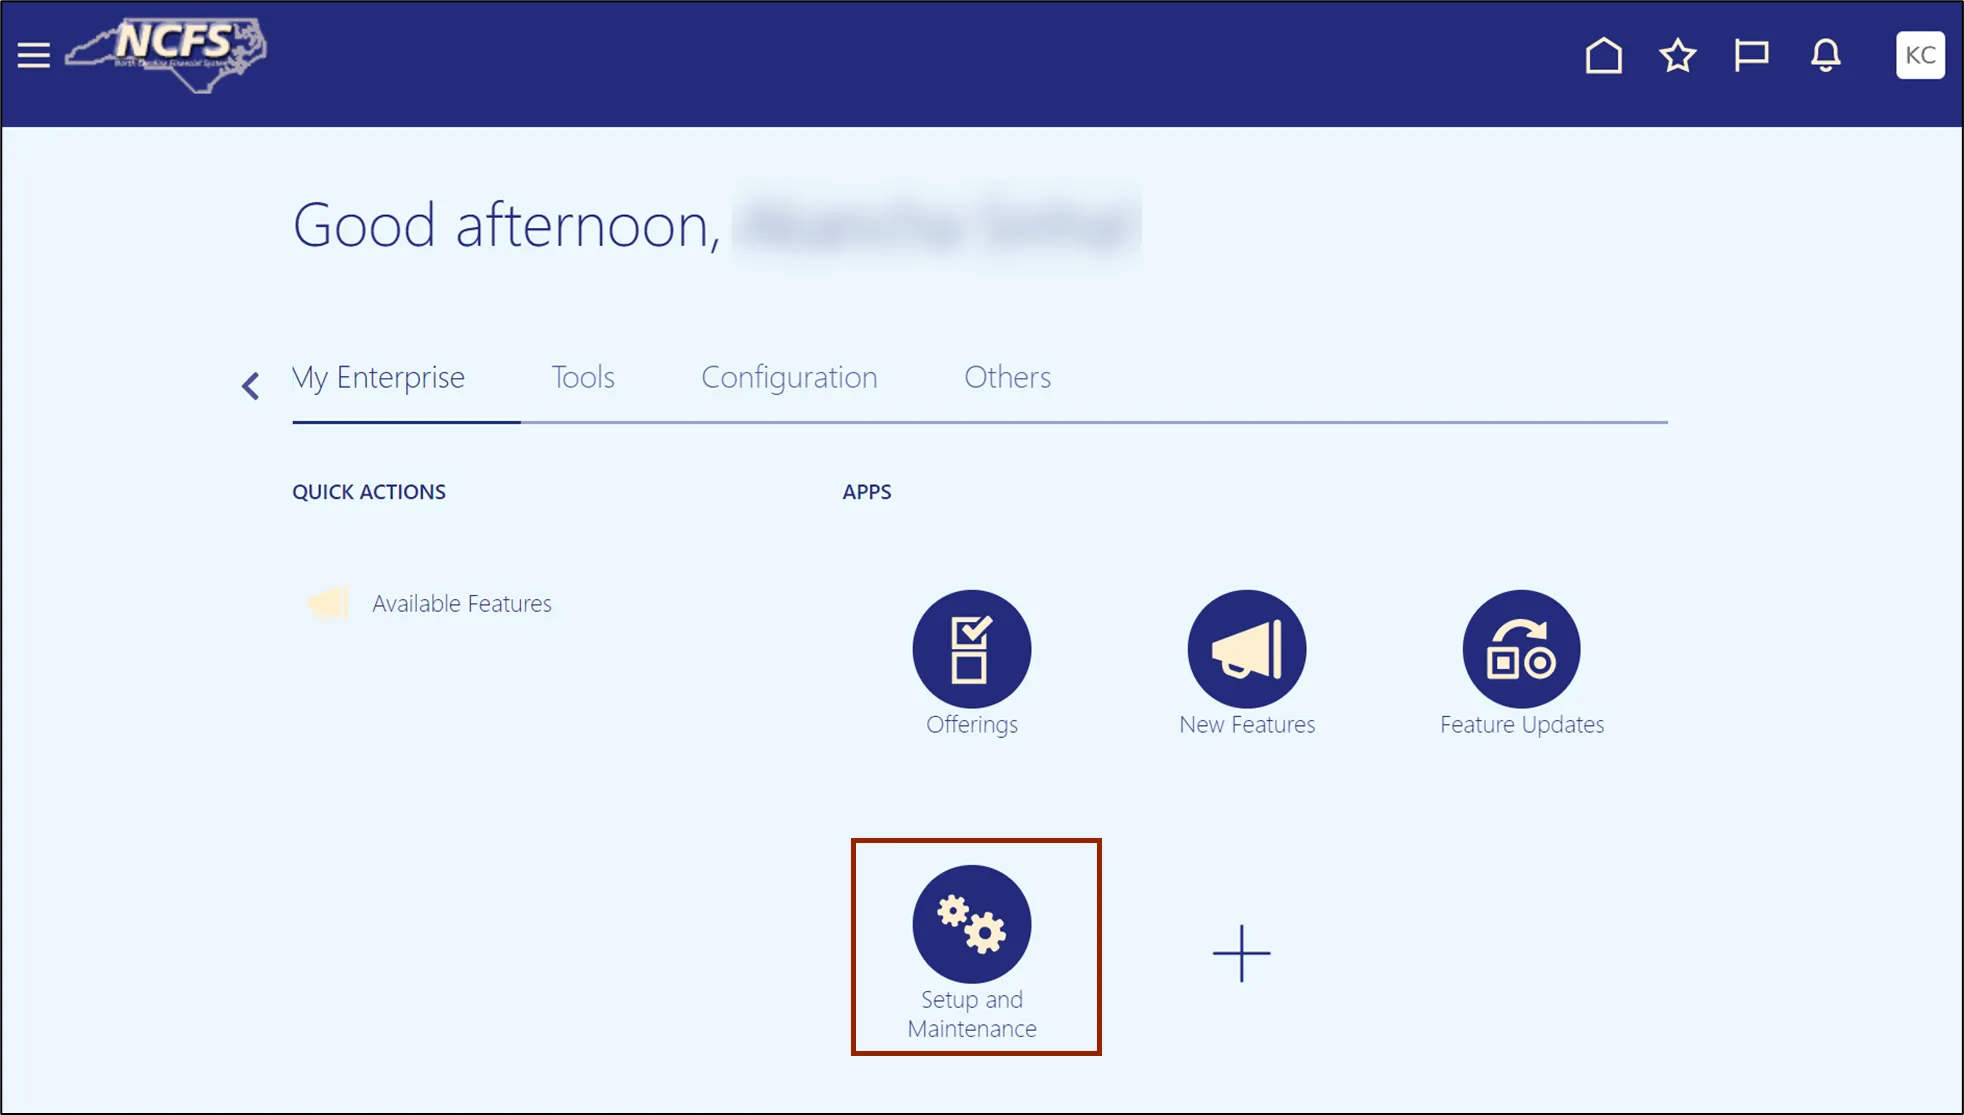
Step 2. Click the Setup and Maintenance app.
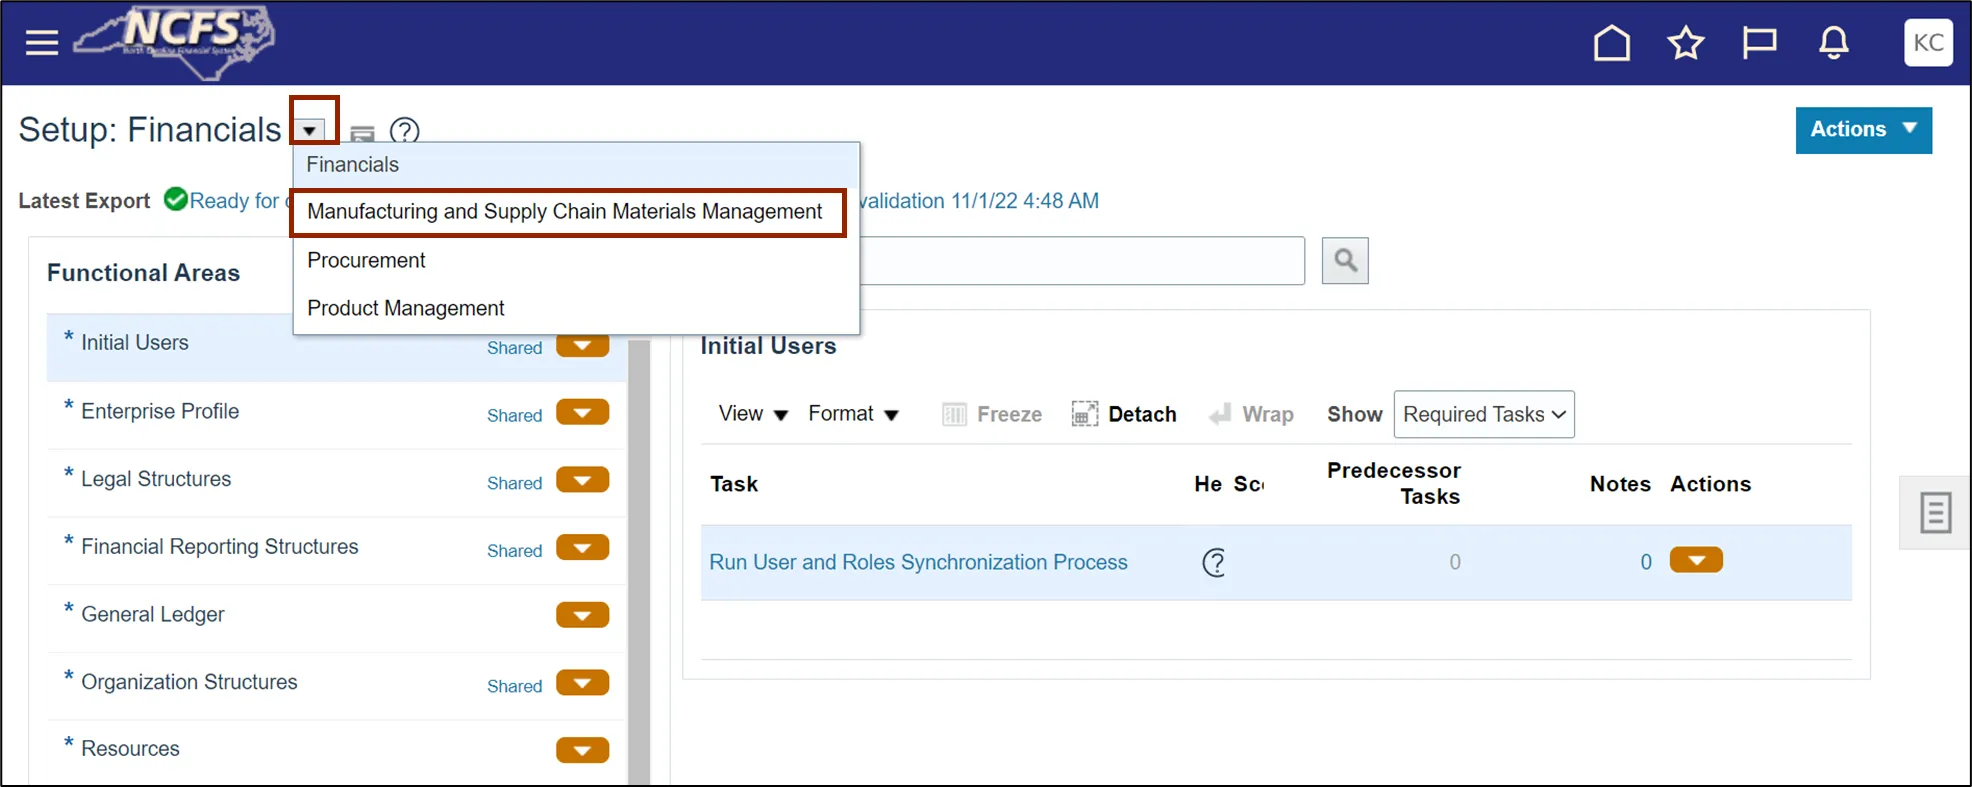
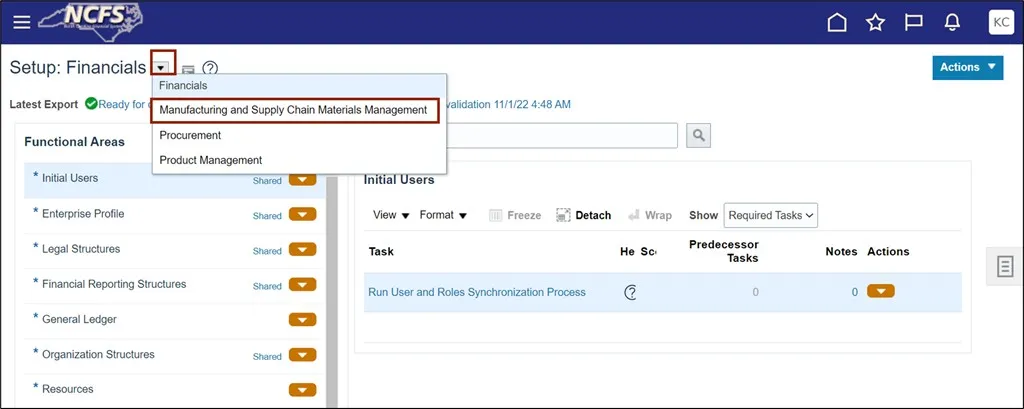
Step 3. On the Setup page, click the drop-down icon and select the Manufacturing and Supply Chain Materials Management from the drop-down choice list.
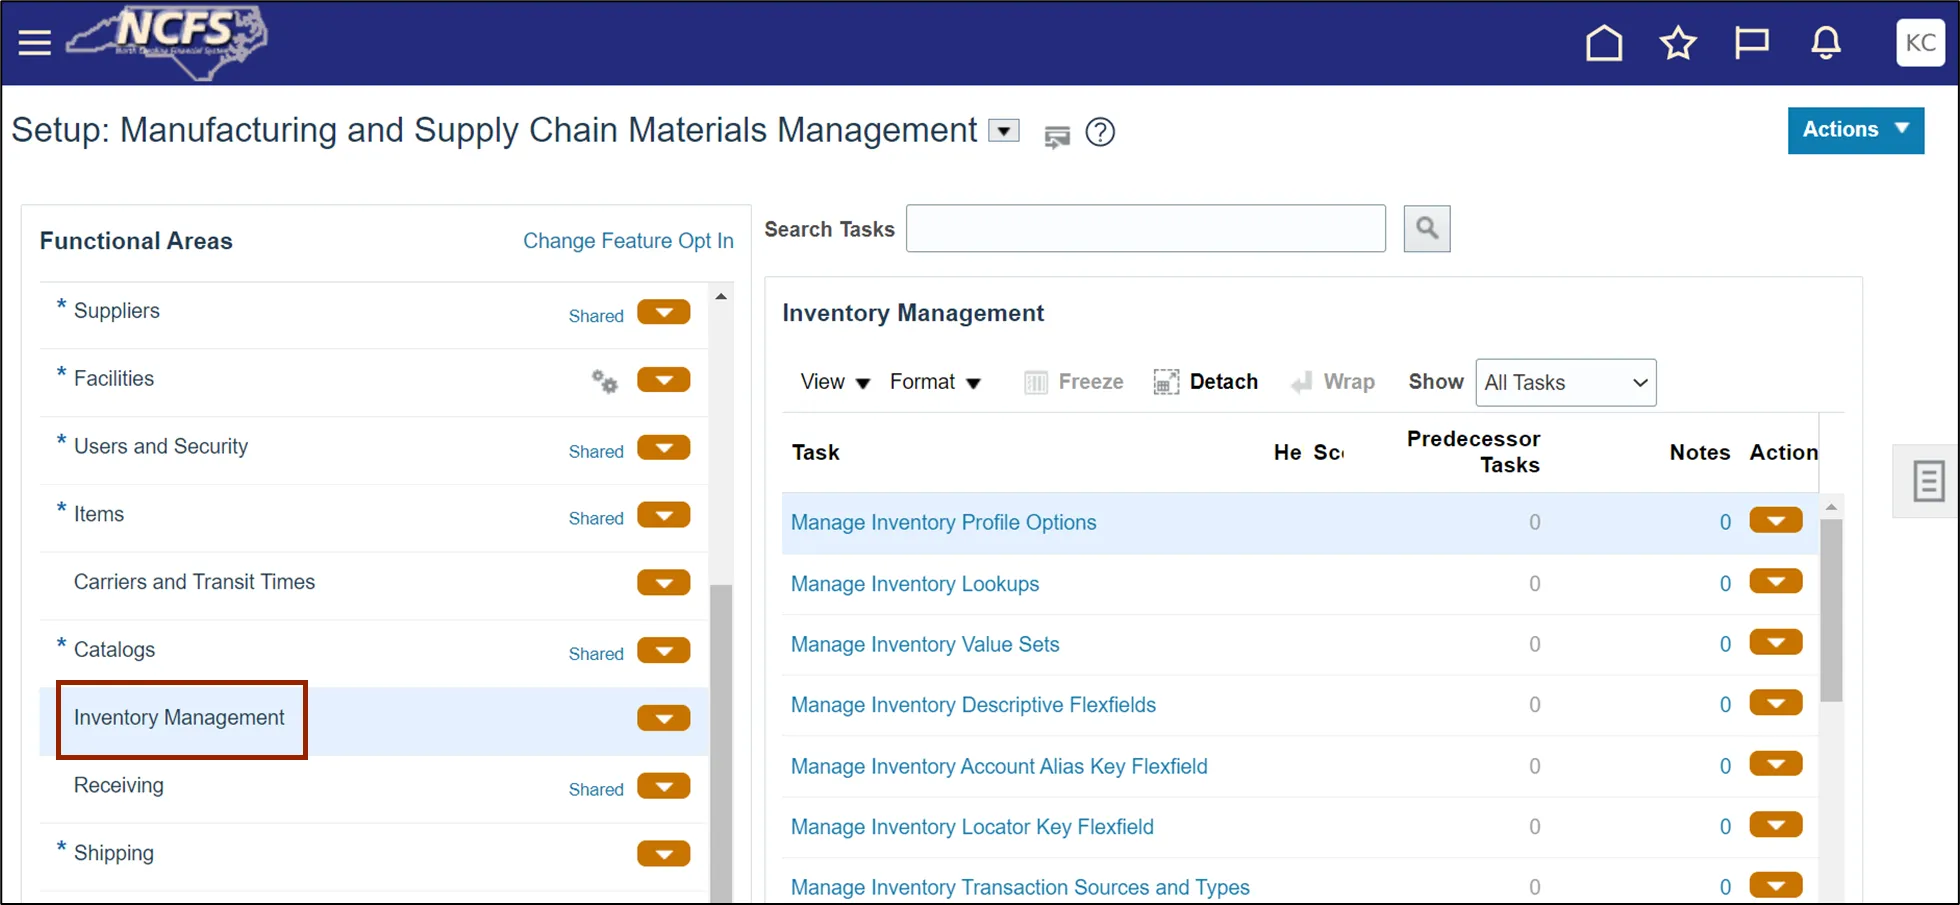
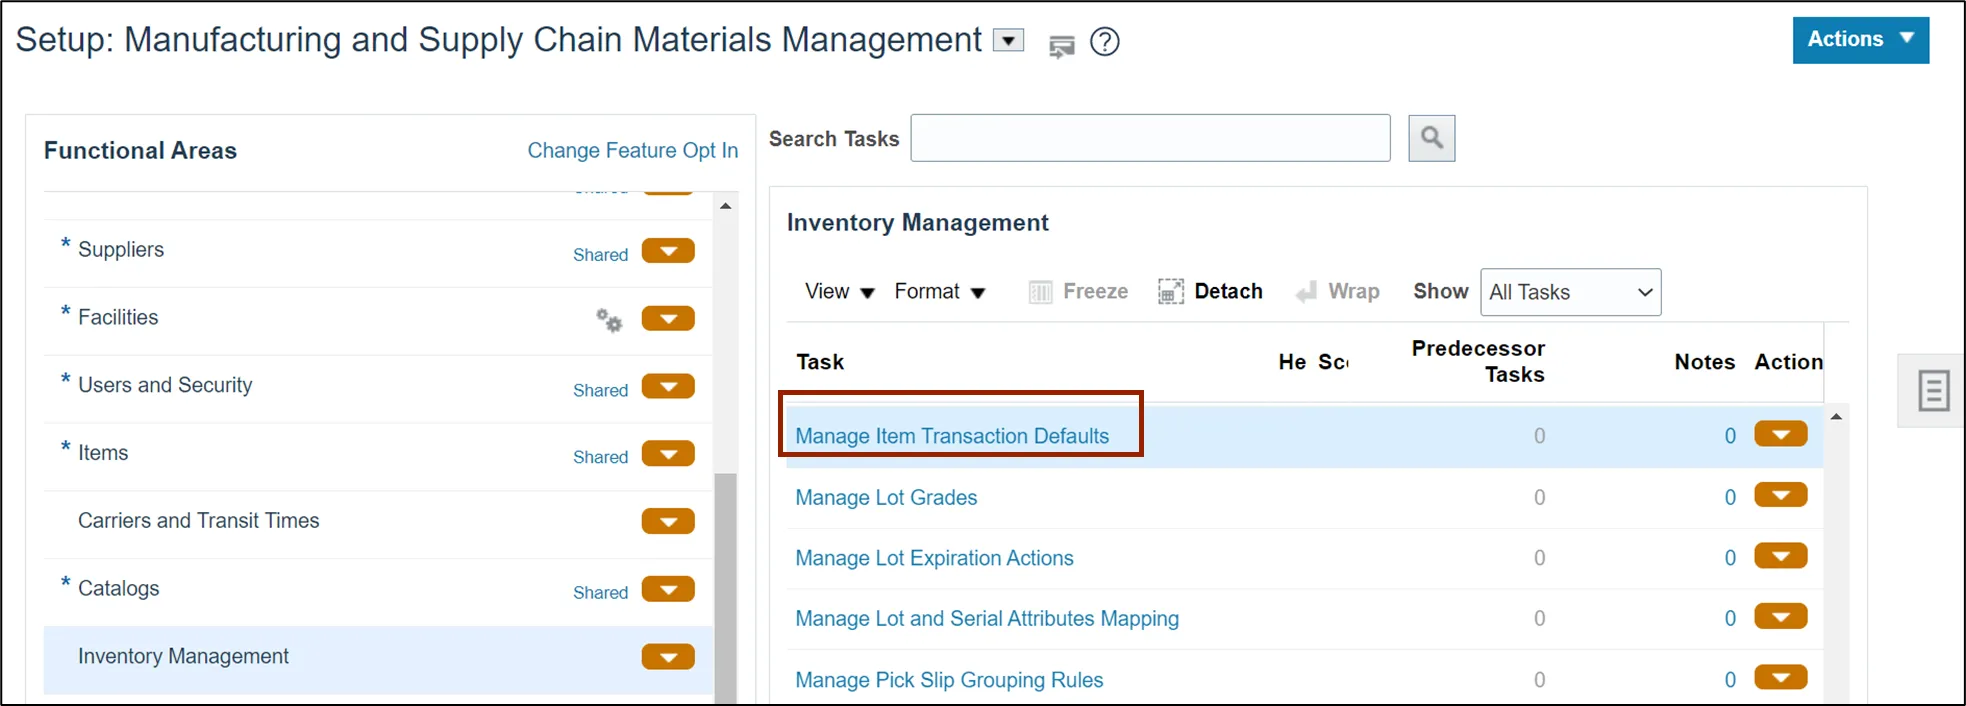
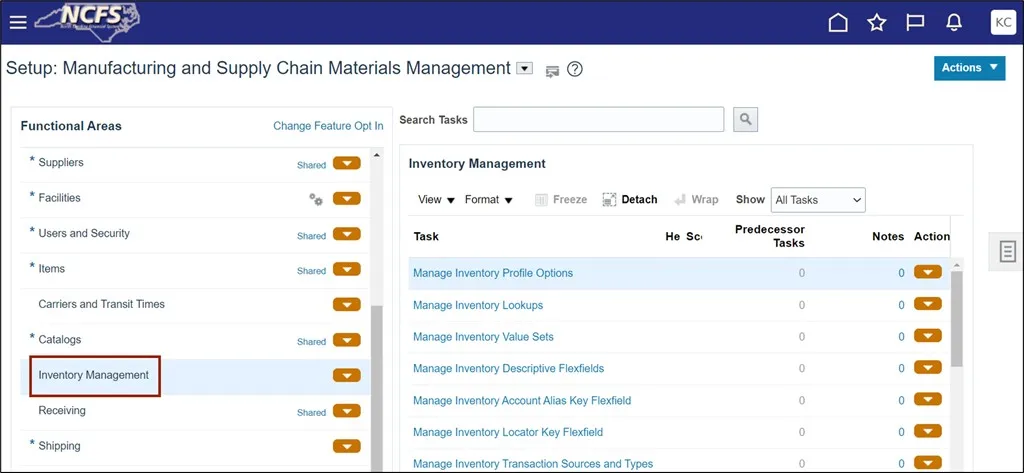
Step 4. On the Functional Area section, click Inventory Management to open the Inventory Management page on the right-hand side.
Step 5. Click the Manage Item Transaction Defaults link.
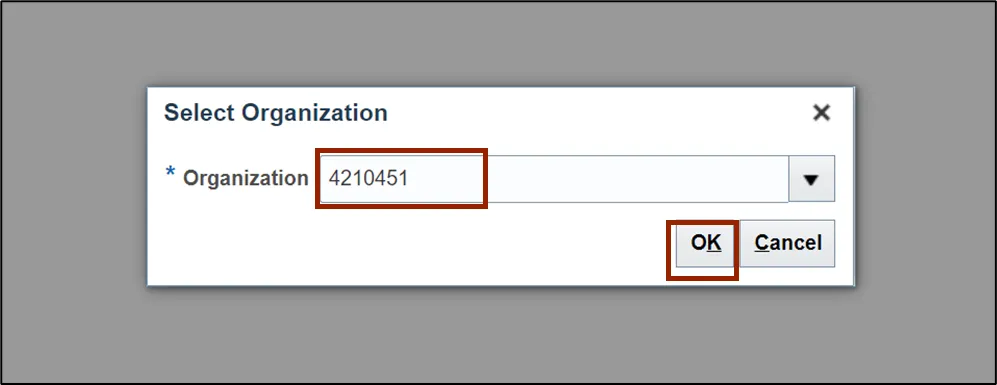
Step 6. On the Select Organization pop-up, Enter the Organization details.
In this example, we choose 4210451. Then click the OK button.
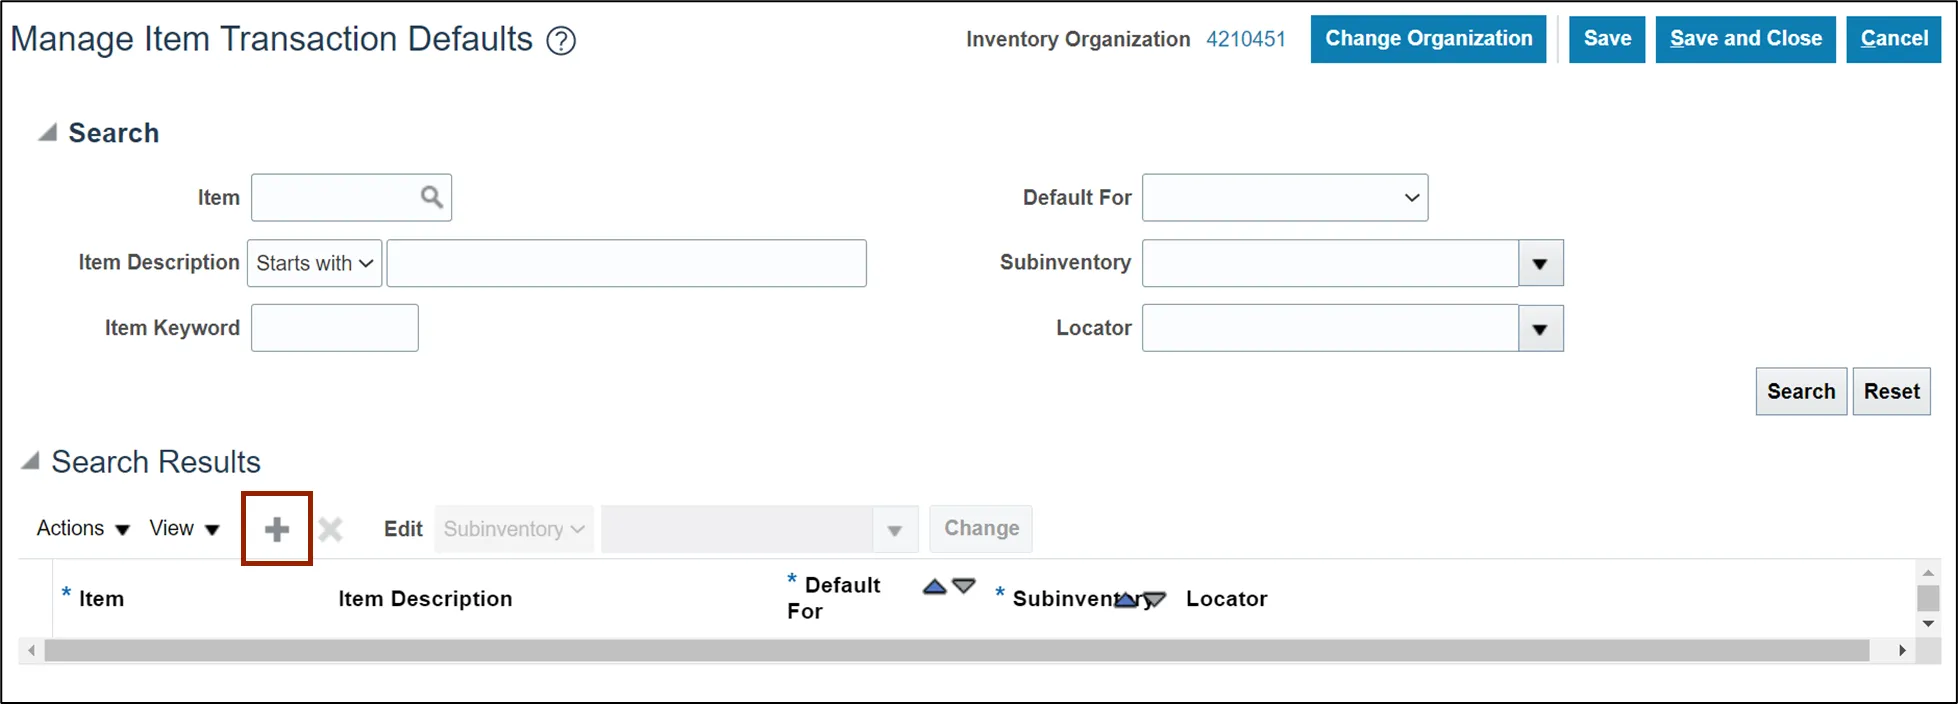
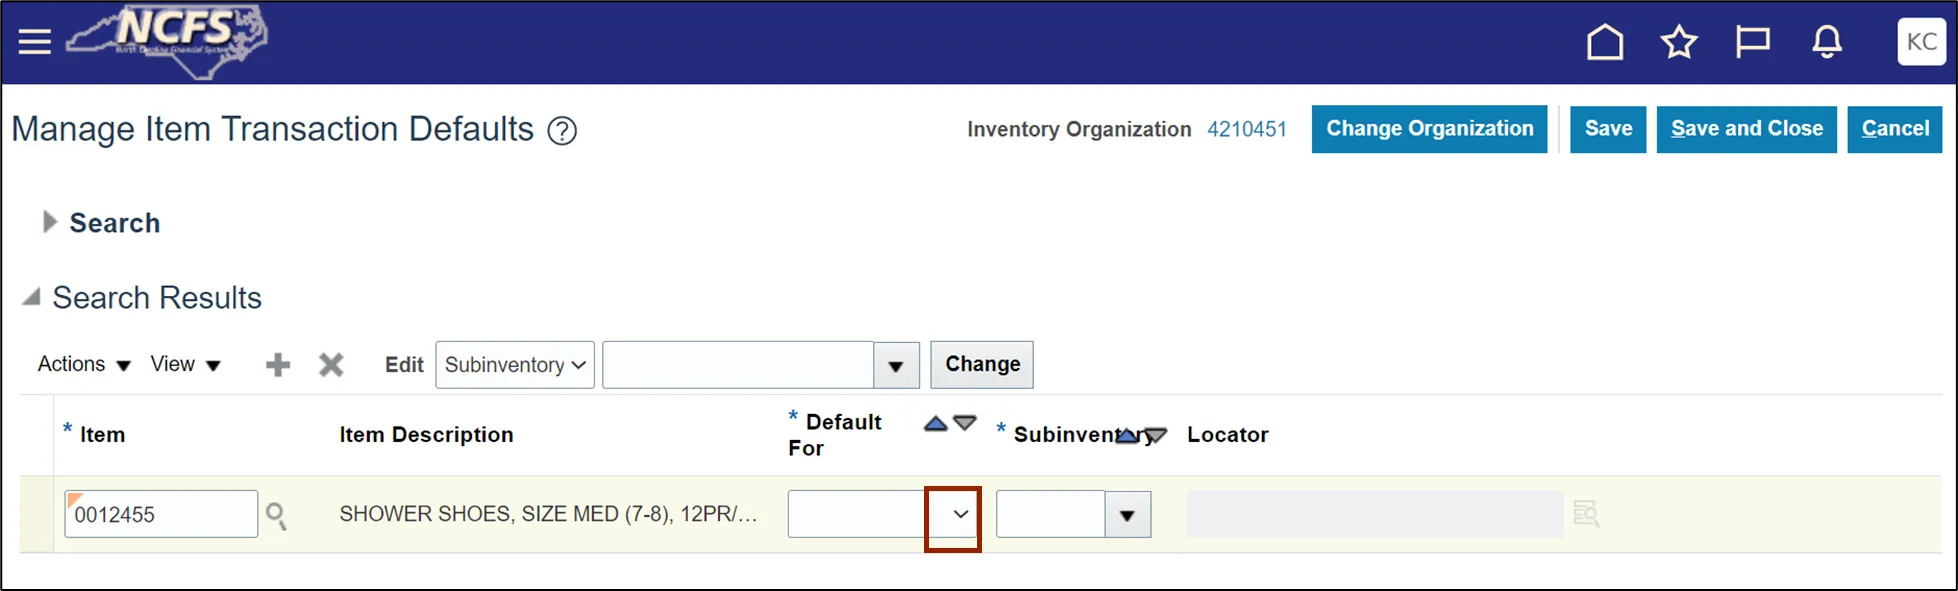
Step 7. On the Manage Item Transaction Default page. Click the Add icon.
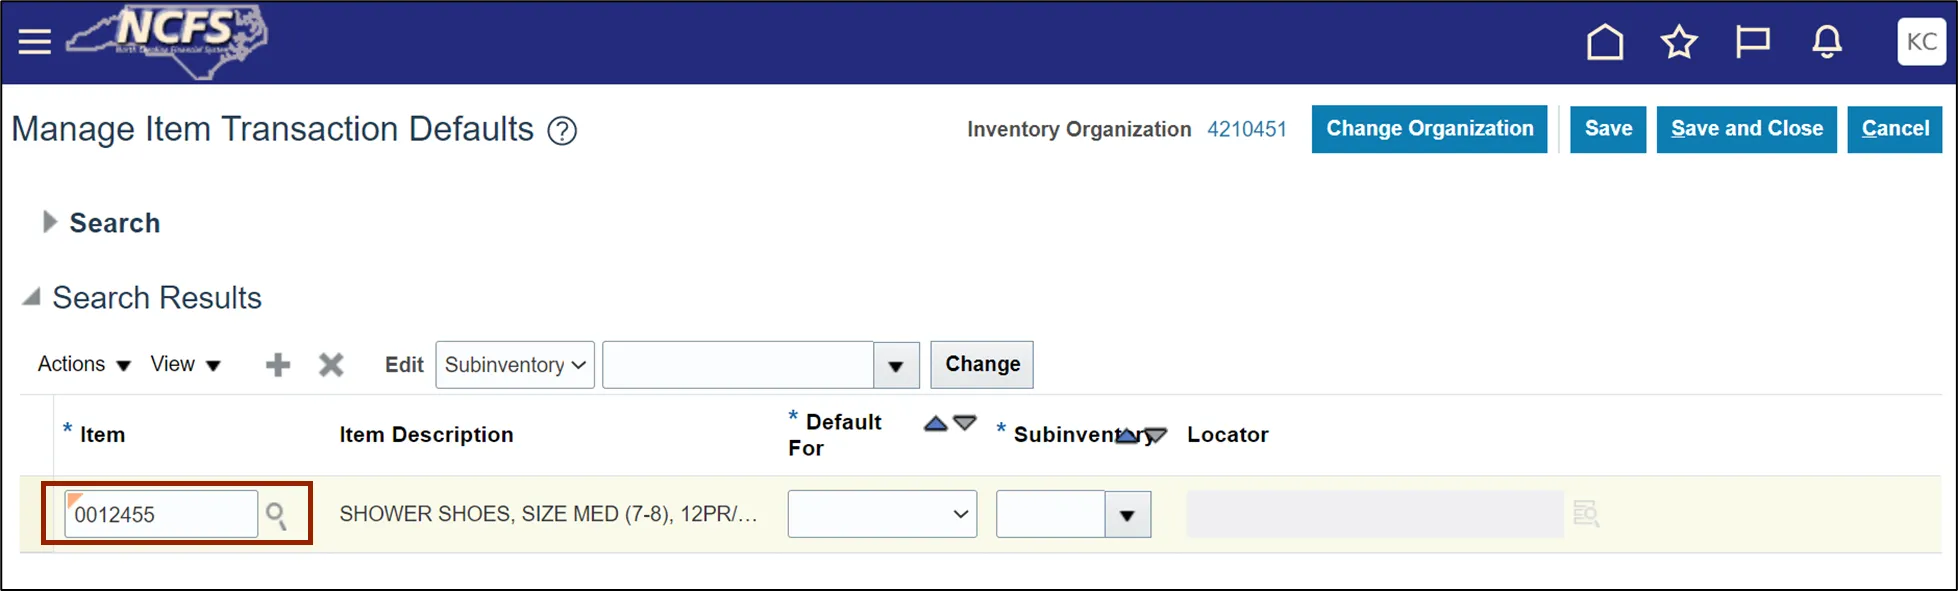
Step 8. Enter Item number. In this example, we choose 0012455.
Step 9. Click the Default For drop-down list icon.
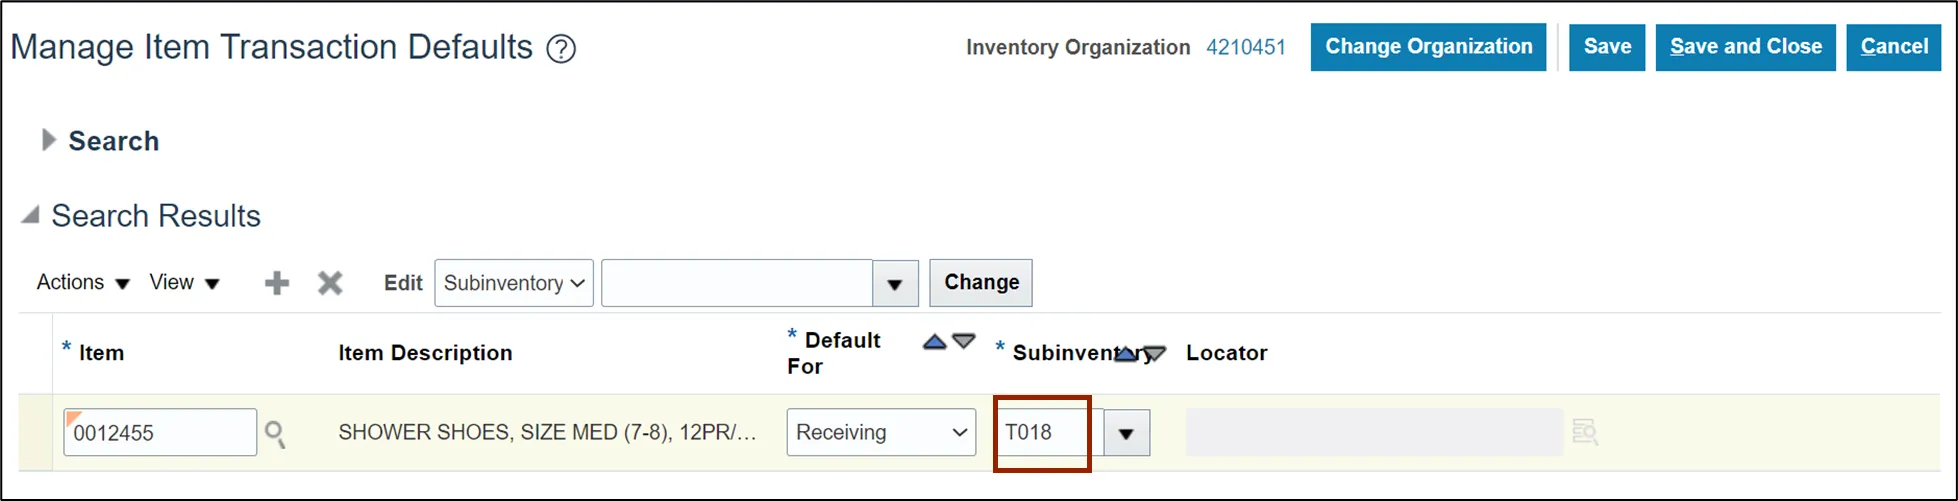
Step 10. Select the Receiving option.

Step 11. Enter Subinventory. In this example, we choose T018.
Step 12. Click the Save and Close button.
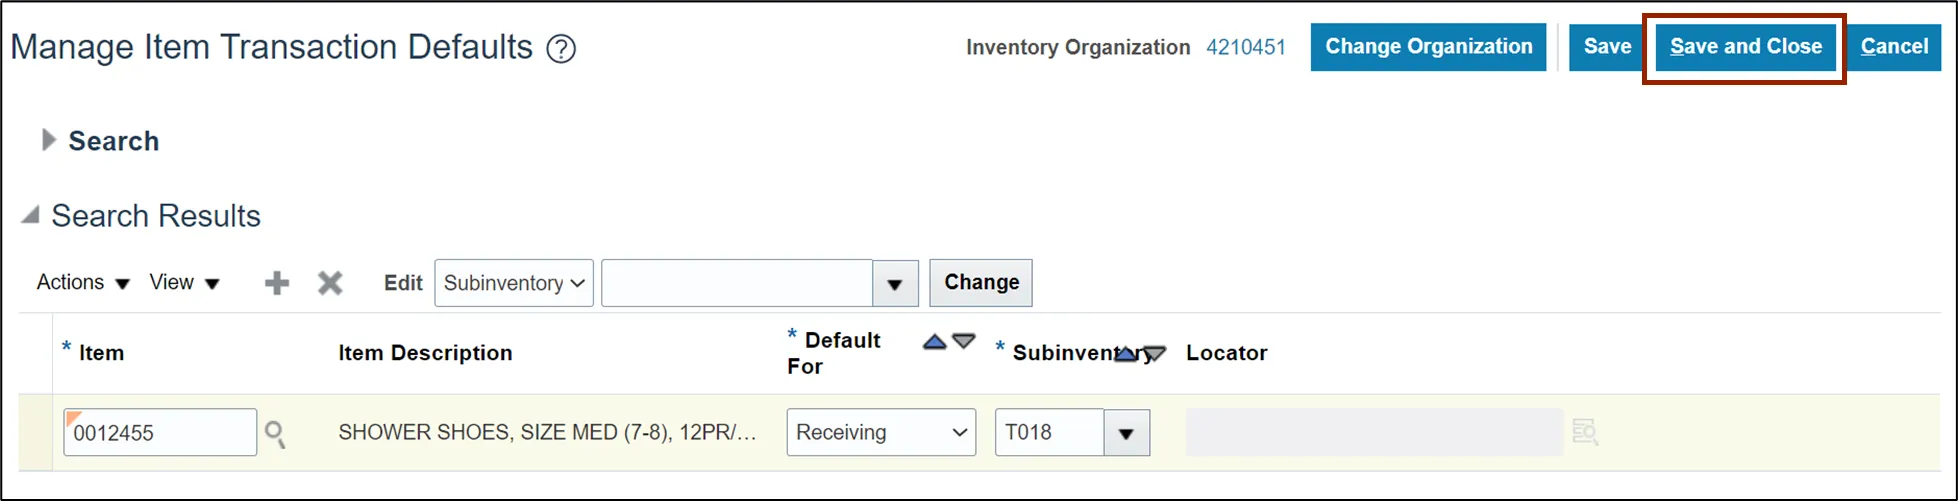
This concludes the setup for Preferred Stock Location in Inventory Module Setup in NCFS.
To Create Item Template in Inventory Module Setup in NCFS, please follow the steps below. There are 18 steps to complete this process.
Step 1. On the Home page, click the My Enterprise tab.

Step 2. Click the Setup and Maintenance app.
Step 3. On the Setup page, click the drop-down icon and select the Product Management from the drop-down choice list.
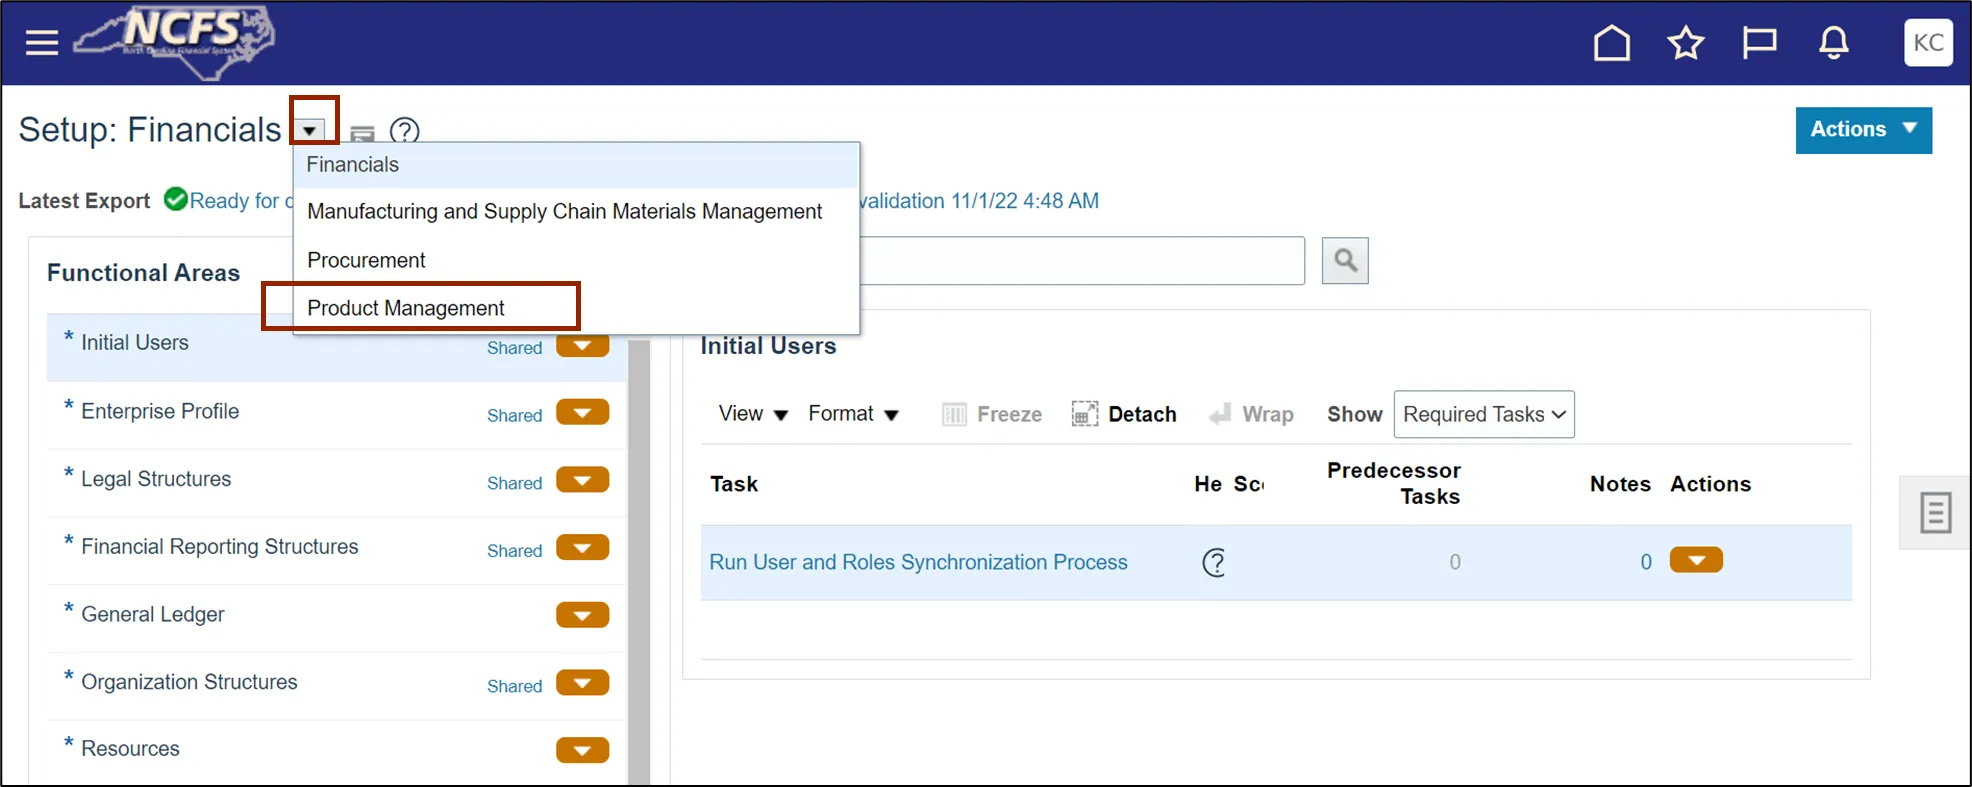
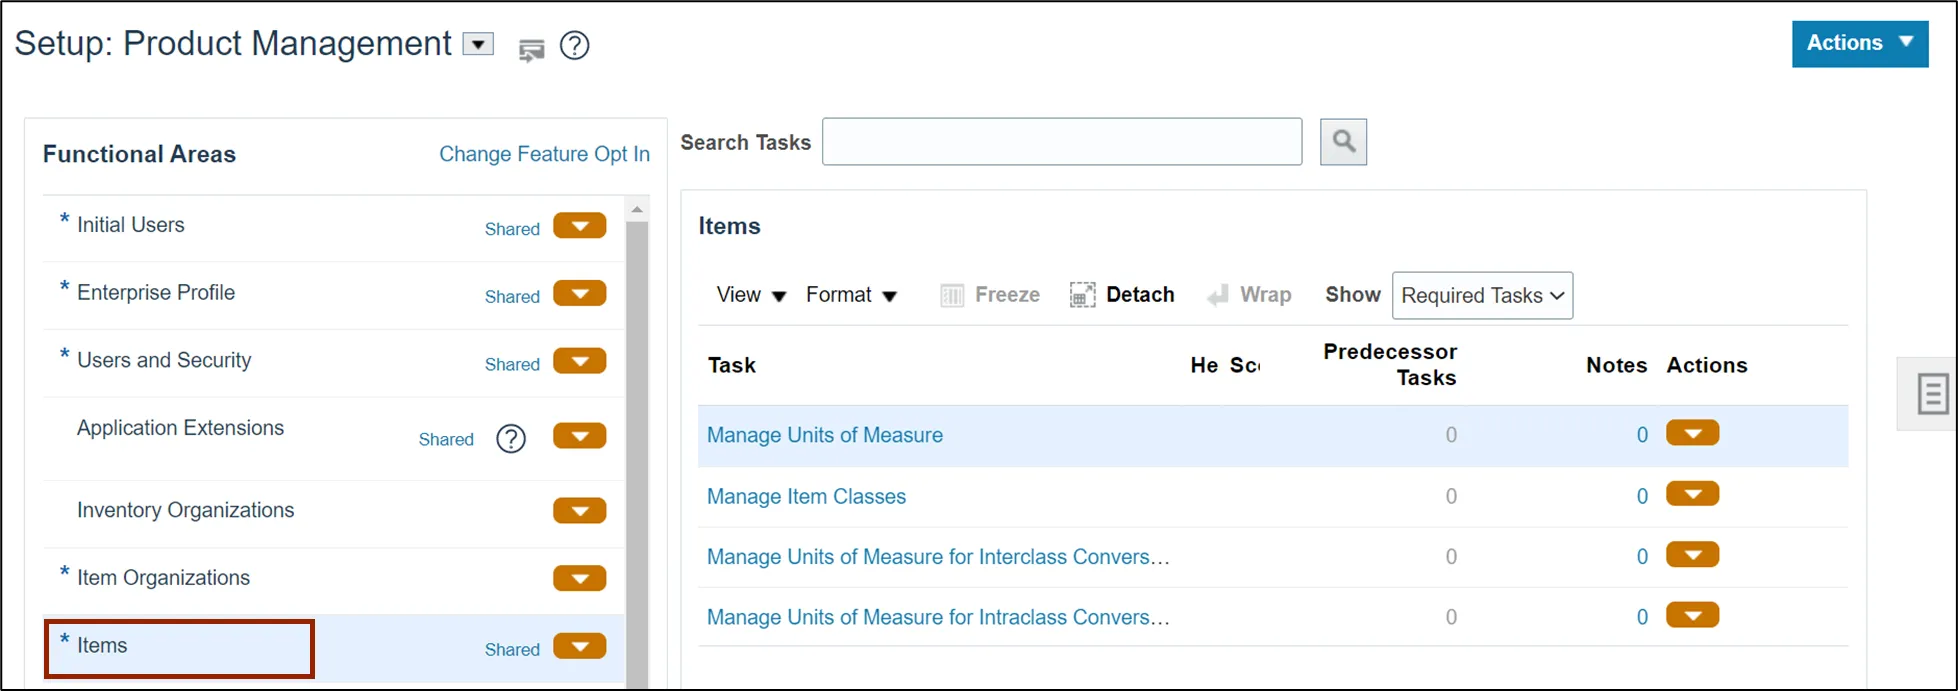
Step 4. On the Functional Area section, click Items to open the Items page on the right-hand side.
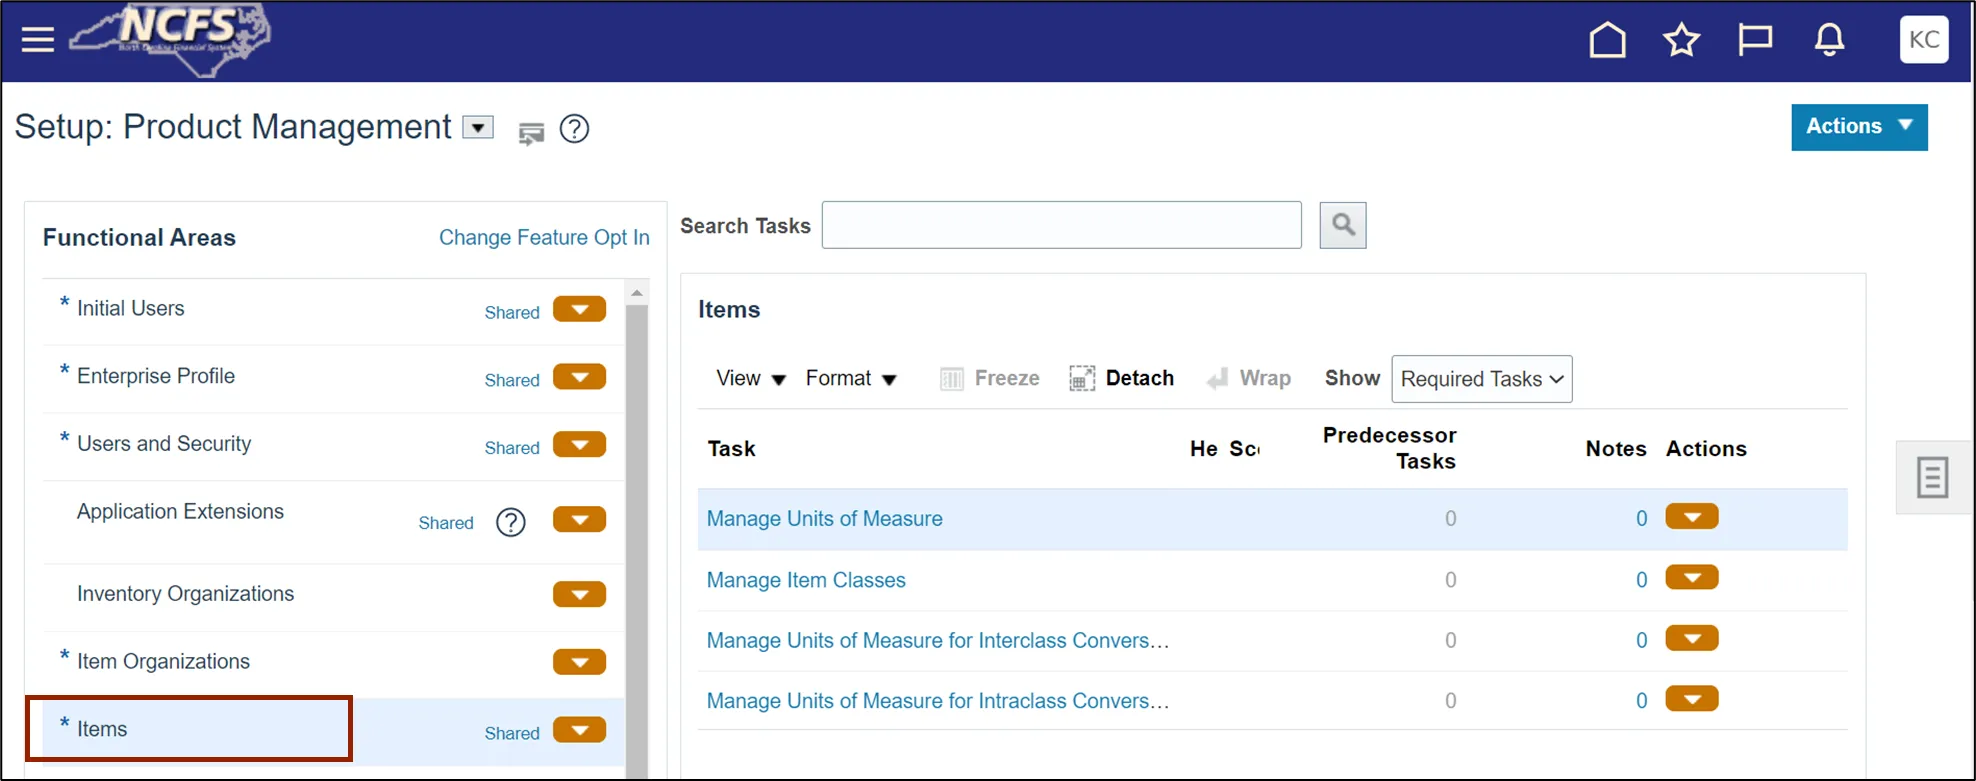
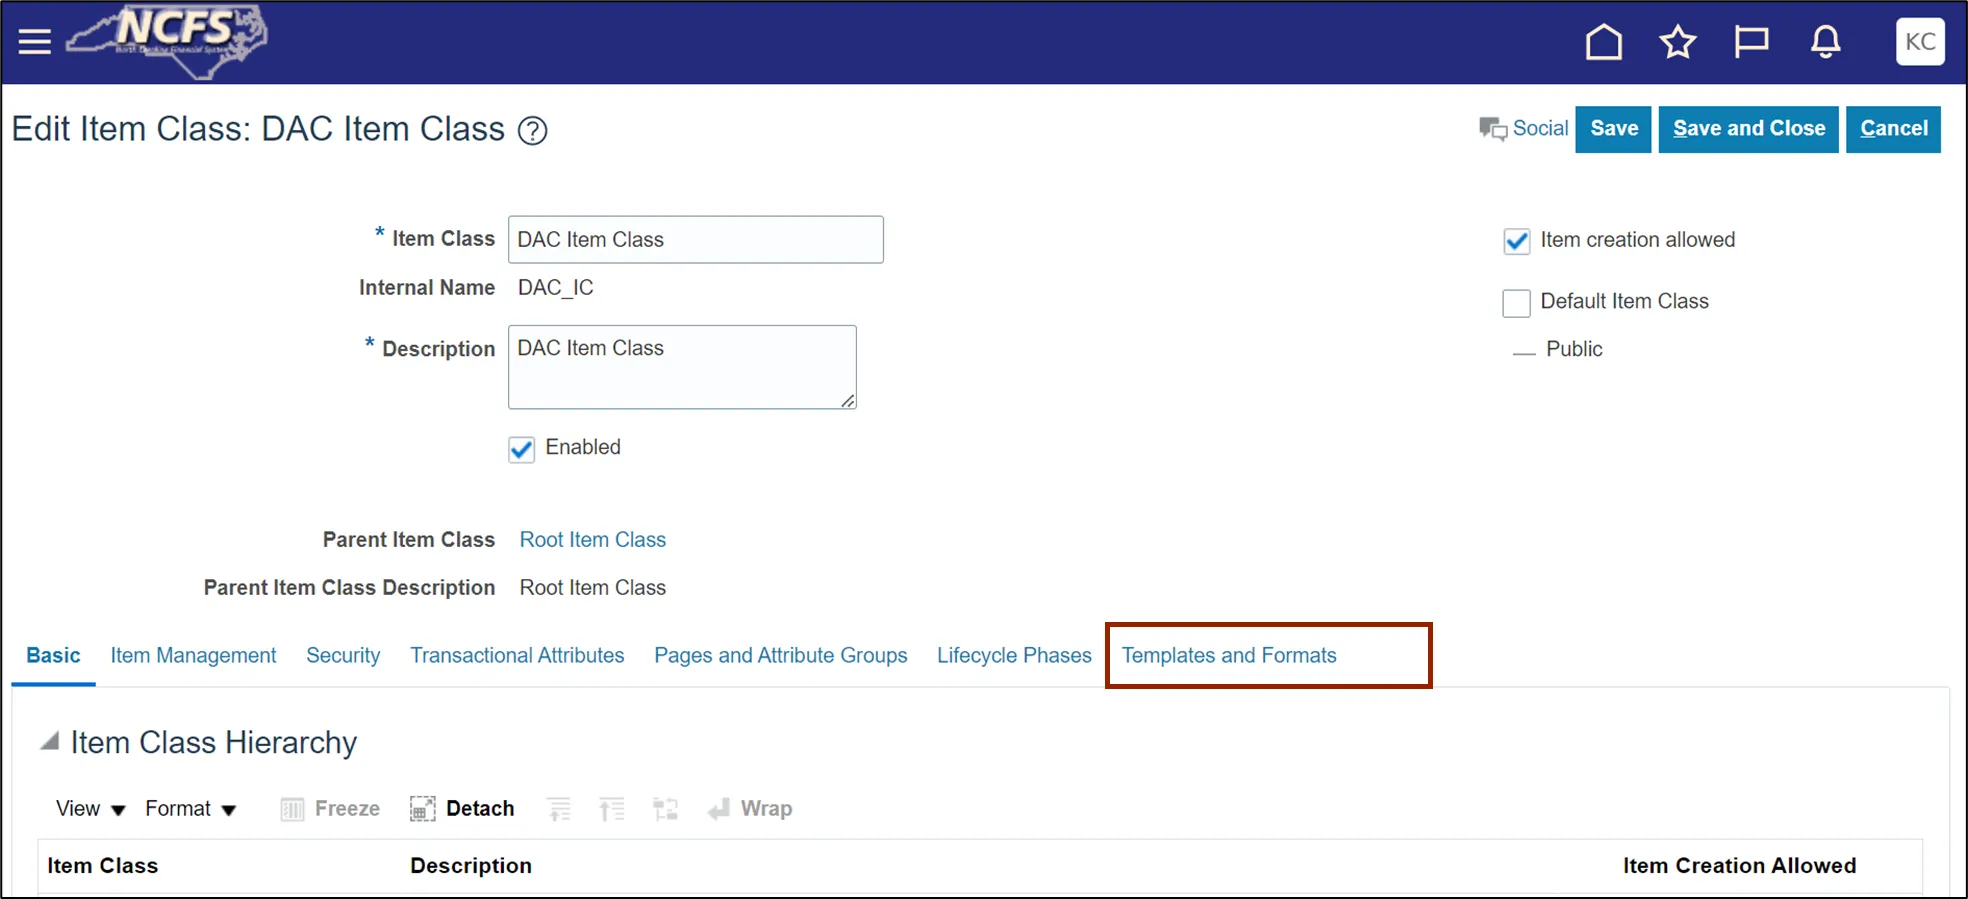
Step 5. Click the Manage Item Classes task link.
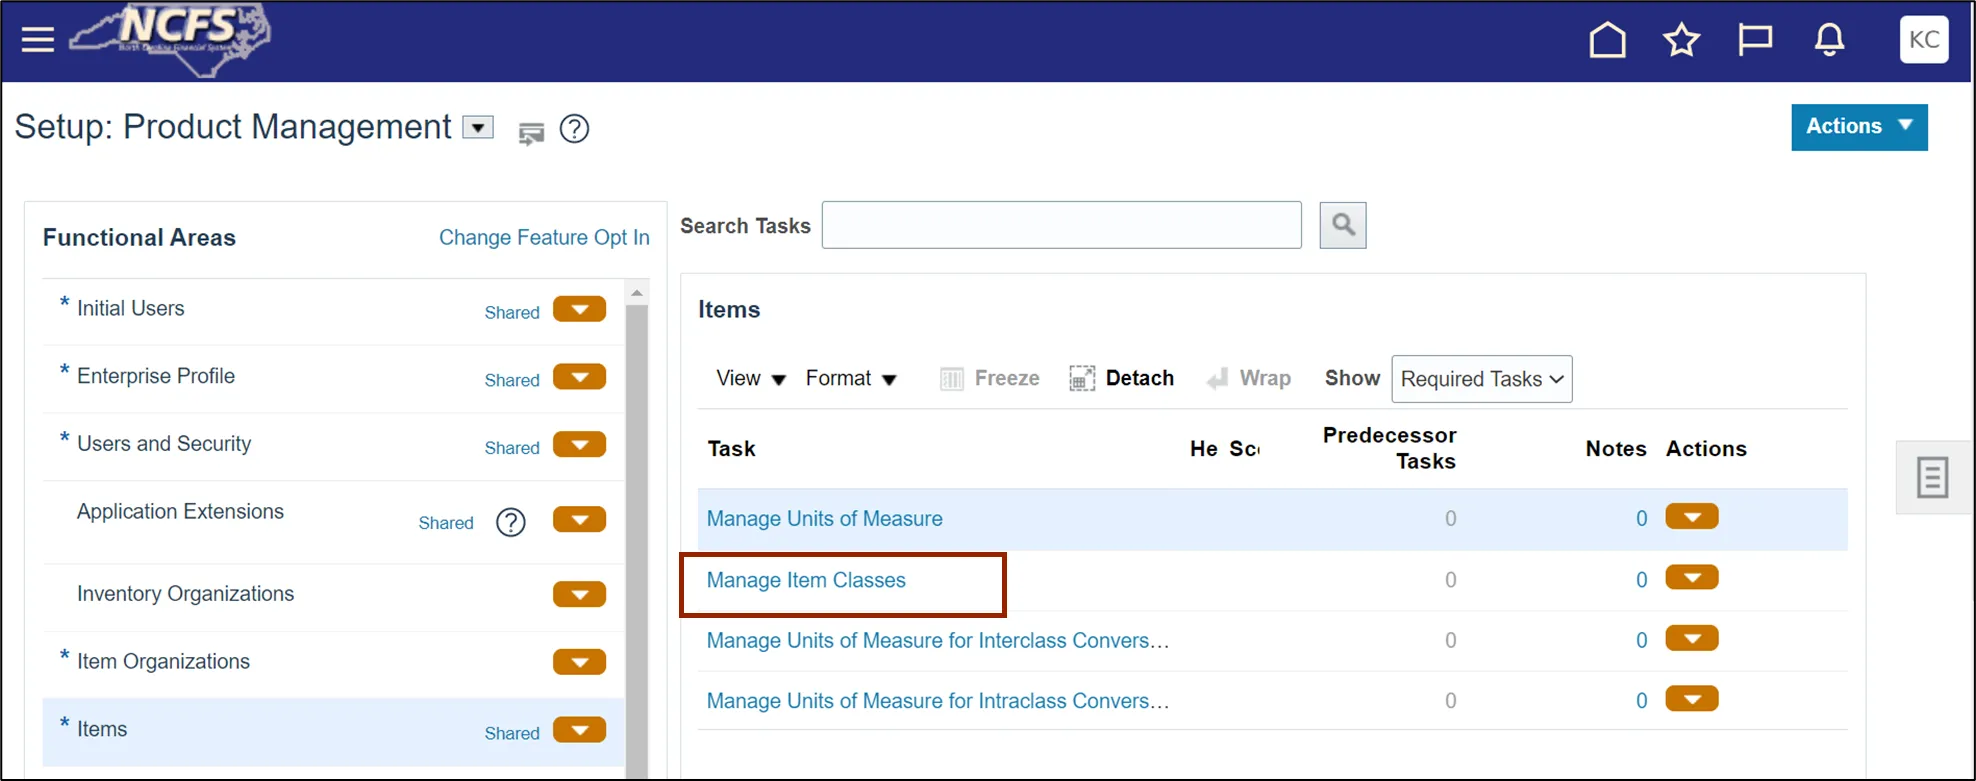
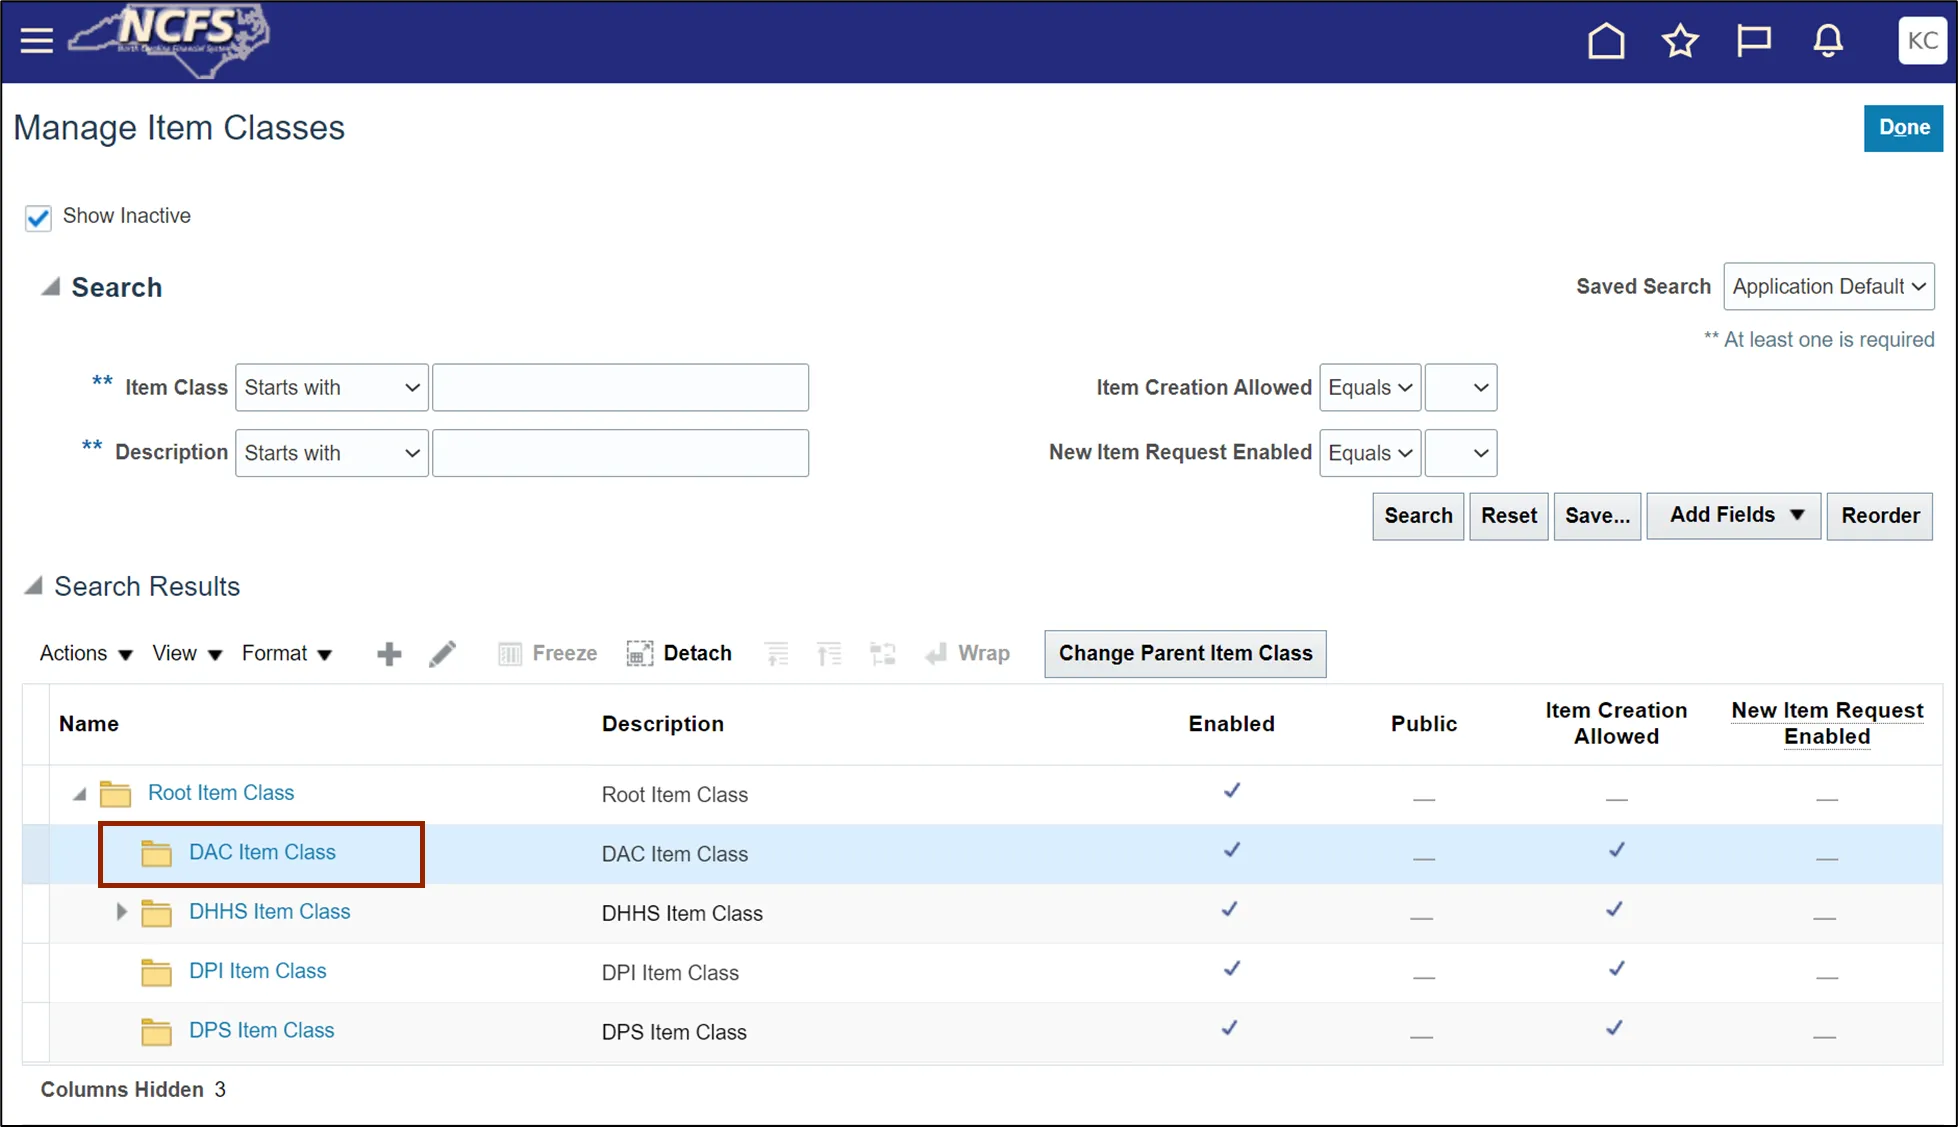
Step 6. On the Manage Item Classes page, Click the Item Class as per agency requirement.
Step 7. Click the Template and Formats tab.
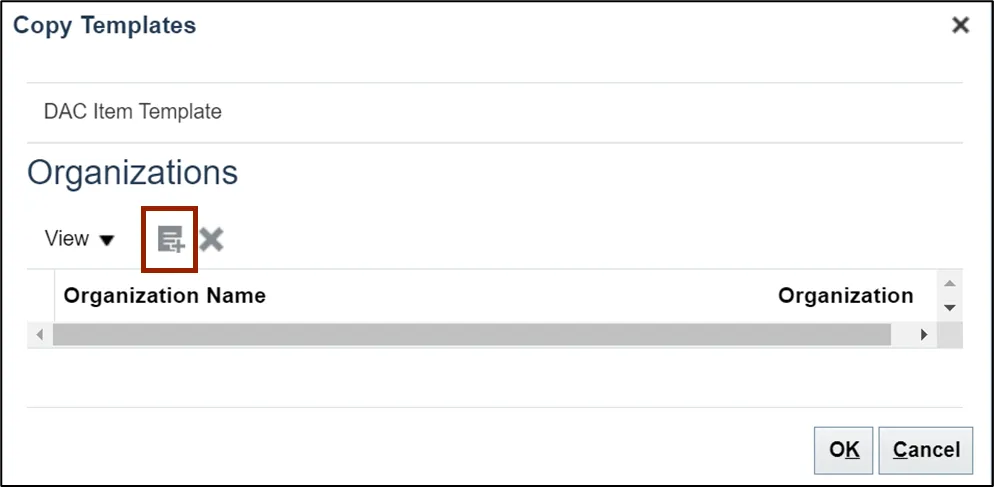
Step 8. Select the existing Item Template and click the Copy button.
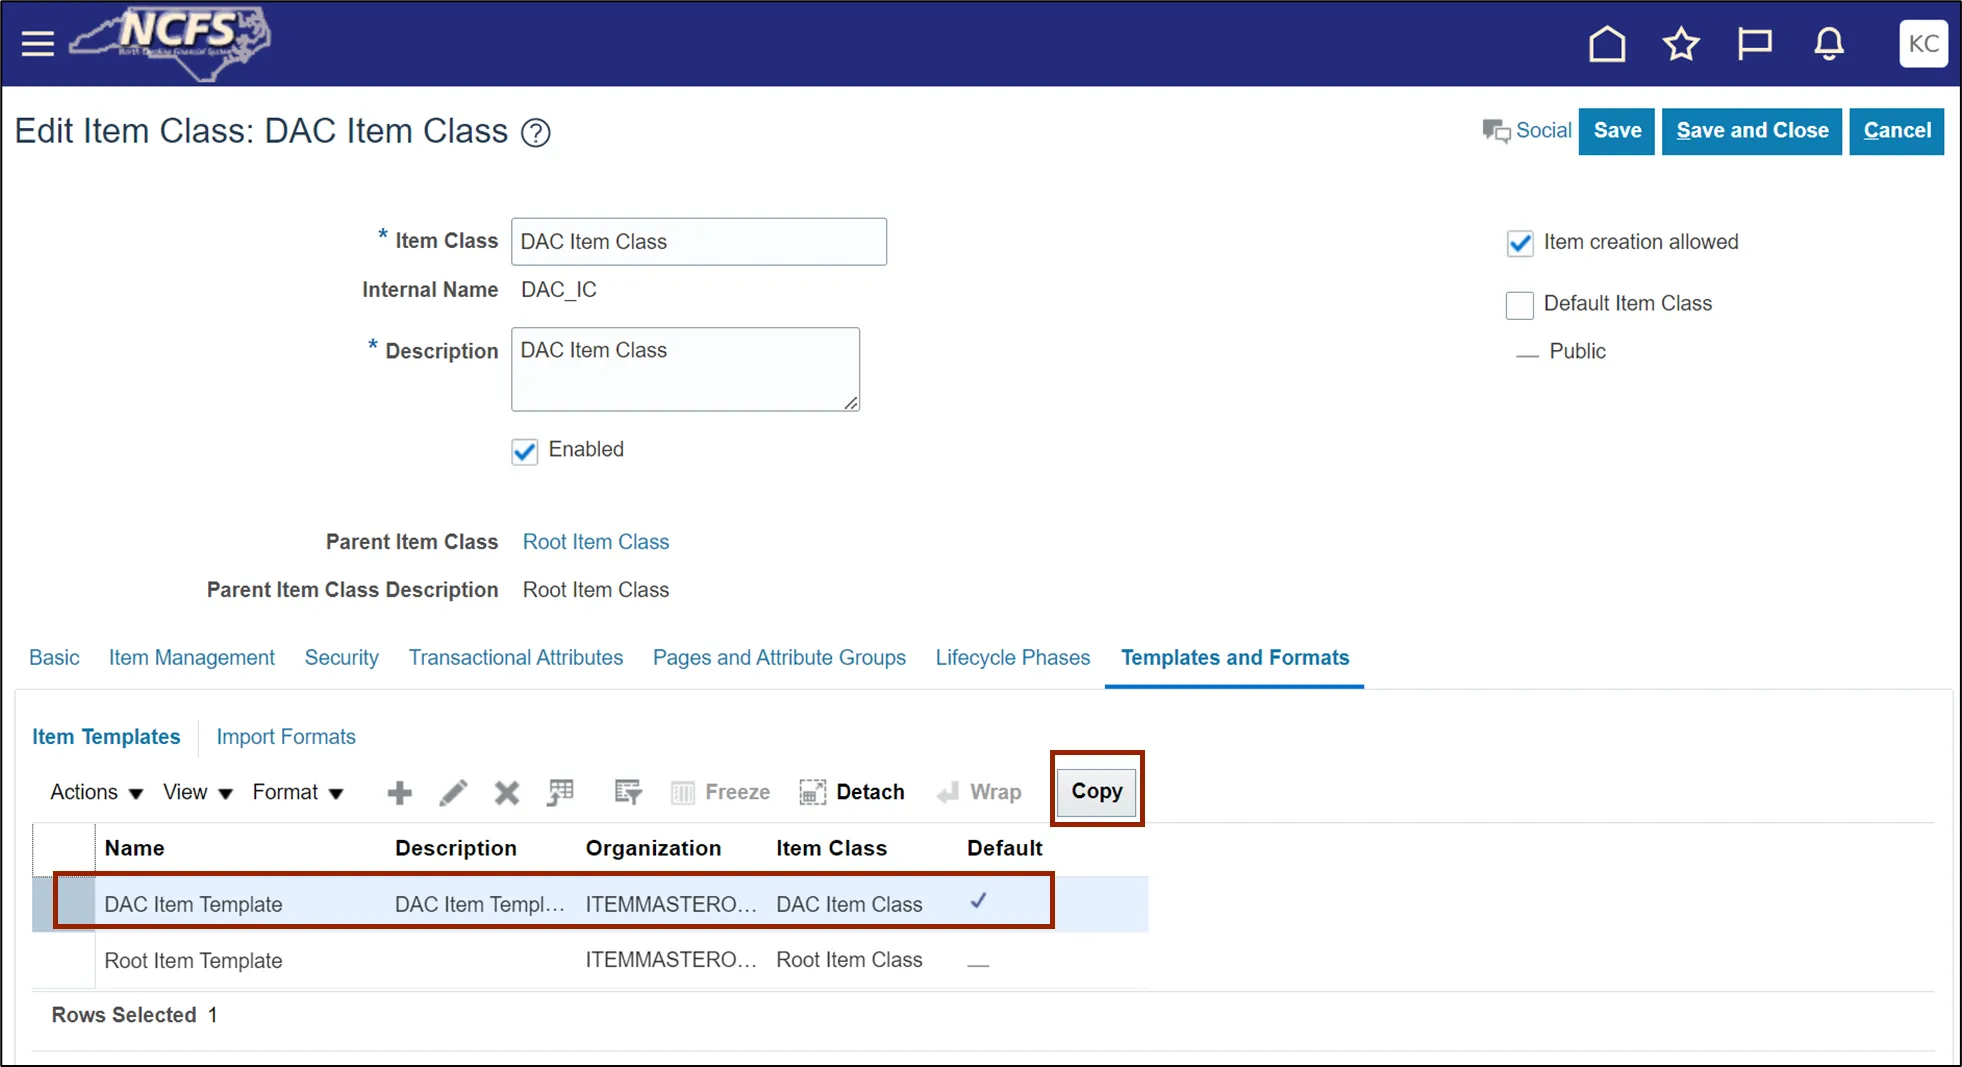
Step 9. Click the Add icon.
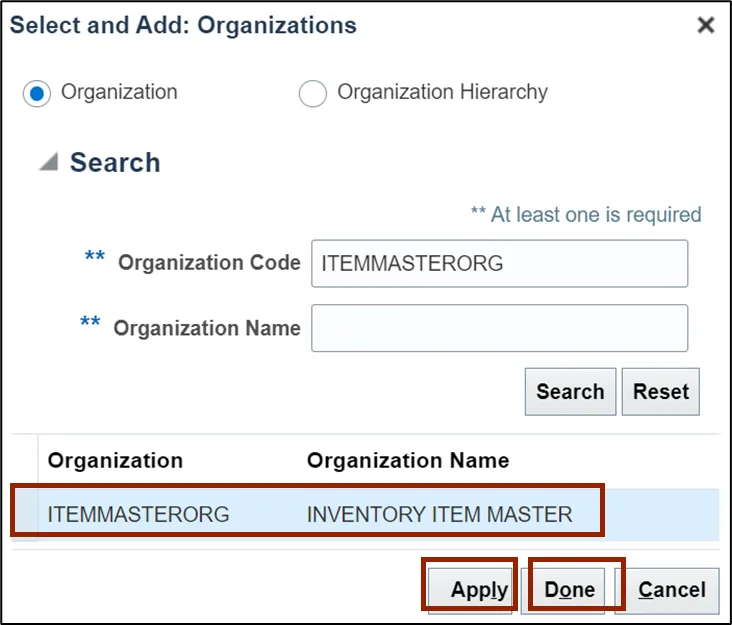
Step 10. Enter Organization Code ITEMMASTERORG and click the Search button.
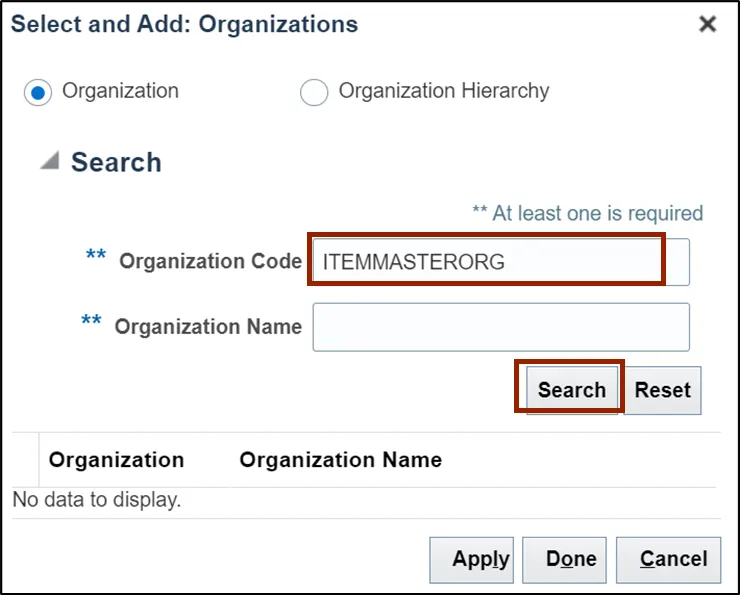
Step 11. Select the organization ITEMMASTERORG, click the Apply and Done button.
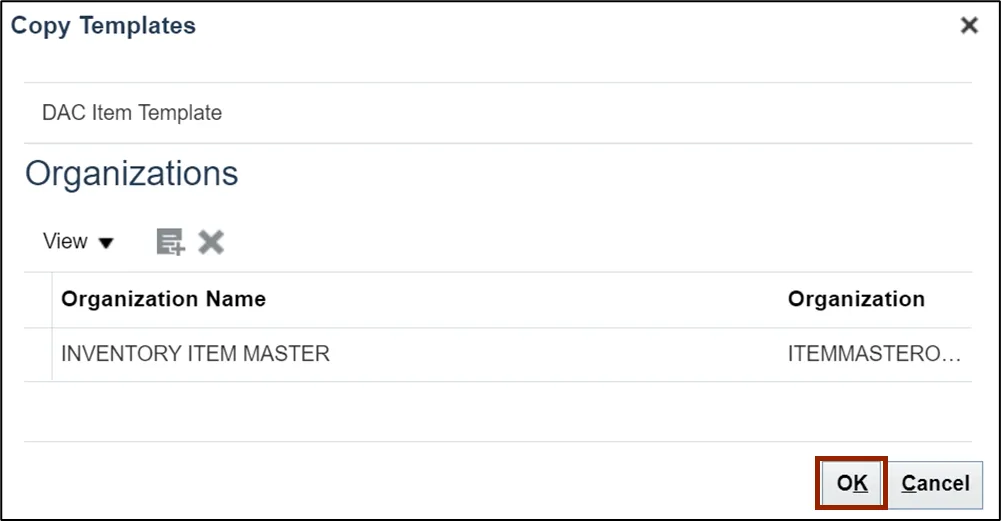
Step 12. Click the OK button.
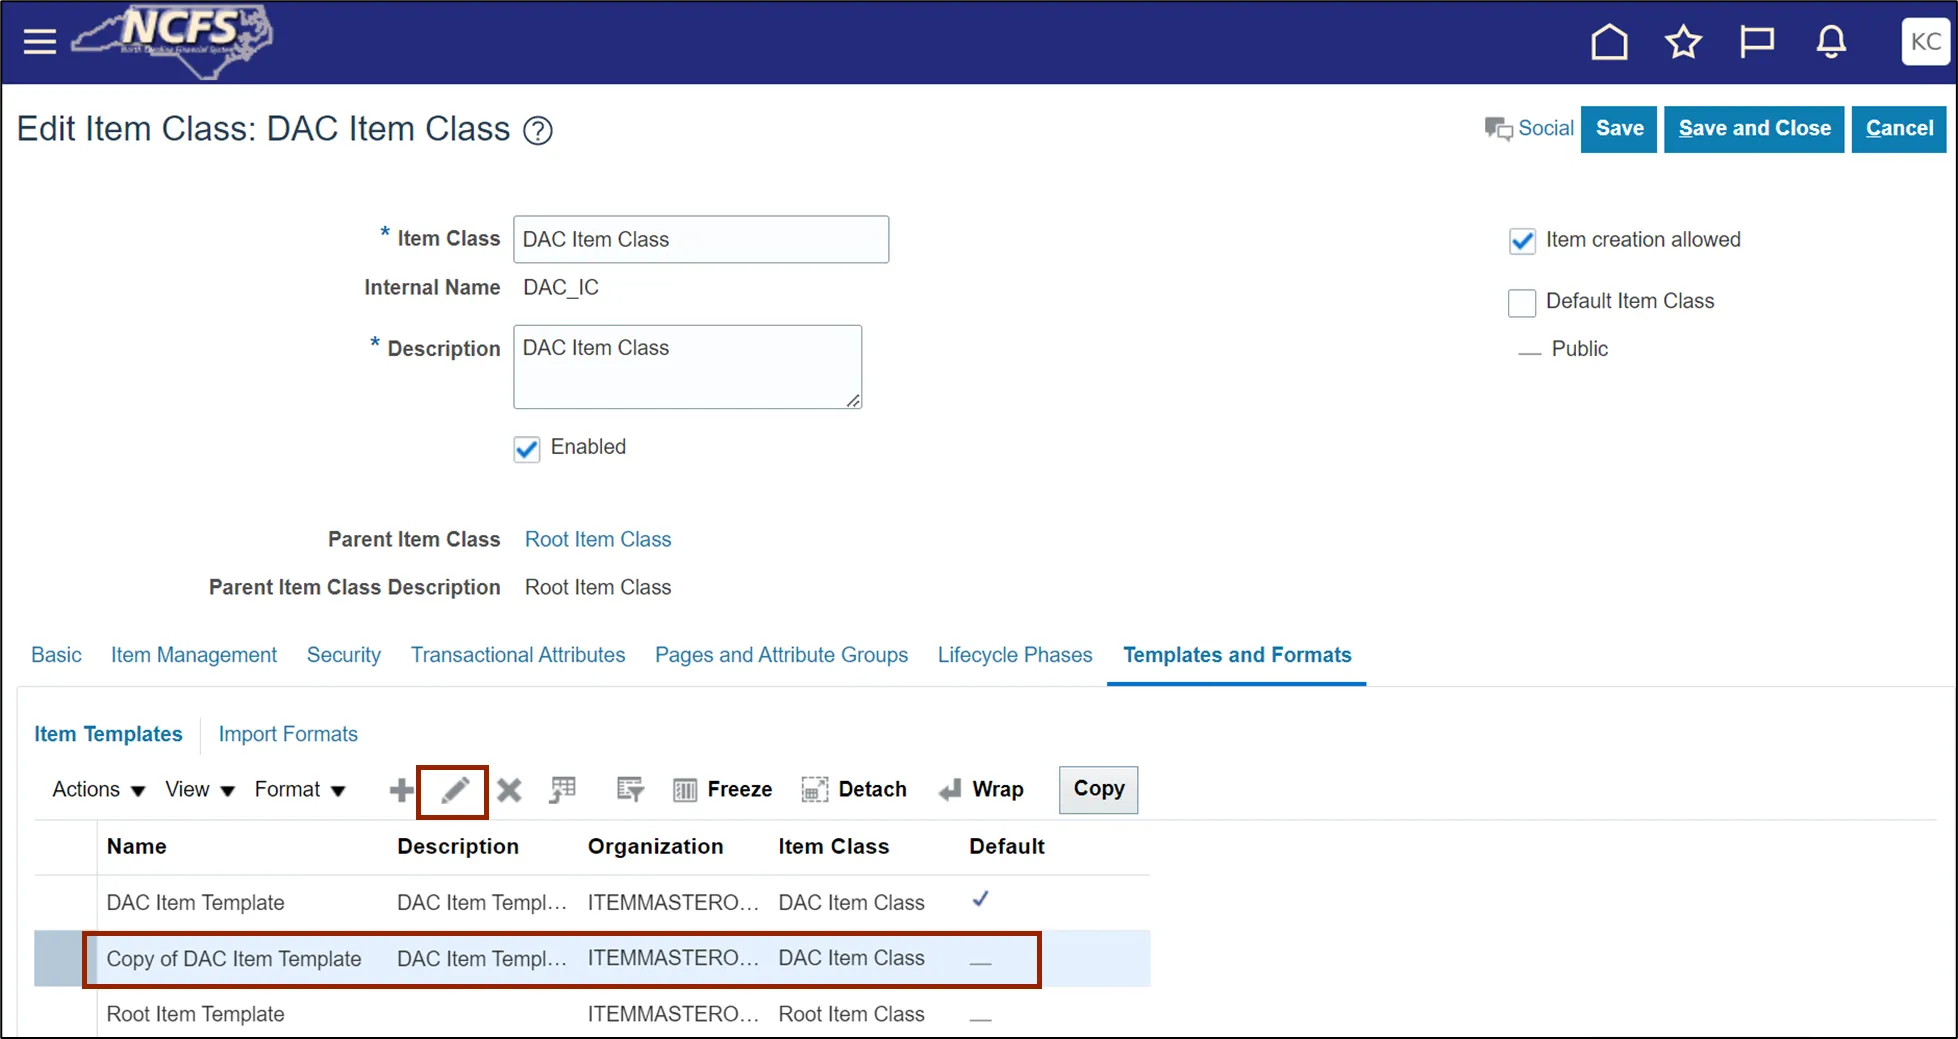
Step 13. Click the Item Template row and click the Edit icon.
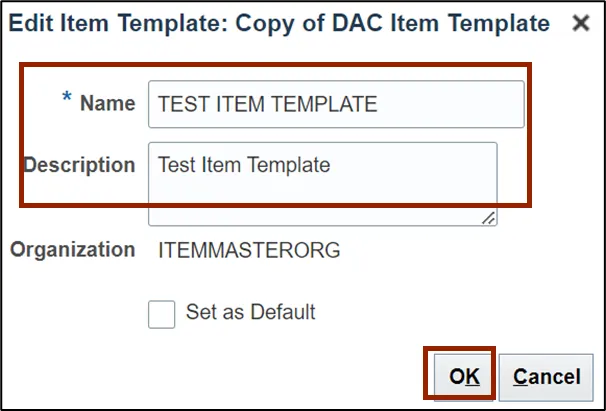
Step 14. Update Name and Description as per business requirement and click the OK button.
Step 15. Select Item Template and Update attributes details as per business requirement in Overview tab.

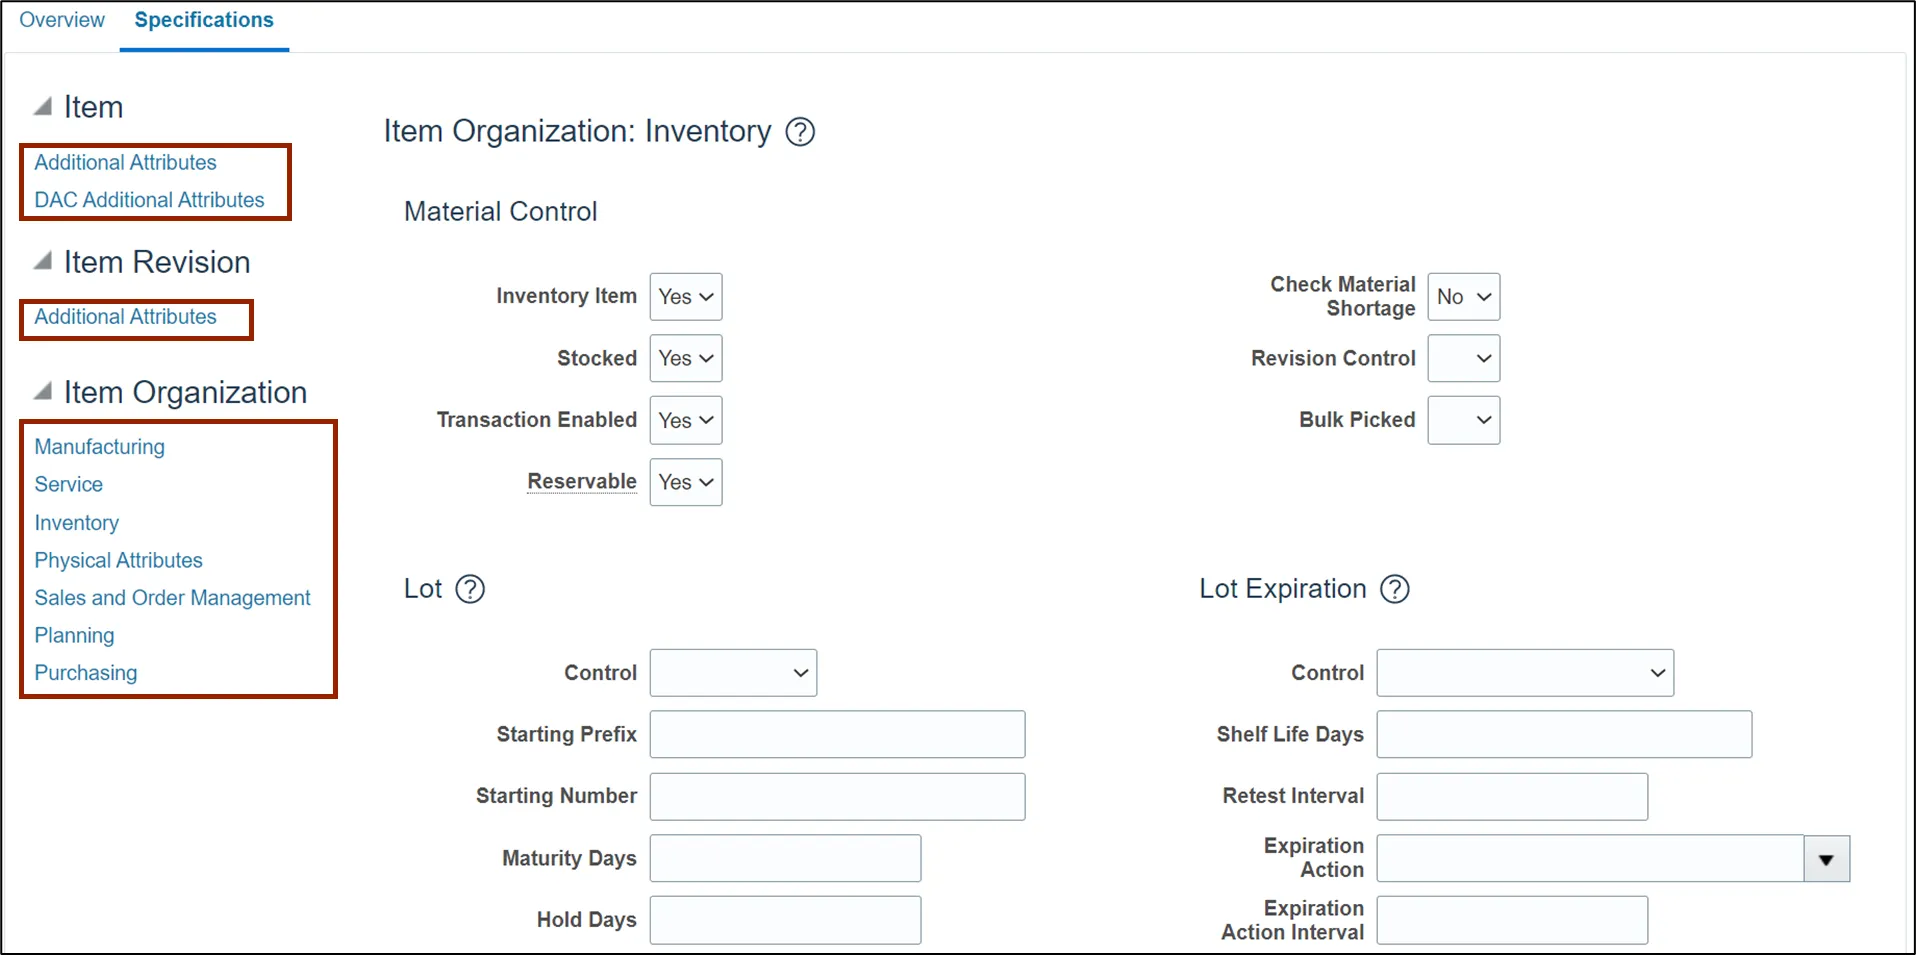
Step 16. Click the Specifications tab.
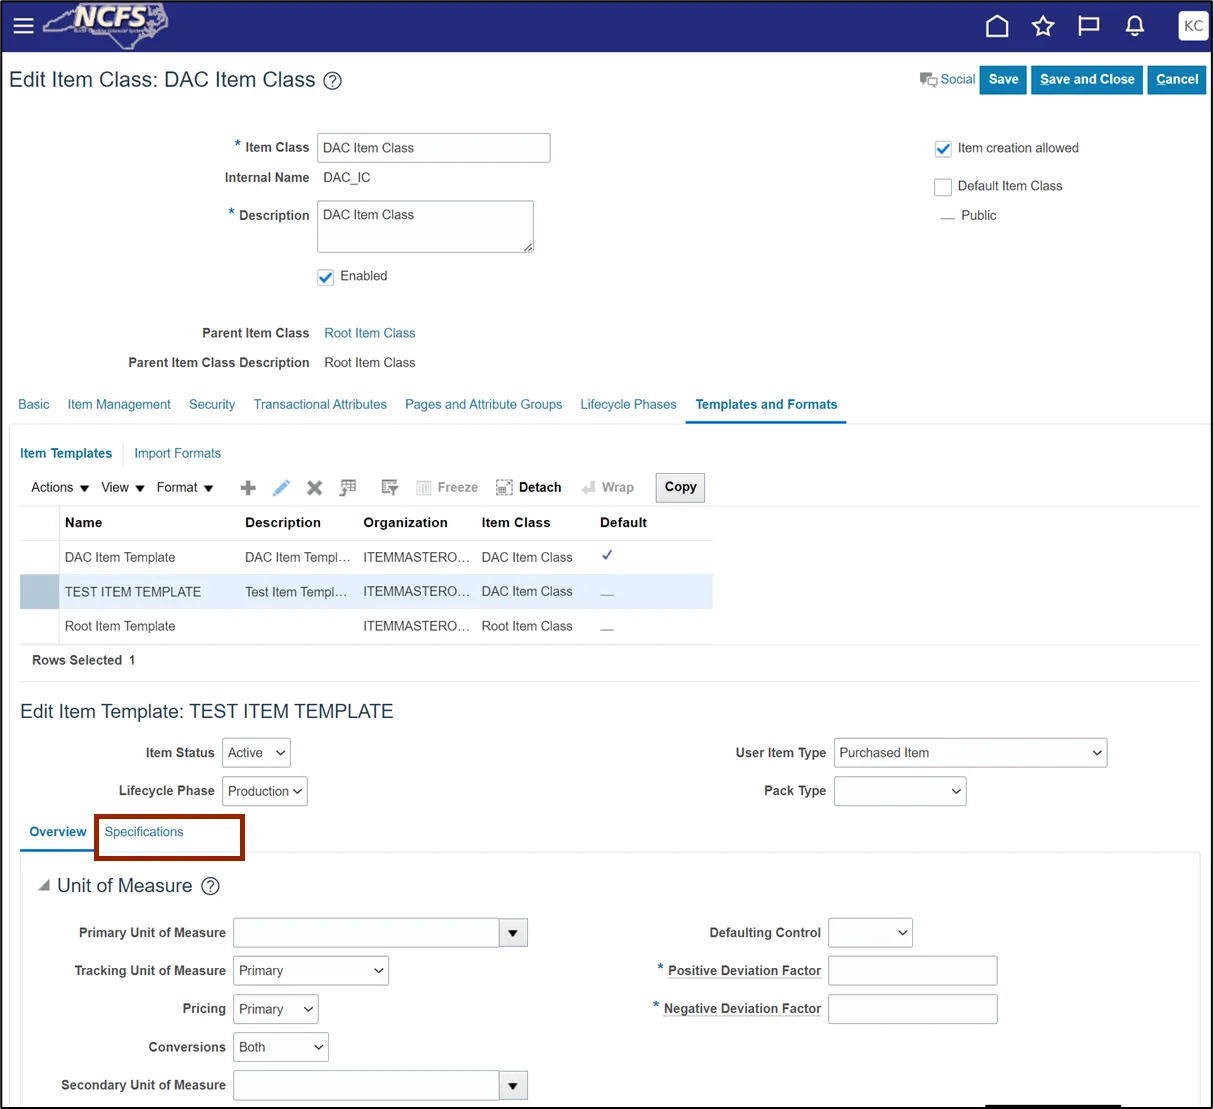
Step 17. Update attributes as per business requirement in Specifications tabs like Inventory, Planning, Purchasing and Additional Attributes.
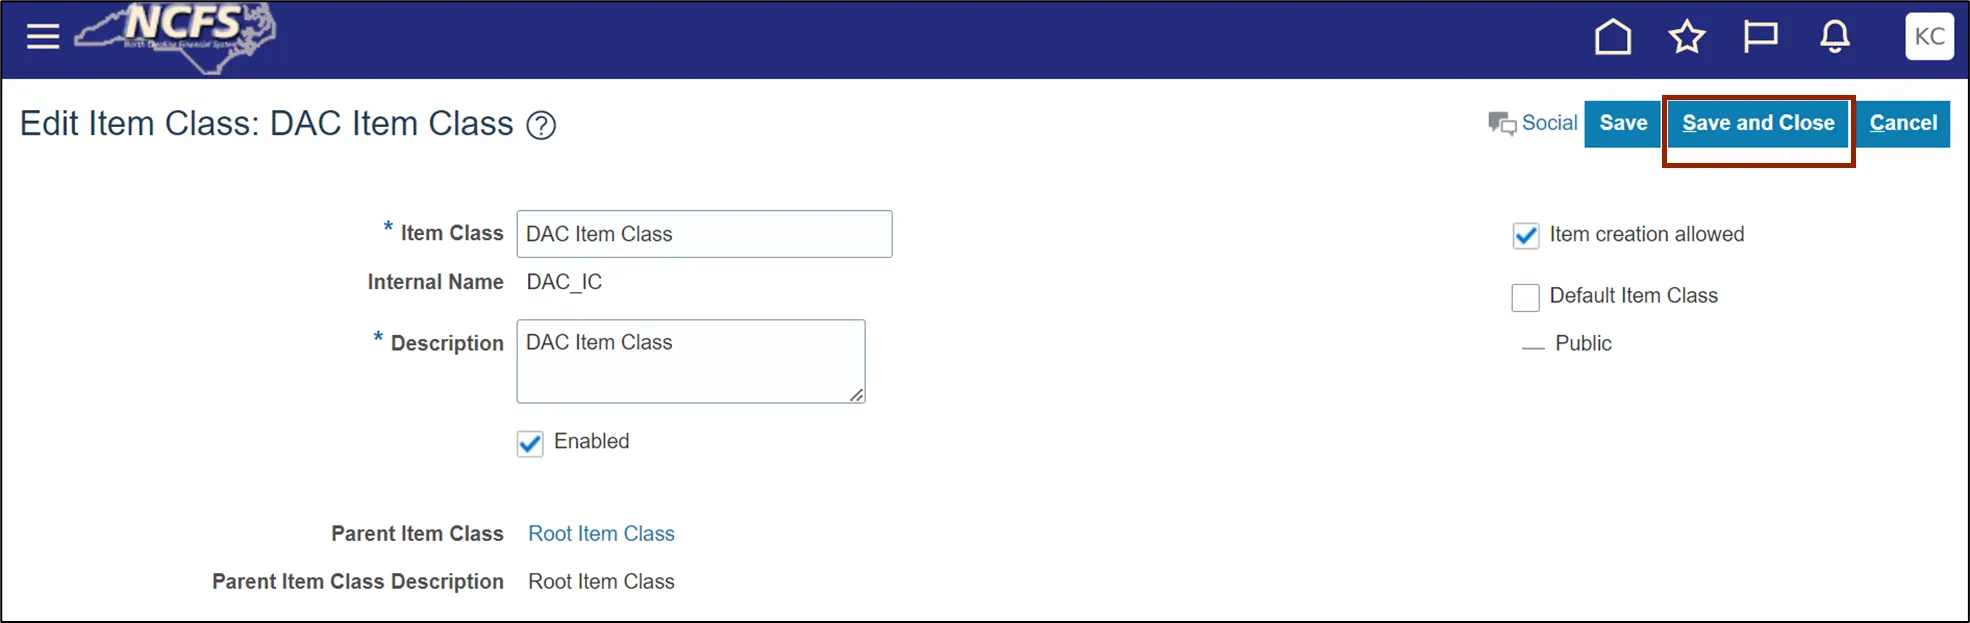
Step 18. Click the Save and Close button.
This concludes the steps to Create Item Template in Inventory Module Setup in NCFS.
To Create Item Subinventory Relationship to Count Zero Qty in Inventory Module Setup in NCFS, please follow the steps below. There are 11 steps to complete this process.
Step 1. On the Home page, click the My Enterprise tab.

Step 2. Click the Setup and Maintenance app.
Step 3. On the Setup page, click the drop-down icon and select the Manufacturing and Supply Chain Materials Management from the drop-down choice list.
Step 4. Under the Functional Area section, click Inventory Management to open the Inventory Management page on the right-hand side.
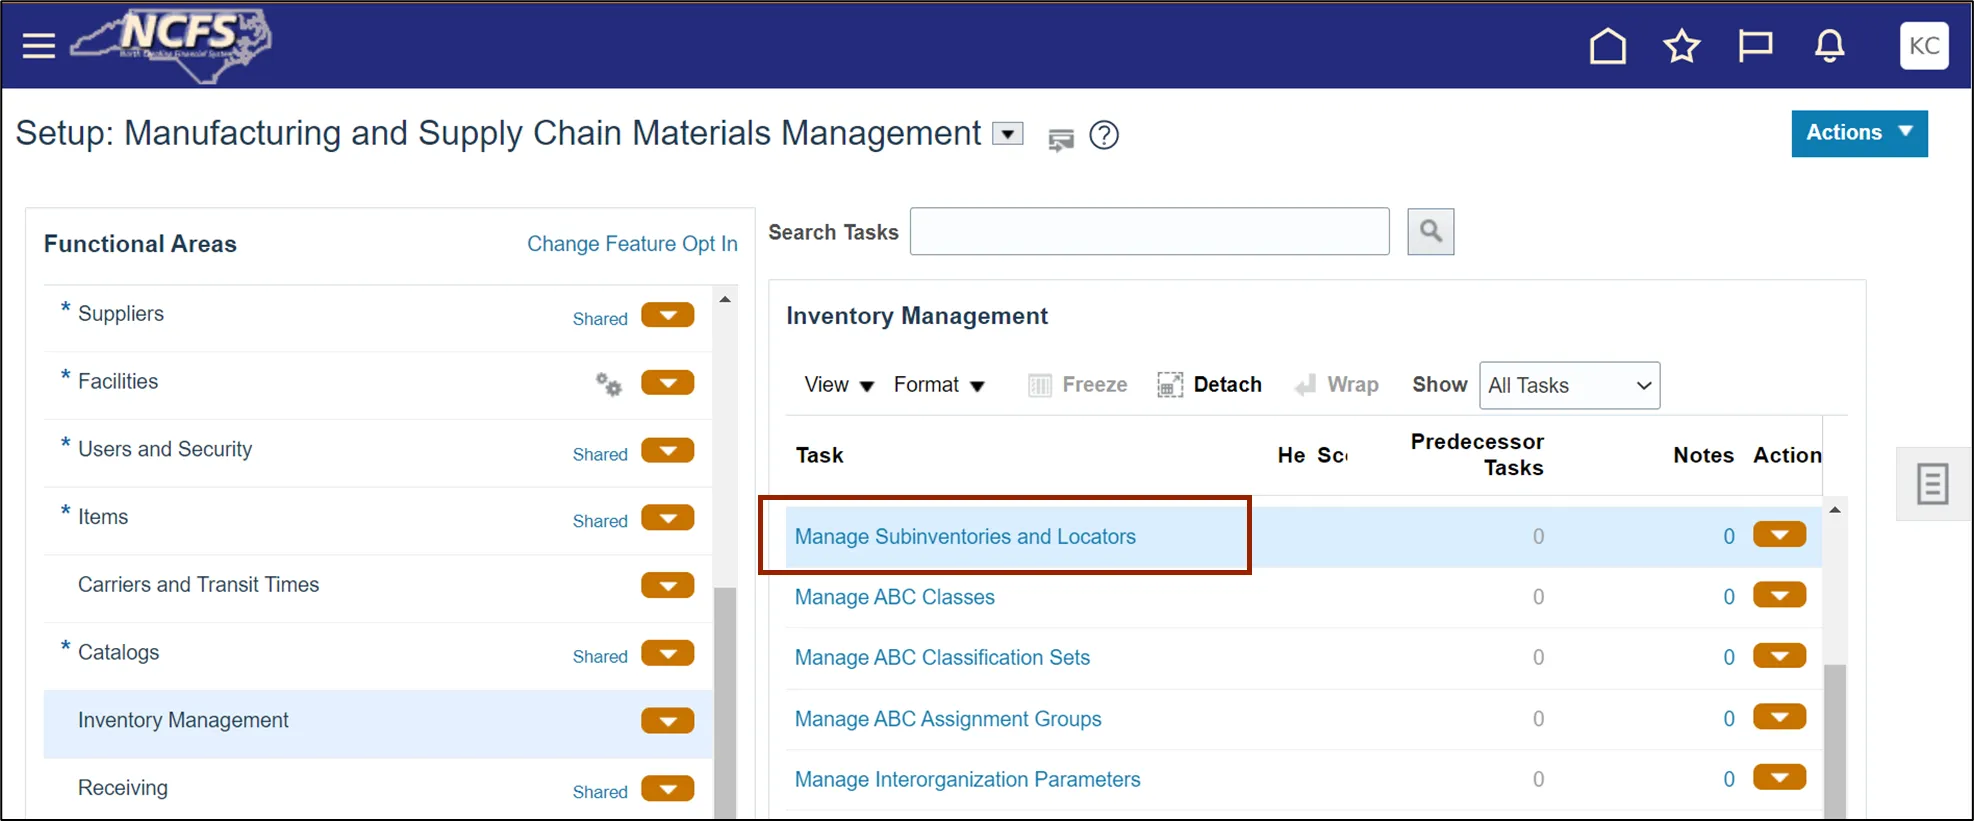
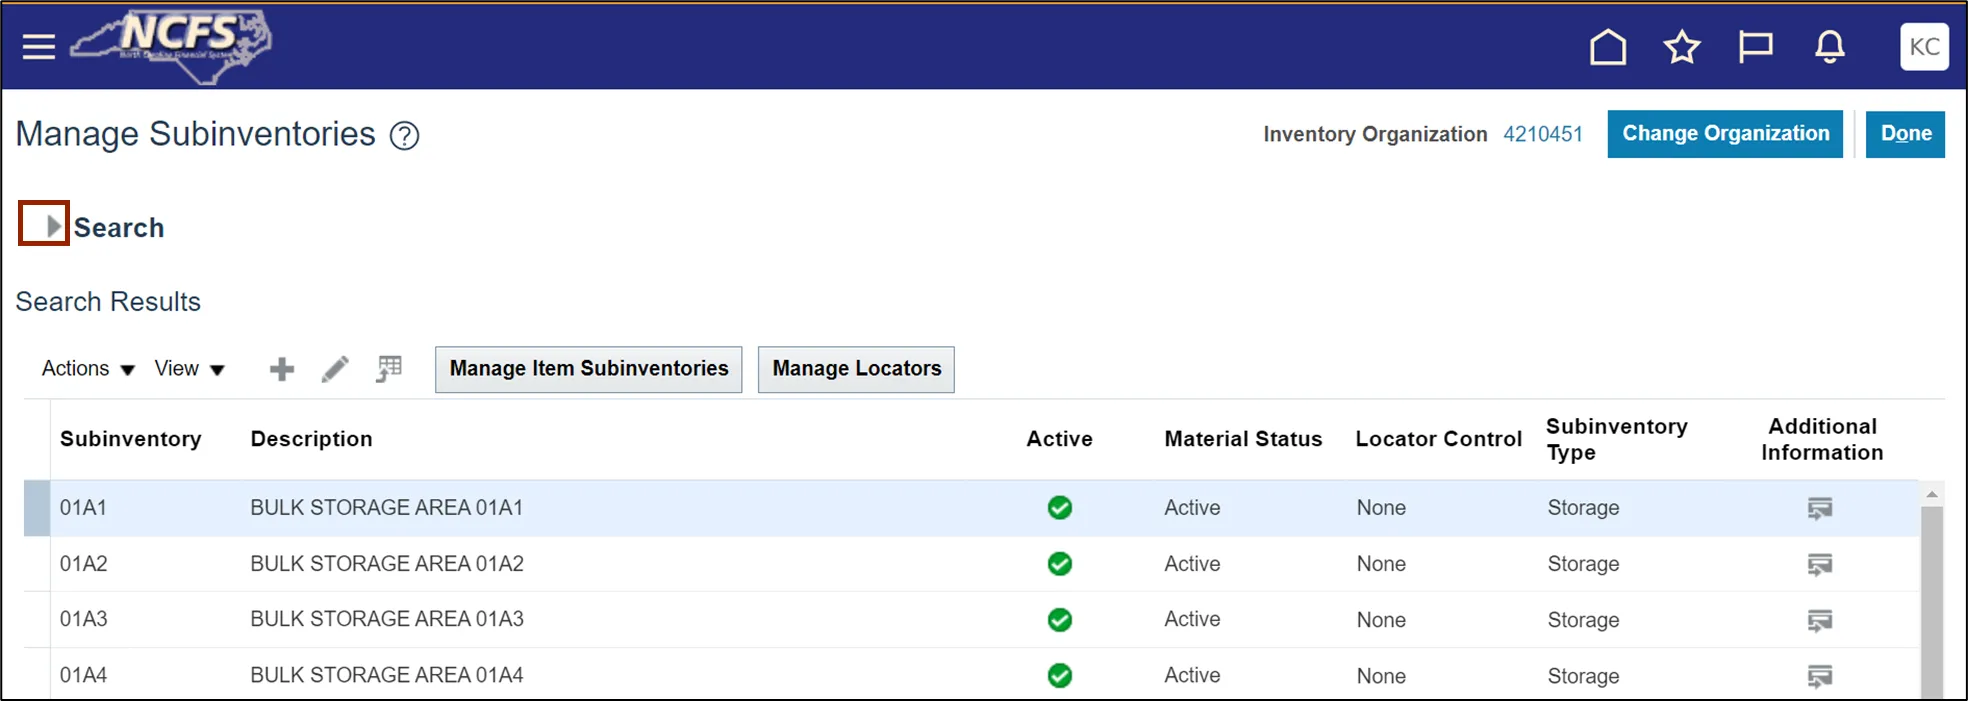
Step 5. Click the Manage Subinventories and Locators task link.
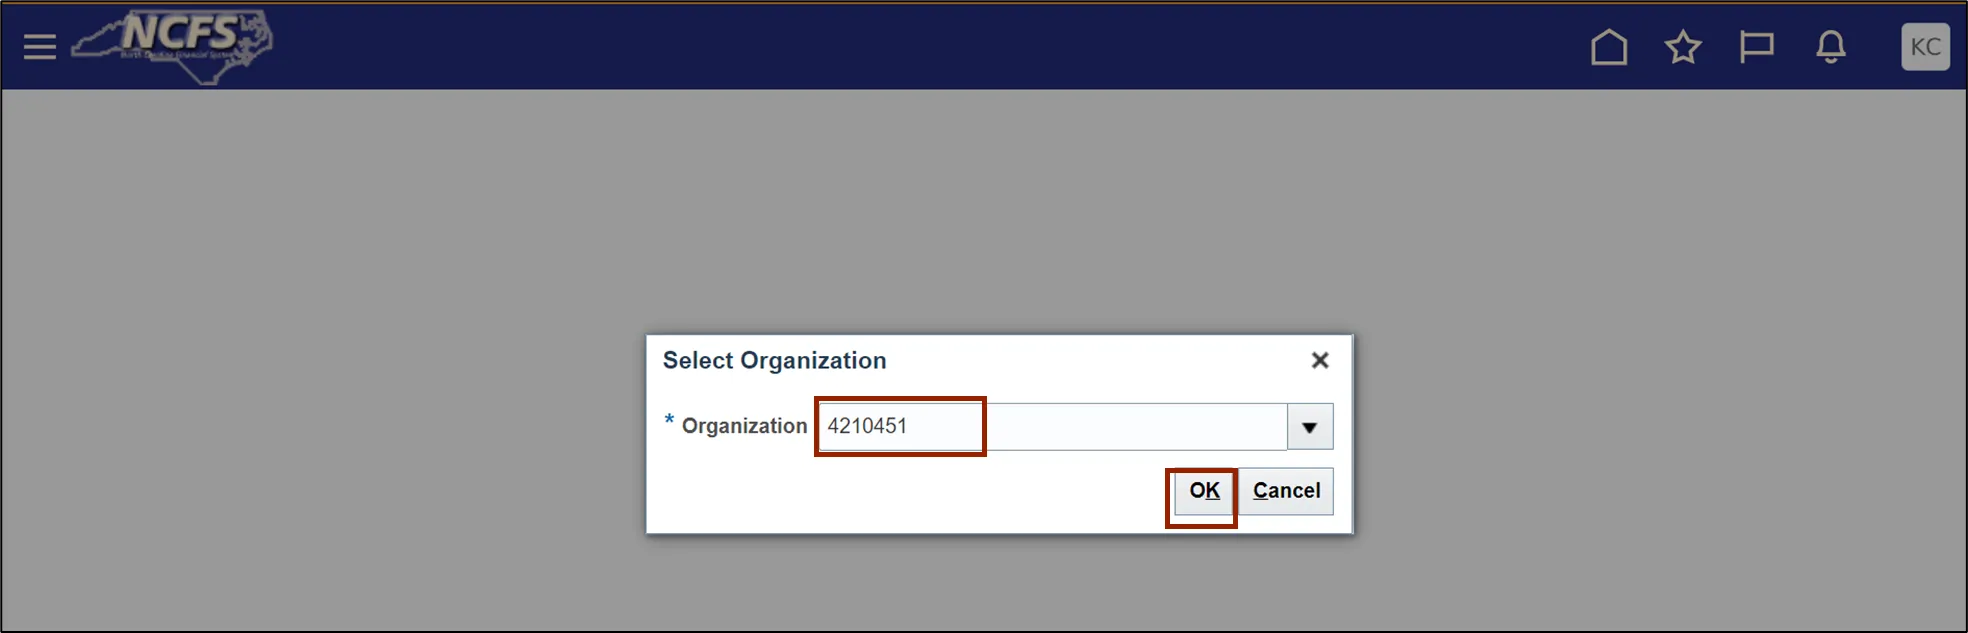
Step 6. Enter Organization. In this example, we choose 4210451. Click the OK button.
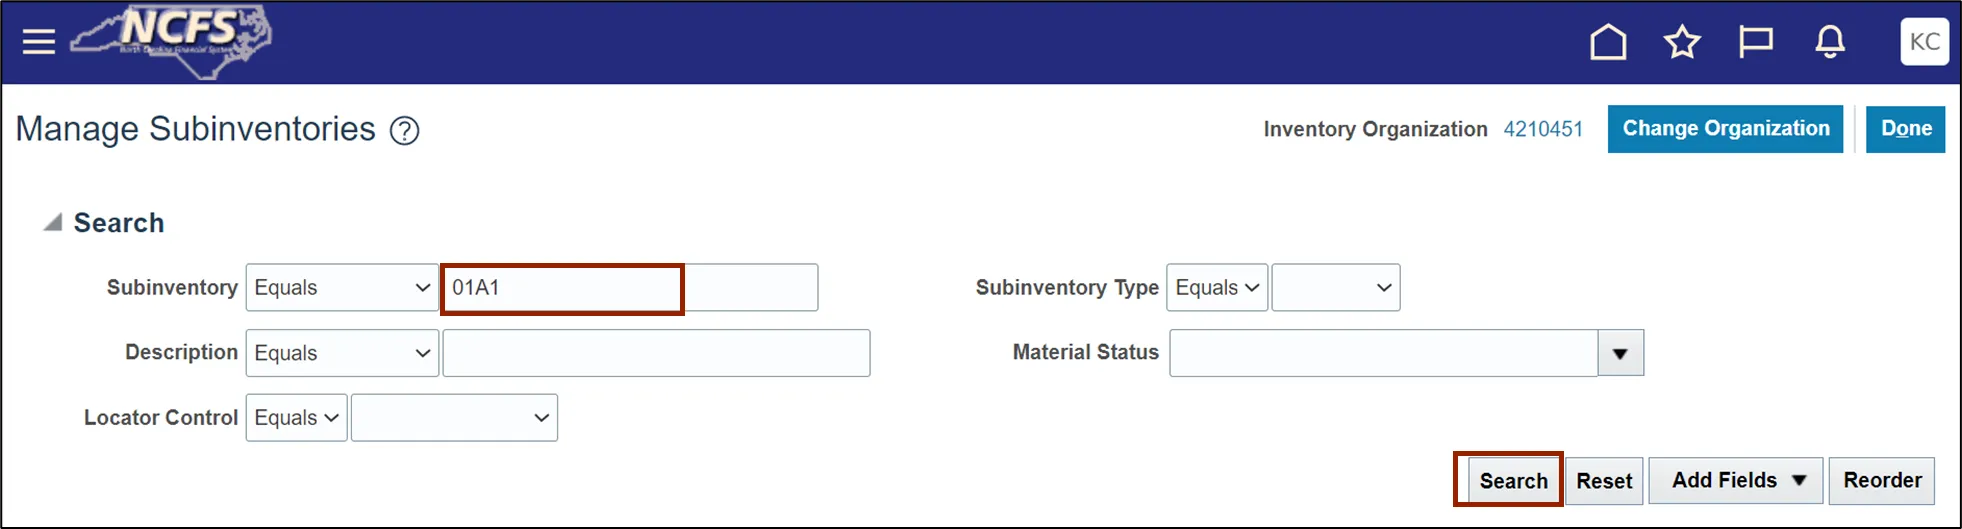
Step 7. On the Manage Subinventories page, click the Expand icon for Search criteria.
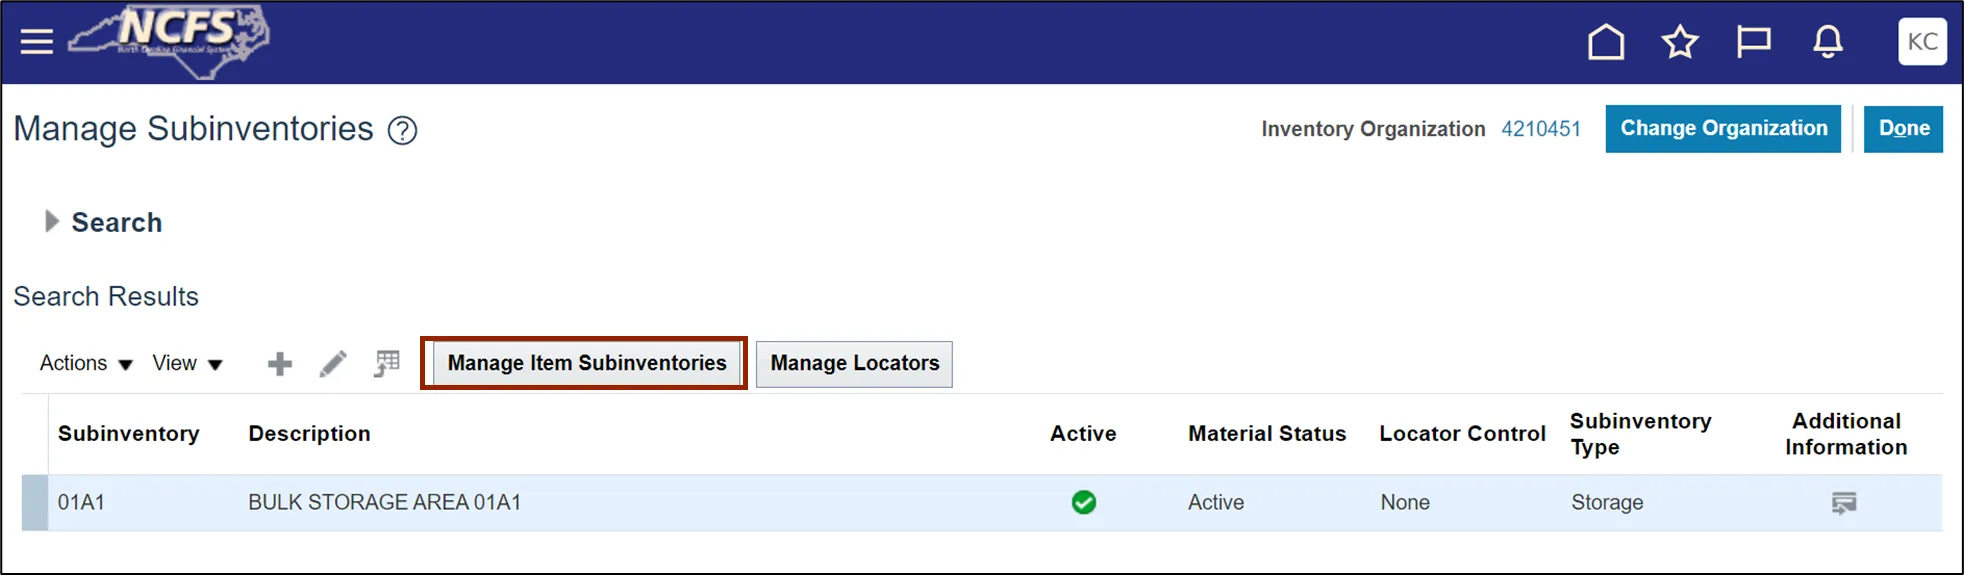
Step 8. Enter Subinventory. In this example, we choose 01A1. Click the Search button.
Step 9. Click the Manage Item Subinventories button.
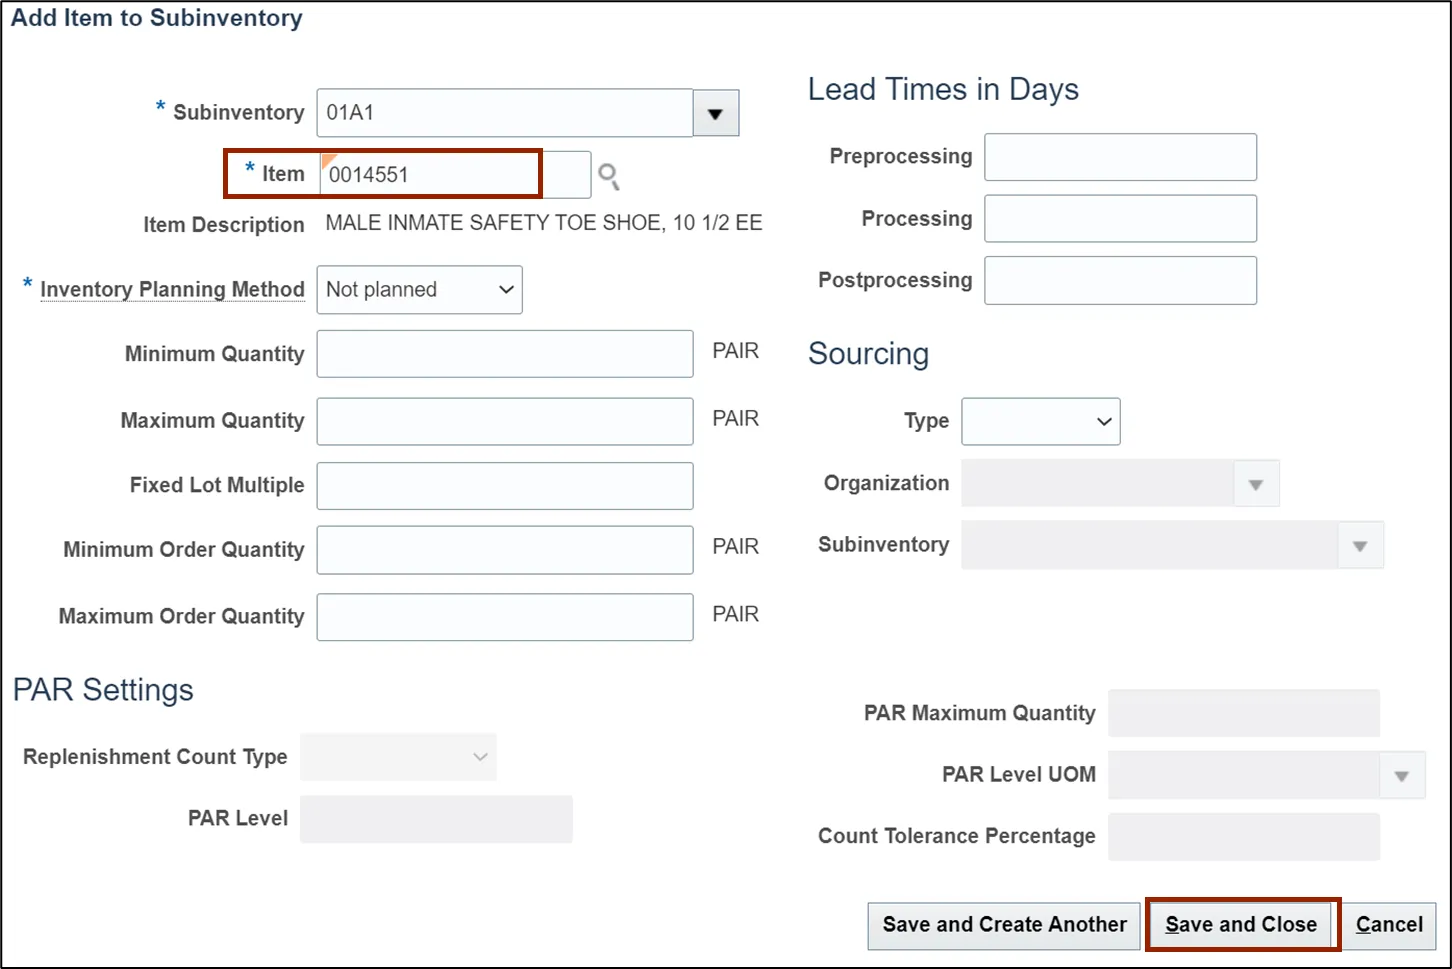
Step 10. On Manage Item Subinventories page, Click the Add icon.
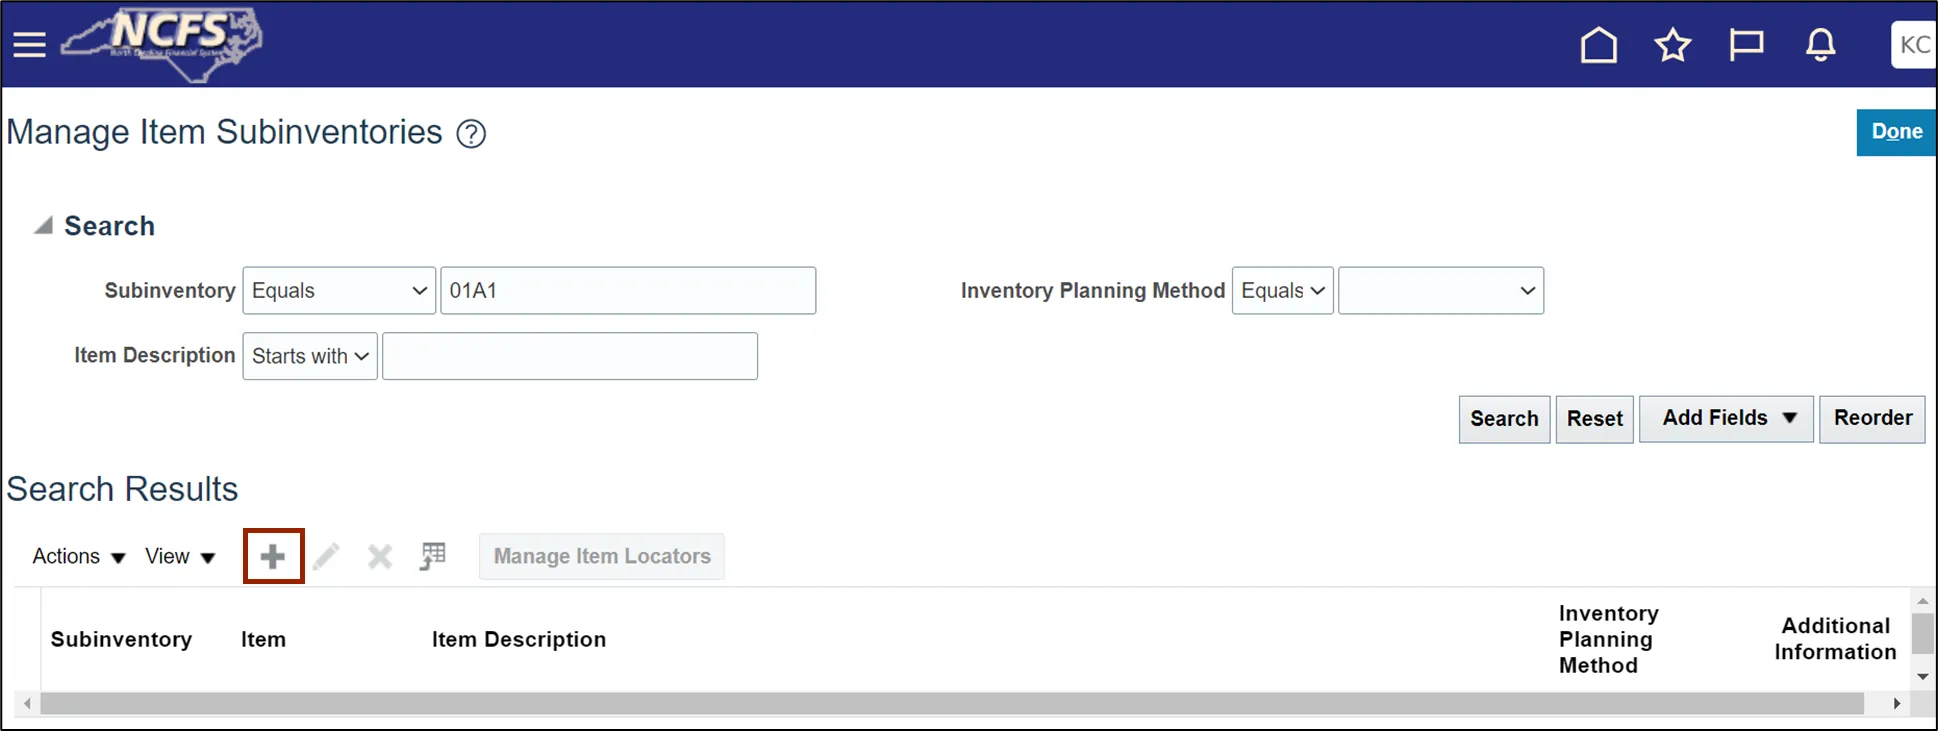
Step 11. Enter Item number. In this example, we choose 0014551. Click the Save and Close button.
This concludes the steps to Create Item Subinventory Relationship to Count Zero Qty in Inventory Module Setup in NCFS.
To Create DPI Category, Subject and Grade Code in Inventory Module Setup in NCFS, please follow the steps below. There are 19 steps to complete this process.
Step 1. On the Home page, click the My Enterprise tab.
Step 2. Click the Setup and Maintenance app.
Step 3. On the Setup page, click the drop-down icon and select the Product Management from the drop-down choice list.

Step 4. Under the Functional Area section, click Items to open the Items page on the right-hand side.
Step 5. Click the Show field and select All Tasks.
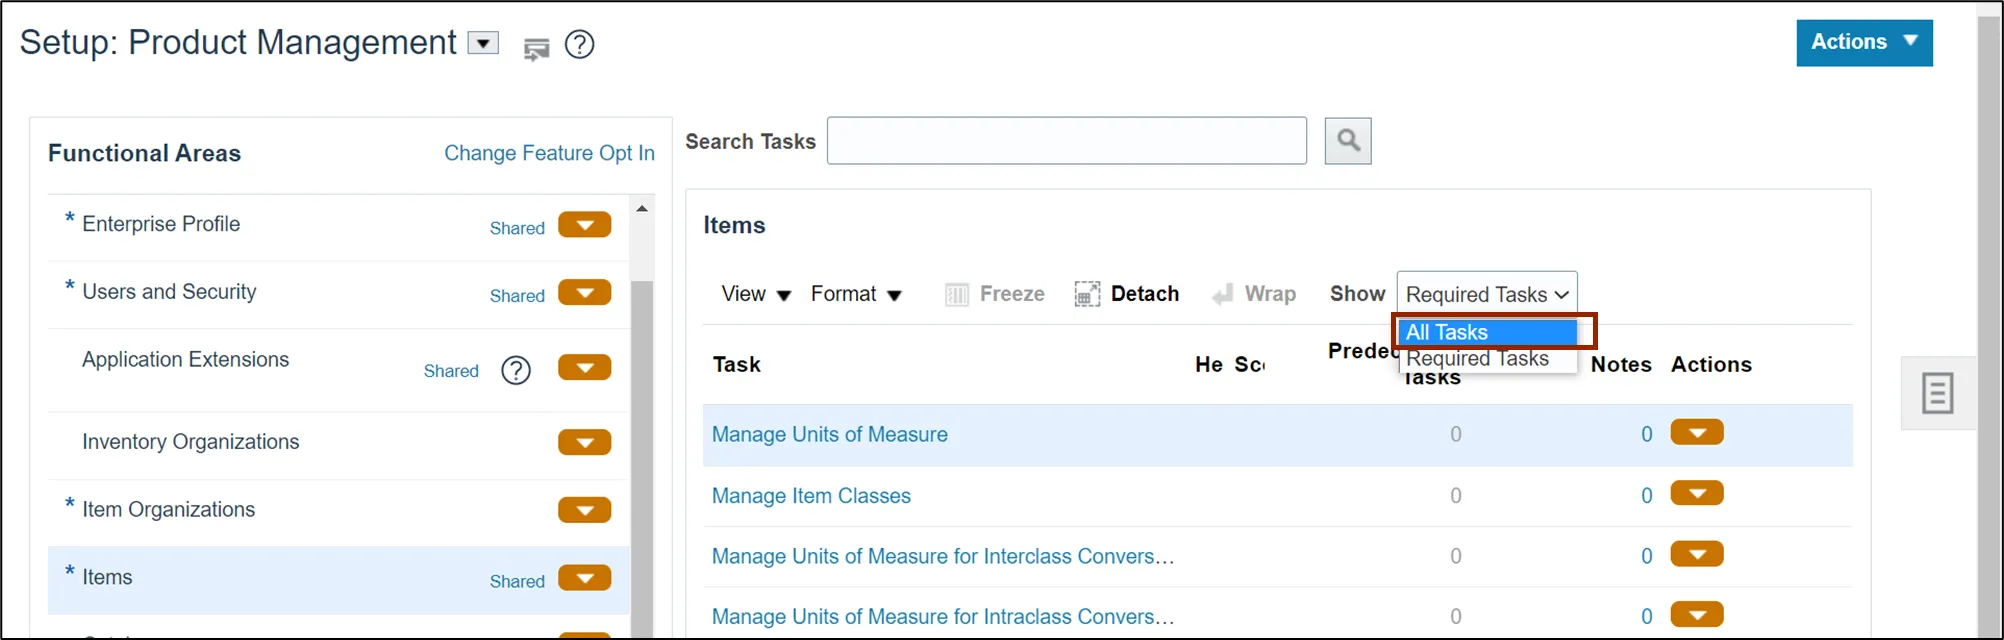
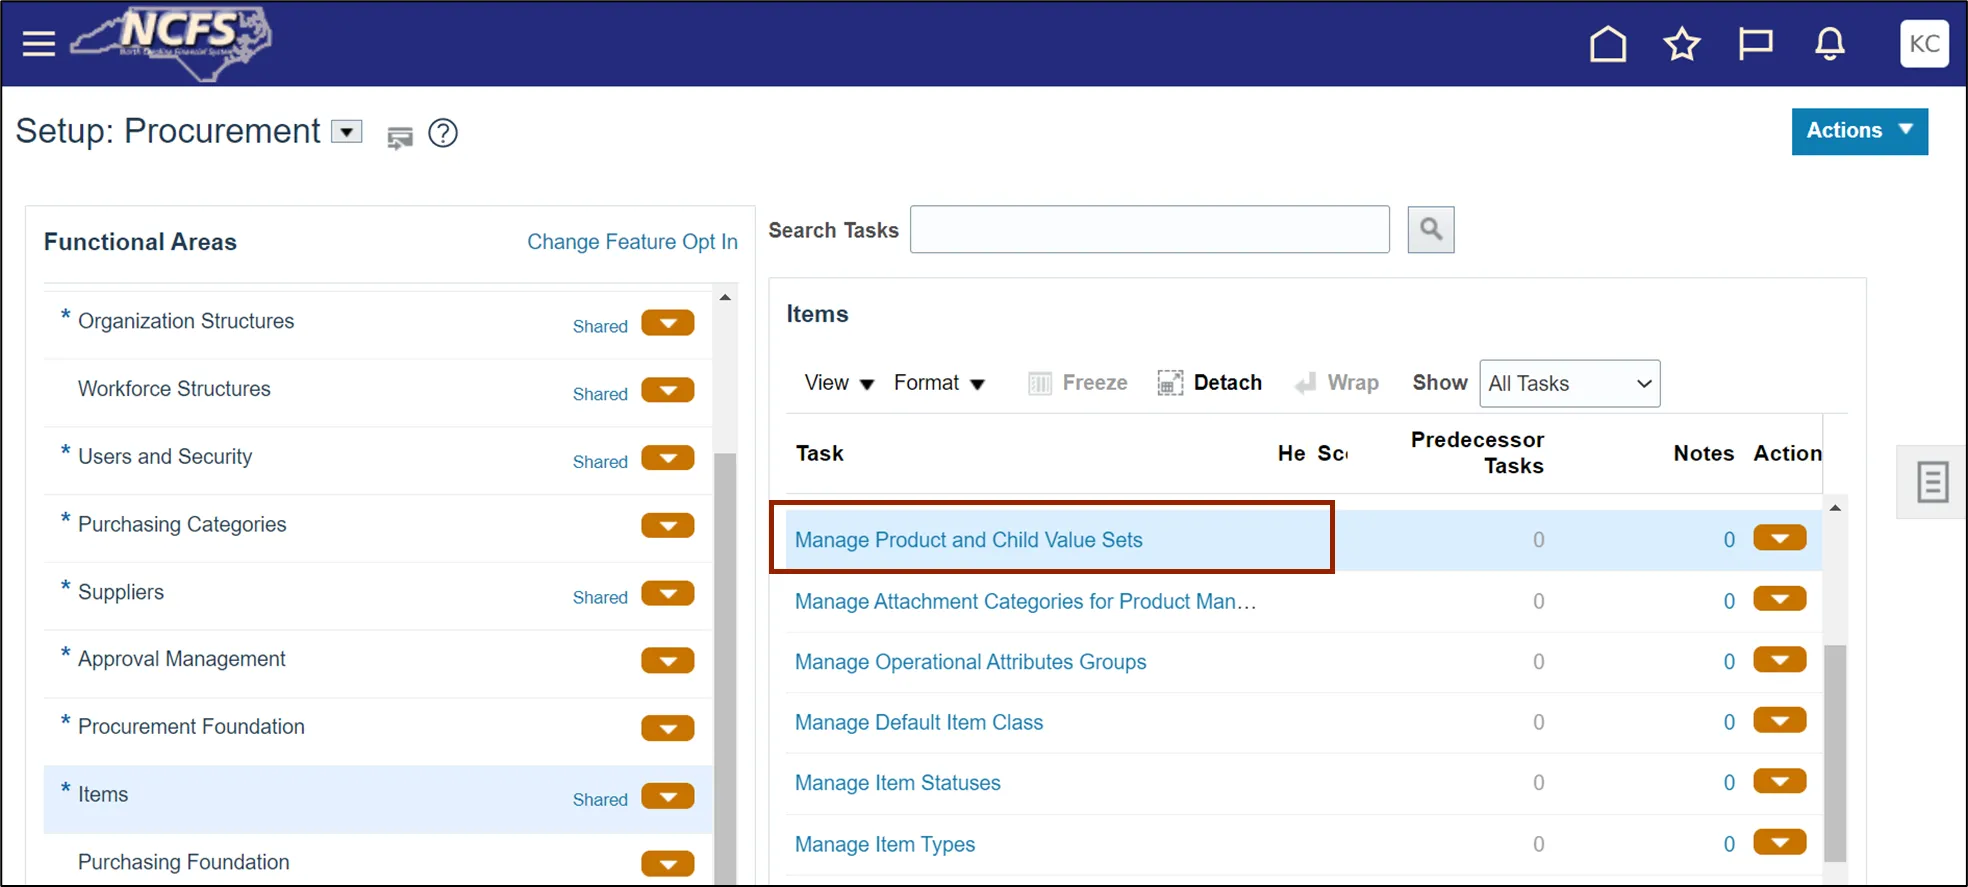
Step 6. Click Manage Product and Child Value Sets link.
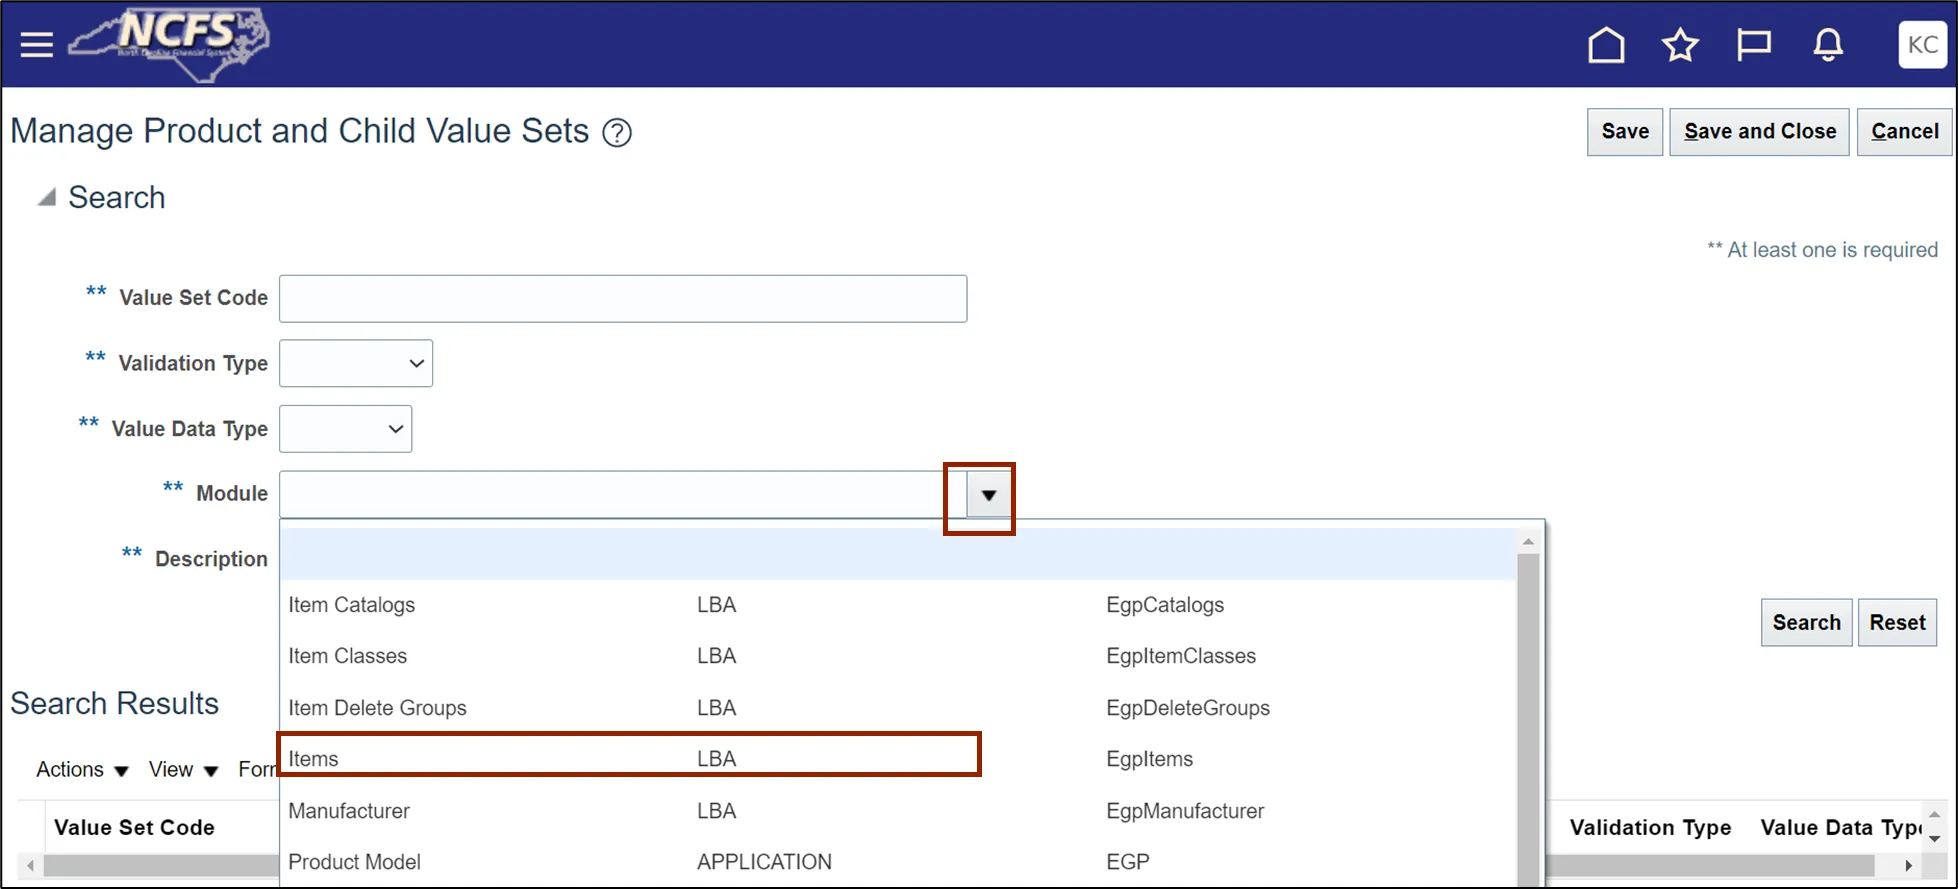
Step 7. On Manage Product and Child Value Sets Page, click on drop-down list icon and select Items module.
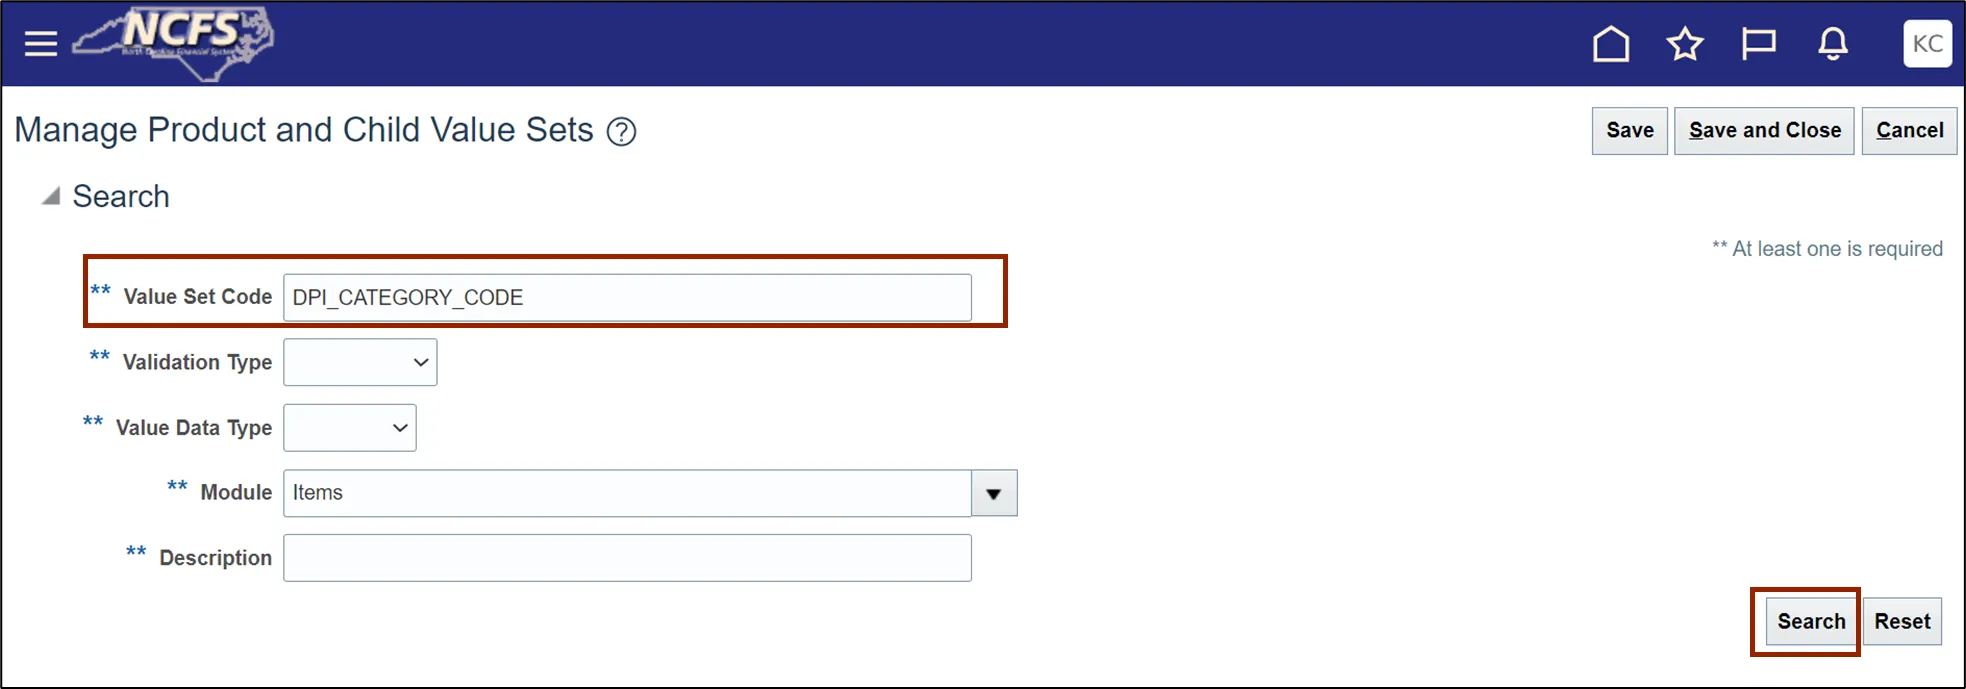
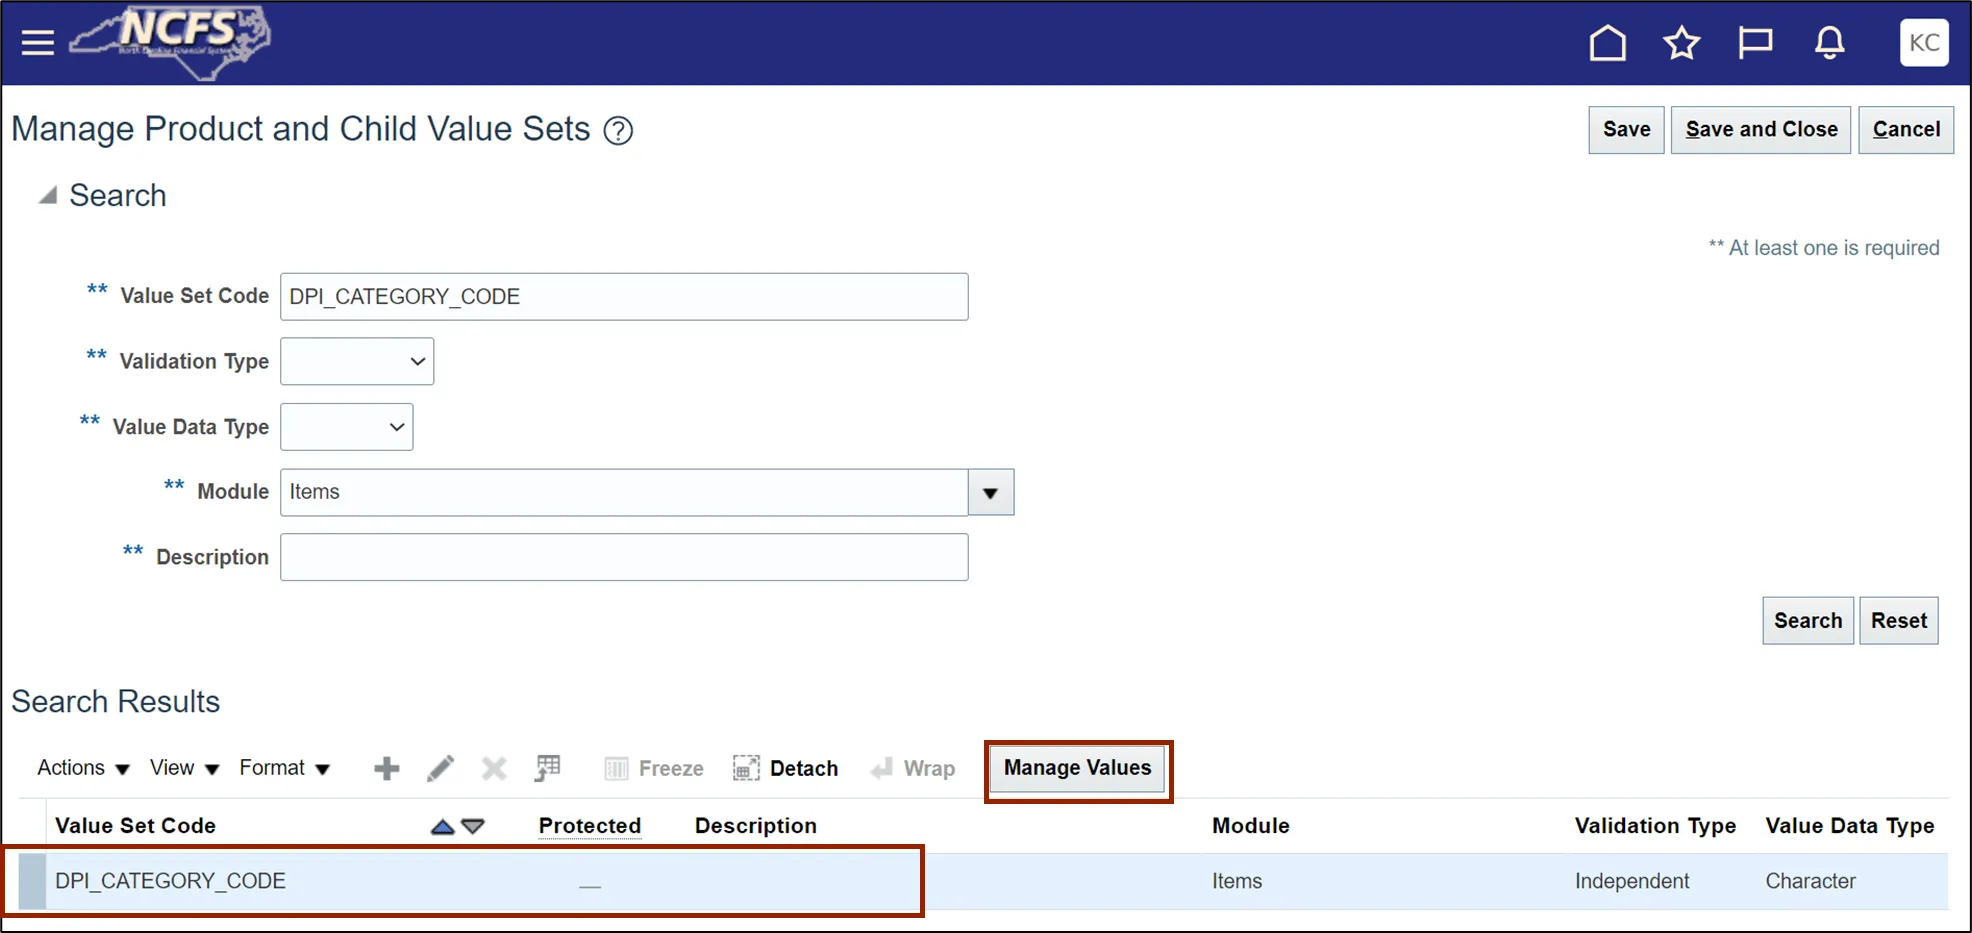
Step 8. Enter the Value Set Code field. In this example, we choose DPI_CATEGORY_CODE. Click the Search button.
Step 9. Select Value Set Code record and click the Manage Values button.
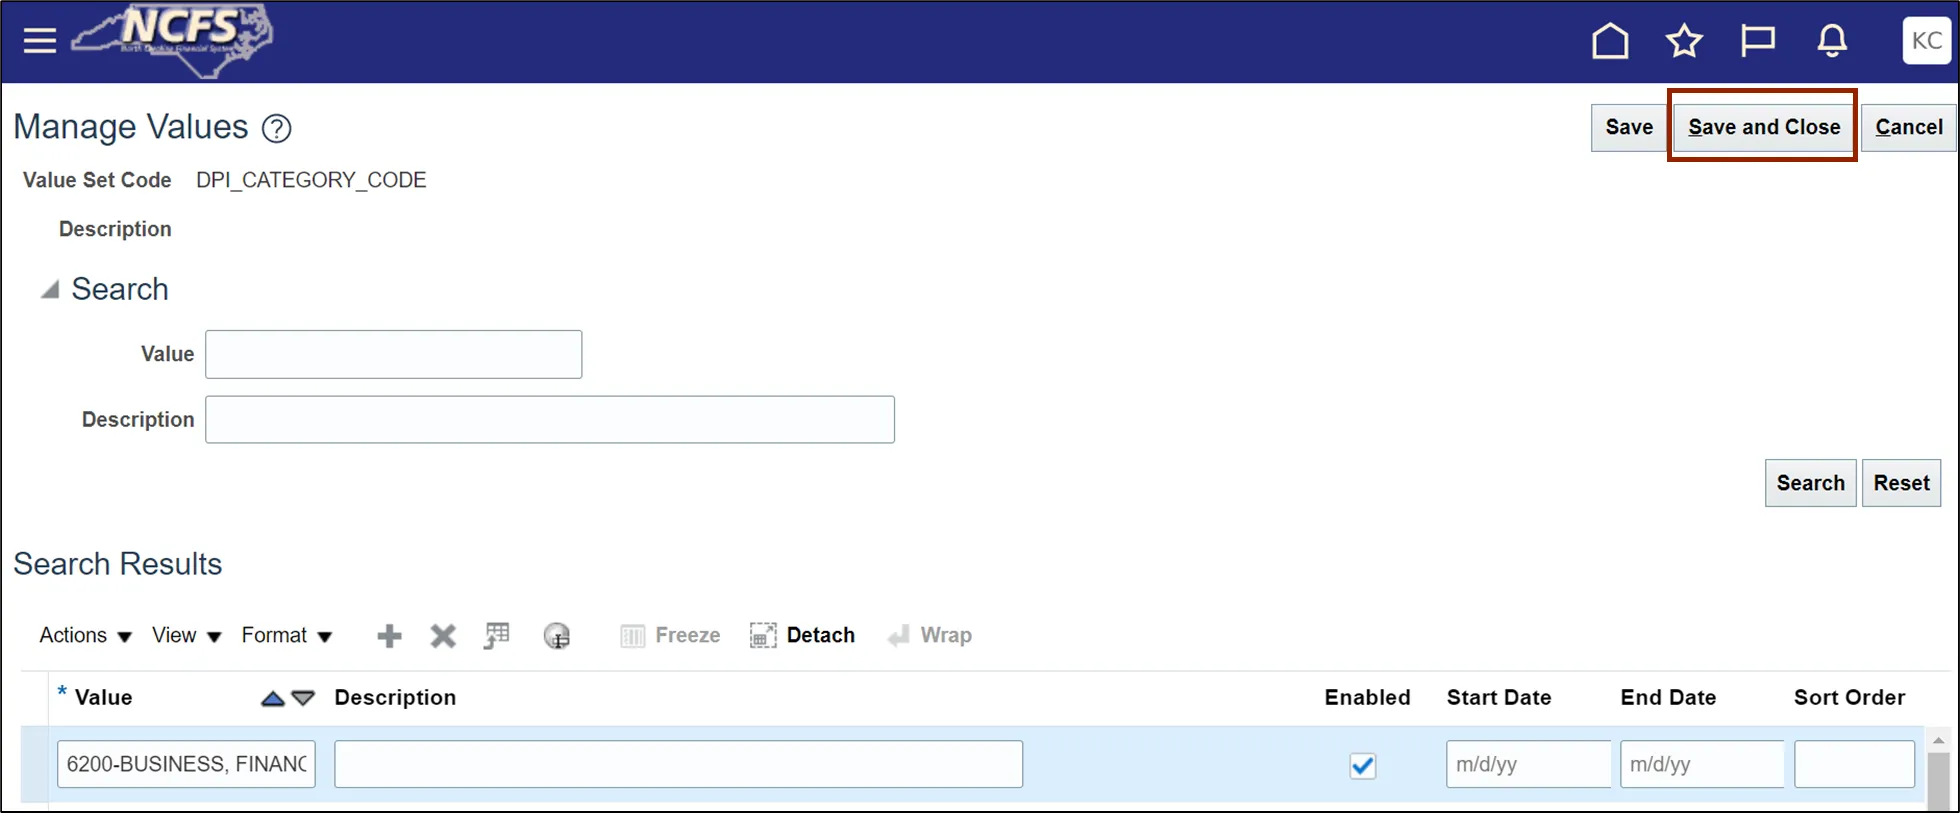
Step 10. On the Manage Values page, click the Add icon and enter Value.
In this example, we entered 6200-BUSINESS, FINANCE, AND MARKETING EDUCATION.

Step 11. Click the Save and Close button.
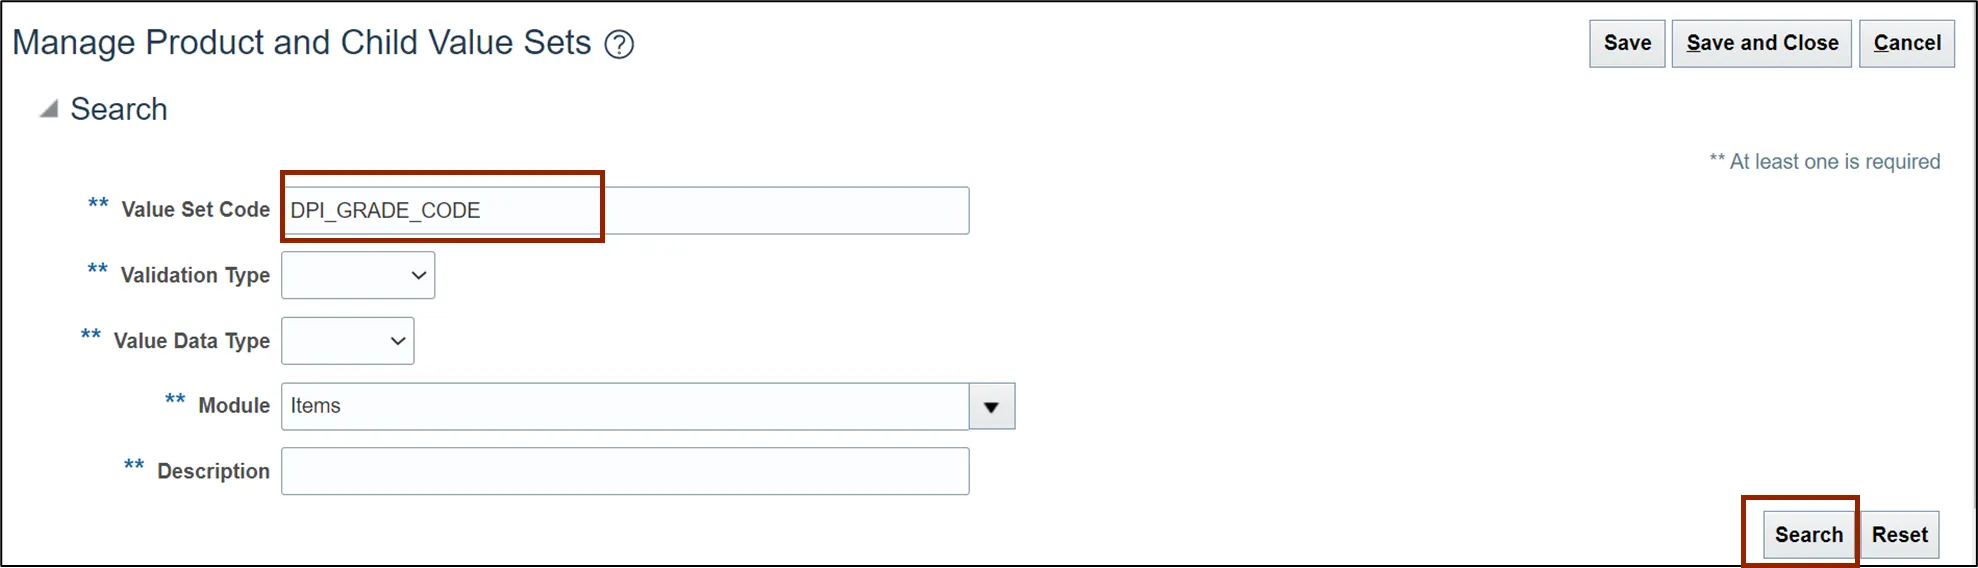
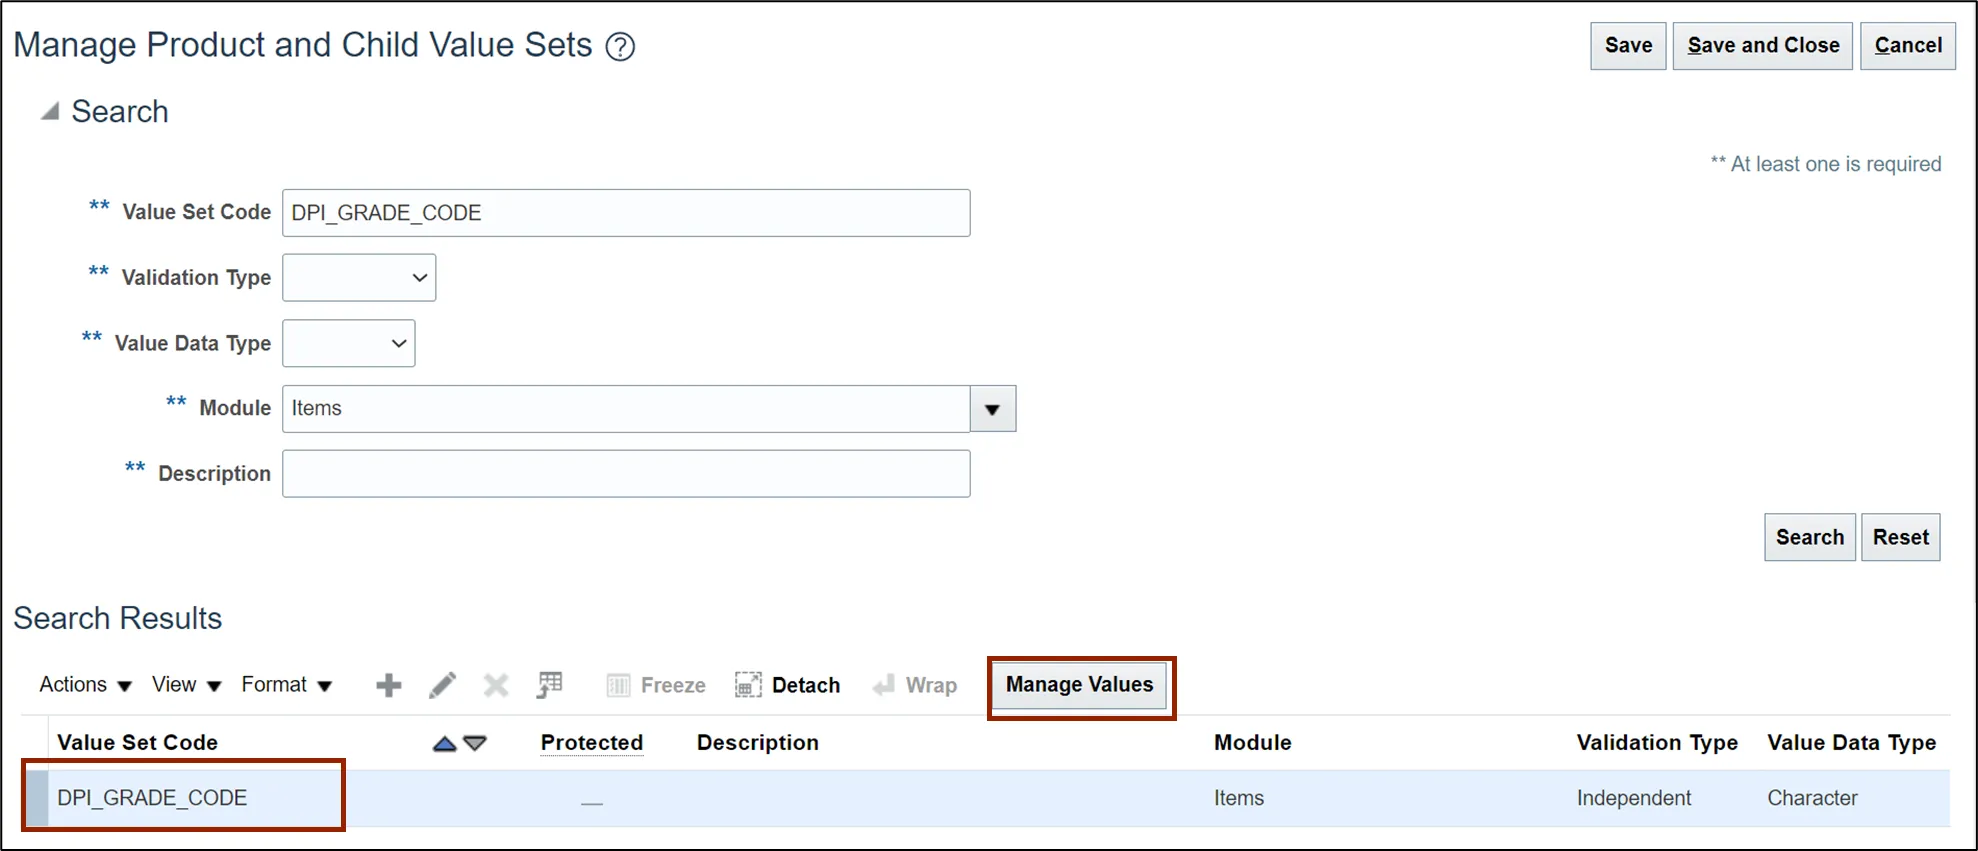
Step 12. Enter the Value Set Code field. In this example, we choose DPI_GRADE_CODE. Click the Search button.
Step 13. Select Value Set Code record and click the Manage Values button.
Step 14. Click the Add icon and enter Value. In this example, we entered 0011-KINDERGARTEN VISUAL ARTS.
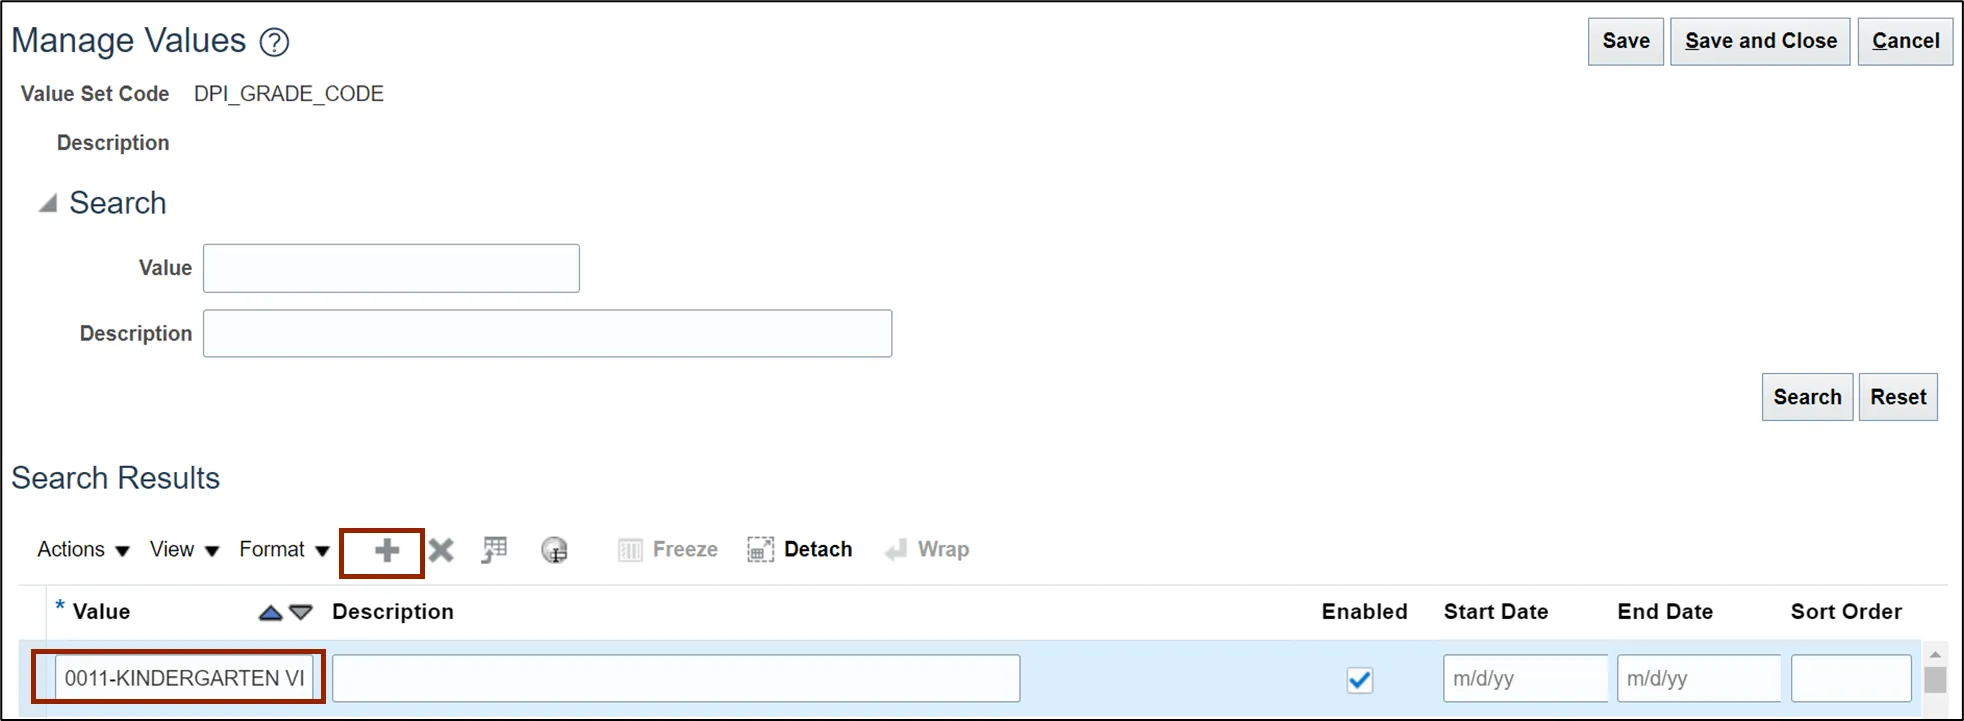
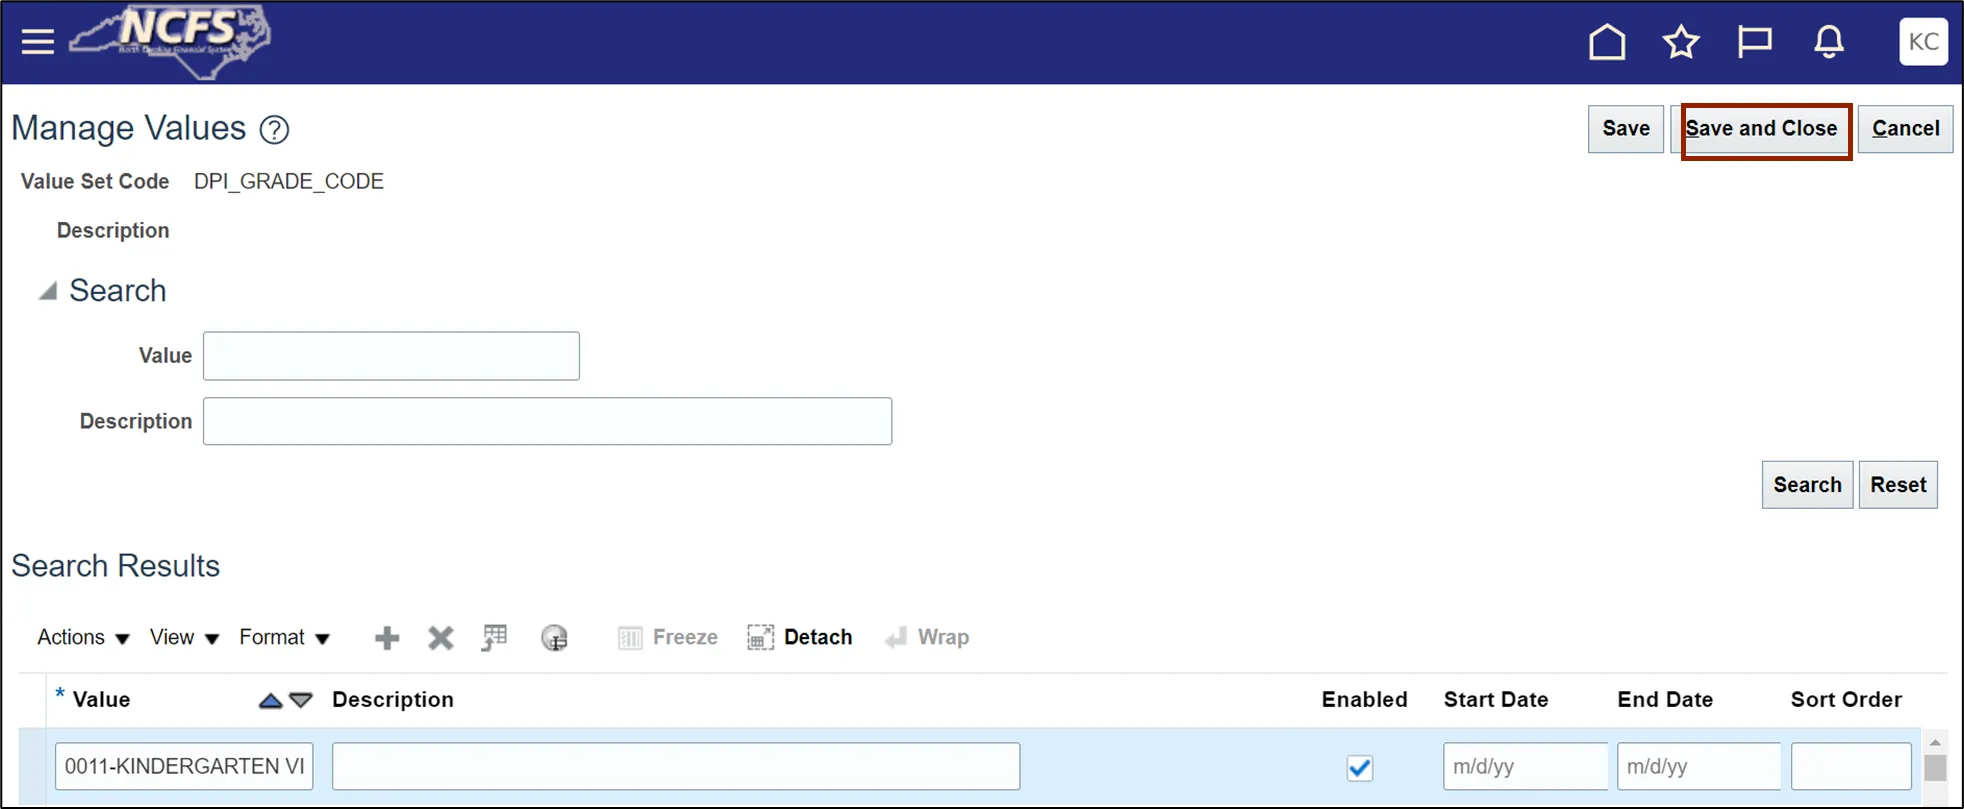
Step 15. Click the Save and Close button.
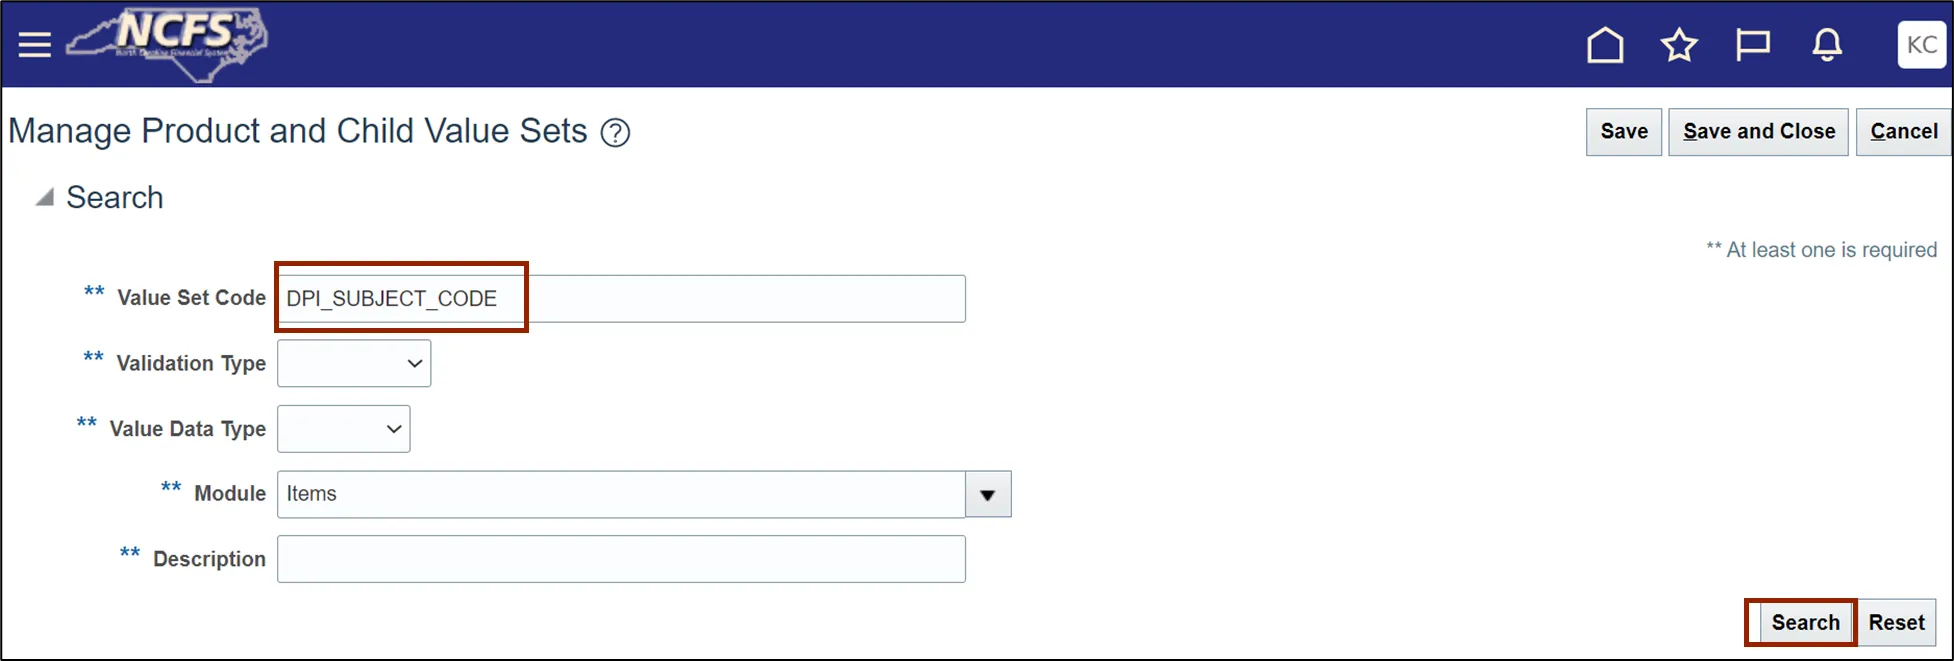
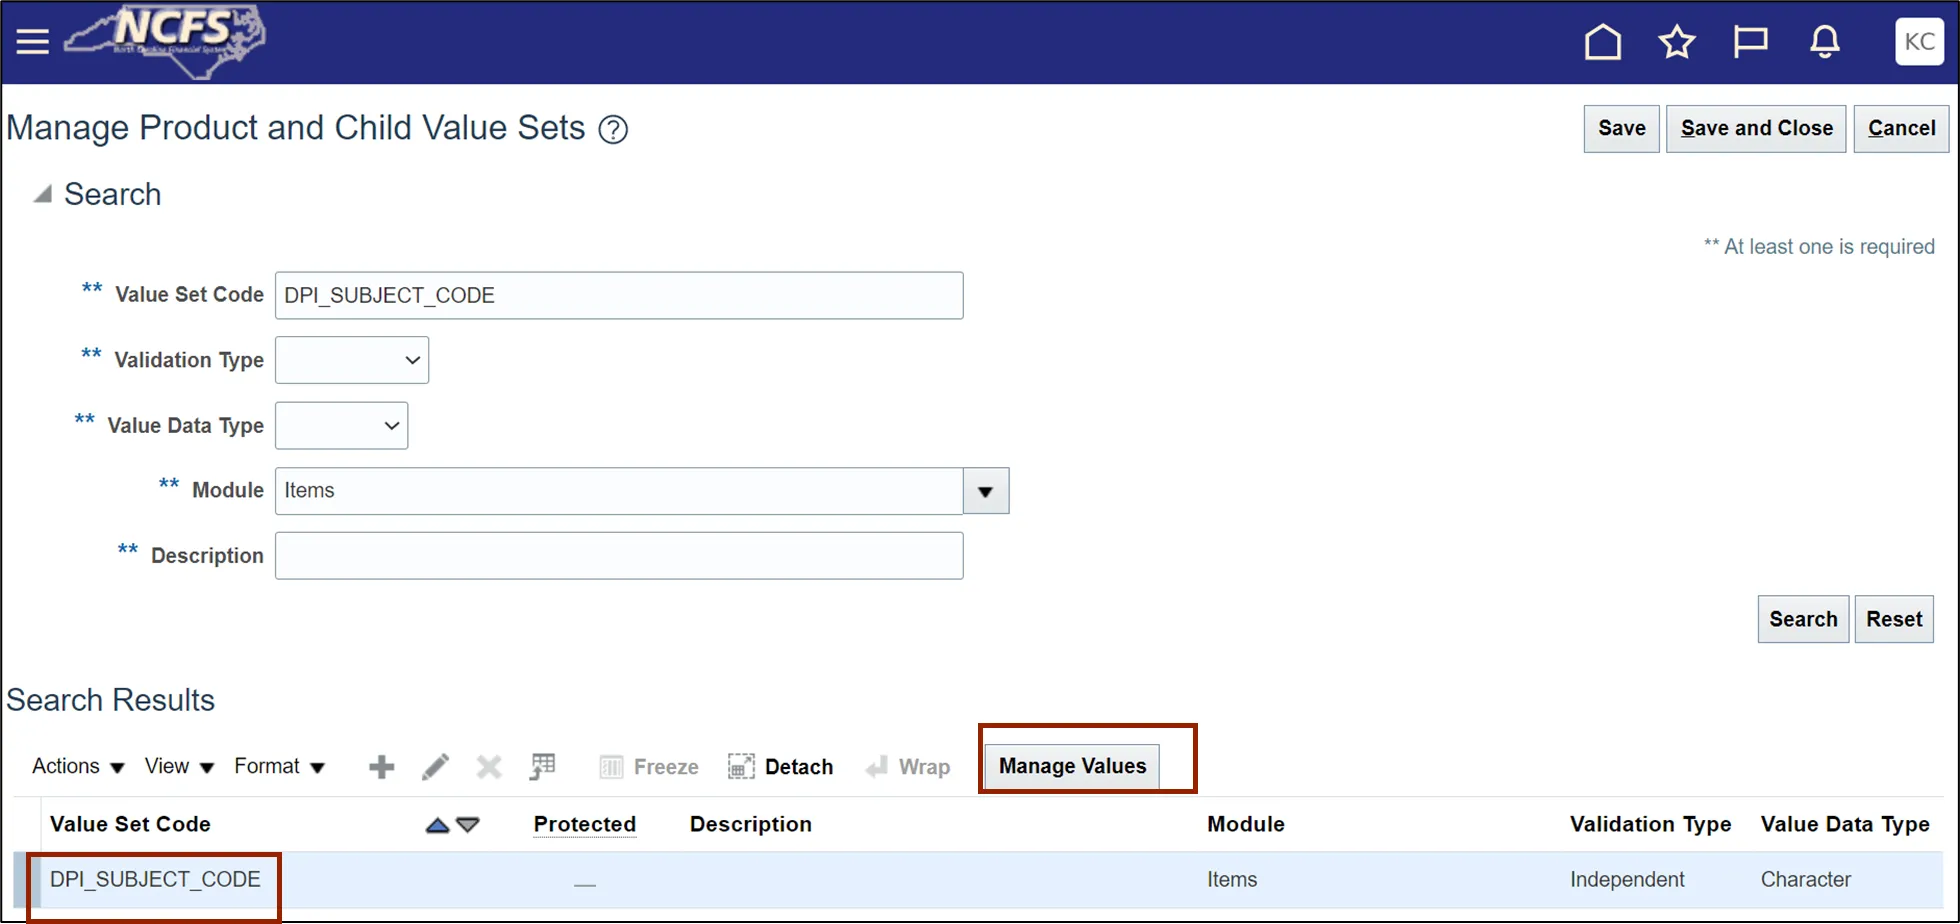
Step 16. Enter the Value Set Code field. In this example, we choose DPI_SUBJECT_CODE. Click the Search button.
Step 17. Select Value set code record and click the Manage Values button.
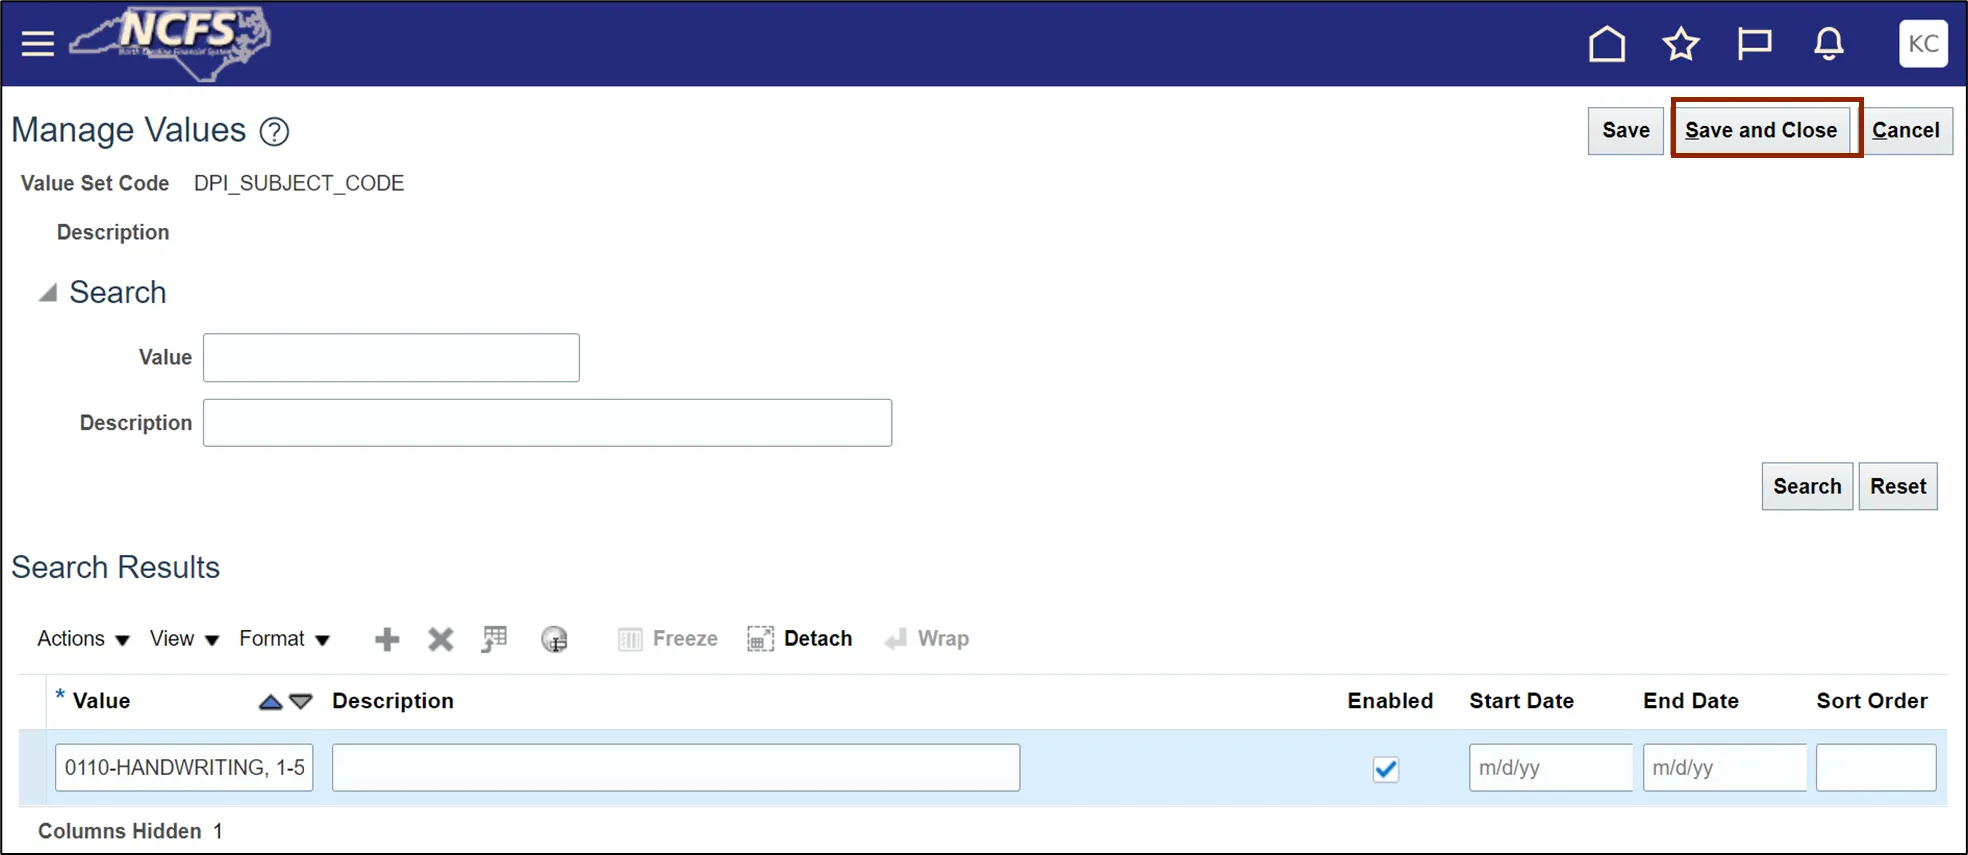
Step 18. Click the Add icon and enter Value. In this example, we choose 0110-HANDWRITING, 1-5.
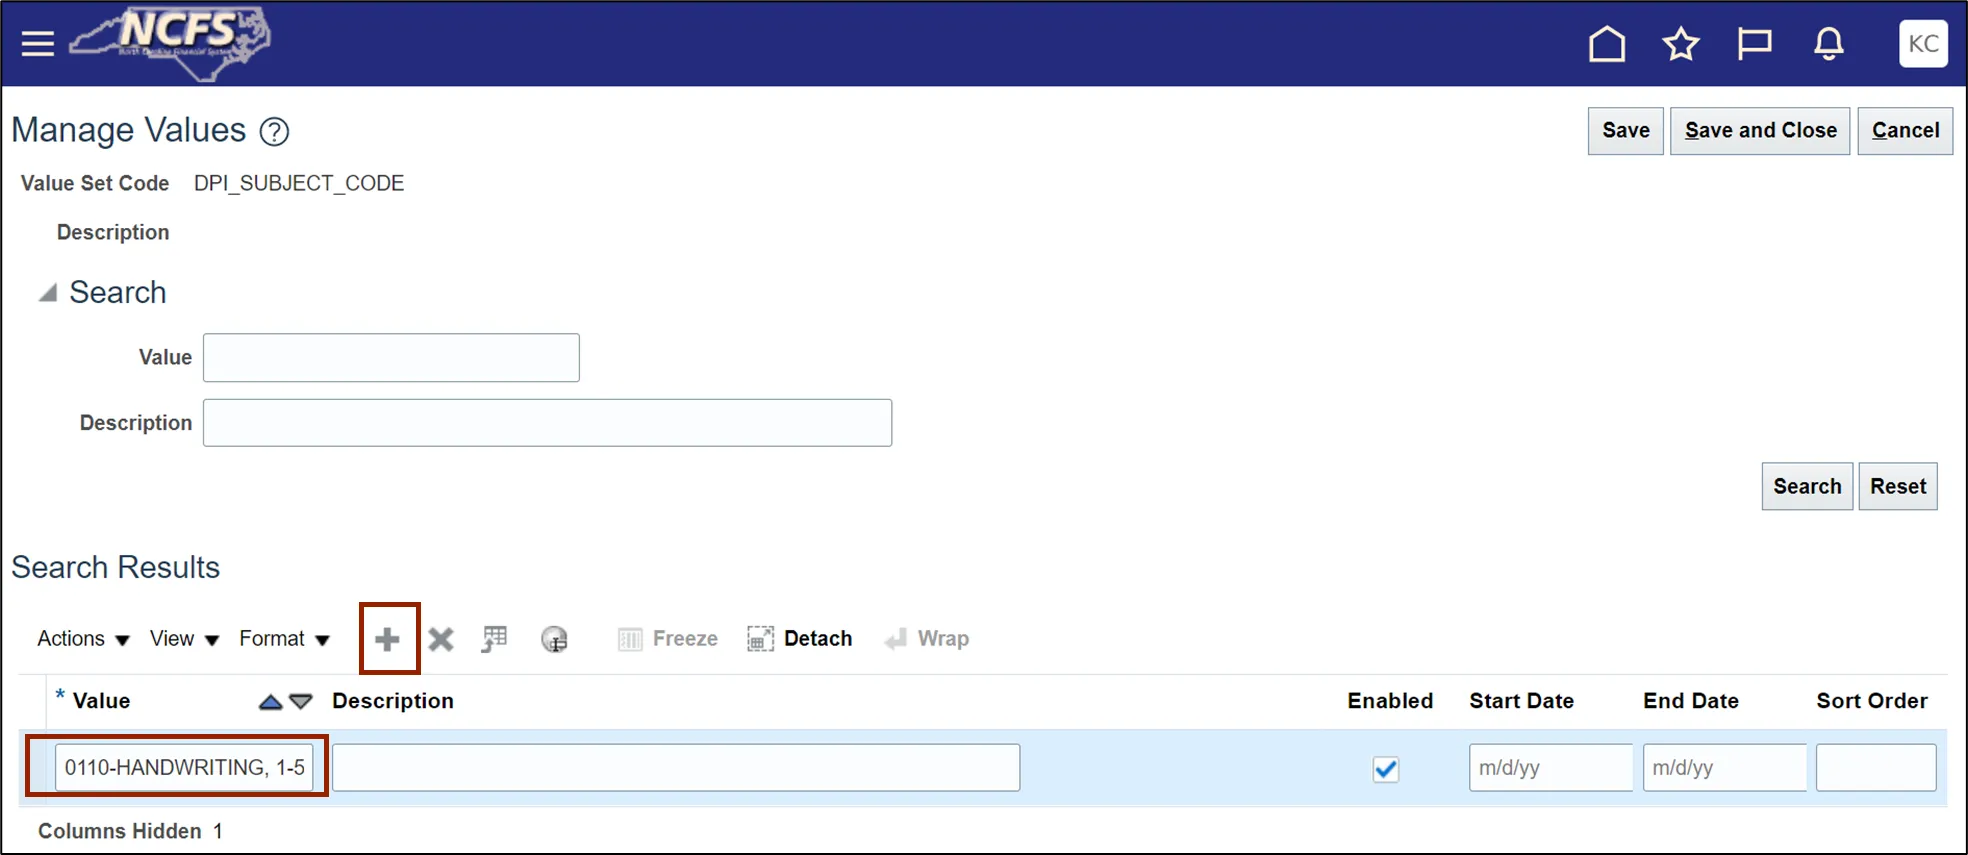
Step 19. Click the Save and Close button.
This concludes the steps to Create DPI Category, Subject and Grade Code in Inventory Module Setup in NCFS.
Wrap-Up
Perform the steps shown above to set up Inventory Module in NCFS.