Purpose
The purpose of this Quick Reference Guide (QRG) is to provide a step-by-step explanation on how to Approve Intercompany Transactions as the Receiving Agency in the North Carolina Financial System (NCFS).
Introduction and Overview
This QRG covers the Approval process that allows the Receiver Agency to accept or reject a transfer. It helps in monitoring fund transfers between agencies by OSC based on cash availability in NCFS.
User Tip
The following are prerequisites to Approve Intercompany Transactions as the Receiving Agency:
-
Agency User (IC Provider and Receiver Batch Entry User) has completed transaction by entering required details like Agency, IC DFF, Amount, and Account Distributions.
Approve a Transfer Request (Receiver Agency Approval)
To approve a transfer request (receiver agency approval), please follow the steps below. There are 12 steps to complete this process.
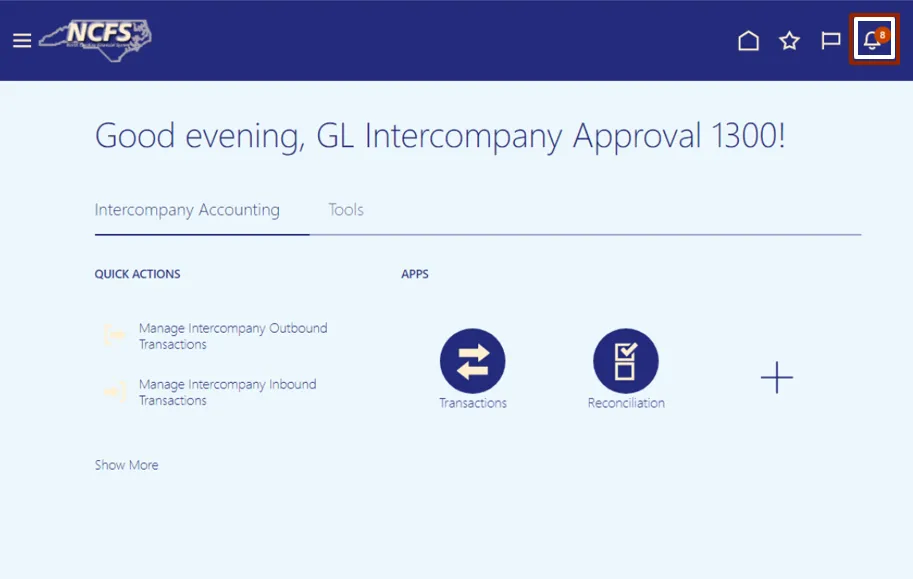
Step 1. Log in to the NCFS portal with your credentials to access the system.
Step 2. On the Home page, select the Bell Notification icon on the top right navigation pane.
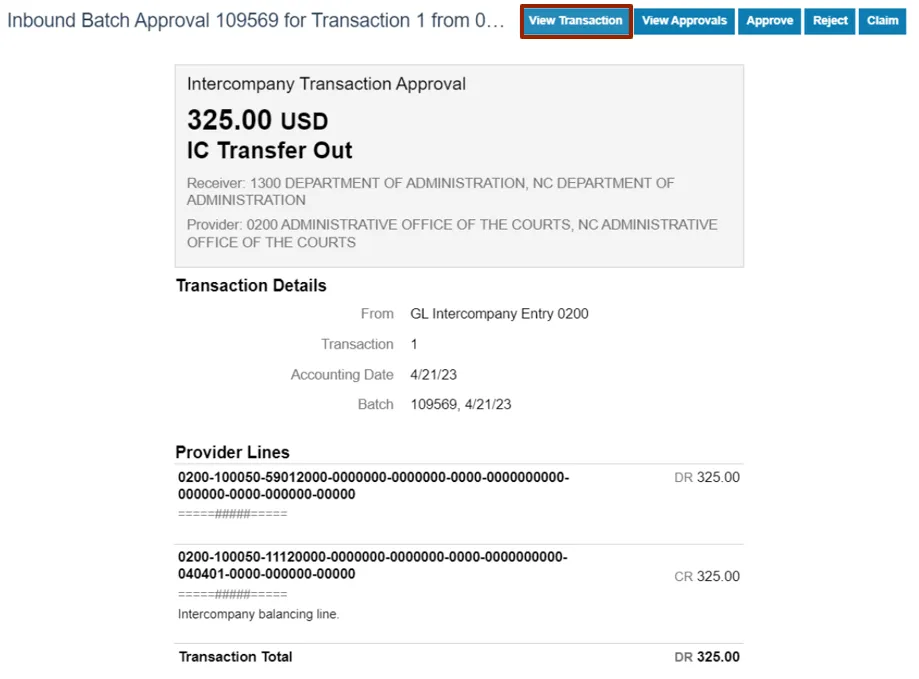
Step 3. The Notifications pop-up appears. Click the required Notification link.
In this example, we choose: Inbound Batch Approval 109569 for Transaction 1 from 0200 ADMINISTRATIVE OFFICE OF THE COURTS (325.00 USD).
Note: Click the Show All link to view all the notifications.

Step 4. The Inbound batch Approval 109569 for Transaction page opens. Click the View Transaction button.
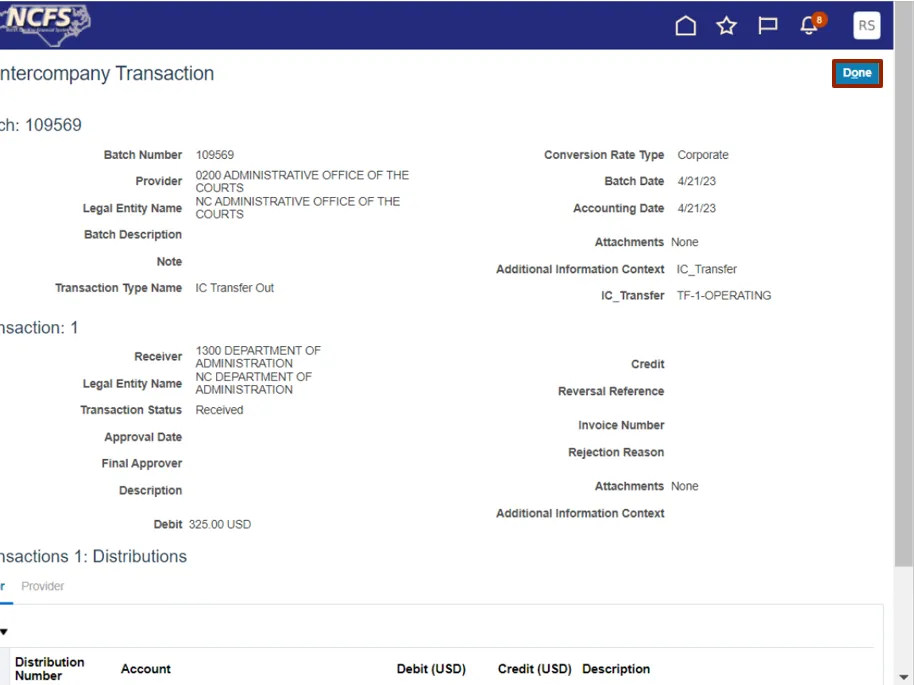
Step 5. View Intercompany Transaction page opens. Validate the IC Transfer value.
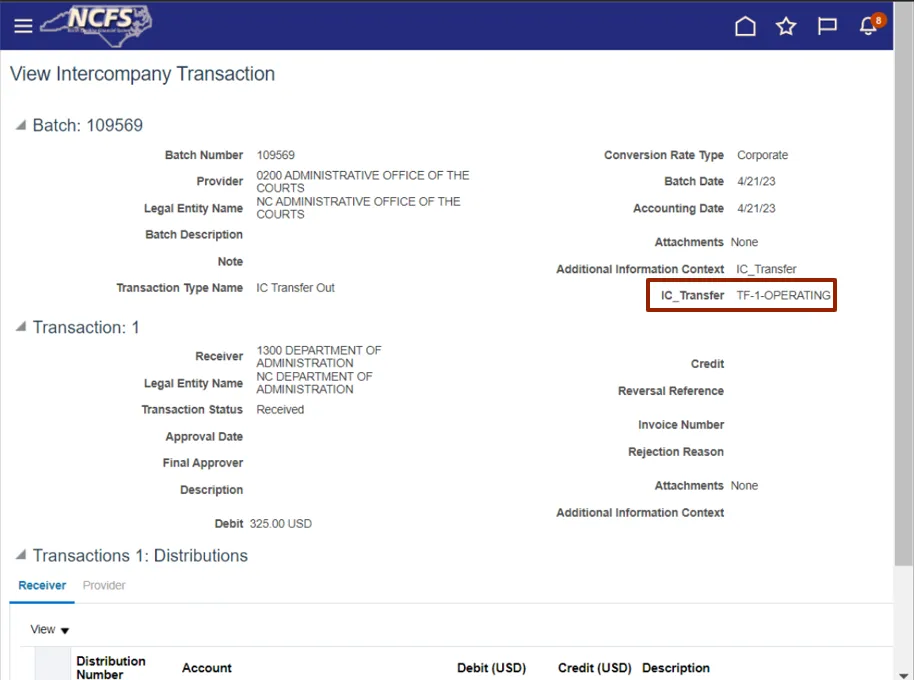
Step 6. On the same page, scroll down to review the Account and Amount details.
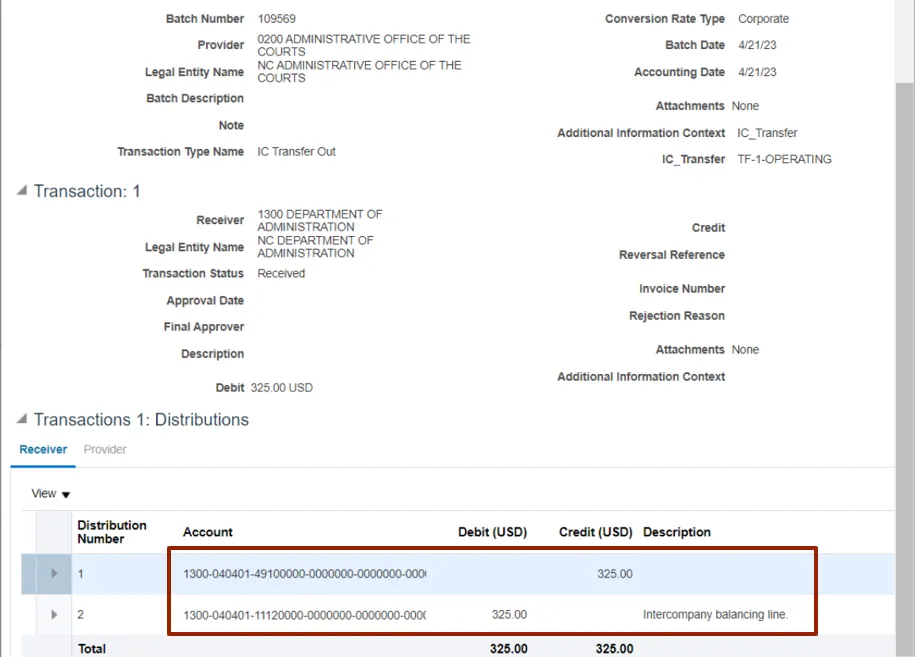
Step 7. Scroll back to the top of the page and click the Done button.
Step 8. Click the Approve or Reject button.
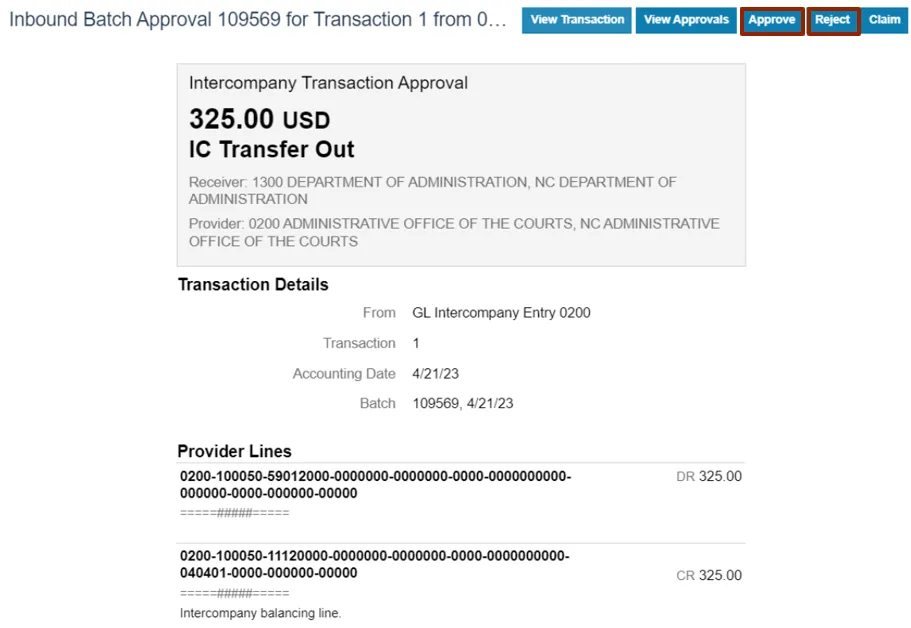
Please Note: This is an optional step and follows only when a Transaction is approved.
Step 9. Approve pop-up appears. Enter a Comment as to reason for approval.
In this example, we choose Test Approval for Training. User can also add attachments if required.
Step 10. Click the Submit button.

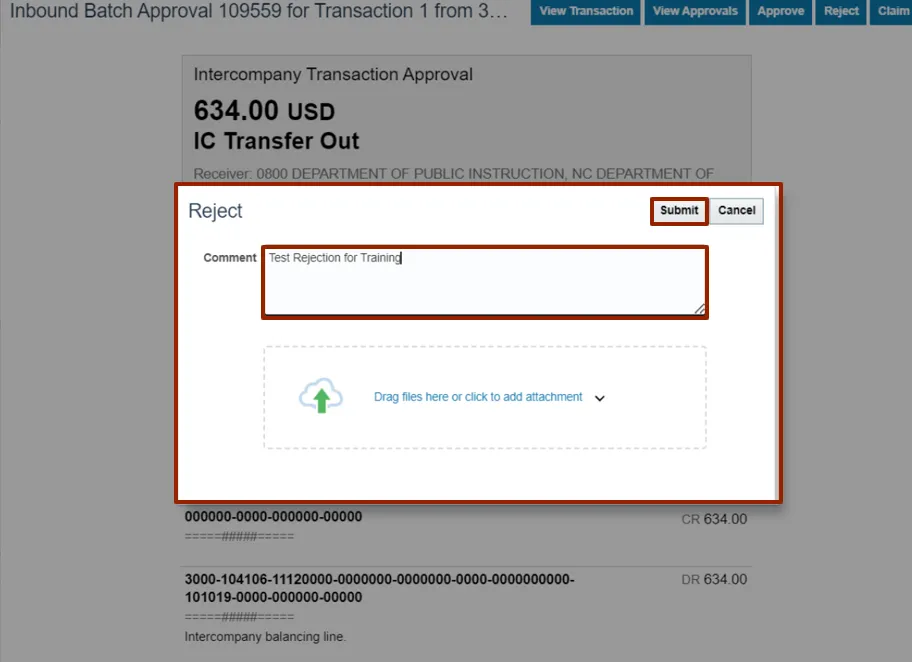
Please Note: This is an optional step and follows only when a Transaction is rejected.
Step 11. Reject pop-up appears. Enter a Comment as to why rejected.
In this example, we choose Test Rejection for Training. User can also add attachments if required.
Step 12. Click the Submit button.
Wrap-Up
Receiver Agency can approve or reject a transfer request by following the steps explained above of the approval process in NCFS.
Additional Resources
- Web Based Trainings (WBT)