Purpose
The purpose of this Quick Reference Guide (QRG) is to provide a step-by-step explanation of how to Receive and Complete a Transfer Manually in the North Carolina Financial System (NCFS).
Introduction and Overview
This QRG covers the steps to receive and complete a transfer manually in NCFS. Prior to this, the Provider creates a transaction and submits it to the Receiving Agency for completion.
Receive and Complete a Transfer (Receiver Agency)
To receive and complete a transfer (manually) in NCFS, please follow the steps below. There are 14 steps to complete this process.
Step 1. Log in to the NCFS portal with your credentials to access the system (Receiver - Agency user with Entry Role).
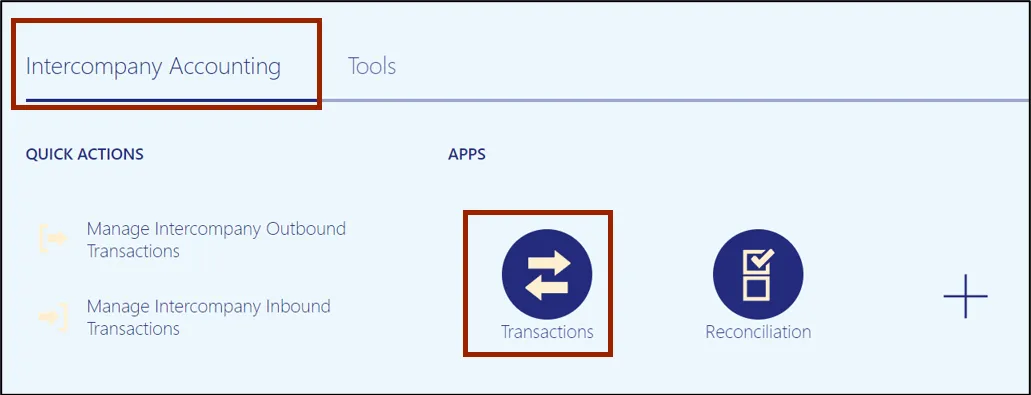
Step 2. On the Home page, click the Intercompany Accounting tab and click the Transactions app.
Note: Optionally, first use the Bell icon to identify a specific Batch Number.
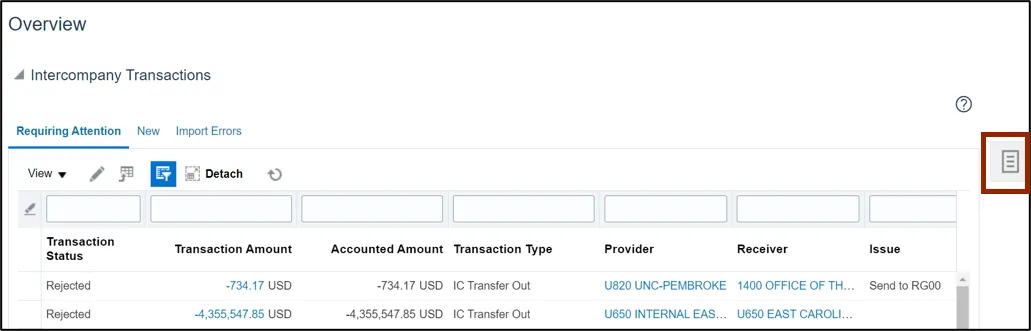
Step 3. On the Overview page, click the Tasks icon.
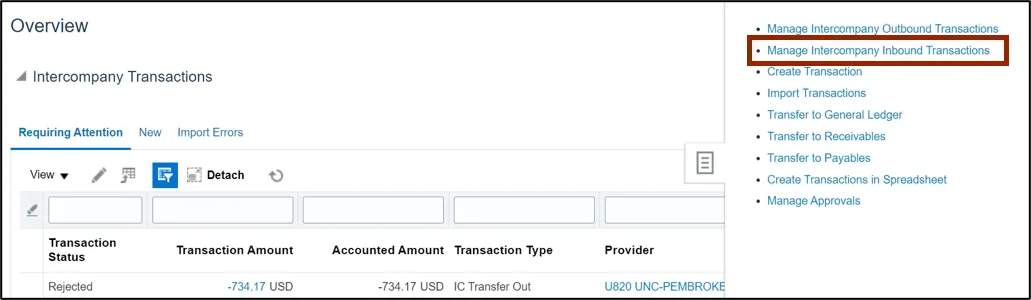
Step 4. On the Tasks pane, click Manage Intercompany Inbound Transactions.
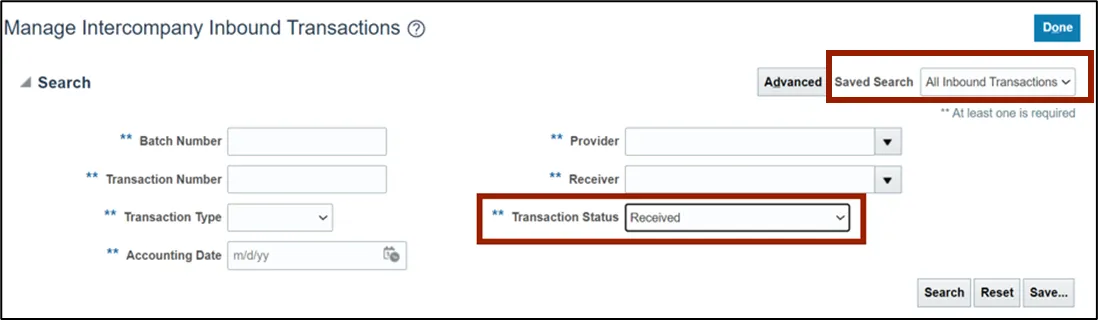
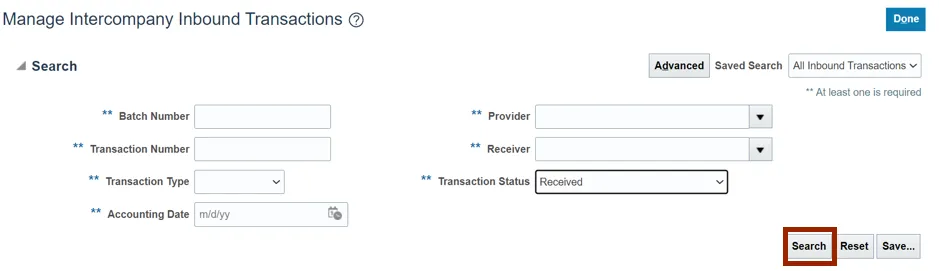
Step 5. The Manage Intercompany Inbound Transactions page opens. Under the Search section, enter your search criteria.
In this example we select Received from the Transaction Status drop-down choice list.
Note: Your most recently used Saved Search name will default. If needed, select a different value from the drop-down list before you run your search.
Step 6. Click the Search button.
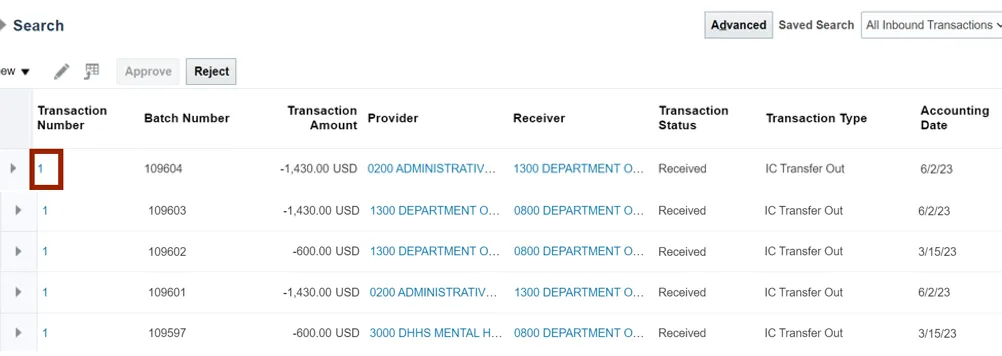
Step 7. A list of transactions is displayed. Click the Transaction Number link.
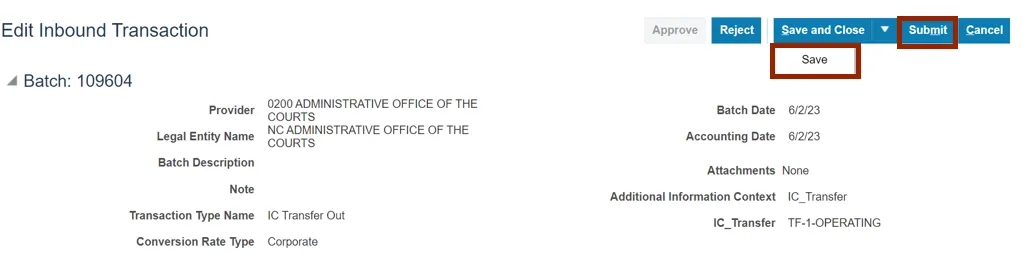
In this example, we choose the transaction associated with Batch Number 109604.
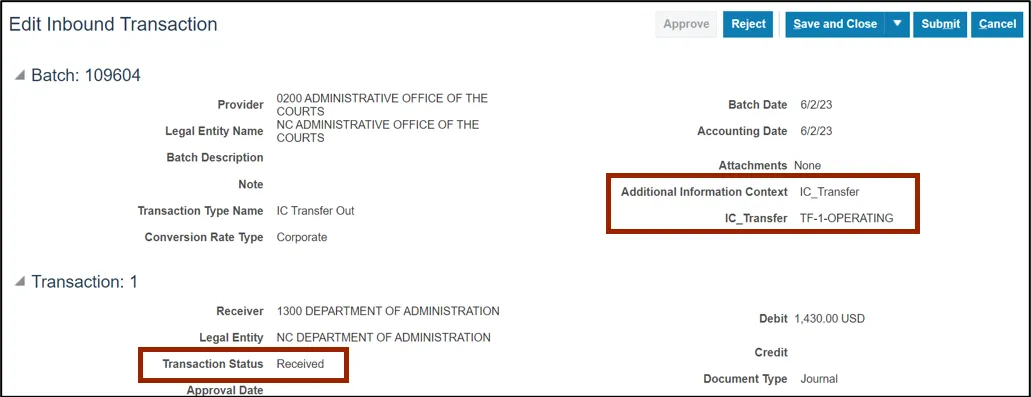
Step 8. On the Edit Inbound Transaction page, validate the transaction details and verify the Transaction Status field displays as Received and the correct IC_Transfer value has been chosen.
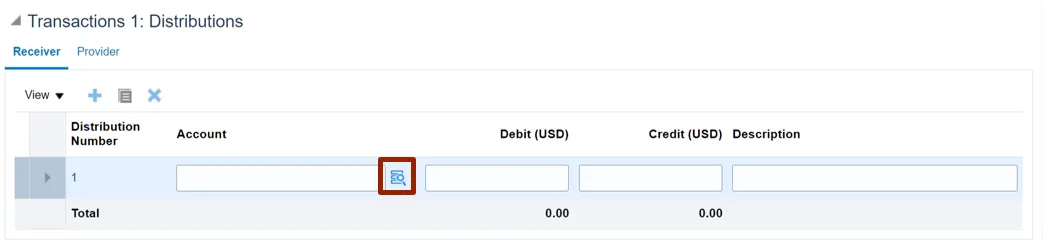
Step 9. Scroll down to the Transaction 1: Distributions section. Within the Receiver tab, click the Create icon to add receiver details.

Step 10. To the right of the Account field, click the Account icon.
Note: Field separator may need to be dragged to the right to see the icon.
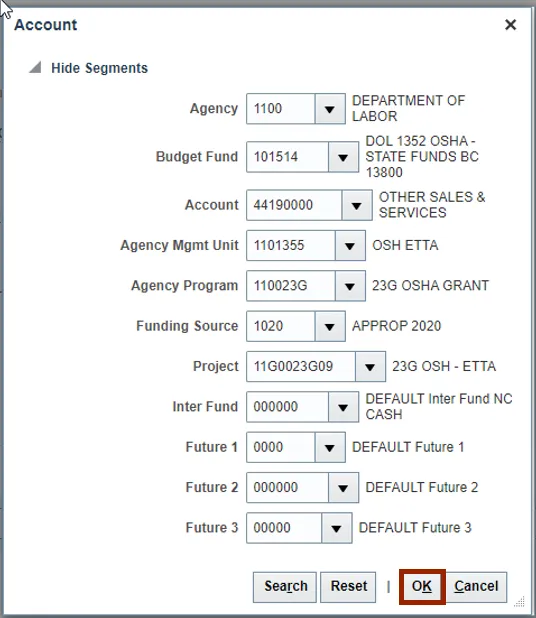
Step 11. The Account pop-up appears. Using the drop-down lists, select a value for the first three COA segment fields. Next, if desired, select non-zero values for one or more of the remaining COA segments then click the OK button.
Step 12. Enter the Credit (USD) and Description fields as per the existing batch transaction amount.
In this example, we choose 1,430.00 and Financial Conference Fees respectively.
Note: You may add multiple distribution lines to receive incoming funds.

Step 13. On the top right corner on the Edit Inbound Transaction page, click the Save button from the Save and Close drop-down choice list and then click the Submit button.
Note: The transfer transaction is now routed for approval to OSC.
Step 14. A pop-up displays. Click the OK button.
Note: You are now redirected to the Manage Intercompany Inbound Transactions page.

Wrap-Up
Manually receive and complete a transfer using the steps above.
Additional Resources
- Virtual Instructor-Led Training (vILT)