Purpose
The purpose of this Quick Reference Guide (QRG) is to provide a step-by-step explanation of how to Resolve or Delete Import Data in the North Carolina Financial System (NCFS).
Introduction and Overview
This QRG covers the processes of Resolving Import Data and Deleting Import Data in NCFS. It shows the steps to correct imported data via an Excel sheet. Resolving Import Data can be performed by users assigned the ‘GL Journal Entry’ security role, while Deleting Import Data can be performed by users assigned the ‘GL Journal FBDI’ security role.
Resolve Journal Import Errors and Reimport Journals
To resolve journal import errors and reimport journals, please follow the steps below. There are 12 steps to complete this process.
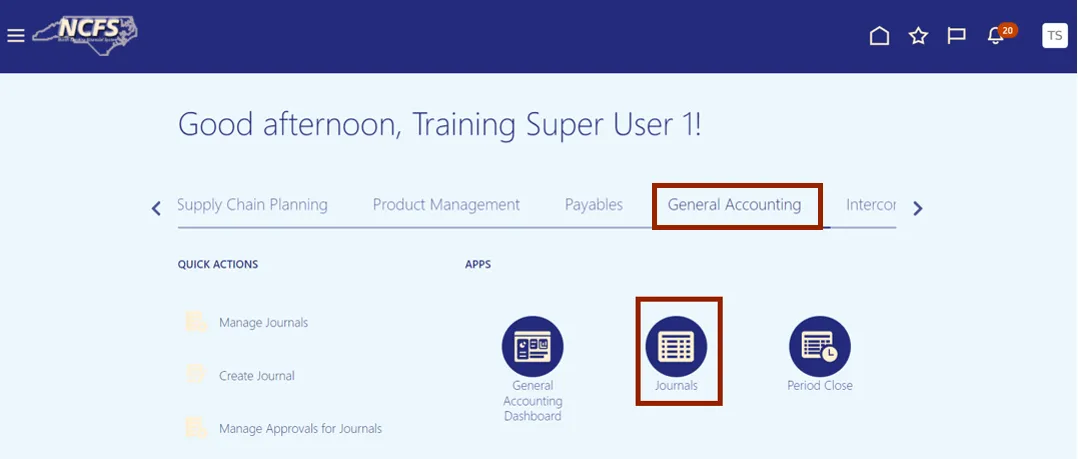
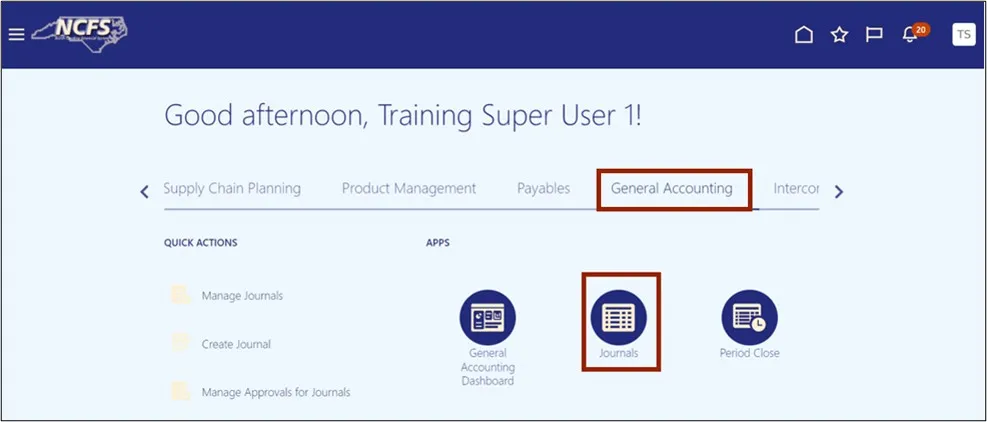
Step 1. Log in to the NCFS portal with your credentials to access the system.
Step 2. On the Home page, click the General Accounting tab and select the Journals app.
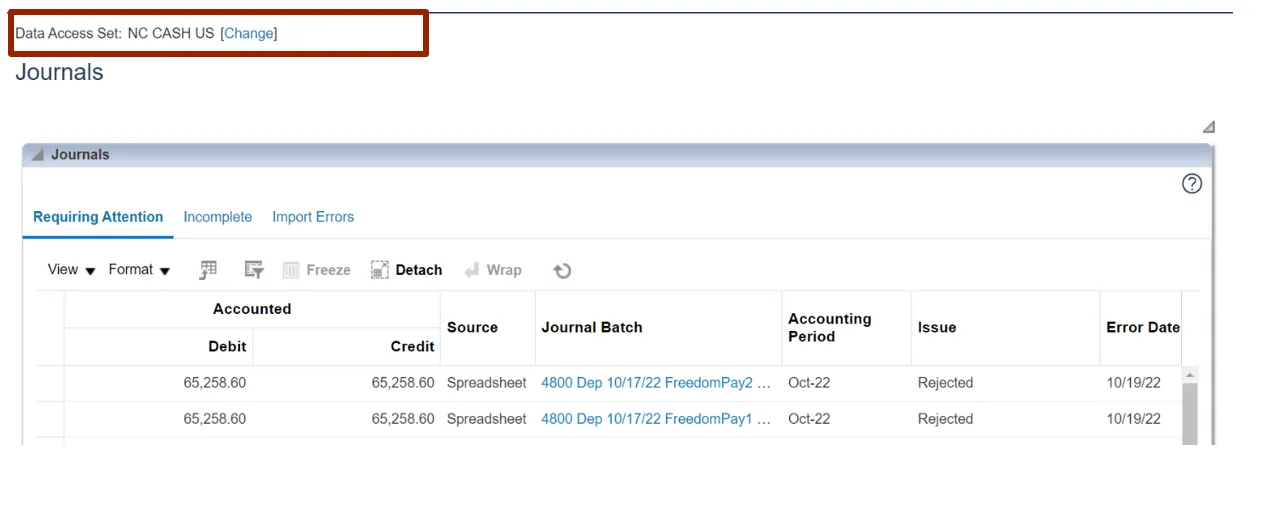
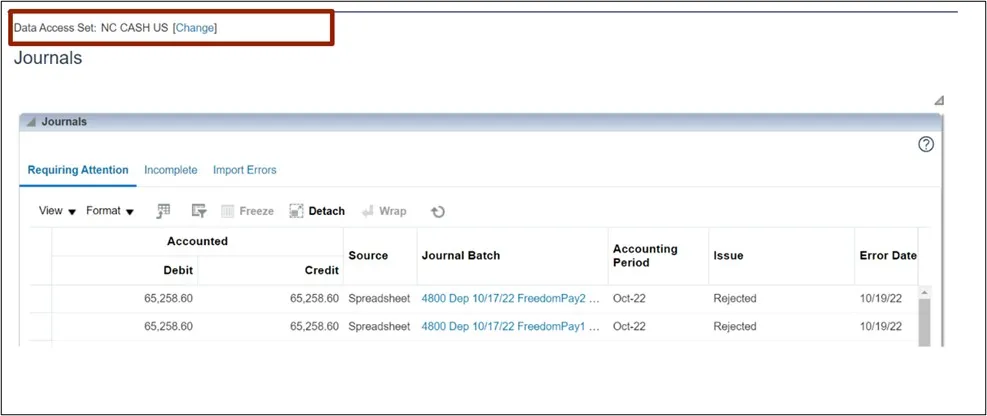
Step 3. Validate the Data Access Set. If the data access set is not already selected, click the Change link, and select the Data Access Set.
In this example, choose NC CASH US.
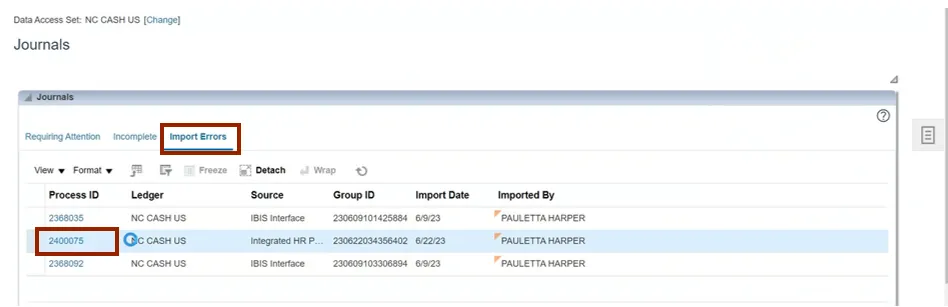
Step 4. There are 2 methods to Import/ Correct errors.
Method 1 - On the Journals landing page, click the Import Errors tab and highlight the Process ID link.
Step 5. Or Method 2- On the Journals landing page, click the Tasks icon. Under Journal Import, click Correct Import Errors.

Step 6. Click the Open button to open the downloaded Excel file.

Step 7. Open the Excel file and click the Enable Editing button.
Note: Log in to Oracle again, if the Enable Editing button doesn’t appear.

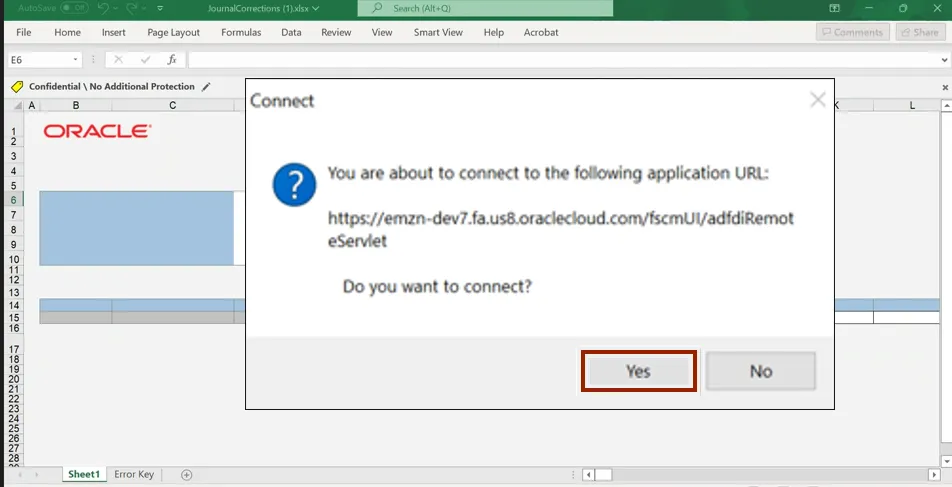
Step 8. The Connect pop-up appears. Click the Yes button to successfully connect to the server.
Note: In the NCFS portal Login pop-up, enter your User ID and Password credentials and click the Sign In button.
Step 9. Under Correct Journal Import data, double click on the cell next to Ledger and *Source and select the required parameters and then click the Search icon.
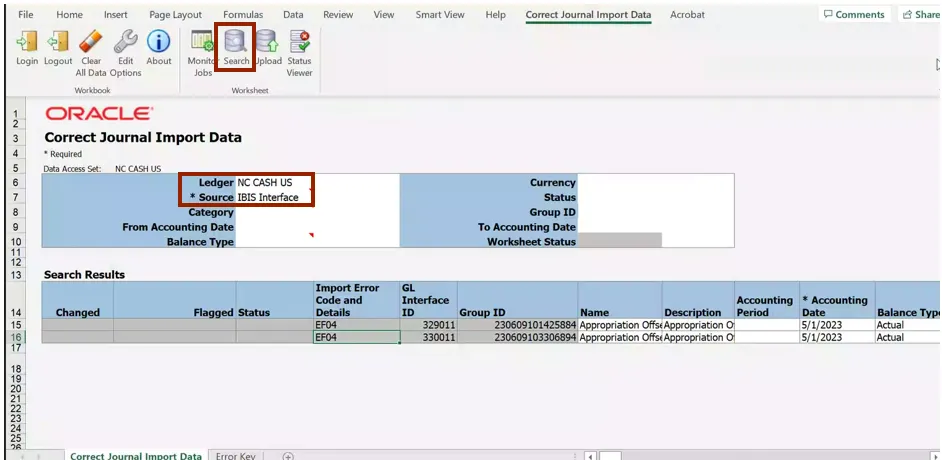
Step 10. Search Results are generated. Make the needed changes or corrections.
Note: If no Search Results are generated, you may have selected a Source for which there are no existing journal errors.
Step 11. Under the Correct Journals Import Data tab on the header, click the Upload icon.
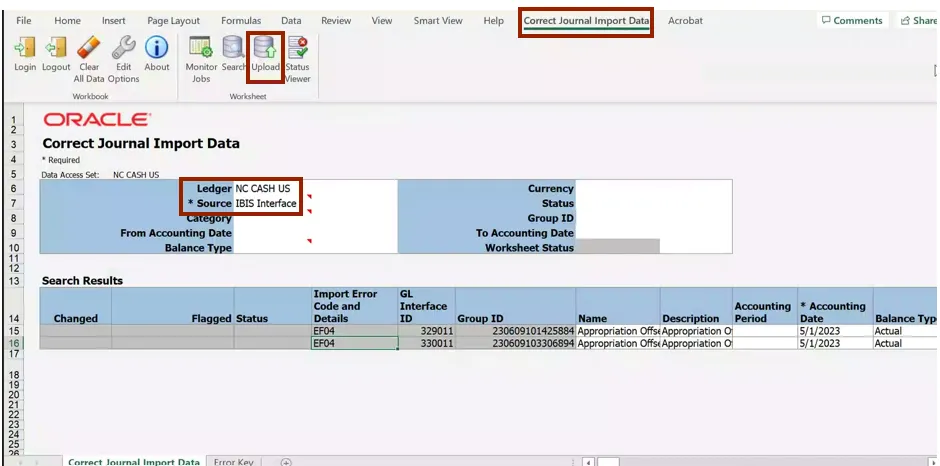
Step 12. The Submission Statistics pop-up appears. Under Submission Option, select the appropriate option to submit the Journal.
In this example, choose Submit Journal Import. Click the Submit button.

Delete Journal Interface Errors
To delete journal interface errors, please follow the steps below. There are 8 steps to complete this process.
Step 1. Log in to the NCFS portal with your credentials to access the system.
Step 2. On the Home page, click the General Accounting tab and select the Journals app.
Step 3. Validate the Data Access Set. If the desired data access set is not already selected, click the Change link, and select the desired Data Access Set.
In this example, choose NC CASH US.
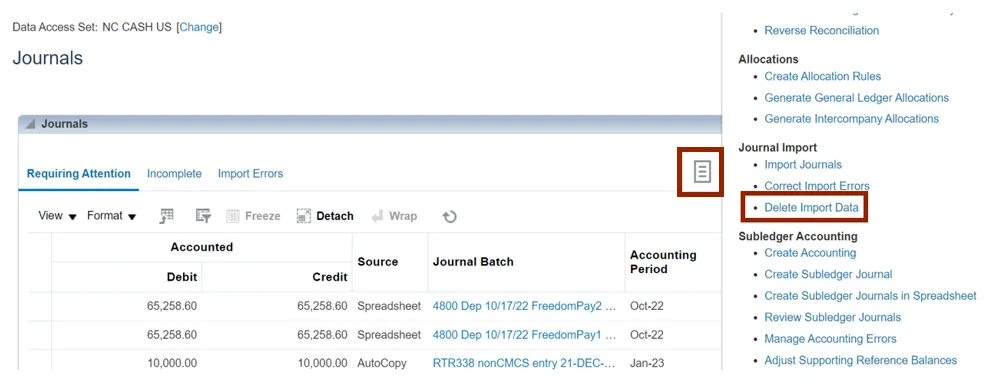
Step 4. On the Journals page, click the Tasks icon. Under the Journal Import section, click Delete Import Data.
Step 5. On the Basic Options section, select the mandatory parameter values from the drop down choice lists and then click Submit.
In this example, choose:
- NC CASH US for *Data Access Set
- Agency Journal Interface for *Source
- 2221418 for *Process ID
- NC CASH US for *Ledger

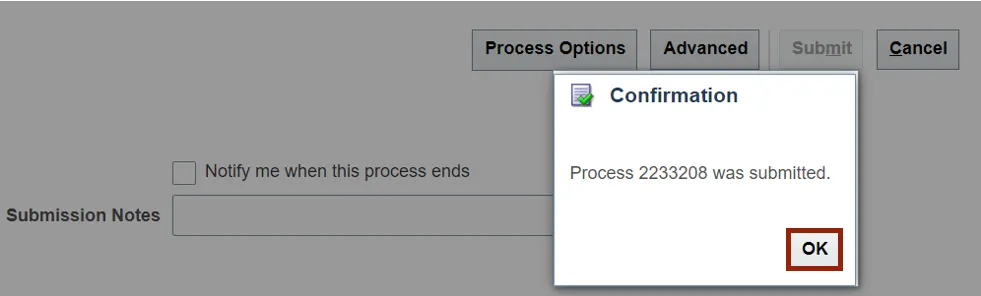
Step 6. A Confirmation pop-up appears. Click the OK button.
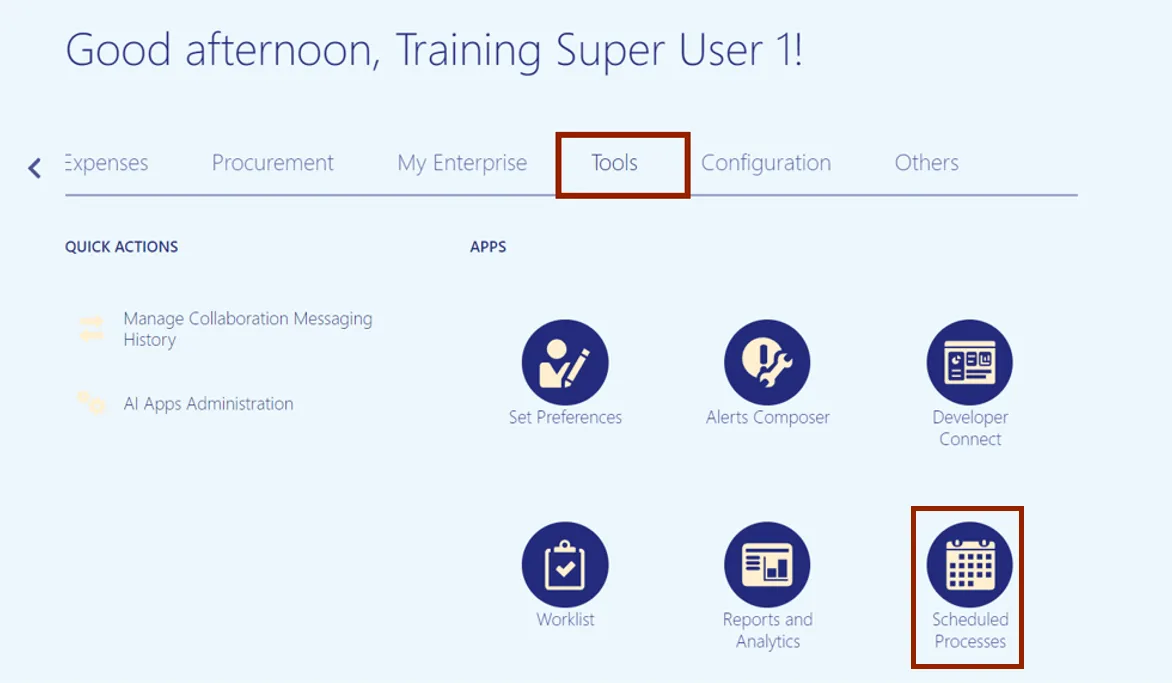
Step 7. On the Home page, click the Tools tab and select the Scheduled Processes app.
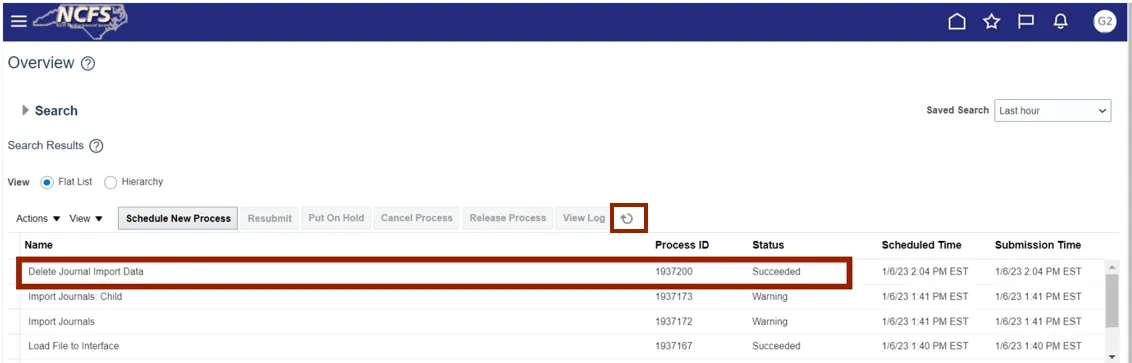
Step 8. On the Overview page, under the Search Results section, click the Refresh icon. The status is available as Succeeded for Delete Journal Import Data option.
Note: If Delete Journal Import Data does not appear in the list of displayed process Names, you may need to search for it using the Search section of page which is located in the top portion of the page.
Wrap-Up
Users can Resolve journal import errors and Reimport journals or Delete journal interface errors by following the steps shown above.
Additional Resources
- Virtual Instructor-Led Training (vILT)
• GL100c: Journal Entry