Purpose
The purpose of this Quick Reference Guide (QRG) is to provide step-by-step instructions on establishing a connection using Smart View for NC Financial System (NCFS) reporting.
Note: This QRG should only be used to reconnect a saved spreadsheet to the data source. It is not necessary for initial set-up nor to pull reports from NCFS.
Introduction and Overview
Smart View is an Excel plug-in that provides the capability to analyze financial reports housed the Financial Reporting Studio (FRS) folder in NCFS using an Excel spreadsheet. Smart View has a variety of capabilities available to assist users in making the analysis as efficient as possible. In Smart View, users can establish either a shared or private connection. Shared connections are used in cases where users need to access data from NCFS. Shared connections are used in a majority of cases.
Key Terms
| Key Term | Description |
|---|---|
| Smart View | Smart View is a Microsoft Office plug-in that enables users to view, import, analyze, and share data from a data source. |
| Shared Connection | Shared Connections allows users to connect Excel to NCFS to perform an analysis on data. |
| Private Connection | Private Connections are used mainly to access Smart View reports. Users can access a private connection to connect to a specific report and then make changes to the data, as needed. |
Information Needed to Complete This Process
- Database URL
Outputs of This Process
- Smart View is connected to the database
Establishing a Shared Connection
To establish a shared connection, follow the steps below. There are 8 steps to complete this process.
Step 1. Open Microsoft Excel and click the Smart View ribbon, then click Panel.

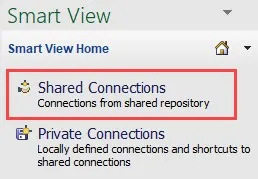
Step 2. From the panel on the right, click Shared Connections.
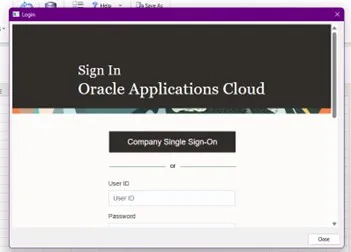
Step 3. Login by selecting the Company Single Sign-On, using your username and password.
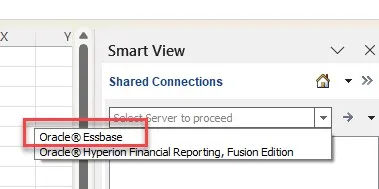
Step 4. In the text box, click the drop down next to the select server to proceed and choose Oracle® Essbase.
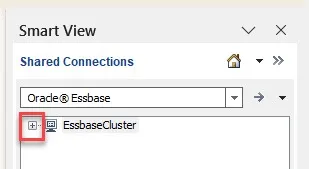
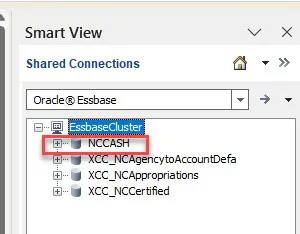
Step 5. Click the Plus sign that is in front of the ESSbaseCluster.
Step 6. Click the Plus sign that is in front of NCCASH.
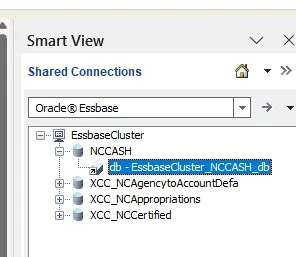
Step 7. Double click db-EssbaseCluster_NCCASH_db. Note: Selection may only say db/.
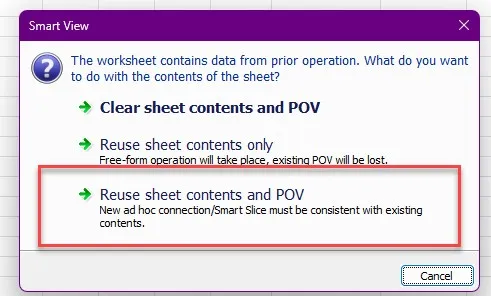
Step 8. Select Reuse sheet contents and POV.
Wrap Up
After the connection is established, users can then begin to run their analysis on the data.
Additional Resources
For more information on Journal Entries please review the following materials:
- Web Based Training (WBT)
- SV100: Overview of Smart View
- SV200: NCFS Smart View Capabilities – Options Feature
- SV201: NCFS Smart View Capabilities – Ad Hoc Analysis Feature
- SV202: NCFS Smart View Capabilities – Keep Only & Remove Only Feature
- SV203: NCFS Smart View Capabilities – Zoom In & Out Feature
- SV204: NCFS Smart View Capabilities – Dimension Members Feature
- SV205: NCFS Smart View Capabilities – Mathematical Calculations Feature
- Quick Reference Guides (QRGs)