Purpose
The purpose of this Quick Reference Guide (QRG) is to provide a step-by-step explanation of how to Manage Workflow-Related Configuration in the North Carolina Financial System (NCFS).
Introduction and Overview
This QRG covers the steps to add, delete, and update the conditions of Accounts Payable (AP) Invoice Approval Rules in NCFS.
Manage Workflow-Related Configuration
To Manage Workflow-Related Configuration in NCFS, please follow the steps below. There are 26 steps to complete this process.
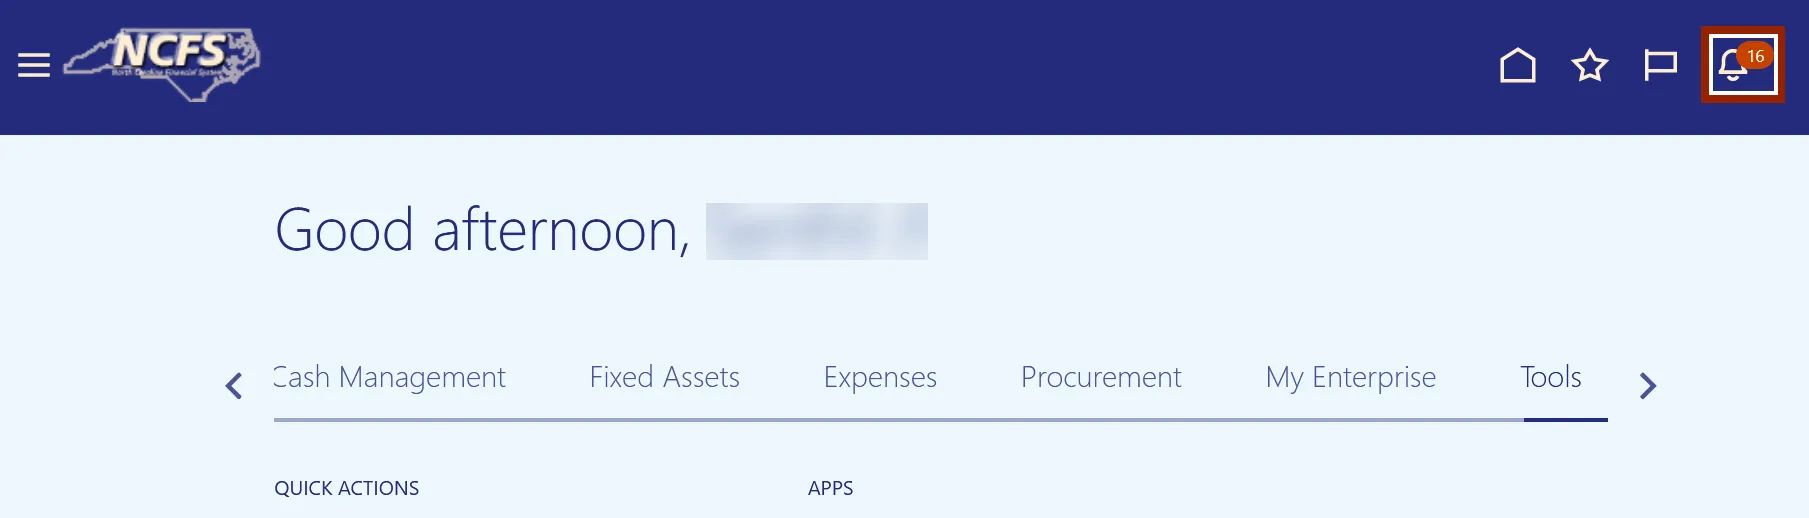
Step 1. Log in to the NCFS portal with your credentials to access the system.
Step 2. In the top right corner of Home page, click the Notifications icon.
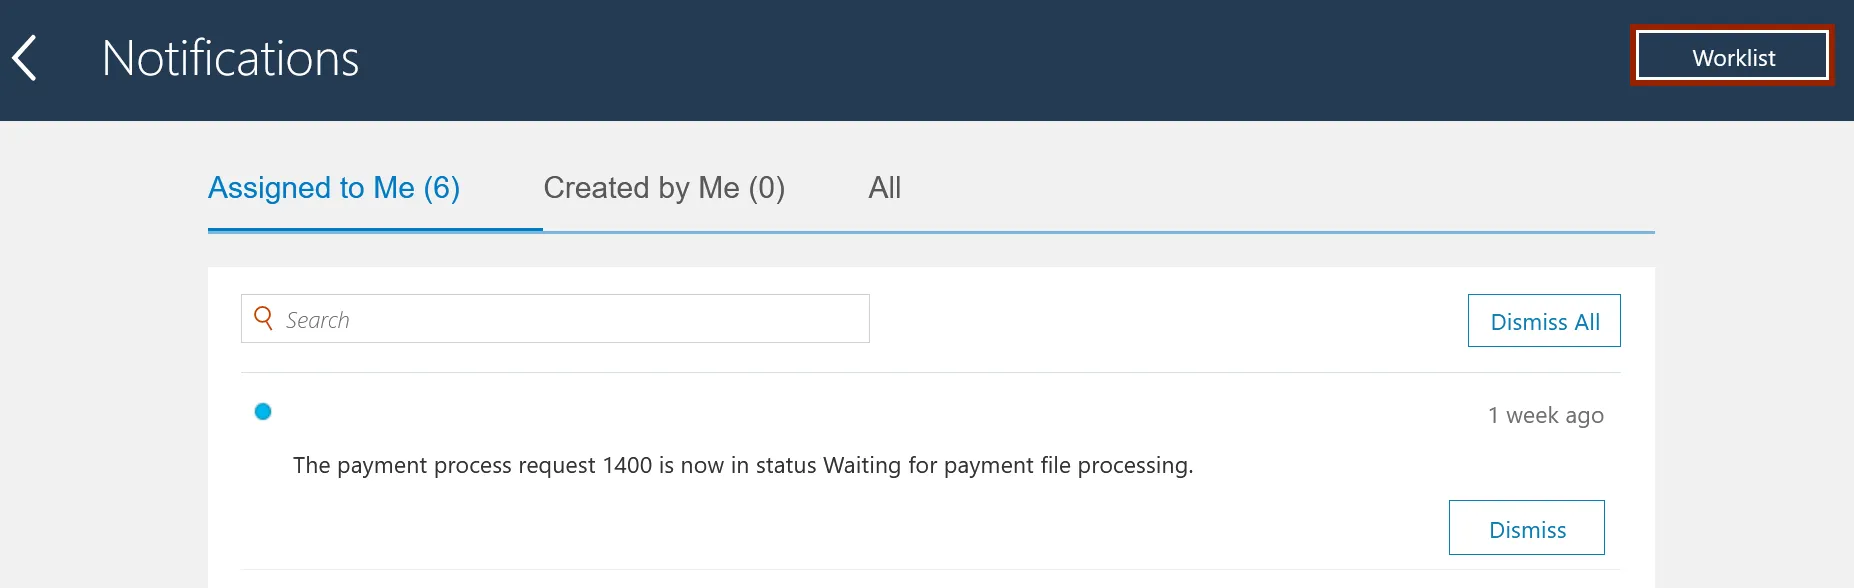
Step 3. On the Notifications page, Click the Worklist button.
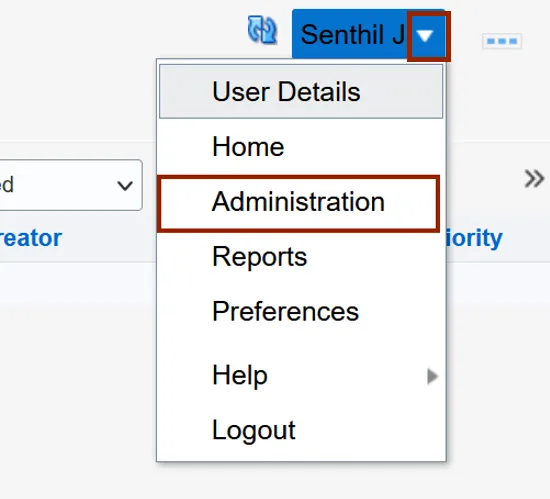
Step 4. In the top right corner of the BPM Worklist page, click the drop-down choice list icon and select Administration.
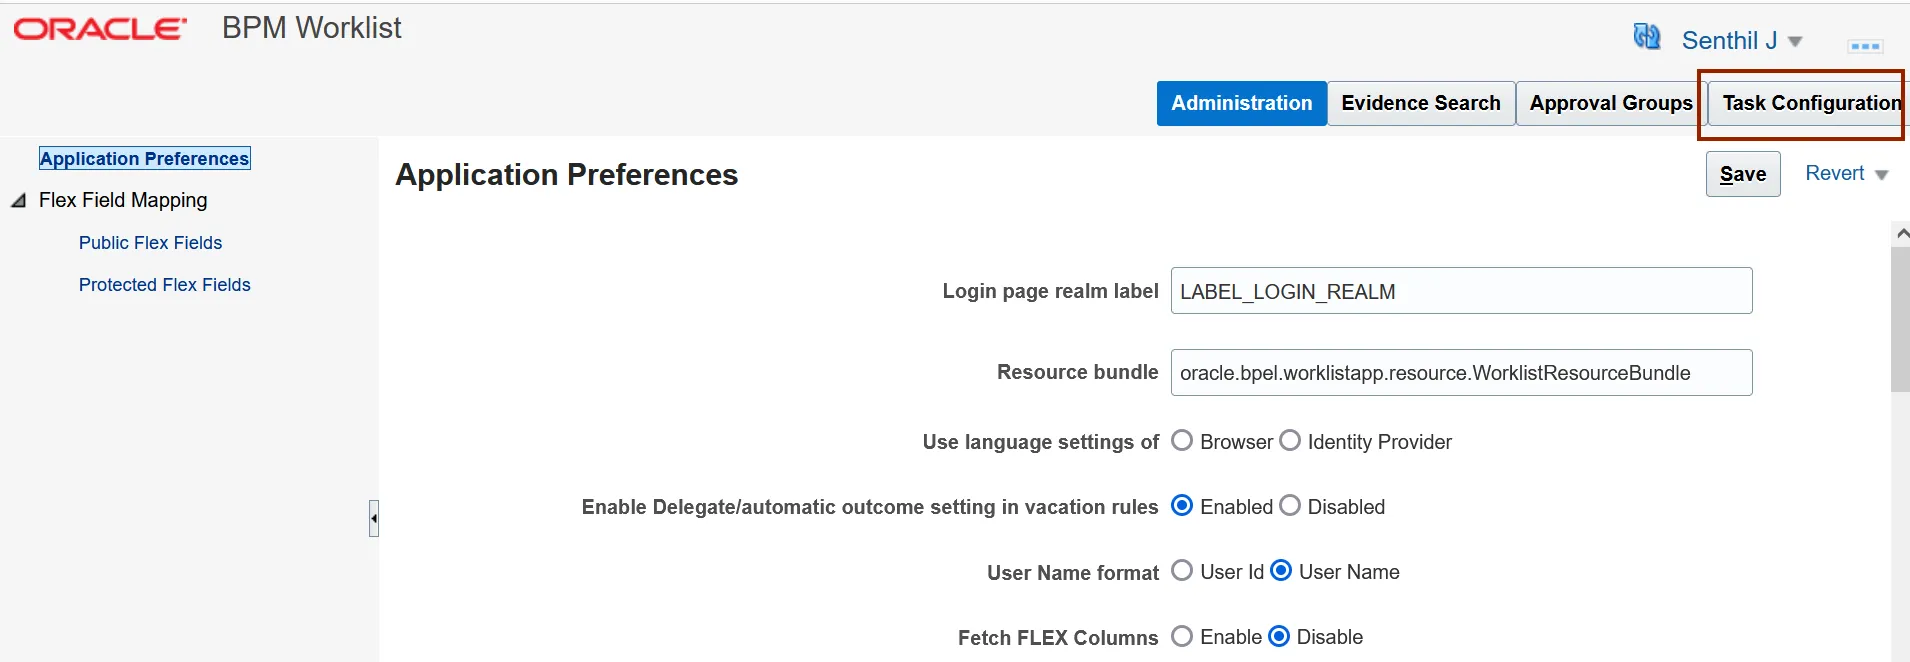
Step 5. In the top right corner of the BPM Worklist page, click the Task Configuration button.
Step 6. Enter the Search field and click the Search icon. In this example, we choose FinApInvoiceApproval.
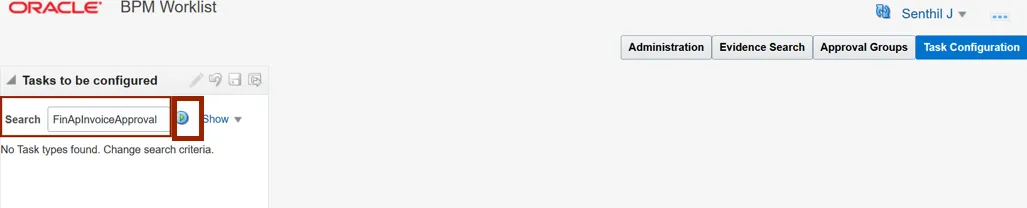
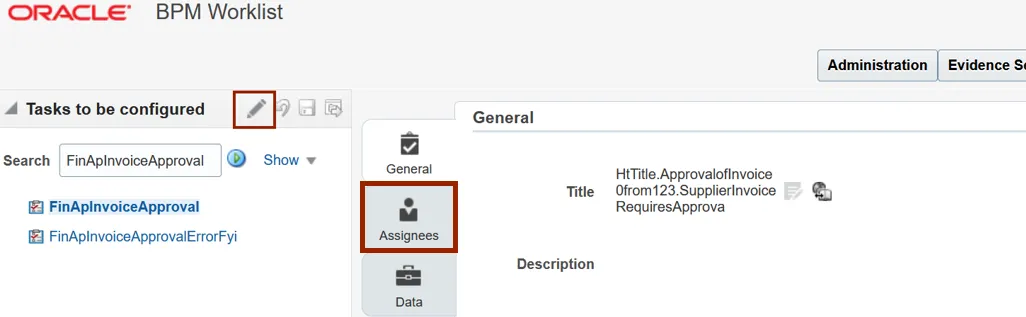
Step 7. Select the FinApInvoiceApproval Task.

Step 8. Click the Edit icon to update the Invoice Approval Configuration and click the Assignees tab to open the Invoice Business Rules.
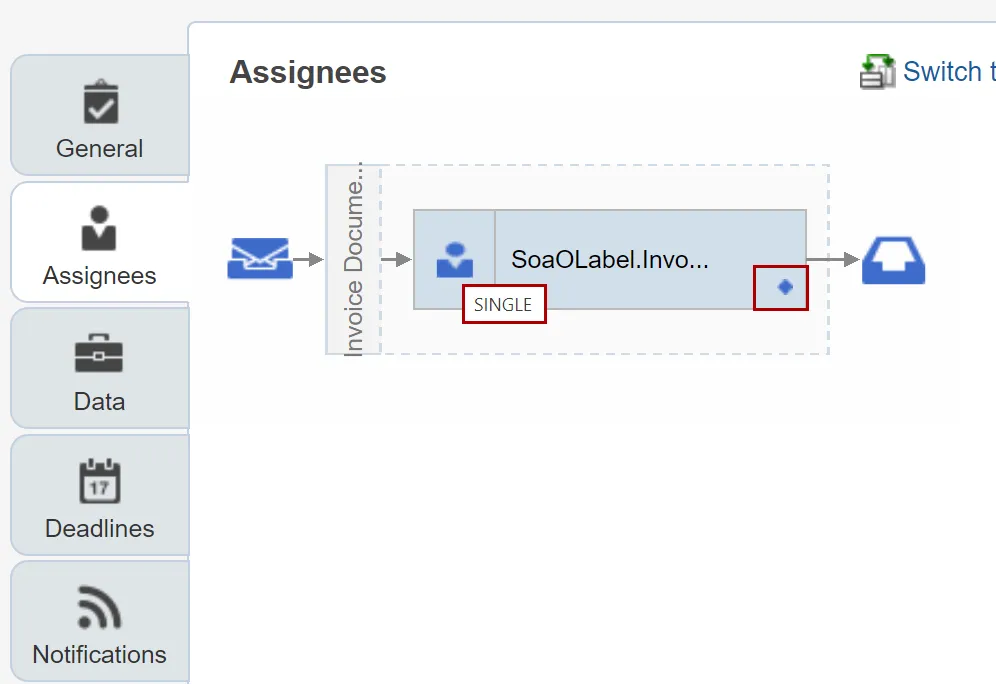
Step 9. Click the Single Participant button and click the Go to Rule icon.
Step 10. Select the Go to Rule option to view rules.
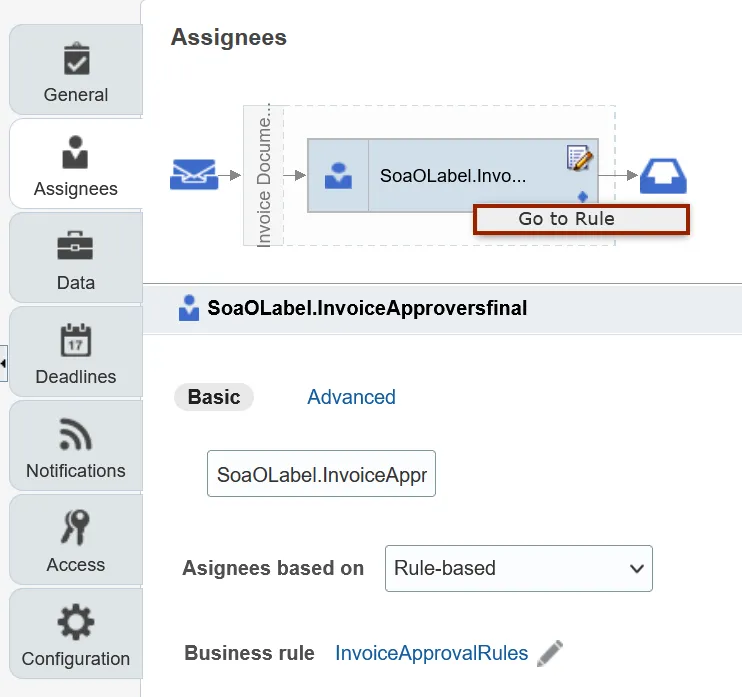
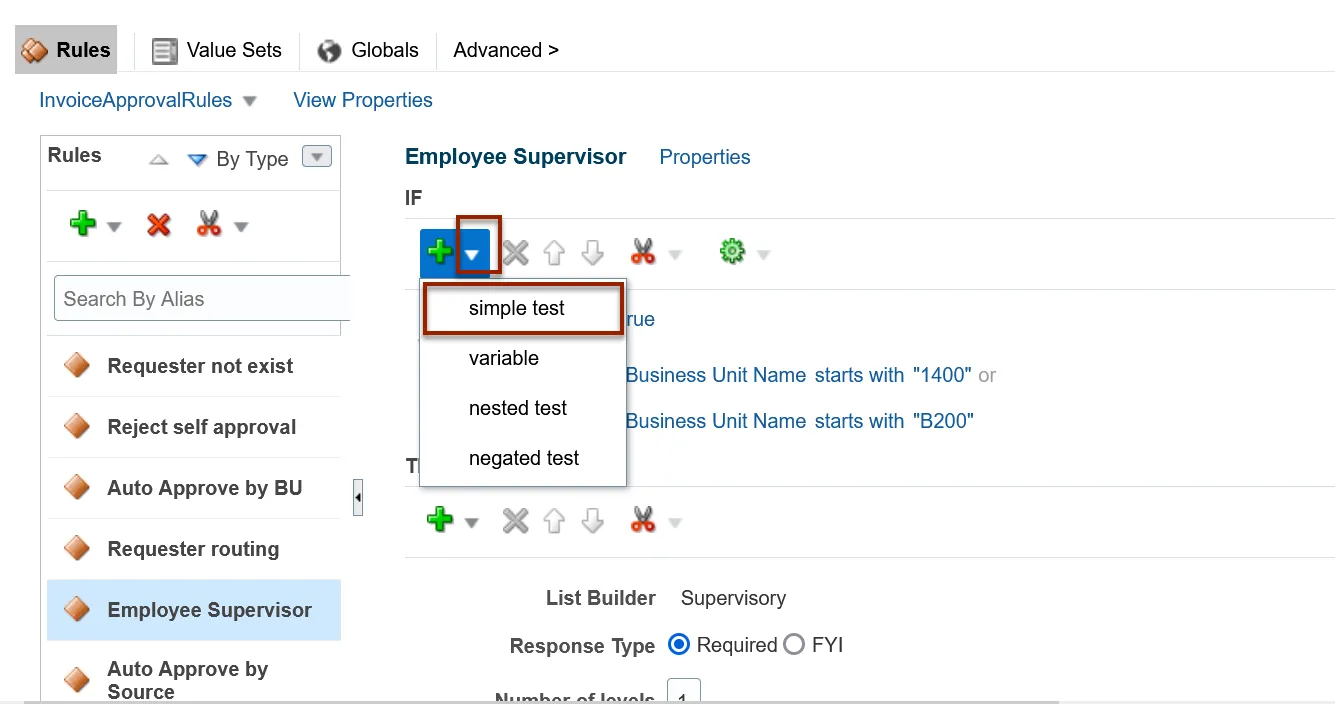
Step 11. Under the Rules section, select the Rule name you wish to update.
In this example, we choose Employee Supervisor.
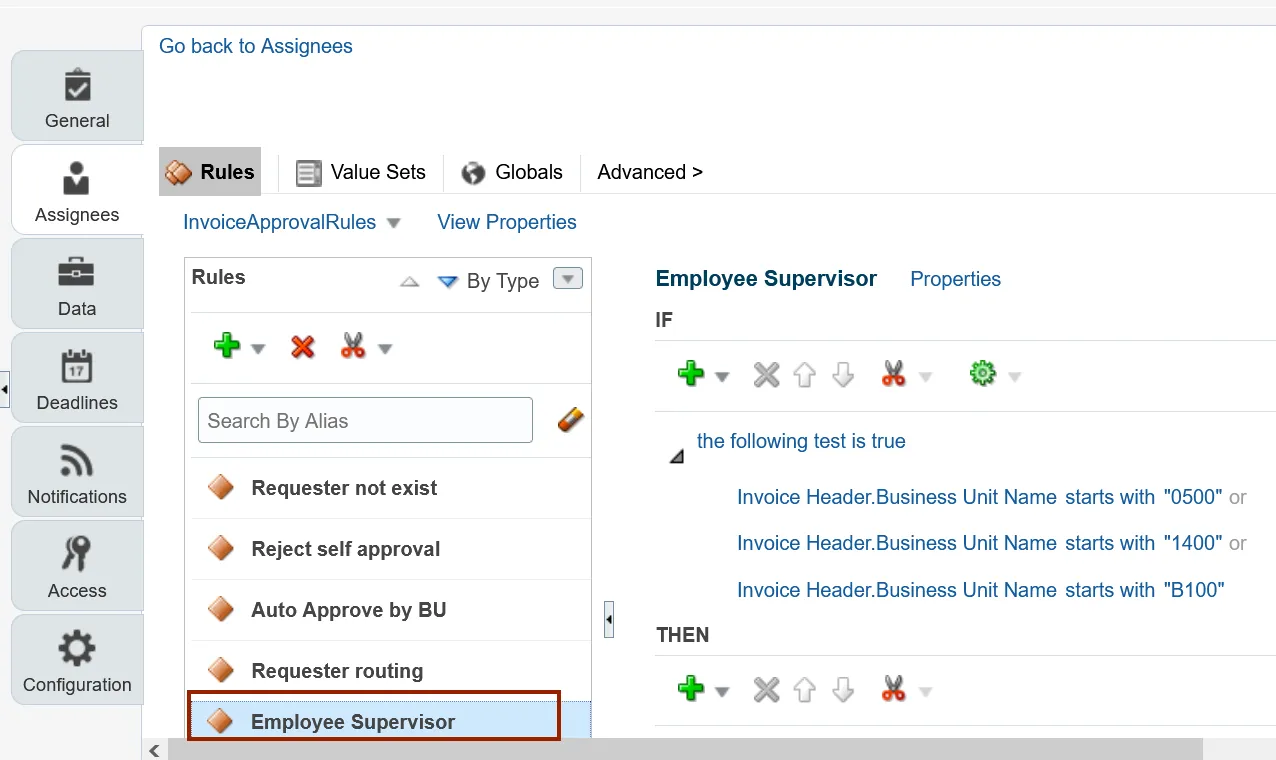
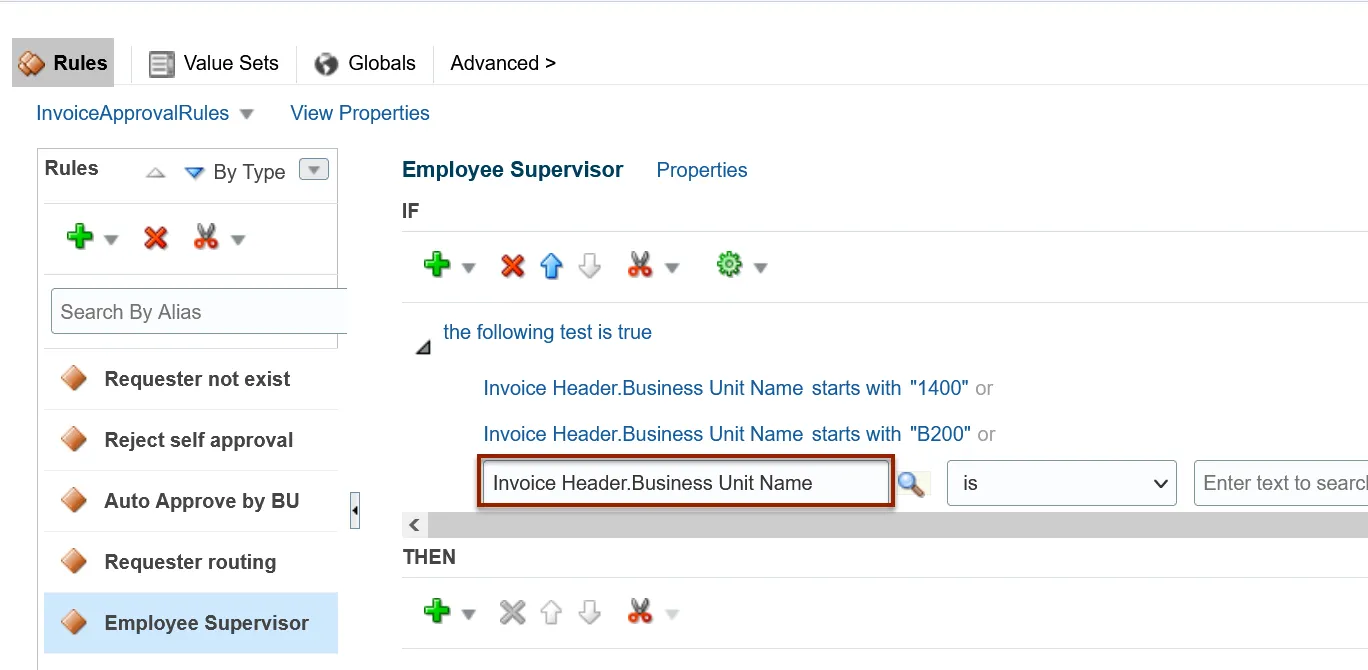
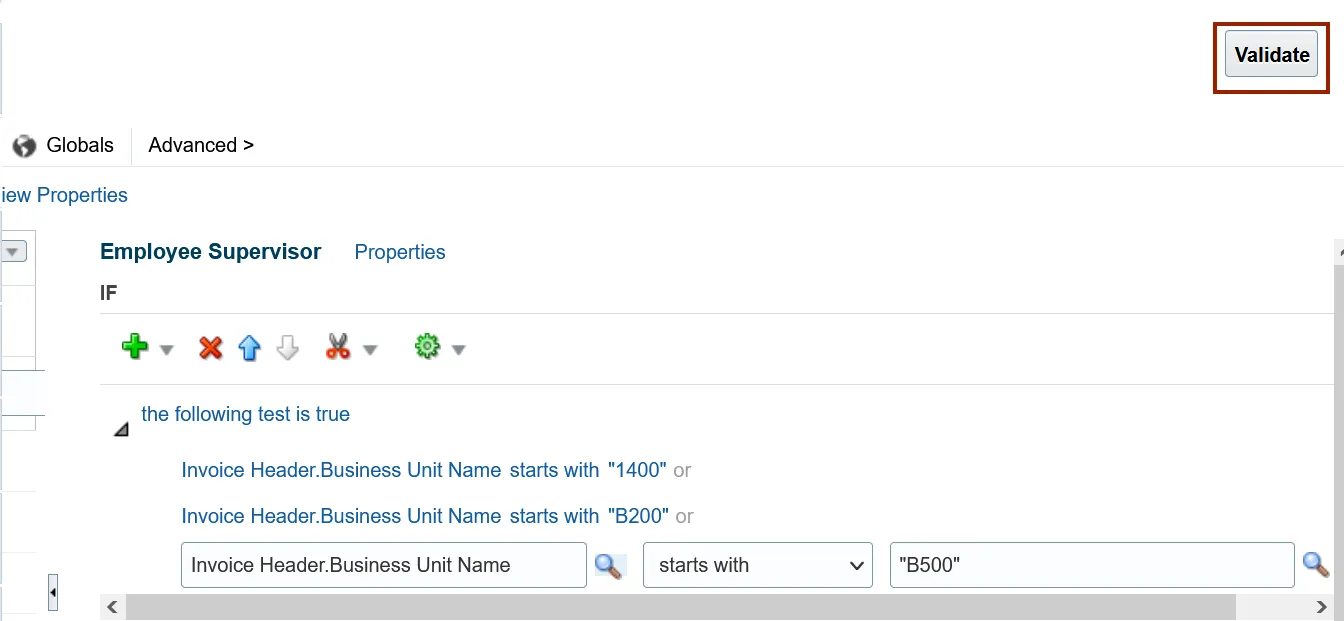
Step 12. Click on the individual condition to update.
In this example, we choose Invoice Header.Business Unit Name starts with “B100”.
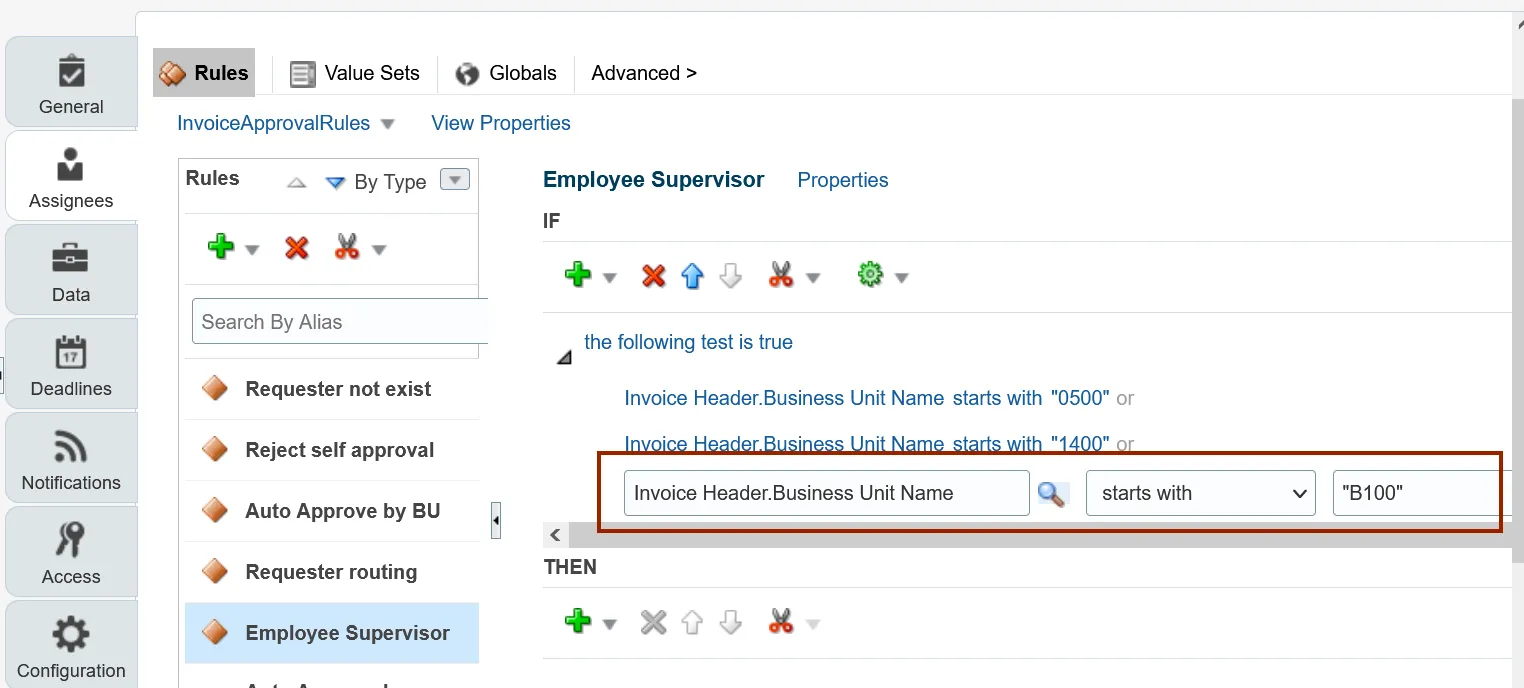
Step 13. To update the Business Unit code, Enter the appropriate Business Unit code in the Value field.
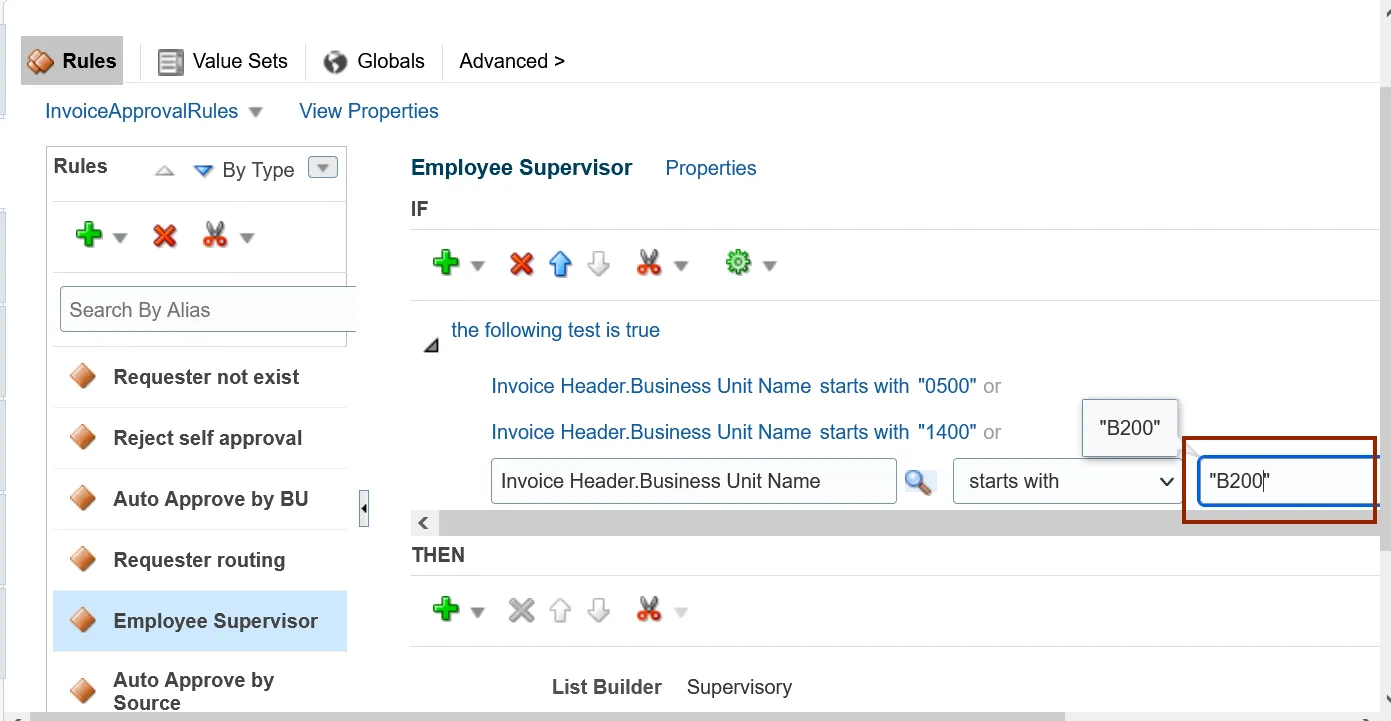
In this example, we choose “B200”.
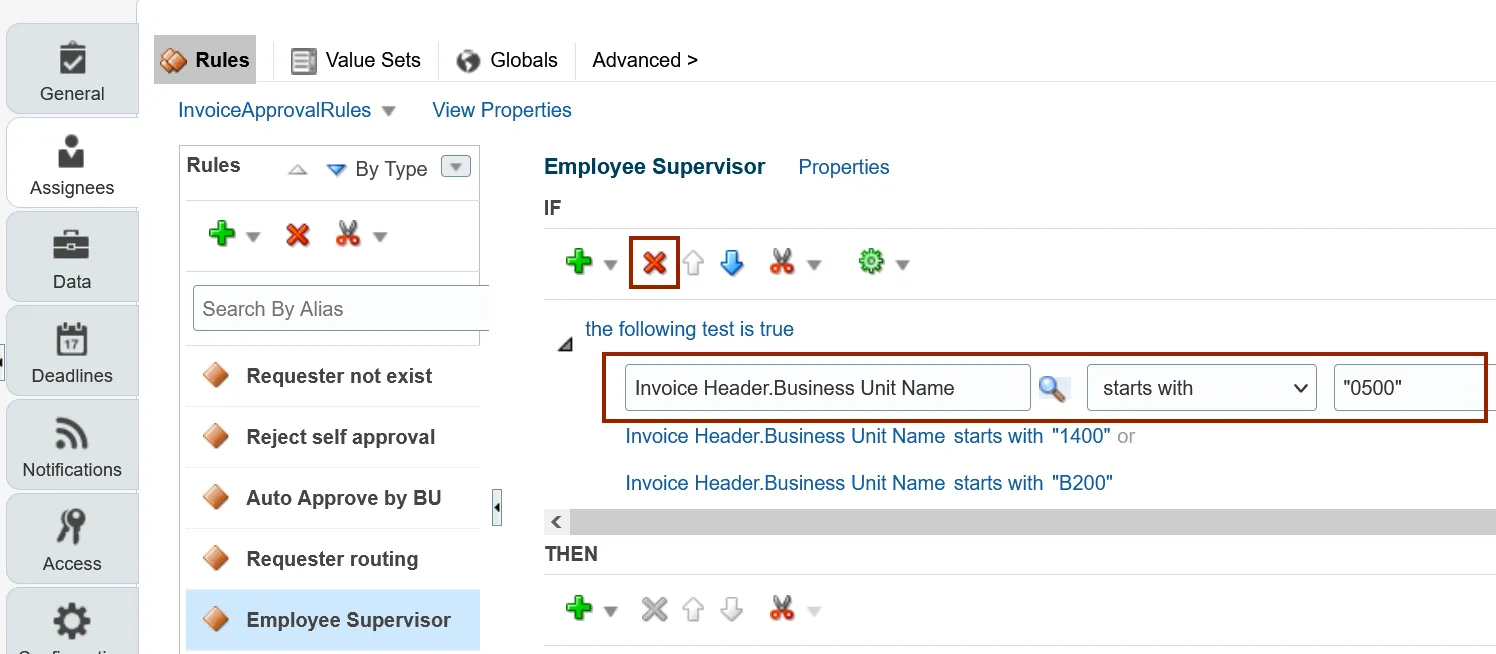
Step 14. Click the Delete icon to delete a condition.
In this example, we choose Invoice Header.Business Unit Name starts with “0500”.
Step 15. Select the simple test option from the drop-down choice list of Advanced Add or Modify Options to add a new condition in the existing approval rule.
Step 16. Enter the condition in the condition field.
In this example, choose “Invoice Header.Business Unit Name” for the condition.
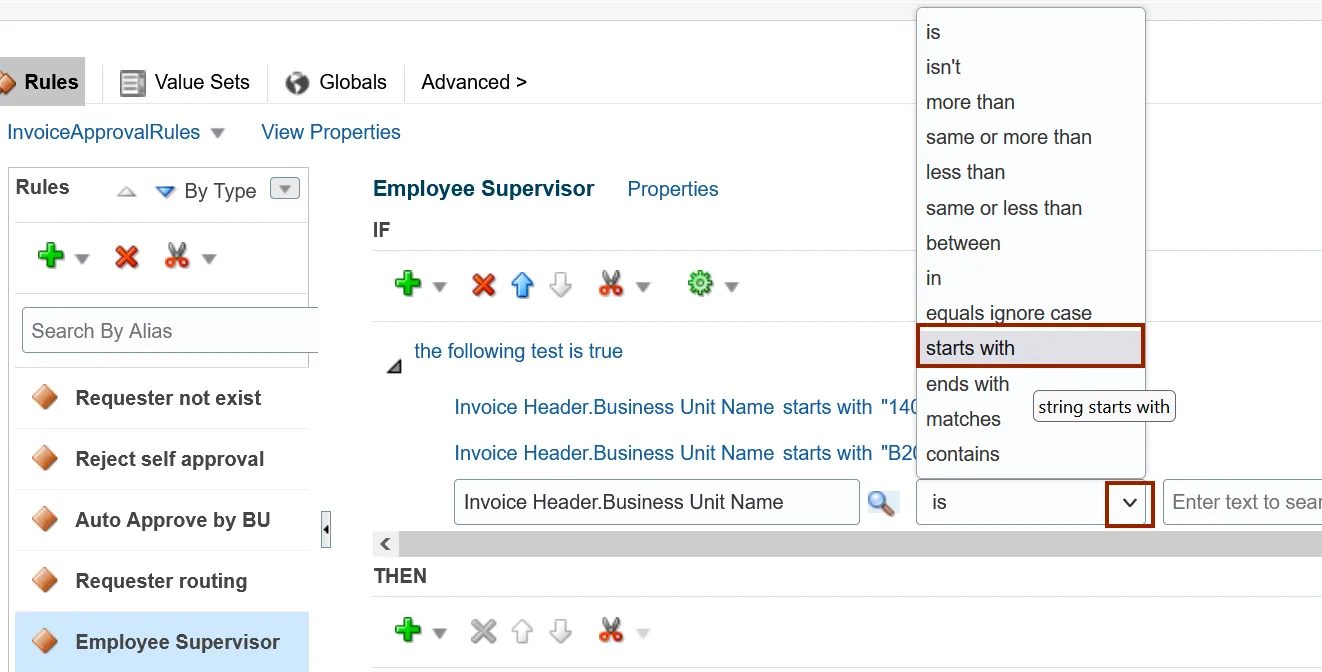
Step 17. Select the corresponding operator from the drop-down choice list.
In this example, we choose starts with for the operator.
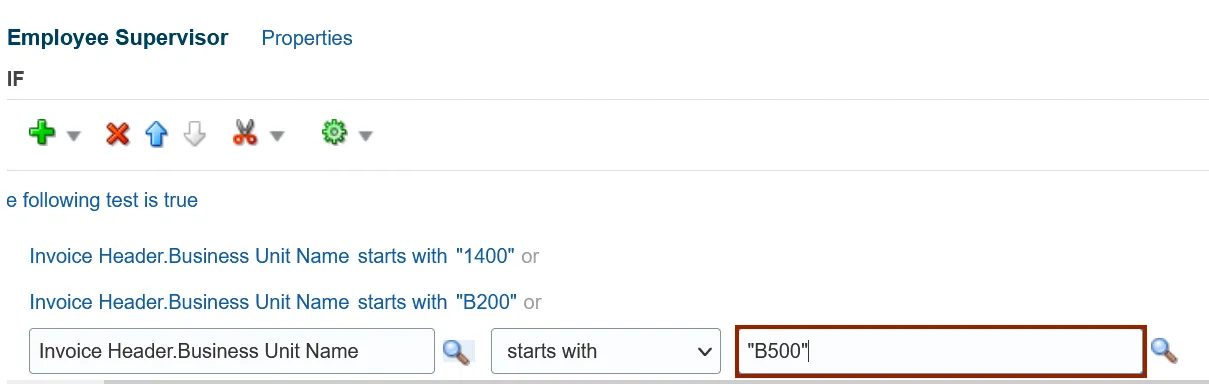
Step 18. Enter the condition value in the value field.
In this example, we choose “B500” as the condition value.
Step 19. Click the Validate button to validate the rules.
Step 20. Review the Validation log at the bottom of the Rules section to check if there are any errors/warnings found. Correct the rules and re-validate in case of any errors/warnings found.

Step 21. In the top left corner of the BPM Worklist page, click on the Save icon to save the changes.

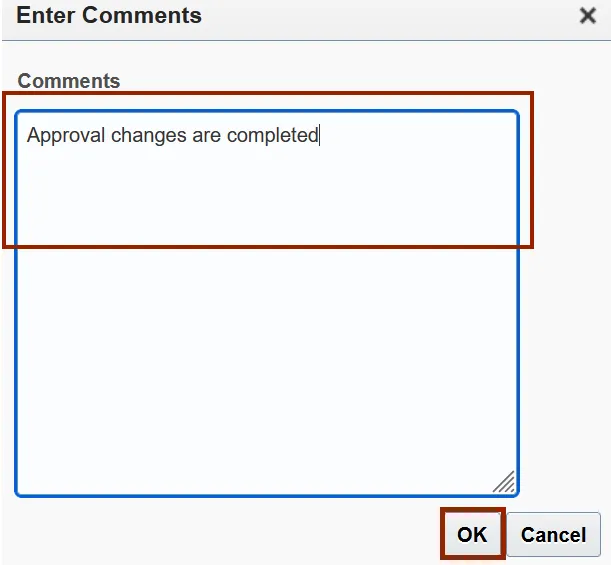
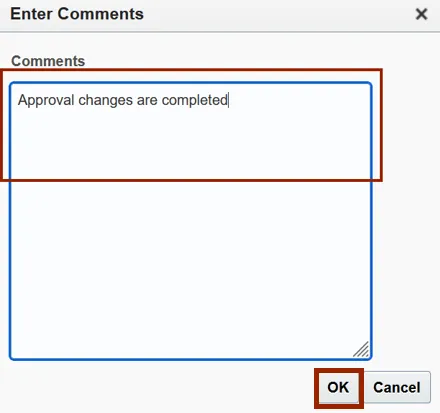
Step 22. On the Enter Comments pop-up page, enter appropriate comments and click the OK button.
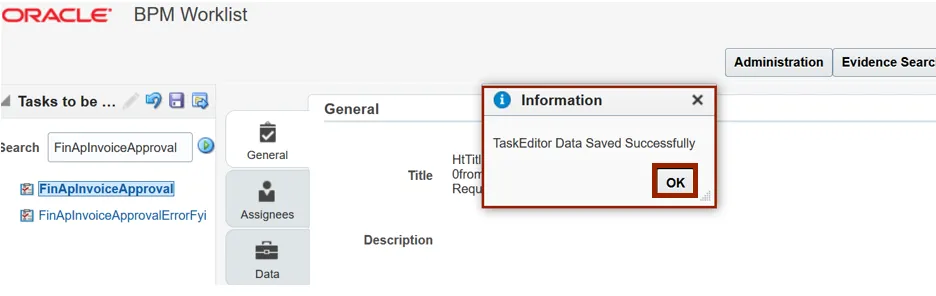
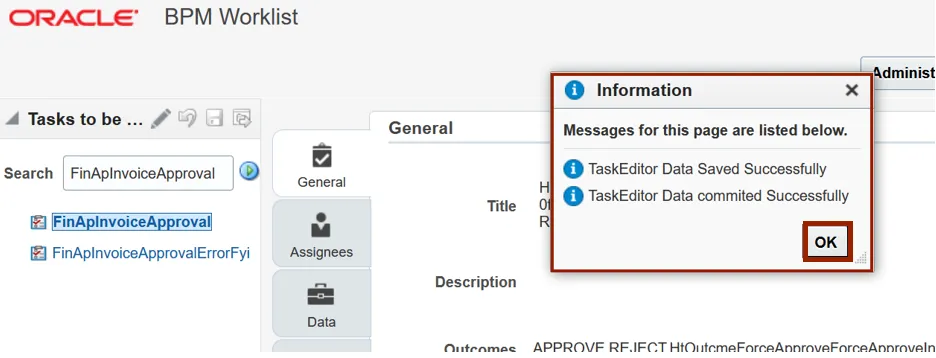
Step 23. The Information pop-up appears as a confirmation to save the changes. Click the OK button.
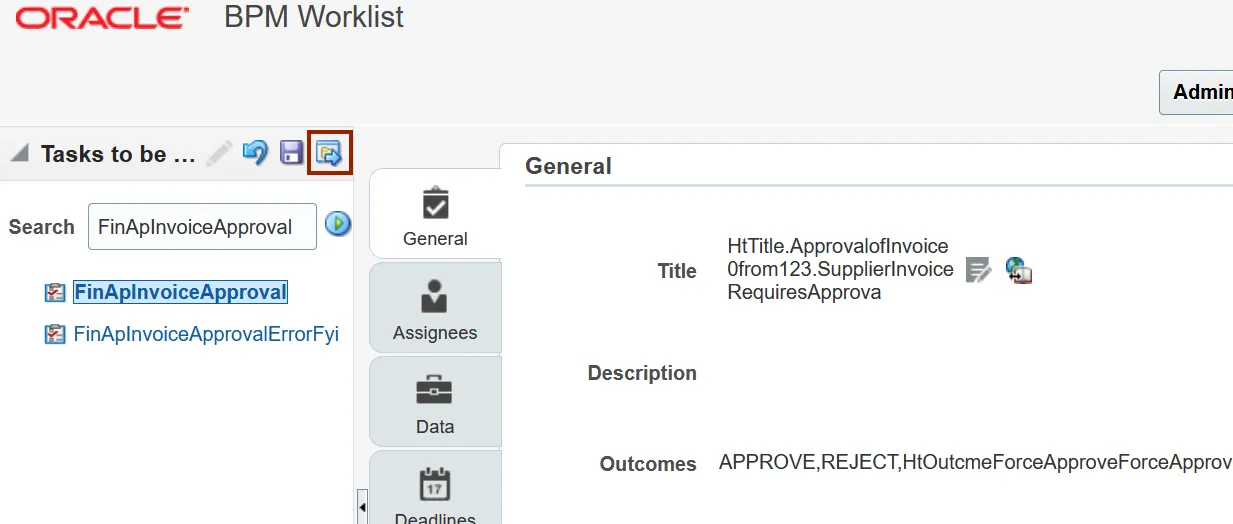
Step 24. Click on the Commit Task icon to deploy the changes.
Step 25. On the Enter Comments pop-up page, enter appropriate comments and click the OK button.
Step 26. The Information pop-up appears as a confirmation to deploy the changes. Click the OK button.
Wrap-Up
Managing Workflow-Related Configuration using the steps above to add, delete, and update the conditions of AP Invoice Approval Rules in the NCFS.