Purpose
The purpose of this Quick Reference Guide (QRG) is to provide a step-by-step explanation on how to Create Credit Memos in the North Carolina Financial System (NCFS).
Introduction and Overview
This QRG covers how to Create Credit Memos in NCFS. A credit memo is created once the goods or services are returned by the customer. Credit Memos can be credited to the customer using percentages or amounts.
Create Credit Memos
To Create Credit Memos, please follow the steps below. There are 13 steps to complete this process.
Step 1. Log in to the NCFS portal with your credentials to access the system.
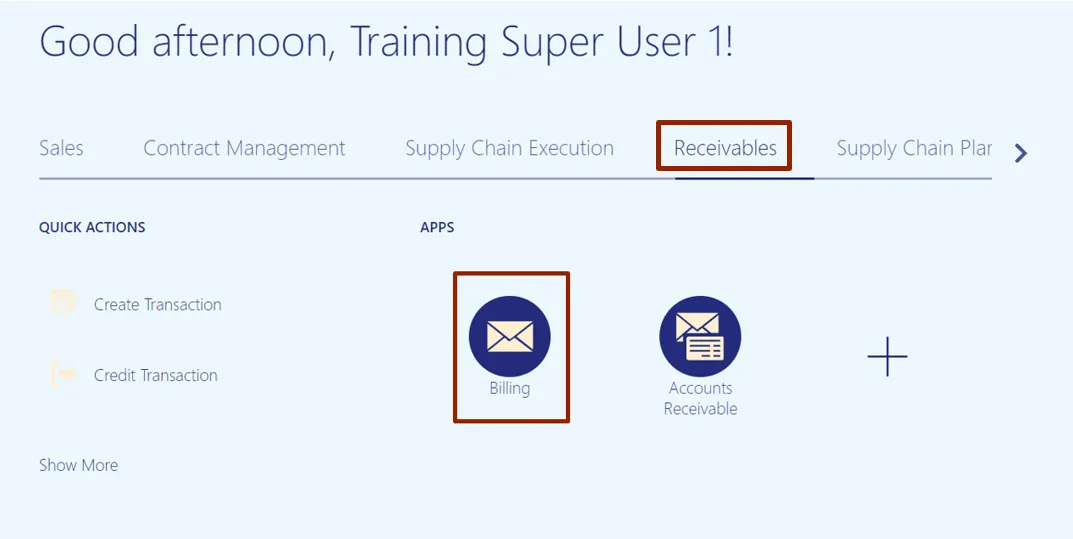
Step 2. On the Home page, click the Receivables tab and select the Billing app.
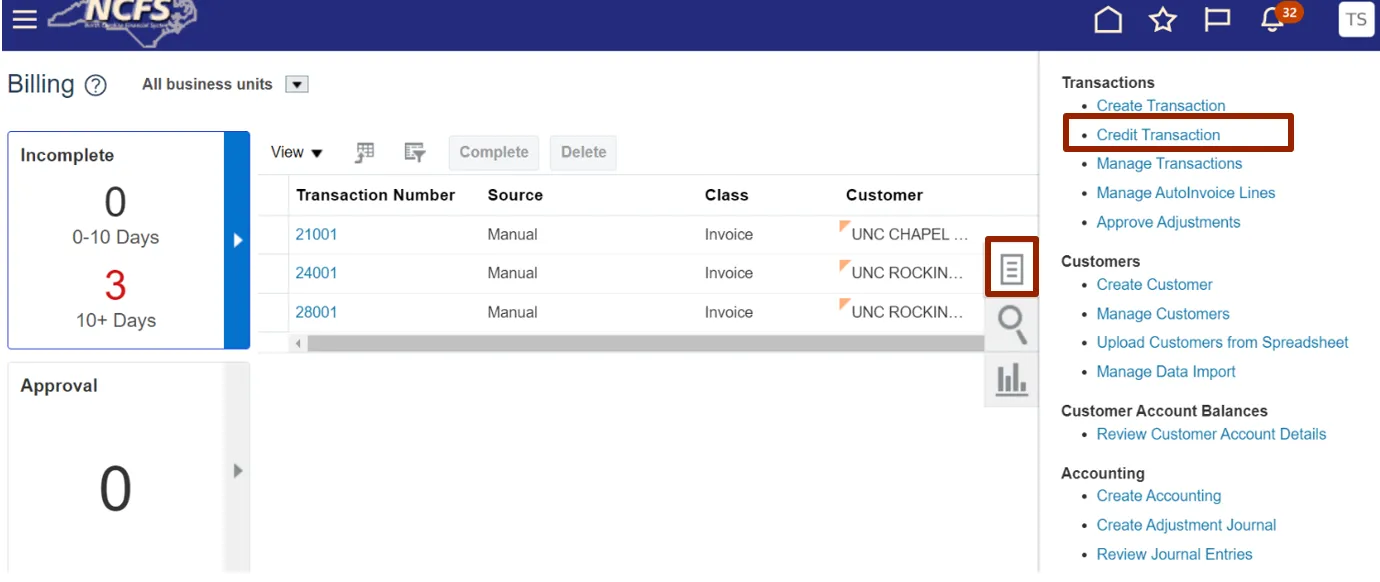
Step 3. On the Billing page, click the Tasks icon. Now, under Transactions section, click Credit Transaction.
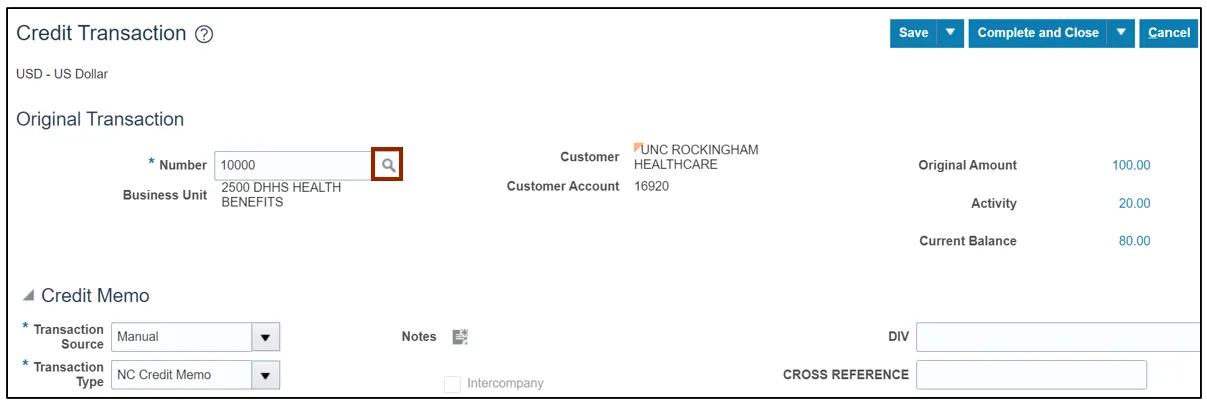
Step 4. On the Credit Transaction page, under the Original Transaction section, enter the correct data in the *Number field.
In this example, we choose 10000 for *Number. Then, click the Magnifying Glass icon next to the *Number field.
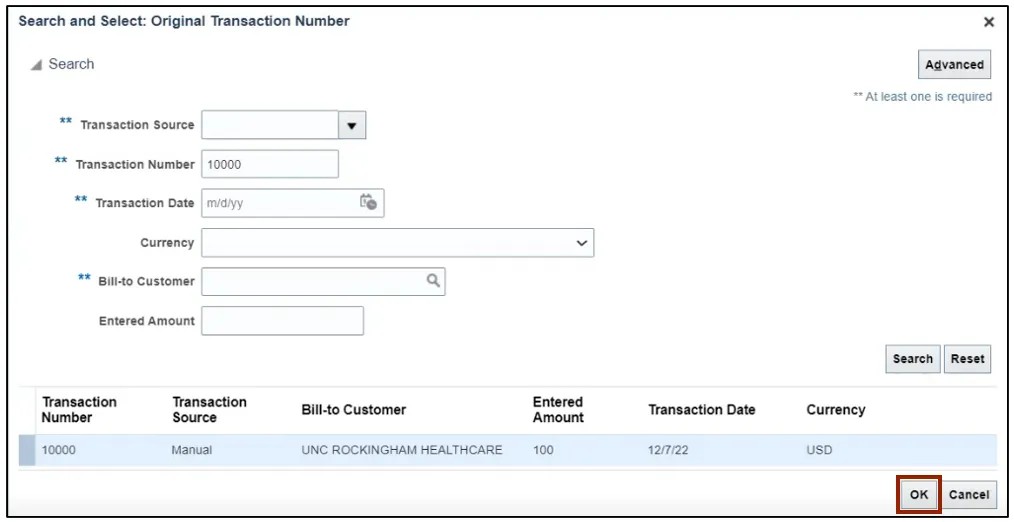
Step 5. The Search and Select: Original Transaction Number pop-up appears. Click the Search button.
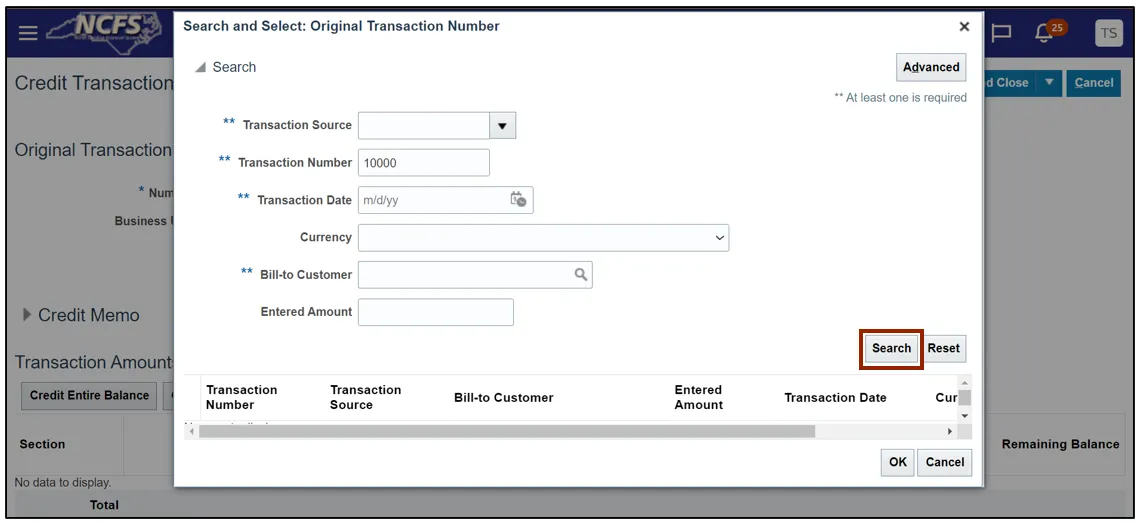
Step 6. Select the Transaction Number and click the OK button to go back to the Create Credit Transaction screen.
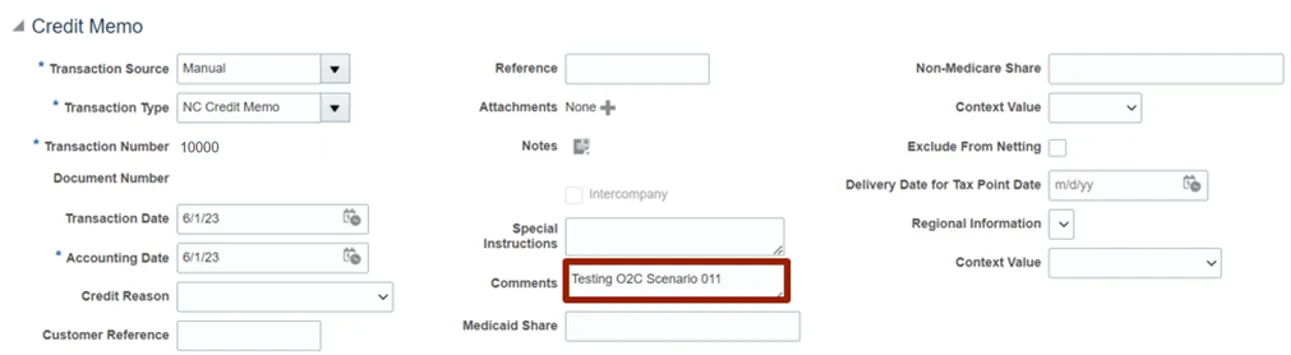
Step 7. In the Credit Memo section, enter the relevant information for Transaction Source and Transaction Type by clicking the drop-down choice list.
In this example, we choose: Manual for *Transaction Source, NC Credit Memo for *Transaction Type, and 10000 for *Transaction Number.
Note: Transaction Type will be populated automatically.

Step 8. Enter the reason for creating the credit memo in the Comments field.
In this example, we choose Testing O2C Scenario 011 for Comments.
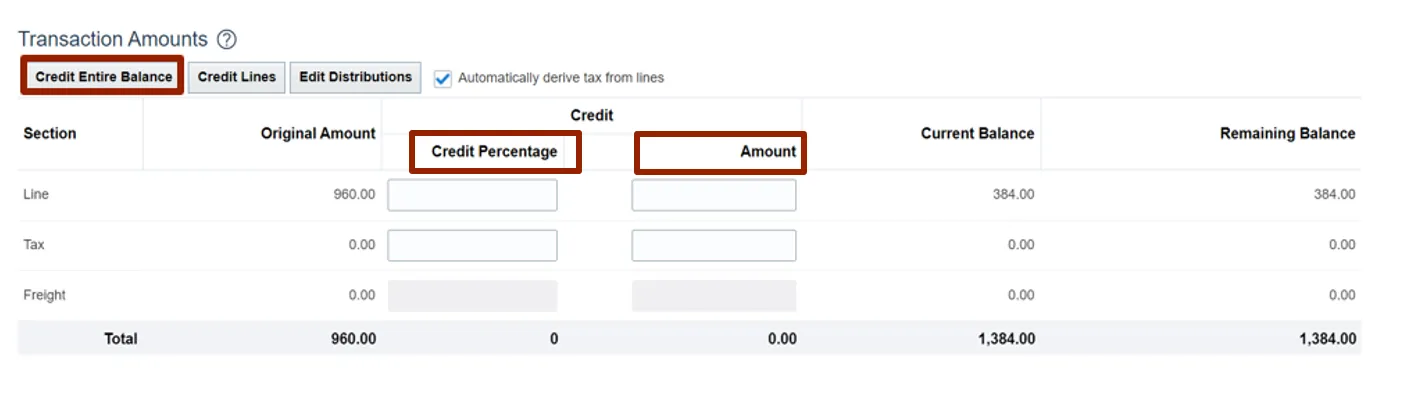
Step 9. In the Transaction Amounts section, click the Credit Entire Balance button.
Note: You may choose to edit the Credit Percentage of the line to issue credit, or the Amount of the line to issue credit.
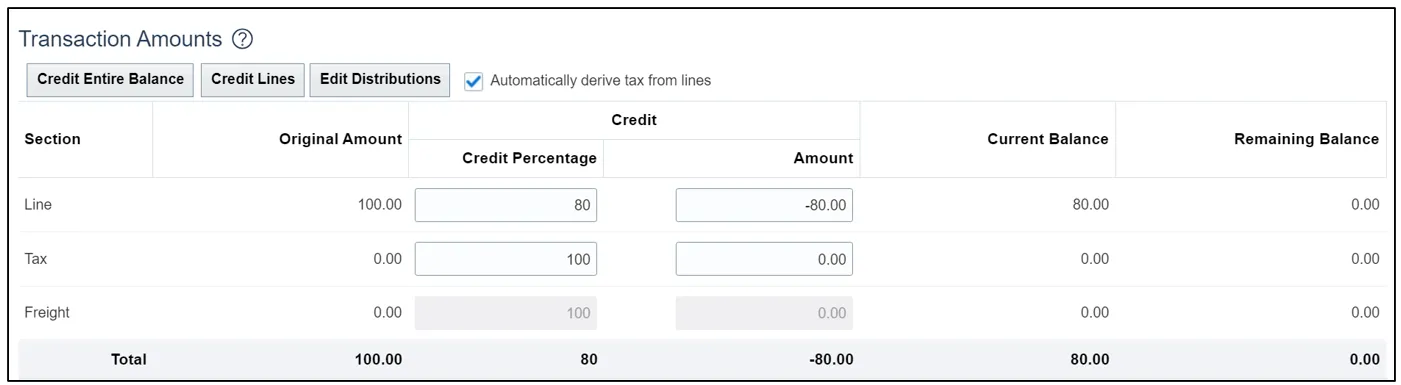
Step 10. The appropriate Percentage and Amount to be credited are displayed on the screen.
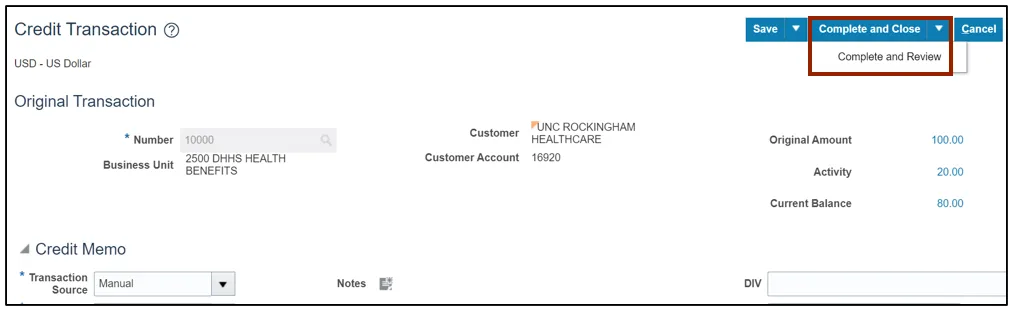
Step 11. Click the Complete and Close drop-down choice list and select the Complete and Review button.
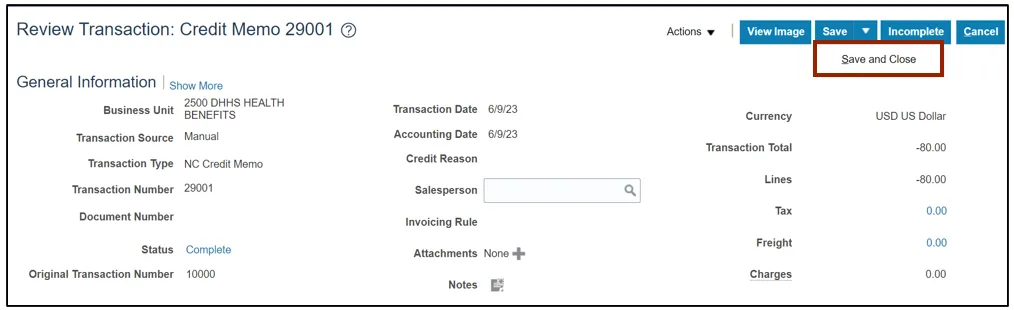
Step 12. Once the review is complete, click the Save drop-down choice list and then, click Save and Close button.
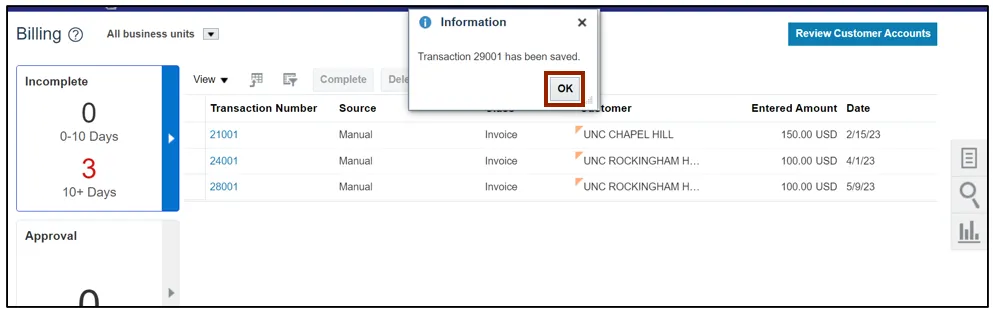
Step 13. An Information pop-up appears. Click the OK button.
Wrap-Up
Users can Create a Credit Memo once the goods or services are returned by the customer by following the steps explained above.
Additional Resources
- Virtual Instructor-Led Training (vILT)