Purpose
The purpose of this Quick Reference Guide (QRG) is to provide a step-by-step explanation on how to Create and Manage Invoices in the North Carolina Financial System (NCFS).
Introduction and Overview
This QRG covers how to create and manage invoices in NCFS.
Create and Manage Invoices
To create and manage invoices in NCFS, please follow the steps below. There are 14 steps to complete this process.
Step 1. Log in to the NCFS portal with your credentials to access the system.
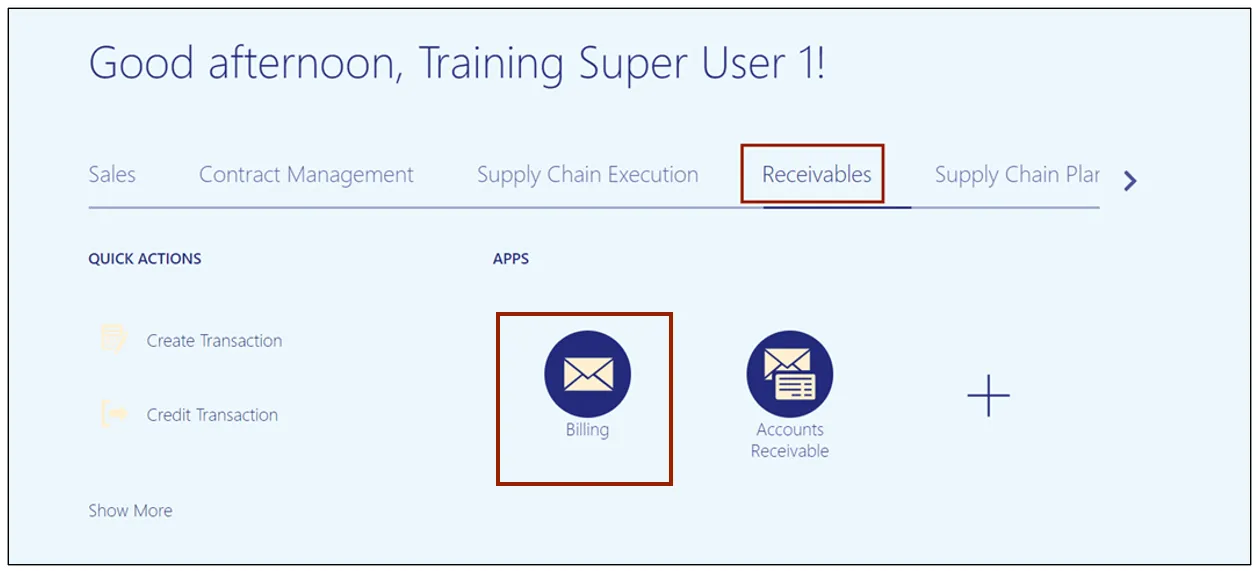
Step 2. On the Home page, under the Receivables tab, Click the Billing app.
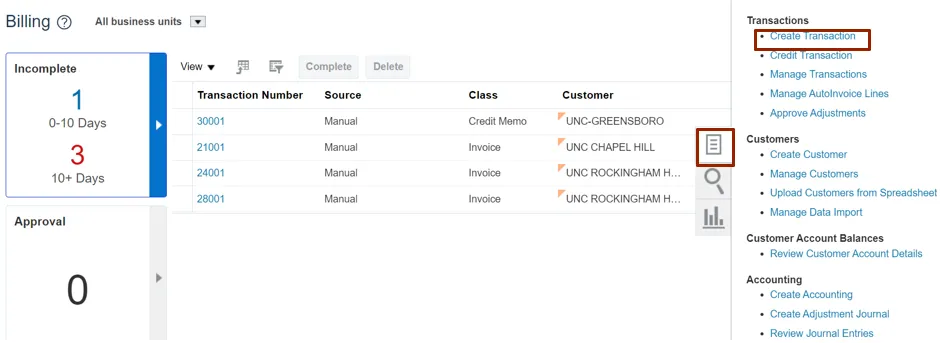
Step 3. On the Billing page, Click the Tasks icon and select the Create Transaction link.
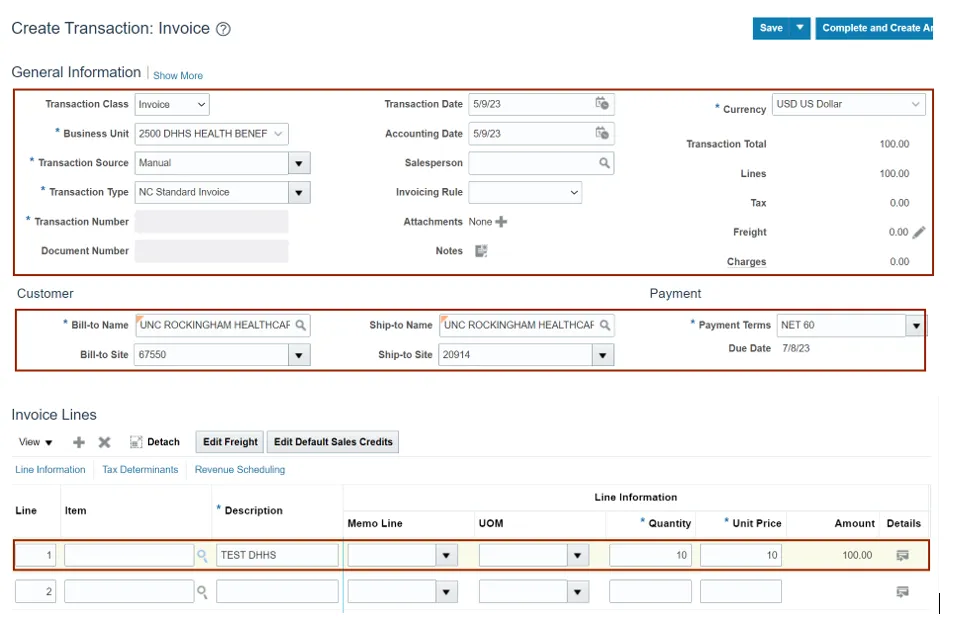
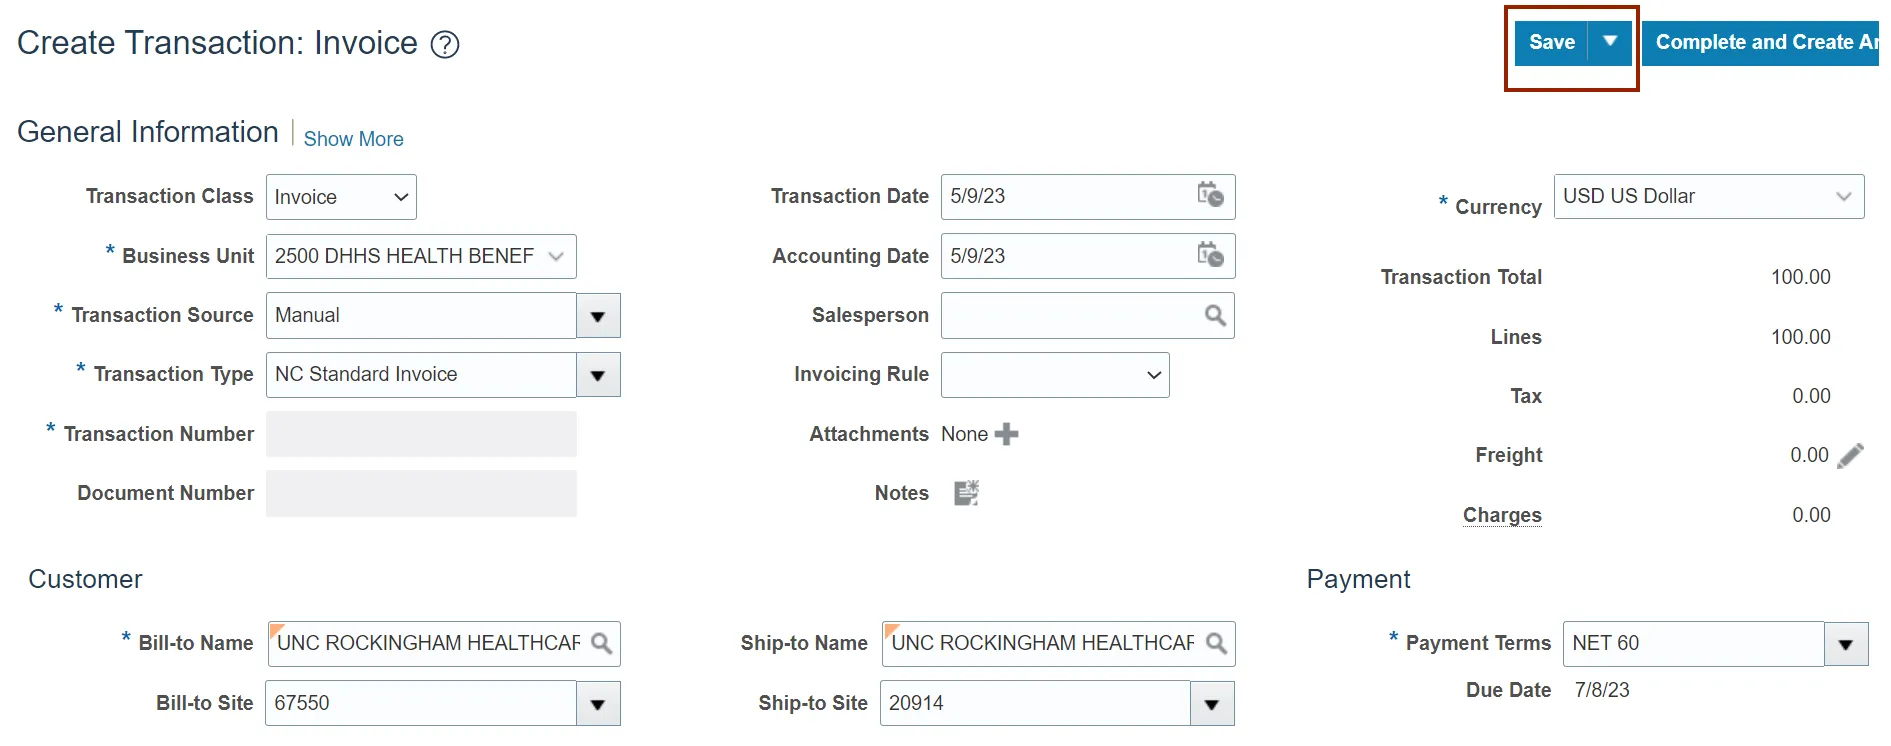
Step 4. Enter the required details in General Information, Customer, and Invoice Lines sections.
Note: The data entered is for training purposes only.
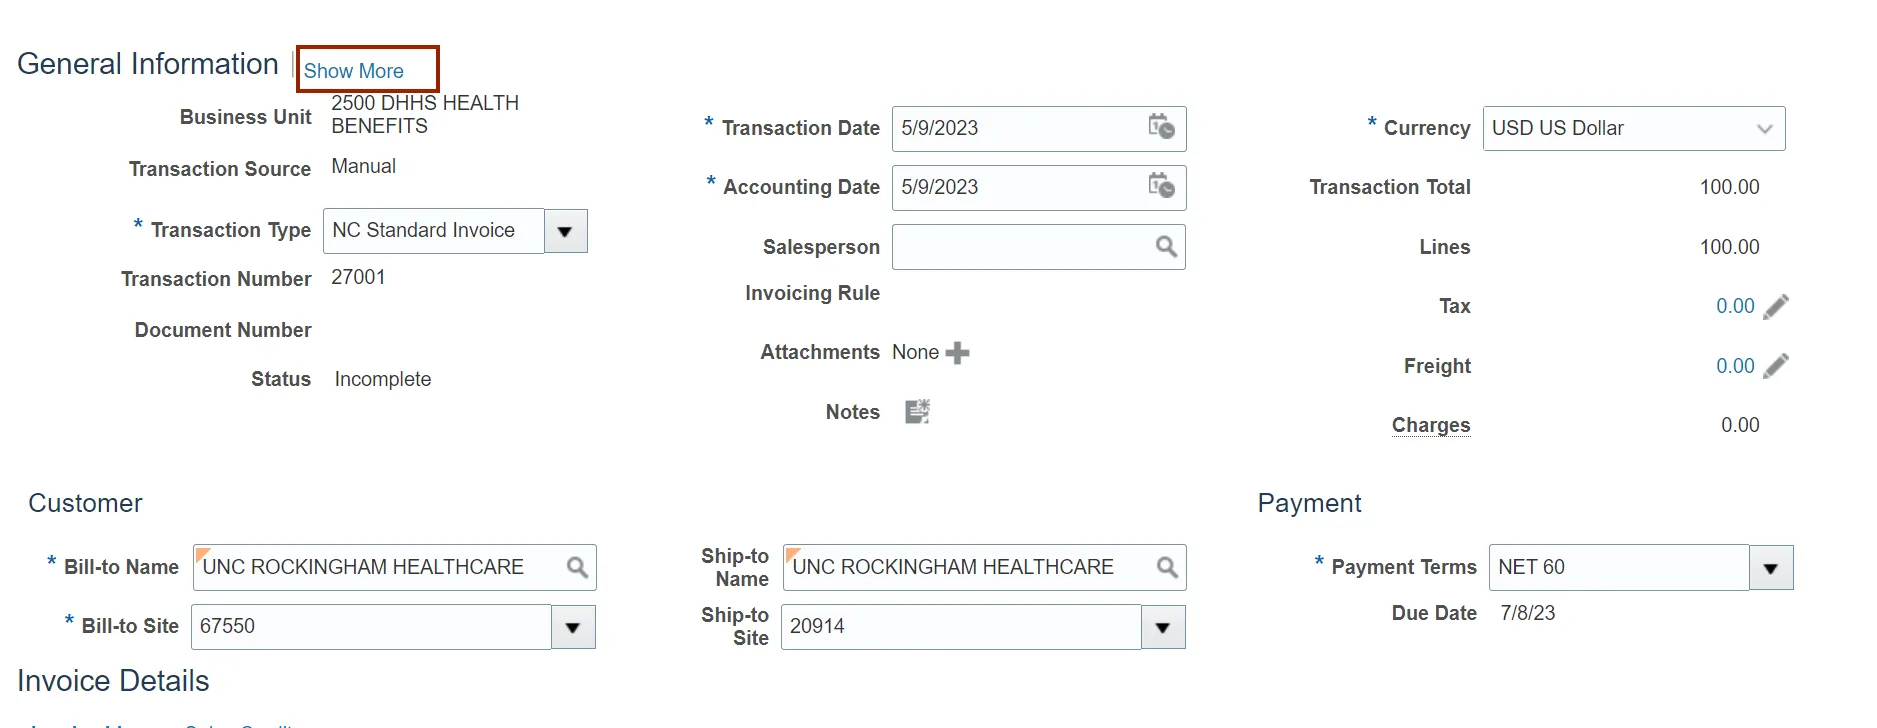
Step 5. Click the Show More link.
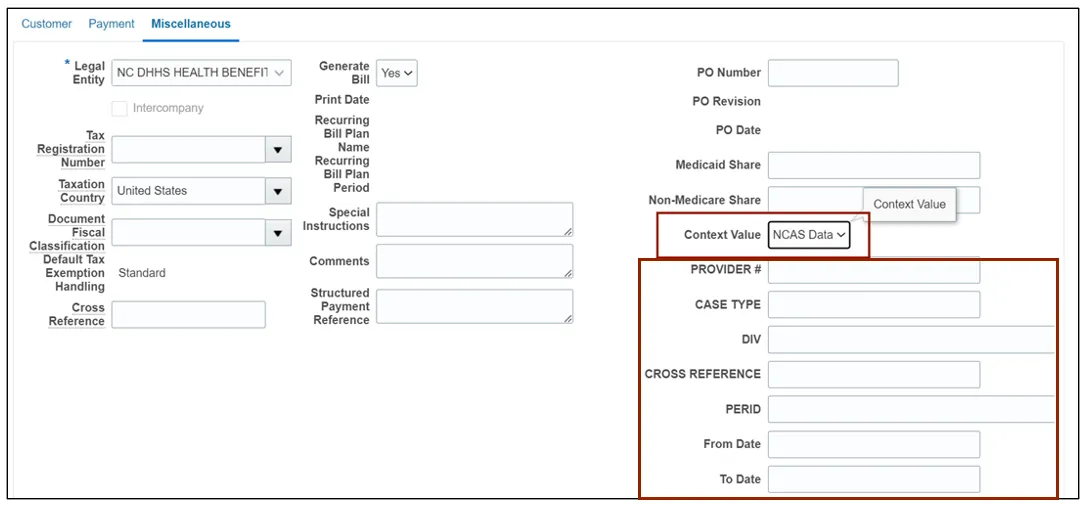
Step 6. Click the Miscellaneous tab.

Step 7. Select NCAS Data from the Context Value drop-down choice list and enter other required details.
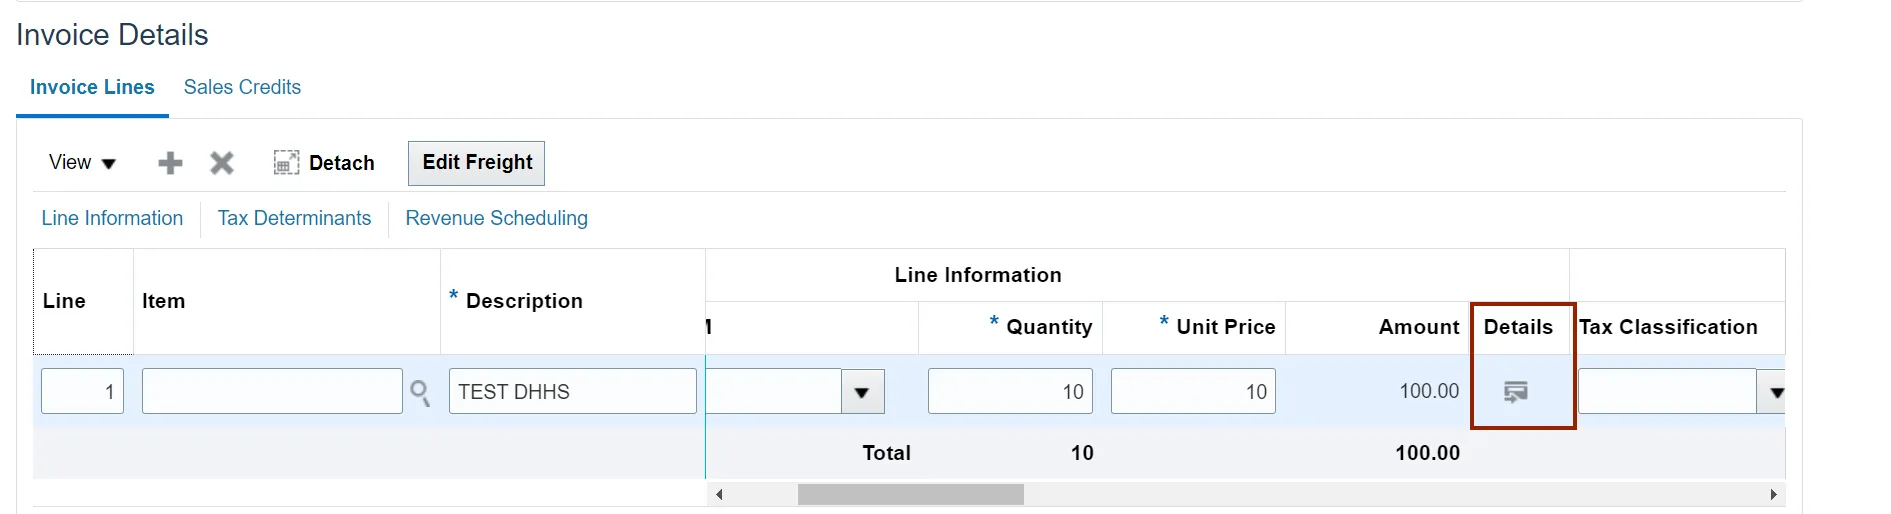
Step 8. In the Invoices Details section, Click the Details icon.
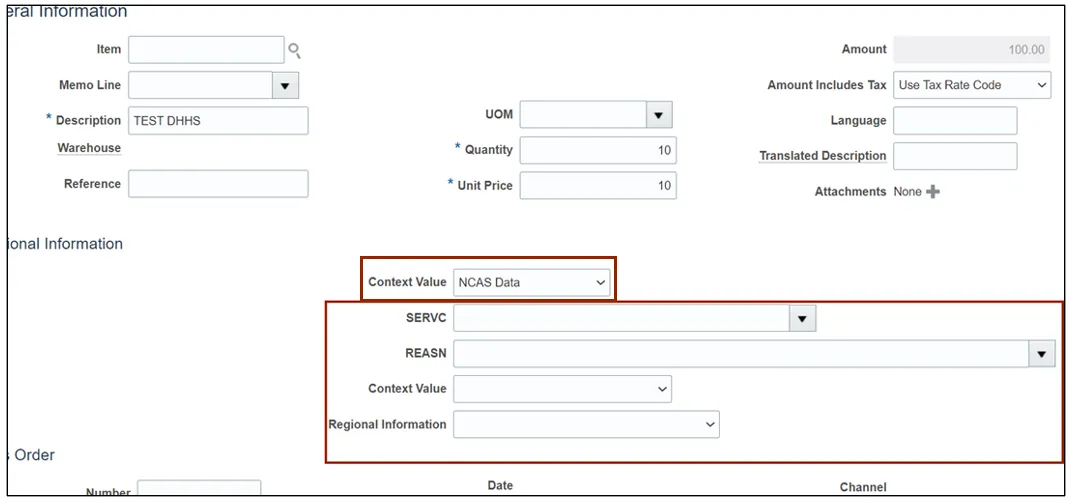
Step 9. Select NCAS Data from Context Value drop-down choice list and enter required data in the other fields.
Step 10. Click the Save button.
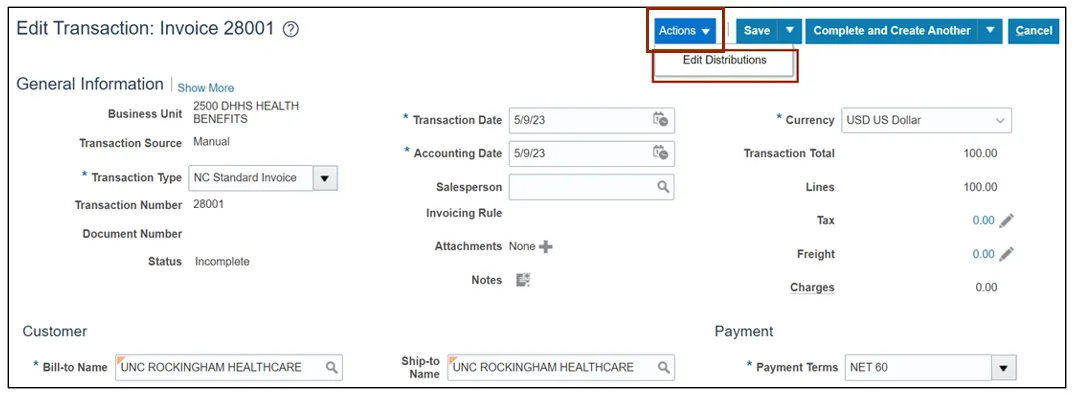
Step 11. Click the Actions drop-down choice list and select the Edit Distribution option.
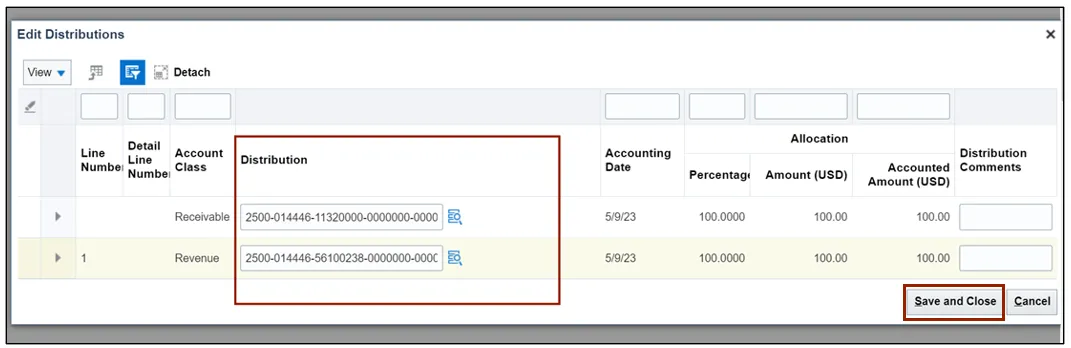
Step 12. Review the Revenue Charge Account details and click the Save and Close button.
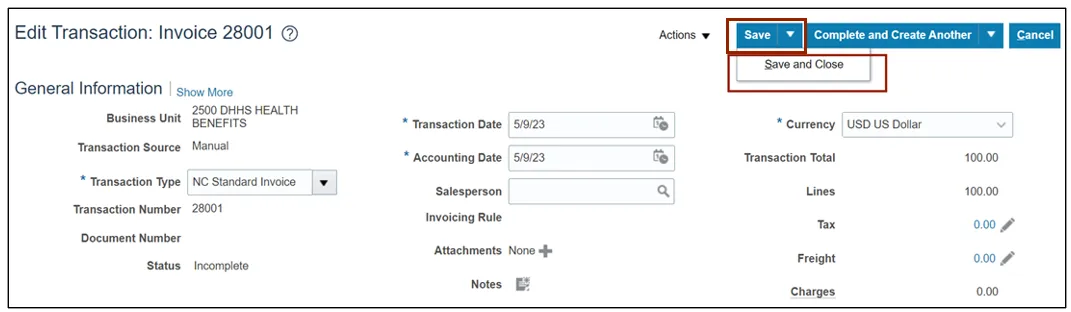
Step 13. Click the Save drop- down choice list and select the Save and Close option.
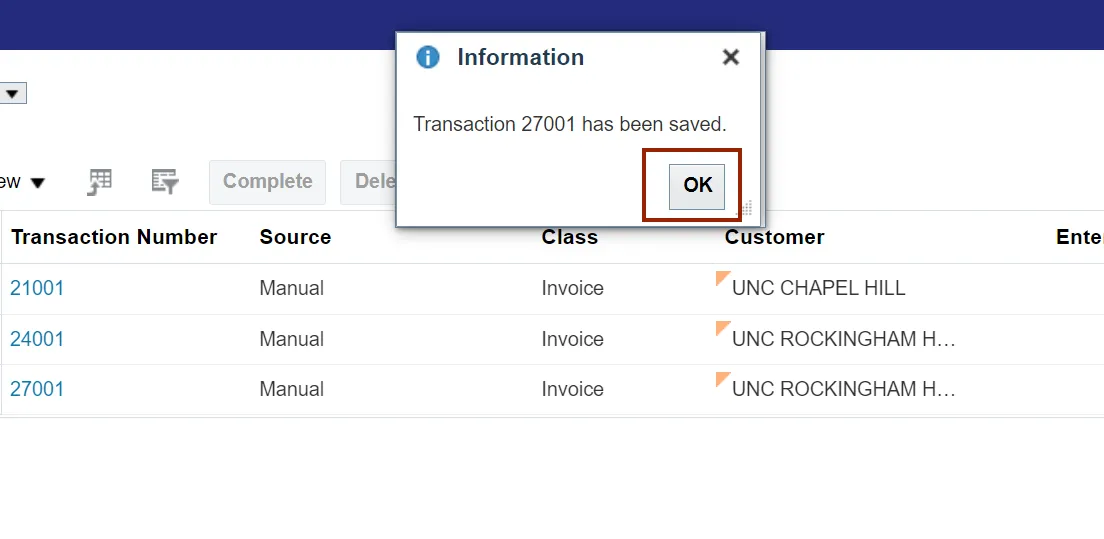
Step 14. An Information pop-up appears. Click the OK button.
Wrap-Up
Create and Manage Invoices using the steps above in NCFS.
Additional Resources
- Virtual Instructor-Led Training (vILT)