Purpose
The purpose of this Quick Reference Guide (QRG) is to provide a step-by-step explanation of how to Create PO Matched Invoice and Update Invoice Cost Distribution in the North Carolina Financial System (NCFS).
Introduction and Overview
This QRG covers the steps to Create PO Matched Invoice.
Create PO Matched Invoice
To Create PO Matched Invoices in NCFS, please follow the steps below. There are 17 steps to complete this process.
Step 1. Log in to the NCFS portal with your credentials to access the system.
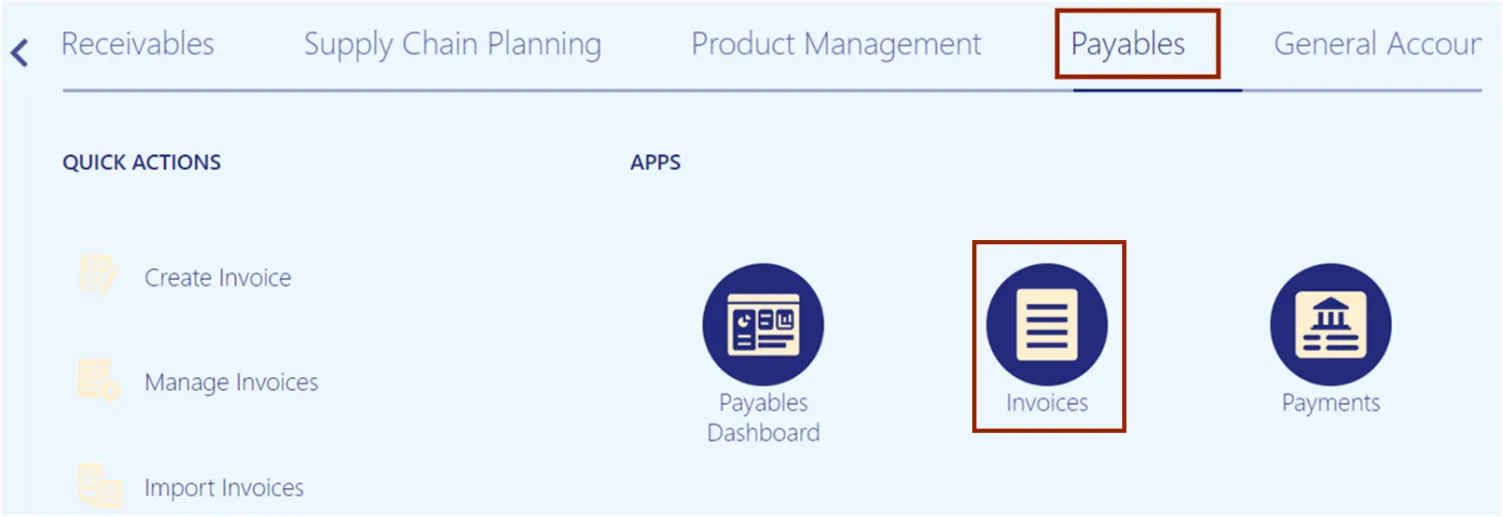
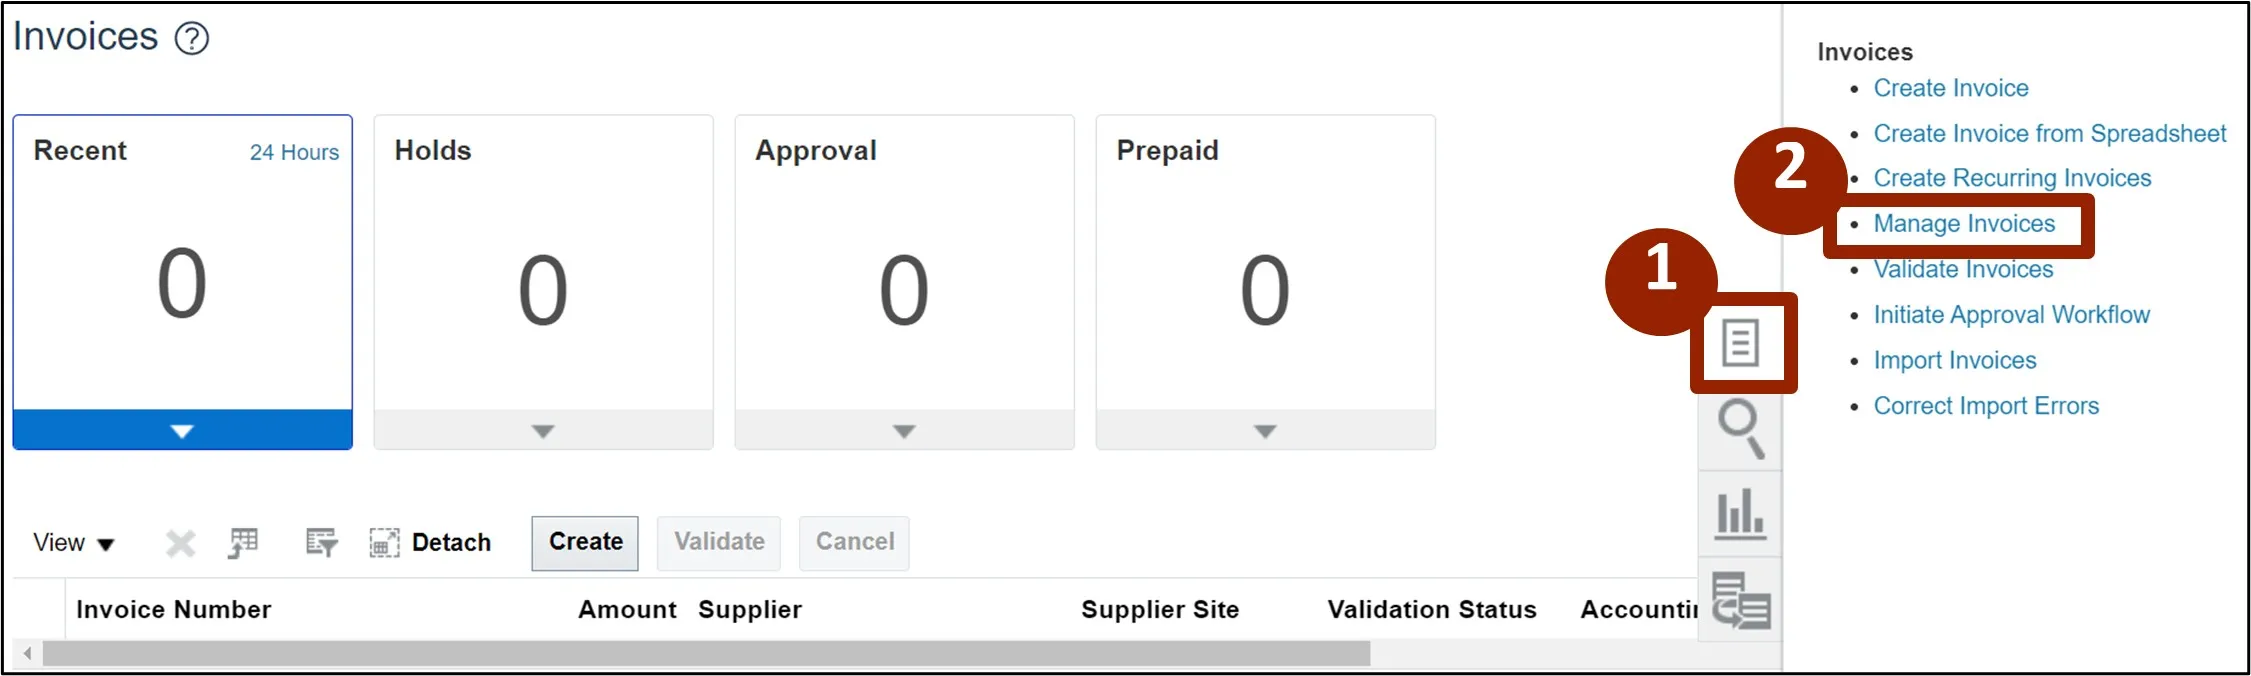
Step 2. Click the Payables Tab. Click the Invoices app.
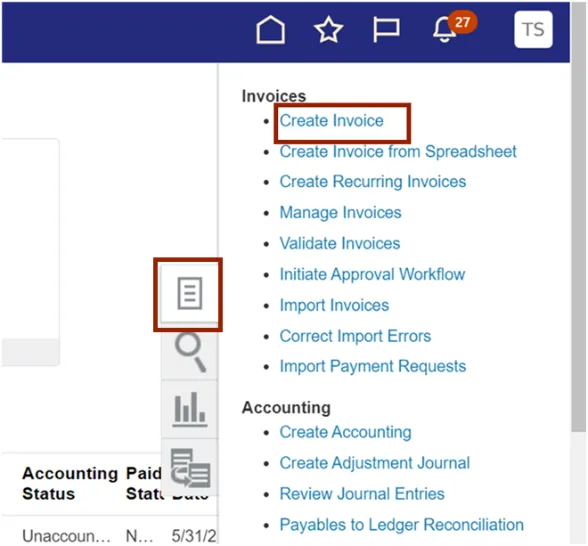
Step 3. Click the Tasks icon. Under Invoices, click Create Invoice.
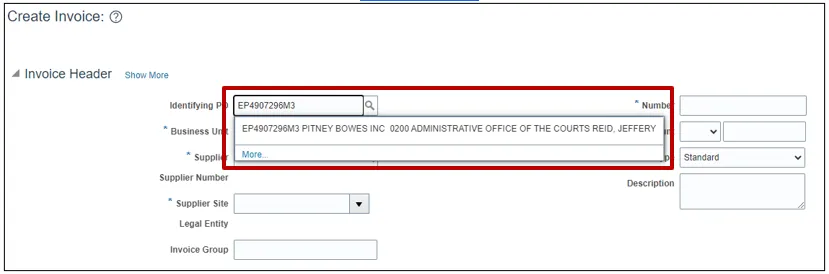
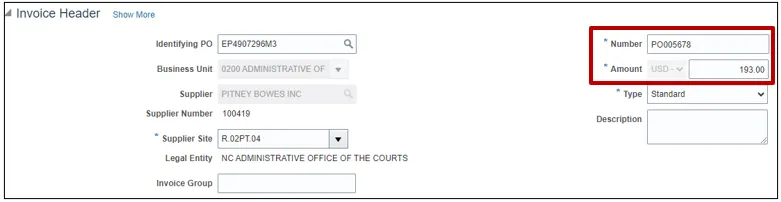
Step 4. The Create Invoice page opens. On the Invoice Header section, enter the appropriate PO number.
In this example, we choose EP4907296M3.
Step 5. The Purchase Order number defaults other information in Business Unit, Supplier, Supplier Number and Legal Entity fields.
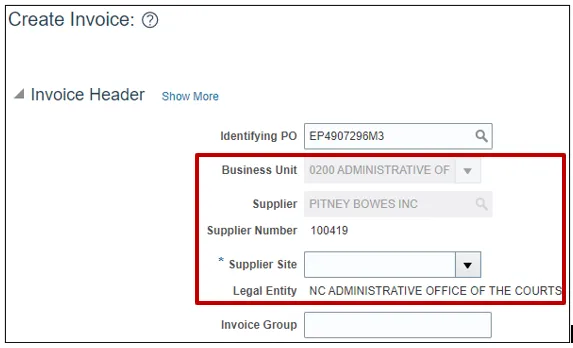
Step 6. Choose the correct Supplier Site from the drop down. In example we choose R.02PT.04.

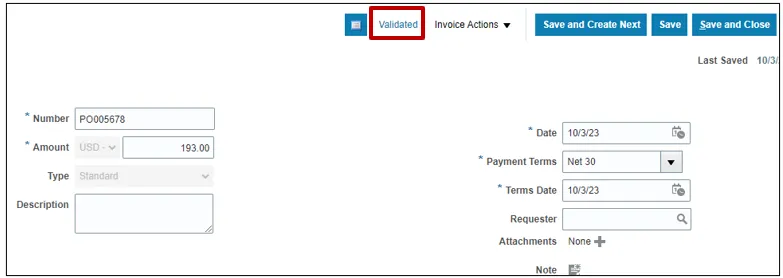
Step 7. Enter the Invoice Number and Invoice Amount.
In this example, we enter PO005678 and $193.
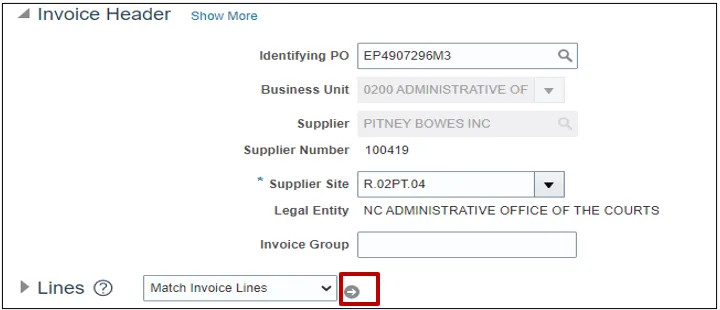
Step 8. Click the Go icon to match the invoice line.
Step 9. Select the Match check box for the required line(s), and validate the Quantity, Unit Price, and Amount.
- You can update the Quantity if needed to match the invoiced quantity and the invoice amount will auto calculate based on the updated quantity.
- Similarly for service POs the quantity can be updated to match the invoice. Please do not update the Unit Price or Amount on a line for services. NCFS will update the Amount automatically after the quantity is updated. (DO NOT CHANGE THE UNIT PRICE OR AMOUNT, CHANGING THESE WILL RESULT IN PO LINE BEING CLOSED FOR INVOICING)
- Additionally, by clicking the Purchase Order Number link you can view and validate purchase order details
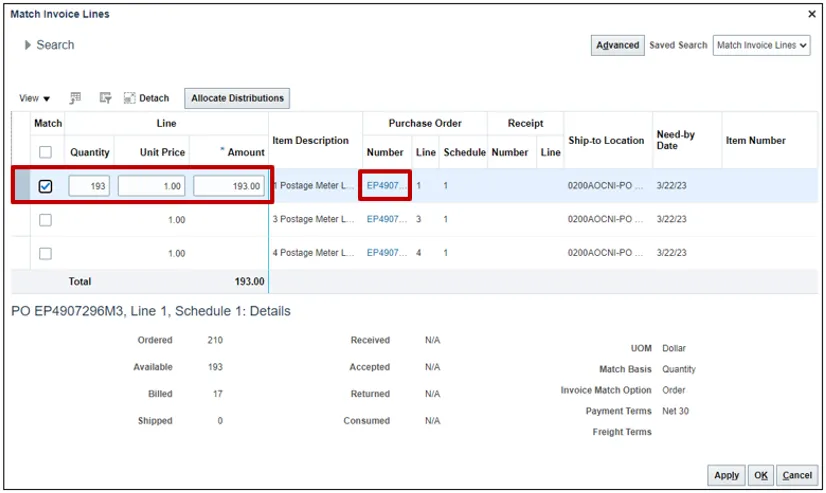
Step 10. Click the Apply and OK button.

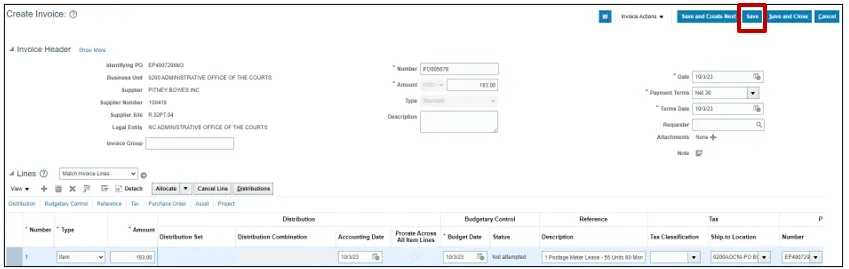
Step 11. On the Create Invoice page, click the Save button.
Step 12. On Create Invoice page appears. Select Validate from the Invoice Action drop-down choice list.
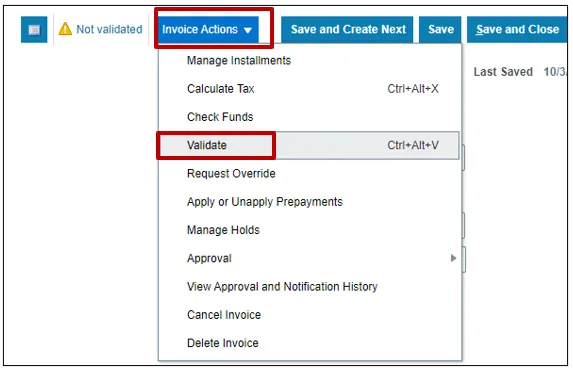
Step 13. Validate the Invoice. The status will be Validated.
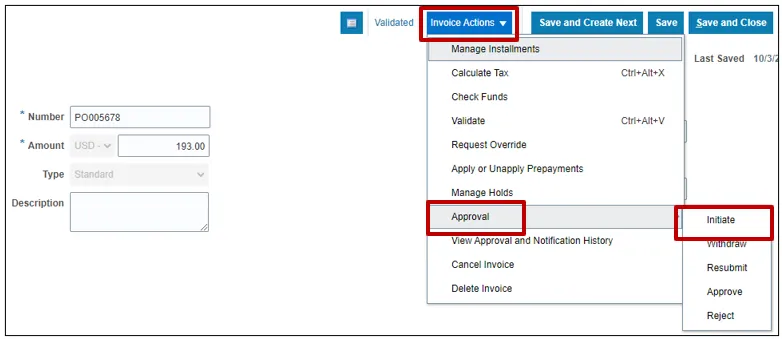
Step 14. Once the Invoice is Validated, click the Invoice Action drop-down button. Select Approval and Initiate from the Invoice Action drop-down choice list.
Step 15. Click the Validated Status link. The status here is Required.
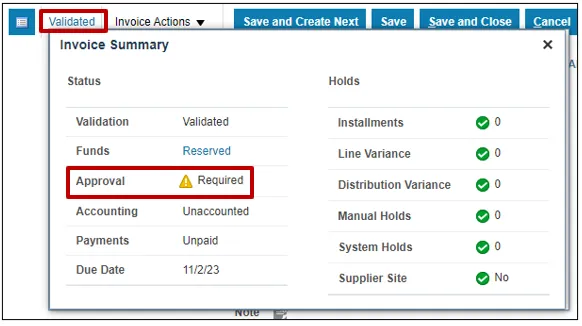
Step 16. Click the Cross icon to close the Invoice Summary pop-up.

Step 17. Click the Save and Close button. This directs you back to the Invoice dashboard page.

Steps to Update Invoice Cost Distribution
There are two methods to update Invoice Cost Distribution.
Method 1 – from line level has 11 steps and Method 2 - from the distribution level has 12 steps.
Method 1
Navigate to the Invoices dashboard. (Home page > Payables tab > Invoice app):
Step 1. Click the Tasks icon.
Step 2. Click Manage Invoices.
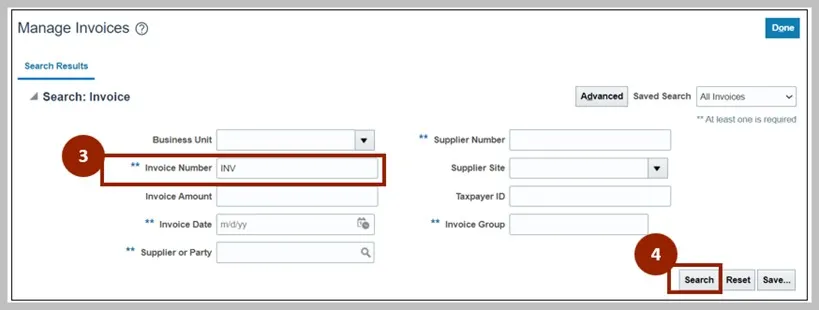
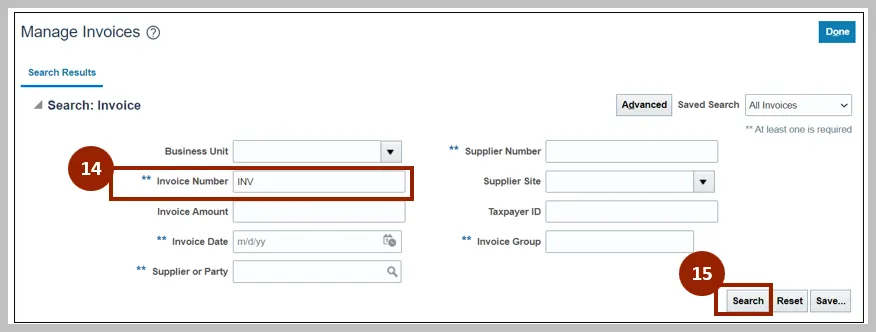
Step 3. Enter details in at least one of the fields marked "**". In this example, the Invoice Number has been entered.
Step 4. Click the Search button.

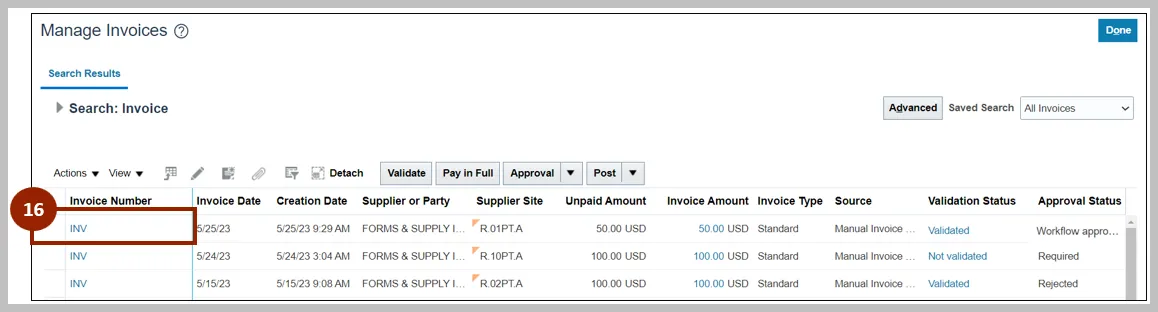
Step 5. Click the Invoice Number link of the required line.
Step 6. On the Manage Invoices page, click the Actions drop-down choice list.
Step 7. Select Edit from the drop-down choice list.

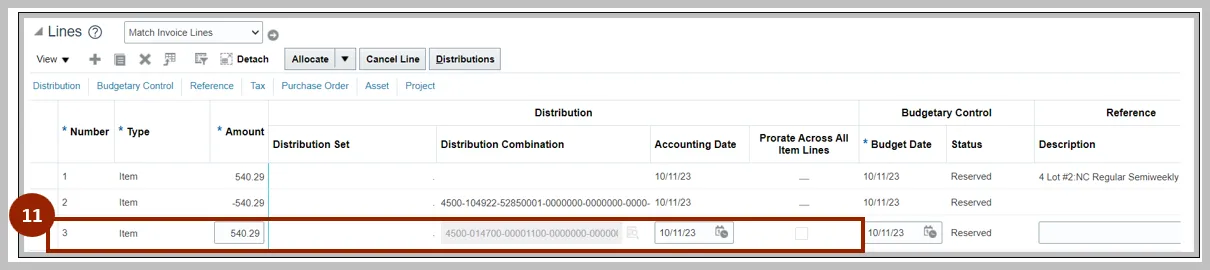
Step 8. Click the Add icon to add a new line.

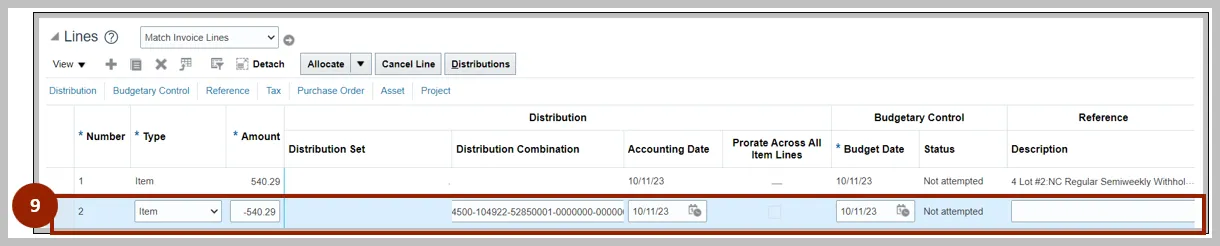
Step 9. Enter the original cost distribution from the PO as a negative line to negate the existing line.
Step 10. Click the Add icon to add a new line.
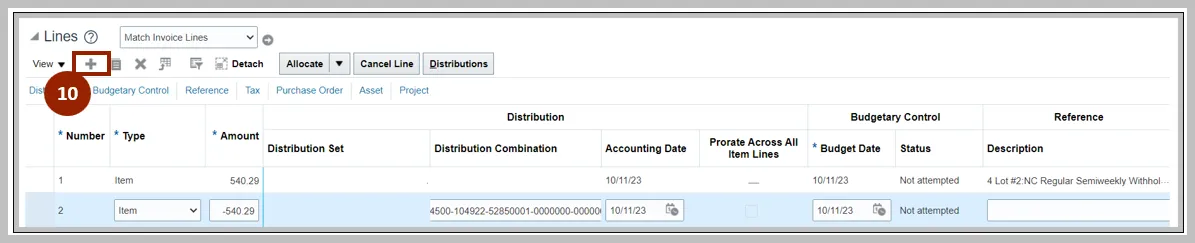
Step 11. Enter details in the new line. This distribution in this line should be the new distribution you want to use for the PO and should be equal to the previous negative line.
Method 2
Navigate to the Invoices dashboard. (Home page > Payables tab > Invoice app):
12. Click the Tasks icon.
13. Click Manage Invoices.
14. Enter details in at least one of the fields marked "**".
In this example, the Invoice Number has been entered.
15. Click the Search button.
16. Click the Invoice Number link of the required line.
17. On the Manage Invoices page, click the Actions drop-down choice list.
18. Select Edit from the drop-down choice list.

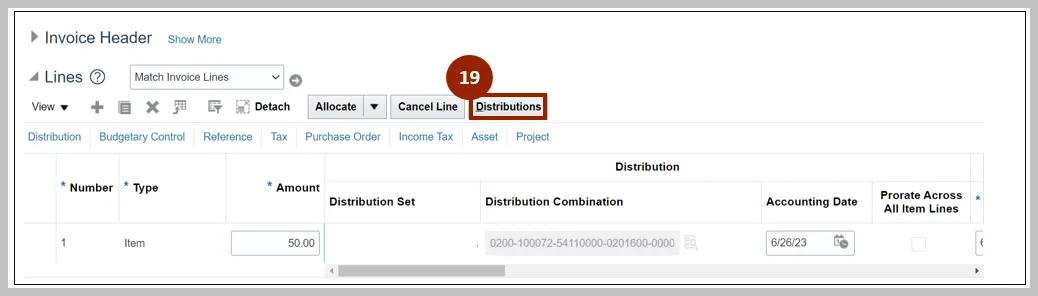
19. Click the Distribution button to update/correct the Distribution Combination.
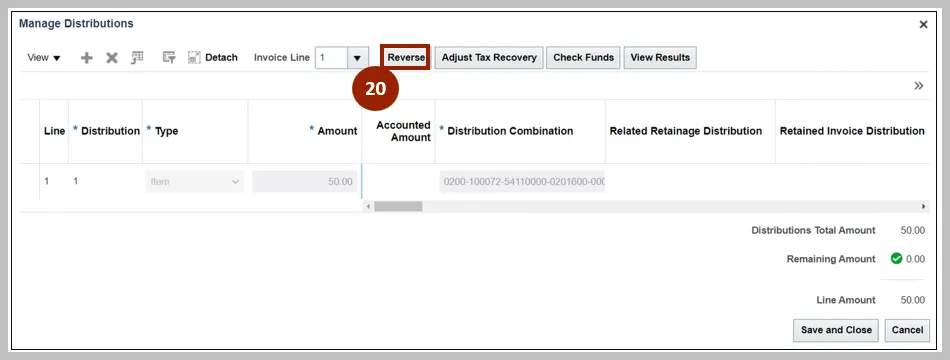
20. Click the Reverse button to reverse the distribution. This automatically creates a negative distribution line for what is being reverse.
21. Click the Add icon to add a new line.
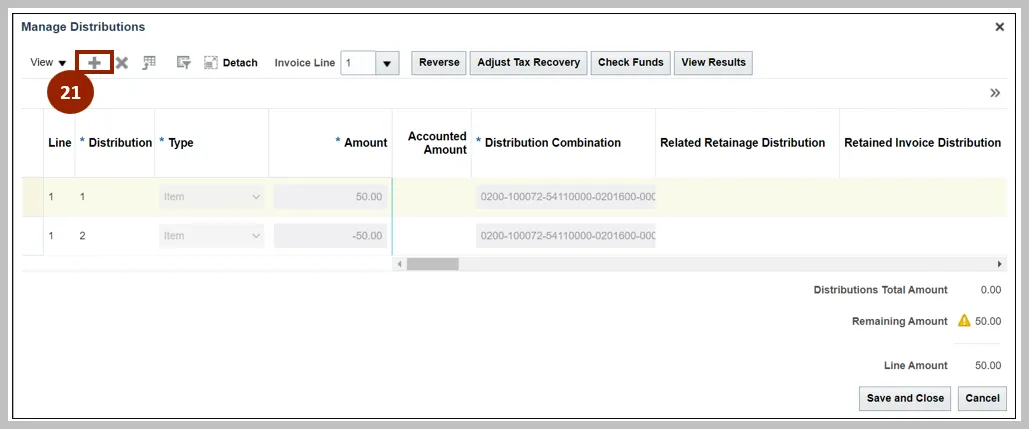
22. Enter details in the new line. This distribution in this line should be equal to the updated / corrected charge account.
23. Click the Save and Close button.

Wrap-Up
Create PO Matched Invoices and update invoice cost distribution using the steps above.
Additional Resources
- Virtual Instructor-Led Training (vILT)