Purpose
The purpose of this Quick Reference Guide (QRG) is to provide a step-by-step explanation of how to manage Bank of America (BOA) PCard Invoices in the North Carolina Financial System (NCFS).
Introduction and Overview
This QRG covers how to manage BOA PCard invoices in NCFS.
Manage BOA PCard Invoices
To manage BOA PCard in NCFS, please follow the steps below. There are 15 steps to complete this process.
Step 1. Log in to the NCFS portal with your credentials to access the system.
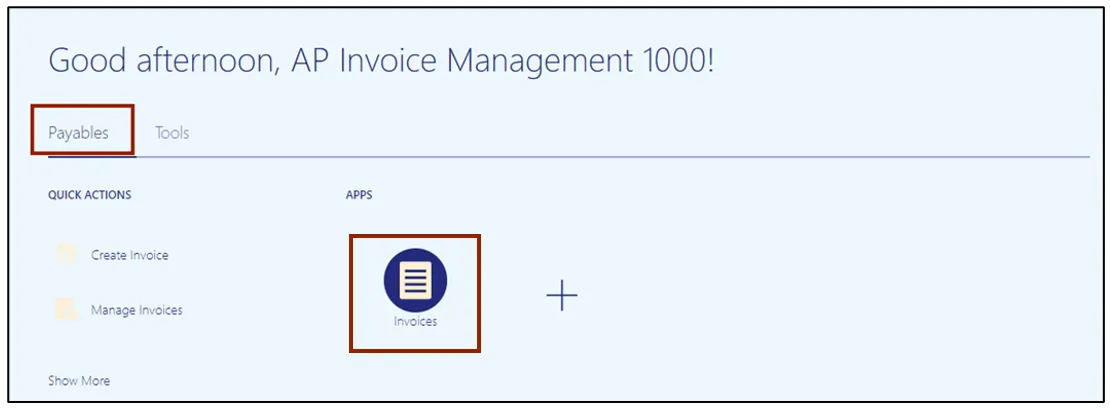
Step 2. On the Home page, under the Payables tab, click the Invoices app.
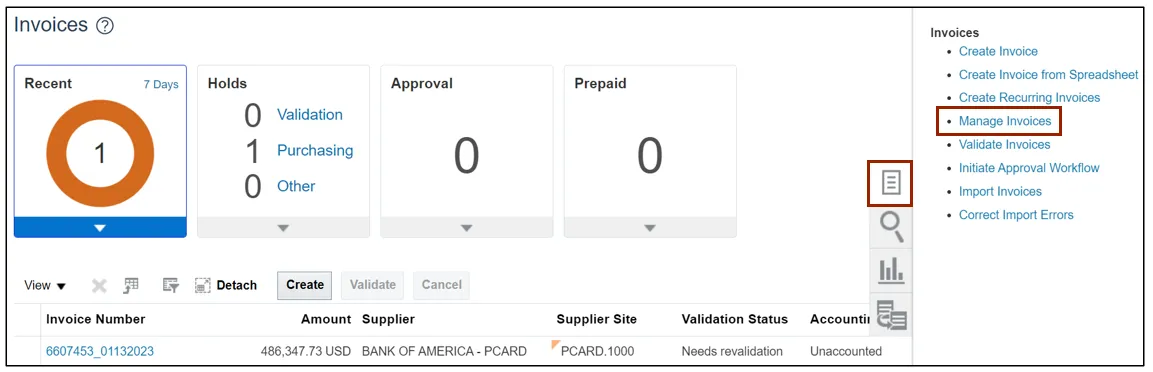
Step 3. On the Invoices page, click the Tasks icon. Under the Invoices section, click the Manage Invoices link.
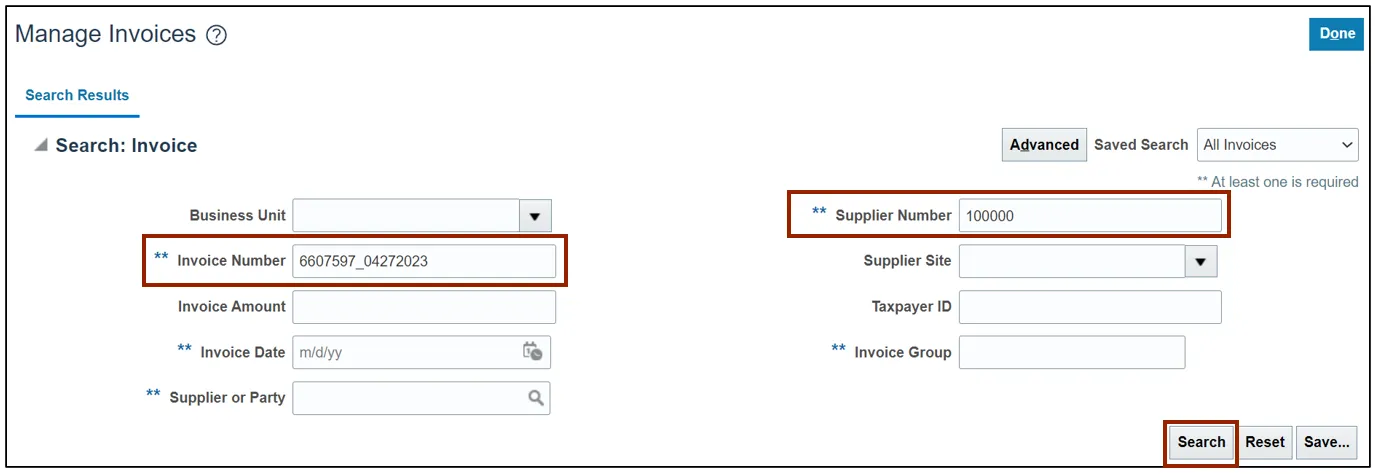
Step 4. On the Manage Invoices page, enter the Invoice Number and Supplier Number. Click the Search button.
Note: BOA PCards Supplier Number is 100000.
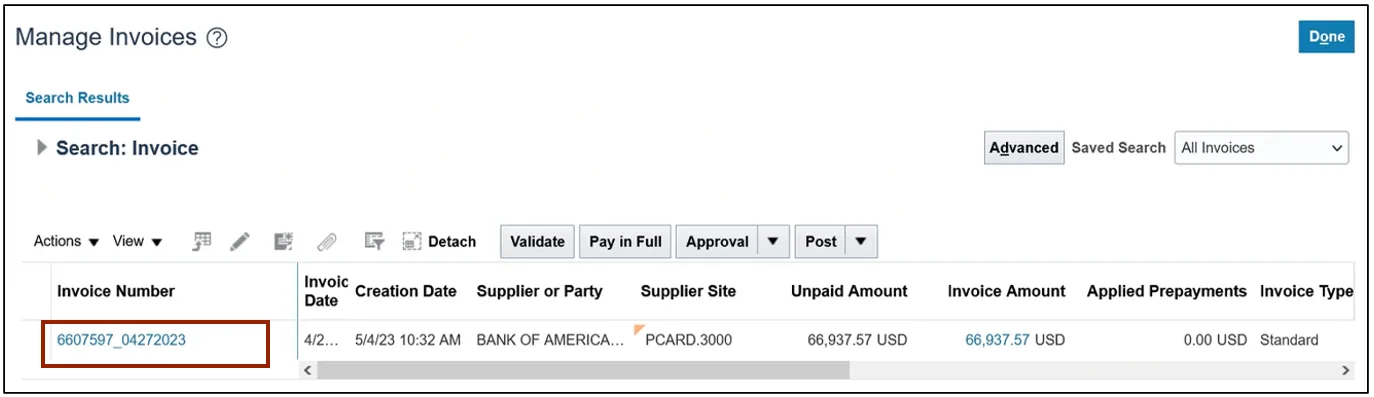
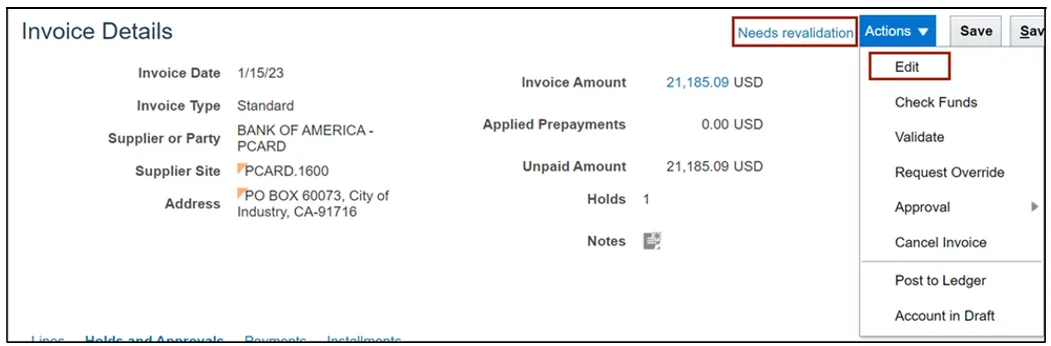
Step 5. The appropriate invoice appears in the search results. Click the Invoice Number link.
Step 6. After validating the header information, select Edit from the Actions drop-down choice list.
Note: the invoice status is Needs revalidation.
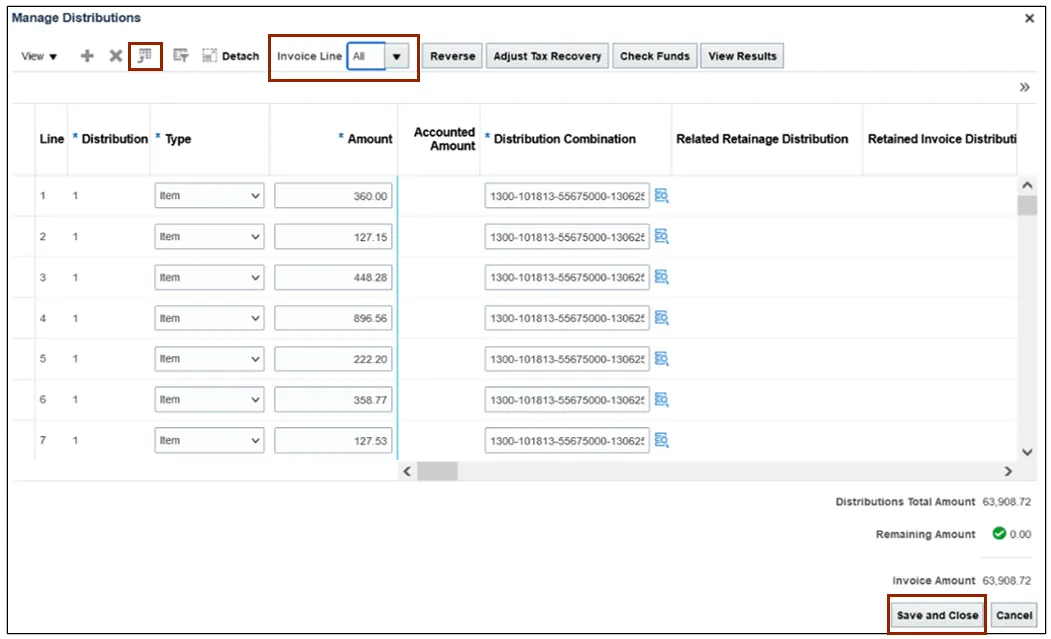
Step 7. On the Edit Invoice page, under Lines section, select the Distribution button. The Manage Distributions window opens.

Step 8. On the Manage Distributions window, select All from the Invoice Line drop-down choice list. Verify or change any needed invoice line distributions details for correct account distribution. If necessary, you can export them to an Excel spreadsheet by selecting the Export to Excel icon to assist in verification.
After verifying or changing the invoice line distributions, click the Save and Close button.
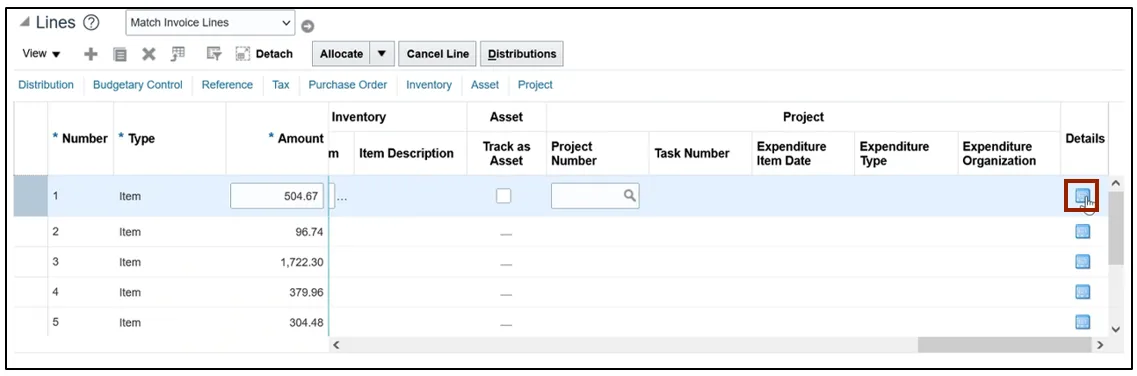
Step 9. Click the Details icon for the required Invoice Line.
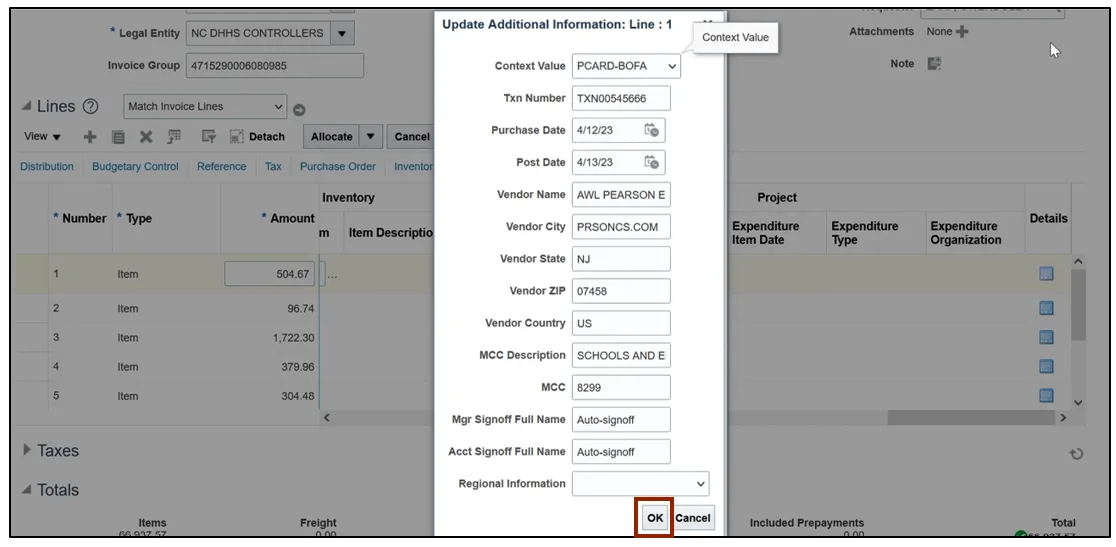
Step 10. The Update Additional Information pop-up appears. Validate and click the OK button.
Note: Steps 11, 12 and 13 are not applicable to the Invoice Management User as it is not a function of AP invoice management. This is performed by the AP Invoice Release Hold role.
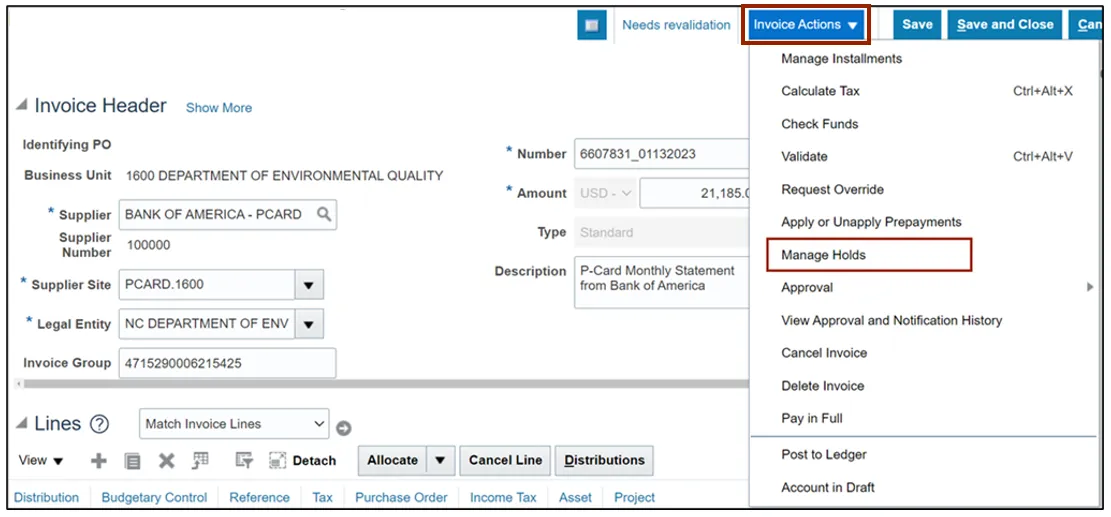
Step 11. Scroll back to the top of the page. From the Invoice Actions drop-down choice list, select Manage Holds.
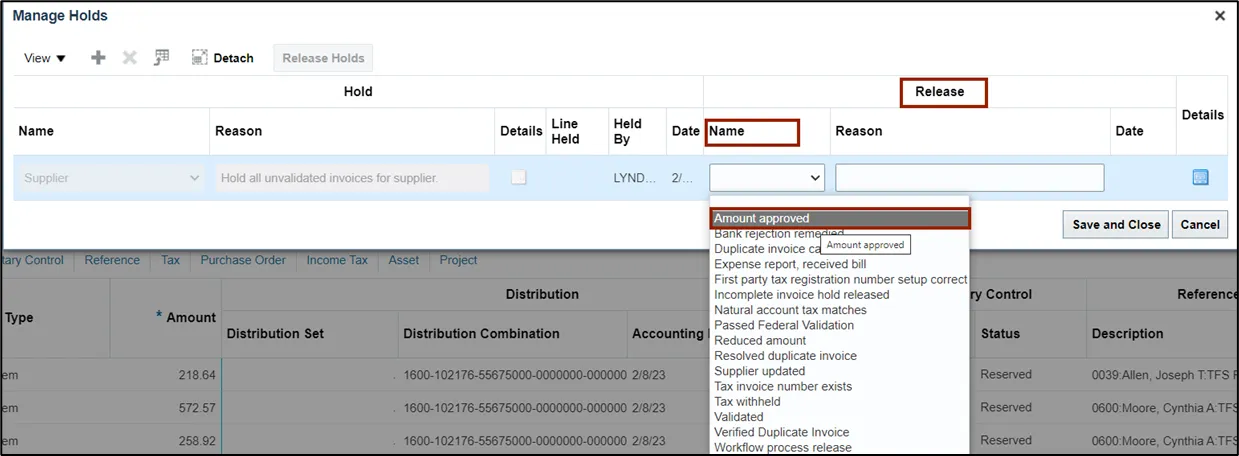
Step 12. On the Manage Holds pop-up window, under the Release section select the appropriate option from the Name drop-down choice list.
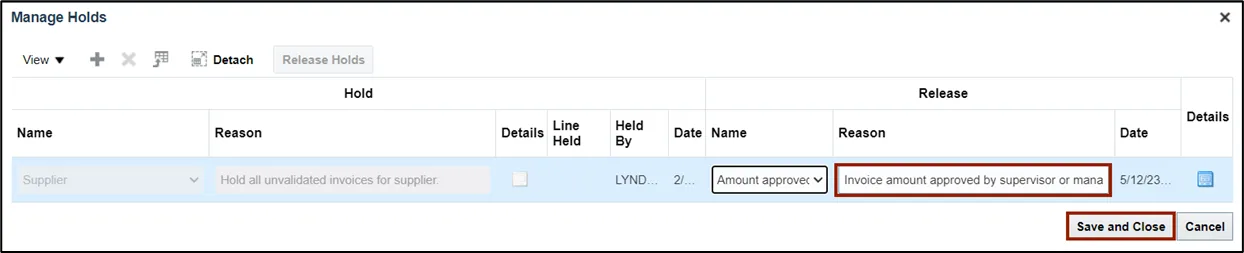
Step 13. Then the Release Reason field is auto populated. Click the Save and Close button
Note: Steps 14 and 15 are performed by the AP Invoice Management User.
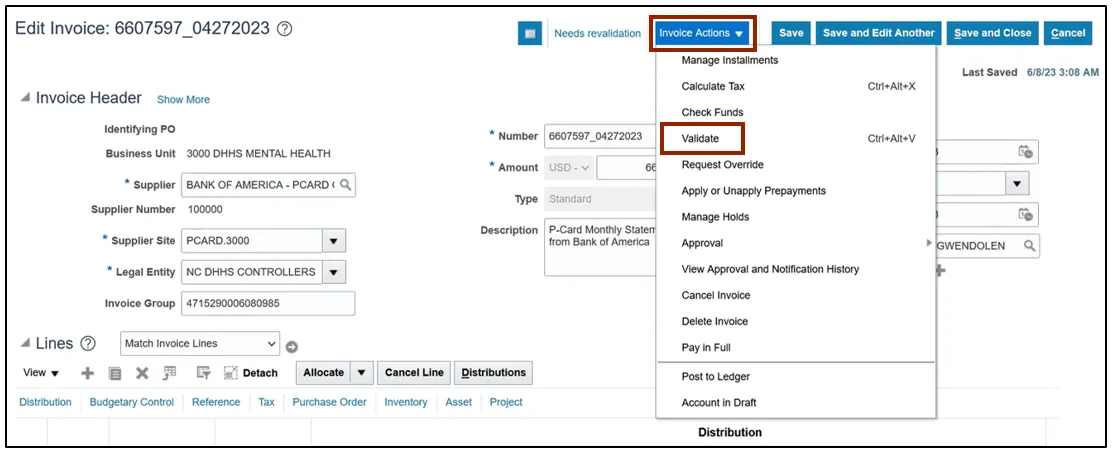
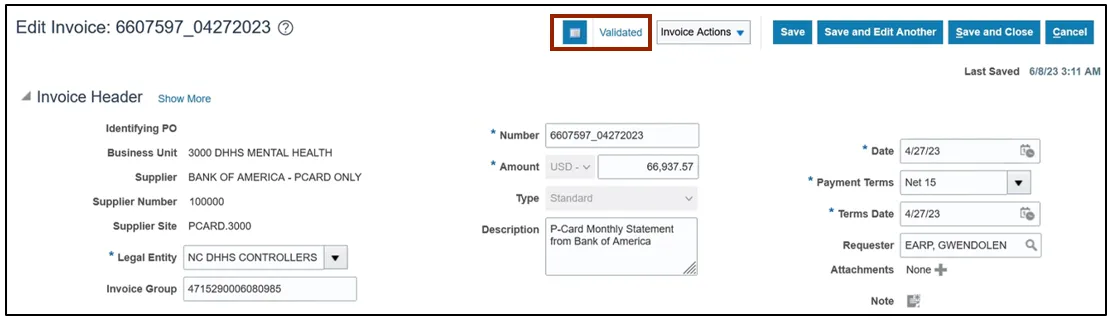
Step 14. After the hold is released by the AP Release Hold user, navigate to the invoice and click the Invoice Actions drop-down choice list and select Validate.
Step 15. On the Edit Invoice page, the invoice status changes from Needs Revalidation to Validated.
Note: If the invoice is set up for auto approval or supervisor approval, you don’t have to initiate the approval of the invoice. If not, please follow the approval process decided by your agency. For example, you can either choose the Requestor to approve, or force approve.
Wrap-Up
Manage BOA PCard invoice using the steps above.
Additional Resources
- Virtual Instructor-Led Training (vILT)