Purpose
The purpose of this Quick Reference Guide (QRG) is to provide a step-by-step explanation of how to Register and Maintain Suppliers in the North Carolina Financial System (NCFS).
Introduction and Overview
This QRG covers the procedure of registration of suppliers in NCFS which will enable you to Register Supplier.
Create Supplier Profile Manually
To create a supplier profile manually in NCFS, please follow the steps below. There are 17 steps to complete this process.
Step 1. Log in to the NCFS portal with your credentials to access the system.
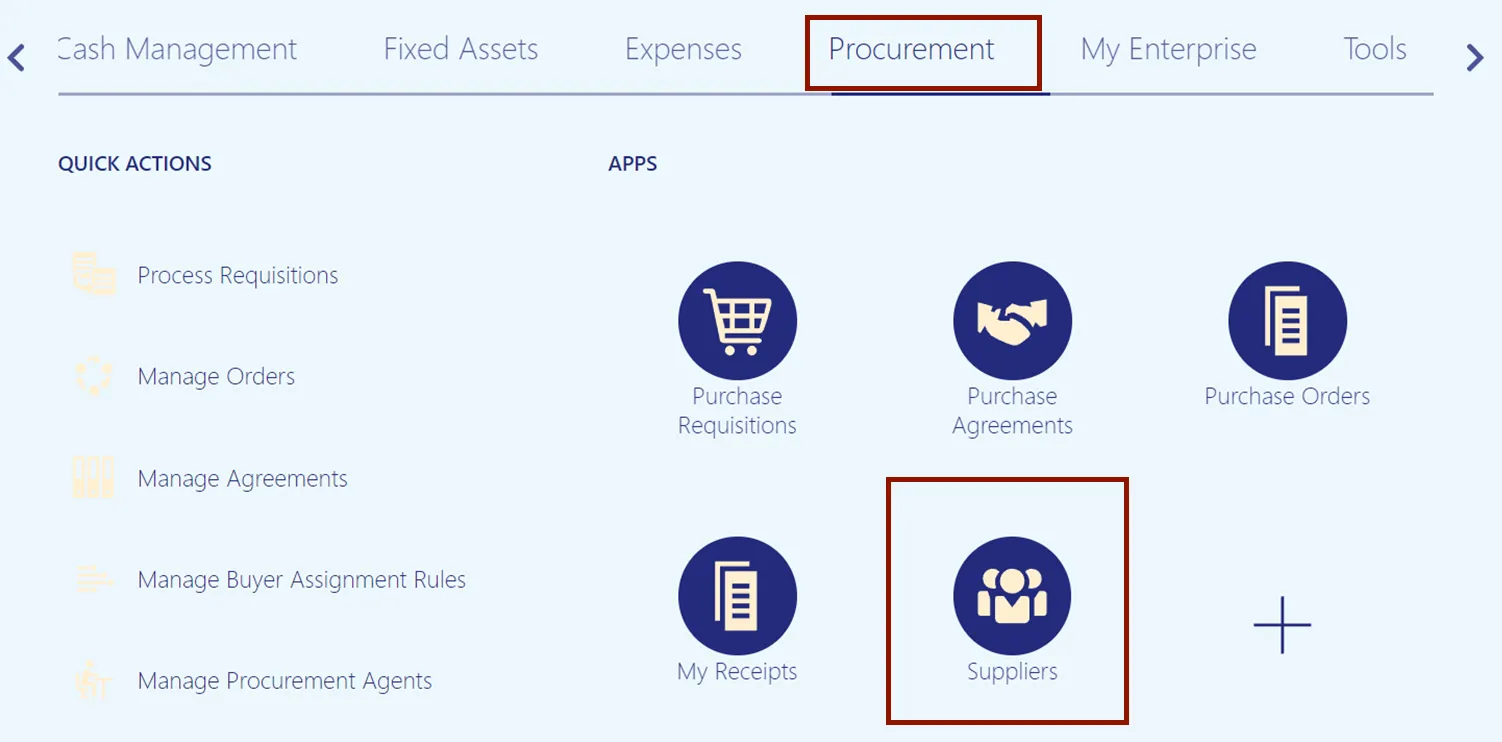
Step 2. On the Home page, click the Procurement tab, and then click the Supplier app.
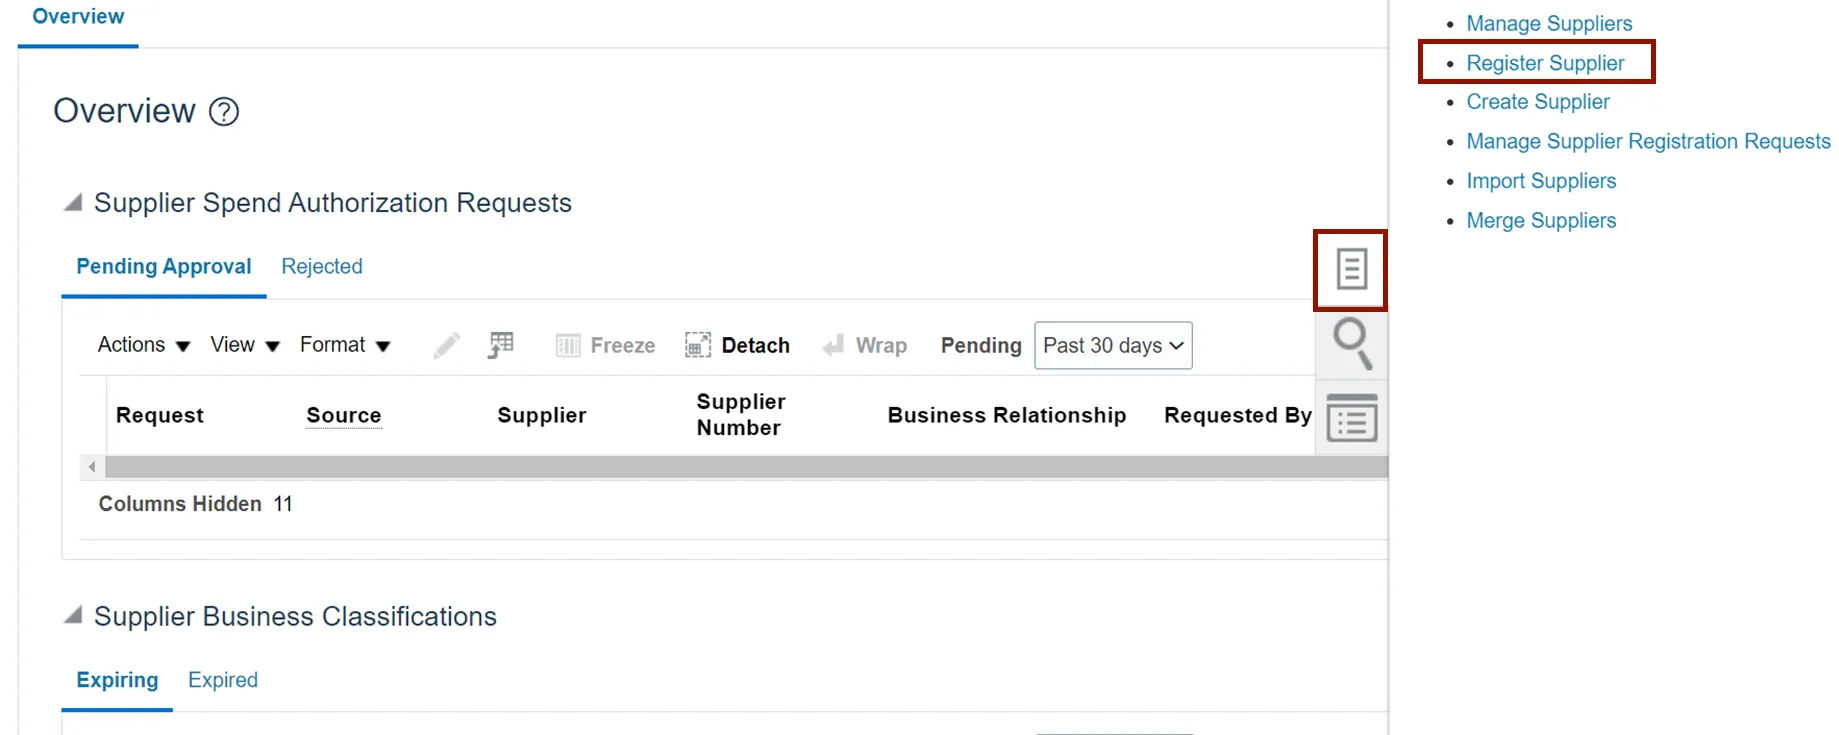
Step 3. On the Overview page, click the Tasks icon and then click Register Supplier.
Step 4. The Supplier Register page opens in a new internet browser tab.
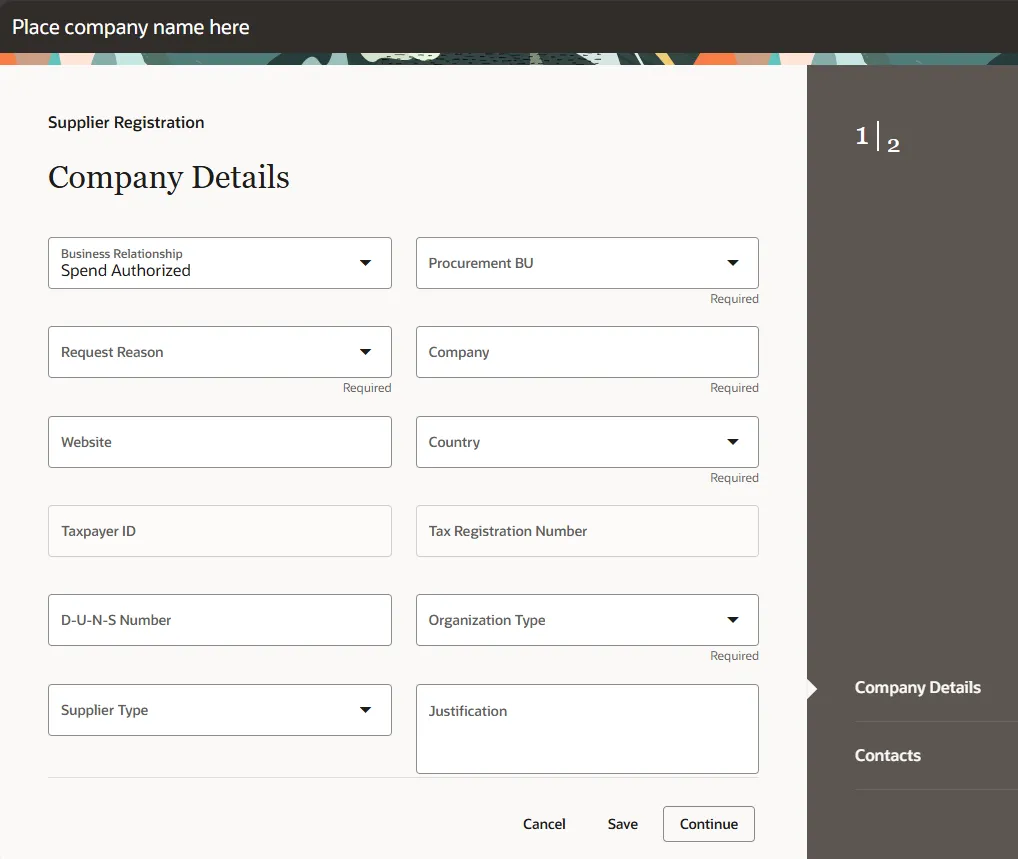
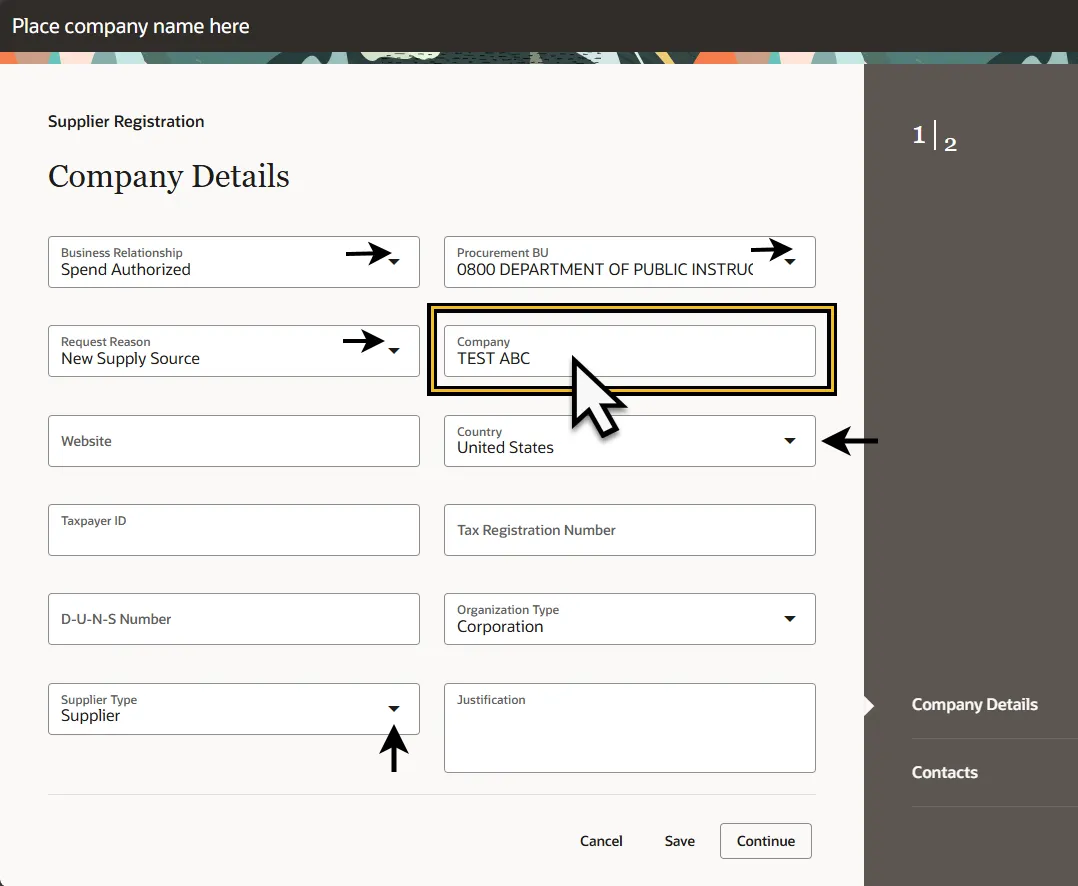
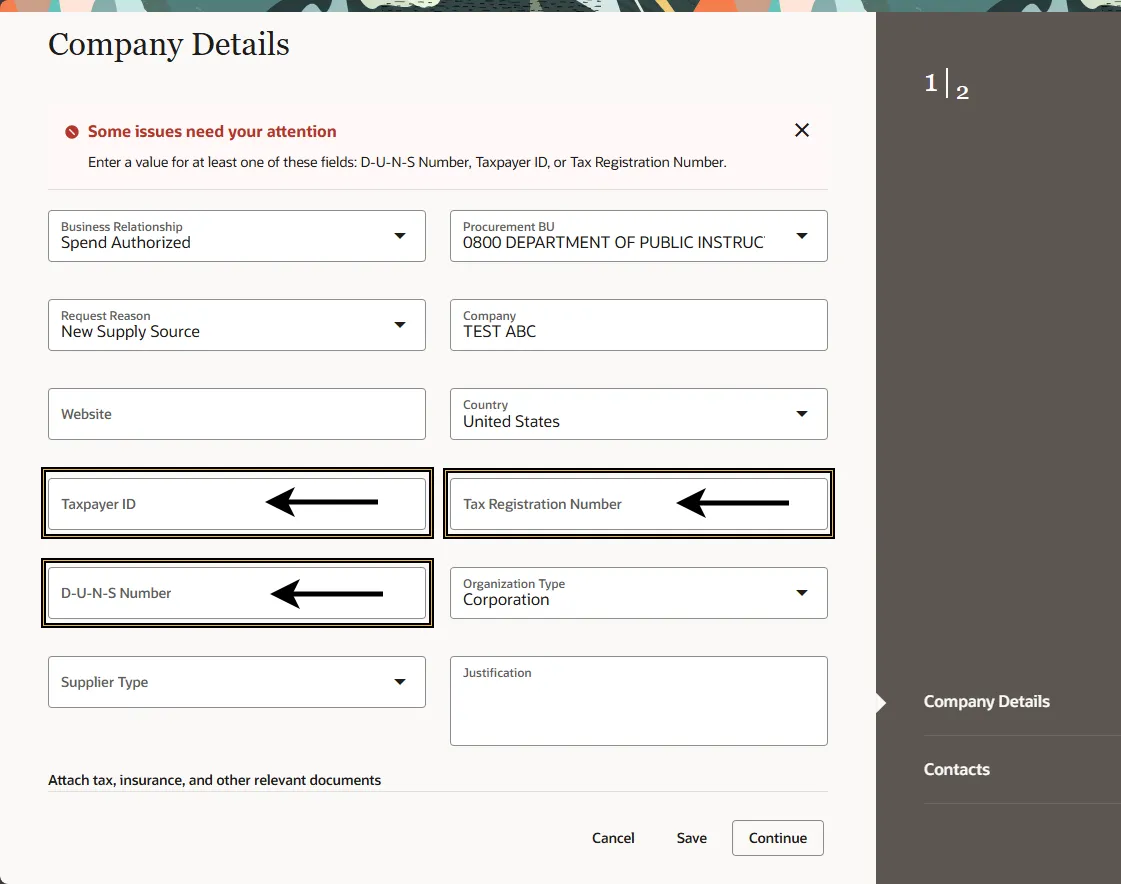
Step 5. In the Company Details section, enter the required information.
- Business Relationship: Select the Business Relationship
- Example: Spend Authorized
- Procurement BU: Select the Procurement BU
- Example: 0800 Department of Public Instruction
- Request Reason: Select the Request Reason
- Example: New Supply Source
- Company Name: Enter the Company name
- Example: Test ABC.
- Country: Select the country
- Example: United States
- Organization Type: Select the organization type from the drop-down list.
- Example: Corporation
- Supplier Type: Select the supplier type from the drop-down list.
Step 6. In the Company Details section, you must enter one of the following: Taxpayer ID, Tax Registration Number, or D-U-N-S Number.
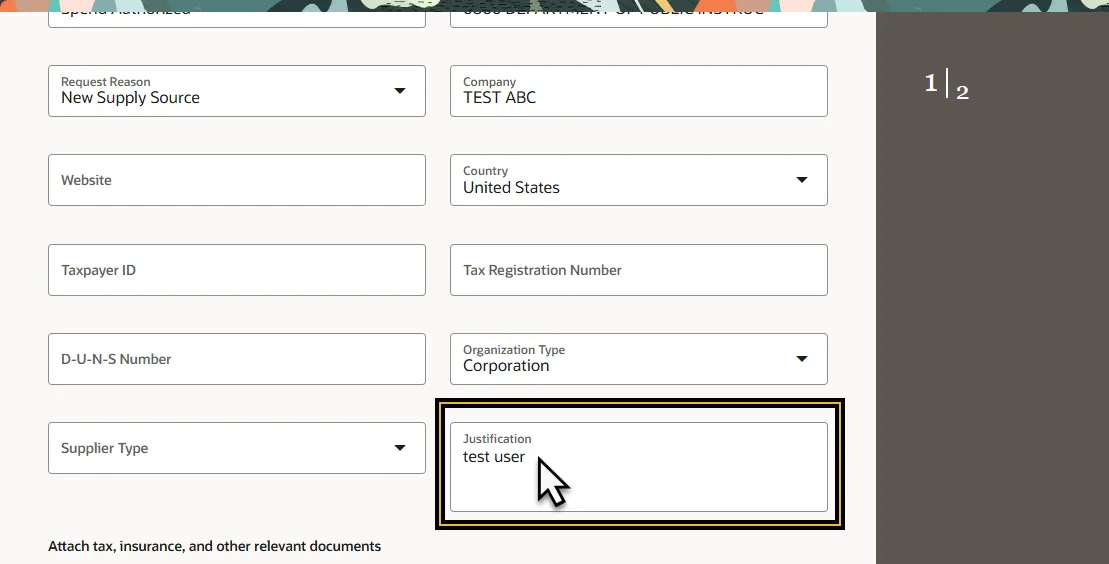
Step 7. In the Justification field, enter the justification for the new supplier registration.
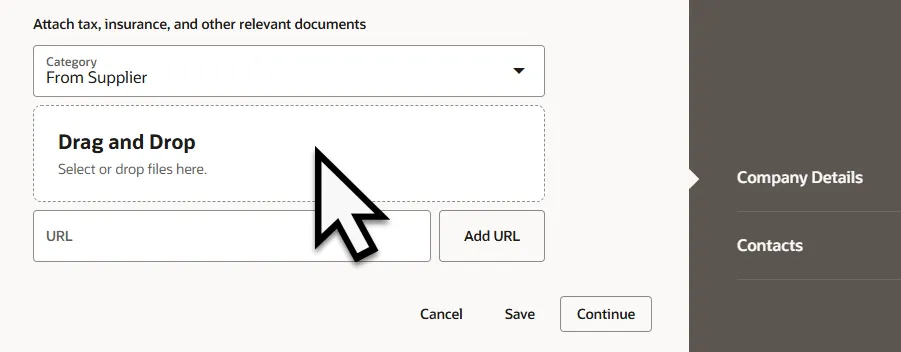
Step 8. Click the Drag and Drop field to select files to attach with the new supplier registration. Examples of documents that may be attached are Tax, Insurance, and other relevant documentation.
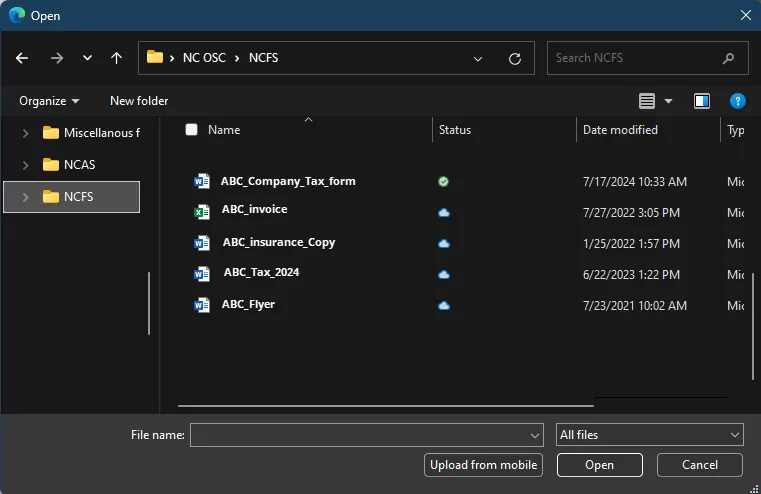
Step 9. In the file explorer navigate to the correct file location and select the files needed to upload into the Supplier Registration.
Step 10. Once the Company Details have been entered. Click Save.
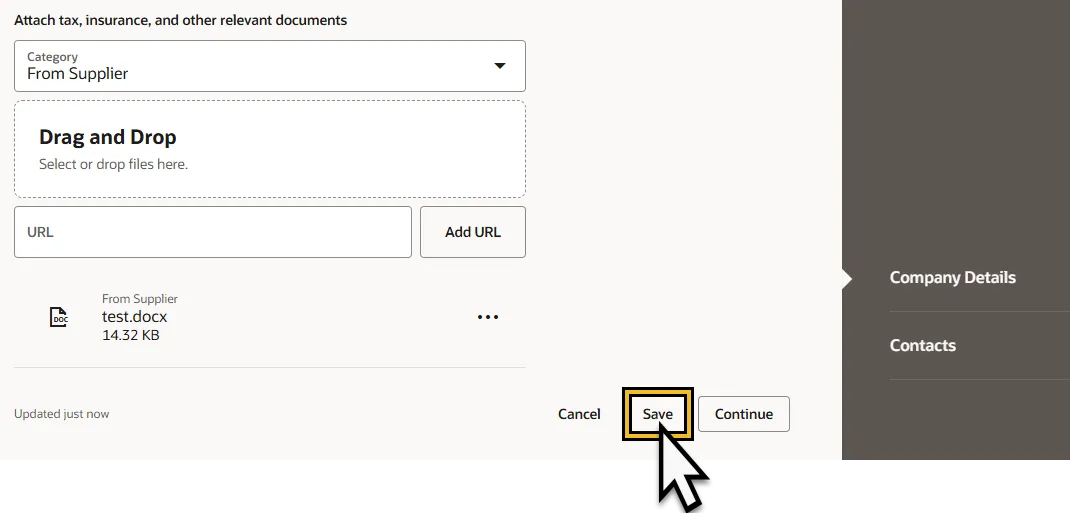
Step 11. Click Continue.
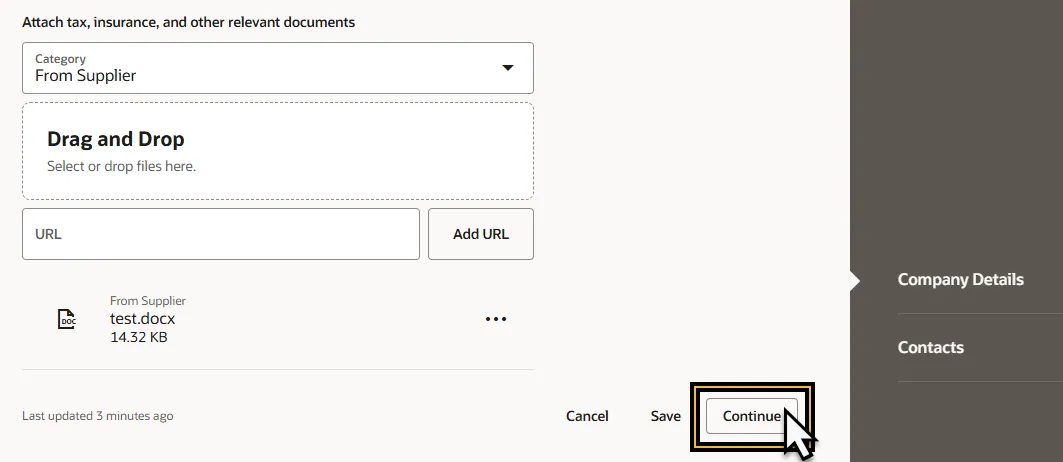
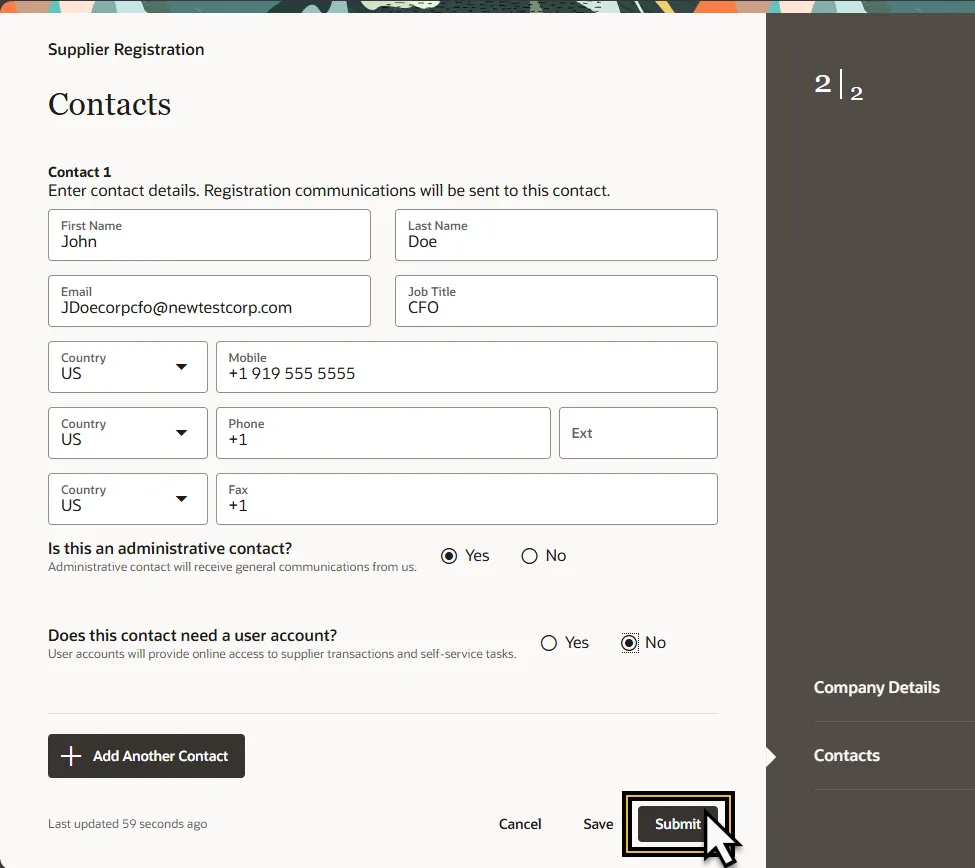
Step 12. Enter the required information into the Contacts page. The registration communications will be sent to the individual entered in the Contacts details page.
- First Name: Enter the first name of the contact.
- Last Name: Enter the last name of the contact.
- Email: Enter the email address of the contact.
- Contact number: Enter the mobile, phone, and/or fax number for the contact.
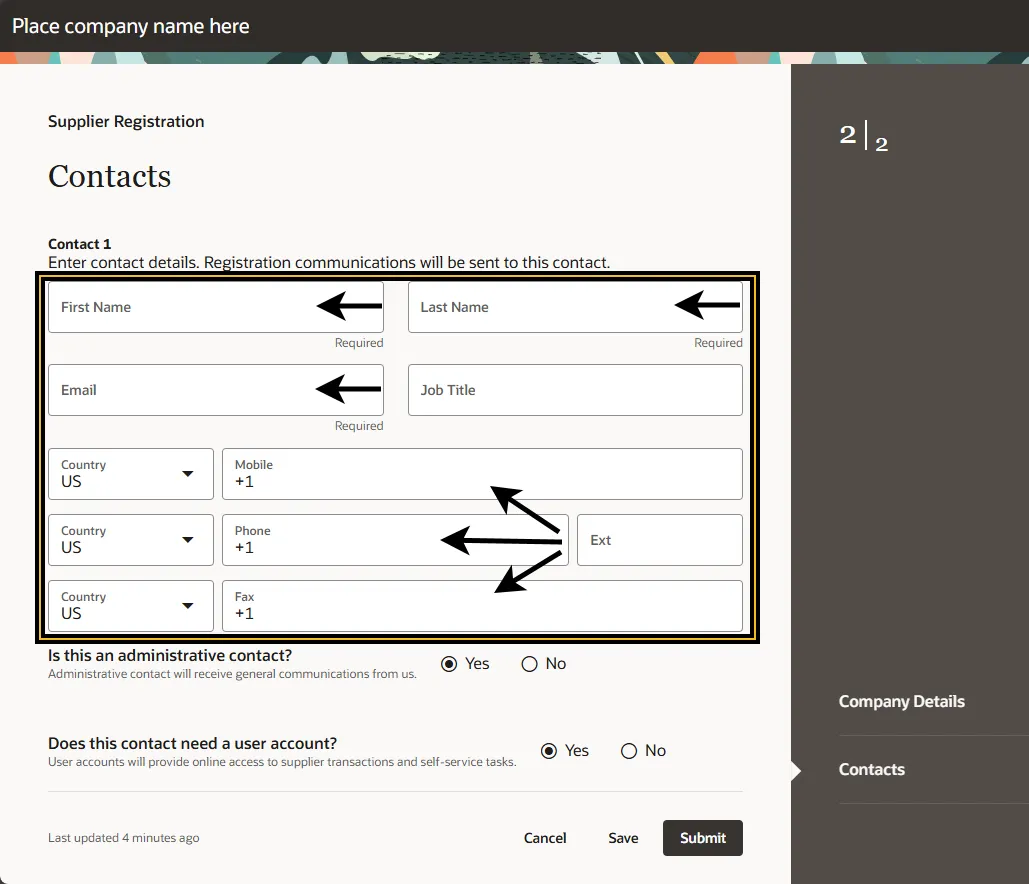
Step 13. Select the Contact Type. If the contact is an administrative contact, they will receive general communication information. Select Yes if they are an administrative contact select No if they are not.

Step 14. Select if the Contact Needs a User Account. A user account provides access to supplier transactions and self-service tasks. Select Yes if the contact needs a user account, select No if the contact does not.

Step 15. Click the Save button.
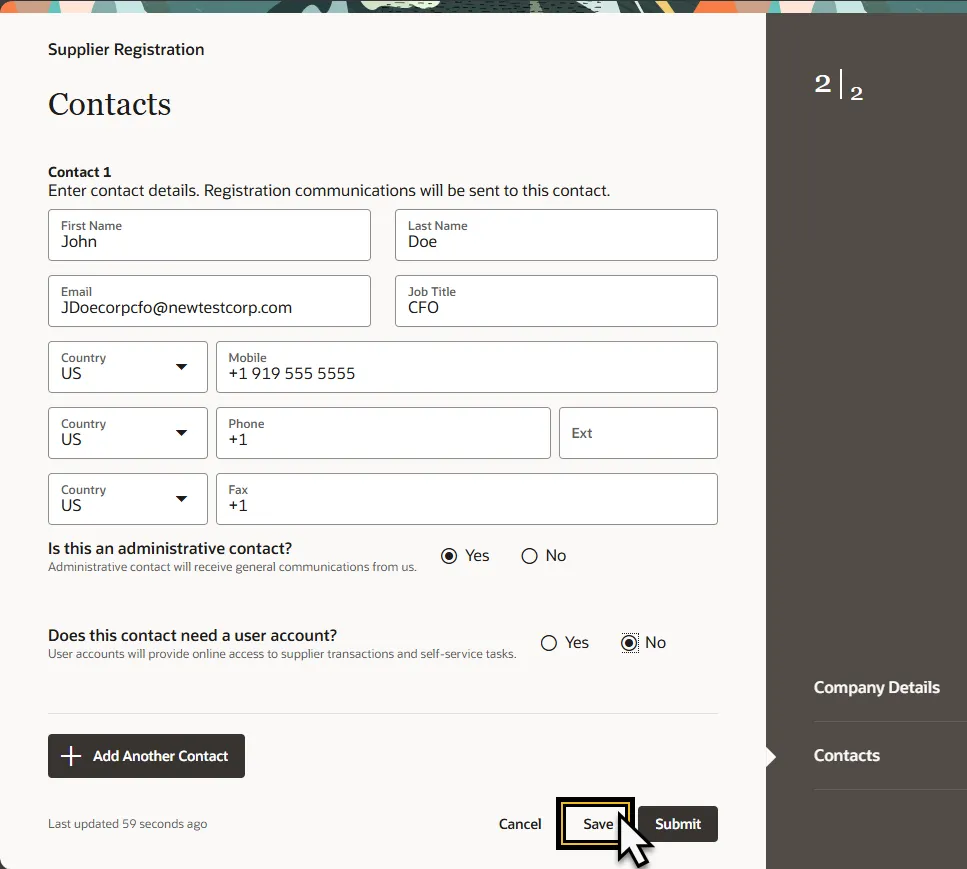
Step 16. Click the Submit button.
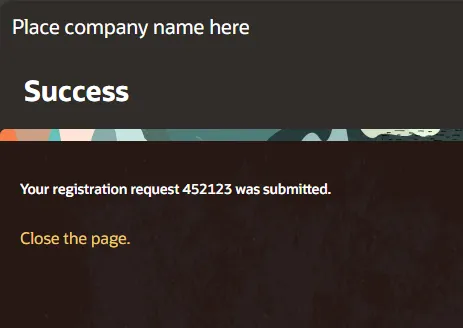
Step 17. The Success Conformation page will appear after a successful registration request providing a registration request number. Click Close the page, to return to the Supplier Dashboard.
Wrap-Up
Register Suppliers using the steps above to register the supplier registration request and update the supplier data elements.
Additional Resources
- Virtual Instructor-Led Training (vILT)