Purpose
The purpose of this Quick Reference Guide (QRG) is to provide a step-by-step explanation of how to submit an Invoice for Approvals in the North Carolina Financial System (NCFS).
Introduction and Overview
This QRG covers the steps to initiate approval for single invoice and initiate approval for multiple invoices.
Initiate Approval for single Invoice
To Initiate Approval for single Invoice in NCFS, please follow the steps below. There are 7 steps to complete this process.
Step 1. Log in to the NCFS portal with your credentials to access the system.
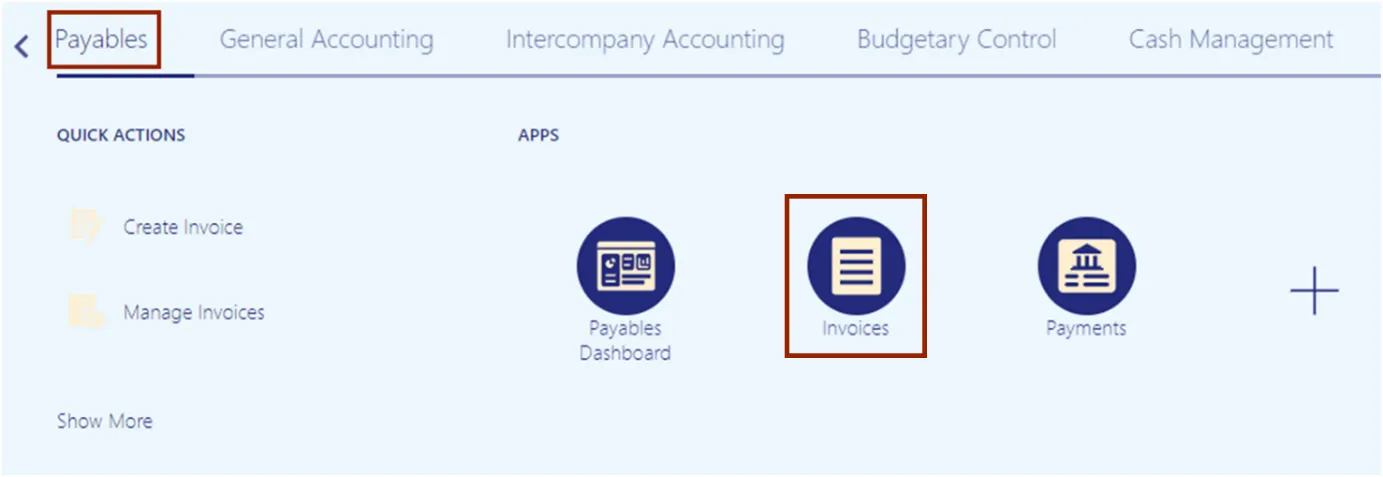
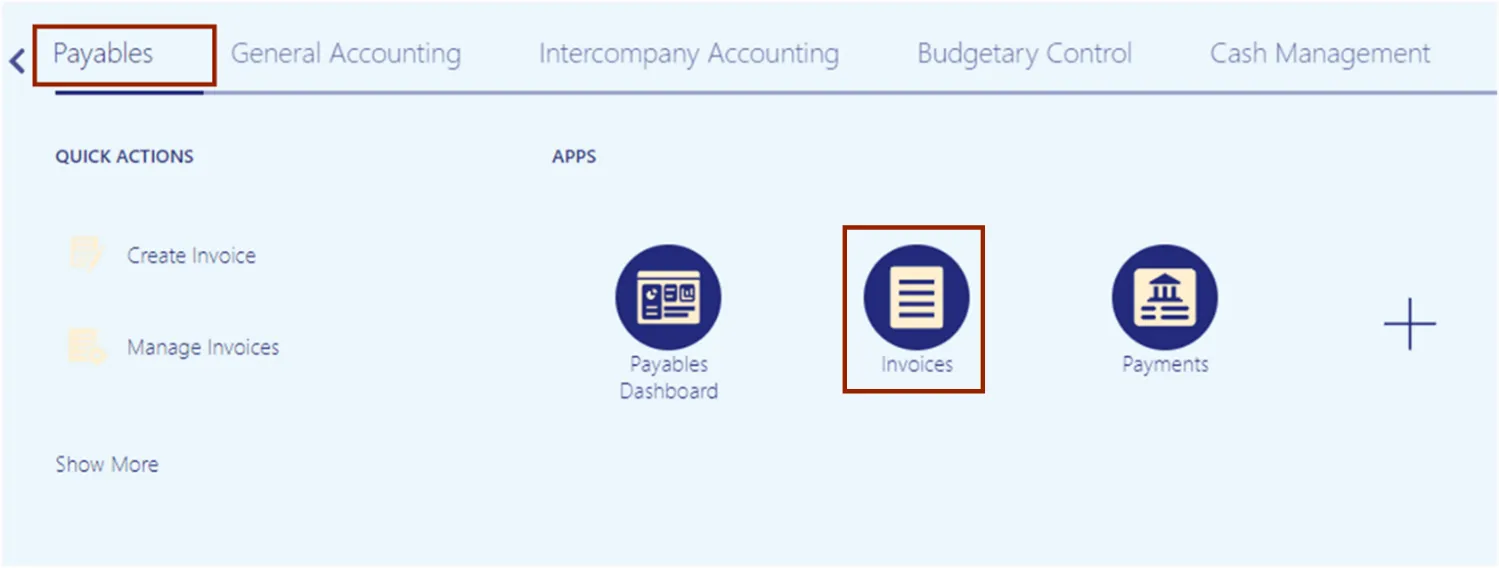
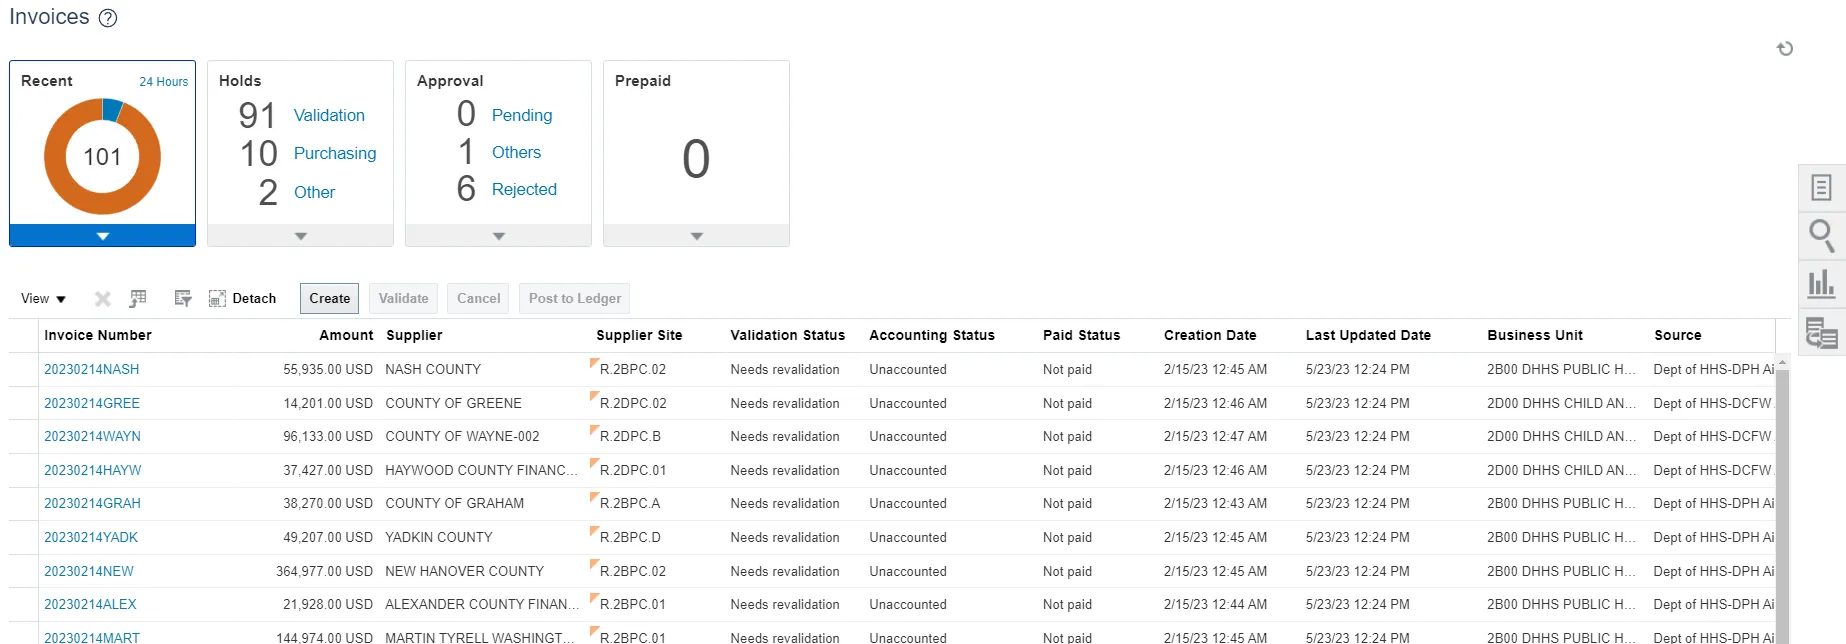
Step 2. Click the Payables tab. Click the Invoices app.
Step 3. Click the Tasks icon. On the Tasks pane, click the Manage Invoices.

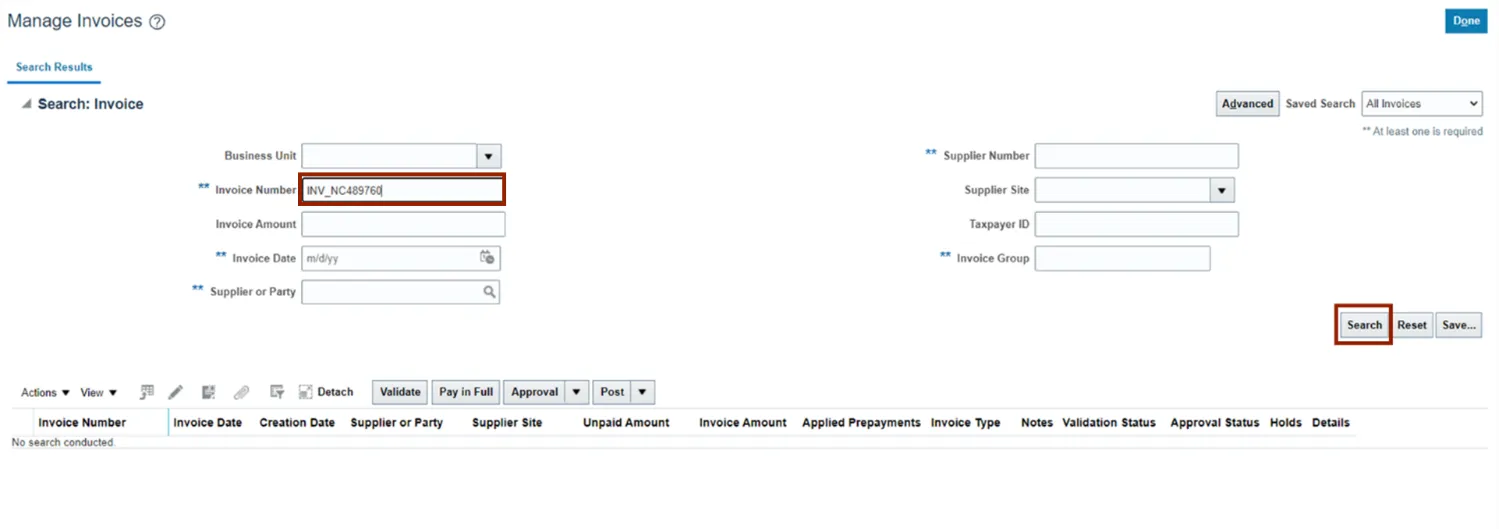
Step 4. The Manage Invoices page opens. On the Search: Invoice section, enter the required fields. Click the Search button.
Step 5. Click the Actions drop-down choice list button. Select Approval and the select Initiate.
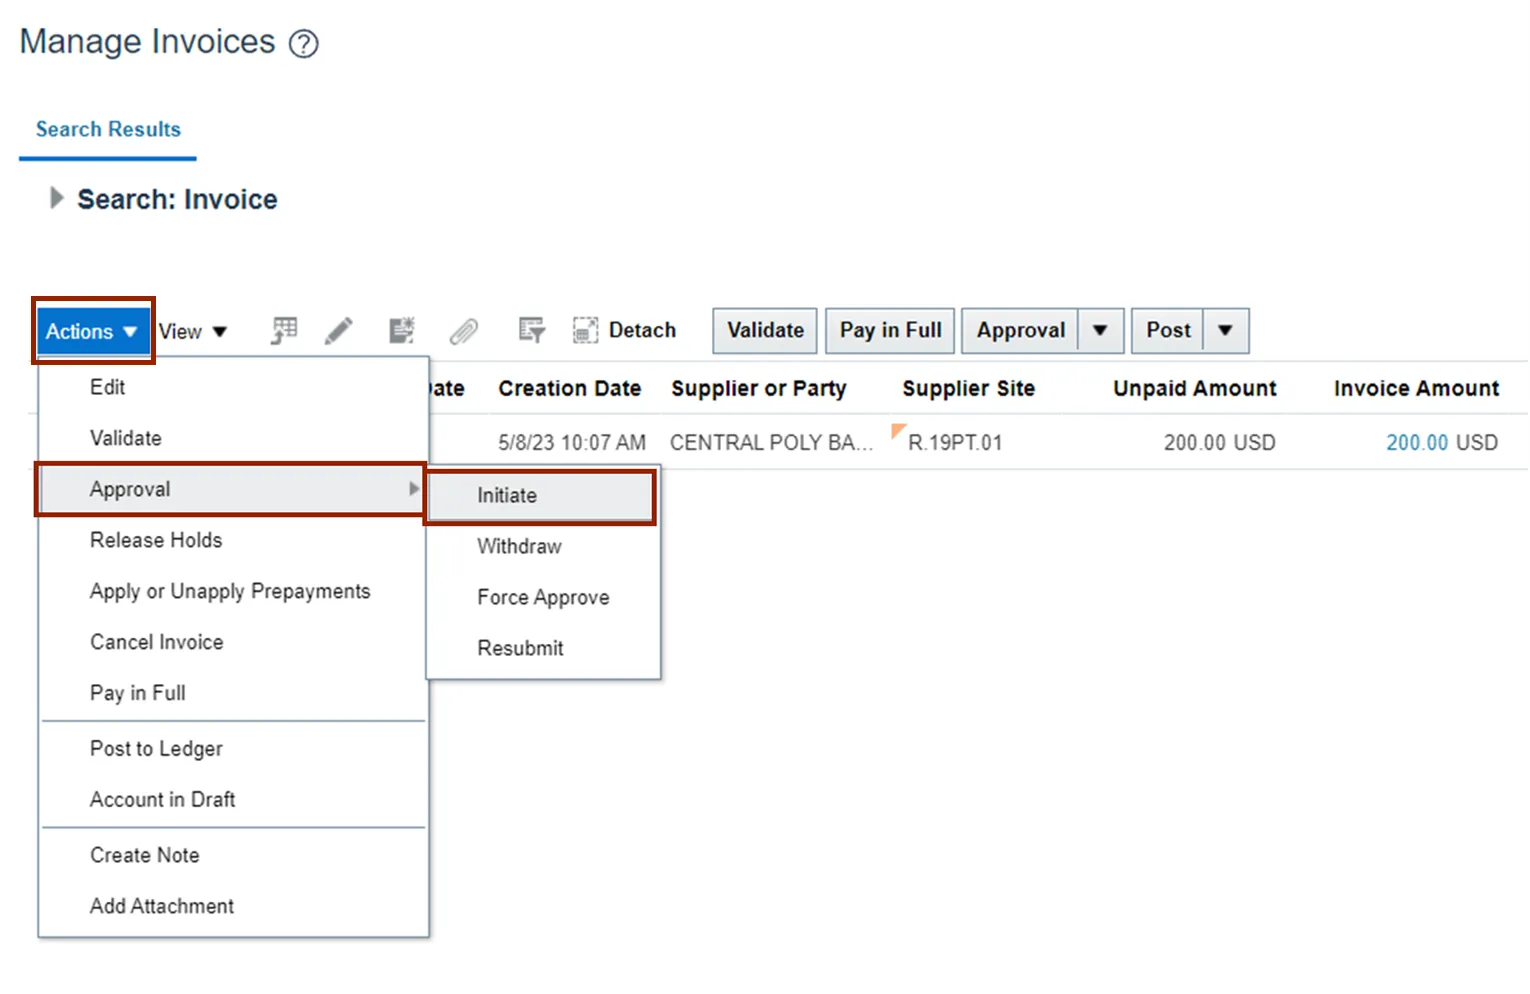
Step 6. The selected Invoice number’s Approval Status will change to Initiated.

Note: Depending on the workflow configuration for the specific BU, it might go directly to the status of workflow approved
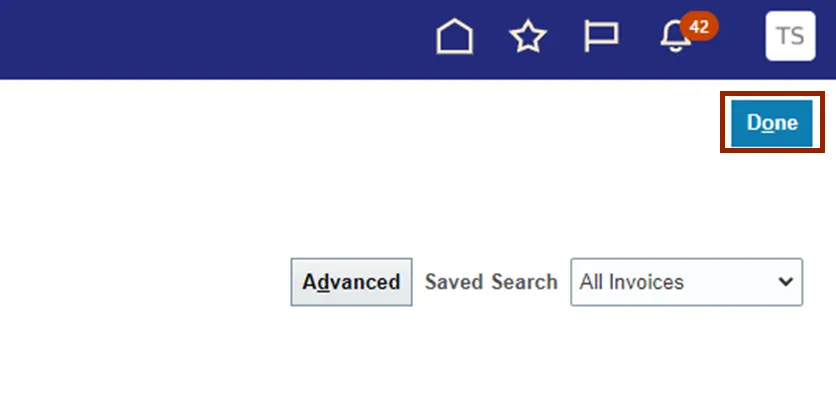
Step 7. Scroll to the top of the Manage Invoices page and click the Done button.
Initiate Approval for multiple Invoices
To Initiate Approval for multiple Invoices in NCFS, please follow the steps below. There are 11 steps to complete this process.
Step 1. Click the Payables tab. Click the Invoices app.
Step 2. Click the Tasks icon. On the Tasks pane, under Invoices, click Initiate Approval Workflow.

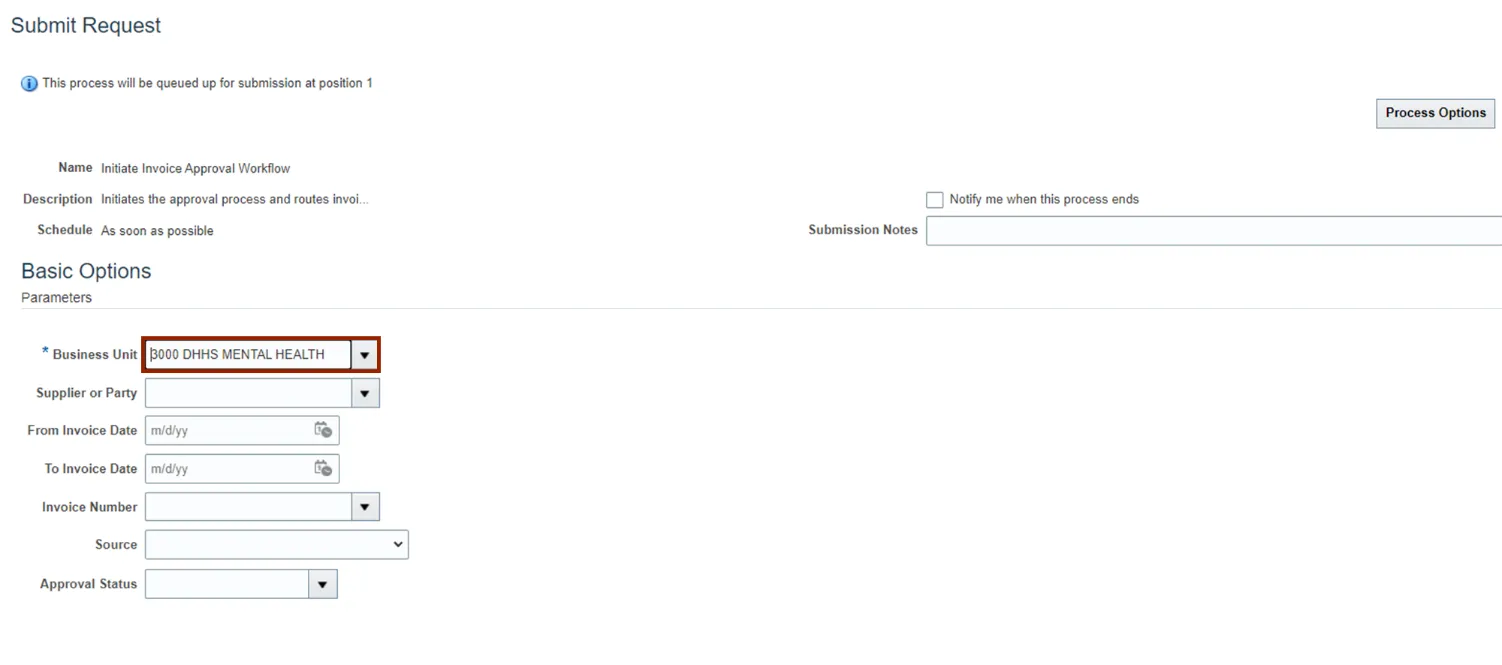
Step 3. The Submit Request page opens. On the Basic Options section, enter the required fields Business Unit.
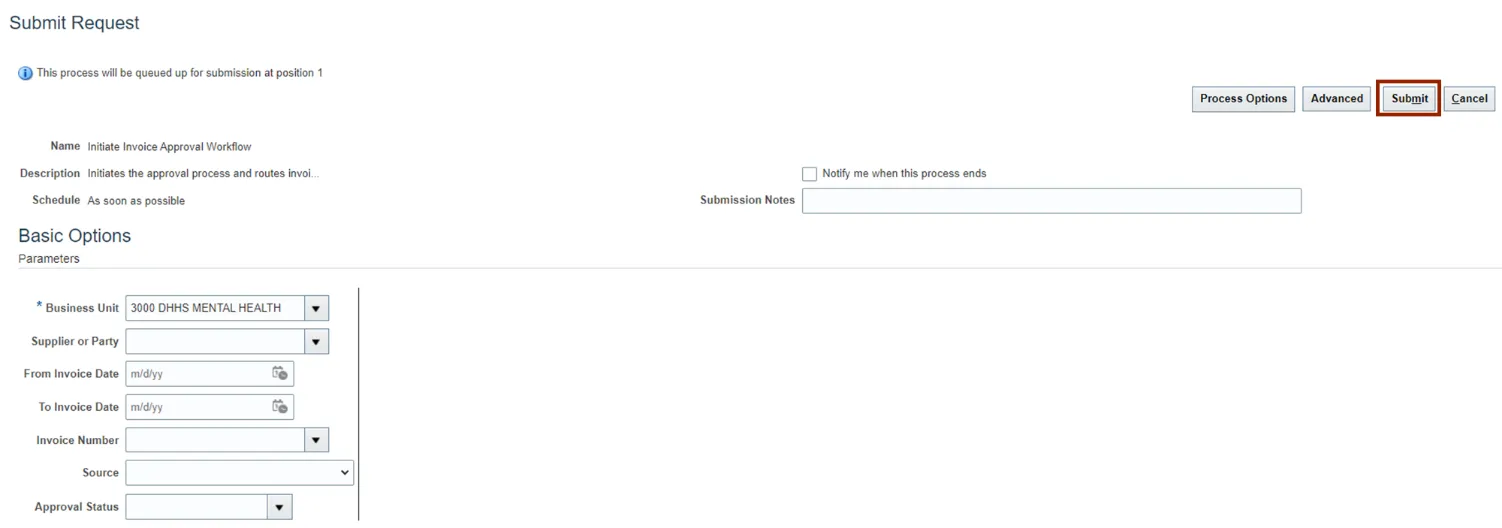
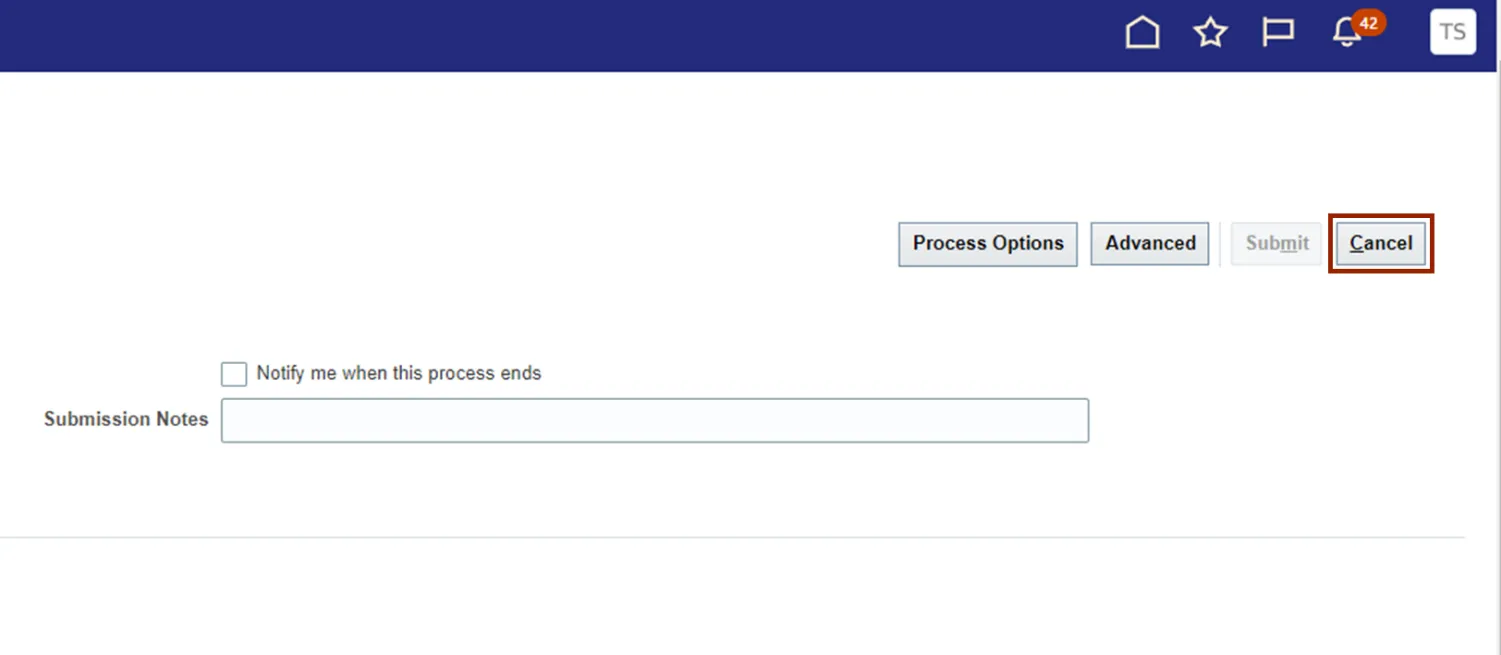
Step 4. Click the Submit button.
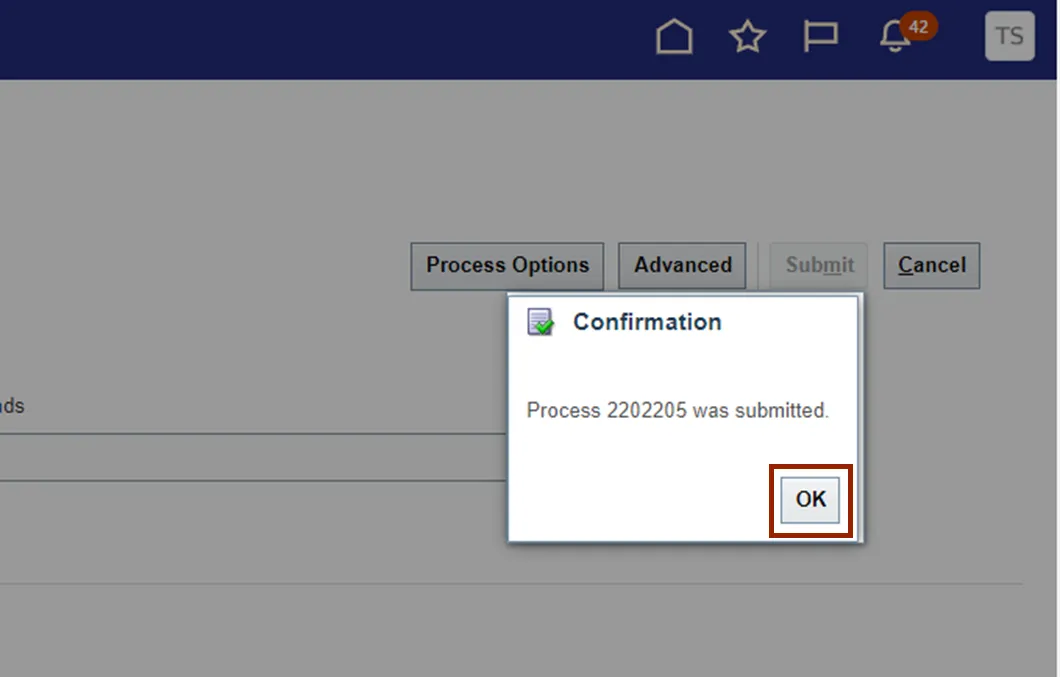
Step 5. The Confirmation pop-up appears. On the Confirmation pop-up, click the OK button.
Step 6. On the Submit Request page, click the Cancel button. The Invoice Approval workflow is initiated and the Invoices are submitted.
Step 7. You are now redirected to the Invoices page. Click on Home page.
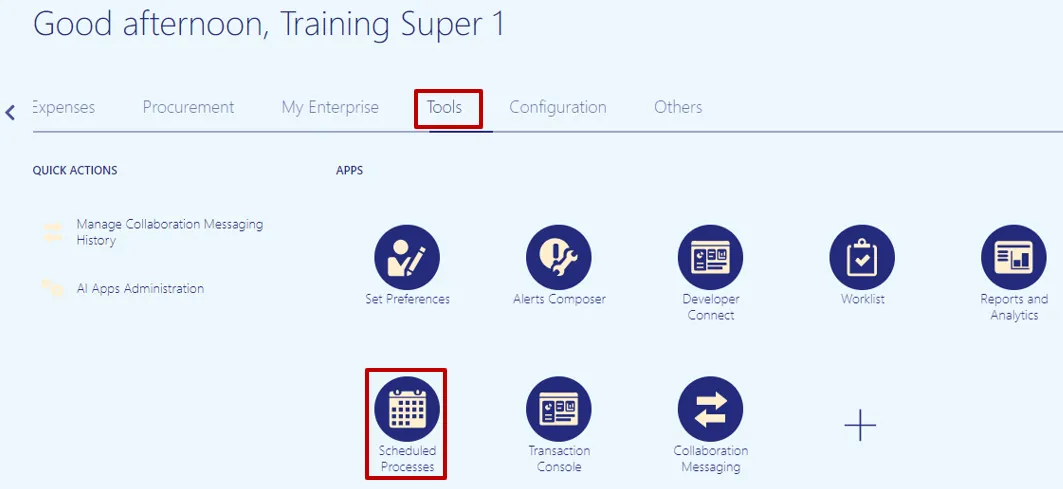
Step 8. Navigate to Tools application and click on Scheduled Processes. This is the step to find out the status of the Validate Invoice program.
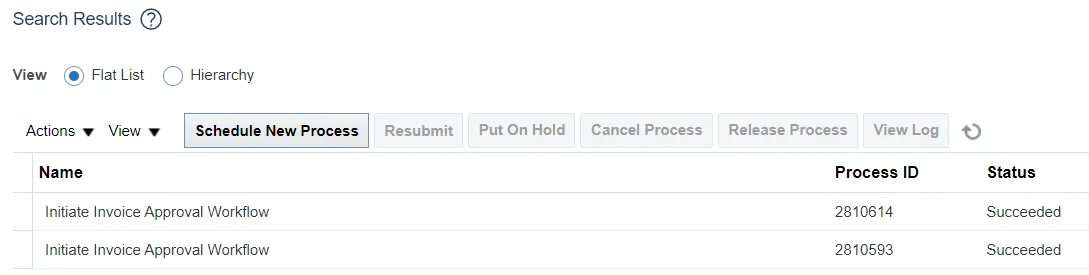
Step 9. The overview page is displayed and a list of all the processes are displayed. You can search for the process using the search criteria or scroll down and look for the process in the list.
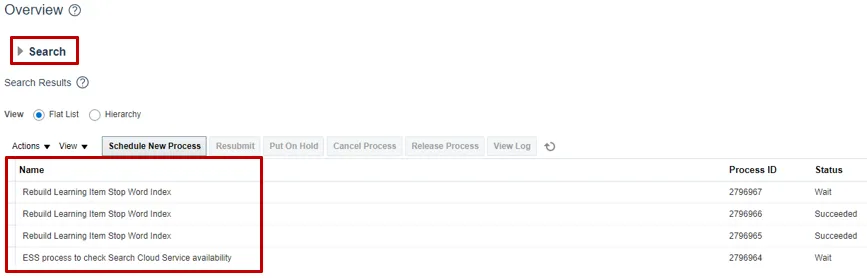
Step 10. Click the Search arrow and enter the search criteria. You can use several criteria like Name, Process ID or the Submission Time to inquire for the process status. The process name to search for is – Initiate Invoice Approval Workflow, click on Search button.

Step 11. A list of all the processes inquired on will be displayed with the status.
Wrap-Up
Submit a single Invoice and multiple Invoices for approval using the steps above.
Additional Resources
- Virtual Instructor-Led Training (vILT)