Purpose
The purpose of this Quick Reference Guide (QRG) is to provide a step-by-step explanation of how to Approve or Reject Invoices in the North Carolina Financial System (NCFS).
Introduction and Overview
This QRG covers the steps to Approve or Reject Invoices in NCFS.
Approve Invoices
To Approve Invoices in NCFS, please follow the steps below. There are 5 steps to complete this process.
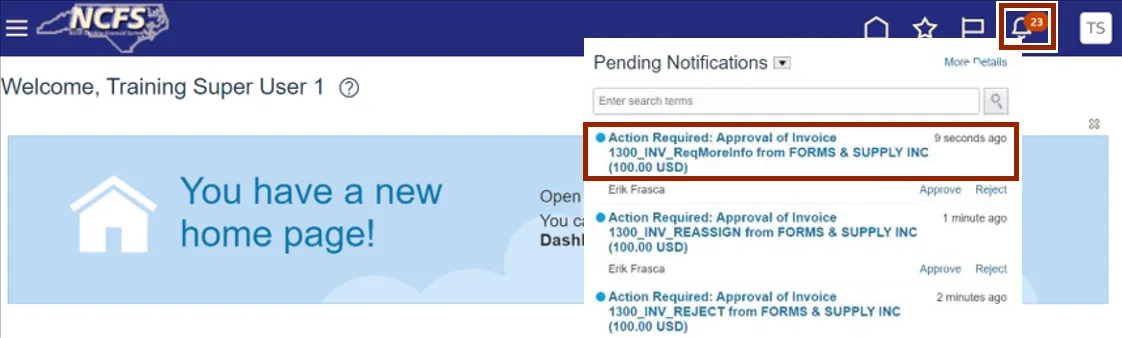
Step 1. Log in to the NCFS portal with your credentials to access the system.
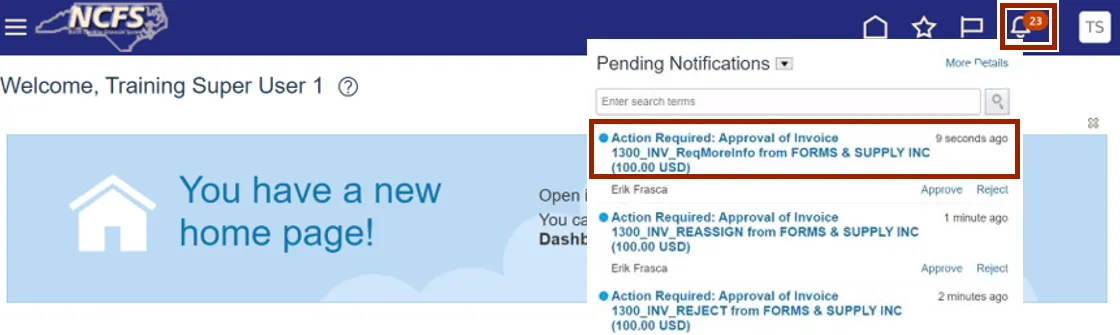
Step 2. On the Home page, click the Notifications icon and select the required notification.
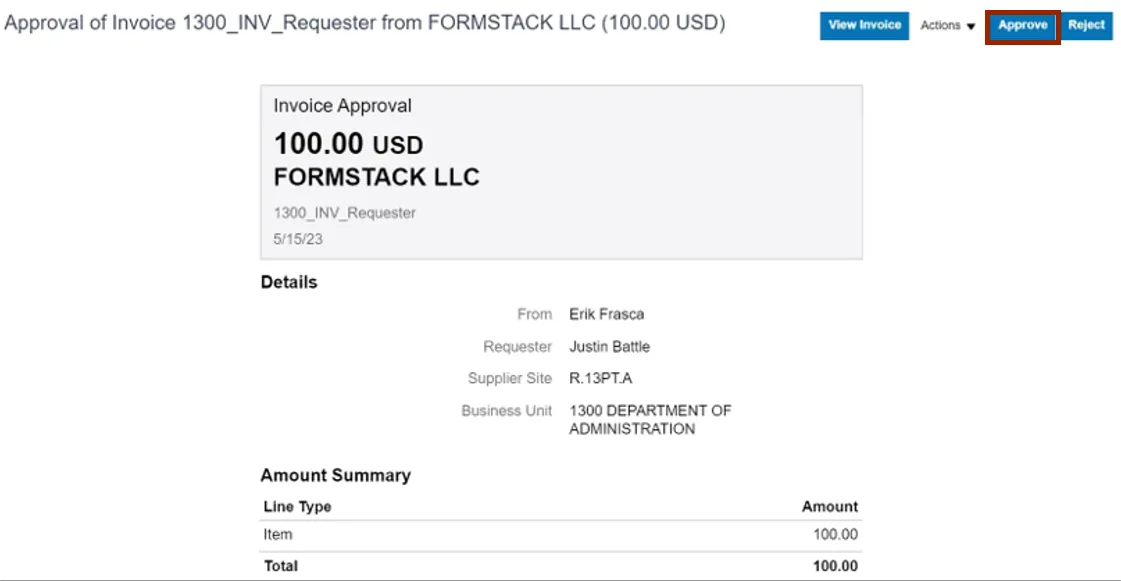
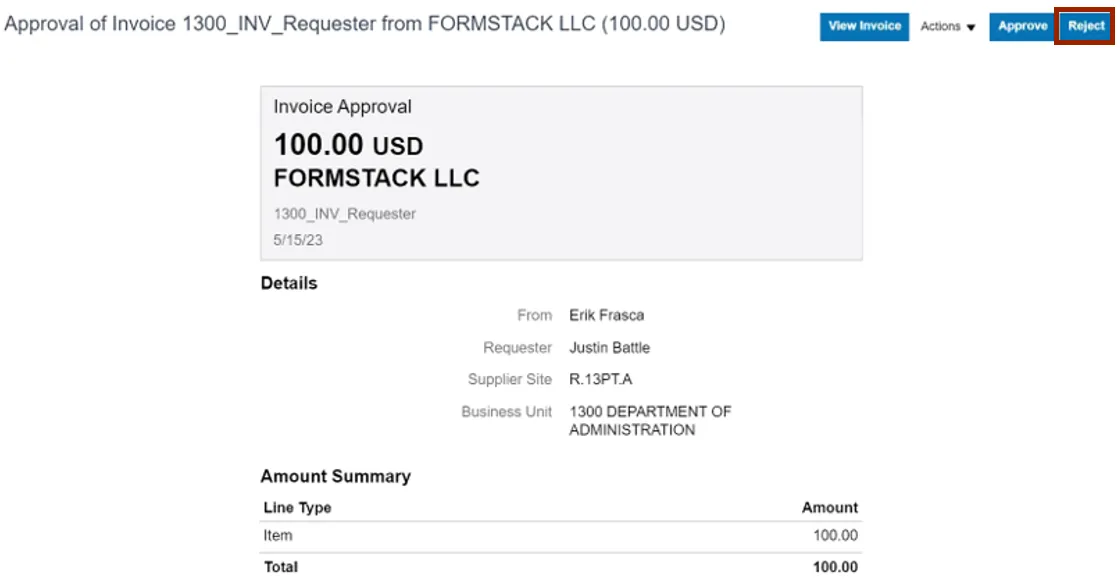
Step 3. The Approval pop-up window appears. Click the Approve button.
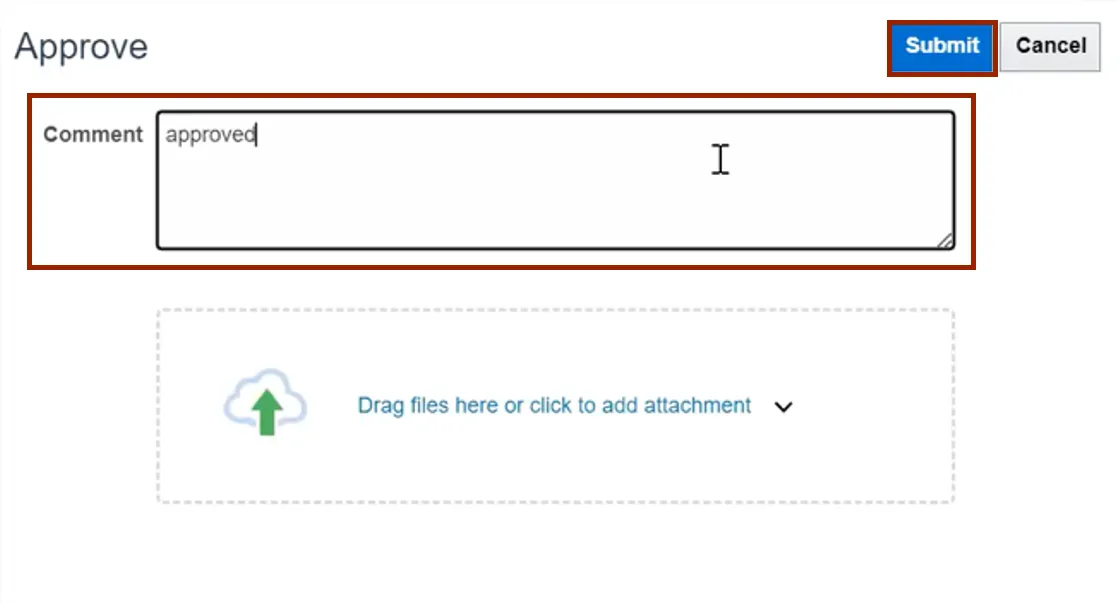
Step 4. The Approve pop-up appears. Enter a Comment if required and click the Submit button. The Invoice is Approved.
Note: Comments for approving an invoice is optional.
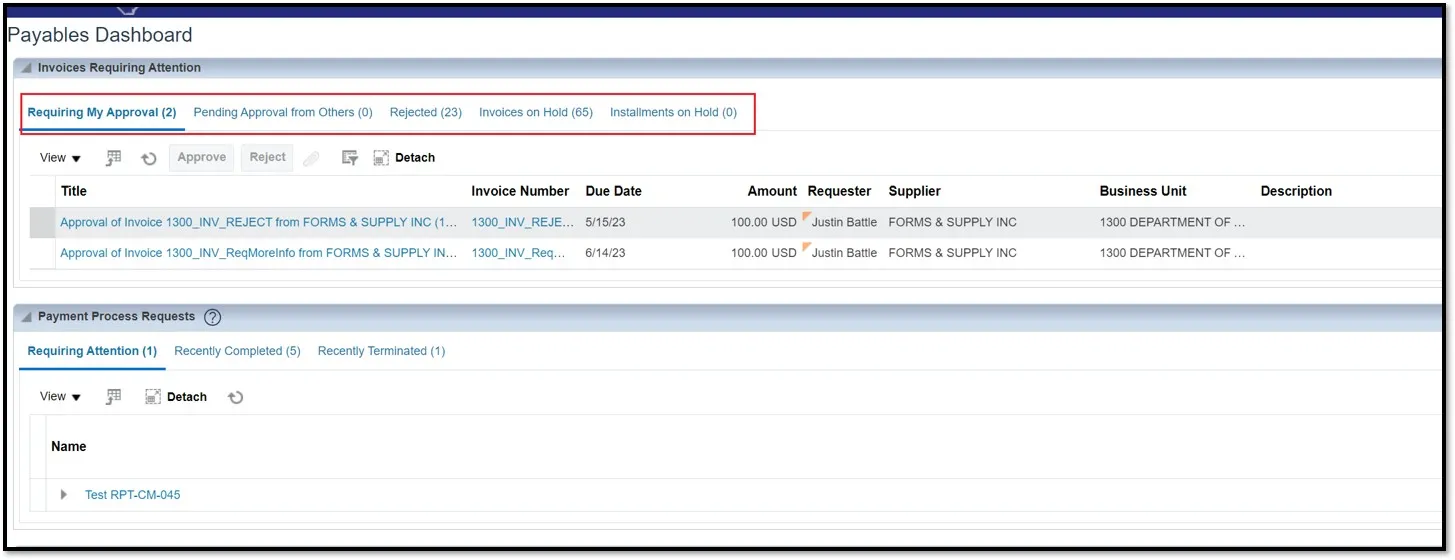
Step 5. Users can also navigate to Home page > Payables tab > Payables Dashboard to view the list of Invoices requiring attention and Approve or Reject from here.
Reject Invoices
To Reject Invoices in NCFS, please follow the steps below. There are 4 steps to complete this process.
Step 1. Log in to the NCFS portal with your credentials to access the system.
Step 2. On the Home page, click the Notifications icon and click on the required notification.
Step 3. The Approval pop-up appears. Click the Reject button.
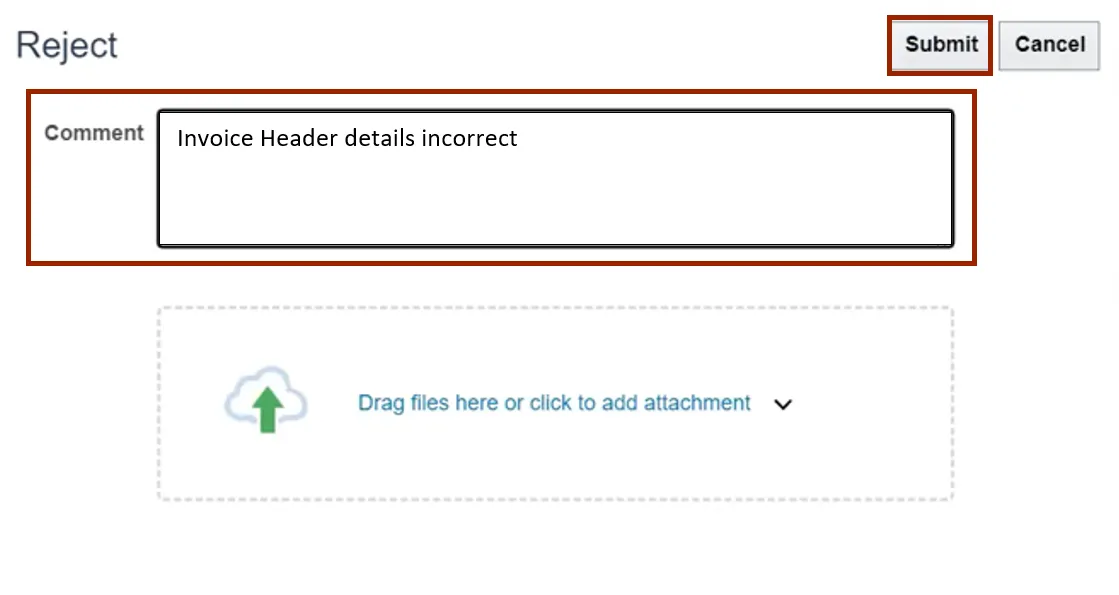
Step 4. The Reject pop-up appears. Enter a Comment as required and click the Submit button. The Invoice is Rejected.
Note: The Comment is optional but it is encouraged to add the reasons for rejection.
Request Additional Information
An approver can send an invoice back to the requestor if adequate details are not mentioned in it. Complete the following steps to request for additional information. There are 4 steps to complete this process.
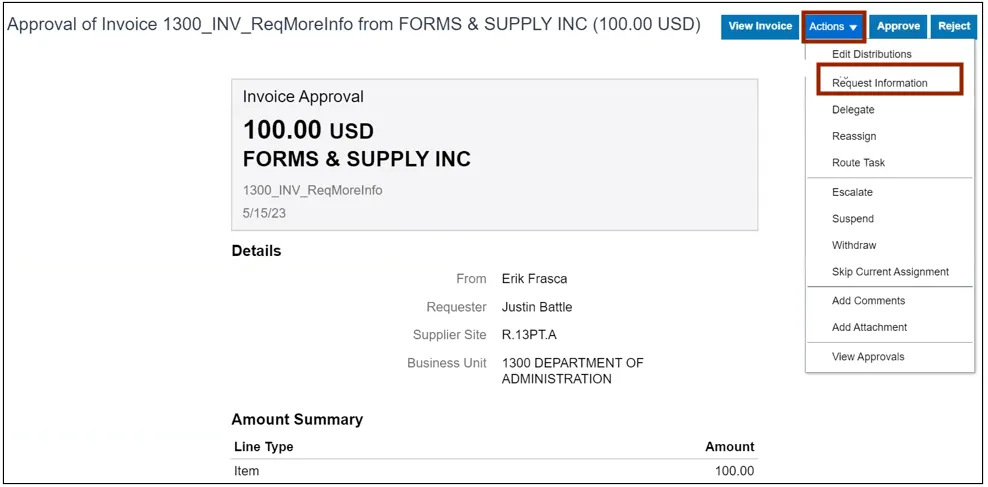
Step 1. On the NCFS Home page, click the Notifications icon. Select the required notification.
Step 2. The Approval pop-up window appears. Click the Actions drop-down choice list button, select Request Information.
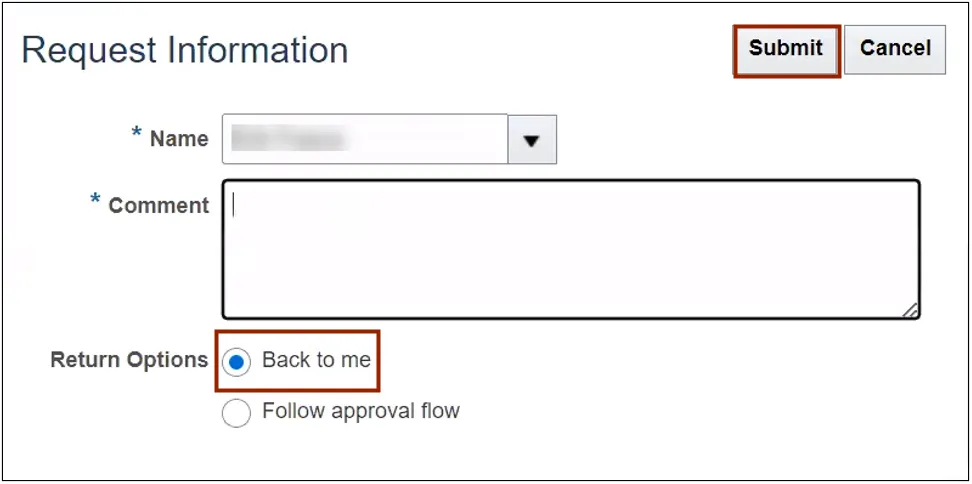
Step 3. The Request Information pop-up window appears. Enter the Name of the user from whom additional information is required. Enter a Comment mentioning the required information.
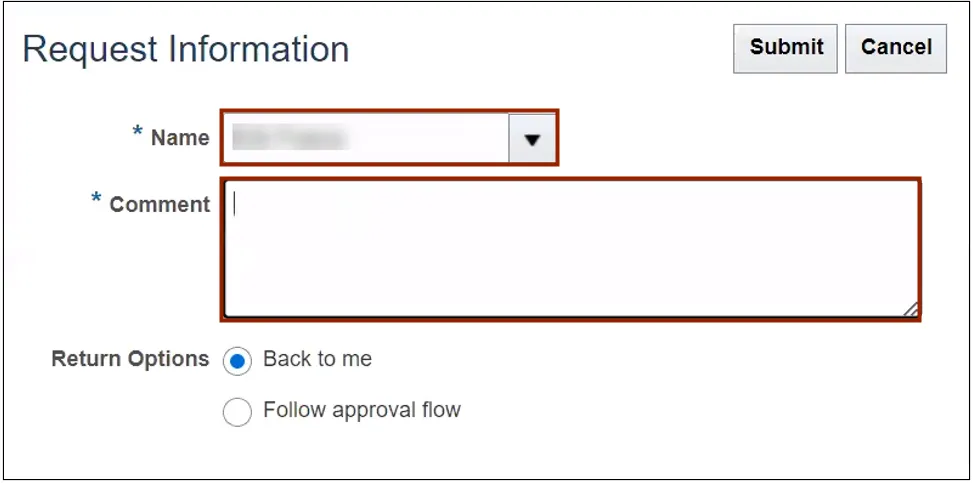
Step 4. Select the required Return Options radio button. Click the Submit button.
Wrap-Up
Approve or Reject Invoices using the steps above. The Invoice Approver must approve or reject an invoice sent to a requestor/employee supervisor for approval in the event of invoice not getting auto approved.
Additional Resources
- Virtual Instructor-Led Training (vILT)