Purpose
The purpose of this Quick Reference Guide (QRG) is to provide a step-by-step explanation of how to Create Split Line Distributions in the North Carolina Financial System (NCFS).
Introduction and Overview
This QRG covers the steps to create split line distributions in NCFS. While creating an invoice, the line distribution can be split as required.
Create Split Line Distributions
To create split line distributions in NCFS, please follow the steps below. There are 11 steps to complete this process.
Step 1. Log in to the NCFS portal with your credentials to access the system.
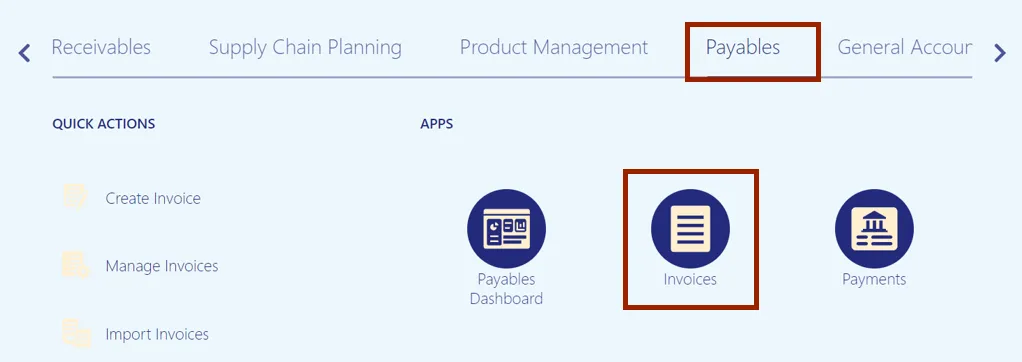
Step 2. On the Home page, click the Payables tab and click the Invoices app.
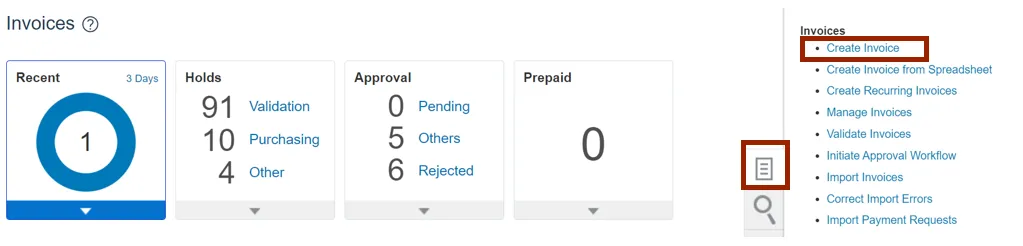
Step 3. The Invoices dashboard opens. Click the Tasks icon and click Create Invoice.
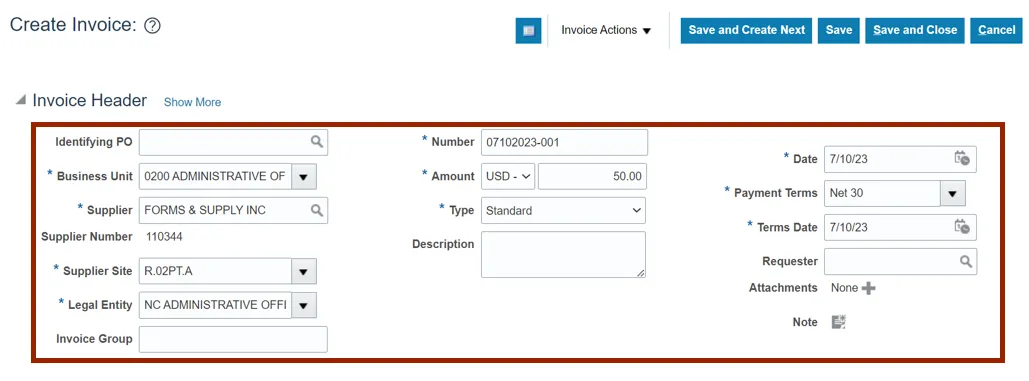
Step 4. The Create Invoice page opens. On the Invoice Header section, enter the details in the mandatory fields (marked with *).
In this example, we choose:
- *Business Unit: 0200 ADMINISTRATIVE OFFICE OF THE COURTS
- *Supplier: FORMS & SUPPLY INC
- *Supplier Site: R.02PT.A
- *Legal Entity: NC ADMINISTRATIVE OFFICE OF THE COURTS
- *Number: 07102023-001
- *Amount: USD 50.00
- *Type: Standard
- *Date: 7/10/23
- *Payment Terms: Net 30
- *Terms Date: 7/10/23
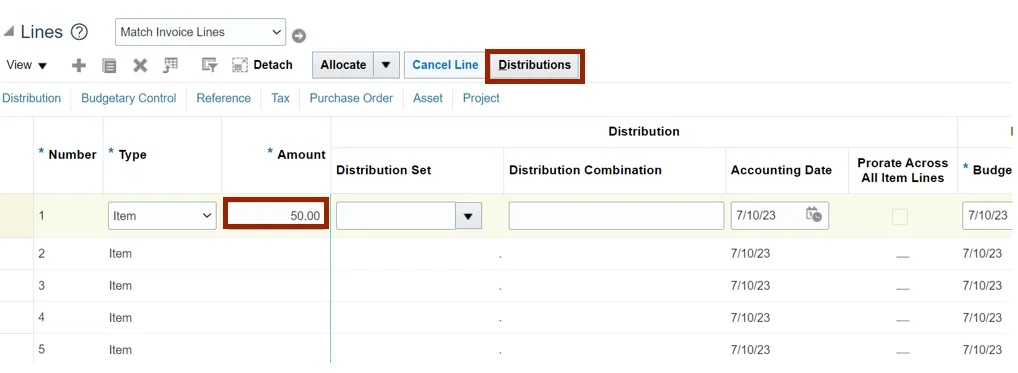
Step 5. Scroll down to the Lines section. Enter the Amount and click the Distributions button.
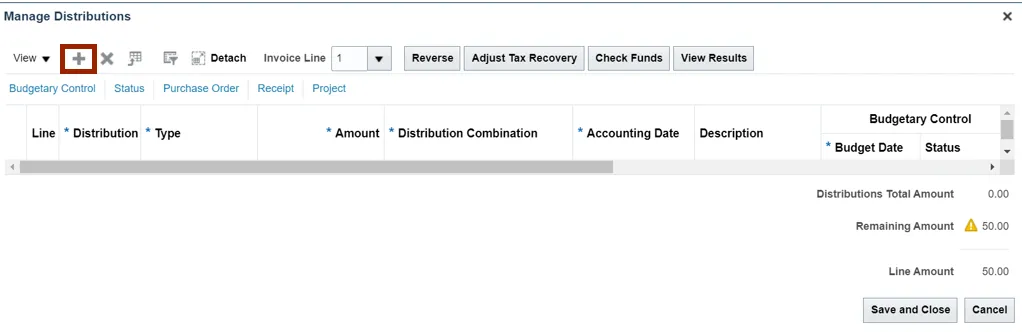
Step 6. The Manage Distributions pop-up appears. Click the Plus icon.
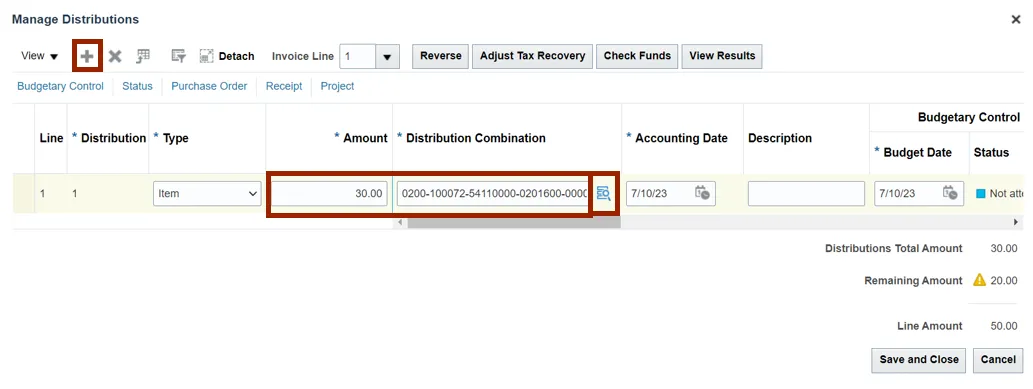
Step 7. Enter the required Amount and Distribution Combination. Click the Plus icon to add another distribution.
Note: Alternatively, click the Search icon to fill in the Distribution Combination.
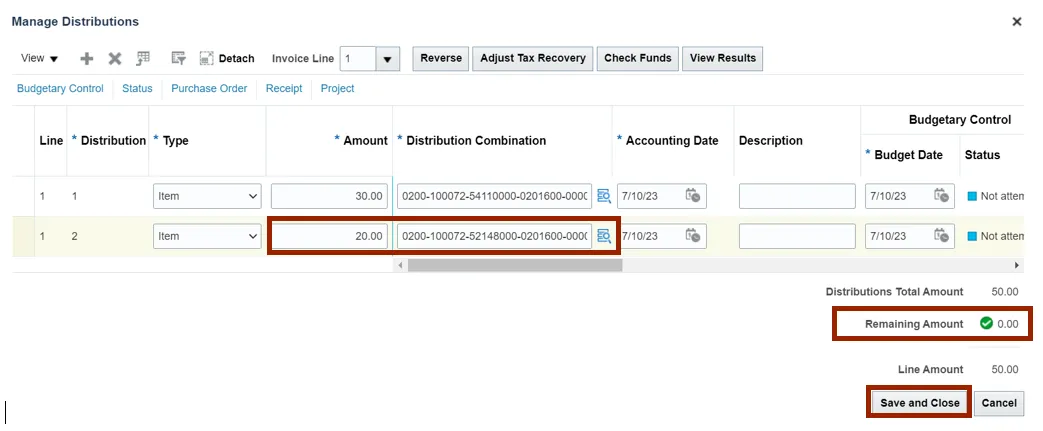
Step 8. Enter the required Amount and Distribution Combination. Click the Save and Close button.
Note: Ensure the Remaining Amount is 0.00.
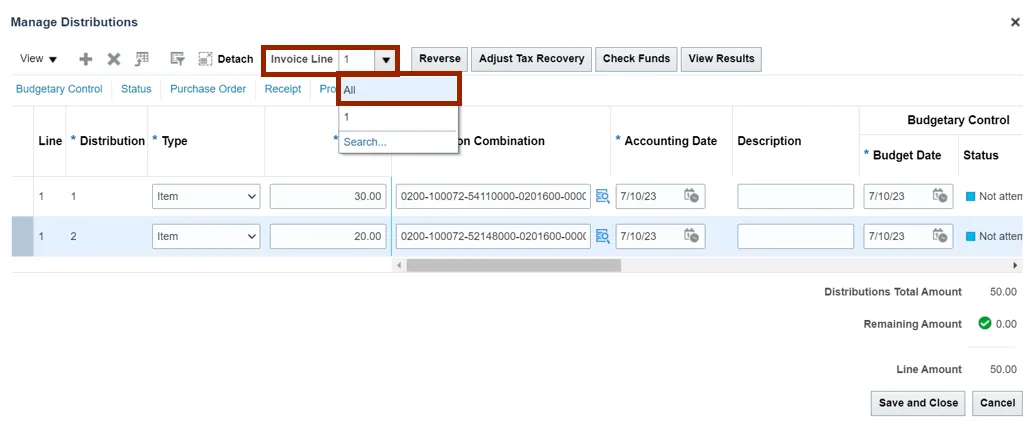
Step 9. Click the Invoice Line drop-down choice list and select All to add distributions for additional lines in case of multi-line invoices.
Note: In this example, we have added two distributions for one Invoice Line.
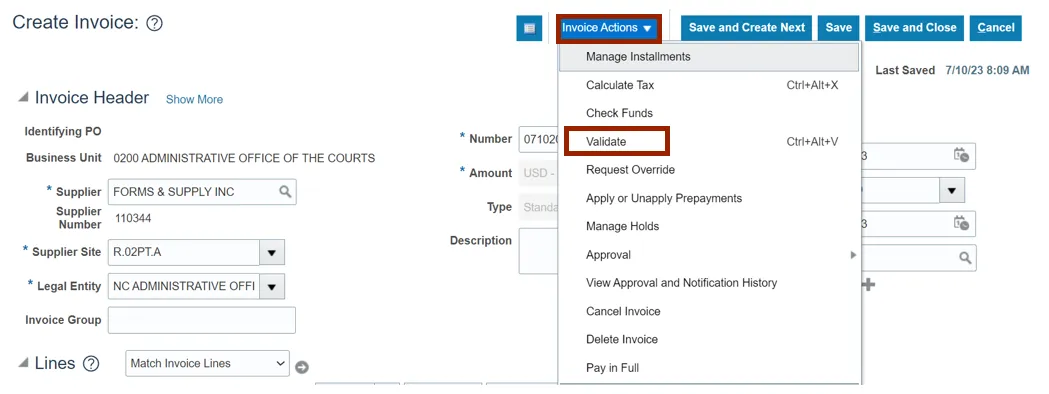
Step 10. You are redirected to the Create Invoice page. Click the Invoice Actions drop-down choice list and select Validate option.
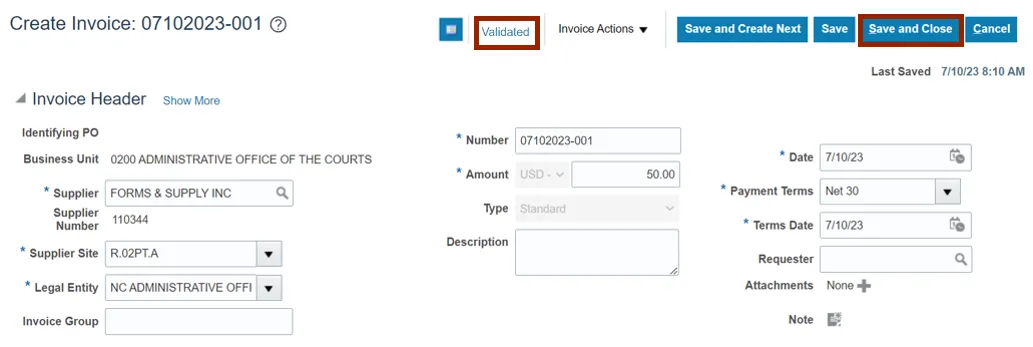
Step 11. The invoice is Validated. Click the Save and Close button. The changes are saved.
Wrap-Up
Create split line distributions using the steps above. While creating an invoice, the line distribution can be split as required.
Additional Resources
- Virtual Instructor-Led Training (vILT)