Purpose
The purpose of this Quick Reference Guide (QRG) is to provide a step-by-step explanation of how to escheat unclaimed checks in the North Carolina Financial System (NCFS).
Introduction and Overview
This QRG covers the steps to escheat unclaimed checks in NCFS. Initiate Escheatment, Escheatment, and Create Invoice to Escheatment Authority are outlined in the steps below. You must have the AP Void Payment Security Role to proceed with this process.
AP Void Payment Role
To escheat unclaimed checks in NCFS, please follow the steps below. There are 13 steps to complete this process.
Step 1. Log in to the NCFS portal with your credentials to access the system.
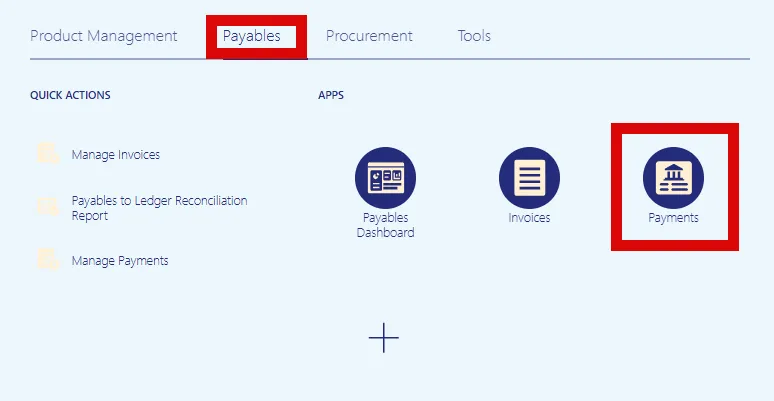
Step 2. On the Home page, select the Payables tab and the Payments app.
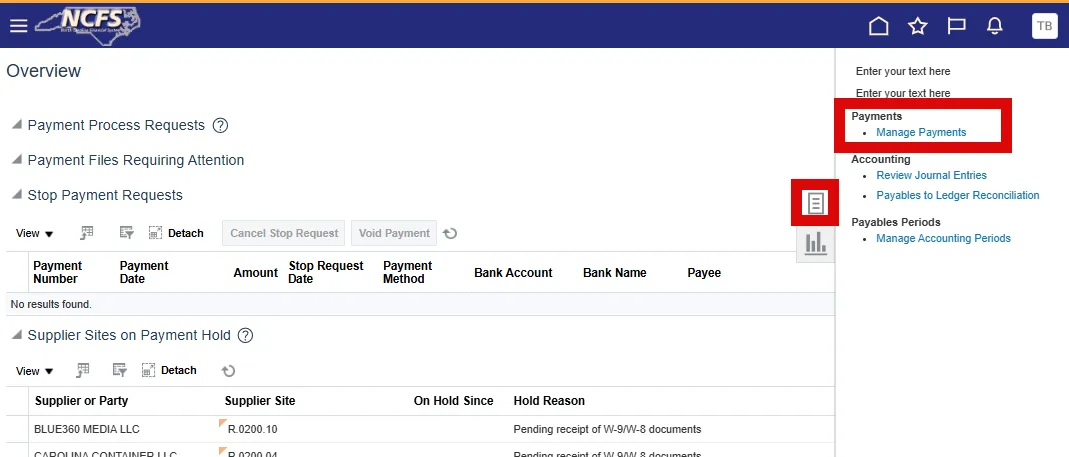
Step 3. Select the Tasks icon and then select the Manage Payments link.
Step 4. Once on the Manage Payments page, select the Advance search toggle button to switch to Advance Search Mode. You will now have more search criteria fields and the conditional operators will be activated, allowing you to filter your search options.
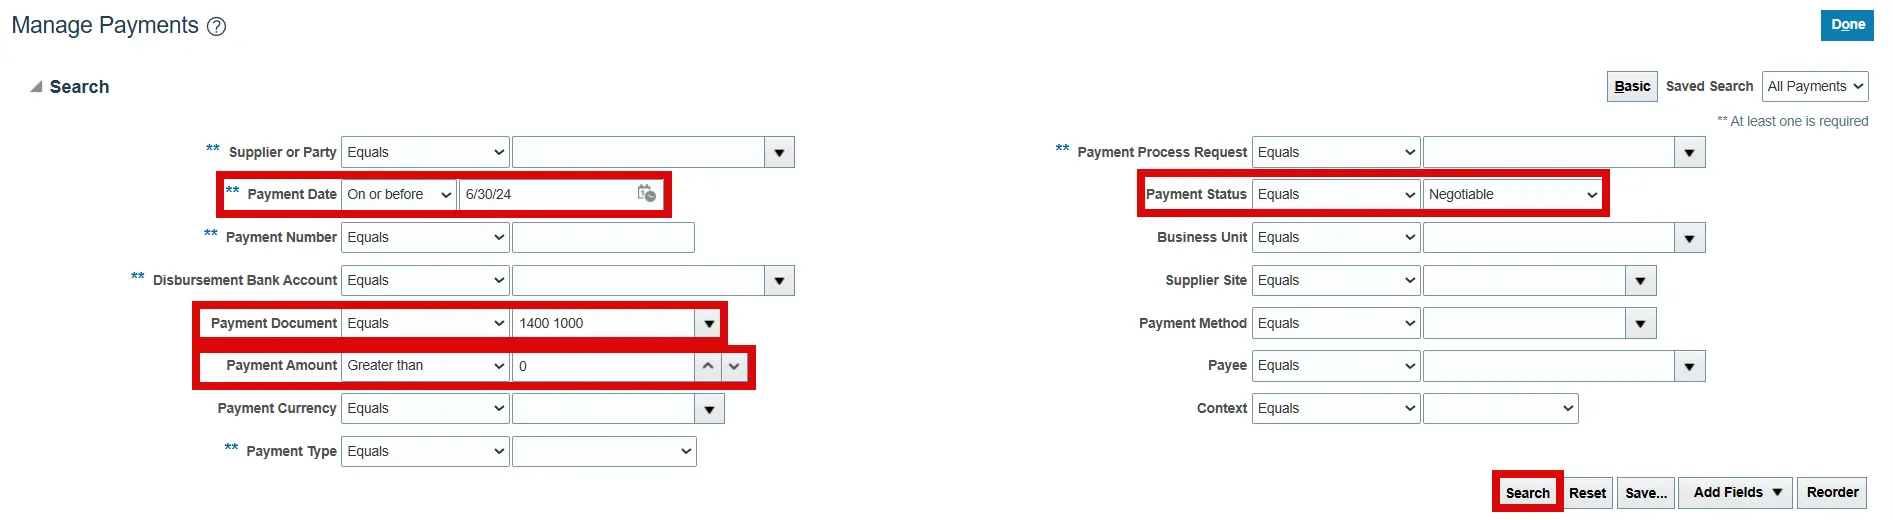
Example:
- Payment Date (On or before): 6/30/24 (The date should equal the end date of the Payment Issue Year)
- Payment Status (Equals): Negotiable
- Payment Document (Equals) Business Unit 1000 (XXXX 1000): 1400 1000
- Payment Amount (Greater than): 0
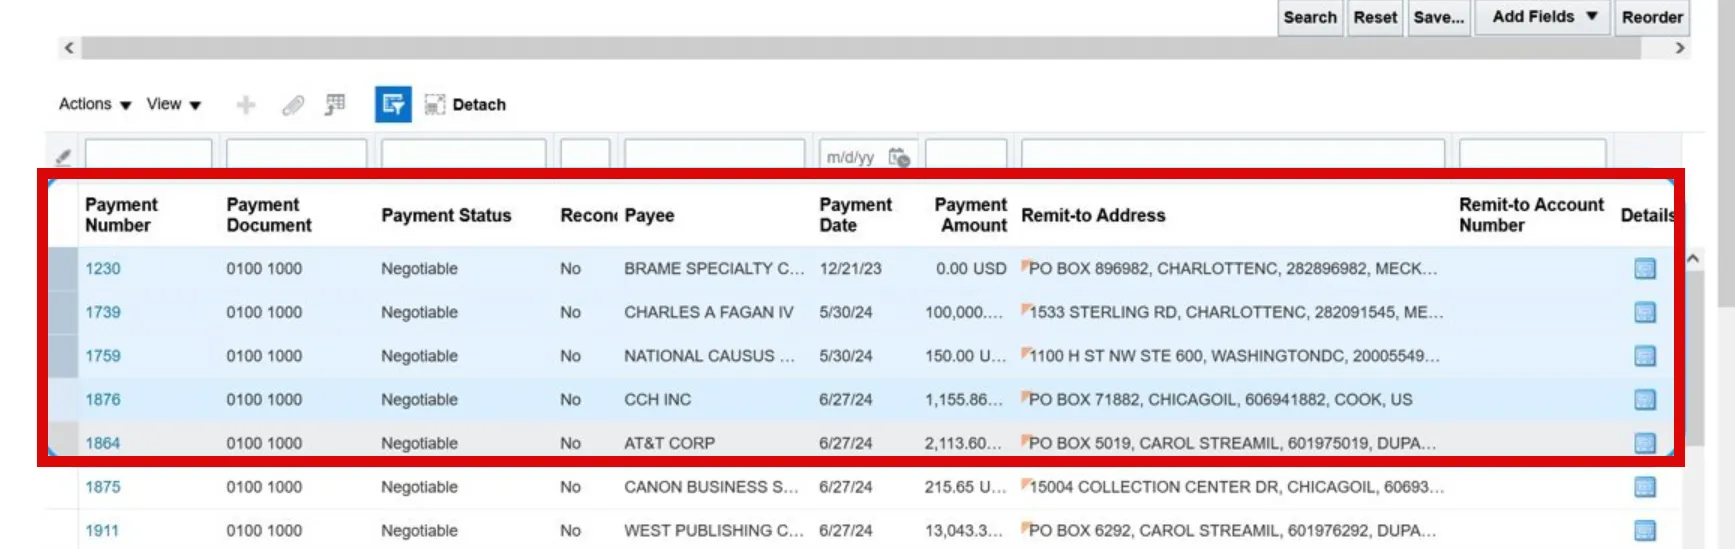
Step 5. Once your search results are generated, you can hold the Ctrl button on your keyboard and select one or more of the unclaimed payments, from the Manage Payments search results.
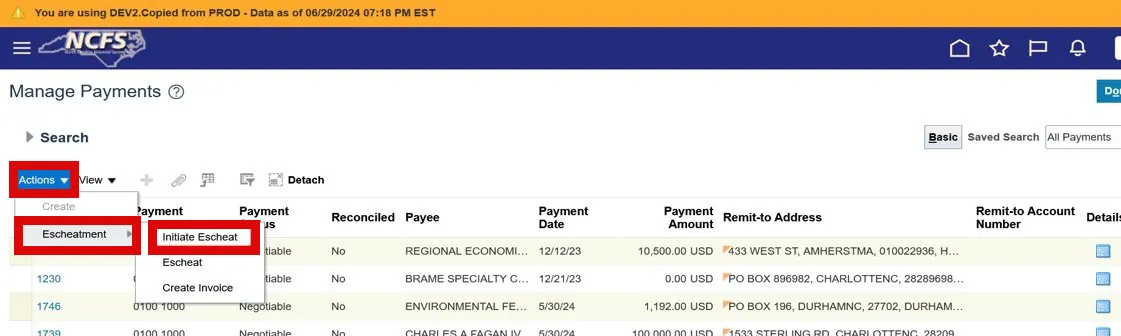
Step 6. After selecting the appropriate payments, select the Actions drop-down list. Then select Escheatment and then Initiate Escheatment.
Note: Once you initiate the escheat, you CANNOT undo this process.
Step 7. After payment is initiated for escheatment, the payment status will update to Escheatment Initiated.
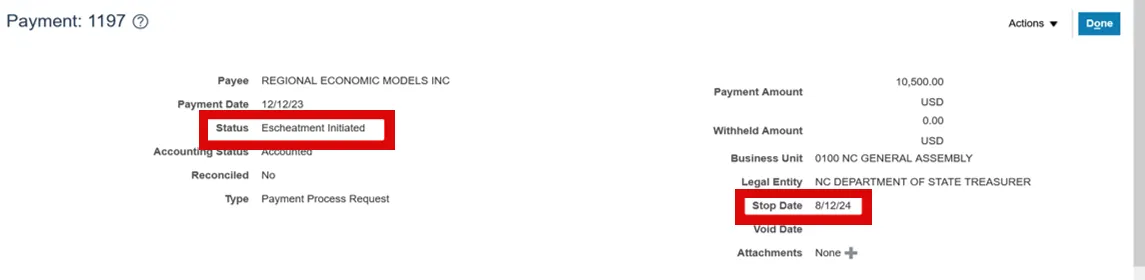
Note: The next step is to fully escheat the payment.
Step 8. From the Manage Payments search page, change your search criteria to filter and find unclaimed checks in Escheatment Initiated status.
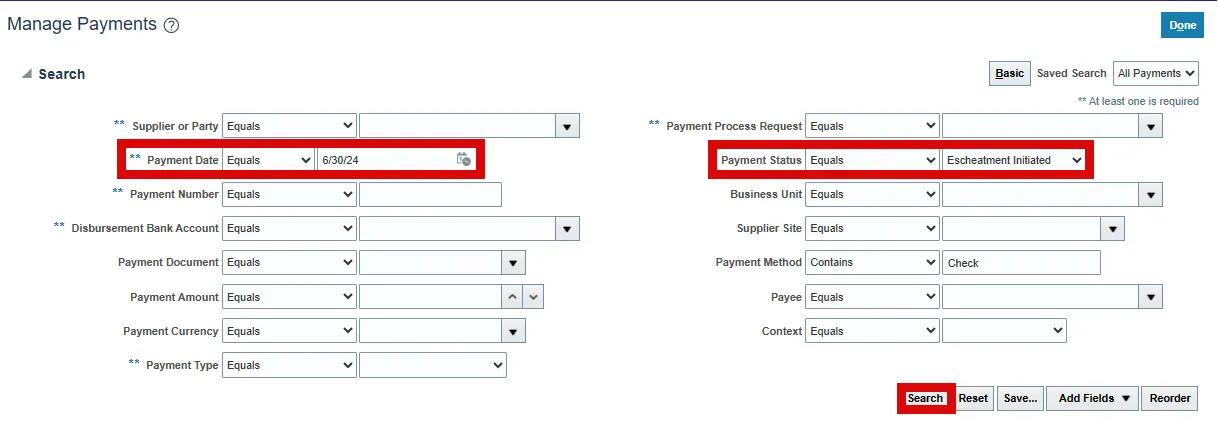
Example:
- Payment Date (On or before): 6/30/24
- Payment Status (Equals): Escheatment Initiated
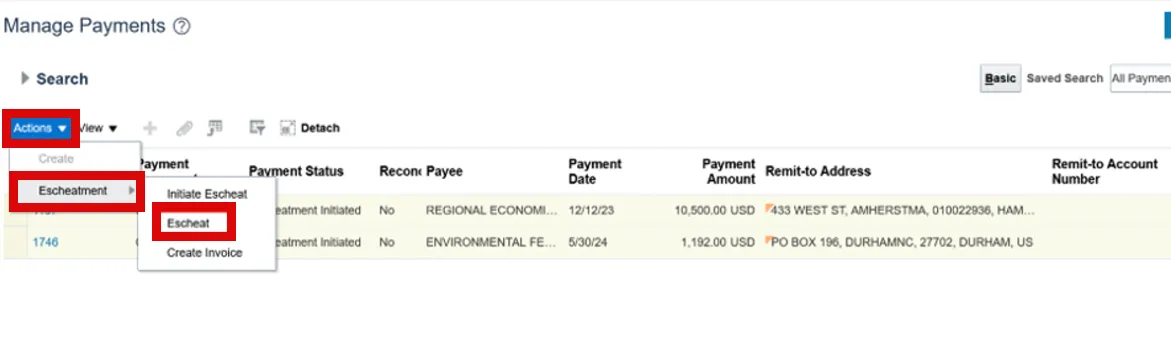
Step 9. Once your search results are generated, you can hold the Ctrl button on your keyboard and select one or more of the Escheatment Initiated. After selecting the appropriate payments, select the Actions drop-down list then select Escheatment and then Escheat.
Step 10. Now the payment status will update to Escheated for those selected lines.

Note: The Create Accounting job is set to run every hour in NCFS. After the payments are escheated, create accounting will run the following hour to transfer the amounts from the Cash Clearing account to the Unclaimed Fund account.
The next step is to Create the Invoice to the Escheatment Authority supplier.
Step 11. You can hold the Ctrl button on your keyboard and select one or more of the lines with the Escheated status. After selecting the appropriate lines, select the Actions drop-down list then select Escheatment and then Create Invoice.
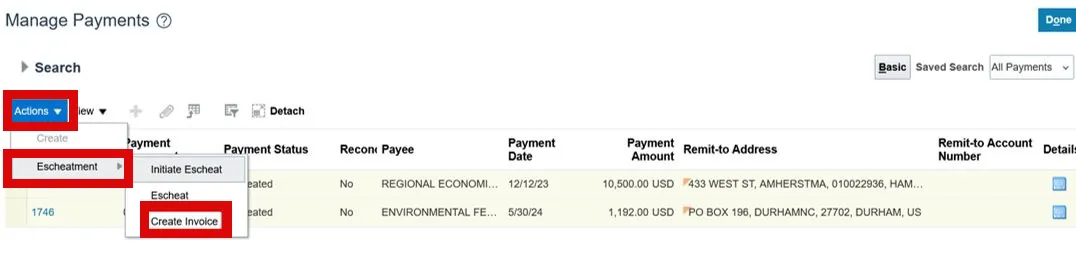
The next step is to choose the Escheatment Authority supplier.
For NC unclaimed checks, the escheatment authority is NC DST.
Out of state checks will need to be escheated to that State's Escheatment Authority.
Step 12. Once on the Search and Select: Escheatment Authority page, search for the Escheatment Authority Supplier using the search criteria. Select the Search button. Once your search results are generated, with that Escheatment Supplier selected in our search results, select the Submit button to create the invoice.
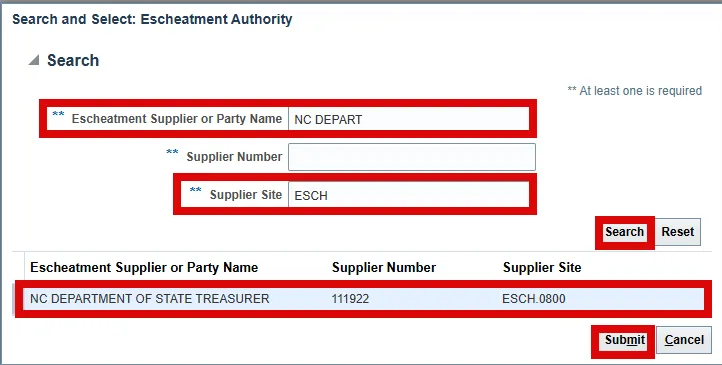
Note: All agencies have an escheatment pay site under the NCDST supplier record. The naming convention for the site is ESCH.XXXX (XXXX = Agency Business Unit).
Step 13. A message will now appear advising that the invoices have been created.
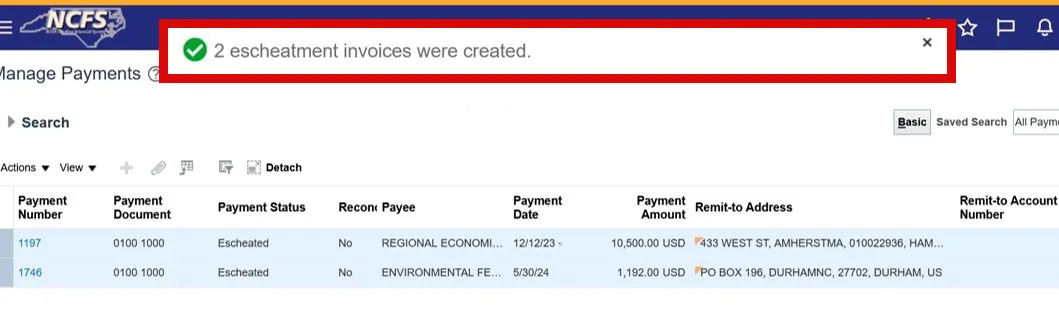
Note: The next step is to view the invoices on the Manage Invoices screen.
Wrap-Up
Escheat unclaimed checks in NCFS using the steps above.
Additional Resources
- Virtual Instructor Led Training (vILT)
- Escheatment Session Info (Slide Deck & Recordings)
- Please see the NCFS Resources page