Purpose
The purpose of this Quick Reference Guide (QRG) is to provide Intercompany (IC) Entry users step-by-step instructions on how to reverse a transfer in the North Carolina Financial System (NCFS).
Introduction and Overview
Intercompany Transfers occur when there is a transfer of funds between organizations. Intracompany Transfers occur when there is a transfer of funds between budget funds within the same organization. A transfer must be initiated by the providing organization then received and completed by the receiving organization before it can move forward to approval and posting. Once a transfer has been posted it is eligible for reversal if necessary. A transfer may need to be reversed to update a transaction or to remove a transaction all together. Reversing a transfer means a user wants to remove the transaction from the General Ledger account balances. Users can reverse IC transfers via the Intercompany Accounting module.
Key Terms
- Intercompany Transaction
- Intercompany transactions are cash transfers occurring between two or more budget funds, either within the same organization or between two organizations.
- Reversal
- A reversal cancels out the original transfer entry.
Information Needed to Complete this Process
- Batch Number
- Batch Name
Output of this Process
- Reversed Transfer
Reversing a Transfer
To reverse a transfer, please follow the steps below. There are 25 steps to complete this process.
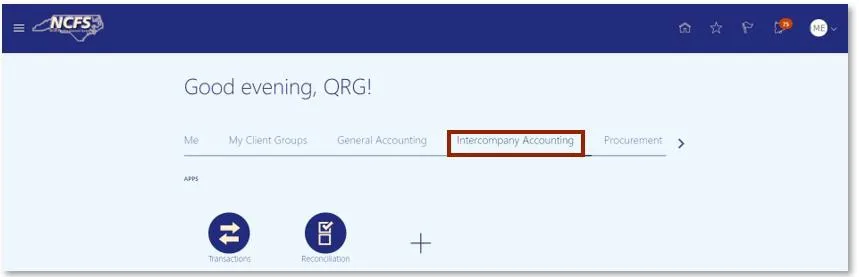
Step 1. Access the NCFS Home Page and click the Intercompany Accounting icon.
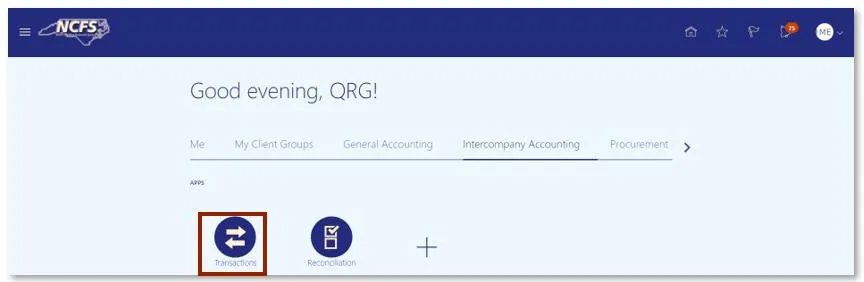
Step 2. Click Transactions.
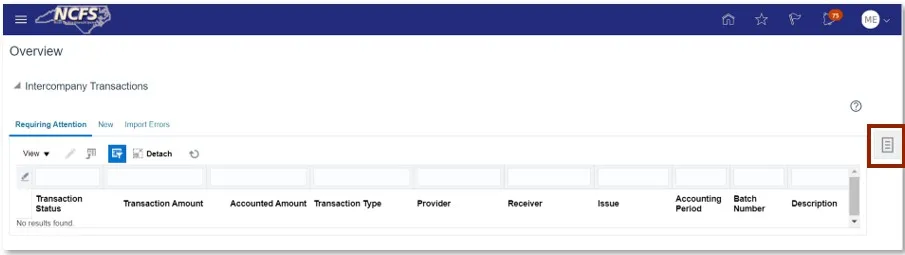
Step 3. Click the Tasks icon to open the task list.
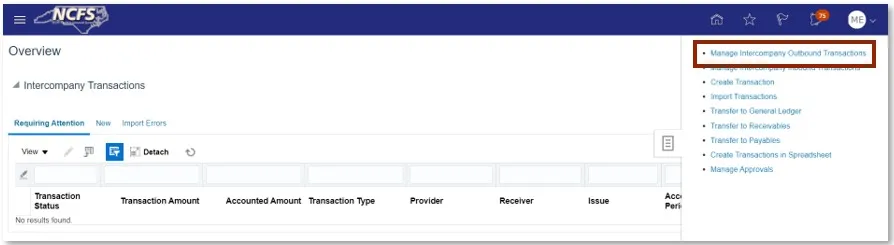
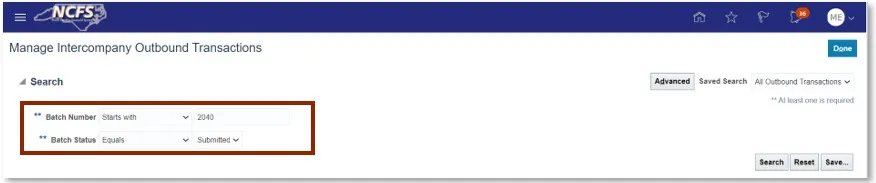
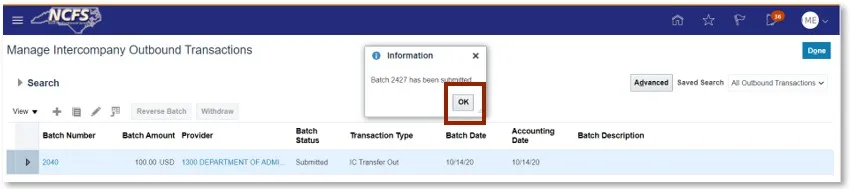
Step 4. Click on Manage Intercompany Outbound Transactions.
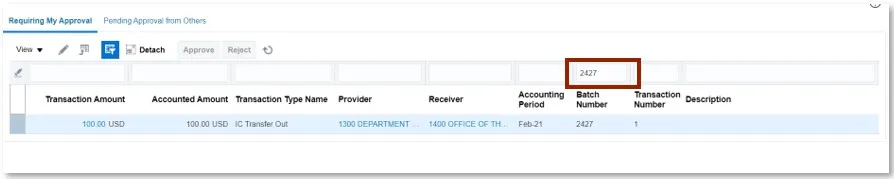
Step 5. Enter the desired Batch Number or Batch Status.
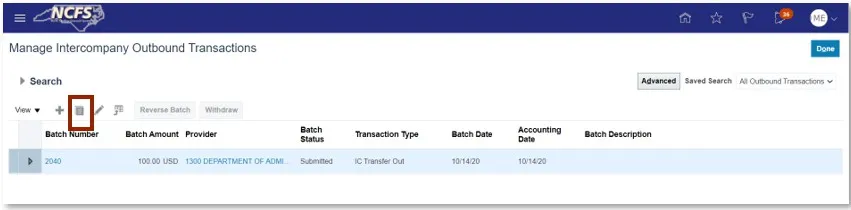
Step 6. The search results appear. Highlight the row and click on the Duplicate button.
Step 7. Enter the Additional Information Context and type of IC Transfer.
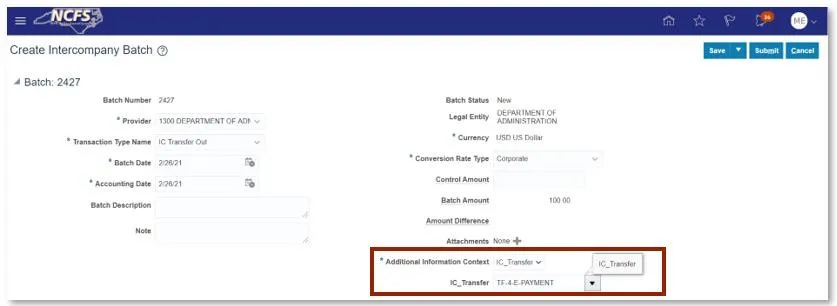
User Tip
Users need to update the Batch and Accounting Date if they do not default to current system date.
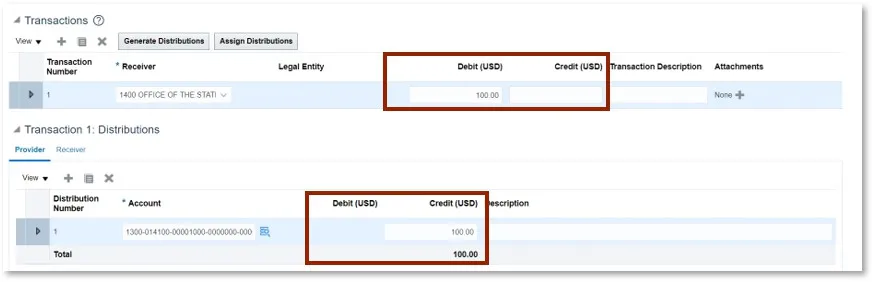
Step 8. Under Transactions, update the Receiver totals by removing the Credit (USD) amount and paste it into the Debit (USD) Field. Under Transactions 1, update the Provider totals by removing the Debit (USD) amount and paste it into the Credit (USD) Field.
Step 9. Scroll up and click Save then Submit.
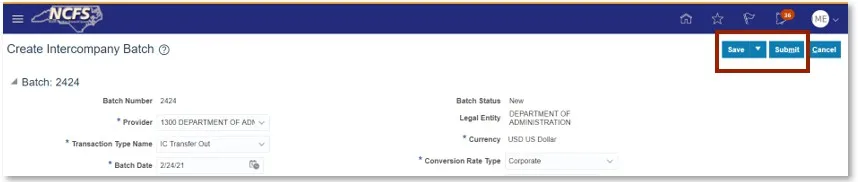
Step 10. A Submission Confirmation pop-up appears. Click OK.
Note: The below steps must be completed by the Receiving organization.
Step 11. Click the Bell Notification icon to identify the batch to approve.

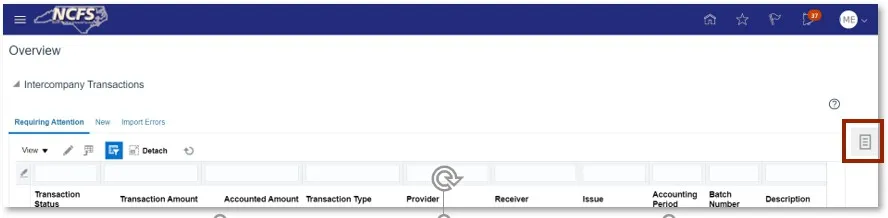
Step 12. Navigate to the Intercompany Transaction screen and click the Task List.
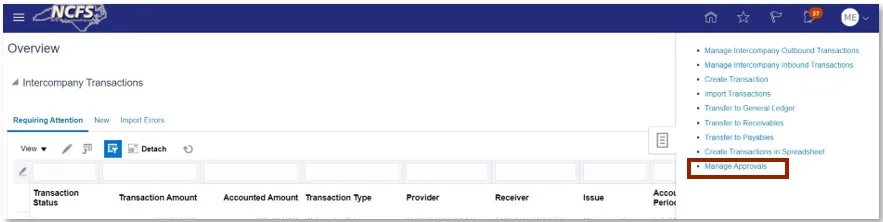
Step 13. Click Manage Approvals in the task list.

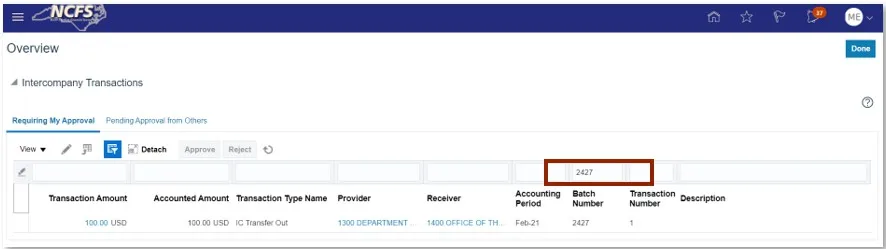
Step 14. Search for the transaction in the Batch Number field and then select the Transaction Amount hyperlink.
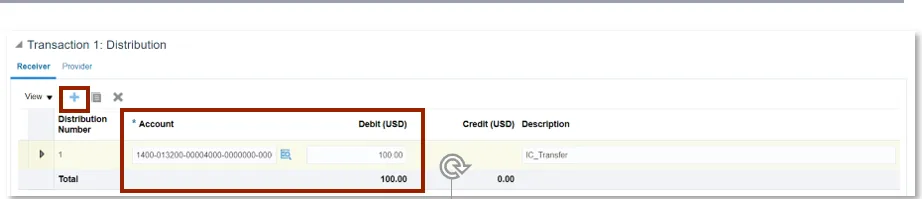
Step 15. Scroll to the Transactions 1: Distribution section. Click the Add icon and then enter the Account information and Debit (USD) amount.
Step 16. Scroll up and select Save and Submit.

User Tip
Select the Save and Close dropdown, then the Save option will appear.
Step 17. A Submission confirmation appears. Click OK.

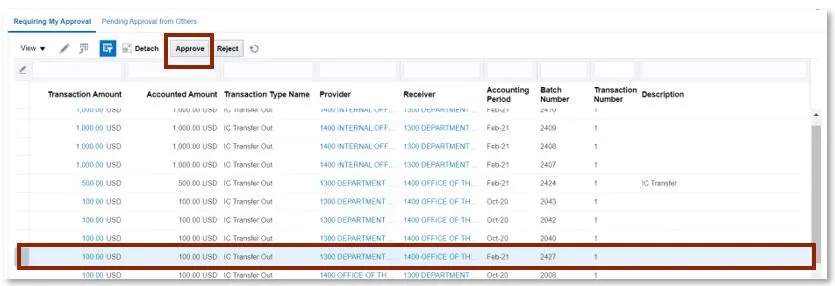
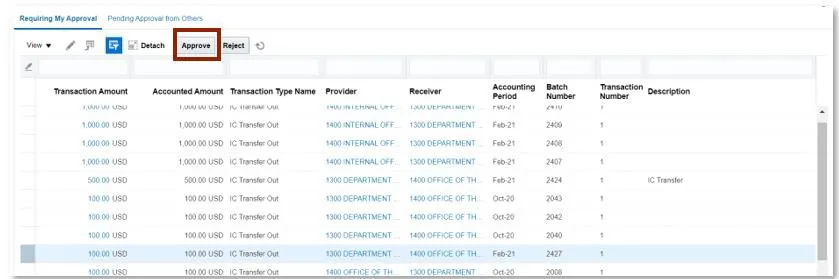
Step 18. Find the Transaction and highlight the row. Once highlighted, click the Approve button.
Step 19. Click Done to return to the Intercompany Transaction Home Screen.

Note: The below steps must be completed by OSC.
Step 20. Click the Bell Notification icon to identify the batch to approve.

Note: Steps 21-24 will be completed by the Robotics Process Automation (RPA) bot unless the user wants to manually approve. If the user uses the RPA bot, skip steps 21-24 and complete step 25.
Step 21. Click the Task List on the Intercompany Transactions screen.
Step 22. Click Manage Approvals in the task list.
Step 23. Search for the Batch Number.
Step 24. Click the Save and Submit button.

Step 25. Click Approve to complete the Reverse Transfer.
User Tip
Users can approve from the NCFS worklist in the Bell Notification Center also.
Wrap Up
The user can reverse the transfer following the steps above. Once an IC transfer has been submitted for reversal it is approved in the next AutoPost run. Once this transaction is posted, the GL account balances will be updated, and this will be reflected in the Cash Availability Report.
Additional Resources
- Instructor Led Training (ILT)
- Quick Reference Guides (QRGs)
- Creating a transfer (via Spreadsheet Upload) QRG
- Creating a transfer (Manually) QRG
- Reversing a Transfer (OSC)